
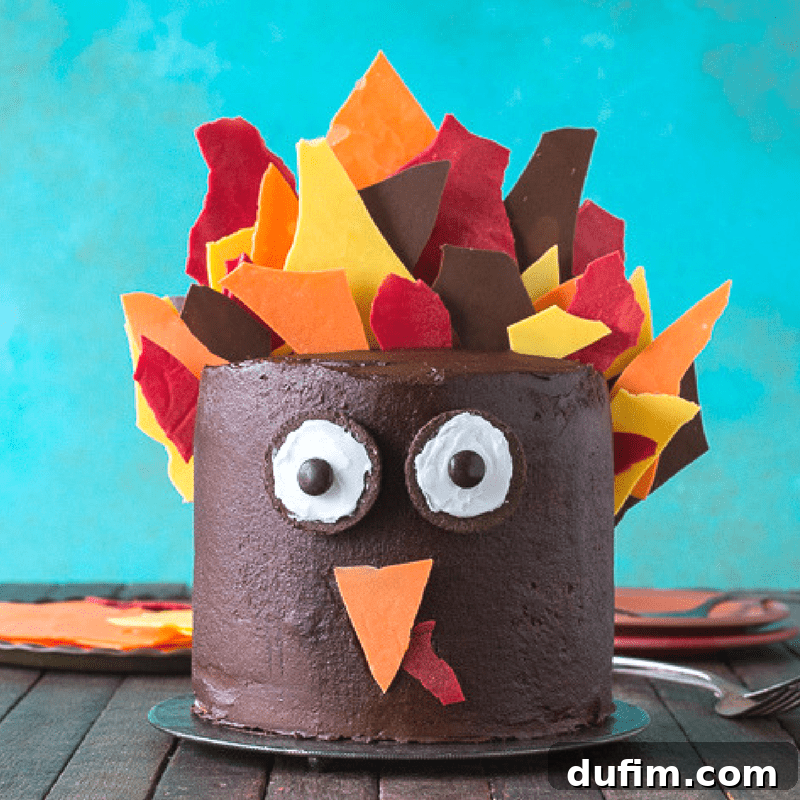
From Student Loans to Sugar Rush: Our Thanksgiving Turkey Cake Adventure
A few weeks ago, my husband Ryan and I marked a truly significant milestone: we triumphantly paid off all of our student loans! This wasn’t just a financial achievement; it was a deeply personal journey, years in the making, filled with diligent budgeting, careful planning, and countless small sacrifices. The feeling of finally being debt-free was exhilarating, a liberating weight lifted from our shoulders, opening up possibilities we hadn’t dared to dream of before.
As a spontaneous celebration of this newfound freedom, fate seemed to align perfectly. That very same weekend, our local humane society was hosting a 50% off adoption event. For months, we had talked about getting a kitten once our loans were gone, a small furry reward for our hard work. The sale was the final nudge we needed. With our last loan payment confirmed, we headed straight to the shelter, eager to find our new family member.
Embracing Feline Frenzy: The Unpredictable Joy of Kitten Parenthood
It didn’t take long to fall in love. We came home with a tiny, two-pound ball of black fur, utterly smitten with his playful antics and adorable purrs. We were in blissful ignorance, imagining a serene existence with a cat that would simply look cute, sleep peacefully for hours, and play gently with toys. Oh, how quickly we learned the truth!
Kittens, we soon discovered, are much like newborn babies – except they possess the added ability to walk, bite, and seemingly terrorize every corner of your home with boundless energy. Our first week was a whirlwind. We decided to let the kitten sleep with us, which turned out to be a rookie mistake of epic proportions. Playtime commenced religiously at 2 AM every morning, involving elaborate chases, daring leaps across the bed, and tiny claws exploring every available surface. Furthermore, we were baffled by how such a small creature could command so much bed space, leaving us clinging precariously to the edges!
My work-from-home routine was also dramatically altered. My keyboard became his favorite napping spot, an irresistible warm haven that made typing an elaborate game of avoidance. When he wasn’t strategically positioned on my laptop, he was meticulously investigating every cord in the house – a nerve-wracking habit that sent us on a mission to kitten-proof our entire living space. And my hair? Apparently, it was the ultimate dangling toy, constantly subjected to playful attacks, tugs, and playful bites.
Despite the adorable chaos, as I write this, he’s currently curled up in my lap, purring so loudly it vibrates through me, sleeping like the most innocent angel. And in moments like these, all the early morning wake-up calls and chewed cables fade into the background. I’m reminded why we fell in love with him in the first place, and why the joy he brings far outweighs the mischief. Though, a Hawaiian vacation as a celebratory gift for paying off loans would have been significantly less demanding!
Transitioning to Festive Feasts: A Thanksgiving Turkey Cake Like No Other
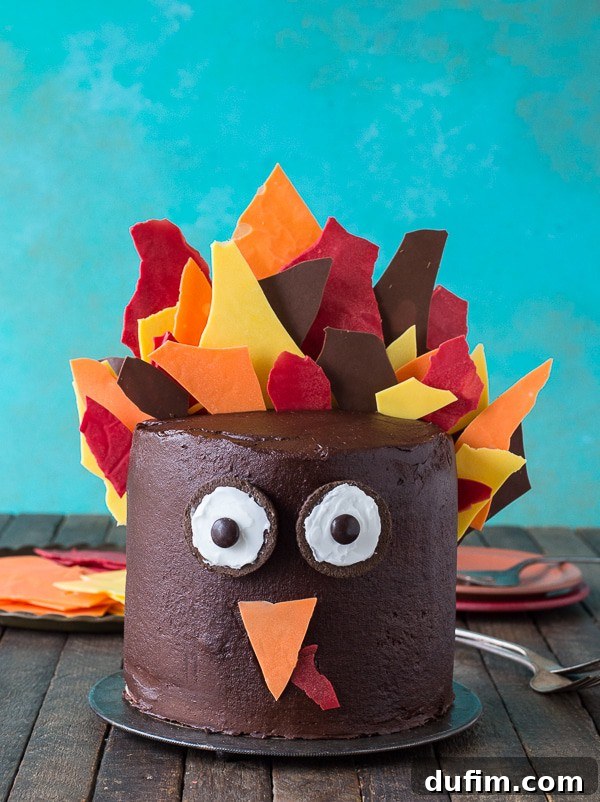
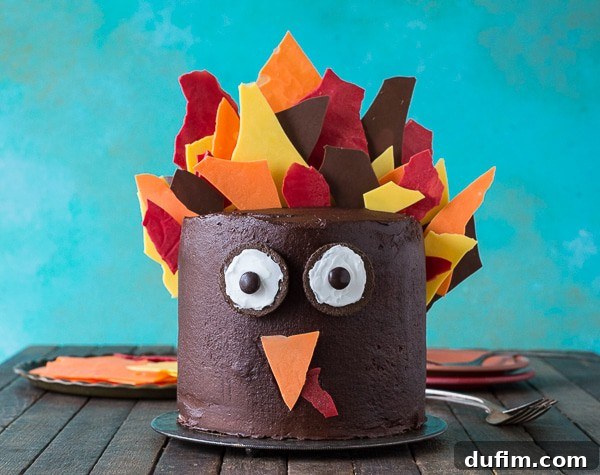
From the lively antics of our new kitten, we now transition to another exciting, albeit less chaotic, adventure: Thanksgiving baking! Every holiday season, I find myself with one particular, often “ridiculous,” recipe idea that simply won’t leave my mind until I bring it to life. This year, it was an adorable turkey cake. Thanksgiving desserts often lean towards pies, but I was determined to create a show-stopping cake that captured the festive spirit in a fun, edible way.
The Creative Spark: Crafting an Edible Turkey Masterpiece with Chocolate Shards
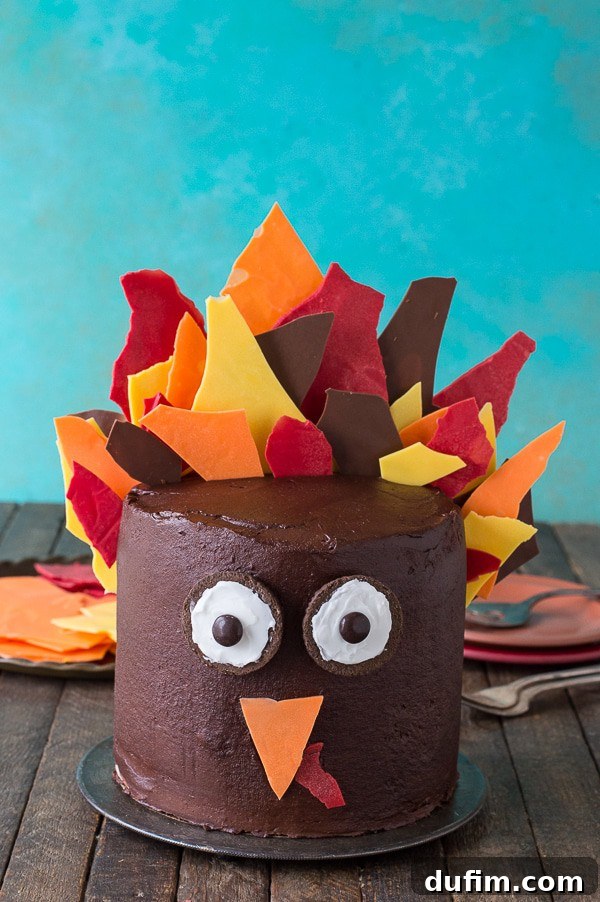
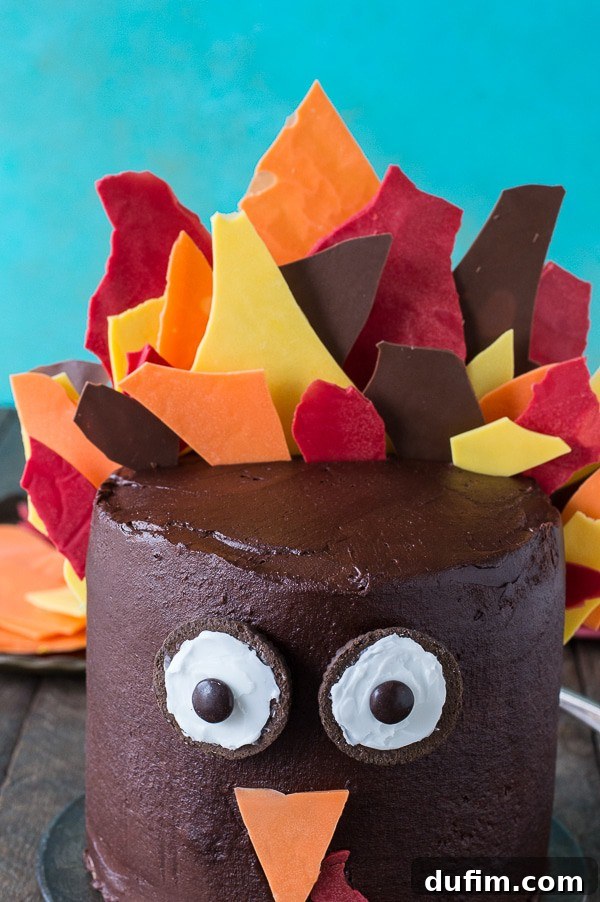
The initial concept of a turkey cake presented a delightful challenge: how do you incorporate the iconic feathers without resorting to actual, inedible plumage? Real feathers and buttercream are certainly not a match made in culinary heaven, and edible decorations are always paramount. Then, inspiration struck! Having recently used delicate chocolate shards on another cake, the “aha!” moment arrived. Why not use different colored chocolate shards to mimic the beautiful, fanned tail feathers of a turkey? It was a creative breakthrough that promised both visual appeal and a delicious crunch, turning a potentially tricky design into an elegant solution.
This method not only solves the inedibility problem but also adds an incredible textural dimension to the cake. The crisp chocolate contrasts beautifully with the soft cake and creamy buttercream, making each slice an experience for both the eyes and the palate. This approach allows for vibrant customization, letting you choose colors that truly pop and make your Thanksgiving centerpiece unforgettable. It’s a fantastic way to impress your guests with a dessert that’s as delicious as it is decorative, celebrating the essence of autumn and the holiday spirit.
A Symphony of Autumnal Flavors: Pumpkin and Chocolate Perfection
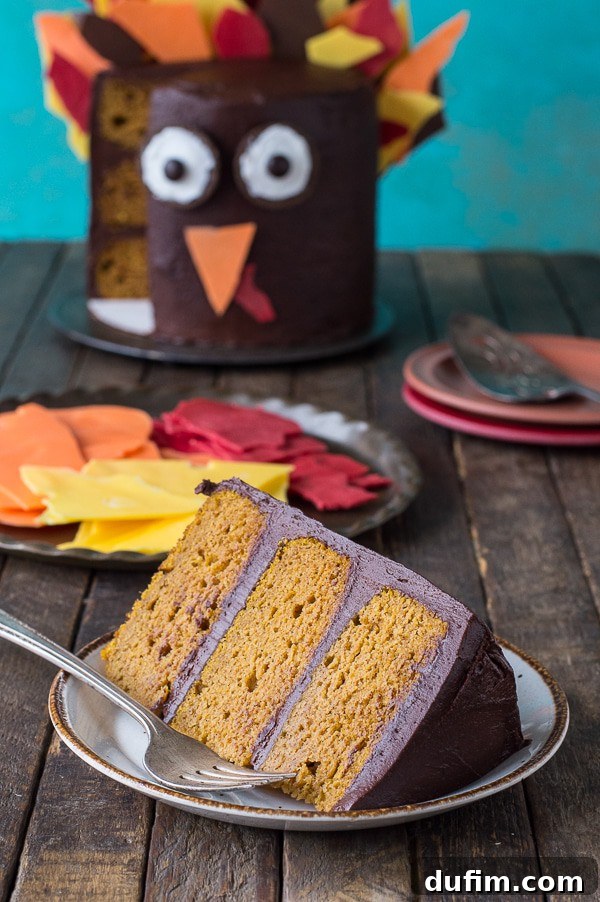
When it came to the flavors, I wanted something undeniably autumnal and perfectly suited for the Thanksgiving table. For me, that meant a harmonious blend of rich pumpkin and decadent chocolate! If you know me, you know that my absolute favorite way to enjoy pumpkin is when it’s paired with chocolate – the earthy sweetness of pumpkin finds its perfect counterpart in the deep, comforting notes of cocoa. This cake features three moist layers of spiced pumpkin cake, generously frosted with a luxurious chocolate buttercream. It’s a match made in heaven, capturing the warmth and coziness of the season in every bite.
The pumpkin cake itself is incredibly tender and aromatic, infused with classic fall spices like cinnamon and pumpkin pie spice. The chocolate buttercream is smooth, rich, and provides a wonderful balance to the pumpkin’s sweetness. This flavor profile ensures that while the cake looks spectacularly festive, it also delivers on taste, making it a truly satisfying conclusion to your Thanksgiving feast. It’s not just a pretty face; it’s a truly delicious cake that everyone will adore.
Essential Ingredients for Your Thanksgiving Turkey Cake Decorations
While the cake itself is a masterpiece of flavor, transforming it into an adorable turkey requires just a few simple decorative elements:
- Red, orange, yellow, and brown candy melts (plus a little vegetable shortening for melting)
- 1 Oreo cookie
- A small amount of white icing or frosting
- 2 brown M&Ms
Step-by-Step Guide to Crafting Vibrant Chocolate Shards (The Turkey’s Feathers)
Making these edible feathers is surprisingly simple and incredibly fun. Here’s how to create those stunning, colorful chocolate shards:
- Melt about 1 cup of red candy melts with approximately 1 tablespoon of vegetable shortening in a small saucepan over very low heat. Stir continuously with a spatula until the mixture is completely smooth and melted. Be careful not to overheat the chocolate, as it can seize.
- Prepare your work surface by placing a plastic cutting board or a metal baking sheet on your counter. Lay a large piece of wax paper flat on top of this surface.
- Pour the melted chocolate onto the wax paper. Using your spatula, quickly and evenly spread the chocolate into a thin, consistent layer across the entire sheet of wax paper.
- Gently place another piece of wax paper directly on top of the melted chocolate. Lightly smooth out any air bubbles by pressing down gently with your hands or a flat object.
- Carefully transfer the cutting board or baking sheet with the chocolate and wax paper into the freezer. Let it chill for about 15 minutes, or until completely firm.
- Once firm, remove the chocolate from the freezer. Allow it to sit at room temperature for 3-5 minutes. This slight warming makes the chocolate easier to break without shattering too much.
- Peel off the top layer of wax paper. Now, break the hardened chocolate into various sized shards. These will be your turkey feathers! Store them in the freezer on a plate, in an airtight container, or in a freezer bag until you are ready to assemble your cake.
- Repeat this process for each color of candy melt (orange, yellow, and brown) to create a beautiful assortment of “feathers.”
Tips for Perfect “Feather” Placement and Presentation
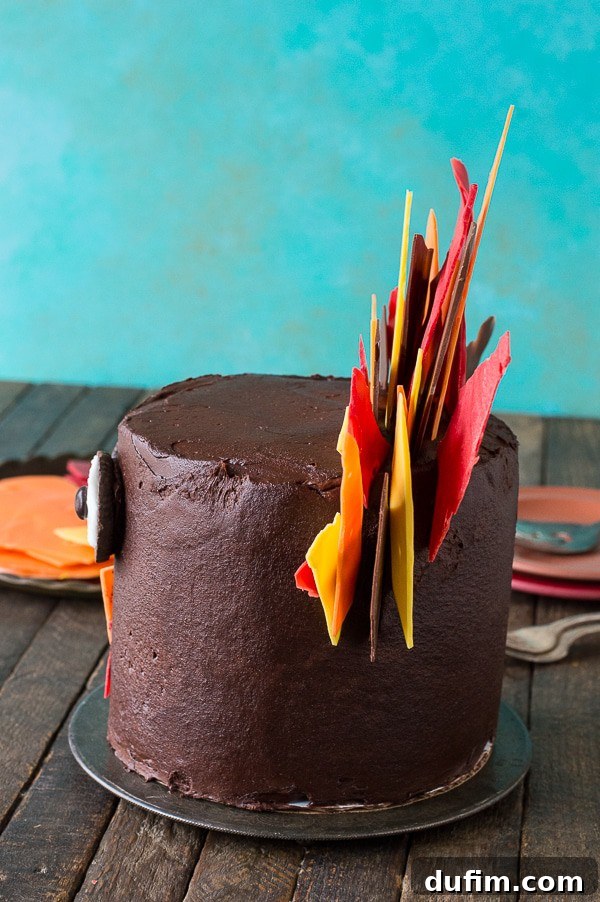
Adding the chocolate shards is the final, most fun step in bringing your turkey cake to life. A little piece of advice from my experience: if some of the shards seem too heavy and tend to fall off, try breaking them into smaller, lighter pieces. Alternatively, carefully push them a bit deeper into the buttercream for better stability. For the freshest appearance and best structural integrity, I highly recommend adding these delicate “feathers” no more than 30 minutes before you plan to serve the cake. This ensures they remain crisp and vibrant.
Arrange your chocolate shards in a fanned pattern at the back of the cake, varying the colors and sizes for a more dynamic and realistic feather effect. Don’t be afraid to experiment with the layering to create depth. This turkey cake isn’t just a dessert; it’s a festive centerpiece that will garner compliments and smiles around your Thanksgiving table. Enjoy the process and the delightful outcome!
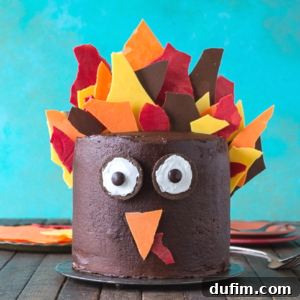
Thanksgiving Turkey Cake Recipe
Tap stars to rate!
By: Beth
Prep Time: 15 minutes
Cook Time: 25 minutes
Additional Time: 15 minutes
Total Time: 55 minutes
Servings: 16 servings
This delightful pumpkin cake, paired with rich chocolate icing and whimsical chocolate shard feathers, is the perfect centerpiece for your Thanksgiving celebration.
Ingredients
Pumpkin Cake
- ½ cups + 2 tbsp all purpose flour
- ½ tsp baking powder
- ¼ tsp baking soda
- pinch of salt
- ¼ tsp cinnamon
- ½ tsp pumpkin pie spice
- ¼ cup + 2 tbsp brown sugar
- ½ stick butter, 1/4 cup, room temperature
- 1 large egg
- ½ cup pumpkin puree
Chocolate Buttercream
- 3 sticks butter, room temperature (1 1/2 cups)
- 1 ½ cup vegetable shortening
- 1 ½ cups cocoa powder
- 3-4 cups powdered sugar
Turkey Decorations
- red, orange, yellow, and brown candy melts
- vegetable shortening
- 1 oreo cookie
- very small amount of white frosting
- 2 brown m&ms
Instructions
Pumpkin Cake Preparation
- Preheat the oven to 350º F.
- Using butter, grease the bottom and sides of a 6-inch round cake pan or springform pan and line the bottom with a round piece of parchment paper. To ensure even baking, place a bake-even strip around the pan. You can make your own homemade bake-even strip by cutting a towel or shirt to fit the size of your pan. Get the fabric really wet, then squeeze out the dripping water but do not squeeze it too dry. Secure the fabric around the pan with a safety pin.
- In a bowl, combine the flour, baking powder, baking soda, salt, cinnamon, and pumpkin pie spice. Mix well to combine.
- In a separate bowl, combine the brown sugar and butter, beat together using an electric mixer until creamy, 1-2 minutes.
- Add in the egg and mix until fully incorporated.
- Add in the pumpkin puree, mixing by hand with a spatula until just combined.
- Add half of the flour mixture to the wet ingredients, do not dump it in. Rather, take spoonfuls of the flour mixture and gently shake it over the wet ingredients, as if you were sifting in the flour. Fold in the mixture until no flour remains. Repeat with the other half of the flour, folding it in and scraping the sides and bottom of the bowl to incorporate everything.
- Scrape the batter into the prepared cake pan, using a spatula to evenly spread it.
- Bake for 25-28 minutes, or until a toothpick inserted in the center comes out clean.
- Once the cake is done, allow it to cool in the pan on a cooling rack for 10 minutes. After 10 minutes, carefully remove the cake from the pan. If using a springform pan, remove the sides and bottom. Allow the cake to cool completely on a cooling rack. Once cool, remove the parchment paper round from the bottom of the cake. If you need to level the top of your cake, do so now using either a cake leveler or knife. Make sure the cake is completely cooled, then wrap the cake in plastic wrap and place it in the refrigerator. This cake is good for up to one week like this.
Repeat these steps for each additional cake layer you need.
Chocolate Buttercream Preparation
- In a large mixing bowl, combine the butter and vegetable shortening, beat using an electric mixer until light and fluffy. Add in the cocoa powder, and gently mix by hand with a spatula to prevent a “cocoa cloud” before beating.
- Begin to add the powdered sugar, about 1-2 cups at a time, mixing by hand first, then with the electric mixer on low speed. Continue adding powdered sugar until the frosting reaches your desired taste and consistency, and is well mixed.
Crafting Chocolate Shards
- Melt some red candy melts with a little bit (1 tbsp) of vegetable shortening in a small saucepan over low heat. Stir with a spatula until smooth and completely melted.
- Place a plastic cutting board or metal baking sheet on the counter. Place a large piece of wax paper on top of the flat surface.
- Pour the melted chocolate on top of the wax paper. Use a spatula to smooth the chocolate into an even, thin layer all around the wax paper.
- Place another piece of wax paper on top of the melted chocolate and gently smooth out any air bubbles.
- Place the cutting board or baking sheet with the wax paper on it in the freezer for 15 minutes.
- After 15 minutes, remove it from the freezer and allow it to warm up for 3-5 minutes at room temperature.
- Remove the top layer of wax paper, break the chocolate into shards, and store them in the freezer on a plate, in a container, or in a bag until you’re ready to use them.
- Repeat these steps, melting each color (orange, yellow, brown) and making shards to create your full set of turkey feathers.
Assembling Your Turkey Cake
- Spread a small amount of buttercream on a 6-inch round cardboard cake circle. Place your first layer of cake on top of the cardboard. Put buttercream on top of the first layer and spread it as evenly as possible with an offset spatula. Decide how much frosting you want between each layer; I typically use 1/3 to 1/2 cup.
- Repeat this process for each subsequent layer of cake. Once all the layers are stacked and frosted, spread some frosting (the same amount as you did between the layers) on the top of the cake.
- Next, it’s time to apply a crumb coat. This thin layer of buttercream will help seal in any loose crumbs. Using your offset spatula, spread a thin layer of buttercream around the sides and the top of the cake. It’s often easiest to start with more frosting on the cake and remove excess as needed.
- Place the entire cake in the freezer or fridge for 20 minutes to allow the crumb coat to firm up.
- Begin to add the second, final layer of frosting. Spread an even layer of frosting on the top of the cake. Then, either pipe on the frosting or spread it evenly around the sides of the cake. Use a spatula or an icing smoother to smooth out the frosting, scraping off excess as you go. Once the frosting is uniform around the cake, use the smooth side of Viva brand paper towels (or another smooth, lint-free paper towel) and a fondant smoother to smooth out any imperfections. Place the paper towel on the cake and gently rub the fondant smoother around. Repeat this process, moving the paper towel all around the cake.
- Carefully transfer the finished cake to your desired serving plate or cake stand.
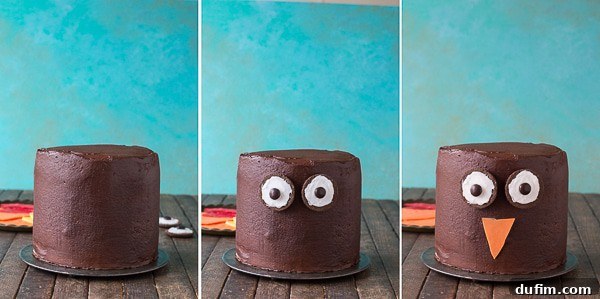
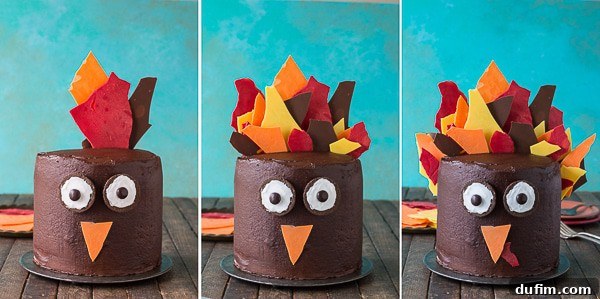
- To create the turkey’s eyes, add a dab of white frosting to the center of two Oreo cookies. Use a small amount of frosting to “glue” one brown M&M onto the white frosting of each cookie, creating the pupil.
- Add a little bit of buttercream to the back of each Oreo eye and gently press them into the front of the cake.
- Cut or break a longer, irregular shape from some of the red chocolate shards to form the turkey’s wattle (the fleshy growth under the beak). Gently press that onto the cake below one of the eyes.
- Cut or break a triangle shape from some of the orange chocolate shards for the turkey’s beak. Gently press that onto the cake, slightly overlapping the wattle.
- Begin adding your prepared chocolate shards to the back half of the cake, creating the turkey’s vibrant feathers. Arrange them in a fanned pattern, varying sizes and colors for a dynamic look. Add as many as you’d like, sticking them firmly into the buttercream and cake.
- Display your magnificent turkey cake, slice, and serve to eager guests!
Nutritional Information (Approximate per serving)
- Calories: 491kcal
- Carbohydrates: 35g
- Protein: 3g
- Fat: 41g
- Saturated Fat: 18g
- Polyunsaturated Fat: 6g
- Monounsaturated Fat: 14g
- Trans Fat: 3g
- Cholesterol: 65mg
- Sodium: 219mg
- Potassium: 160mg
- Fiber: 3g
- Sugar: 26g
- Vitamin A: 1826IU
- Vitamin C: 1mg
- Calcium: 32mg
- Iron: 2mg
All nutritional values are approximate and provided to the reader as a courtesy. Changing ingredients and/or quantities will alter the estimated nutritional calculations.
Like this festive recipe? We’d love to hear from you! Rate and comment below to share your experience with this delightful Thanksgiving Turkey Cake!