
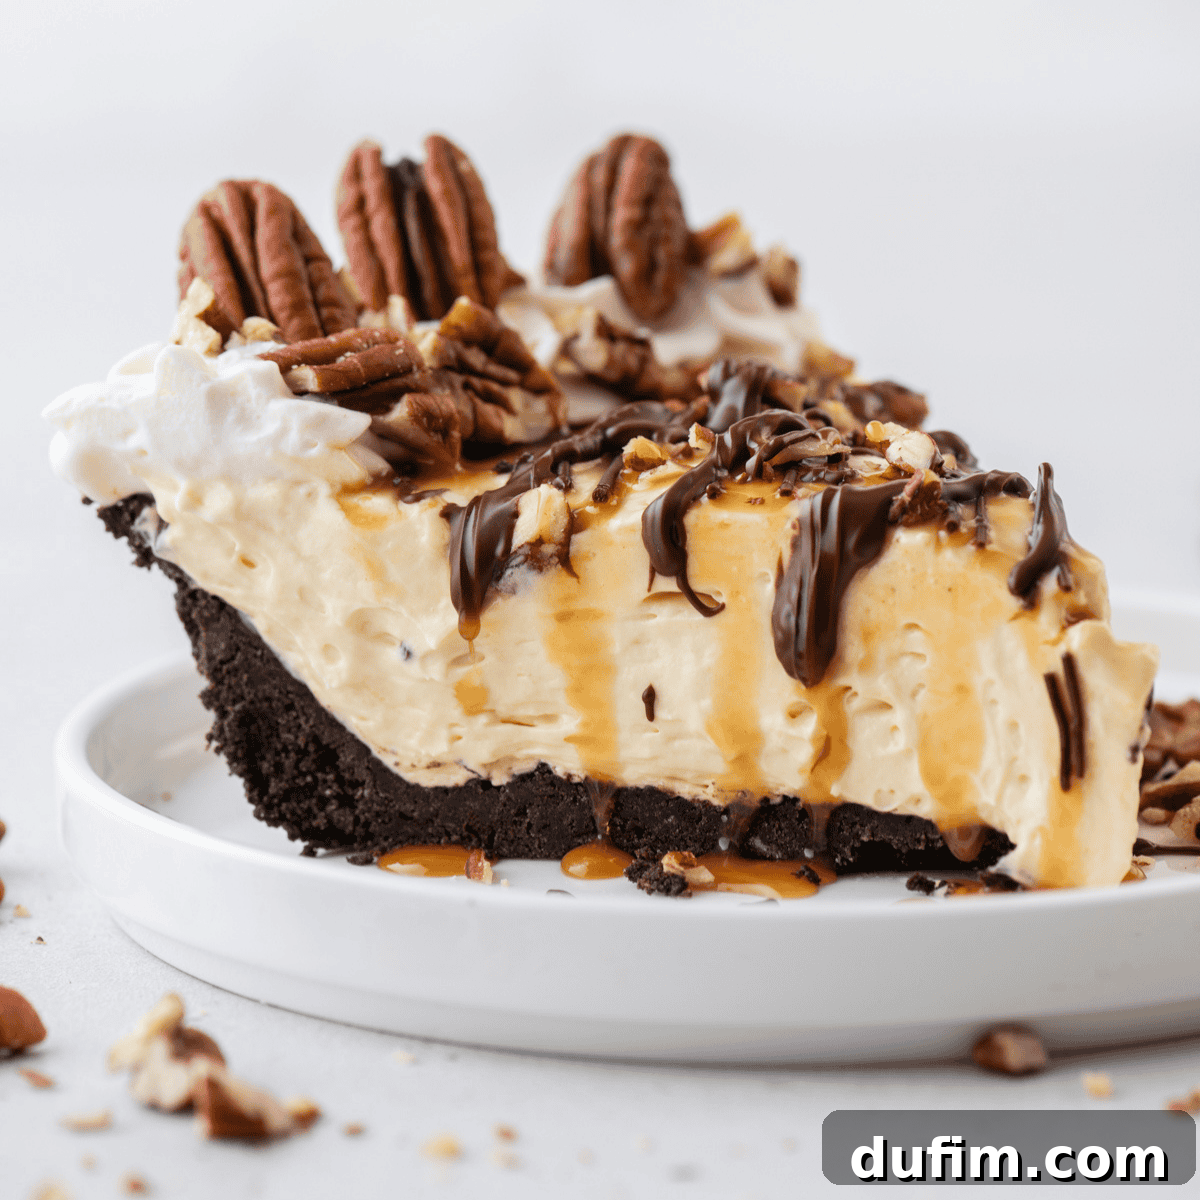
Ultimate No-Bake Turtle Pie: A Decadent Caramel, Chocolate & Pecan Delight
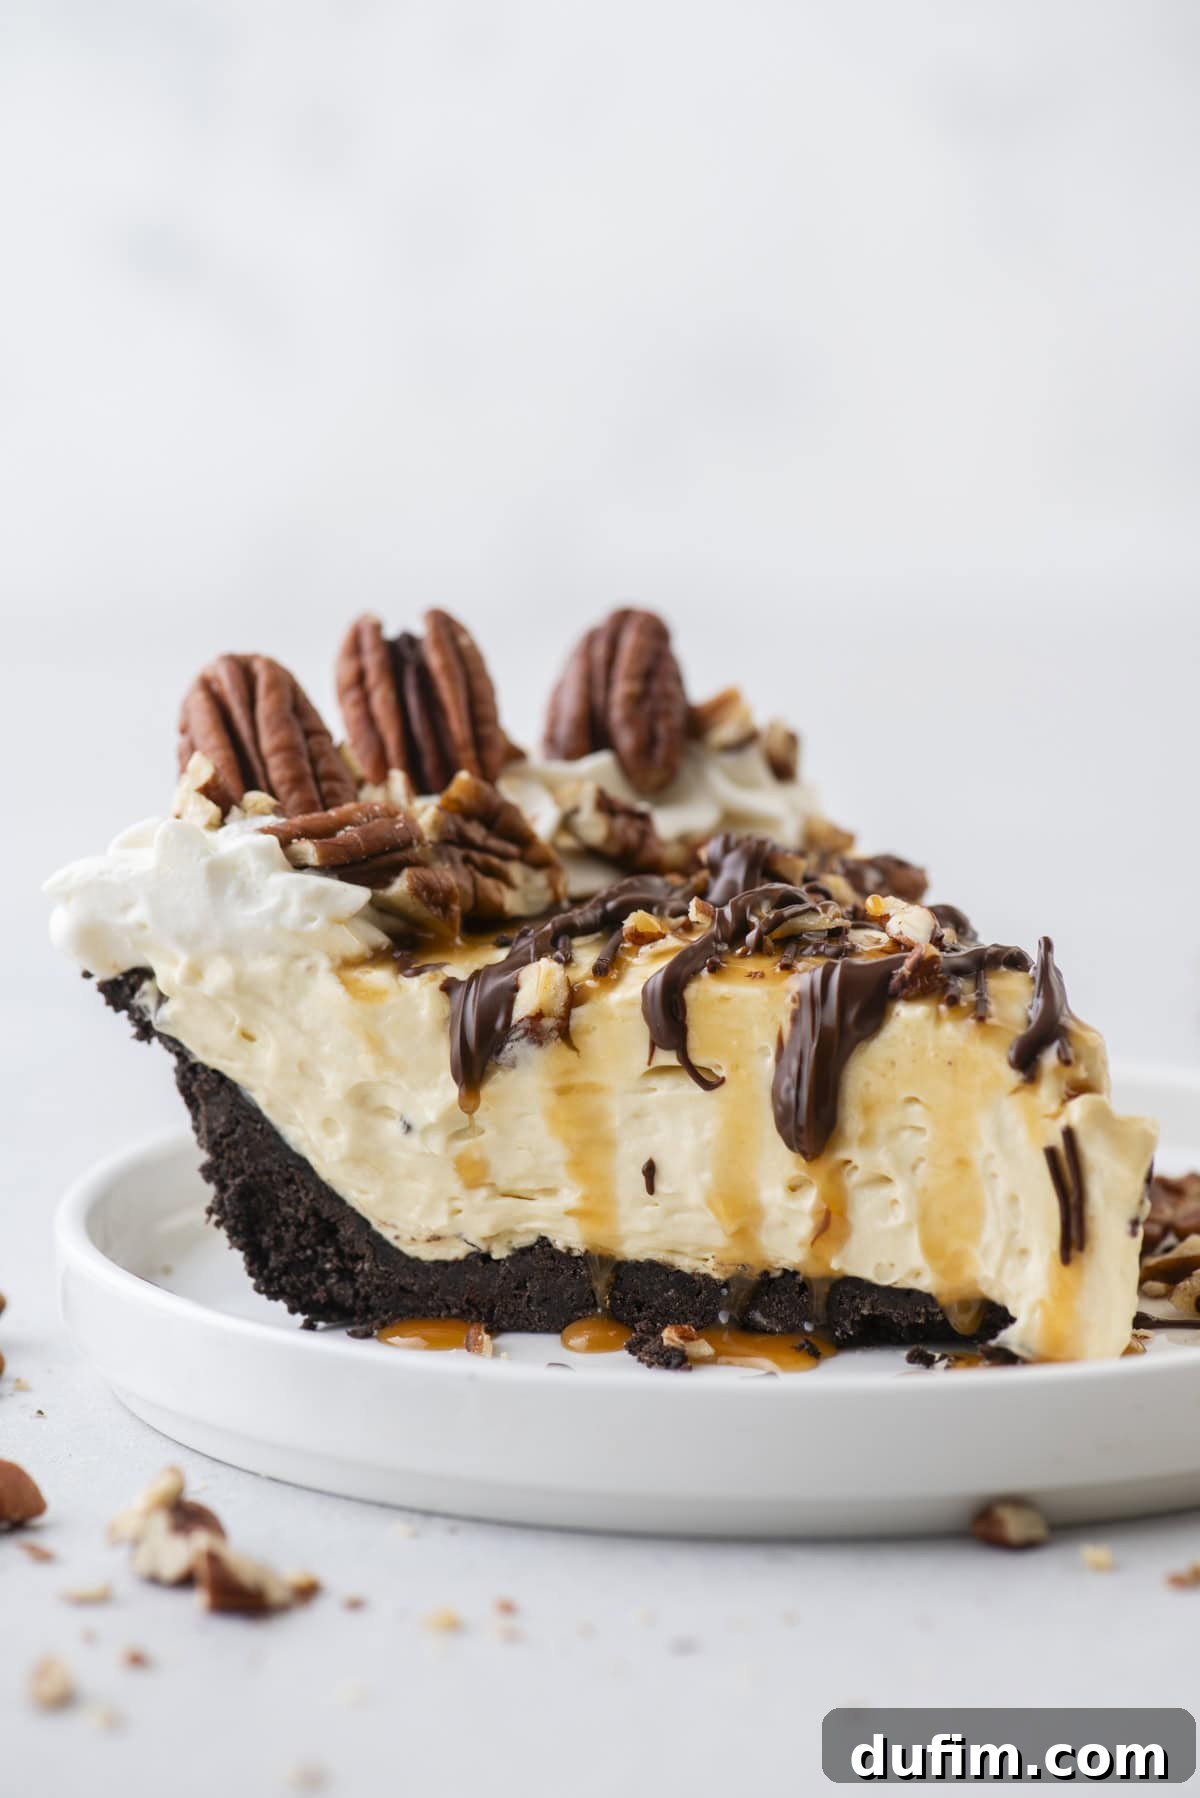
Prepare to elevate your dessert game with this truly exceptional No-Bake Turtle Pie. This recipe stands head and shoulders above the rest, offering a harmonious blend of textures and flavors that will captivate any palate. Imagine a velvety smooth filling, where the richness of cream cheese meets the light texture of pudding, all nestled in a classic Oreo cookie crust. It’s then crowned with a luscious layer of caramel, a generous swirl of whipped cream, decadent chocolate drizzles, and the satisfying crunch of toasted pecans.
The journey to perfecting this dessert involved extensive testing, meticulously balancing between a lighter pudding-based filling and a richer cream cheese variant. The result is a unique, hybrid filling that delivers the absolute best of both worlds – the irresistible flavor profile of cream cheese combined with the delightfully smooth consistency typically found in pudding pies. This innovative approach ensures every slice is a memorable experience. Get ready to dive into our comprehensive guide, packed with expert tips on crafting the ideal Oreo crust, creating the ultimate caramel cream filling, and mastering the art of the perfect toppings.
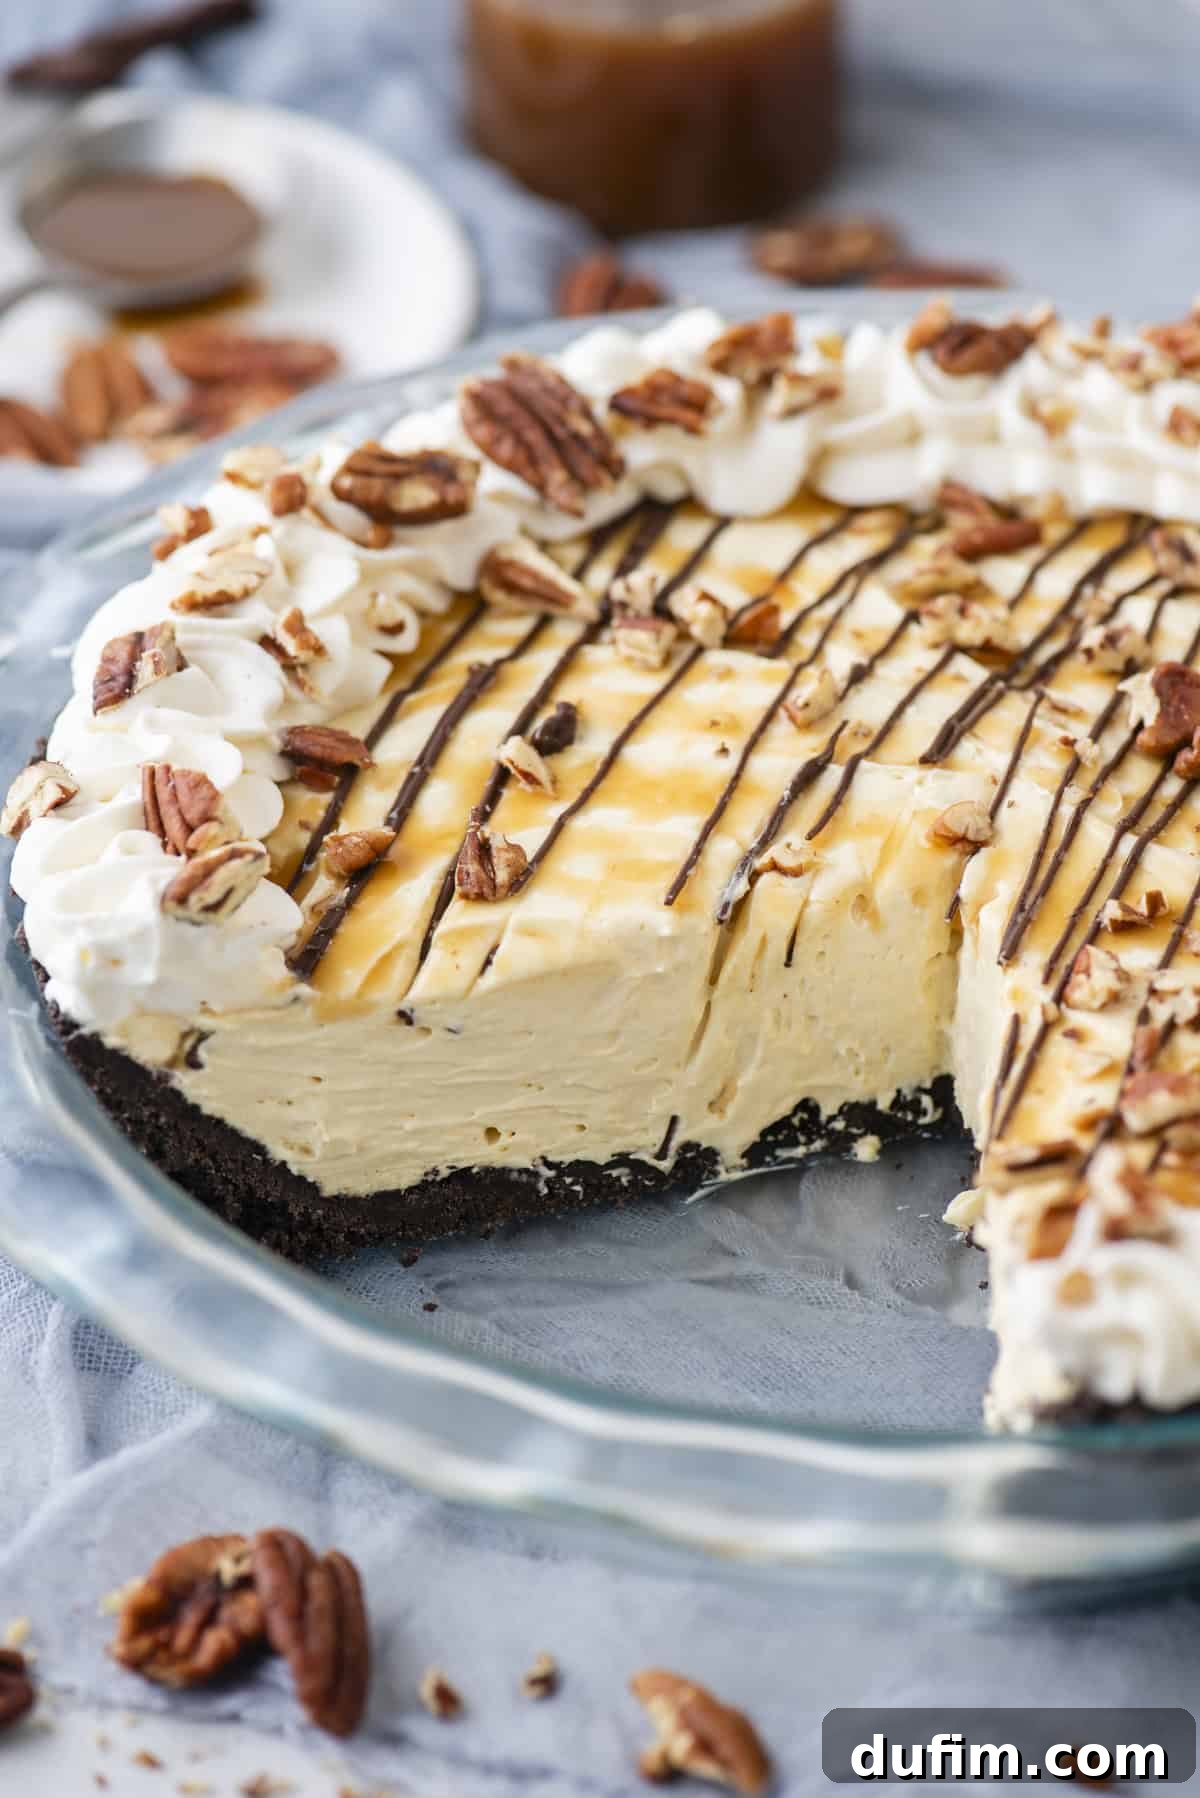
“I made this Turtle pie for Thanksgiving and it did not disappoint! It was a huge hit and tastes as incredible as it looks. Plus, it’s surprisingly easy to make! I absolutely adore all your recipes; they are truly fantastic!”
– Liz
Why This No-Bake Turtle Pie Recipe Will Become Your Favorite
Having dedicated years to perfecting no-bake desserts, I’ve channeled all my culinary expertise into refining this Turtle Pie recipe, transforming it into a true masterpiece. My experience with popular creations like my chocolate pudding pie and my no-bake peanut butter pie provided invaluable insights. The chocolate pudding pie relies on a blend of pudding mix and heavy cream for its thick, luscious texture, while the peanut butter pie achieves its richness through cream cheese.
Initially, I experimented with two distinct filling versions for this Turtle Pie. One was a pudding-centric mixture featuring vanilla pudding mix, heavy cream, caramel sauce, and Cool Whip. The other focused on cream cheese, incorporating softened cream cheese, powdered sugar, caramel, and Cool Whip. Both had their merits; I loved the smooth texture of the pudding version but was drawn to the deeper, tangier flavor of the cream cheese filling. This creative dilemma led me to develop a third, groundbreaking option: a harmonious mash-up that combines the best characteristics of both. This innovative blend proved to be the undeniable winner, creating a filling that is both sumptuously creamy and intensely flavorful. It strikes the perfect balance, ensuring a dessert that is rich without being overly heavy, and satisfyingly smooth with every bite.
This is undeniably one of the most irresistible pies you can prepare, guaranteed to impress at any gathering. Its ease of preparation belies its gourmet taste and stunning presentation. Continue reading to uncover all my essential tips for crafting the perfect crunchy Oreo crust, achieving that signature caramel cream filling, and assembling a show-stopping dessert that everyone will adore!
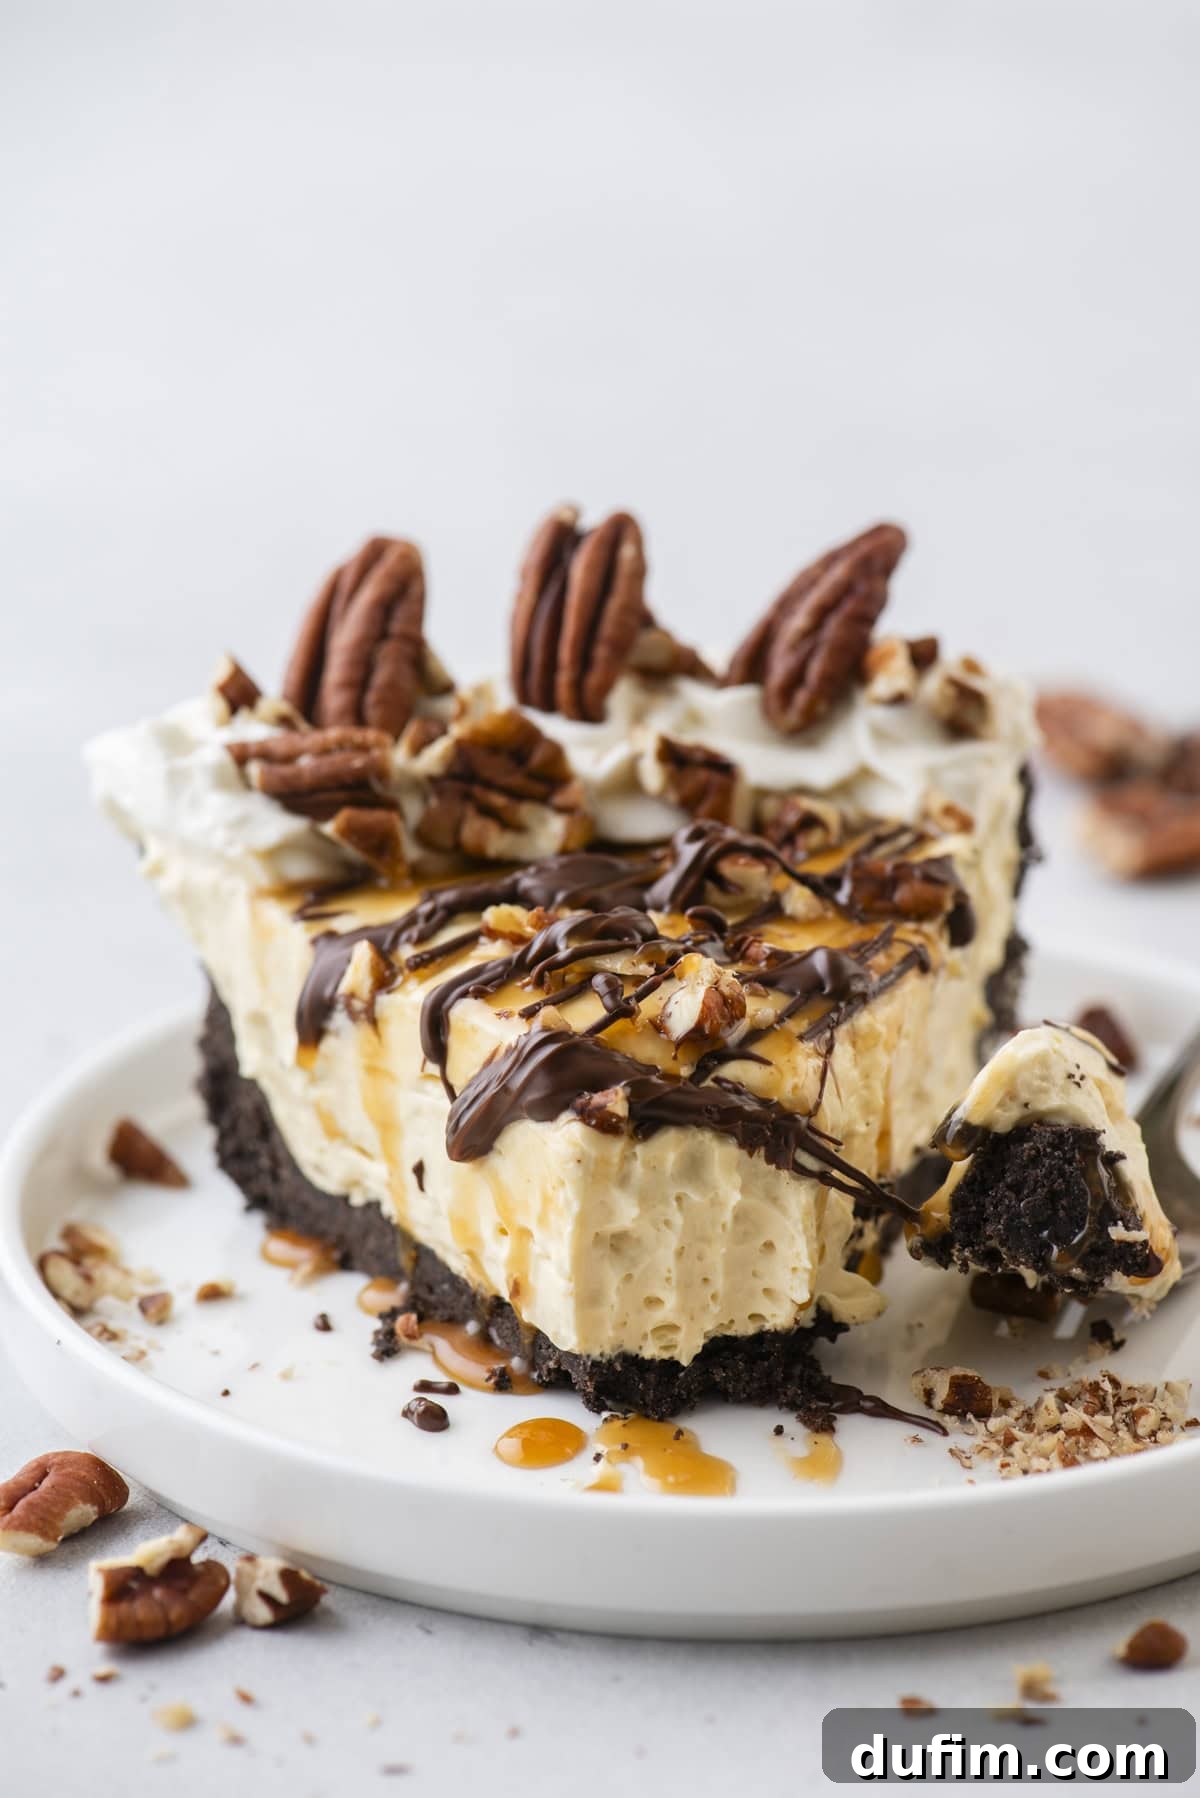
What Exactly is a Turtle Pie? Delving into this Classic Dessert
For those new to this delightful dessert, a Turtle Pie is a classic no-bake creation known for its indulgent combination of flavors and textures. It typically starts with a crunchy cookie crumb crust – most famously, an Oreo crust, providing a dark, chocolatey base. This sturdy foundation supports a rich, creamy filling, often a caramel cheesecake or a pudding-based concoction, infused with sweet caramel notes and sometimes hints of vanilla or chocolate. The pie is then lavishly adorned with a trio of decadent toppings: fluffy whipped cream, generous drizzles of caramel sauce, and rich chocolate drizzles. The finishing touch, and what truly gives the pie its distinctive name, is a generous scattering of crunchy pecans.
The name “Turtle Pie” is a delicious homage to the beloved DeMet’s Turtles candies, which feature a delectable combination of pecans, caramel, and chocolate, often arranged in a way that vaguely resembles a turtle’s shape. This pie beautifully translates those iconic candy flavors into a luxurious, easy-to-make dessert that has become a staple in many households and a crowd-pleaser at potlucks, holiday gatherings, and special occasions. It’s a nostalgic treat that promises comfort and indulgence in every single forkful, delivering a perfect balance of sweet, salty, creamy, and crunchy elements.
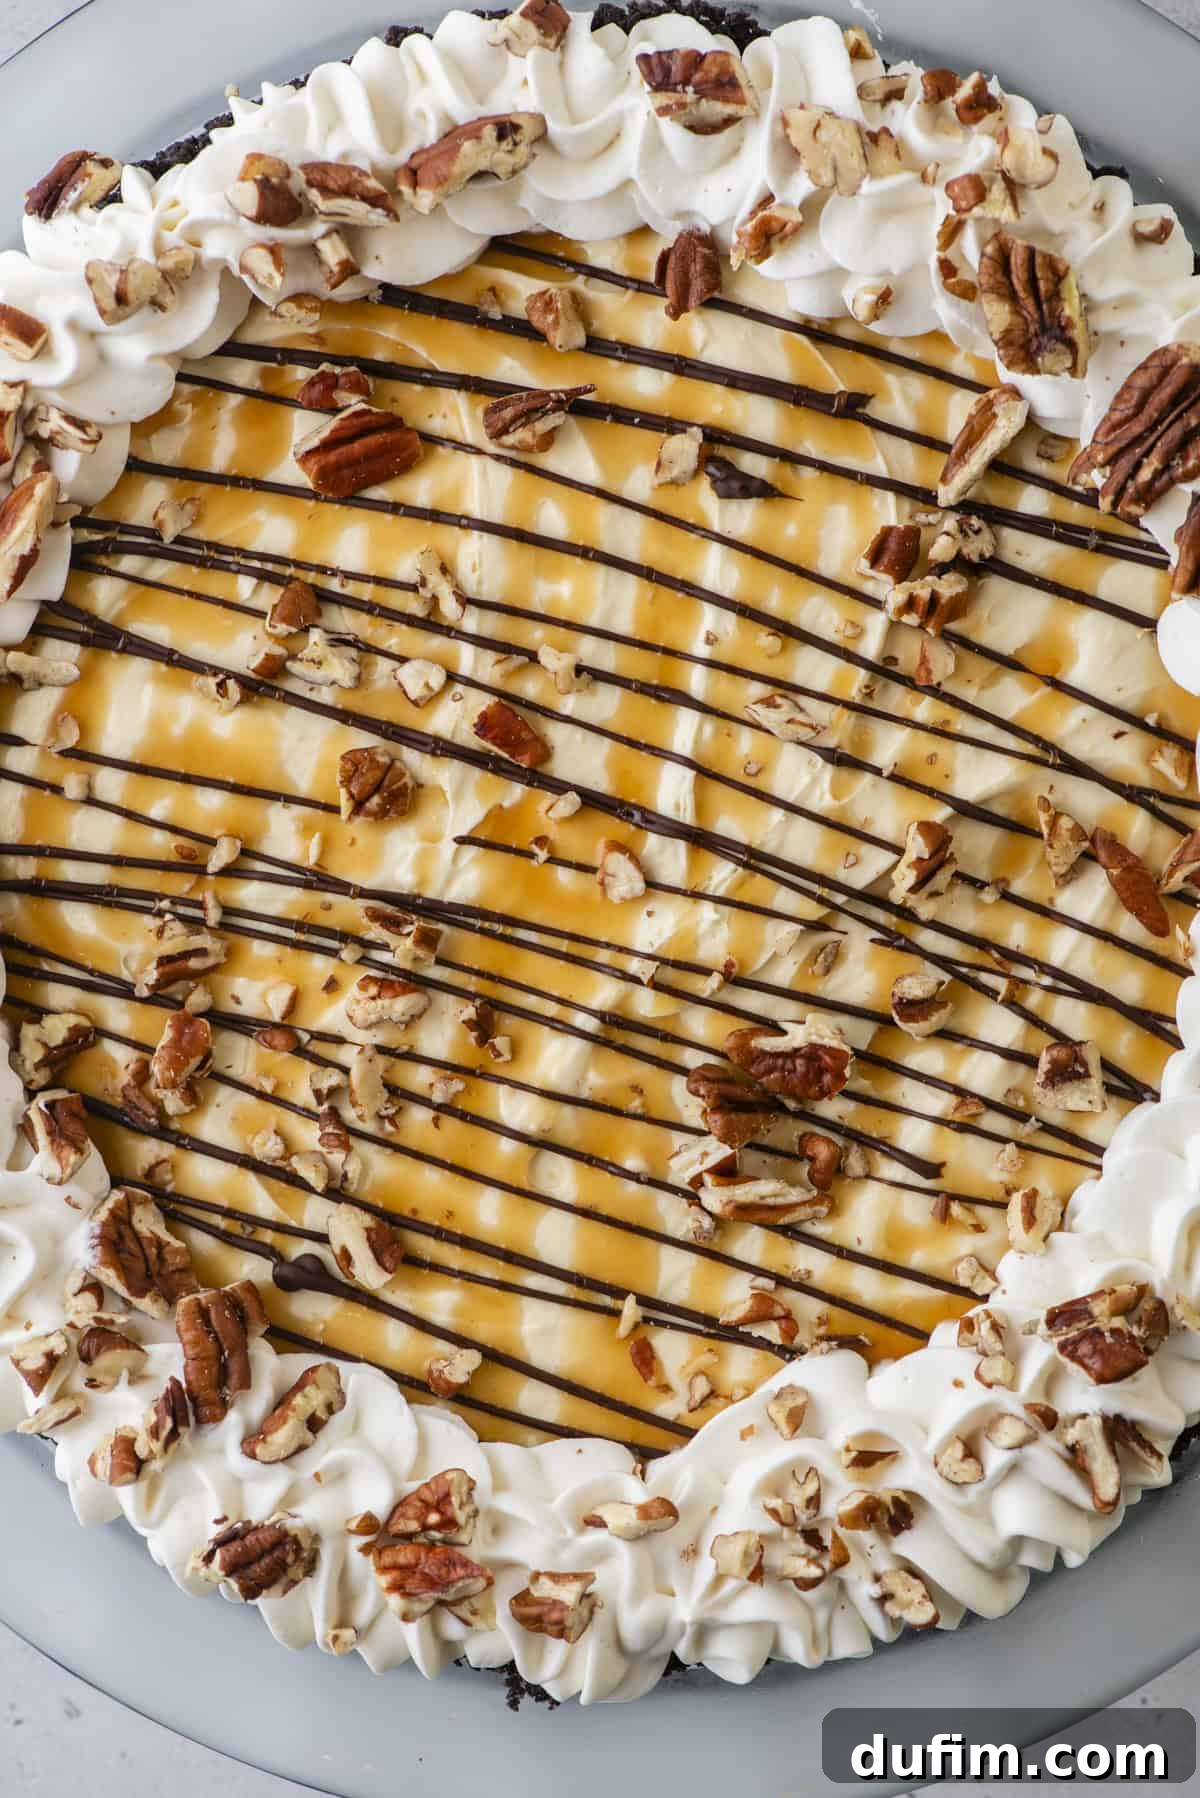
Essential Ingredients for Your Decadent Turtle Pie
Crafting this incredible Caramel Turtle Pie is simpler than you might think, thanks to a carefully selected list of ingredients. Each component plays a crucial role in building the layers of flavor and texture that make this no-bake pie truly special. From the sturdy, chocolatey crust to the decadent filling and the irresistible toppings, every item contributes to a dessert that’s sure to make your mouth water. Below is a detailed breakdown of what you’ll need to create this show-stopping dessert. For precise measurements and the full recipe, refer to the recipe card at the end of this article. Here’s a summary of the key ingredients you’ll gather for this delightful no-bake journey:
For the Irresistible Oreo Crust
- Oreos: The star of our crust! Use the classic sandwich cookies, including both the chocolate cookie and its creamy filling, for the best flavor and texture. This ensures a richer, more cohesive base.
- Unsalted Butter, melted: Acts as the binding agent, holding the crushed Oreos together to form a firm, crumbly base that won’t fall apart when sliced.
For the Dreamy Caramel Cream Filling
- Full-Fat Cream Cheese, room temperature: Essential for a rich, tangy, and incredibly smooth filling. Bringing it to room temperature ensures it blends seamlessly without lumps and contributes to the luxurious mouthfeel.
- Caramel Sauce: The heart of the “turtle” flavor. A good quality, thick caramel sauce (like Smucker’s, as used in testing) is key for that signature sweet and buttery depth.
- Instant Vanilla Pudding Mix: Provides essential structure and a hint of vanilla sweetness, contributing to the unique texture of our hybrid filling. Remember, we won’t be preparing it as directed on the box!
- Heavy Whipping Cream: Whipped into the pudding mix and cream cheese, it adds lightness and a luxurious, airy mouthfeel, making the filling wonderfully smooth.
- Cool Whip, thawed: For an additional layer of airy texture and stability, Cool Whip is a convenient and effective addition that makes the filling incredibly light and fluffy without extra effort.
For the Light & Fluffy Homemade Whipped Cream Topping
- Cream Cheese, room temperature: A small but mighty amount that adds stability and a subtle tang to the homemade whipped cream, helping it hold its beautiful piped shape longer.
- Powdered Sugar: Sweetens the whipped cream to perfection and aids in its stability, ensuring a smooth, non-gritty finish.
- Heavy Whipping Cream: The foundation for our homemade, light, and airy whipped topping. Ensure it’s very cold for optimal whipping and volume.
- Vanilla Extract: Enhances the sweet flavors and adds a warm, inviting aroma to the topping, complementing the other rich ingredients.
For the Decadent Turtle Topping
- Caramel Sauce: An extra drizzle on top for an added layer of sticky, sweet indulgence and visual appeal.
- Melted Chocolate or Chocolate Sauce: Provides the rich, bittersweet contrast that is characteristic of a turtle dessert. You can use chocolate chips, chopped chocolate, or a quality chocolate syrup.
- Pecans: The quintessential crunch! Chopped pecans deliver texture and the classic “turtle” flavor profile. Lightly toasting them beforehand can significantly enhance their nutty aroma and flavor.
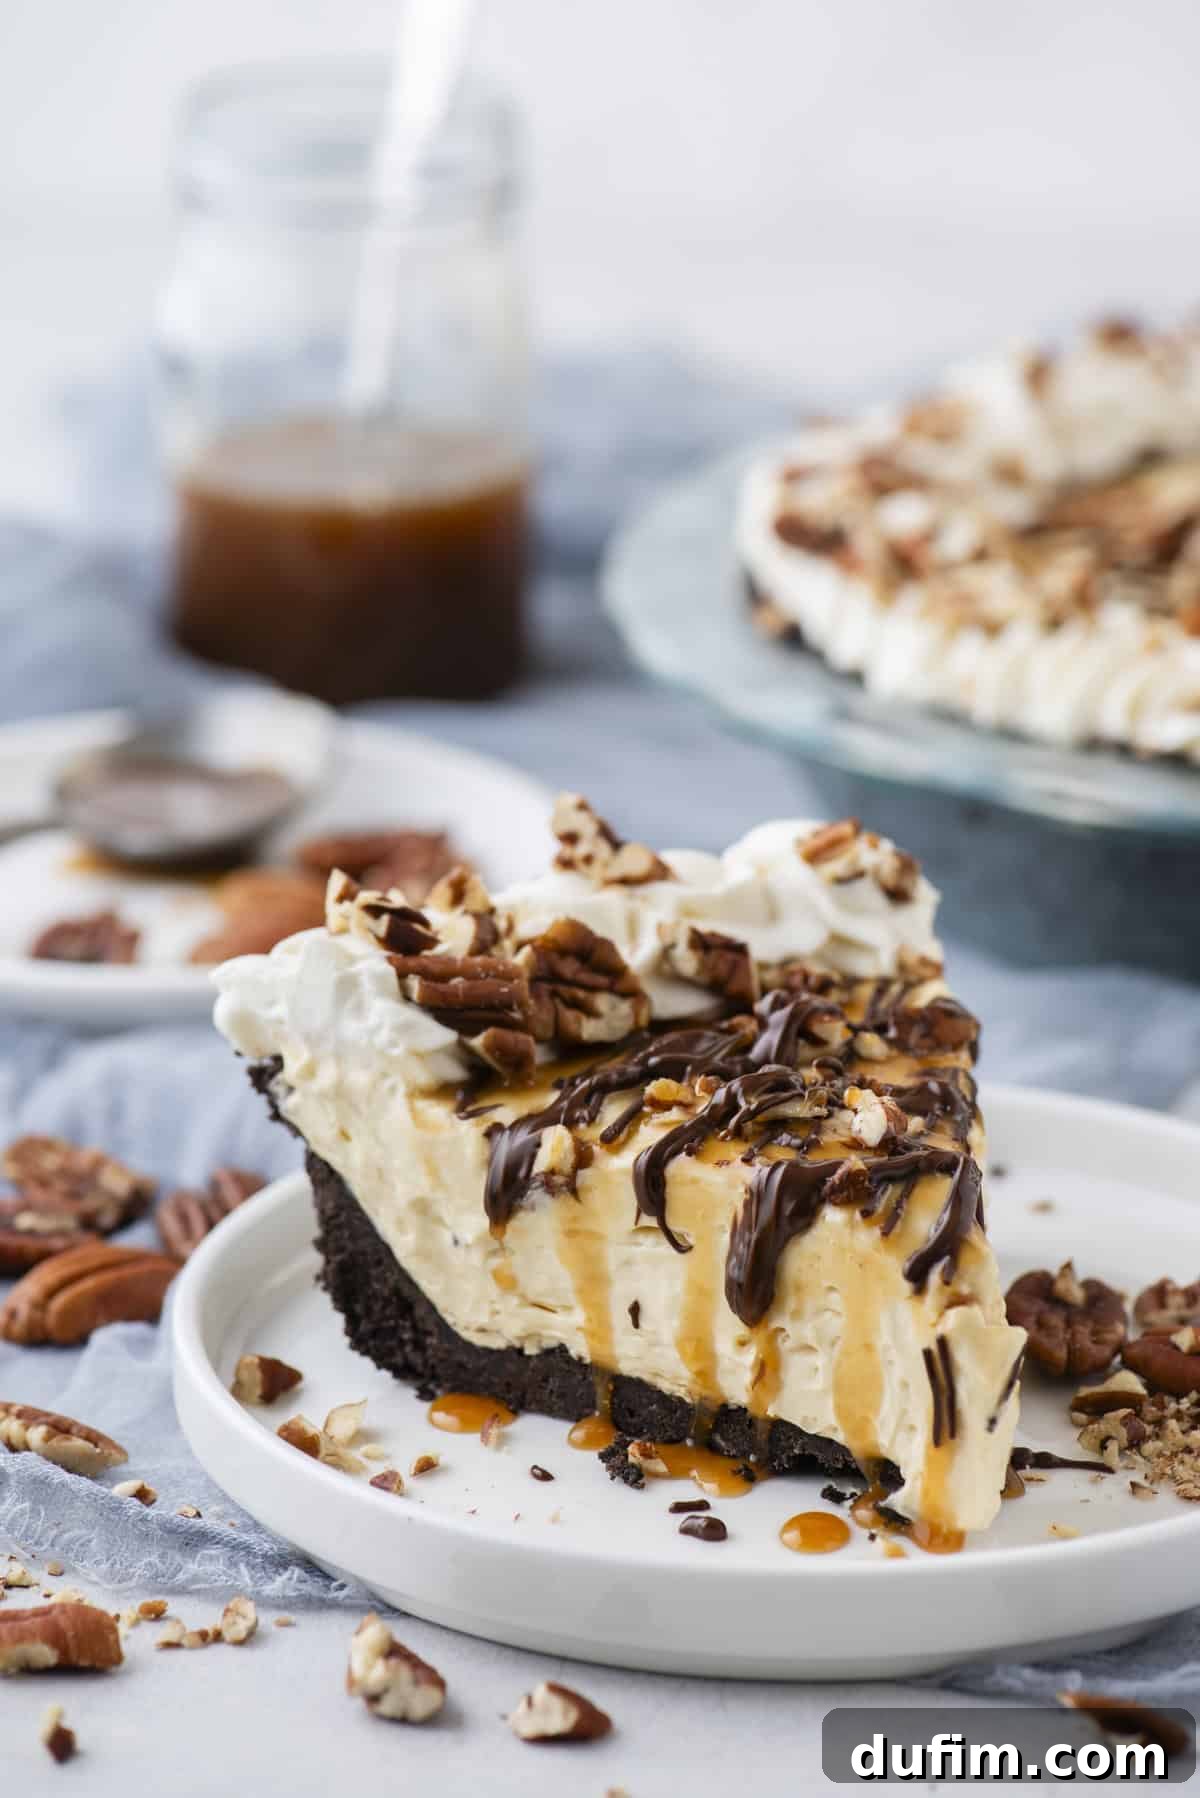
How to Masterfully Create Your Decadent Turtle Pie
Making this easy no-bake Turtle Pie is a delightful process, broken down into manageable stages: first, the crunchy Oreo crust; then, the luxurious caramel cream filling; next, the homemade whipped cream; and finally, the exciting assembly and topping with caramel, chocolate, and pecans. It truly is “easy as pie” (pun absolutely intended!). Follow these detailed steps to ensure a flawless and show-stopping dessert. Remember to check the full recipe card below for exact measurements and further details.
Phase 1: Crafting the Perfect Oreo Crust
- Prepare Oreo Crumbs: In a food processor or a high-powered blender, add the entire Oreo cookies – yes, both the chocolate cookie and its creamy white filling! Pulse until they are transformed into fine, uniform crumbs. The cream filling adds moisture and flavor, helping the crust bind beautifully and ensuring a richer, more stable base.
- Combine with Butter: Transfer the fine Oreo crumbs to a medium mixing bowl. Pour in the melted unsalted butter. Using a sturdy spatula or your hands, mix thoroughly until all the crumbs are evenly moistened and resemble wet sand. This ensures a cohesive crust that holds together.
- Form the Crust: Transfer the buttered crumbs into a 9-inch pie pan. Using the bottom of a flat-bottomed measuring cup or a drinking glass, firmly press and tamp the crumbs evenly into the bottom of the pan and up the sides. Pressing tightly and uniformly is absolutely key to a sturdy crust that won’t crumble when sliced.
Phase 2: Preparing the Decadent Caramel Cream Filling
- Cream Cheese and Caramel: In the bowl of a stand mixer fitted with a paddle attachment (or a large mixing bowl with an electric hand mixer), combine the softened full-fat cream cheese and the caramel sauce. Beat on medium speed for about 1 minute, until the mixture is completely smooth and well blended, with no lumps of cream cheese visible. Scrape down the sides of the bowl as needed.
- Integrate Pudding Mix and Cream: Gradually add the instant vanilla pudding mix to the cream cheese mixture. Immediately pour in the very cold heavy whipping cream. Beat on medium-high speed for approximately 2 minutes. Important: Do NOT prepare the pudding mix according to its box instructions. The mixture will thicken considerably as you beat it, forming a rich, dense cream. This is exactly how it should be, providing the unique texture for our hybrid filling!
- Fold in Cool Whip: Gently add the thawed Cool Whip to the thick pudding-cream cheese mixture. Mix on low speed, or fold in by hand with a spatula, until just combined and uniformly smooth. Avoid overmixing to maintain the light and airy texture from the Cool Whip and prevent deflation.
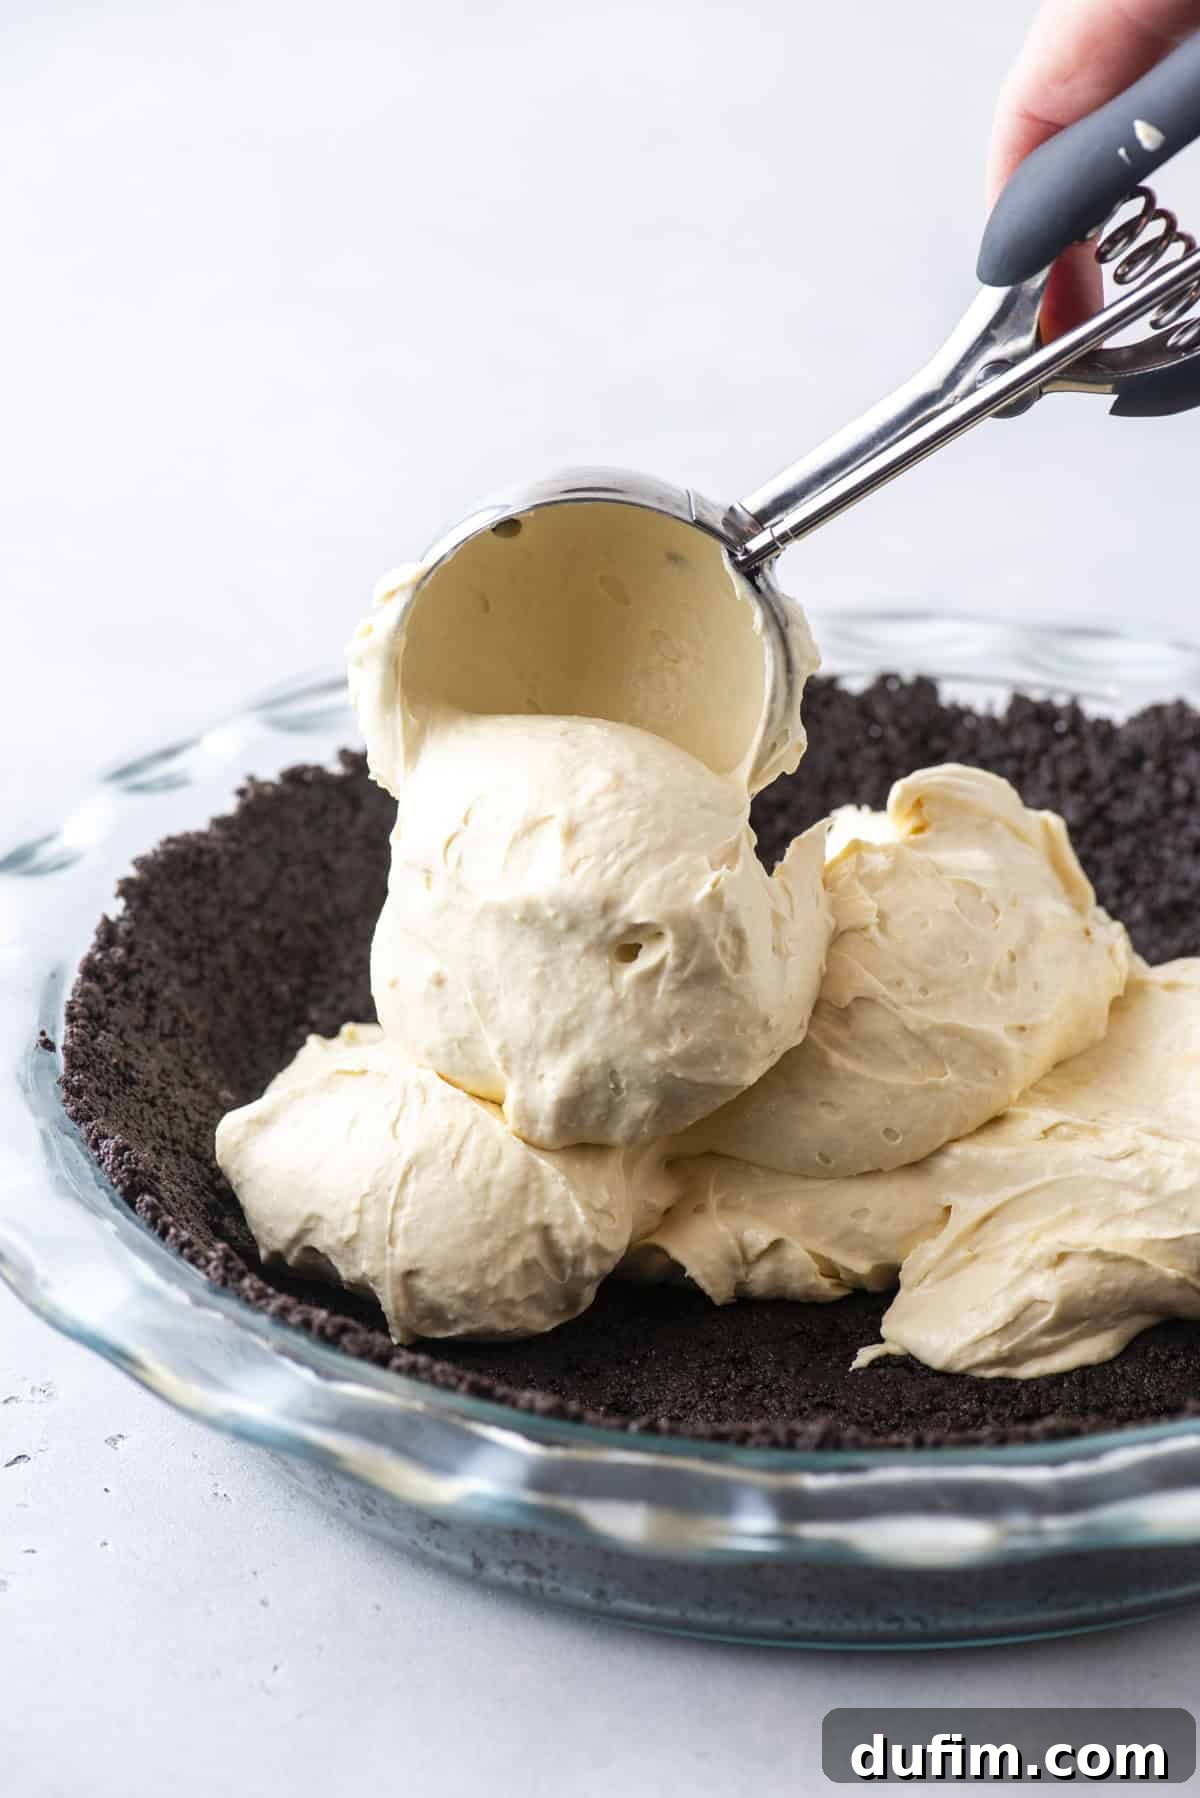
- Spread and Chill the Filling: Evenly spread this glorious caramel cream filling over your prepared Oreo crust in the pie pan. Use an offset spatula or the back of a spoon to create a smooth, even layer. Cover the entire pie pan tightly with plastic wrap to prevent a skin from forming and to keep it fresh. Refrigerate for a minimum of 4 hours, but ideally 6-8 hours, or even overnight. This crucial chilling period allows the filling to set completely, ensuring perfect, clean slices.
Phase 3: Whipping Up the Dreamy Topping
- Chill Your Equipment: For the best whipped cream, this step is essential! Place a clean metal or glass mixing bowl and your mixer beaters (or whisk attachment) into the freezer for 15-20 minutes. Cold equipment helps the cream whip up faster, achieve greater volume, and hold its peaks better.
- Beat Cream Cheese and Powdered Sugar: Remove the chilled bowl and beaters from the freezer. Add the softened cream cheese and powdered sugar to the cold bowl. Beat with an electric mixer on medium speed for about 1 minute, until the mixture is smooth, creamy, and lump-free.
- Whip with Cream and Vanilla: Pour in the very cold heavy whipping cream and vanilla extract. Increase the mixer speed to high and beat for 4-5 minutes, or until stiff peaks form. The whipped cream should be thick, scoopable with a spoon, and hold its shape beautifully without collapsing. Be careful not to overbeat, or it will turn grainy and separate.
Phase 4: Assembling and Finishing Your Masterpiece
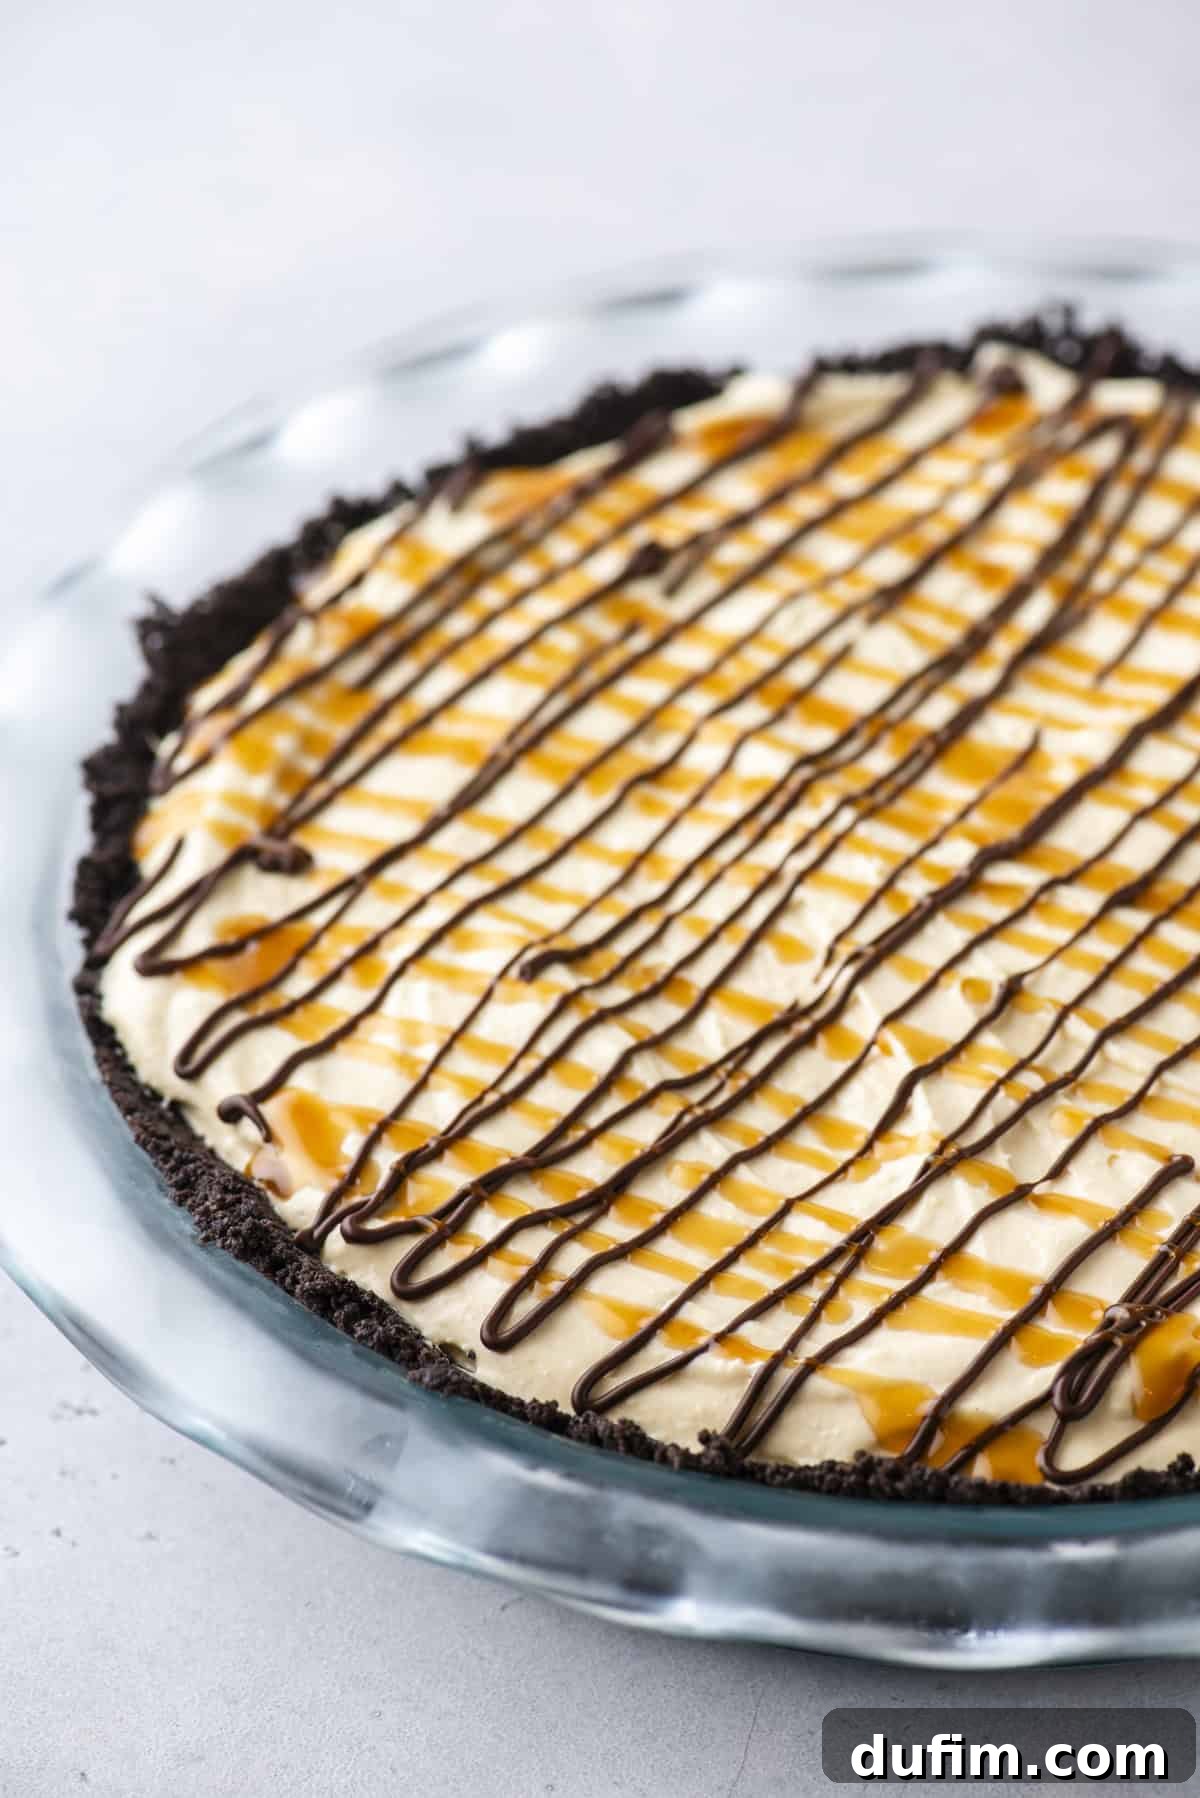
- Drizzle Caramel and Chocolate: Once the pie filling is thoroughly chilled and set, take it out of the refrigerator. Drizzle generous amounts of caramel sauce and melted chocolate (or chocolate syrup) over the top of the pie. Create an appealing pattern by alternating directions or creating swirls for a professional look.
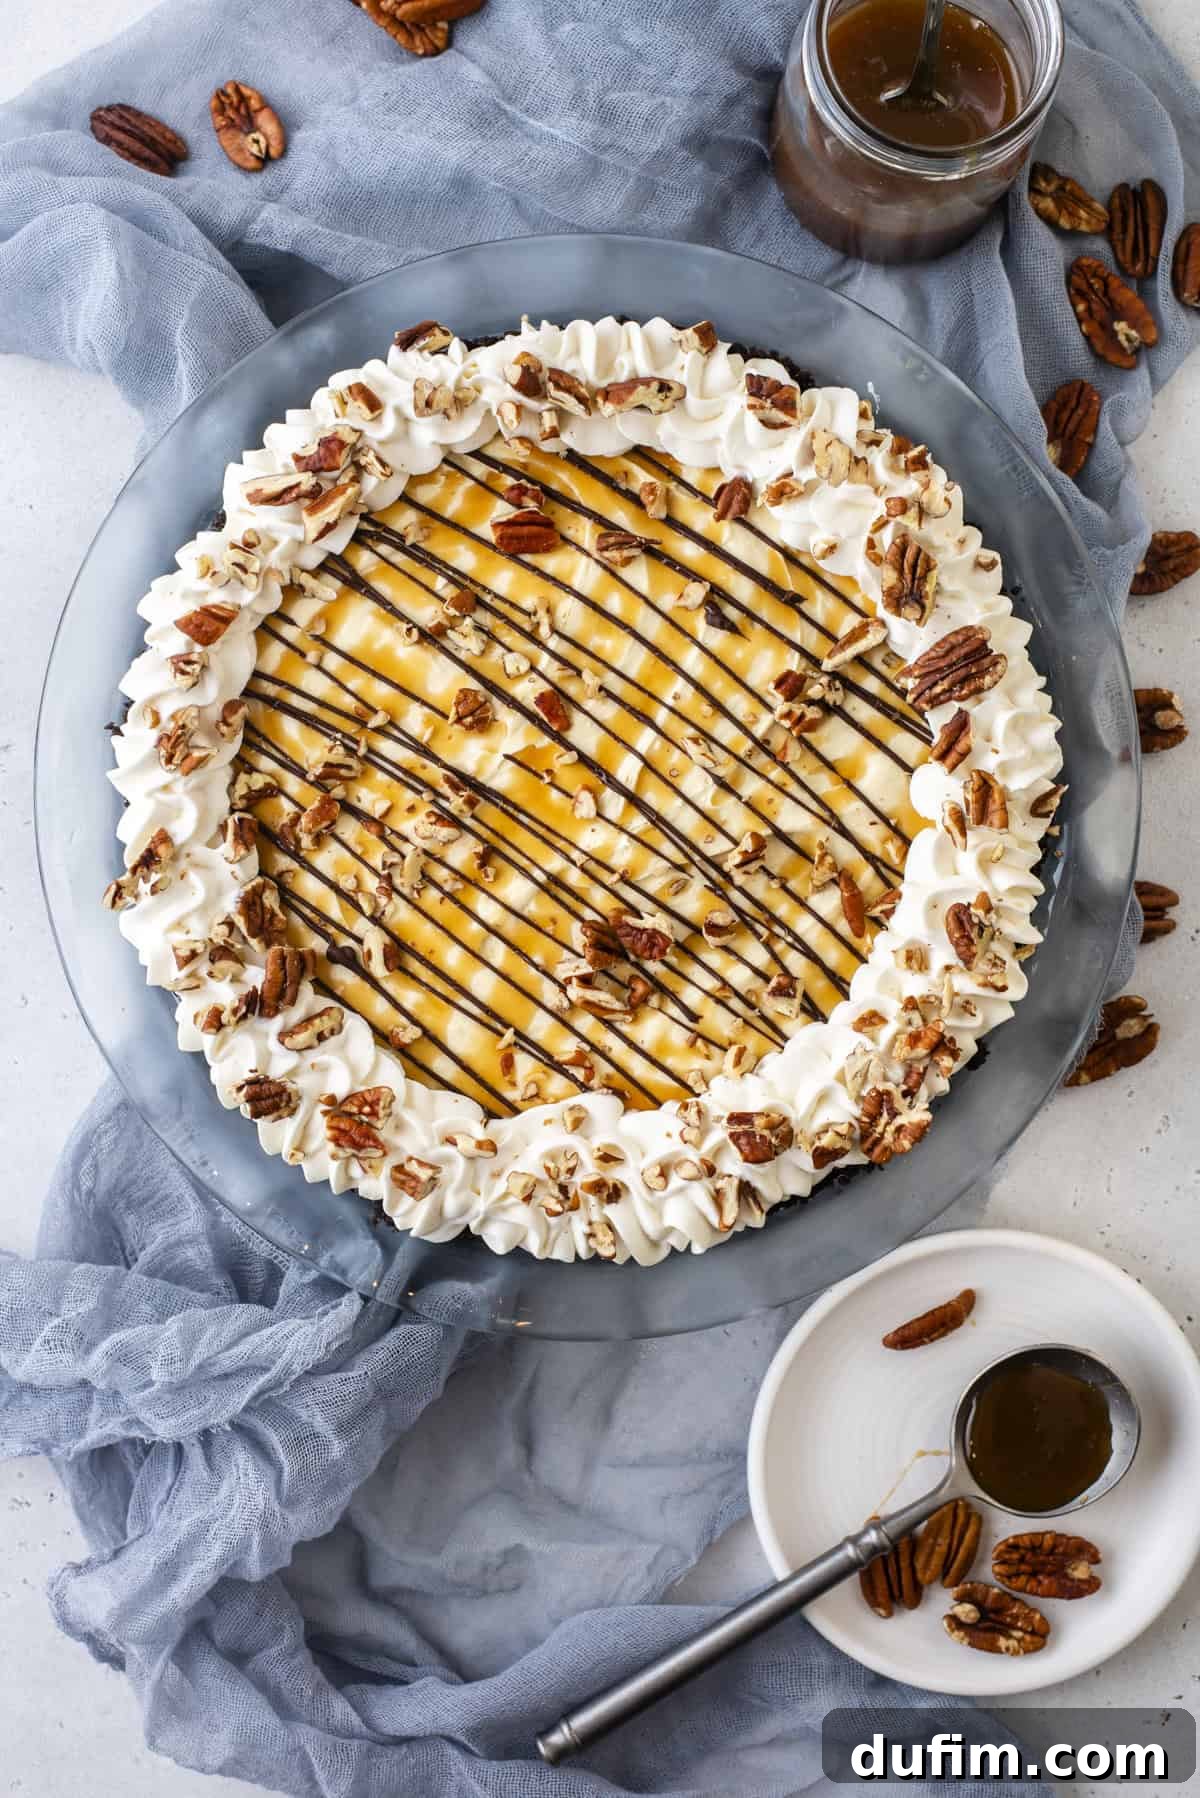
- Add Whipped Cream and Pecans: Using a piping bag with your favorite tip, pipe the freshly made whipped cream decoratively around the edge of the pie, or spread it evenly over the entire surface. Finally, generously sprinkle chopped pecans over the whipped cream and drizzles. For extra flavor, lightly toast your pecans beforehand and let them cool.
- Final Chill & Serve: For best results and easiest slicing, return the assembled pie to the refrigerator for at least 30 minutes to allow the toppings to set slightly and ensure the entire pie is perfectly chilled. Store in the refrigerator until you’re ready to serve this glorious dessert!
Expert Tips for a Flawless No-Bake Turtle Pie
To ensure your No-Bake Turtle Pie turns out perfectly every time, keep these invaluable tips in mind. These small details can make a significant difference in the final taste, texture, and presentation of your dessert:
- For the Best Crust Texture: When preparing your Oreo crust, don’t separate the cookies from their cream filling! Blend the entire sandwich cookie. The cream contributes extra moisture and flavor, helping the crumbs bind together more effectively and creating a richer, more cohesive base that won’t fall apart when sliced.
- Do NOT Skip the Setting Time: Patience is truly a virtue with no-bake pies. The caramel cream filling absolutely requires a minimum of 4 hours, and ideally 6-8 hours, in the refrigerator to properly set. This allows the ingredients to firm up and integrate, preventing a runny pie and ensuring a clean cut. Resist the temptation to rush this step – a well-set pie slices cleanly and holds its shape beautifully.
- Ignore Pudding Box Instructions: This recipe utilizes instant pudding mix as a thickener and flavor enhancer, not as a standalone pudding. You will NOT follow the preparation instructions on the pudding mix box. Instead, integrate the dry mix directly into the cream cheese and heavy cream as outlined in our recipe steps. Don’t be alarmed when the mixture becomes incredibly thick – this is the desired consistency for our robust, stable filling.
- Pre-Chill Whipping Equipment: This is my number one secret for achieving perfectly stiff, stable whipped cream. Placing your metal or glass mixing bowl and beaters in the freezer for 15-20 minutes before whipping cream makes a dramatic difference. The cold surface helps the fat globules in the cream emulsify better, leading to a much fluffier, more stable whipped topping that holds its shape longer without weeping.
- Serve Well-Chilled: Turtle pie is a dessert that shines when served cold. Keep your pie stored in the refrigerator right up until serving time. This not only enhances the refreshing qualities of the pie but also ensures the filling and toppings remain firm and delightful, providing the optimal eating experience.
- Toasting Pecans (Optional, but Recommended): For an extra layer of flavor and aroma, lightly toast your chopped pecans. You can do this in a dry skillet over medium-low heat for 5-7 minutes, stirring frequently until they are fragrant, or spread on a baking sheet at 350°F (175°C) for 5-10 minutes. Let them cool completely before sprinkling them on top. This brings out their natural nutty oils and deepens their taste significantly.
- High-Quality Ingredients Matter: While this recipe is straightforward, using good quality full-fat cream cheese and a reputable caramel sauce can significantly elevate the final taste and texture of your pie. Quality ingredients often lead to superior results.
Frequently Asked Questions About Chocolate Turtle Cream Pie
How long does no-bake Turtle Pie last in the fridge?
When properly stored, your delicious no-bake Turtle Pie will last beautifully in the refrigerator for up to 5 days. To maintain its freshness, prevent it from drying out, and keep it from absorbing other odors from the fridge, ensure it is tightly wrapped with several layers of plastic wrap or aluminum foil. Alternatively, place any individual slices or leftovers in an airtight container.
Does Turtle Pie traditionally contain nuts?
Yes, traditional Turtle Pie, staying true to its namesake candy, almost always features pecans as a key ingredient. The crunchy texture and rich, buttery flavor of pecans are integral to the classic “turtle” profile, providing a wonderful contrast to the creamy filling and sweet drizzles. If you have nut allergies or simply prefer not to use them, you can certainly omit the pecans or substitute them with a nut-free alternative like crushed pretzel pieces or toasted coconut flakes for crunch, though the flavor profile will naturally differ slightly from the classic.
Can I freeze Turtle Pie?
Absolutely! No-bake Turtle Pie freezes exceptionally well, making it a fantastic make-ahead dessert. To freeze, place the fully assembled and chilled pie (without the final whipped cream topping if you prefer to add it fresh) in the freezer until firm, about 2-3 hours. Once solid, wrap it tightly in several layers of plastic wrap, followed by a layer of heavy-duty aluminum foil. It can be stored in the freezer for up to 1-2 months. When ready to serve, thaw the pie in the refrigerator overnight, or for a faster thaw, leave it at room temperature for an hour or two before serving (though texture might be slightly softer if thawed too quickly). Add fresh whipped cream and drizzles if they were omitted before freezing.
Can I make individual mini Turtle Pies?
Yes, this recipe is perfectly adaptable for making individual mini Turtle Pies! Instead of a single 9-inch pie pan, you can press the Oreo crust crumbs into standard muffin tins lined with paper liners, small ramekins, or even mini springform pans for individual servings. Adjust the chilling time accordingly for these smaller portions, as they will set faster. This is a fantastic option for parties, dessert buffets, or when you want perfectly portioned servings for a crowd.
What kind of chocolate should I use for drizzling on top?
You have a few great options for the chocolate drizzle! For a richer, more intense chocolate flavor, you can melt semi-sweet chocolate chips or chopped chocolate bars (dark chocolate also works for a less sweet profile). Alternatively, a good quality chocolate syrup, hot fudge sauce, or even a pre-made chocolate ganache works wonderfully for convenience and a smoother, glossier finish. Choose what you prefer, but aim for something that will firm up slightly when chilled for the best presentation and eating experience.
“I’ve made this pie a few times now and it is always a big hit! I highly recommend trying it out. It’s a crowd-pleaser every time and so easy to put together.”
– Brian
Explore More Decadent Turtle-Inspired Recipes
If you’ve fallen in love with the classic combination of caramel, chocolate, and pecans, then you’ll be thrilled to discover these other fantastic turtle-themed desserts from my collection. Each recipe brings its own unique twist to these beloved flavors, offering something new to satisfy your sweet tooth:
- Mini Turtle Cheesecakes: Bite-sized portions of creamy cheesecake loaded with all the irresistible turtle goodness.
- Chocolate Turtle Cheesecake: A rich and indulgent baked cheesecake with layers of chocolate, caramel, and pecans, perfect for a grand celebration.
- Turtle Bark: A quick and easy treat, ideal for gifting or a fast craving fix, packed with crunchy pecans and gooey caramel.
- Turtle Popcorn Balls: A fun, chewy, and crunchy snack that combines sweet and salty flavors, coated in caramel and chocolate.
Tap stars to rate!
Decadent No-Bake Turtle Pie Recipe
This no-bake Turtle Pie is a cut above the rest, featuring a unique combination of pudding and cream cheese for the absolute best texture and taste! After extensive testing, I finally nailed the ultimate creamy caramel filling, paired with my popular Oreo crust, and topped with whipped cream, chocolate, caramel, and crunchy pecans.
Equipment
- Glass Pie Pan
- Stand Mixer or Electric Hand Mixer
- Large Mixing Bowls
- Food Processor or Blender
- Spatula
Ingredients
Oreo Crust
- 32 Oreos (entire cookies with cream filling)
- 6 Tbsp (86g) unsalted butter, melted
Caramel Cream Filling
- 16 oz (452g) full-fat cream cheese, room temperature
- ½ cup (164g) caramel sauce (e.g., Smucker’s)
- 1 box instant vanilla pudding mix (3.4 or 3.9 oz box, NOT prepared)
- 1 ¼ cups (295ml) heavy whipping cream, cold
- 8 oz (226g) Cool Whip, thawed
Homemade Whipped Cream Topping
- 2 oz (57g) cream cheese, room temperature
- ½ cup (56g) powdered sugar
- 2 cups (473ml) heavy whipping cream, very cold
- 1 tsp vanilla extract
Turtle Topping
- 2 Tbsp caramel sauce
- 2 Tbsp melted chocolate or chocolate sauce
- ½ cup (or more) chopped pecans, lightly toasted (optional)
Instructions
Oreo Crust
- Make Oreo Crumbs: In a food processor or blender, pulse 32 Oreos (the cookie portion and the cream filling) into fine crumbs.
- Mix Crumbs and Butter: In a mixing bowl, use a spatula to combine the crumbs with 6 Tbsp (86g) melted unsalted butter until well combined.
- Press into Pan: Transfer the crumbs to a 9-inch pie pan. Use the bottom of a measuring cup or drinking glass to pack the crumbs evenly and tightly into and up the sides of the pan to form the crunchy Oreo crust.
Caramel Cream Filling
- Mix Cream Cheese and Caramel: In a stand mixer or large mixing bowl, combine 16 oz (452g) room temperature full-fat cream cheese and ½ cup (164g) caramel sauce with an electric mixer until well blended, about 1 minute.
- Beat in Pudding Mix and Heavy Cream: Beat in 1 box instant vanilla pudding mix and 1 ¼ cups (295ml) heavy whipping cream for 2 minutes. You will NOT prepare the pudding mix as directed on the box. The mixture will become very thick.
- Add Cool Whip: Add 8 oz (226g) thawed Cool Whip and mix on low until just combined.
- Spread and Chill: Spread this mixture evenly over the prepared Oreo crust. Cover the pie pan with plastic wrap and refrigerate for 4-8 hours to set properly.
Homemade Whipped Cream Topping
- Chill Equipment: Place a metal or glass mixing bowl and beaters in the freezer for 15 minutes.
- Beat Cream Cheese and Powdered Sugar: Remove the bowl from the freezer. Add 2 oz (57g) room temperature cream cheese and ½ cup (56g) powdered sugar. Beat with an electric mixer for 1 minute or until smooth and creamy.
- Whip Cream and Vanilla: Add 2 cups (473ml) very cold heavy whipping cream and 1 tsp vanilla extract. Beat with an electric mixer for 4-5 minutes on high speed, or until stiff peaks form and it holds its shape.
Assemble the Pie
- Drizzle Caramel and Chocolate: Drizzle 2 Tbsp caramel sauce and 2 Tbsp melted chocolate or chocolate sauce over the chilled pie, in alternating directions.
- Pipe Whipped Cream and Add Pecans: Pipe the homemade whipped cream around the edge of the pie. Top generously with chopped pecans.
- Final Chill & Serve: Store the assembled pie in the refrigerator until ready to serve.
Recipe Video (Optional)
A short video demonstrating the assembly of this delicious Turtle Pie may be available on the original blog post or creator’s channel. Look for visual guides to help you master the techniques!
Nutrition Information (Approximate)
Serving: 1 slice | Calories: 1411kcal | Carbohydrates: 57g | Protein: 8g | Fat: 132g | Saturated Fat: 81g | Polyunsaturated Fat: 6g | Monounsaturated Fat: 35g | Trans Fat: 4g | Cholesterol: 349mg | Sodium: 396mg | Potassium: 249mg | Fiber: 1g | Sugar: 43g | Vitamin A: 4241IU | Vitamin C: 0.4mg | Calcium: 143mg | Iron: 4mg
Nutrition Disclosure
All nutritional values provided are approximate and are offered to the reader as a courtesy. Please note that changing ingredients and/or quantities will alter the estimated nutritional calculations. This information is not intended to be a substitute for professional nutritional advice.