
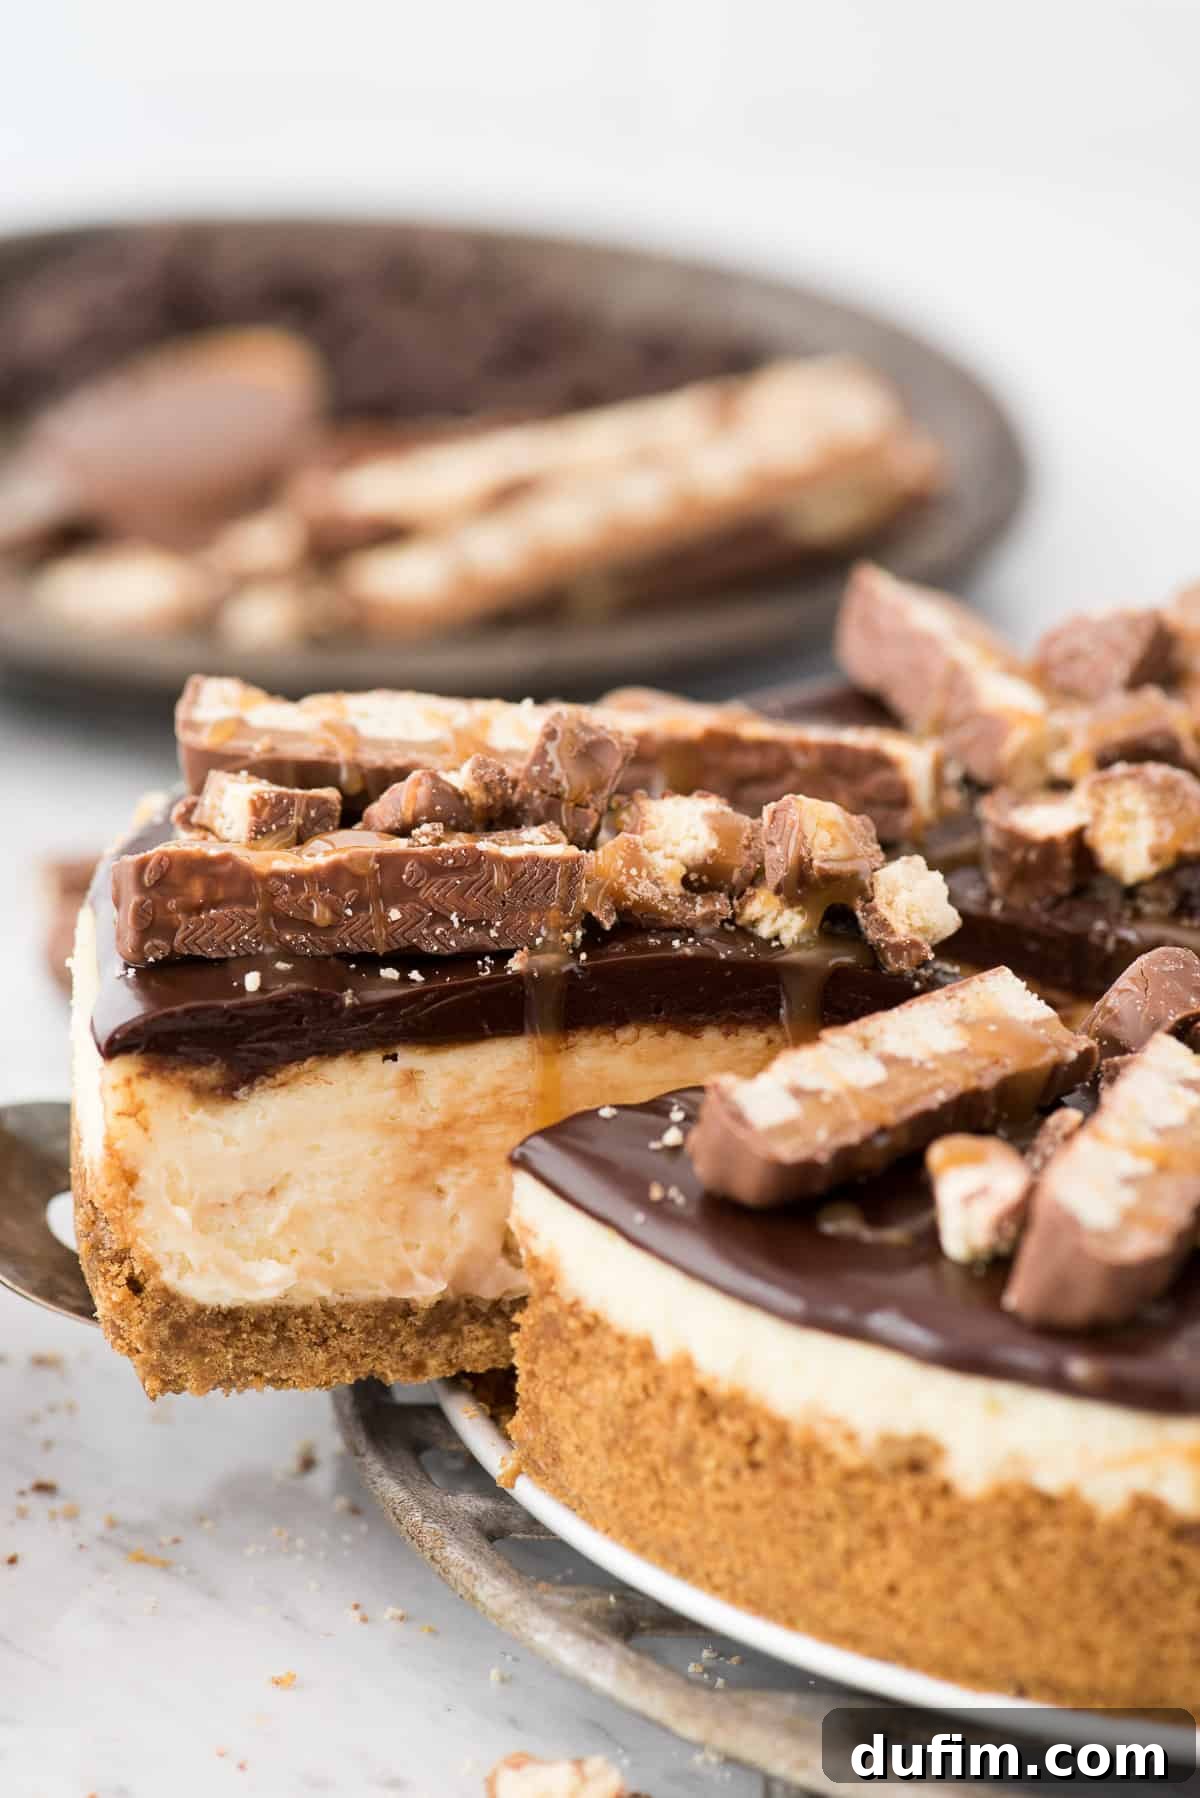
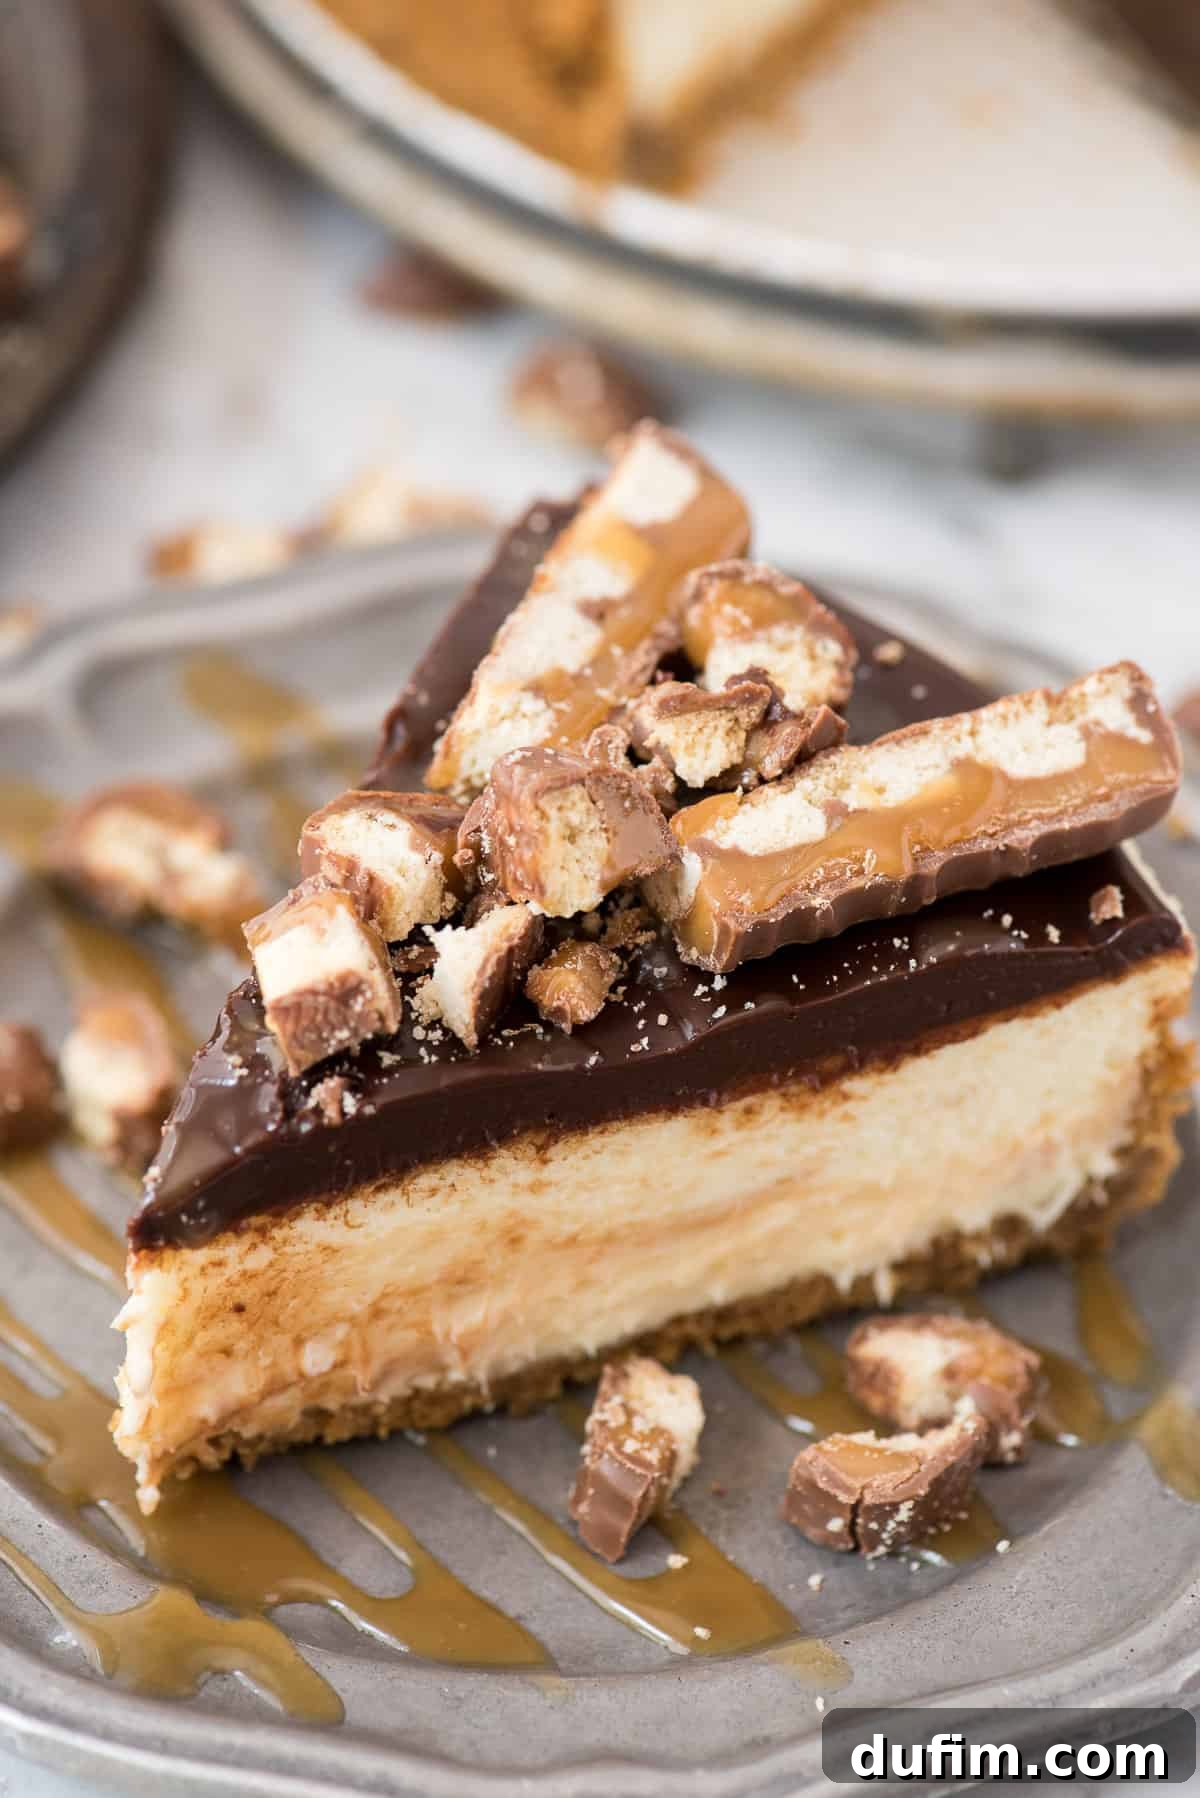
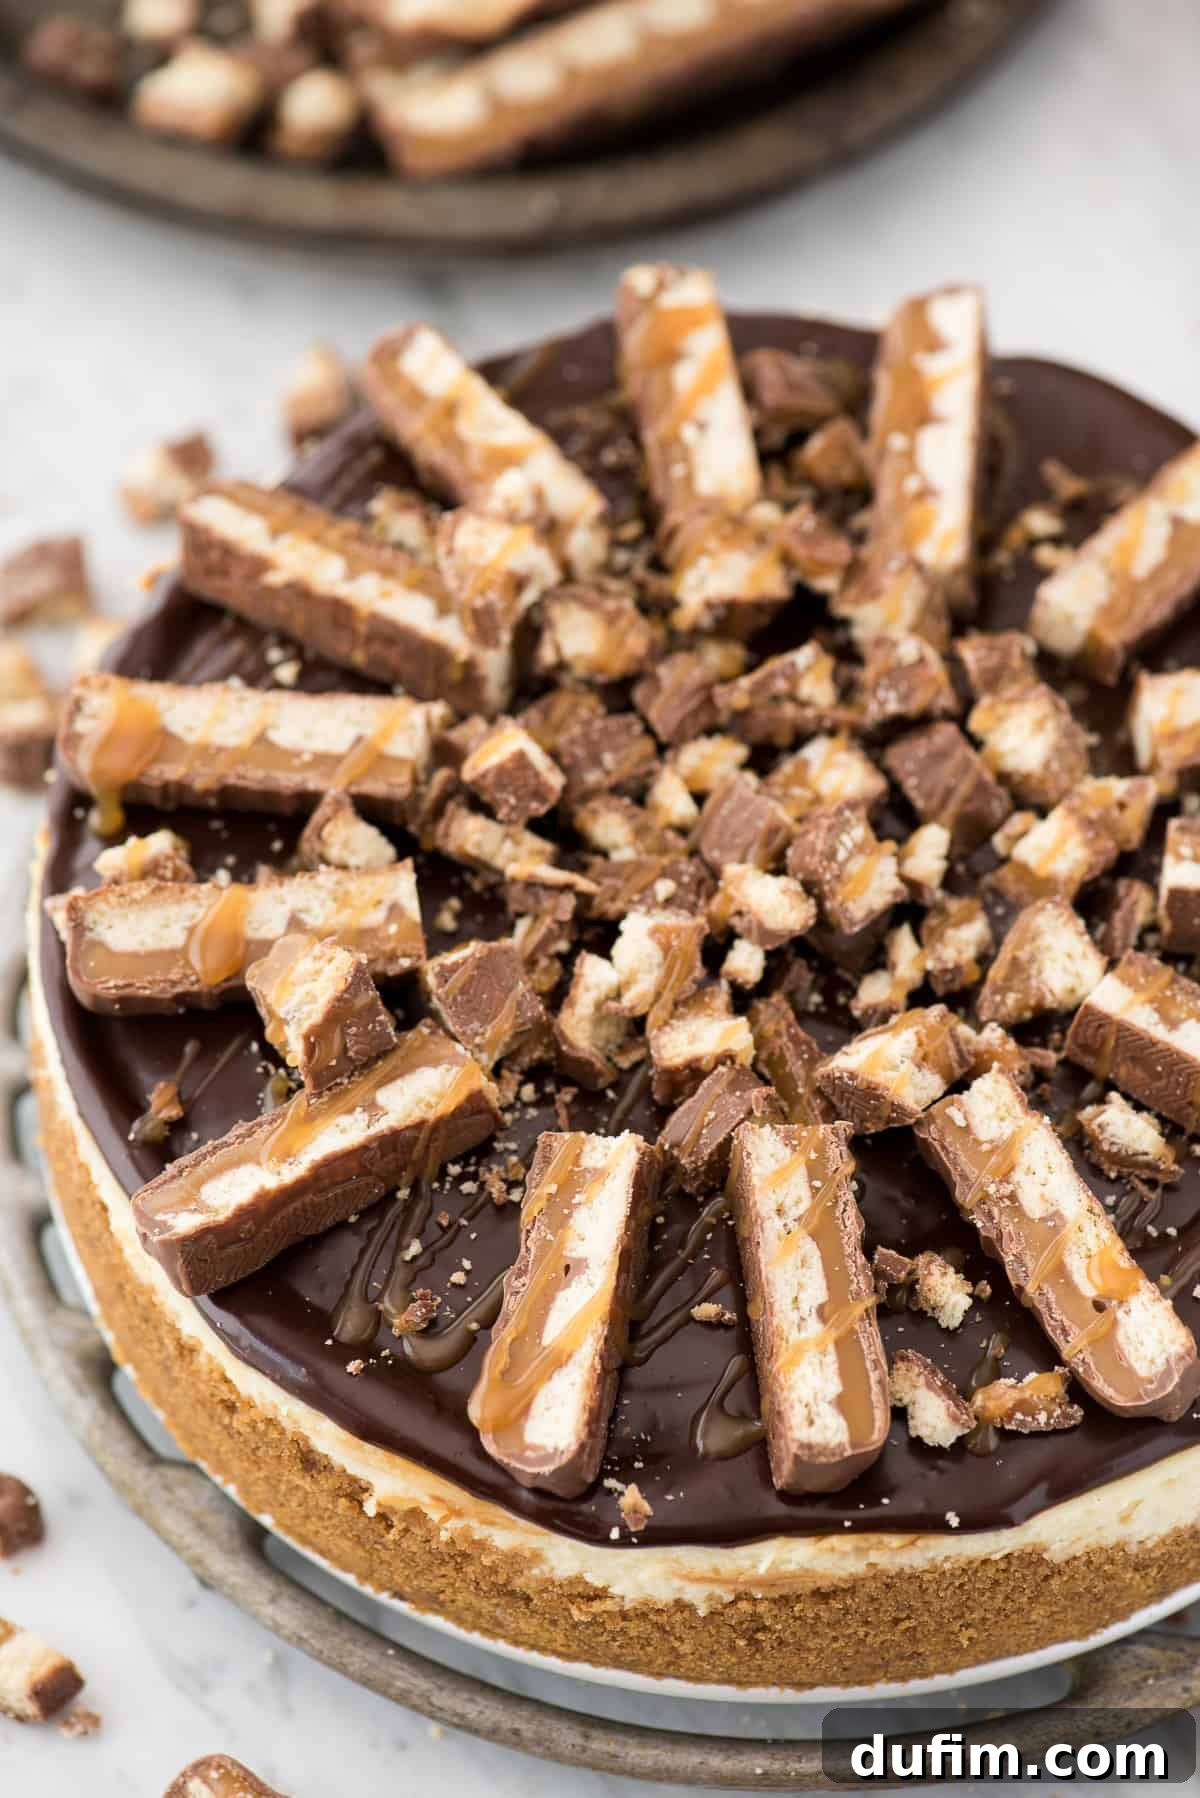
Prepare for an extraordinary dessert experience with this incredible Twix Cheesecake. It masterfully combines all your favorite caramel and chocolate flavors into one irresistible treat. Imagine a luxuriously creamy, Philadelphia-style cheesecake, generously swirled with rich caramel sauce, crowned with a thick, glossy layer of chocolate ganache, and finally adorned with generous pieces of Twix candy bars and an extra drizzle of caramel. This isn’t just a cheesecake; it’s a celebration of iconic flavors, meticulously crafted for the ultimate indulgence.
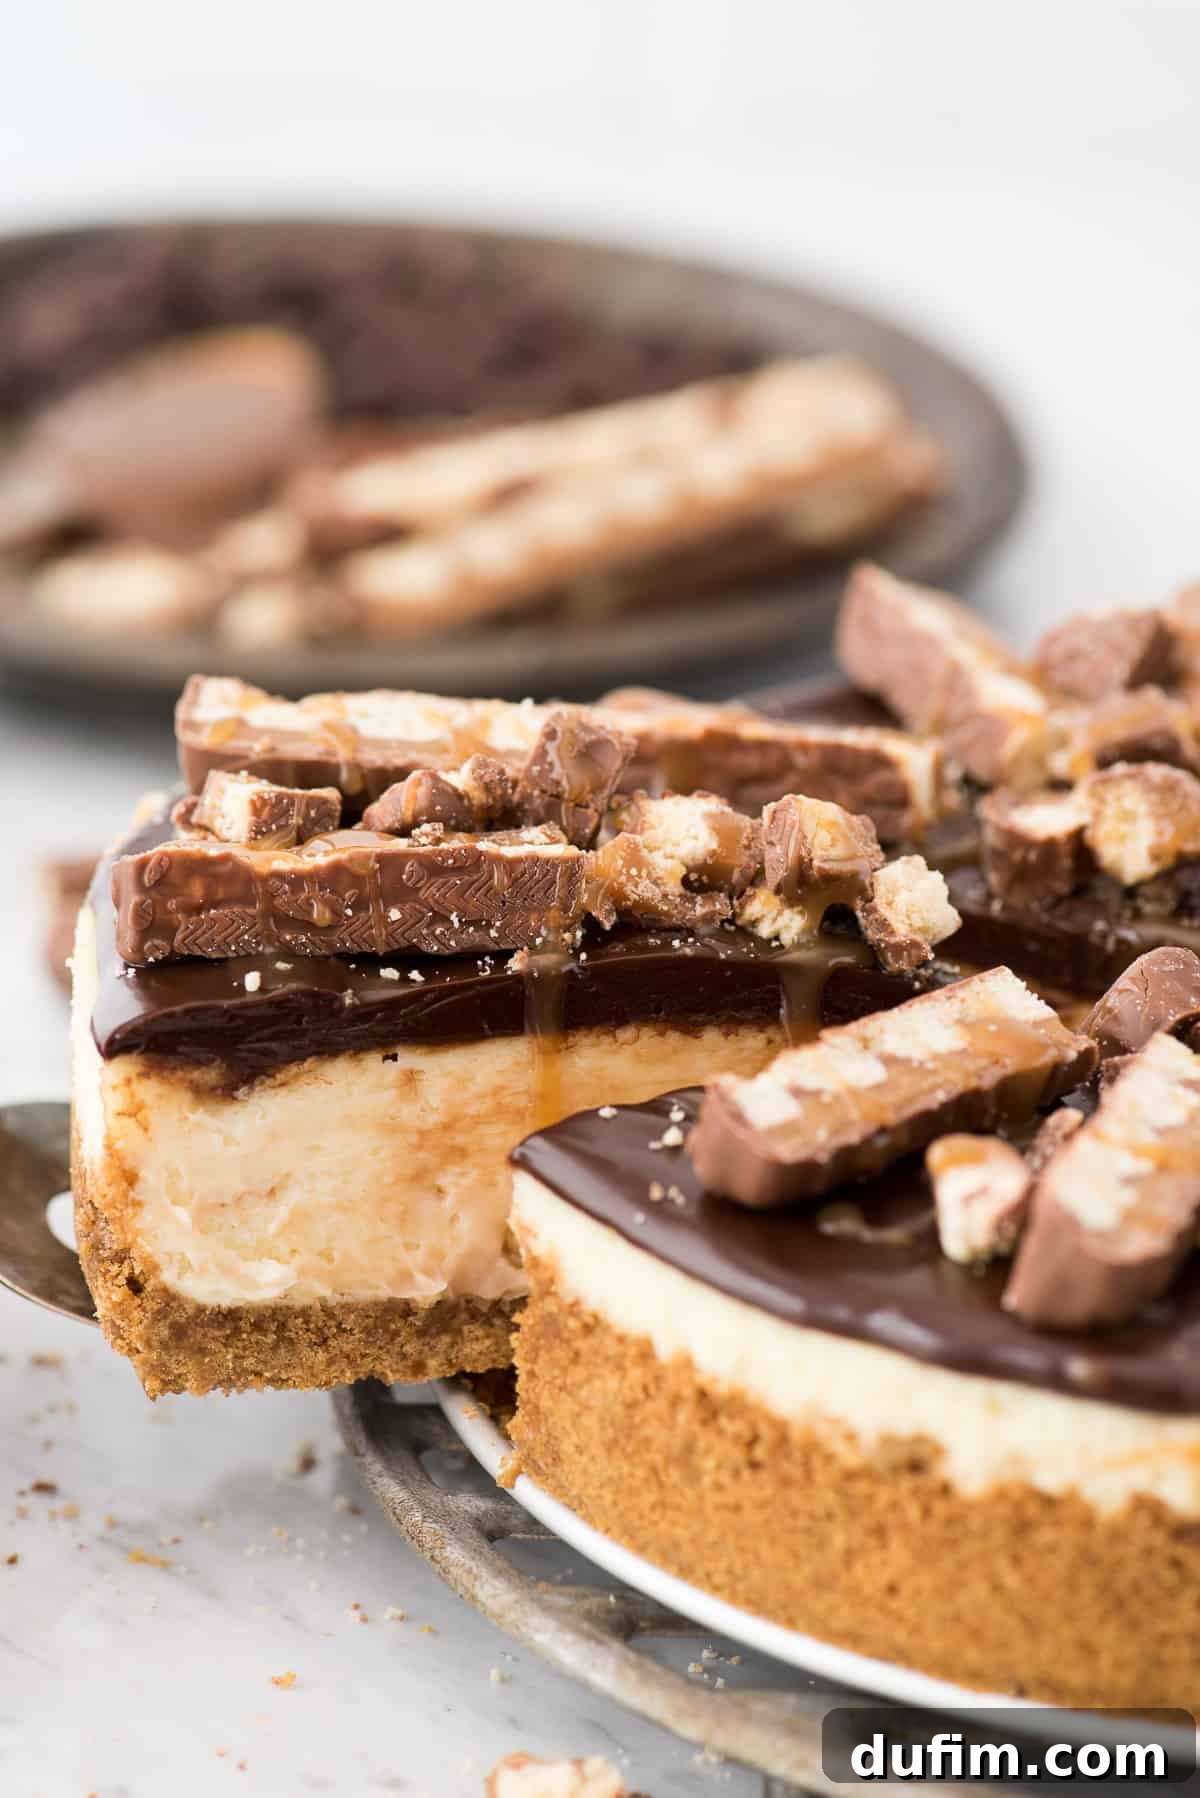
“I made this cheesecake for a co-worker’s birthday, and it was an absolute hit! He and his entire family adored it. Thank you so much for sharing such a phenomenal recipe!”
– Larry
The proof, as they say, is in the pudding – or, in this case, the cheesecake! My husband Ryan’s co-workers have consistently demonstrated their unwavering passion for delicious desserts. He once brought this very cheesecake to work at 7 AM, and by a mere 8:15 AM, the empty pan was returned to his desk. Such rapid disappearance confirms its status as an undeniable crowd-pleaser and a must-try recipe for anyone who appreciates truly exceptional sweet treats. This Twix Cheesecake isn’t just a dessert; it’s an experience that leaves everyone asking for more!
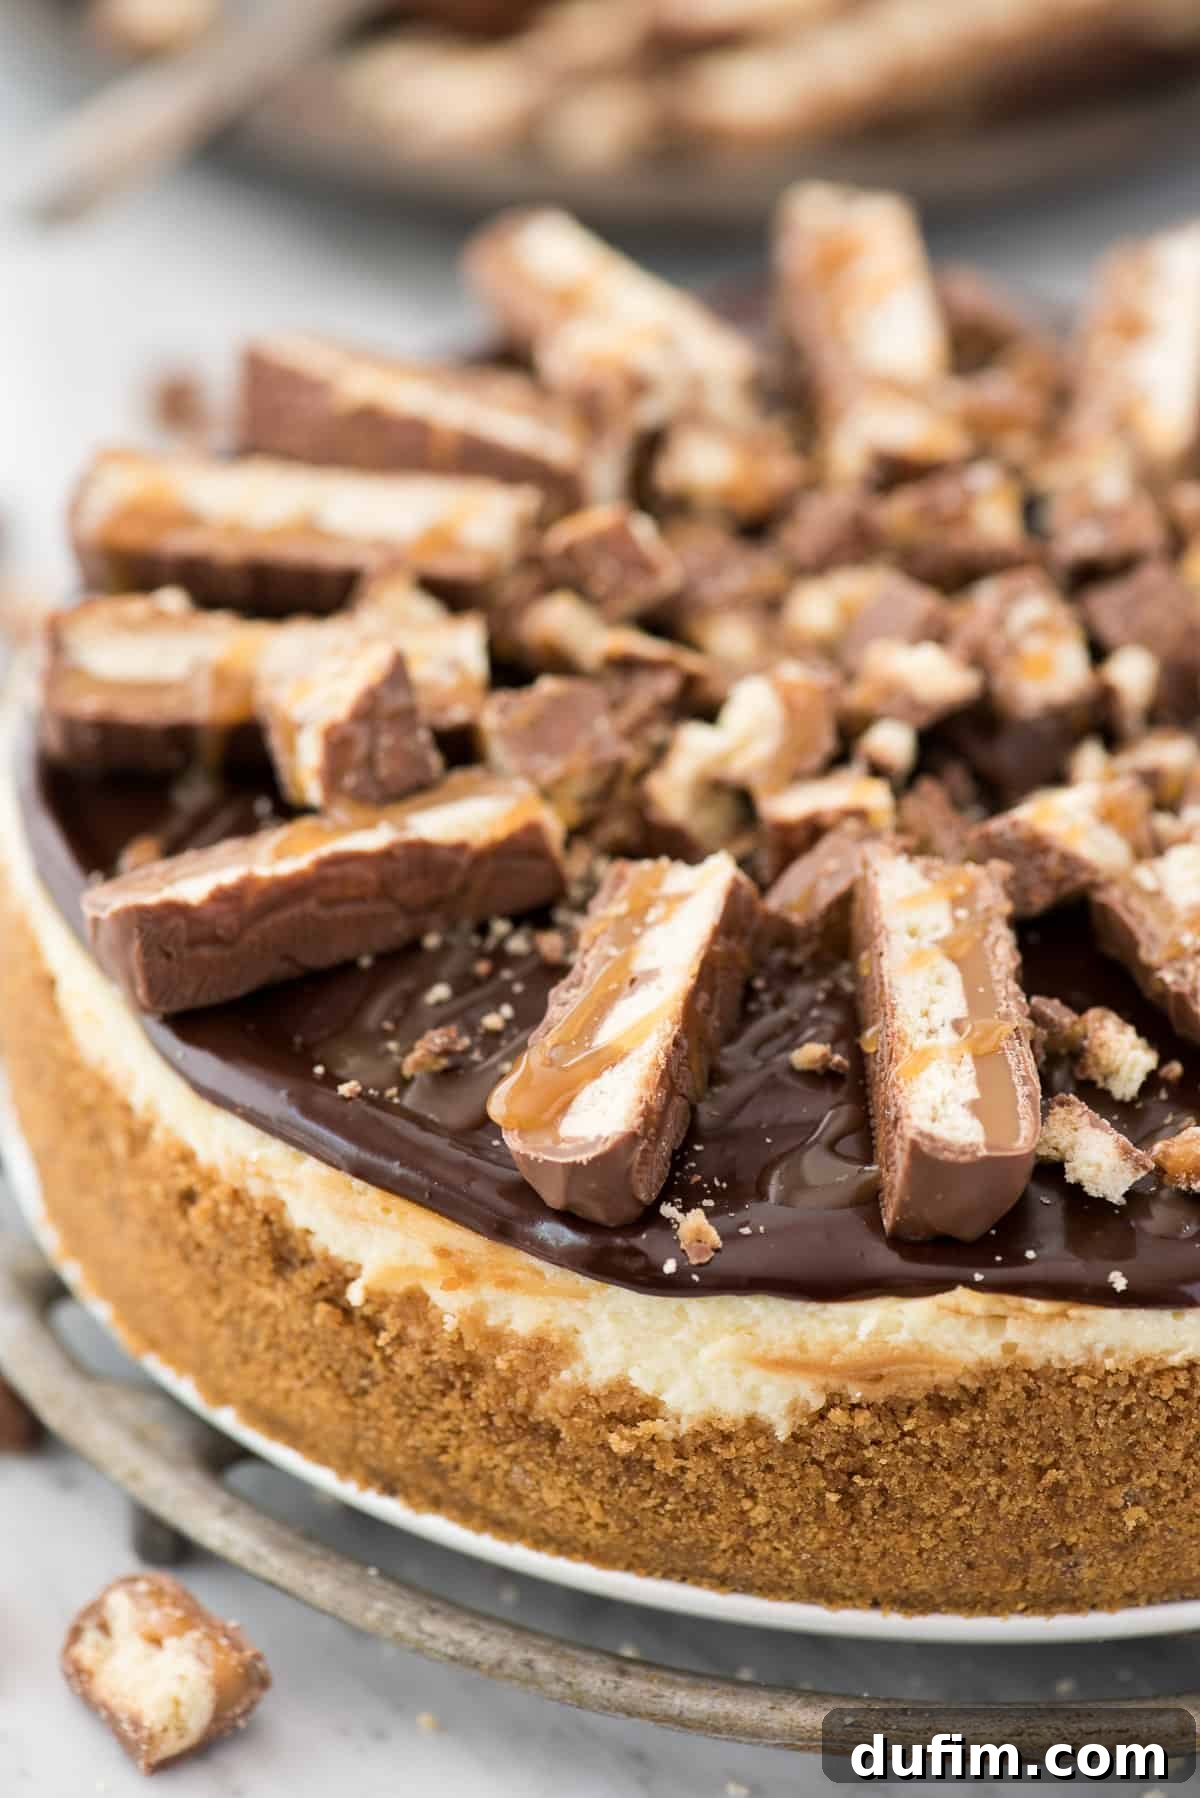
This ultimate Twix Cheesecake brilliantly captures all the iconic flavors and textures of your favorite candy bar. Each bite offers the delightful crunch of a buttery graham cracker crust, followed by the sweet, chewy caramel swirled directly into the creamy cheesecake filling. The experience culminates with a lavish, thick layer of rich chocolate ganache, perfectly complemented by chunks of real Twix pieces on top. It’s a symphony of textures and tastes, designed to satisfy even the most discerning sweet tooth. This homemade Twix cheesecake truly elevates the classic candy bar to an elegant dessert masterpiece.
For those who crave an even more intense caramel experience, feel free to increase the amount of caramel sauce swirled into the cheesecake batter – perhaps even creating multiple layers of caramel within the filling. And for an extra layer of candy bar goodness and delightful crunch, consider chopping up additional Twix pieces and folding them directly into the cheesecake mixture before baking. The possibilities for customizing this decadent dessert are endless, allowing you to tailor the caramel-chocolate ratio to your personal preference!
Crafting the Perfect Graham Cracker Crust for Your Cheesecake
A truly exceptional cheesecake begins with a flawless crust. Our easy-to-make graham cracker crust provides the ideal crunchy base, a beautiful counterpoint to the creamy filling. This foundation is essential for supporting the rich layers above and adding a delightful texture to every slice. Using the right ingredients and technique ensures a sturdy, flavorful, and perfectly baked base for your homemade cheesecake.
Essential 4-Ingredient Graham Cracker Crust
- Graham Cracker Crumbs: The backbone of our crust! Did you know you can often find pre-crushed graham cracker crumbs in the baking aisle of most grocery stores? They are typically located near the ready-made pie crusts. Opting for store-bought crumbs is a fantastic time-saver, allowing you to get straight to the baking fun without the extra step of crushing crackers. However, if you prefer, you can easily crush whole graham crackers in a food processor or by hand.
- Brown Sugar: This ingredient is crucial not only for adding a deep, rich, molasses-infused sweetness to the crust but also for its role in binding the crumbs and melted butter together. The slight stickiness of brown sugar helps create a more cohesive and sturdy base that resists crumbling.
- Cinnamon: Just a touch of cinnamon introduces a subtle warmth and aromatic spice that beautifully enhances the graham cracker flavor without overpowering it. It adds a comforting, classic note that complements the cheesecake perfectly, tying all the flavors together.
- Unsalted Butter (Melted): The most vital component for binding the crust. Melted butter saturates the crumbs, sugar, and cinnamon, creating a sturdy foundation that holds its shape, provides that signature buttery richness, and bakes into a delightful golden-brown. Ensure it’s unsalted to control the overall sodium content of your dessert.
To assemble your graham cracker crust, simply combine all the measured ingredients – the graham cracker crumbs, brown sugar, cinnamon, and melted unsalted butter – in a medium bowl until thoroughly mixed. The mixture should resemble wet sand. Then, firmly press this mixture into the bottom and slightly up the sides of your springform pan. For an even and compact crust that won’t fall apart, use the flat bottom of a measuring cup or a clean glass to help pack it down tightly and evenly. This ensures your crust will be sturdy enough to hold the rich cheesecake filling and will bake to a beautiful golden perfection, providing the ideal crunchy contrast to the creamy Twix cheesecake filling.
Mastering the Creamy Caramel Swirl Cheesecake Filling
The heart of our Twix Cheesecake is its incredibly smooth and creamy filling, elevated by delightful swirls of golden caramel. Despite its luxurious taste and impressive presentation, this Philadelphia-style cheesecake recipe requires just a handful of key ingredients, making it surprisingly straightforward to prepare. Precision in measuring and ensuring ingredient quality are paramount for achieving that perfect, silky texture that defines a truly exceptional homemade cheesecake.
- Full-Fat Cream Cheese: You’ll need three 8 oz packages of full-fat cream cheese for the absolute best results. It’s crucial to use full-fat cream cheese, not low-fat, whipped, or flavored varieties, as the higher fat content contributes significantly to the cheesecake’s signature richness, density, and incredibly smooth, velvety texture. Always ensure your cream cheese is at room temperature before you begin mixing; this is vital for preventing lumps and achieving a perfectly homogeneous batter.
- Granulated Sugar: This provides the perfect sweetness to balance the slight tanginess of the cream cheese, creating a harmonious and well-rounded flavor profile without being overly saccharine. It dissolves beautifully into the cream cheese, contributing to the smooth consistency.
- Vanilla Extract: A single teaspoon of good quality pure vanilla extract goes a long way in enhancing and deepening the overall flavor of the cheesecake. It adds a warm, aromatic note that acts as a bridge between the caramel and chocolate components, creating a more complex and appealing taste.
- Large Eggs: Eggs are the essential binding agents that give cheesecake its structure, richness, and custardy texture. They should be the last ingredient mixed into the batter. It’s crucial to add them one at a time, beating just until the yolk breaks and is barely incorporated into the mixture. Over-beating the eggs is a common culprit for incorporating too much air into the batter, which can lead to air bubbles forming during baking and, ultimately, unsightly cracks in your finished cheesecake.
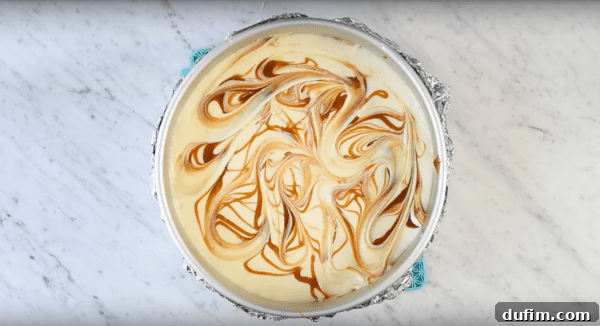
- Jarred Caramel Sauce: For that irresistible caramel swirl, a good quality jarred caramel sauce works perfectly and saves time. Slightly warm it before use to ensure it’s easily pourable and swirls beautifully into the creamy batter, creating elegant ribbons of golden sweetness throughout the cheesecake. You can also use homemade caramel sauce if you prefer, for an even more artisanal touch.
Secrets to Baking a Flawless Twix Cheesecake
Achieving a perfectly baked, crack-free cheesecake with a silky-smooth texture might seem daunting, but it’s entirely achievable with a few critical techniques. Across every cheesecake recipe I share, two golden rules consistently stand out as paramount for success. These aren’t just suggestions; they are fundamental principles that will transform your cheesecake baking from uncertain to consistently perfect:
1. Embrace the Water Bath: Your Key to a Moist, Evenly Baked Cheesecake
2. Master the Cooling Process: The Secret to Preventing Cracks
Understanding and diligently applying these two essential tips will elevate your homemade cheesecake from good to absolutely spectacular. These techniques address the most common challenges in cheesecake baking, ensuring a dessert that is not only delicious but also visually stunning. Read on for detailed explanations of each technique and how they contribute to baking the perfect Twix Cheesecake!
The Indispensable Cheesecake Water Bath Demystified
While the idea of placing your delicate cheesecake in a water bath might sound a bit unconventional or even intimidating, I assure you it’s the single most effective secret to consistently creating moist, perfectly baked, and crack-free cheesecakes. This technique, also known as a “bain-marie,” is far less scary than it sounds and offers immense rewards in terms of texture and appearance, making it a non-negotiable step for any serious cheesecake baker.
The concept of a water bath is simple yet ingenious: By surrounding the cheesecake with hot water during baking, you create a humid, gentle cooking environment. This even heat distribution prevents the edges of the cheesecake from baking too quickly and drying out before the center is cooked – a primary cause of cracking and a crumbly texture. The steam generated within the oven also adds crucial moisture, resulting in that signature velvety, melt-in-your-mouth texture that defines a truly great Philadelphia-style cheesecake.
To set up a water bath, you’ll need a large roasting pan or a similar oven-safe dish that is significantly larger than your springform pan. Place your springform pan, containing the unbaked cheesecake batter, inside this larger pan. Then, carefully pour about 1 inch of hot water (tap water or pre-boiled, it doesn’t matter much) into the larger roasting pan. Be very mindful to ensure the water level does not come too high up the sides of your springform pan to prevent accidental seepage. Place this entire setup into your preheated oven, and let the gentle, consistent heat from the water bath work its magic, transforming your batter into a perfectly set and smooth cheesecake.
Foolproof Method to Prevent Cheesecake Water Bath Leaks
One of the most common anxieties associated with using a water bath is the fear of water leaking into the springform pan and potentially ruining your beautiful cheesecake. While springform pans are designed to be watertight, tiny imperfections or worn seals can sometimes lead to seepage. But worry not! I have an absolutely brilliant and foolproof trick that guarantees a leak-proof water bath experience every single time, ensuring your cheesecake remains pristine.
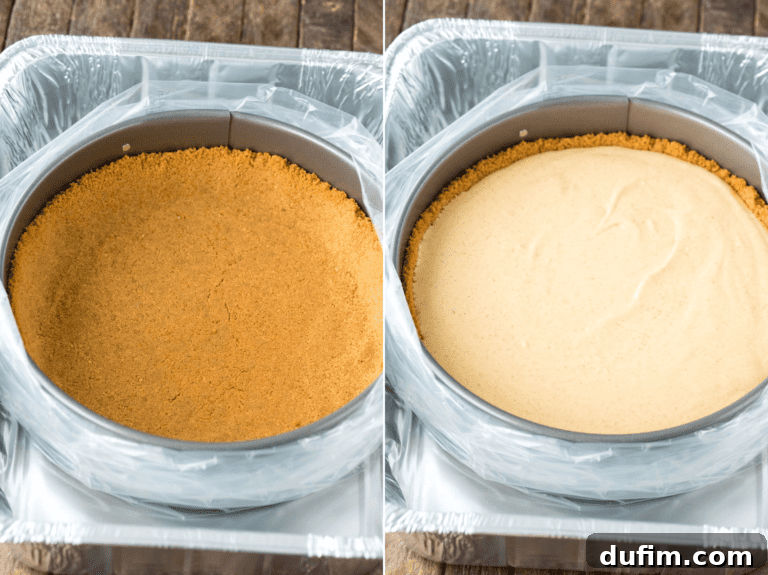
Before placing your springform pan into the larger roasting pan for the water bath, first slide the springform pan inside a large, oven-safe turkey bag or a heavy-duty slow cooker liner bag. Once the pan is securely inside the bag, roll down the top edges of the bag so that it securely covers the sides of the pan but does not extend over the top of the cheesecake itself. If there’s a lot of excess bag material, you can twist one side tightly and knot it, creating a snug fit around the pan. This effectively creates a robust, waterproof barrier around your springform pan, acting as a second line of defense against any potential leaks.
Now, place the springform pan (which is safely nestled inside its protective bag) into your large roasting pan, and then fill the roasting pan with about 1 inch of hot water as usual. With this simple yet incredibly effective barrier in place, you can bake your homemade cheesecake with complete confidence, knowing that no water will seep in to compromise its integrity or texture. This little trick is a game-changer for stress-free and successful cheesecake baking!
The Art of Cooling Cheesecake for a Perfect Finish
Just as important as the baking process itself is the way you cool your cheesecake. Remember this crucial mantra: do not rush the cooling process! This step is fundamental to preventing those unwelcome cracks that can mar an otherwise perfect cheesecake, and it plays a significant role in achieving the ideal creamy texture and firm set.
Once your cheesecake has finished baking and has achieved that perfect slight jiggle in the center (indicating it’s set but not overbaked), turn off the oven. Gently remove the springform pan from the water bath and its protective oven-safe bag. Place the cheesecake (still in its springform pan) onto a baking sheet. Return the baking sheet with the cheesecake to the now-off oven, leaving the oven door slightly ajar. This allows the cheesecake to cool down very slowly and gradually, minimizing the thermal shock that can cause cracks as the temperature rapidly changes and the cheesecake contracts.
This slow cooling process allows the delicate custard structure of the cheesecake to set evenly as it transitions from a hot environment to room temperature. Resist the urge to pull it out immediately and place it on the counter, as rapid cooling is a prime cause of cracking. After it has cooled completely to room temperature inside the oven (which can take 1-2 hours, depending on your kitchen’s ambient temperature), you can then remove it. Finally, and this is another non-negotiable step for optimal texture and flavor, refrigerate your cheesecake overnight. This extended chilling period allows the flavors to meld beautifully, the cheesecake to firm up to its ideal, sliceable consistency, and results in that luxurious, dense texture we all crave. Patience truly is a virtue when it comes to baking a flawless cheesecake!
Expert Tips for Your Twix Caramel Cheesecake Success
Beyond the core baking and cooling techniques, these additional tips will help ensure your Twix Caramel Cheesecake turns out absolutely perfect, maximizing its flavor, texture, and visual appeal:
- Room Temperature Cream Cheese is Non-Negotiable: Always allow your full-fat cream cheese to come to a complete room temperature (usually takes 1-2 hours on the counter) before you begin beating it. Cold cream cheese will result in a lumpy batter, no matter how much you mix it. Room temperature cream cheese, however, whips up smoothly and effortlessly, creating a velvety, lump-free batter that is the hallmark of a great cheesecake.
- Gentle Egg Incorporation is Key: As previously emphasized, the eggs are the very last ingredient to be mixed into your cheesecake batter. Add them one at a time, and beat just until the yolk breaks and is barely combined. The goal is to incorporate them without adding excess air. Over-beating at this stage incorporates too much air, which can cause the cheesecake to puff up excessively in the oven and then tragically collapse or crack upon cooling.
- Pan Size Matters for Baking Time: The size of your springform pan directly affects the thickness of your cheesecake and, consequently, the baking time. This recipe is optimized for an 8 or 9-inch springform pan. If you use a different size (e.g., a smaller pan will yield a taller, thicker cheesecake), be prepared to adjust your baking time accordingly; a thicker cheesecake will require more time, while a larger, shallower cheesecake will bake faster. Always rely on the “slight wobble” test for doneness.
- Patience with Initial Cooling: Reiterate the importance of the initial cooling phase in the oven. After baking, let the cheesecake cool gradually in the oven with the door cracked for at least 60-90 minutes. This slow, gentle transition from hot to warm is paramount for preventing cracks and allowing the cheesecake’s delicate structure to set properly.
- Invest in Quality Ingredients: While you don’t need to break the bank, using high-quality ingredients, especially for cream cheese, pure vanilla extract, and good quality chocolate for your ganache, will significantly impact the overall flavor and luxuriousness of your finished cheesecake. It truly makes a difference.
- Customize Your Twix Experience: Don’t be shy about how you incorporate your Twix! Beyond the topping, consider crushing some Twix pieces into the graham cracker crust for an extra layer of cookie and caramel goodness, or even folding small chopped pieces directly into the cheesecake batter for delightful pockets of candy bar flavor within the creamy filling.
How to Properly Freeze a Whole Cheesecake for Future Enjoyment
This magnificent Twix Cheesecake is so delicious, you might want to make an extra one for later, or perhaps you’re planning ahead for a special occasion. Freezing a whole cheesecake is a fantastic way to preserve its freshness and flavor without compromising its quality. Here’s how to do it correctly, ensuring a perfect dessert whenever you’re ready to serve it:
- Ensure Complete Cooling and Chilling: The most crucial first step is to ensure your cheesecake is completely cooled. It should be at room temperature, and ideally, it should have been refrigerated overnight to chill thoroughly and set properly. Freezing a warm or even slightly warm cheesecake will lead to condensation and ice crystals forming, which can severely compromise its texture and flavor upon thawing.
- Prepare for Wrapping: Once fully chilled, use a thin, sharp knife or spatula to carefully loosen and remove the outer ring of the springform pan. Then, gently slide the cheesecake off the base of the pan using the knife or a large spatula. Place the cheesecake onto a round cardboard cake circle that is the same size as the cheesecake. This provides a stable base for handling, freezing, and thawing. Covering the cardboard circle with aluminum foil first can offer an extra layer of protection and cleanliness.
- Wrap Thoroughly and Securely: This is where meticulous wrapping comes in. First, wrap the entire cheesecake (without any toppings like ganache or Twix pieces, as these are best added fresh before serving) very tightly in several layers of plastic wrap. Ensure no part of the cheesecake is exposed to air, as this is the primary defense against freezer burn. Next, wrap the plastic-wrapped cheesecake in at least two layers of heavy-duty aluminum foil for an extra barrier against freezer burn, odors from other freezer items, and physical damage.
- Freeze and Thaw for Best Results: Place the securely wrapped cheesecake in the freezer, ensuring it lays flat, for up to 2-3 months. To thaw, transfer the frozen cheesecake to the refrigerator and allow it to thaw slowly overnight, typically for 12-24 hours depending on its size. Do not try to thaw it at room temperature, as rapid thawing can negatively affect its delicate texture. Once thawed, add your desired toppings (freshly made ganache, Twix pieces, caramel drizzle) before slicing and serving for the absolute best experience.
Explore More Delectable Cheesecake Recipes
If you’ve fallen in love with the art of cheesecake making, or simply want to try another delightful variation, here are some more irresistible recipes to tempt your taste buds and expand your baking repertoire:
- Mini Funfetti Cheesecakes: A joyful, bite-sized burst of color and classic birthday cake flavor, perfect for parties or individual servings.
- Decadent Chocolate Cheesecake: For the true chocolate lover, a rich, dark, and utterly satisfying chocolate dream, offering intense cocoa flavor in a creamy form.
- Cream Cheese Swirl Brownies: A perfect marriage of fudgy, deep chocolate brownies and tangy, sweet cream cheese, beautifully swirled together for a delightful contrast in every bite.
- Invigorating Espresso Cheesecake: A sophisticated and aromatic cheesecake with a deep coffee kick, creating a delightful balance of bitter and sweet, perfect for an after-dinner treat or coffee enthusiast.
Twix Cheesecake Recipe
Beth
30 minutes
1 hour
15 minutes
12 hours
13 hours
45 minutes
12
servings
This Twix Cheesecake masterfully combines creamy Philadelphia-style cheesecake with decadent caramel swirls, a rich chocolate ganache topping, and crunchy Twix candy bars, offering a truly unforgettable dessert experience.
Equipment
-
8 or 9 inch springform pan
-
Large Mixing Bowl
-
Electric Mixer (stand or hand-held)
-
Heat-proof Spatula
-
Large Roasting Pan (for water bath)
-
Oven-Safe Turkey Bag or Slow Cooker Liner
Ingredients
CRUST
- 2 cups (226g) graham cracker crumbs
- ¼ cup (54g) brown sugar
- ¼ tsp cinnamon
- 6 Tbsp (86g) unsalted butter, melted
CHEESECAKE FILLING
- 24 oz (678g) full-fat cream cheese at room temperature (three 8-oz packages)
- 1 cup (198g) granulated sugar
- 1 tsp vanilla extract
- 3 large eggs
- 3 Tbsp jarred caramel sauce, slightly heated (use more for stronger caramel flavor)
CHOCOLATE GANACHE
- 1 cup (170g) semi-sweet chocolate chips
- ½ cup (118ml) heavy whipping cream
GARNISH
- Twix bars, whole or cut in half, plus extra chopped for sprinkling
- Additional caramel sauce for drizzling
Instructions
CRUST PREPARATION
-
Preheat your oven to 350ºF (175ºC).
-
If using whole graham crackers, finely crush them in a blender or food processor until they resemble fine crumbs. Alternatively, use store-bought graham cracker crumbs. In a medium bowl, combine 2 cups (226g) graham cracker crumbs with ¼ cup (54g) brown sugar, ¼ tsp cinnamon, and 6 Tbsp (86g) melted unsalted butter. Mix thoroughly until all ingredients are well incorporated and moist.
-
Pour the crumb mixture into an 8 or 9-inch springform pan. Distribute the crumbs evenly across the bottom and slightly up the sides of the pan. Use the bottom of a measuring cup or a flat glass to firmly press the crumbs into a compact, even layer.
-
Place the pan with the crust in the preheated oven and bake for 8-10 minutes, or until the crust is lightly golden and fragrant.
-
Remove the baked crust from the oven and allow it to cool completely to room temperature before adding the cheesecake filling. This prevents the filling from softening the crust too much.
-
Reduce the oven temperature to 325ºF (160ºC).
CHEESECAKE FILLING & BAKING
-
Prepare your water bath setup: Place the cooled springform pan (with the crust) inside a large, oven-safe turkey bag or slow cooker liner. Roll down the top edges of the bag so it securely covers the sides of the pan but does not extend over the cheesecake itself. This creates a leak-proof barrier. Set this aside.
-
In a large mixing bowl (using a stand mixer with a paddle attachment or a hand mixer), beat the 24 oz (678g) room temperature full-fat cream cheese on medium speed until it is completely smooth and creamy, about 2-3 minutes, scraping down the sides of the bowl as needed. Add 1 cup (198g) granulated sugar and 1 tsp vanilla extract, and beat again until just combined. Next, add the 3 large eggs, one at a time. Beat each egg just until the yolk breaks and is barely incorporated before adding the next. Avoid over-beating, as this introduces too much air, which can cause cracks. Beat the entire mixture for one additional minute after the last egg is added.
-
Pour the prepared cheesecake mixture over the cooled graham cracker crust in the springform pan. Gently drizzle the 3 Tbsp of slightly heated caramel sauce over the top of the cheesecake batter. Use a small spatula or a knife to create delicate swirls in the caramel, marbling it beautifully into the cream cheese.
-
Carefully place the bagged springform pan into a larger 9×13 inch roasting pan or an even larger oven-safe pan. Then, carefully pour about 1 inch of hot water into the larger roasting pan, making sure it doesn’t spill into the cheesecake.
-
Transfer the roasting pan with the water bath and cheesecake into the preheated 325ºF (160ºC) oven. Bake for 60-75 minutes (see notes below for pan size adjustments). The cheesecake is done when the edges appear set and firm, but the very center still has a slight, gentle wobble when you lightly jiggle the pan.
-
Once baked, turn off the oven. Gently remove the springform pan from the water bath and the oven-safe bag. Place the cheesecake (still in its springform pan) on a baking sheet and return it to the now-off oven, leaving the oven door cracked open by a few inches. Allow the cheesecake to cool slowly to room temperature inside the oven for 60-90 minutes. This slow cooling is crucial for preventing cracks.
-
After it has cooled to room temperature, remove the cheesecake from the oven. Loosely cover the springform pan with aluminum foil (avoiding direct contact with the cheesecake surface) and transfer it to the refrigerator. Chill the cheesecake overnight (at least 8-12 hours) to allow it to set completely and for flavors to fully develop.
-
Before serving, carefully remove the chilled cheesecake from the springform pan. Run a thin, sharp knife around the inner edge of the pan before unclipping to ensure a clean release. Use a small spatula to gently assist any areas that may be sticking.
CHOCOLATE GANACHE PREPARATION
-
Place 1 cup (170g) semi-sweet chocolate chips in a heat-proof bowl.
-
In a small saucepan over medium heat, bring ½ cup (118ml) heavy whipping cream just to a boil. As soon as it boils, remove it from the heat and immediately pour the hot cream over the chocolate chips. Let the mixture sit undisturbed for 1 minute to allow the chocolate to melt. Then, stir thoroughly with a spatula or whisk until the ganache is completely smooth, glossy, and uniform. Allow the ganache to cool for 5-7 minutes at room temperature, stirring occasionally, until it thickens slightly but is still pourable, before applying to the cheesecake.
TO ASSEMBLE & SERVE
-
Carefully pour or spoon the slightly cooled chocolate ganache over the top of the chilled cheesecake. Use a small offset spatula to gently spread it evenly across the surface. Arrange Twix bars (whole or halved) around the outer edge of the cheesecake for a decorative border. Sprinkle additional chopped Twix pieces over the center and drizzle generously with extra caramel sauce. Refrigerate the assembled cheesecake for at least 30 minutes to allow the ganache to set. Slice with a hot, clean knife for neat portions and serve.
Notes
- For an 8-inch springform pan, the baking time is typically 65-75 minutes.
- For a 9-inch springform pan, the baking time is typically 60-70 minutes.
- Baking times can vary depending on your specific oven. Always rely on the “slight wobble” test for doneness rather than strictly adhering to time.
- For extra caramel flavor, you can increase the caramel sauce swirled into the cheesecake batter (up to 1/2 cup) or add a thin layer of caramel on top of the baked crust before adding the cheesecake filling.
- Chilling the cheesecake overnight is essential for the best texture, flavor development, and clean slicing.
- To achieve clean slices, run a long, sharp knife under hot water, wipe it clean, and slice. Repeat this process for each cut.
Nutrition Information (Approximate Per Serving)
Carbohydrates: 46g |
Protein: 7g |
Fat: 37g |
Saturated Fat: 21g |
Polyunsaturated Fat: 2g |
Monounsaturated Fat: 10g |
Trans Fat: 1g |
Cholesterol: 138mg |
Sodium: 317mg |
Potassium: 226mg |
Fiber: 2g |
Sugar: 32g |
Vitamin A: 1162IU |
Vitamin C: 1mg |
Calcium: 98mg |
Iron: 2mg
Nutrition Disclosure
All nutritional values are approximate and provided to the reader as a courtesy. Changing ingredients and/or quantities will alter the estimated nutritional calculations. For precise dietary information, please consult a registered dietitian or use a trusted nutritional analysis tool with your specific ingredients.
Enjoyed this recipe? Share your thoughts and rate it below!