
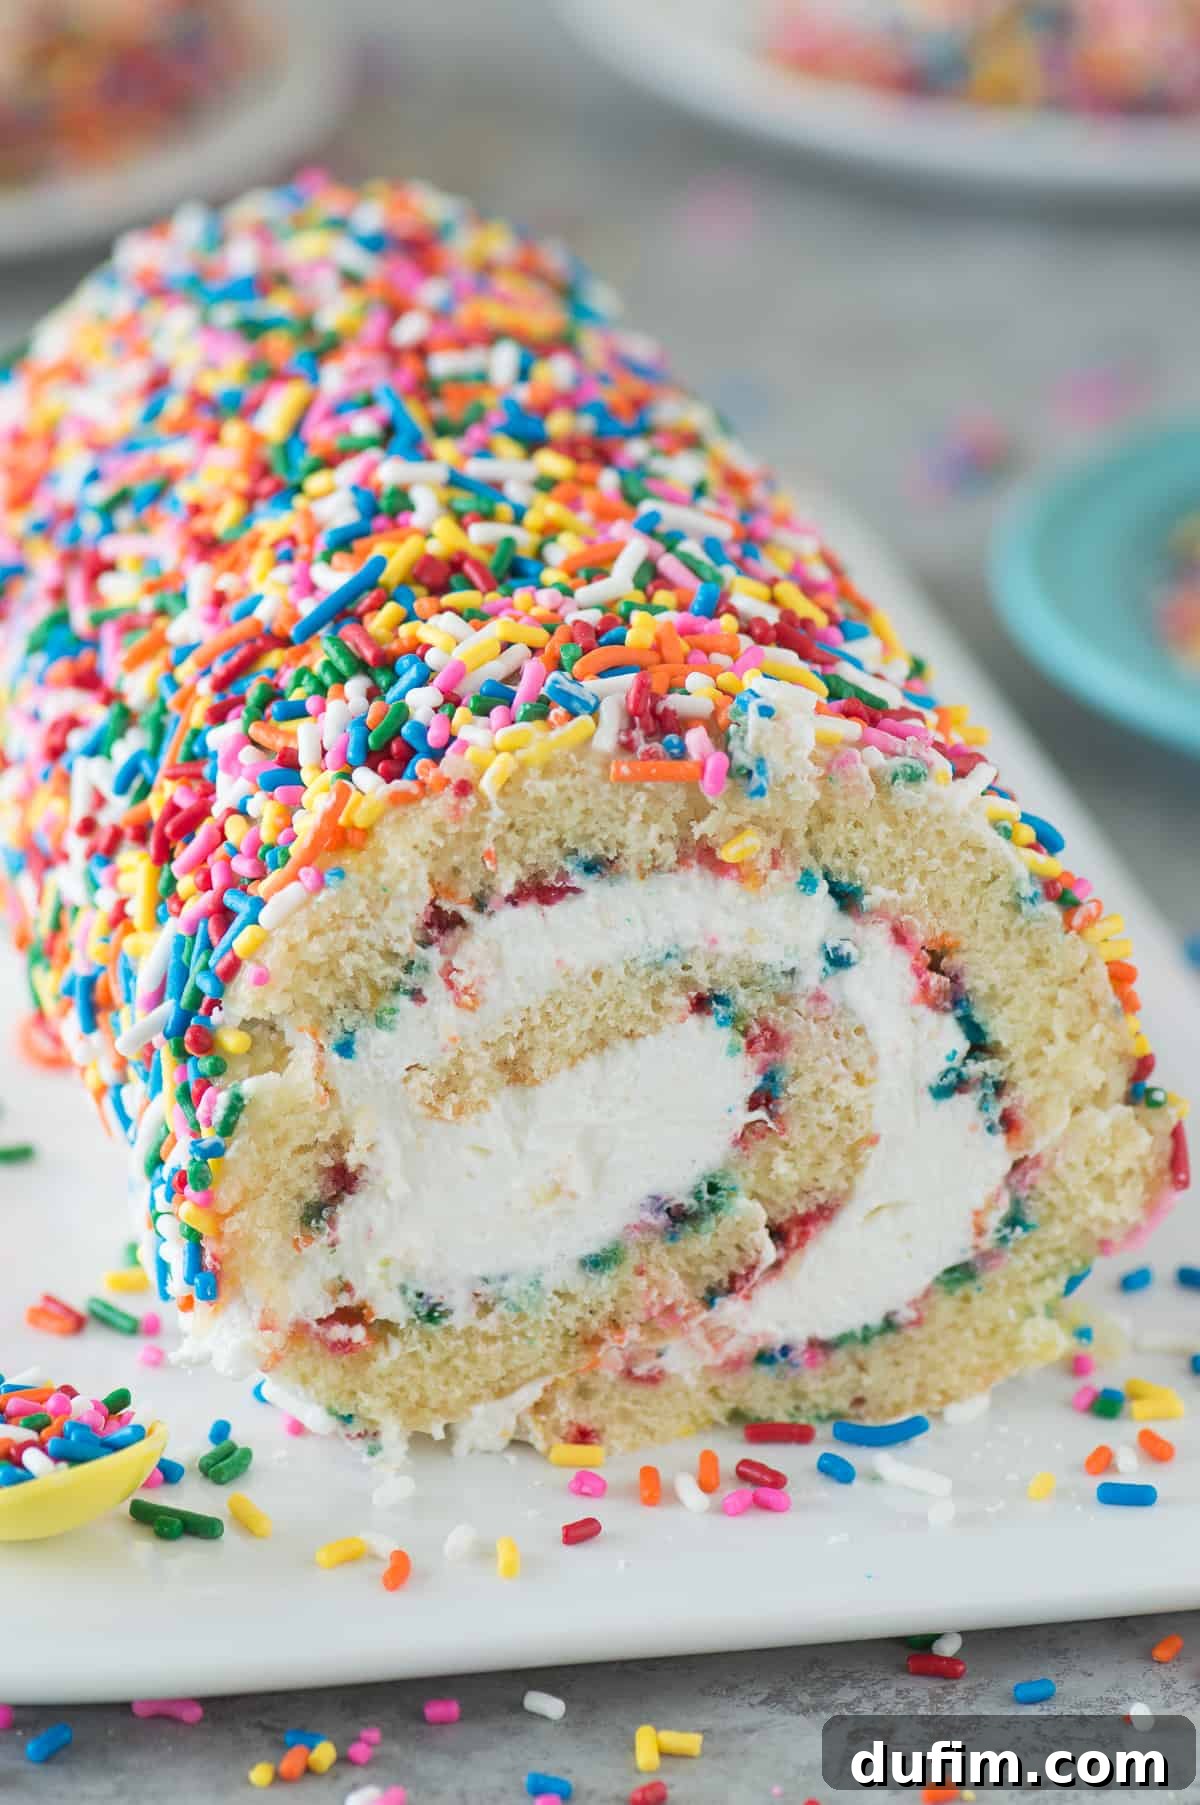
The Ultimate Funfetti Cake Roll: A Celebration in Every Slice
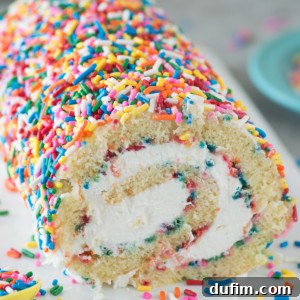
Discover how to create the perfect Funfetti Cake Roll, a delightful vanilla sponge filled with luscious cream cheese frosting and adorned with an abundance of colorful sprinkles. This recipe promises a festive treat that’s surprisingly easy to make and a guaranteed crowd-pleaser for any occasion.
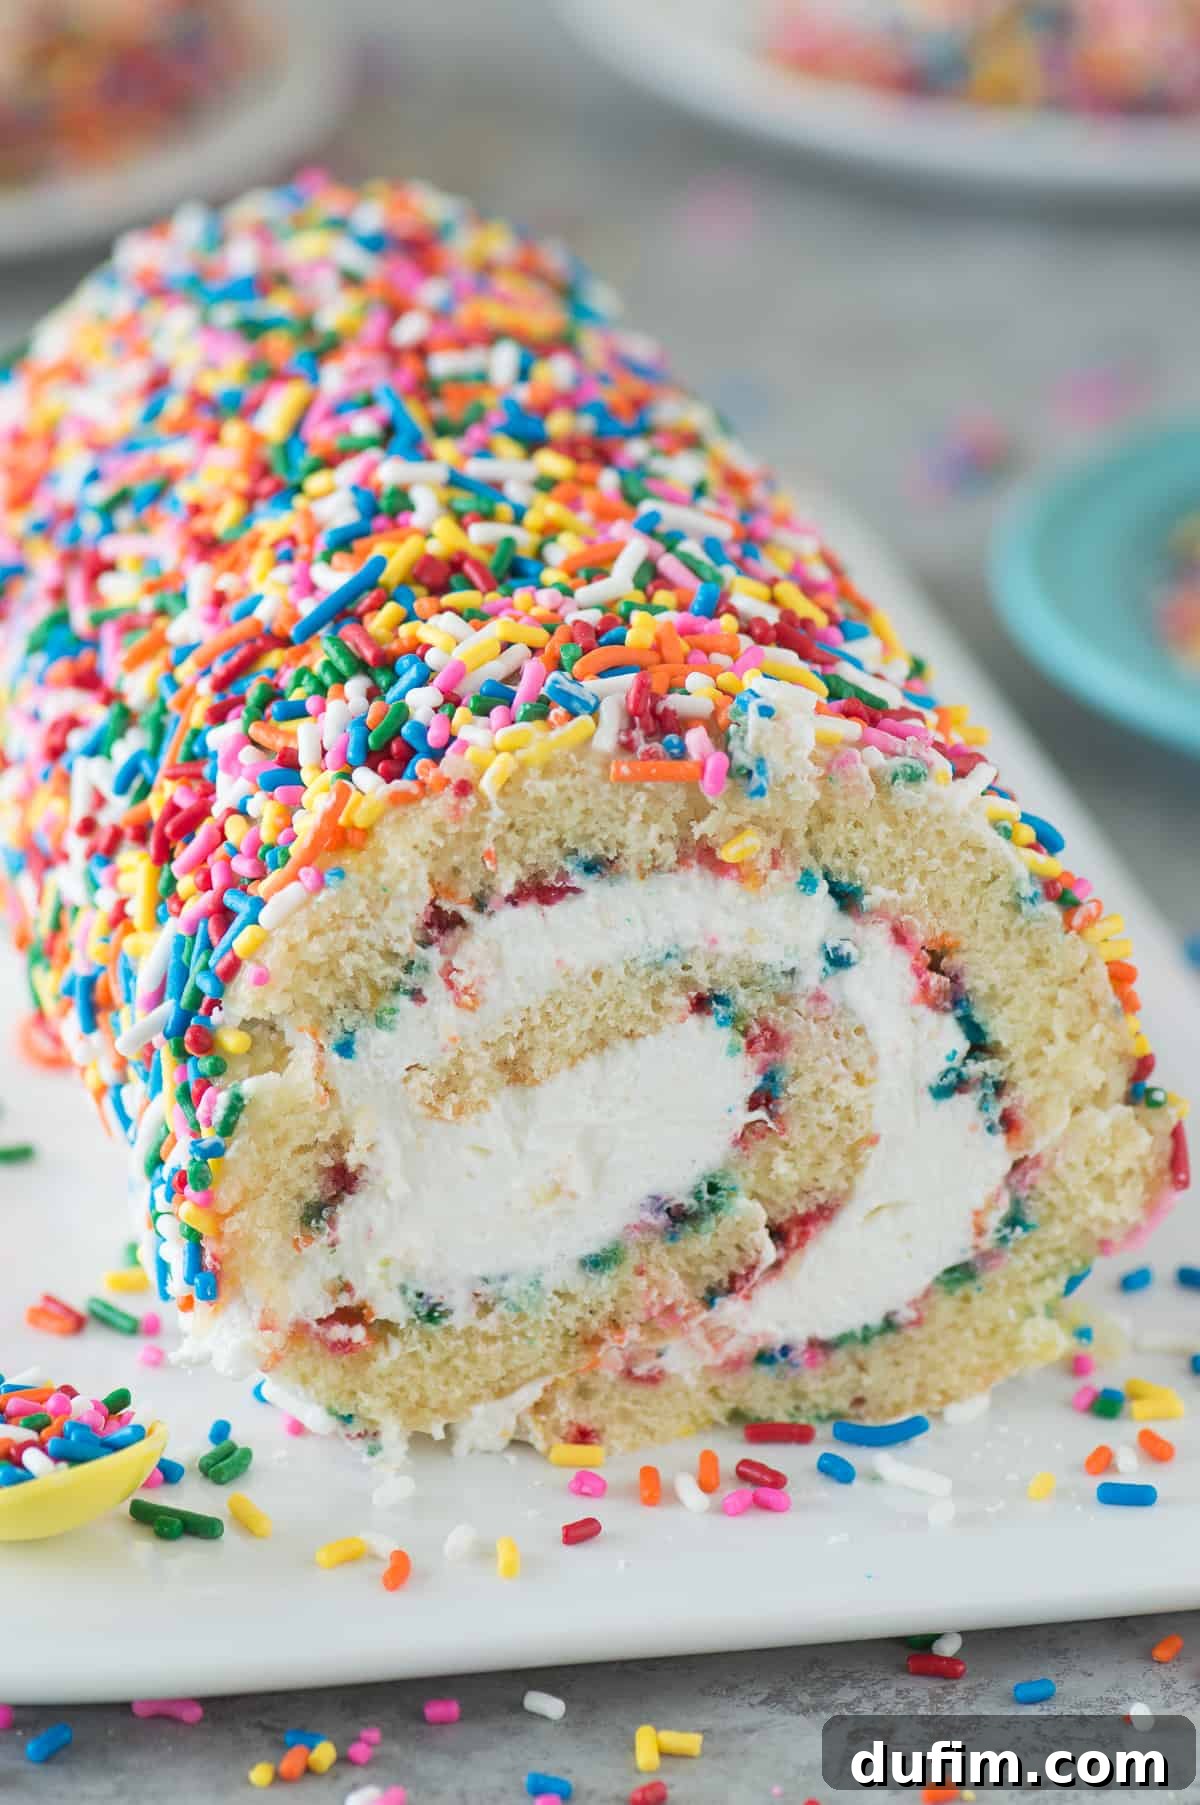
“I just made this Funfetti Cake Roll today for my 10-year-old’s birthday, and it was absolutely delicious – a huge hit! The clear directions were incredibly helpful. Thank you for sharing such a wonderful recipe!”
– Gretchen
Embrace the Sprinkles: Your Guide to a Perfect Funfetti Cake Roll
There’s something undeniably magical about funfetti desserts. The explosion of color, the playful texture, and the sheer joy they bring make them an instant favorite for all ages. When I first introduced this vibrant Funfetti Cake Roll, my partner, Ryan, perfectly captured its essence: “If you’re going to make FUNFETTI anything, there’s gotta be sprinkles!” And he’s absolutely right. While children often adore sprinkles more than anyone, the beauty of a homemade funfetti cake roll is that you have complete control over the sprinkle-to-cake ratio. Whether you prefer a subtle hint of color for a sophisticated touch or a full-blown sprinkle explosion for maximum festivity, this recipe allows for endless customization to match your personal taste and celebratory spirit.
Cake rolls, often perceived as challenging and intimidating, are actually quite approachable with the right guidance and a few insider tricks. My personal journey into cake roll baking began with an adventurous galaxy cake roll, adorned with dark chocolate ganache and an array of cosmic sprinkles. Through that experience and many rolls since, I’ve gathered invaluable tips and developed techniques that I’m excited to share with you. These insights will demystify the rolling process and help you achieve a beautifully moist, evenly filled, and crack-free cake roll every single time.
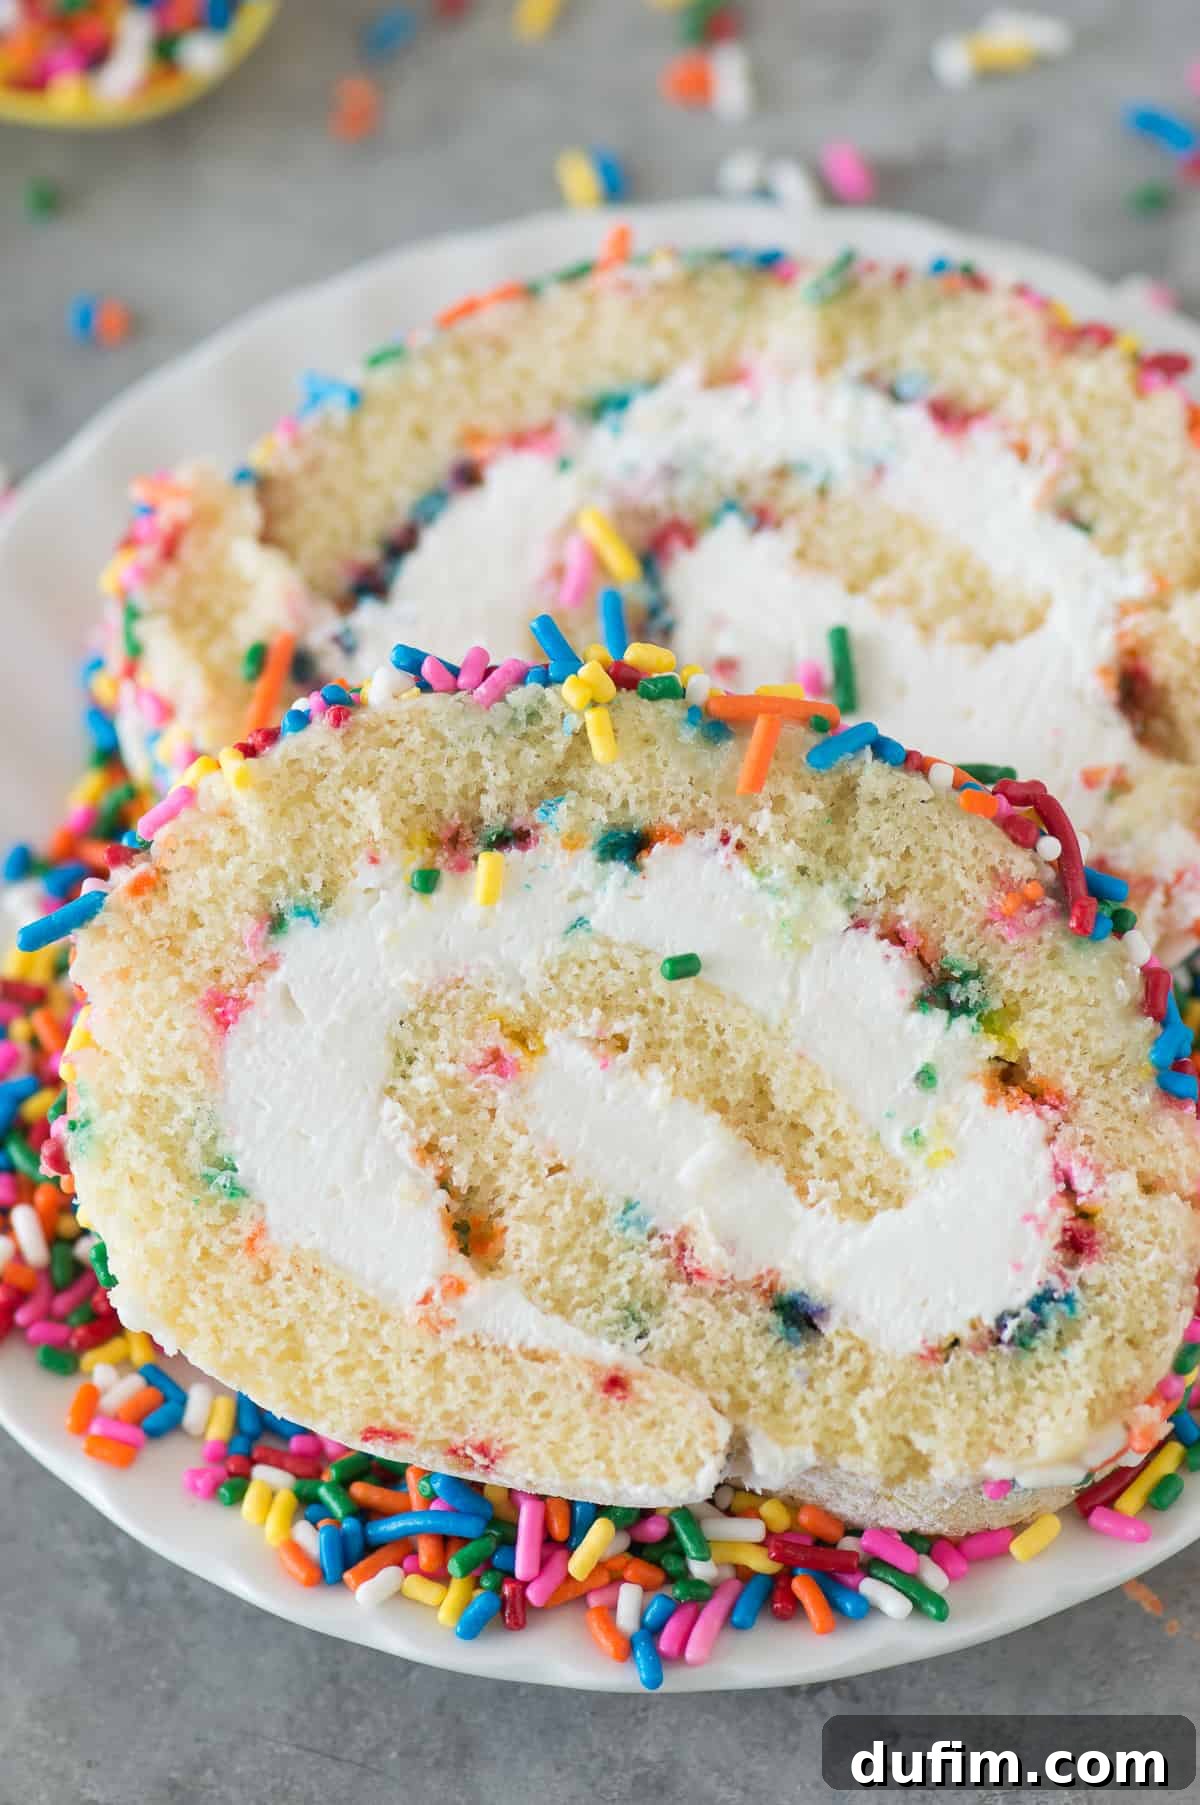
Essential Tips for a Flawless Cake Roll Experience
Creating a perfect cake roll might seem daunting at first glance, but with a few key techniques and the right tools, you’ll be rolling like a seasoned baker in no time. Follow these expert tips closely to ensure your Funfetti Cake Roll turns out beautifully moist, perfectly pliable, evenly filled, and completely crack-free.
1. The Right Pan Matters: Your 10×15 Inch Jelly Roll Pan
The foundation of any successful cake roll is selecting the correct baking pan. For this recipe, you’ll need a standard 10×15 inch (approximately 25×38 cm) jelly roll pan. This specific size is absolutely crucial because it allows the cake batter to spread thinly enough to bake into a delicate, pliable sheet that is ideal for rolling without tearing. A pan that is too large will result in a cake that is excessively thin, making it difficult to handle and more prone to ripping. Conversely, a smaller pan will yield a cake that is too thick and dense, which will inevitably crack when you attempt to roll it. Investing in a good quality jelly roll pan is a worthwhile endeavor, as it will become your most reliable tool for countless cake roll adventures.
2. Prepare Your Pan for Success: Parchment Paper is Non-Negotiable
Proper pan preparation is an essential step that you simply cannot skip for an easy and clean release of your baked cake. Begin by generously spraying your jelly roll pan with a non-stick cooking spray, ensuring every corner and edge is coated. This acts as an initial barrier. Next, line the pan with parchment paper, making sure the paper extends slightly over the short edges of the pan. These overhangs are incredibly vital; they create convenient “handles” that allow you to lift the delicate, warm cake out of the pan without needing to touch the fragile cake itself. If your parchment paper is too short and doesn’t provide these overhangs, the cake might stick to the exposed pan edges, making transfer difficult and significantly increasing the risk of tears.
3. The Art of Precise Baking and the Immediate Roll
Achieving the right baking time is absolutely critical for a flexible and resilient cake. Bake your funfetti cake roll for precisely 12-13 minutes at 350ºF (175ºC). Overbaking is the arch-nemesis of a good cake roll, as it dehydrates the cake, rendering it brittle, dry, and highly susceptible to cracking when you attempt to roll it. The moment the cake emerges from the oven, do not hesitate for even a second. Immediately invert the warm cake onto a clean, lint-free kitchen towel that has been generously dusted with an ample amount of powdered sugar. While the cake is still warm and pliable, gently roll the cake along with the towel into a tight cylinder. This immediate rolling process is crucial; it “trains” the cake to hold its rolled shape, creating essential “muscle memory” and significantly preventing cracks later on. Once rolled, place the towel-wrapped cake on a wire rack and allow it to cool completely to room temperature. Patience here is paramount; attempting to fill or unroll a warm cake will result in a melted, runny frosting and a potential structural collapse.
4. Filling and Chilling: The Secret to Impeccable Slices
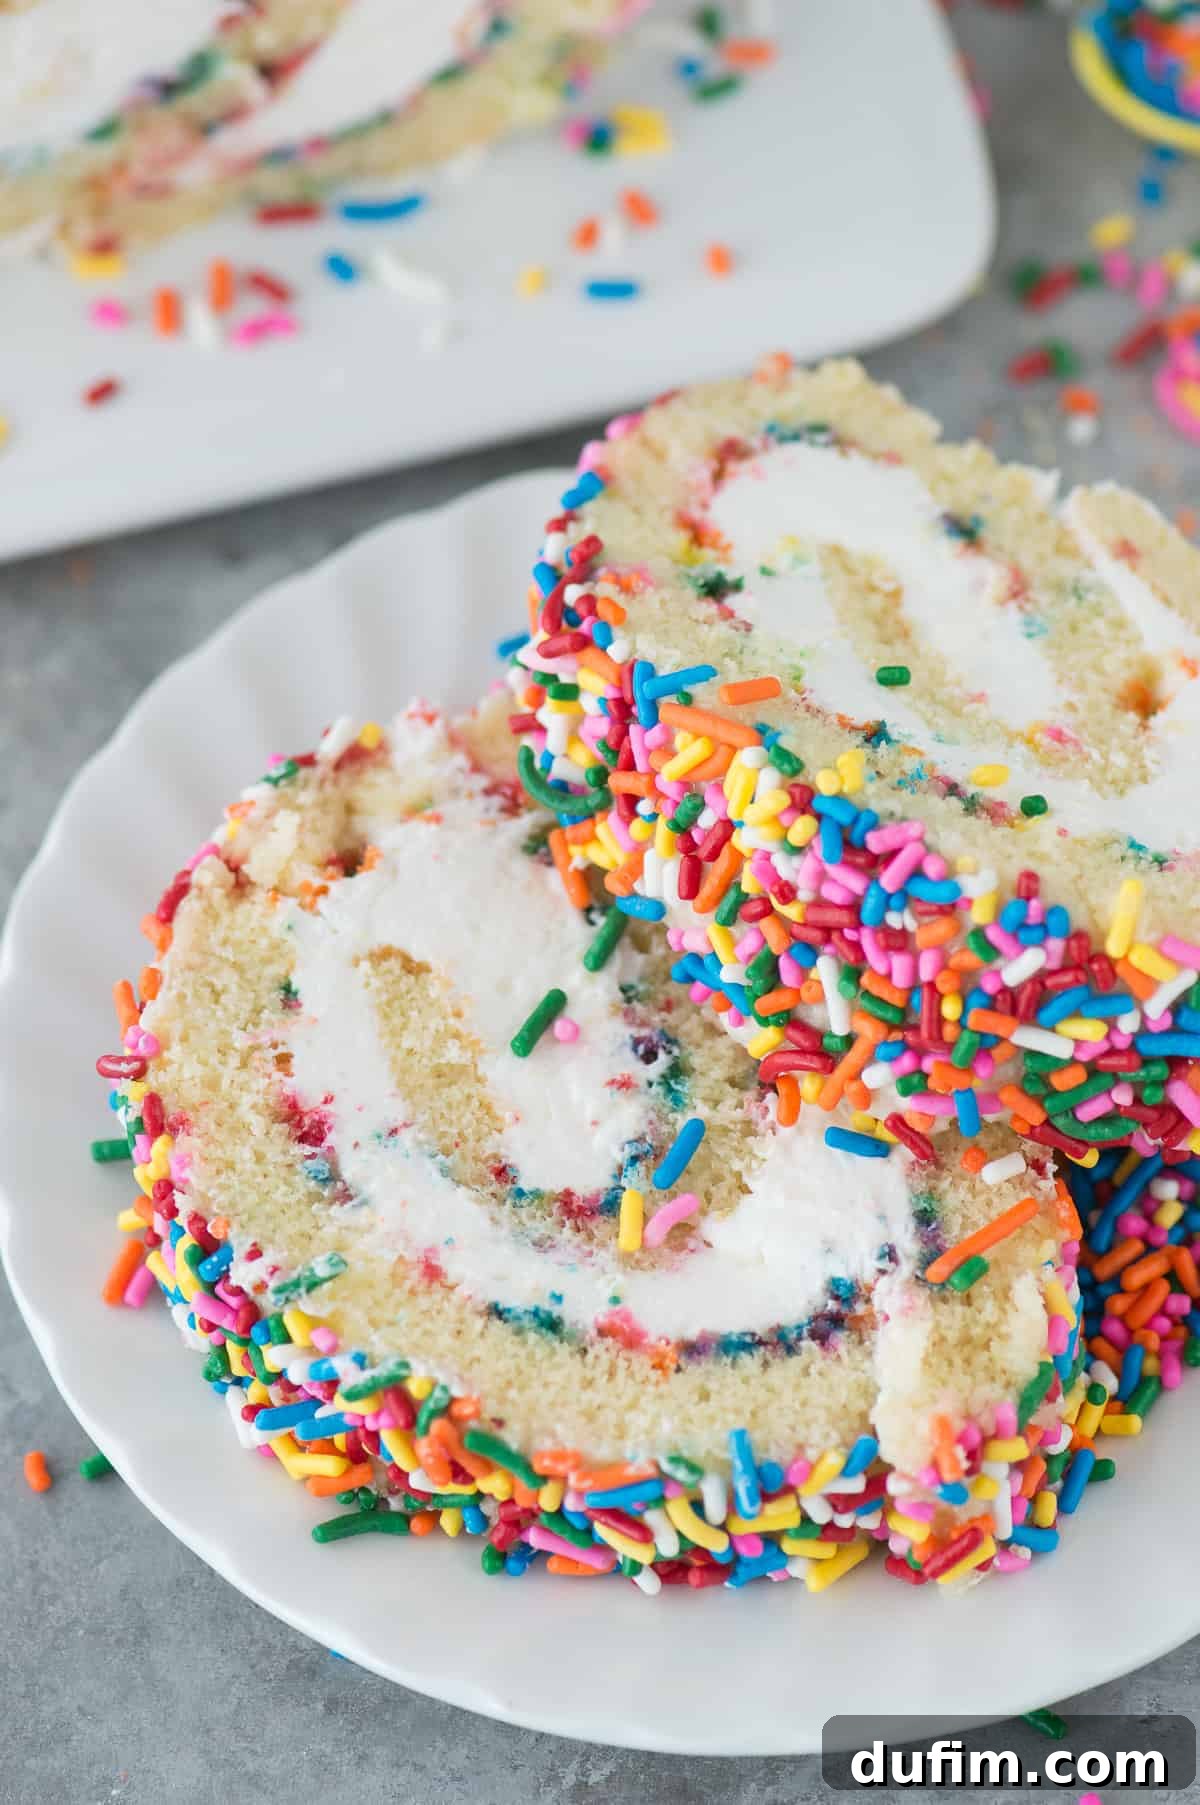
Once your cake has cooled completely, carefully and gently unroll it from the towel. Spread your luscious cream cheese filling evenly over the entire surface of the cake, making sure to leave about a 1/2-inch (1.25 cm) gap around all the edges. This small margin is essential as it prevents the filling from oozing out unattractively when you re-roll the cake. Gently but firmly re-roll the cake, starting from one short end, tucking the initial edge tightly to ensure a neat, spiraled interior. Place the re-rolled cake, seam-side down, on a serving tray or platter. Transfer it to the refrigerator and chill for at least 2 hours. This chilling period is absolutely essential for both the cake and the filling to firm up properly. Attempting to slice a cake roll that hasn’t been adequately chilled will inevitably result in a messy, smushed disaster. A firm cake roll not only slices cleanly into beautiful portions but also maintains its impeccable structure, making for a stunning presentation. The longer it chills, the easier and cleaner your slices will be.
5. The Grand Finale: White Chocolate Ganache and a Shower of Sprinkles
For an extra touch of decadence and an undeniably appealing visual finish, a smooth white chocolate ganache offers a beautiful, glossy topping. Once your cake roll is thoroughly chilled and firm, gently place it on a wire rack positioned over a baking sheet (this will catch any excess ganache drips). Pour the cooled, smooth ganache evenly over the top, using a spoon or spatula to ensure it coats all surfaces, especially the sides. Allow the ganache to set slightly at room temperature or in the fridge for a few minutes before adding a final flourish of vibrant jimmie sprinkles. This prevents the sprinkles from sinking into the wet ganache. A final brief chill helps the ganache set completely and allows it to adhere perfectly before you embark on the incredibly satisfying task of slicing and serving your funfetti masterpiece. Each carefully cut slice will reveal the vibrant, colorful funfetti interior, a true celebration of flavor, texture, and visual delight.
Chef’s Top Tips for Funfetti Cake Roll Perfection
Beyond the fundamental steps, these quick, actionable tips from a seasoned baker will significantly elevate your cake roll game and ensure a smooth, enjoyable baking experience from start to finish, helping you achieve professional-looking results every time.
Tip 1: Prepare Your Filling Ahead of Time for Efficiency
Efficiency and timing are your greatest allies when it comes to making cake rolls. The moment your cake emerges from the oven, you need to act swiftly to roll it while it is still warm, flexible, and pliable. This crucial window is short, and any delay can lead to cracks. By preparing your delicious cream cheese filling in advance and keeping it properly chilled in the refrigerator, you effectively eliminate a significant time constraint from the critical assembly phase. This thoughtful pre-preparation allows you to focus solely on the delicate and precise rolling process without the added pressure of whipping up a filling on the spot. Having your filling ready to go ensures a seamless, stress-free transition between baking and the final assembly of your cake roll.
Tip 2: Powdered Sugar is Your Cake Roll’s Indispensable Best Friend
Do not, under any circumstances, underestimate the immense power and necessity of powdered sugar in preventing sticking during the rolling process. When preparing your clean kitchen towel for the initial roll, generously and liberally dust BOTH sides of it with powdered sugar. Think of this as creating an absolutely impenetrable, non-stick coating designed specifically for your delicate cake. As you expertly roll the warm cake, portions of the towel will inevitably come into contact with the cake’s surface, both on the inside of the roll and on the outside layer. A liberal application of powdered sugar ensures that absolutely no part of your precious cake adheres stubbornly to the fabric, allowing for a clean, effortless unroll later. Don’t be timid with the sugar – you might even find yourself looking a bit like a snowman by the end of this step, but your perfectly preserved cake will undoubtedly thank you!
Tip 3: Chill, Chill, Chill Your Cake Roll for Structural Integrity
While we’ve touched upon the importance of chilling before, it bears repeating with emphasis: refrigeration is absolutely paramount for a beautifully structured, stable, and easy-to-slice cake roll. After the luscious filling has been evenly spread and the cake meticulously re-rolled, a minimum of 2 hours – and ideally even longer – in the refrigerator is essential. This crucial chilling period allows the cake layers, which are delicate, and the creamy filling to firm up sufficiently and meld together harmoniously. Attempting to slice a cake roll that has not been adequately chilled will almost certainly result in a messy, squished, and frustrating disaster, where layers separate and the filling oozes out. A thoroughly firm cake roll not only slices cleanly into elegant, distinct portions but also holds its shape impeccably, making for an impressive and appealing presentation that will wow your guests.
For those who benefit from visual learning, this detailed written guide is perfectly complemented by a short video recipe (conveniently located below) that provides a step-by-step walk-through of the entire cake roll process. Additionally, if you’re seeking more in-depth process photos for clearer visual cues, our comprehensive galaxy cake roll recipe offers extensive step-by-step imagery that breaks down each stage of cake roll creation.
A Touch of Flavor with International Delight
In this particular Funfetti Cake Roll recipe, I’ve chosen to incorporate International Delight French Vanilla creamer. This special ingredient serves a dual purpose: it significantly enhances both the inherent sweetness and the rich, comforting vanilla profile of the cake sponge, adding an extra layer of gourmet flavor. This versatile creamer isn’t just a perfect addition to your morning coffee; it also lends a wonderful depth of flavor and an appealing moistness to baked goods. Its creamy consistency contributes to a tender, soft cake texture, making it an excellent secret weapon in a wide array of dessert recipes. I encourage you to explore all our delightful International Delight recipes for more creative and delicious ways to integrate this fantastic product into your culinary repertoire. Please note that this content is part of a sponsored conversation written by me on behalf of International Delight, and all opinions and recommendations expressed herein are entirely my own and authentically held.
Funfetti Cake Roll Video Tutorial
Funfetti Cake Roll Recipe
By: Beth
Prep Time: 15 minutes
Cook Time: 15 minutes
Additional Time: 2 hours (for chilling)
Total Time: Approximately 2 hours 50 minutes (includes chilling)
Servings: 12 servings
This recipe creates the ultimate funfetti cake roll, featuring a delicate and moist vanilla sponge, generously filled with a tangy and sweet cream cheese frosting, and beautifully finished with a vibrant shower of colorful sprinkles. It’s the perfect festive dessert for birthdays, holidays, or any moment that calls for a little extra cheer and color!
Print Recipe
Equipment
- Glass Mixing Bowl
- KitchenAid 9-Speed Mixer (or similar electric mixer)
- Favorite Spatula
- 10×15 inch Jelly Roll Pan
- Parchment Paper
- Clean Kitchen Towel (lint-free)
- Wire Rack
- Small Pot (for ganache)
- Heat-proof Bowl (for ganache)
- Serving Tray or Platter
Ingredients
For the Funfetti Cake Roll:
- 1 cup (120g) all-purpose flour
- 1 tsp baking powder
- ½ tsp salt
- 4 large eggs, at room temperature
- ¾ cup (149g) granulated sugar
- 2 Tbsp vegetable oil
- 2 Tbsp International Delight French Vanilla Creamer (or your preferred vanilla creamer)
- 1 tsp apple cider vinegar
- 1 tsp vanilla extract
- ¼ cup jimmie sprinkles, plus extra for topping
- Additional powdered sugar, for dusting the towel
For the Cream Cheese Filling:
- 4 oz (113g) cream cheese, softened (approximately 1/2 of a standard package)
- 1 cup (113g) powdered sugar
- 2 cups (150g) Cool Whip (or an equal amount of homemade whipped cream)
For the White Chocolate Ganache:
- ½ cup (118ml) heavy whipping cream
- 1 ½ cups (255g) white chocolate chips
- Extra jimmie sprinkles, for the final topping
Instructions
Phase 1: Preparing and Baking the Cake Roll
- Preheat your oven to 350ºF (175ºC). Line a 15×10 inch jelly roll pan with parchment paper, ensuring the paper hangs slightly over the short edges. Lightly spray the parchment paper with non-stick cooking spray and set this prepared pan aside.
- In a small mixing bowl, thoroughly whisk together the all-purpose flour, baking powder, and salt. Set this dry mixture aside for later use.
- In a larger mixing bowl, using an electric mixer, beat the 4 large room-temperature eggs on high speed for a full 3 minutes. The eggs should transform into a pale yellow, fluffy, and voluminous mixture.
- While continuing to beat the mixture on high speed, gradually add the granulated sugar, a little at a time, until it is well combined and the mixture is light and aerated.
- Reduce the mixer speed to low. Add the vegetable oil, International Delight French vanilla creamer, apple cider vinegar, and vanilla extract. Beat lightly until these wet ingredients are just incorporated into the batter. Avoid overmixing.
- Gently fold in the pre-measured flour mixture and the ¼ cup of jimmie sprinkles. Mix until they are just combined and no streaks of flour remain. Be very careful not to overmix, as this can develop gluten and result in a tough, less pliable cake.
- Pour the delicate cake batter into your prepared jelly roll pan, using a spatula to gently smooth the batter evenly to all the edges of the pan.
- Bake for precisely 12-13 minutes, or until the cake is lightly golden, springs back when gently touched in the center, and a toothpick inserted comes out clean. Be vigilant; overbaking will dry out the cake and make it brittle, leading to cracks when rolled.
- While the cake is baking, prepare your rolling surface: lay a clean, lint-free kitchen towel flat on a clean countertop. Generously dust BOTH sides of this towel with an ample amount of powdered sugar. This step is absolutely crucial to prevent the warm cake from sticking to the towel.
- Immediately after removing the cake from the oven, quickly invert it onto the prepared powdered-sugar-dusted towel. Carefully and gently peel off the parchment paper that was lining the pan.
- While the cake is still warm and flexible, starting from one of the short ends, gently but firmly roll the cake along with the towel into a tight cylinder. Place this rolled cake, still wrapped in the towel, seam-side down on a wire rack to cool completely to room temperature. This “muscle memory” step is key to training the cake to hold its rolled shape without cracking.
Phase 2: Preparing the Cream Cheese Filling
- In a medium mixing bowl, beat the softened cream cheese and powdered sugar with an electric mixer until the mixture is light, smooth, and fluffy, typically taking about 1-2 minutes.
- Gently fold in the Cool Whip (or homemade whipped cream) using a spatula until the mixture is entirely smooth and uniform. Cover the bowl and refrigerate the filling until the cake is completely cool and ready for assembly.
Phase 3: Assembling the Funfetti Cake Roll
- Once the cake is completely cool to the touch, carefully and gently unroll it from the towel, laying it flat on your clean work surface.
- Evenly spread the prepared, chilled cream cheese filling over the entire surface of the cake, making sure to leave a precise ½-inch (1.25 cm) border clear around all the edges. This border will prevent the filling from oozing out during the re-rolling process.
- Starting from one short end, carefully and methodically re-roll the cake into a tight cylinder, tucking the initial edge firmly to ensure a neat and even spiral.
- Place the re-rolled cake, seam-side down, onto your chosen serving tray or platter. Cover it loosely but securely with plastic wrap and transfer it to the refrigerator. Chill for a minimum of 2 hours. This extended chilling period is vital for allowing the cake and filling to firm up properly, which will make slicing much easier and cleaner.
Phase 4: Making the White Chocolate Ganache and Finishing Touches
- Place the white chocolate chips in a medium, heat-proof bowl.
- In a small saucepan over low heat, gently warm the heavy whipping cream until it just begins to simmer around the edges. Do not allow it to boil vigorously.
- Carefully pour the hot cream over the white chocolate chips in the bowl. Let it sit undisturbed for 1-2 minutes to allow the heat to thoroughly melt the chocolate.
- Using a clean spatula, gently stir the mixture until it becomes completely smooth, glossy, and homogeneous. Allow the ganache to cool down to room temperature before you apply it to the cake. If it’s too warm, it will melt the frosting.
- Remove the chilled cake roll from the refrigerator. Place it on a wire rack, positioning the rack over a baking sheet or a piece of parchment paper to catch any excess ganache drips.
- Pour the cooled ganache over the cake roll, using a spoon or spatula to guide it and ensure it’s evenly coated, paying special attention to covering the sides.
- Before the ganache sets completely, generously sprinkle additional jimmie sprinkles over the top for that signature festive Funfetti look.
- Return the decorated cake roll to the refrigerator to chill for another 20 minutes. This final chill allows the ganache to set firmly.
- Once the ganache is set, slice the Funfetti Cake Roll into your desired portions and serve immediately. Any leftovers should be covered tightly and refrigerated.
Recipe Video
Nutrition Information (per serving)
All nutritional values are approximate and provided to the reader as a courtesy. Changing ingredients and/or quantities will alter the estimated nutritional calculations.
- Calories: 374 kcal
- Carbohydrates: 51g
- Protein: 6g
- Fat: 17g
- Saturated Fat: 10g
- Polyunsaturated Fat: 1g
- Monounsaturated Fat: 5g
- Trans Fat: 1g
- Cholesterol: 94mg
- Sodium: 221mg
- Potassium: 137mg
- Fiber: 1g
- Sugar: 41g
- Vitamin A: 400 IU
- Vitamin C: 1mg
- Calcium: 107mg
- Iron: 1mg
Loved this Funfetti Cake Roll recipe? We’d love to hear your thoughts! Share your experience and leave a comment below!