
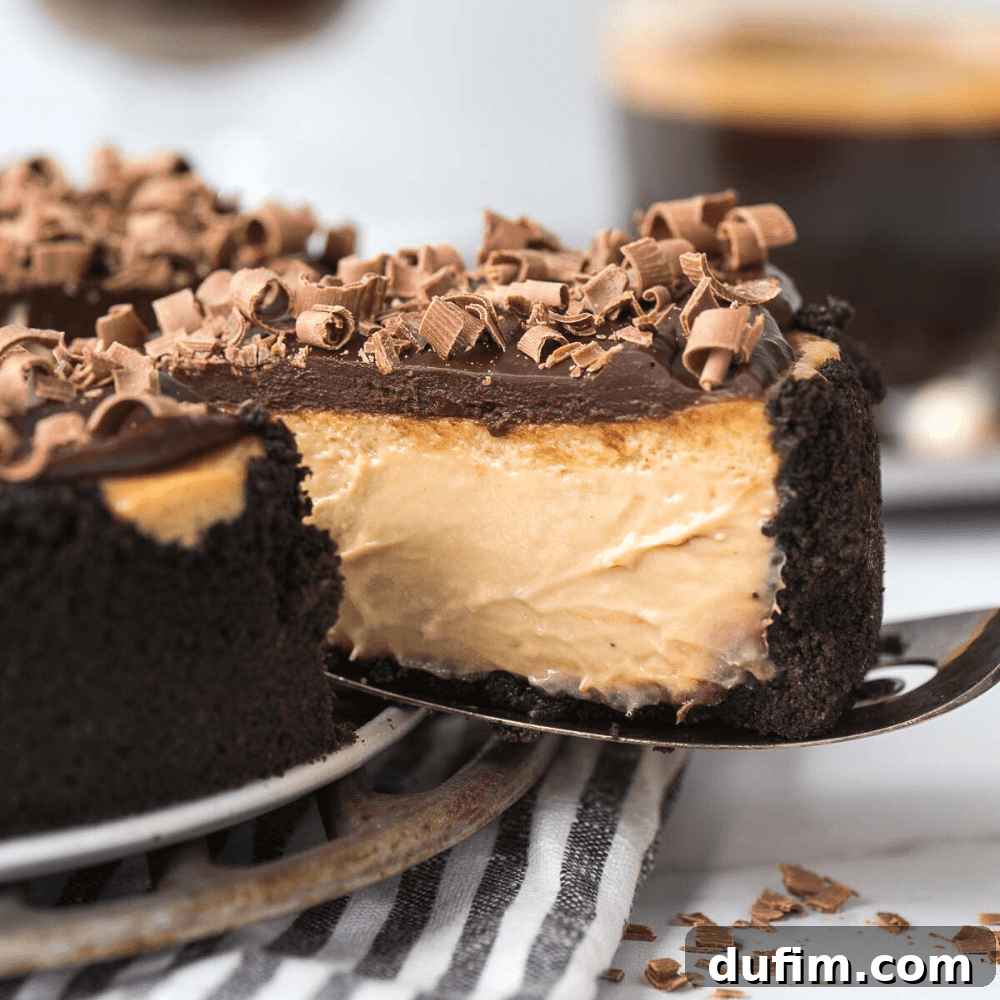
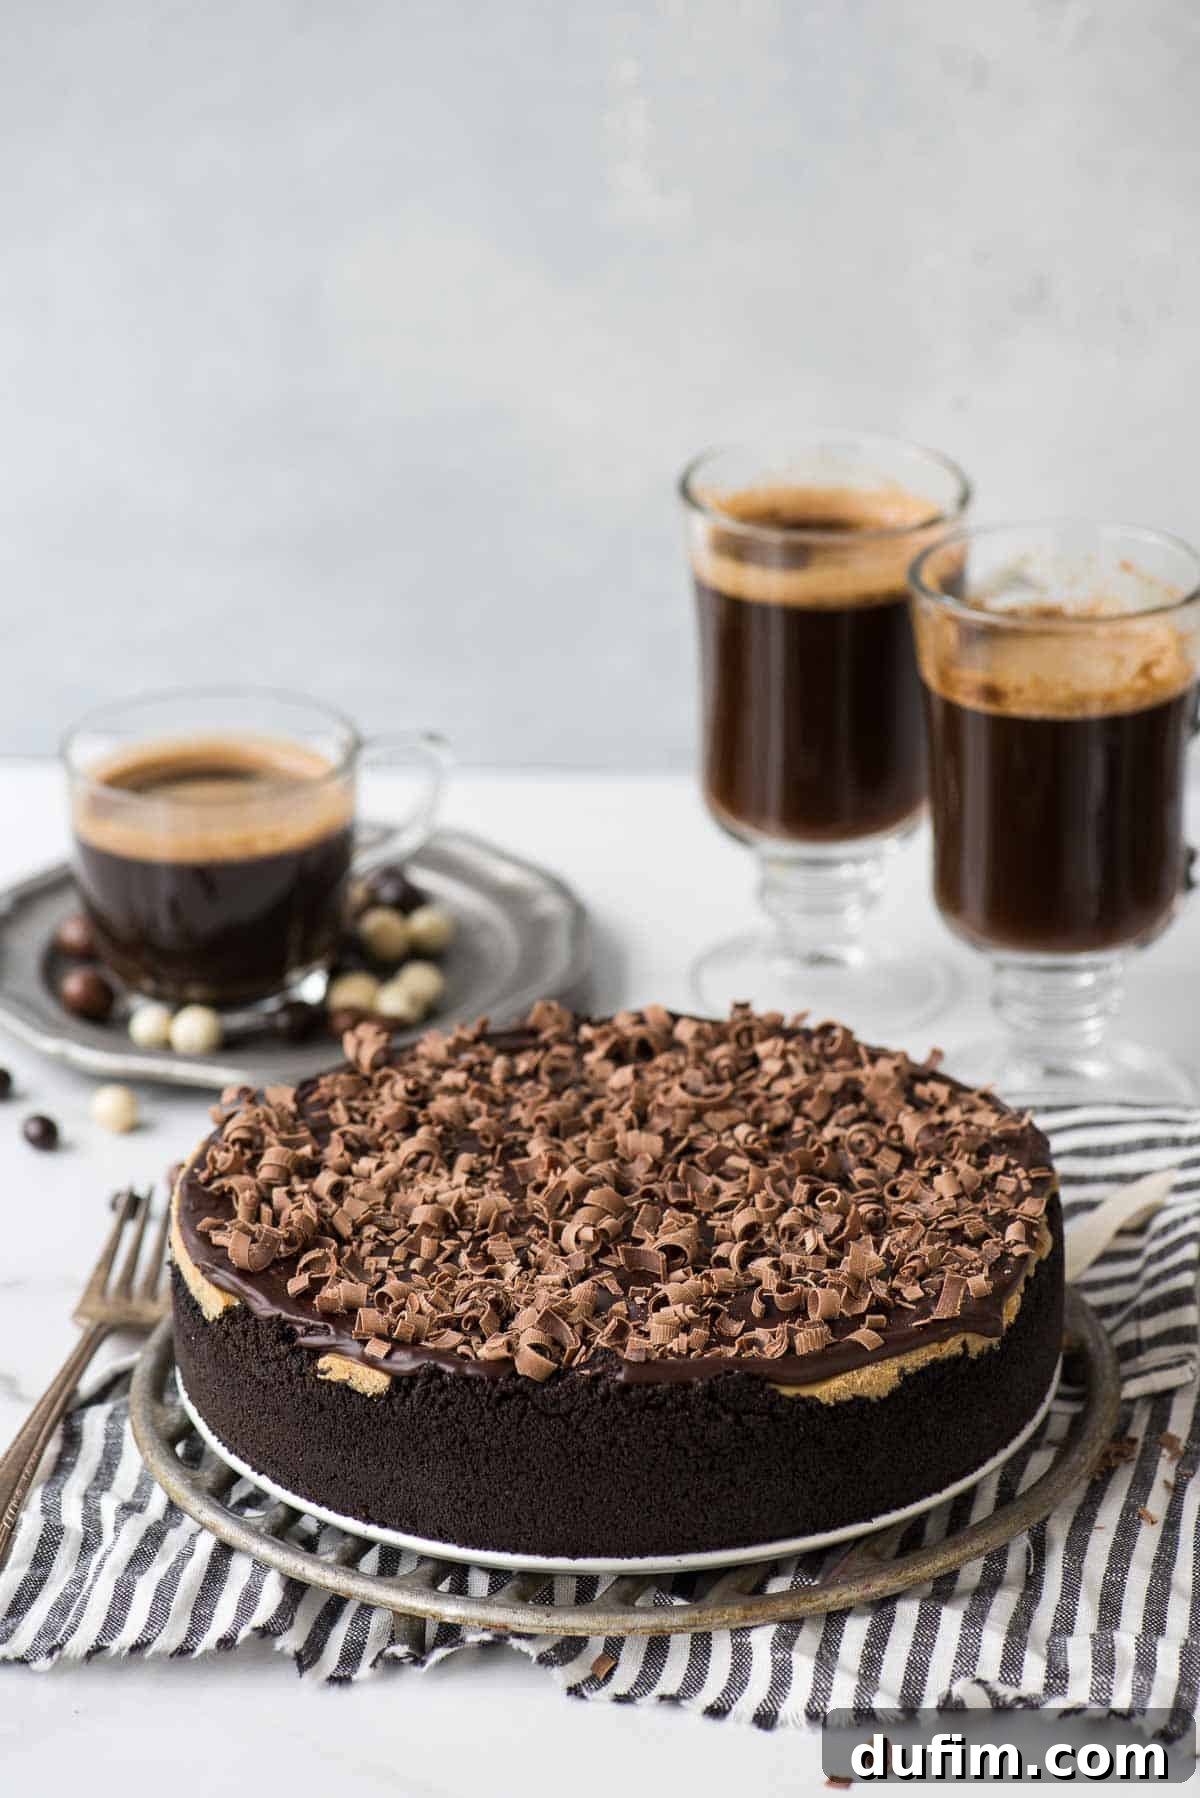
Prepare to be captivated by the most incredible espresso coffee cheesecake you’ll ever taste! This decadent dessert boasts a perfect harmony of intense coffee flavor, a crunchy Oreo crust, and a smooth, luxurious layer of chocolate ganache. It’s a true masterpiece for both coffee enthusiasts and cheesecake purists.
Infused with real espresso, this cheesecake delivers an unforgettable, bold coffee experience in every single bite. Get ready for a dessert that will earn you rave reviews!
This cheesecake is TO DIE FOR!!!! It is one of my most requested desserts!
-Denise
We all have those mornings when a rich dessert feels like a perfectly acceptable breakfast, especially when it cleverly combines your coffee fix with a satisfying treat. A friend once confessed to enjoying this very espresso cheesecake for both breakfast and lunch! And honestly, who are we to judge? She raved about it being the ideal way to get her coffee, breakfast, and lunch, all while expertly navigating the joyful chaos of three energetic little ones. It’s a testament to how truly satisfying and wonderfully convenient this coffee cheesecake can be.
The timeless combination of coffee and chocolate is simply irresistible, especially when it comes to crafting truly memorable desserts. This recipe elevates that classic pairing to new heights, creating a dessert that’s not just delicious but also surprisingly rewarding to bake. We’re here to share all the essential tips and tricks to ensure your coffee cheesecake turns out perfectly smooth, rich, and utterly divine!
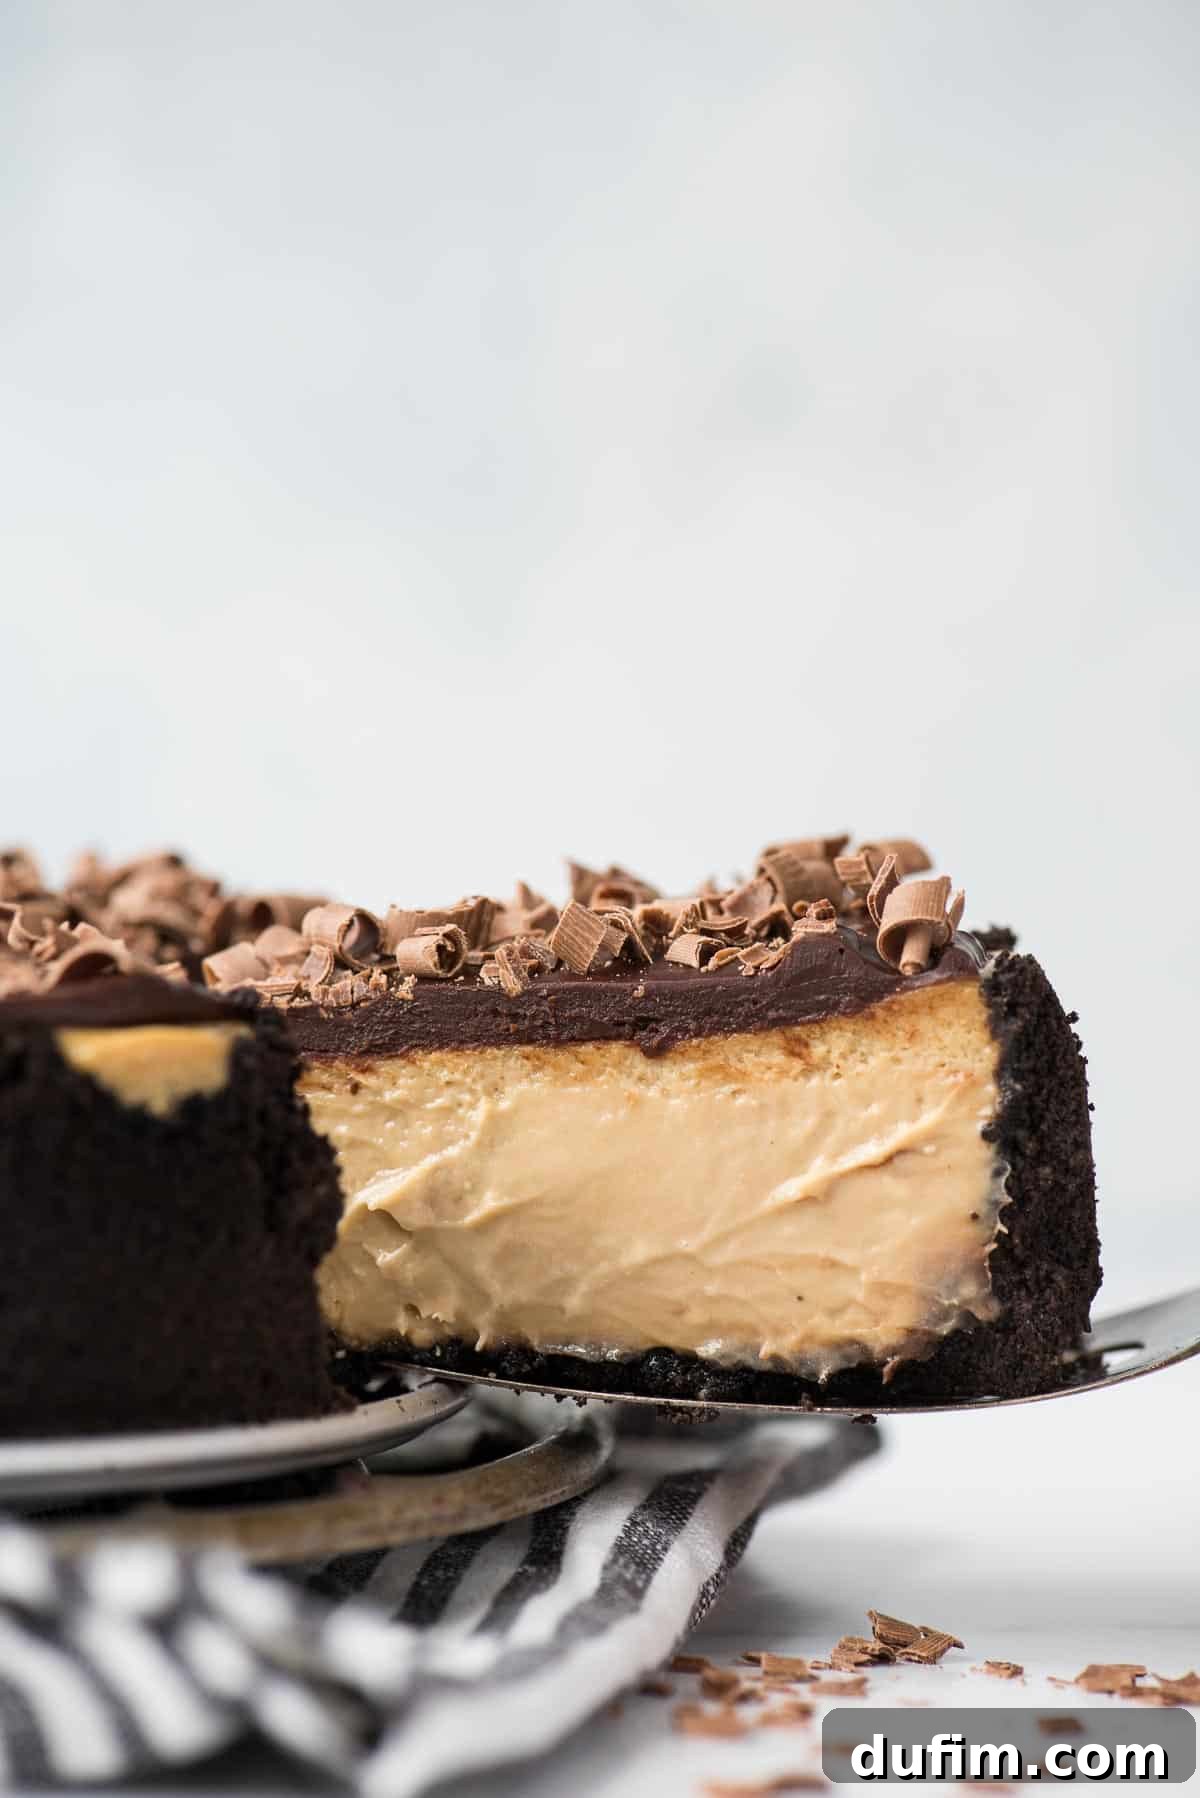
This recipe features an exquisitely smooth, coffee-infused cheesecake filling nestled atop a traditional, crunchy Oreo crust. It’s everything a cheesecake purist dreams of and more! If you consider yourself a true cheesecake fan, this espresso coffee cheesecake recipe is an absolute must-save. It promises to become a staple in your dessert repertoire, delighting everyone who tries it with its deep flavors and luxurious texture.
Crafting the Perfect Oreo Crust for Your Cheesecake
A great cheesecake starts with an exceptional crust, and our Oreo crust provides the perfect dark chocolate base to complement the bold espresso flavor. It’s simple to make and incredibly satisfying.
What You’ll Need for the Crust:
- Oreo Crumbs: To achieve the finest crumbs, simply blend whole Oreo cookies in a food processor or blender until they are uniformly fine. You’ll need about 2 cups of crumbs, which is roughly half a standard package of Oreos. For a slight variation, chocolate graham crackers can be used as a delicious alternative.
- Melted Butter: This is the secret ingredient that binds the crumbs together, creating a firm, flavorful crust that won’t crumble when sliced. Make sure it’s melted and fully incorporated.
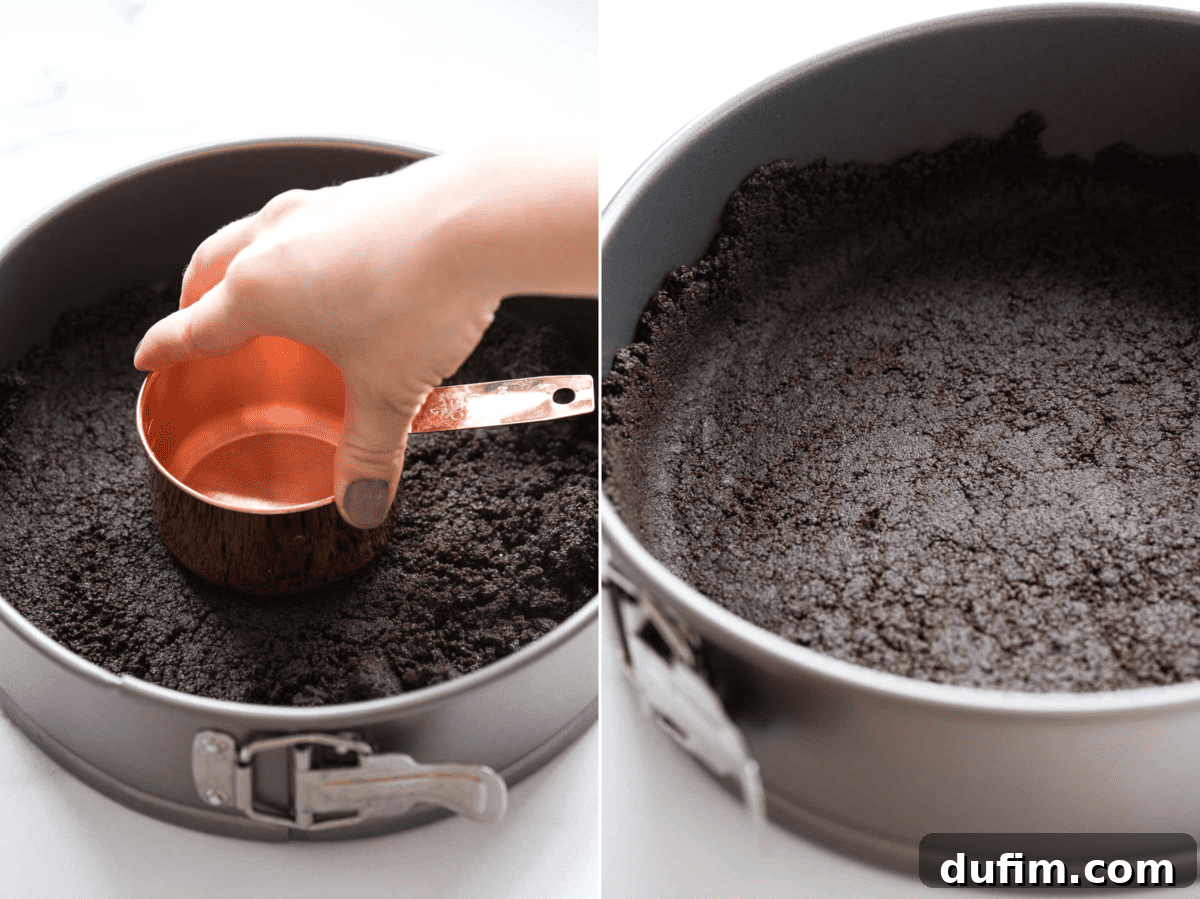
Once you have your ingredients, combine the Oreo crumbs with the melted butter in a bowl, mixing thoroughly until all crumbs are moistened. Then, firmly press this mixture into the bottom and slightly up the sides of your springform pan. For an even, compact crust, use the flat bottom of a measuring cup or a glass to help pack it down tightly. This ensures a sturdy base that holds up beautifully to the creamy cheesecake filling.
Essential Ingredients for an Irresistible Coffee Cheesecake
Creating our rich and creamy mocha-inspired cheesecake requires just a handful of key ingredients, each playing a vital role in achieving that perfect flavor and texture. Quality matters here, so choose your ingredients wisely for the best results.
- Cream Cheese: You’ll need three 8-ounce packages. The most crucial tip here is to use full-fat cream cheese, not low-fat or reduced-fat. Full-fat cream cheese provides the necessary richness and structure for a truly decadent cheesecake that sets perfectly and avoids a rubbery texture. Ensure it’s at room temperature for smooth mixing.
- Granulated Sugar: This balances the delightful tanginess of the cream cheese, adding just the right amount of sweetness to enhance, not overpower, the coffee flavor.
- Vanilla Extract: Just one teaspoon of high-quality vanilla extract is all it takes to deepen and enhance the complex coffee notes, adding a subtle warmth to the overall flavor profile.
- Espresso: This is where the bold, authentic coffee flavor truly shines! For convenience, you can easily make instant espresso by combining hot water with instant espresso powder. Brewed coffee can also work if espresso is unavailable, just ensure it’s strong.
- Large Eggs: Eggs provide the structure that allows the cheesecake to set beautifully. Like the cream cheese, it’s best if they are at room temperature to incorporate smoothly into the batter.
Critical Tip About Incorporating Eggs
When making cheesecake, the eggs are always the very last ingredient to be gently mixed into your batter. It’s absolutely vital to add them one at a time, mixing only until the yolk has just broken and is barely combined. Over-beating the eggs introduces too much air into the batter, which is the primary cause of air bubbles and, subsequently, large, unsightly cracks on the surface of your beautiful cheesecake. A light hand and minimal mixing ensure a dense, smooth, and crack-free finish.
Unlocking the Secrets to Making a Flawless Cheesecake
Across all my cheesecake recipes, I consistently highlight two fundamental principles that are absolutely critical for achieving a perfect, crack-free, and sumptuously smooth dessert. These aren’t just suggestions; they are the bedrock of successful cheesecake baking. Here are the two most important details to meticulously follow when embarking on your cheesecake journey:
1. EMBRACE THE WATER BATH (Bain-Marie)
2. NEVER RUSH THE COOLING PROCESS
Dive deeper into the detailed explanations for each of these indispensable tips below!
Mastering the Cheesecake Water Bath: Your Secret to Perfection
I understand that the idea of placing your delicate cheesecake in a “water bath” might sound a bit unconventional or even daunting at first. However, I promise you, this technique, also known as a bain-marie, is the absolute secret weapon for baking the most incredibly moist, evenly cooked, and crack-free cheesecakes. It’s truly not as intimidating as it sounds and yields consistently superior results every time.
Water Bath Basics Explained:
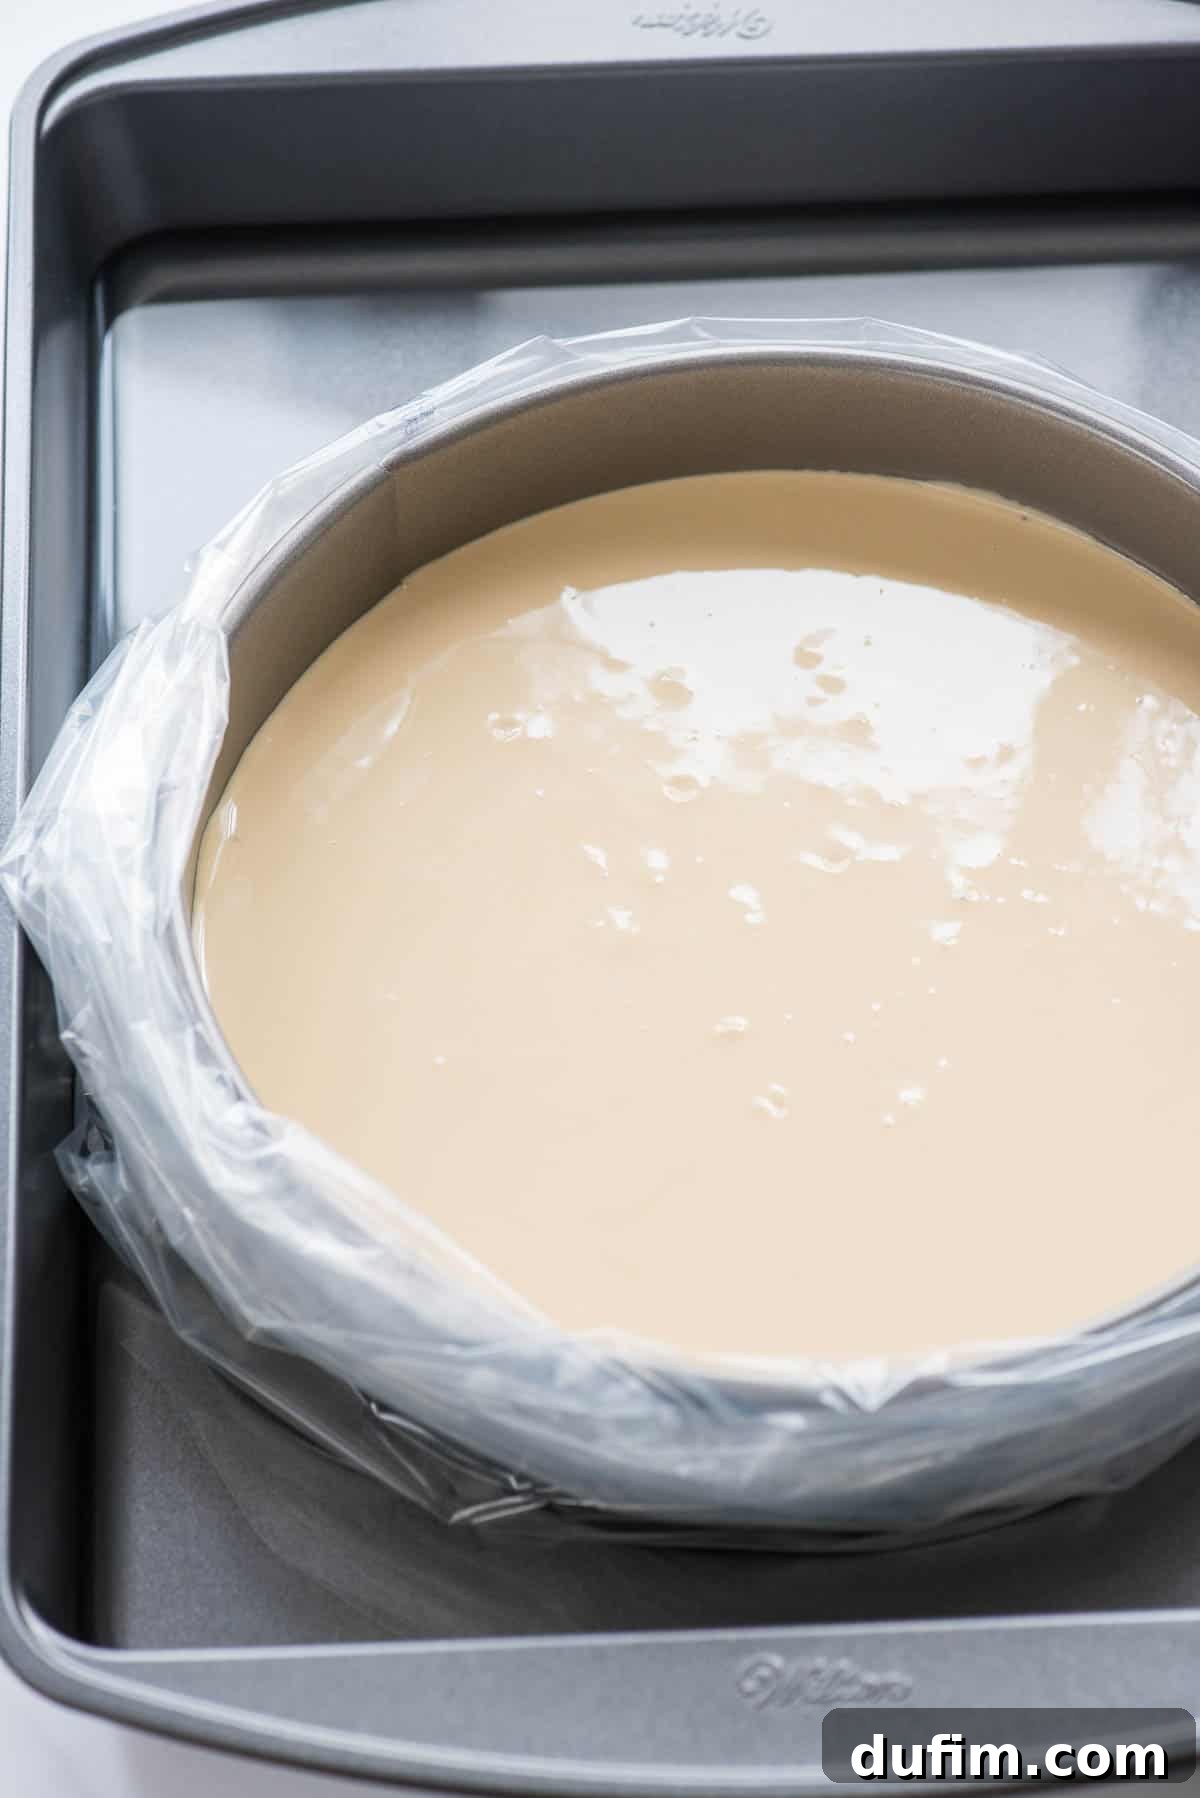
The principle behind a water bath is simple yet brilliant. The hot water surrounding your springform pan creates a moist, consistent, and gentle cooking environment. This prevents the cheesecake from cooking too quickly around the edges while the center remains undercooked, which is a common cause of cracks. To set it up, simply place your springform pan, containing the cheesecake batter, inside a larger cake pan or roasting pan. Then, carefully pour about 1 inch of hot water into the larger pan, ensuring the water level comes up around the sides of the springform pan, but without touching the cheesecake itself. Place this entire assembly into your preheated oven.
Ingenious Trick: Preventing Water Bath Leaks
One of the most common anxieties about using a water bath is the fear of water leaking into your springform pan and ruining your cheesecake. But don’t worry, I have an ingenious, foolproof trick that will completely eliminate this concern and guarantee a perfectly dry cheesecake every time.
The solution is surprisingly simple and highly effective: before placing your springform pan into the larger roasting pan for the water bath, carefully encase the entire springform pan in a large, oven-safe turkey bag or a slow cooker liner bag. Roll down the top of the bag so it creates a protective barrier around the sides but does not cover the cheesecake itself. If there’s a lot of excess bag material, you can twist one side tightly and knot it, ensuring the bag fits snugly around the pan without touching the batter. Once the springform pan is securely inside its protective bag, place it into the larger roasting pan and then fill the roasting pan with water as usual.
This simple barrier ensures that even if your springform pan has the tiniest leak, the water from the bath will be completely prevented from seeping into your precious cheesecake. Enjoy a perfectly baked, leak-free dessert every time!
The Art of Cooling Cheesecake: Patience for a Crack-Free Finish
This step is as crucial as the baking itself: absolutely do not rush the cooling process. Patience here is key to preventing those dreaded cracks and achieving that perfectly smooth top.
Once your cheesecake has finished baking and the center has a slight wobble (indicating it’s just set but not overbaked), turn off your oven. Carefully remove the springform pan from the water bath and the oven-safe bag. Place the cheesecake, still in its springform pan, onto a sturdy baking sheet. Now, here’s the critical step: return the cheesecake to the *turned-off* oven, leaving the oven door slightly ajar. This creates a gradual cooling environment, allowing the cheesecake to slowly come down to room temperature without experiencing a sudden temperature shock that often leads to cracking.
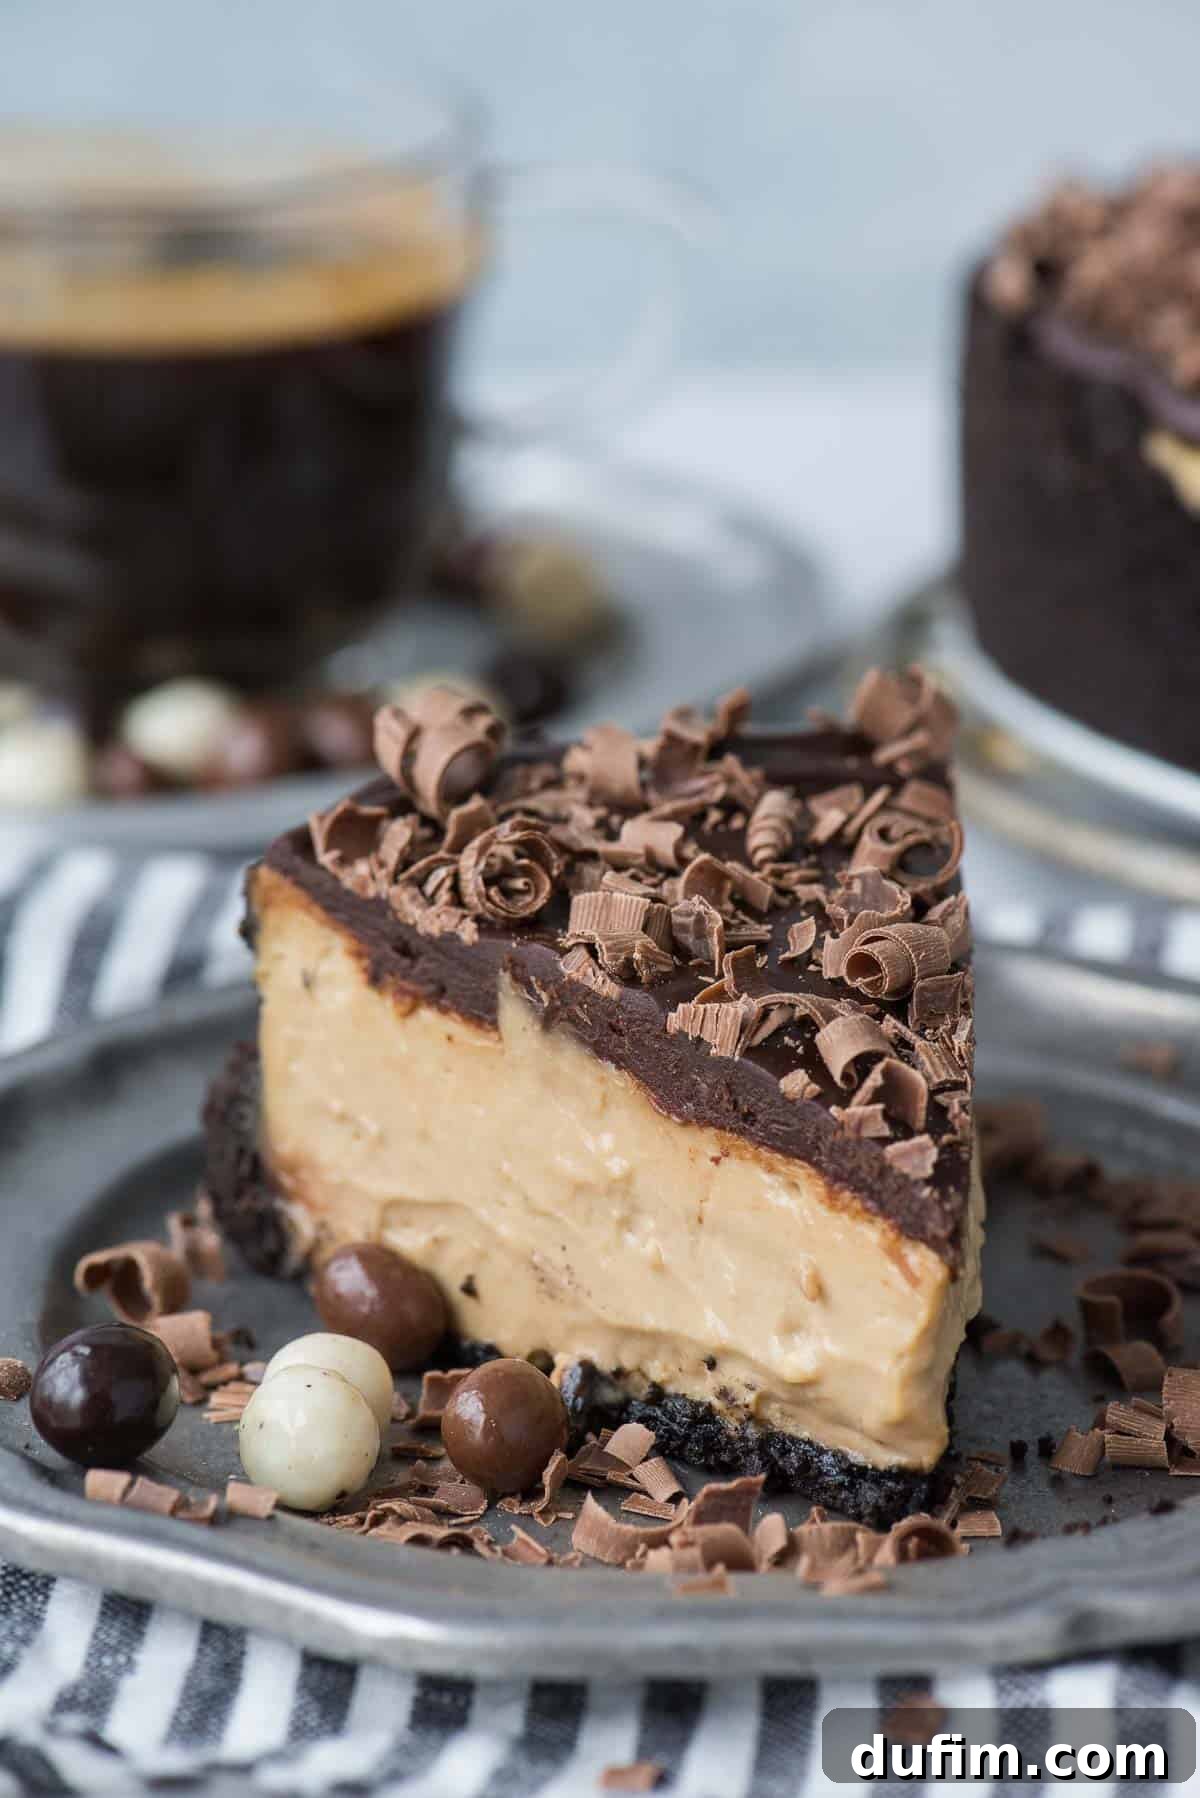
Allowing the cheesecake to cool slowly within the oven for at least 60-90 minutes is essential for a beautiful, crack-free surface. After this initial slow cool, remove the cheesecake from the oven. Loosely cover it with aluminum foil and transfer it to the refrigerator. For the best texture, flavor, and ease of slicing, it’s imperative to refrigerate your cheesecake overnight (ideally for at least 8-12 hours) before serving. This prolonged chilling period allows the flavors to meld and the cheesecake to fully firm up, ensuring a truly sensational dessert experience.
Additional Expert Tips for a Superb Coffee Cheesecake
Beyond the core techniques, a few extra details can make all the difference in achieving a truly perfect espresso coffee cheesecake:
- Room Temperature Cream Cheese is Non-Negotiable: Always allow your cream cheese to come to a complete room temperature before you begin beating it. Cold cream cheese will result in a lumpy batter and an inconsistent texture. Room temperature cream cheese, however, whips up effortlessly into a silky-smooth consistency, ensuring a uniform and creamy cheesecake.
- Gentle Egg Incorporation: As reiterated, eggs are the final component. Introduce them one at a time, mixing minimally – just until the yolk has fully broken and is incorporated. Over-beating at this stage is the leading cause of air bubbles that expand during baking, leading to unwanted cracks on your cheesecake’s surface.
- Pan Size and Baking Time: The baking time for your cheesecake will vary significantly depending on the size of your springform pan. This recipe is optimized for an 8-inch springform pan. If you opt for a different size, be prepared to adjust your baking time accordingly. A larger pan might require less time as the batter layer will be thinner, while a smaller, deeper pan will need more time. Always rely on the “slight wobble” test for doneness rather than strict time.
- The Oven Cooling Rule: After baking, the initial hour of cooling inside the turned-off oven with the door cracked is paramount. This slow, gradual transition from hot to warm helps stabilize the cheesecake’s structure and is a critical step in preventing cracks. Resist the urge to pull it out immediately!
How to Freeze a Whole Cheesecake for Future Indulgence
Cheesecake is a fantastic dessert for making ahead and freezing, ensuring you always have a luxurious treat on hand for unexpected guests or future cravings. Follow these steps for perfect freezer storage:
- Ensure Complete Cooling: Before even thinking about freezing, your cheesecake must be completely cool. Ideally, allow it to chill thoroughly in the refrigerator overnight after its oven cooling process. This ensures it’s fully set and firm.
- Prepare for Wrapping: Once chilled, carefully use a thin knife or offset spatula to gently loosen the outer springform ring, then remove it. Next, carefully slide a thin, flat spatula or knife between the cheesecake and the bottom of the pan to help release it. Transfer the entire cheesecake onto a round cardboard cake circle that has been covered in aluminum foil. Ensure the cardboard circle is the same size as your cheesecake for even support.
- Double-Wrap for Protection: Wrap the entire cheesecake (without any toppings, as some toppings don’t freeze well) extremely well in several layers of plastic wrap. Get it as airtight as possible to prevent freezer burn. For an extra layer of protection against moisture and odors, wrap the plastic-wrapped cheesecake again in a sturdy layer of aluminum foil.
- Freeze and Thaw: Place the double-wrapped cheesecake in the freezer for up to 3 months. When you’re ready to enjoy it, simply transfer the frozen cheesecake to the refrigerator and allow it to thaw slowly overnight. Add your desired fresh toppings just before serving for the best presentation and flavor.
Elevate Your Coffee Cheesecake with Delectable Toppings
While this espresso coffee cheesecake is absolutely divine on its own, adding a topping can transform it into an even more spectacular dessert. Here are some of our favorite ideas to elevate your cheesecake experience:
- Fresh Fruit: A vibrant array of fresh berries like strawberries, blueberries, blackberries, or raspberries offers a beautiful contrast in flavor and texture. Mango or pineapple can also add a delightful tropical twist.
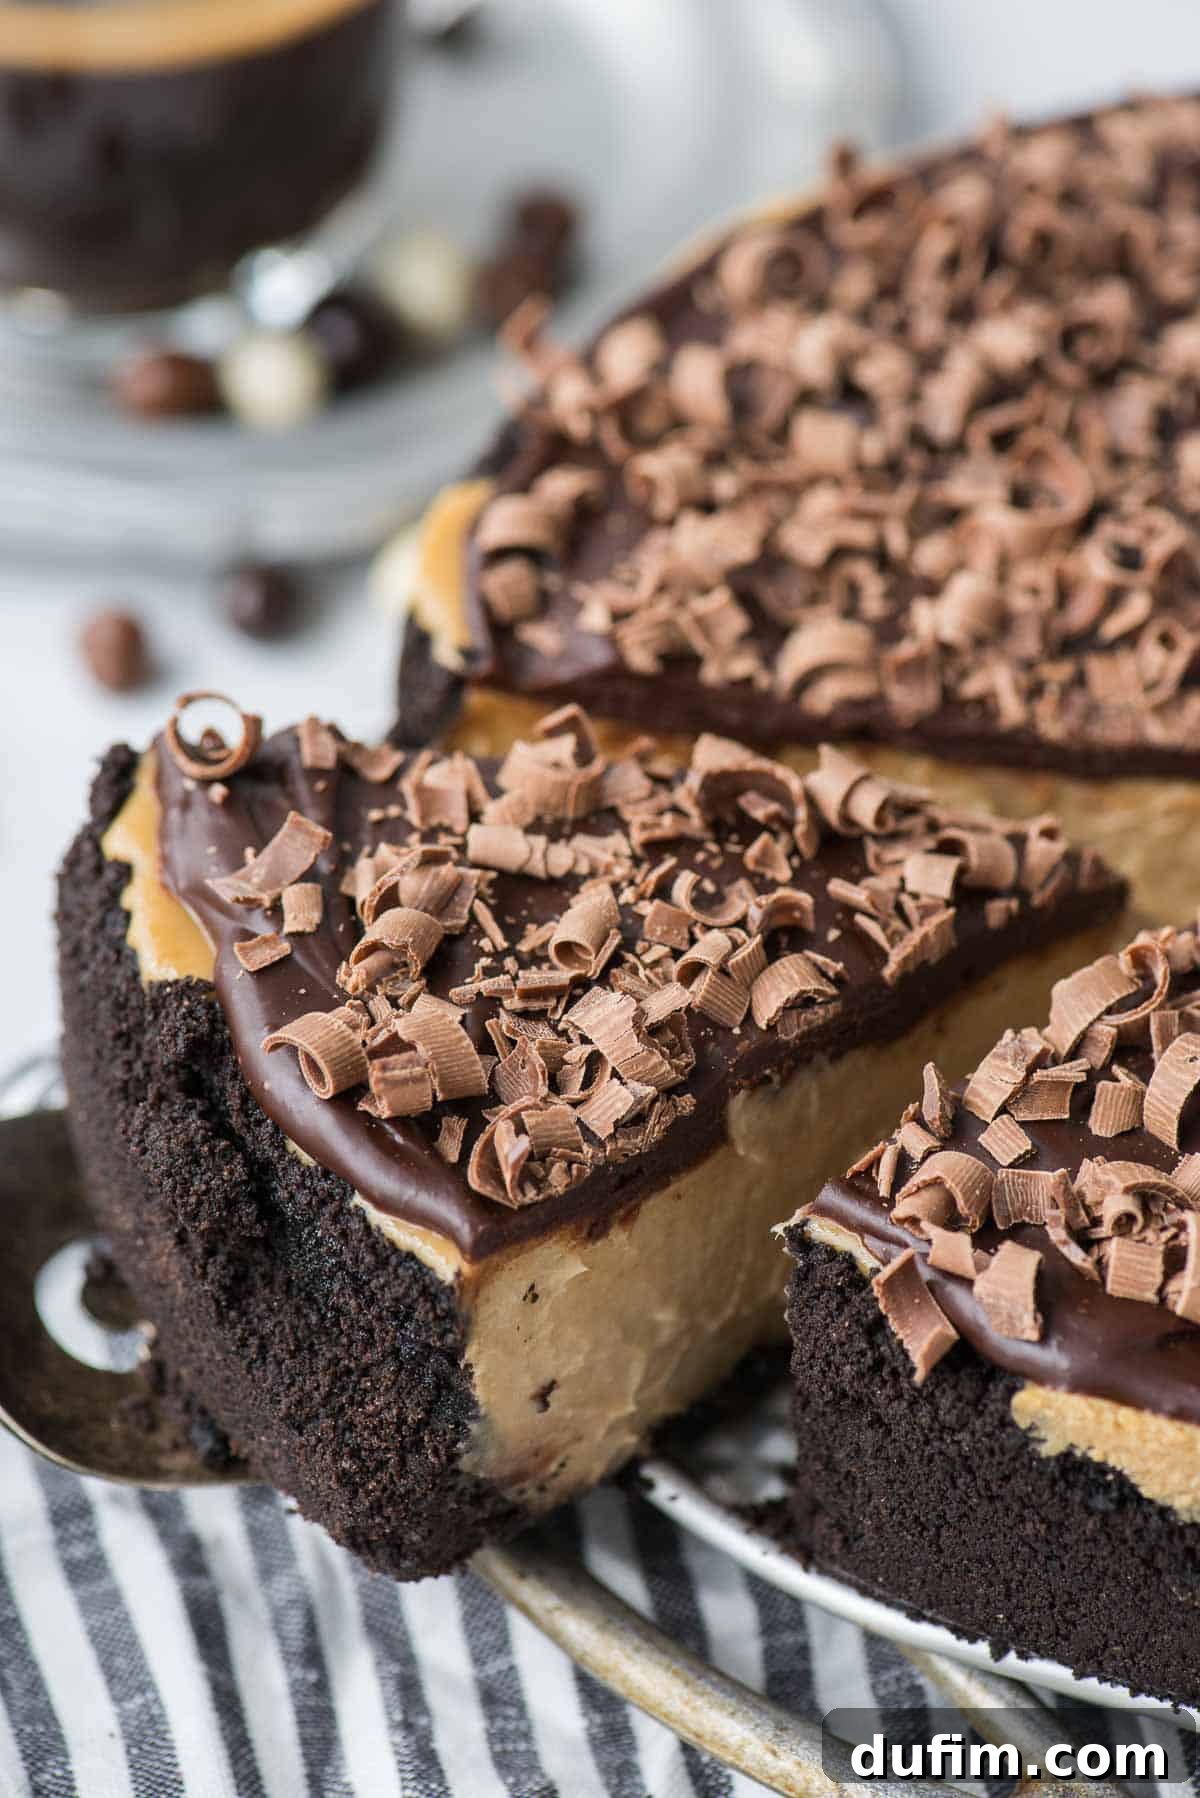
- Luxurious Chocolate Ganache: A silky, rich chocolate ganache provides a decadent layer that perfectly complements the coffee. You can follow the ganache recipe provided within this espresso cheesecake guide for a flawless result.
- Sweet Caramel Sauce: Drizzle warm, gooey caramel sauce over your cheesecake for a classic and utterly satisfying flavor pairing with the coffee notes.
- Tangy Strawberry Sauce: A homemade strawberry sauce offers a bright, fruity counterpoint to the rich cheesecake and a stunning pop of color.
- Fluffy Chocolate Whipped Cream: For an extra layer of chocolatey indulgence, top your cheesecake with a light and airy chocolate whipped cream.
- Crushed Candy Pieces: For a fun and textural element, sprinkle crushed candy pieces like peanut butter cups, M&Ms, or Snickers. This adds a playful crunch and a burst of familiar candy flavors.
Effortless Homemade Chocolate Shavings
Garnishing your espresso cheesecake with elegant chocolate shavings adds a touch of professional flair without any fuss. The easiest method involves a simple kitchen tool and a common chocolate bar:
Take a standard bar of chocolate, like a Hershey’s bar or any quality chocolate bar, and use a vegetable peeler. Gently glide the peeler along the edge of the chocolate bar, allowing beautiful, delicate shavings and curls to form. Once you have enough, use a spoon to carefully transfer the chocolate shavings onto your cheesecake. This technique prevents the heat from your fingers from melting the delicate chocolate pieces, ensuring they maintain their shape and glossy appearance until served. It’s a quick and impressive way to finish your dessert!
Discover More Delectable Dessert Recipes
If you’ve loved this espresso cheesecake, you’ll surely enjoy exploring our other favorite dessert creations. From classic cookies to more unique cheesecake variations, there’s something here for every sweet tooth:
- Classic Sugar Cut Out Cookies
- No-Bake Oreo Crust Cheesecake
- Delightful Mini Oreo Cheesecakes
- Sweet Maraschino Cherry Chocolate Chip Cookies
- Rich & Moist Chocolate Cupcake Recipe
- Easy Cool Whip and Pudding Frosting
- Refreshing Fresh Strawberry Poke Cake
- Deliciously Moist Chocolate Bundt Cake
- Homemade Oreo Pie Crust Recipe
- Chewy Brownies with Oreos
- Elegant Classic White Cupcake Recipe
- Fluffy Homemade Strawberry Muffins
- Zesty Orange Cake Recipe From Scratch
- The Best Bran Muffin Recipe
- Classic Hot Fudge Sundae Recipe
Rating: 4.32 out of 5 stars from 325 ratings
Tap stars to rate!
Coffee Cheesecake
Beth
30 minutes
1 hour 15 minutes
12 hours
13 hours 45 minutes
12 servings
Print Recipe
Equipment
-
8 inch springform pan
-
Kitchen Scale
Ingredients
For the Oreo Crust:
- 2 cups (240g) Oreo crumbs
- 4 Tbsp unsalted butter, melted (1/2 stick)
For the Espresso Cheesecake:
- 3 packages cream cheese at room temperature, 8 oz each (full fat recommended)
- 1 cup (198g) granulated sugar
- 1 tsp vanilla extract
- ⅓ cup brewed espresso
- 3 large eggs
- 1 oven safe turkey bag (for water bath protection)
For the Chocolate Ganache:
- ½ cup (118ml) heavy cream
- 1 cup (170g) chocolate chips, (semi-sweet recommended)
Instructions
Crust Preparation:
-
Preheat your oven to 350º F (175°C).
-
Pulse whole Oreos (or chocolate graham crackers) in a blender or food processor until very fine crumbs are formed. Measure out 2 cups of these crumbs.
-
In a small bowl, combine the Oreo crumbs with the melted butter. Mix well until the crumbs are thoroughly moistened and incorporated.
-
Add the crumb mixture to an 8 or 9-inch springform pan. Distribute them evenly across the bottom and slightly up the sides of the pan. Use the bottom of a cup or a flat object to firmly press the crumbs into a compact, even layer.
-
Place the prepared pan in the preheated oven and pre-bake the crust for 10 minutes.
-
Remove the pan from the oven and allow it to cool completely to room temperature. You can place it in the fridge to speed up this process. Once cooled, reduce the oven temperature to 325º F (160°C).
Cheesecake Filling & Baking:
-
Prepare your water bath safety measure: place the springform pan (with the cooled crust) inside a large oven-safe bag (like a turkey roasting bag). Roll down the top of the bag so it creates a barrier but does not cover the cheesecake. Set aside.
-
In a large mixing bowl, using an electric mixer, beat the 3 packages of room-temperature cream cheese until completely smooth and free of lumps, typically 2-3 minutes.
-
Add the granulated sugar, vanilla extract, and brewed espresso to the cream cheese mixture. Beat again until just combined and smooth.
-
Add the large eggs, one at a time. Beat each egg just until the yolk breaks and is barely incorporated before adding the next. Once all eggs are added, beat the mixture for only 1 additional minute. Avoid over-beating at this stage to prevent cracks. Pour the smooth cheesecake mixture over the cooled Oreo crust in the springform pan.
-
Place the bagged springform pan into a larger 9×13 inch baking pan or roasting pan. Carefully fill the larger pan with about 1 inch of hot water, creating your water bath.
-
Carefully transfer the water bath with the cheesecake into the preheated 325º F (160°C) oven. Bake for 65-85 minutes (see notes below for specific pan sizes). The cheesecake is done when the edges appear set and slightly puffed, but the very center still has a slight wobble when you gently jiggle the pan.
-
Once baked, turn off the oven. Gently remove the springform pan from the water bath and the oven-safe bag. Place the cheesecake (still in its pan) on a baking sheet and return it to the turned-off oven, leaving the oven door slightly ajar. Allow the cheesecake to cool slowly to room temperature inside the oven for 60-90 minutes. This gradual cooling helps prevent cracking.
-
Once completely cooled to room temperature, remove the cheesecake from the oven. Loosely cover it with foil and place it in the refrigerator to chill overnight (at least 8-12 hours) before serving. This is crucial for optimal texture and flavor.
-
Before serving, carefully unmold the cheesecake from the springform pan. Use a small, thin spatula to gently loosen any parts that might be sticking to the sides of the pan. The cheesecake should naturally separate as the pan is opened.
Chocolate Ganache Preparation:
-
Place the chocolate chips in a heatproof bowl.
-
In a small saucepan over medium heat, bring the heavy cream just to a gentle boil. As soon as it boils, remove it from the heat and pour the hot cream over the chocolate chips. Allow the mixture to sit undisturbed for 1 minute to melt the chocolate, then stir vigorously with a whisk or spatula until completely smooth and glossy. Let the ganache cool for 5-7 minutes until slightly thickened but still pourable before adding it to the cheesecake.
To Assemble & Serve:
-
Carefully pour or spoon the cooled chocolate ganache over the top of the chilled cheesecake, using a small spatula to gently spread it evenly to the edges.
-
Garnish with homemade chocolate shavings, if desired. Slice and serve your magnificent espresso coffee cheesecake. Store any leftovers in an airtight container in the refrigerator for up to 5 days.
Notes
- For an 8-inch springform pan, baking time is typically 75-85 minutes.
- For a 9-inch springform pan, baking time is typically 65-75 minutes.
To make instant espresso, simply combine hot water with instant espresso powder according to package directions.
Nutrition Information (per serving)
Carbohydrates: 39g |
Protein: 6g |
Fat: 34g |
Saturated Fat: 19g |
Polyunsaturated Fat: 2g |
Monounsaturated Fat: 8g |
Trans Fat: 1g |
Cholesterol: 136mg |
Sodium: 337mg |
Potassium: 152mg |
Fiber: 1g |
Sugar: 30g |
Vitamin A: 1094IU |
Vitamin C: 1mg |
Calcium: 76mg |
Iron: 1mg
Nutrition Disclosure
All nutritional values are approximate and provided to the reader as a courtesy. Changing ingredients and/or quantities will alter the estimated nutritional calculations.
Like this recipe? We’d love to hear from you! Rate and comment below to share your experience with this delicious espresso coffee cheesecake!