
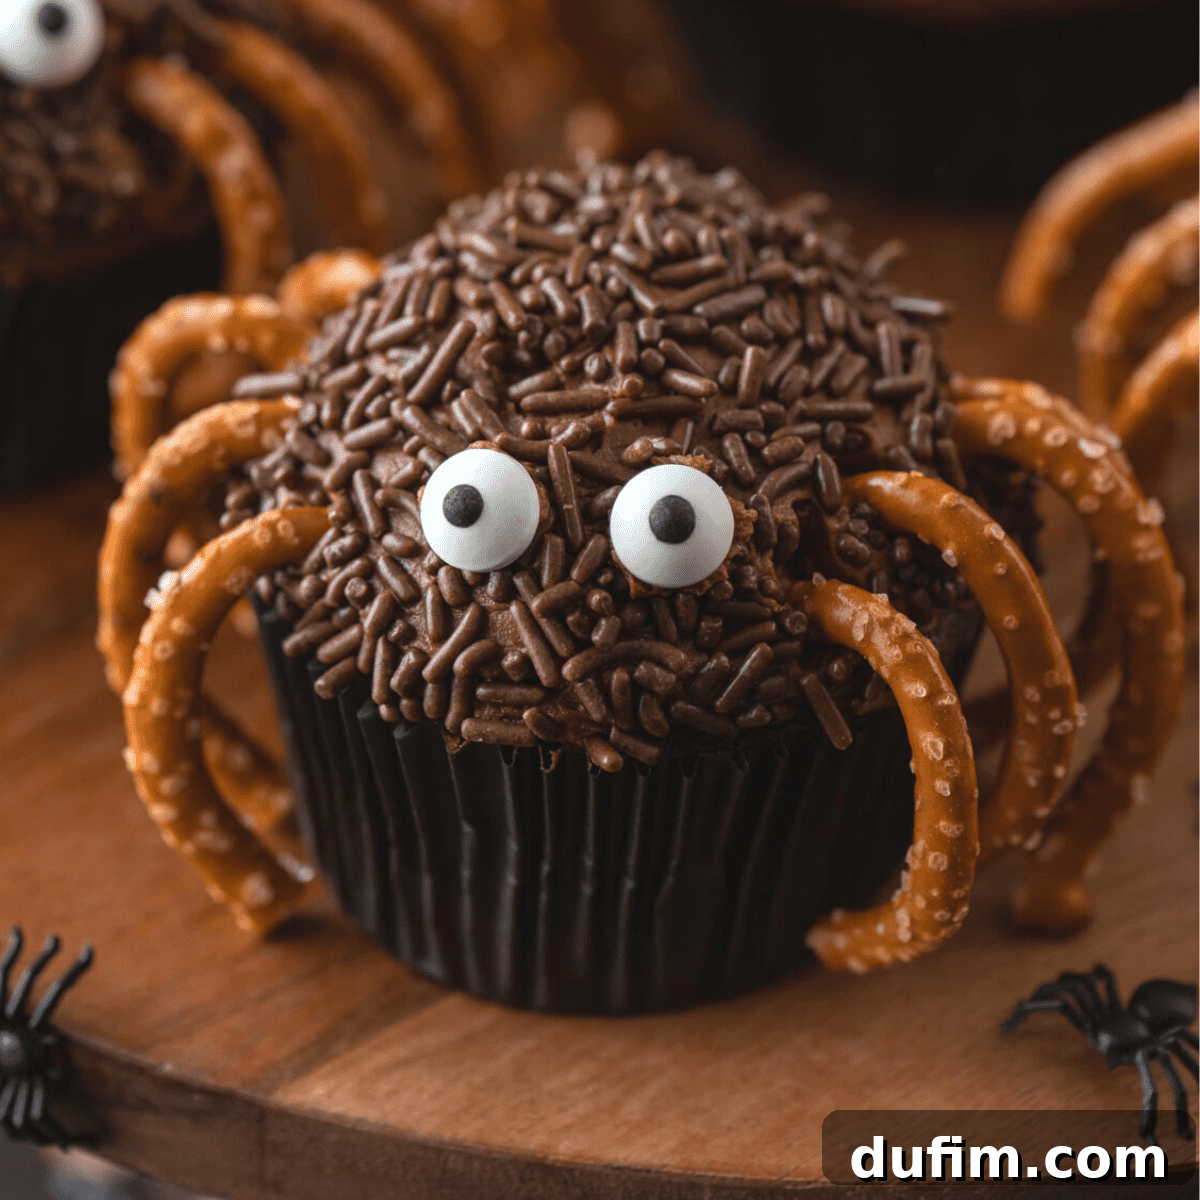
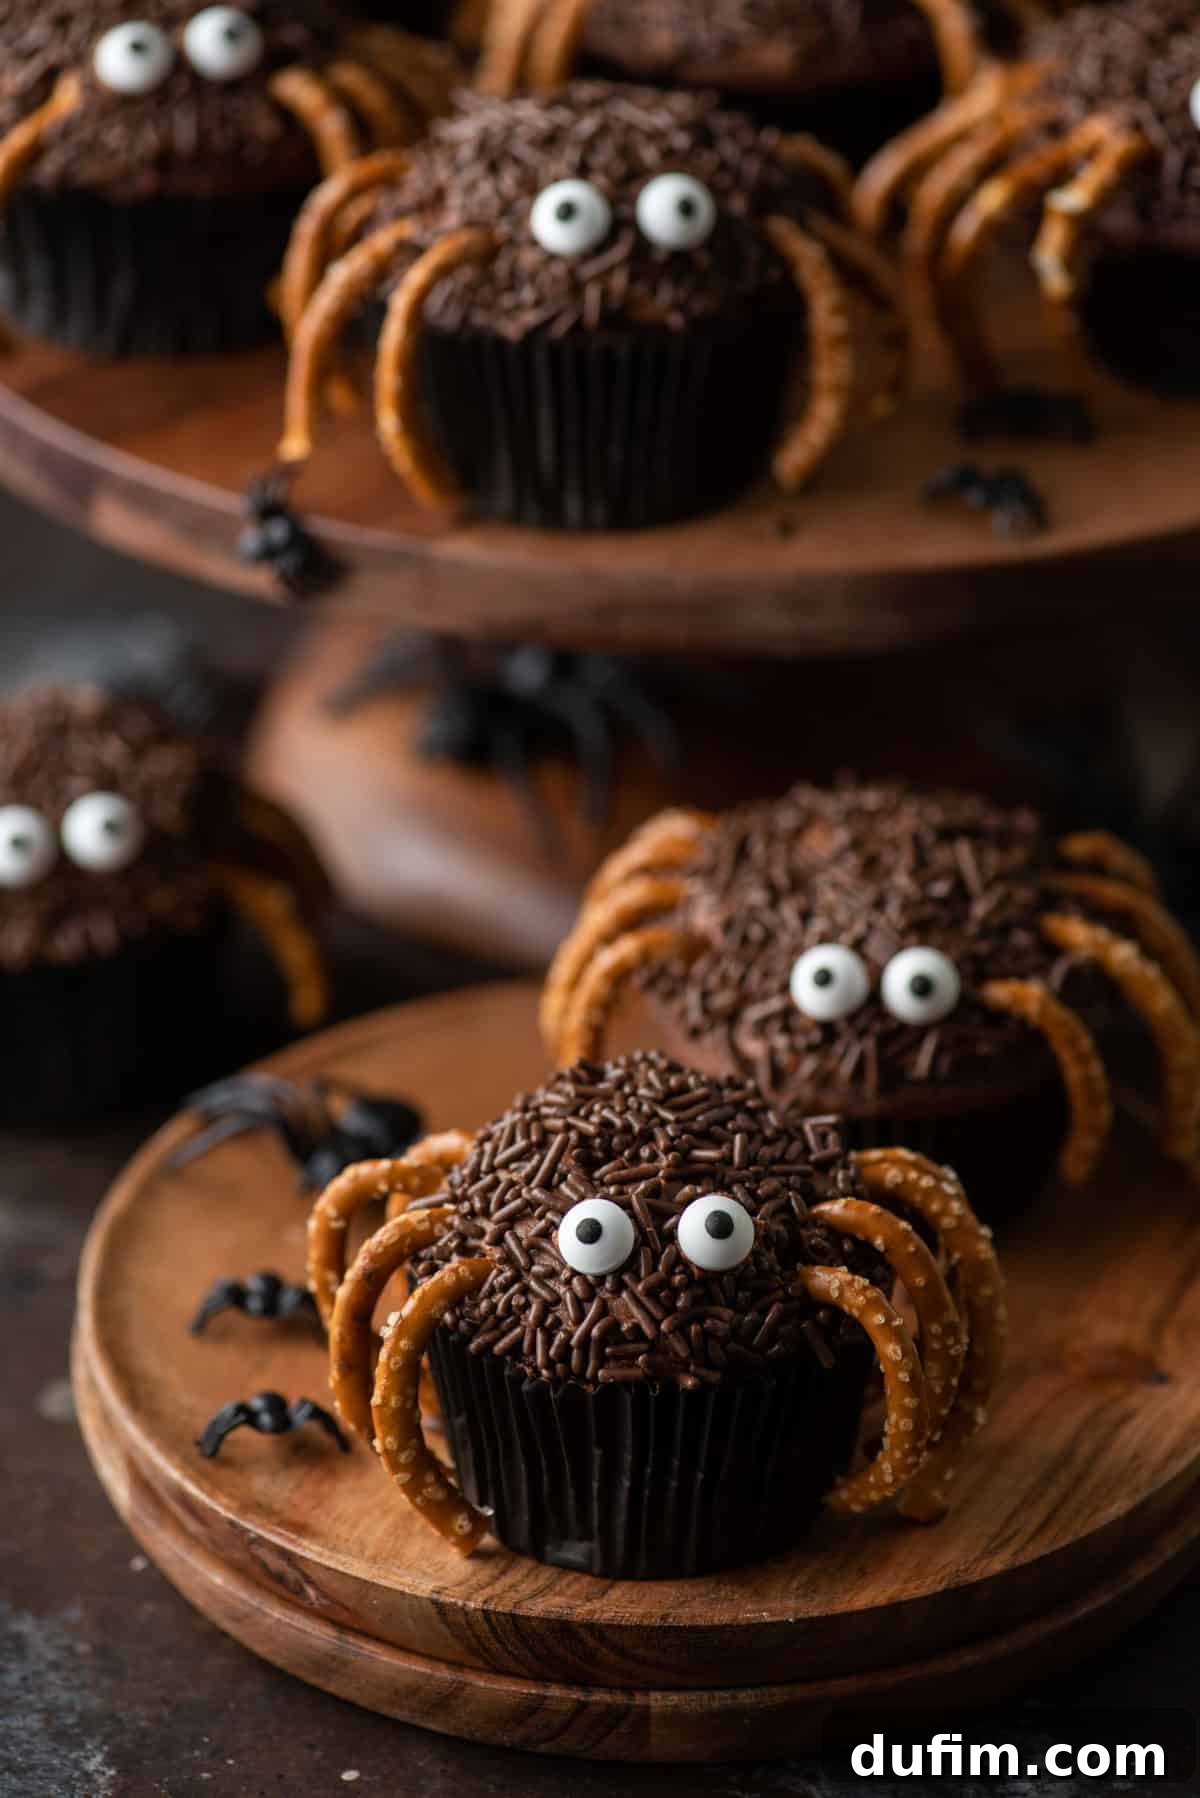
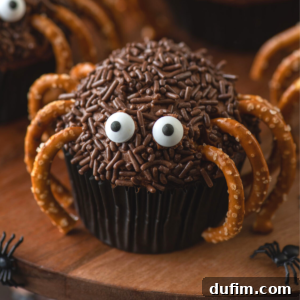
Get ready to charm and spook your guests this Halloween with the most adorable and equally delicious Spider Cupcakes! These treats are more than just cute; they’re a delightful combination of rich, moist chocolate cake and airy chocolate frosting, creatively transformed into friendly eight-legged creatures. Perfect for any Halloween gathering, from school parties to adult celebrations, these cupcakes are surprisingly simple to create and guaranteed to be a hit.
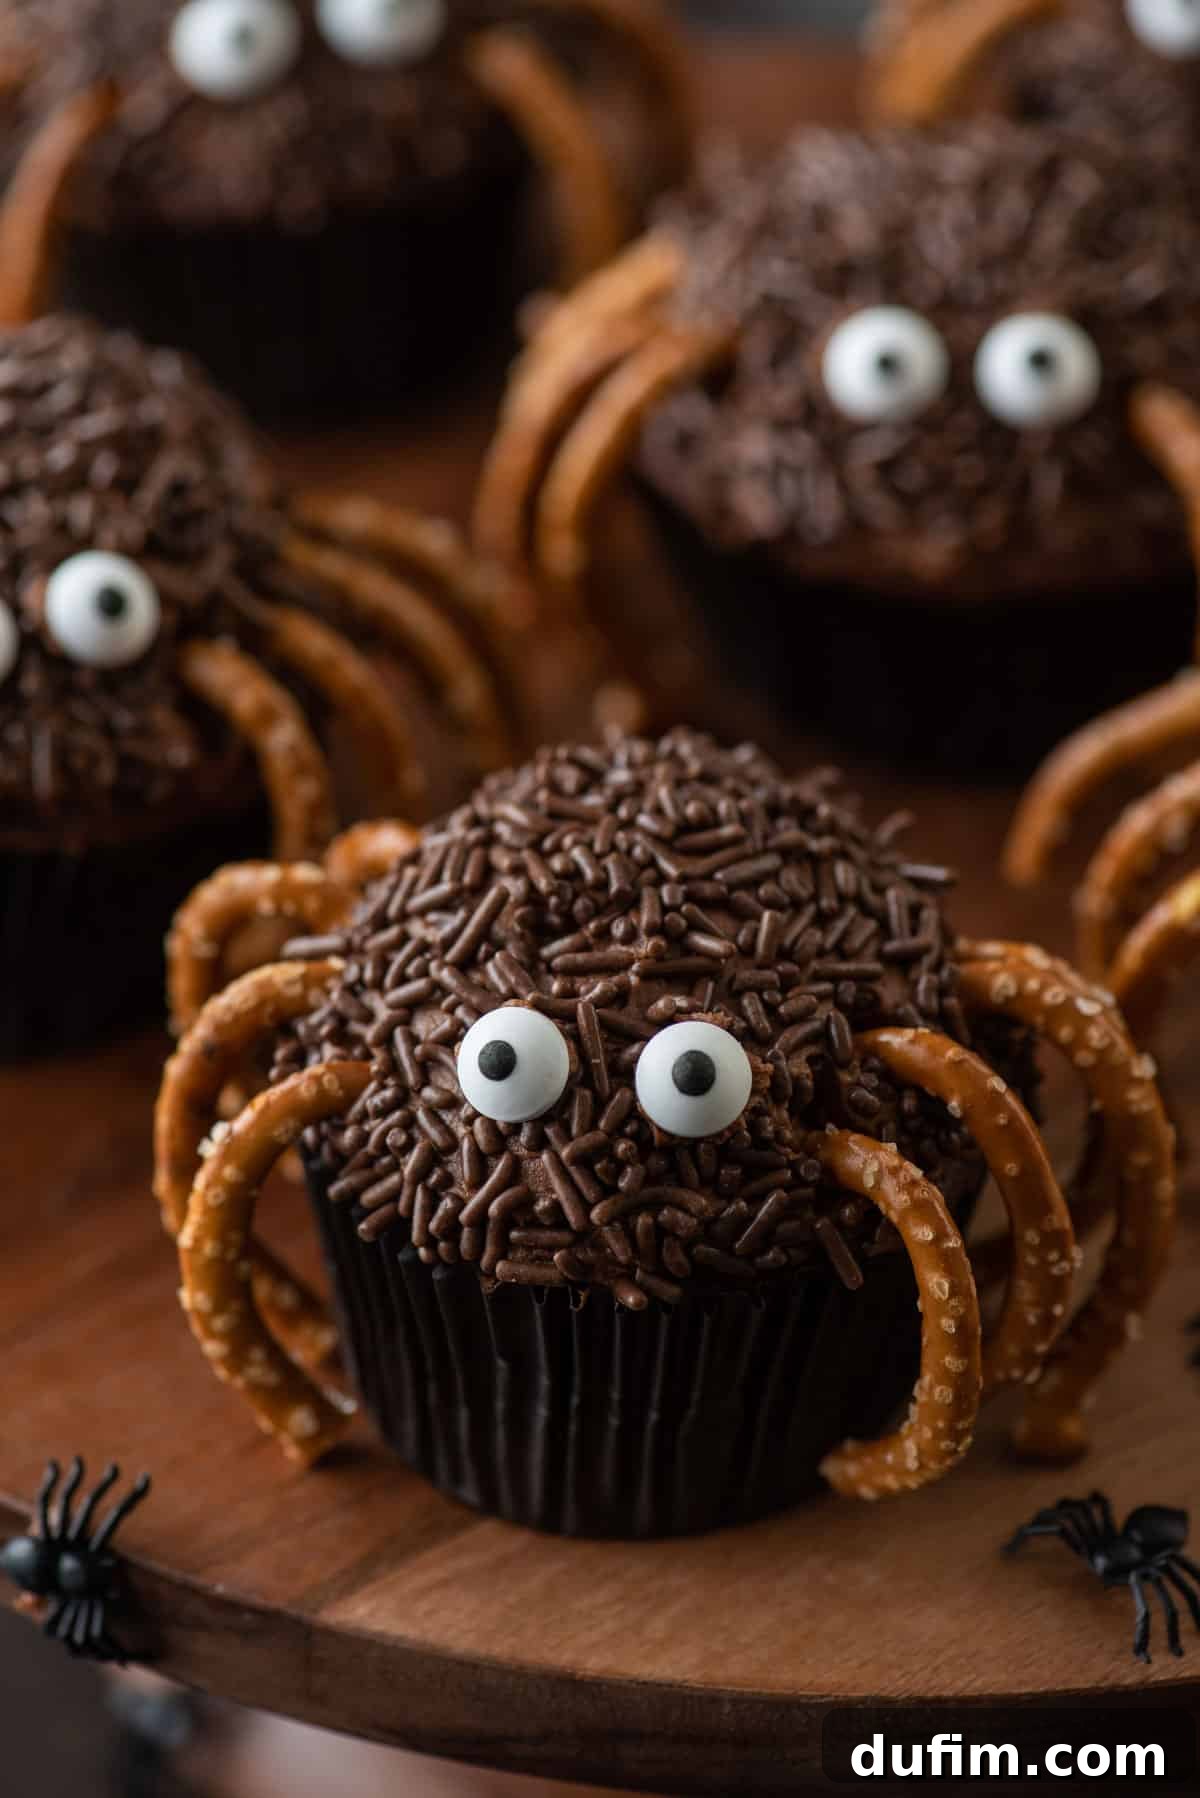
These captivating spider cupcakes begin with a perfectly moist homemade chocolate cupcake base, generously infused with bittersweet chocolate for an exceptionally deep and satisfying flavor. The richness of the chocolate cake is perfectly complemented by a light and fluffy chocolate buttercream frosting, crafted from just a few essential ingredients. The real magic happens with the simple decorations: crunchy pretzel sticks form the spider legs, while whimsical candy eyeballs bring these little critters to life. It’s a recipe that marries irresistible taste with playful presentation, making them a perennial favorite at every Halloween party.
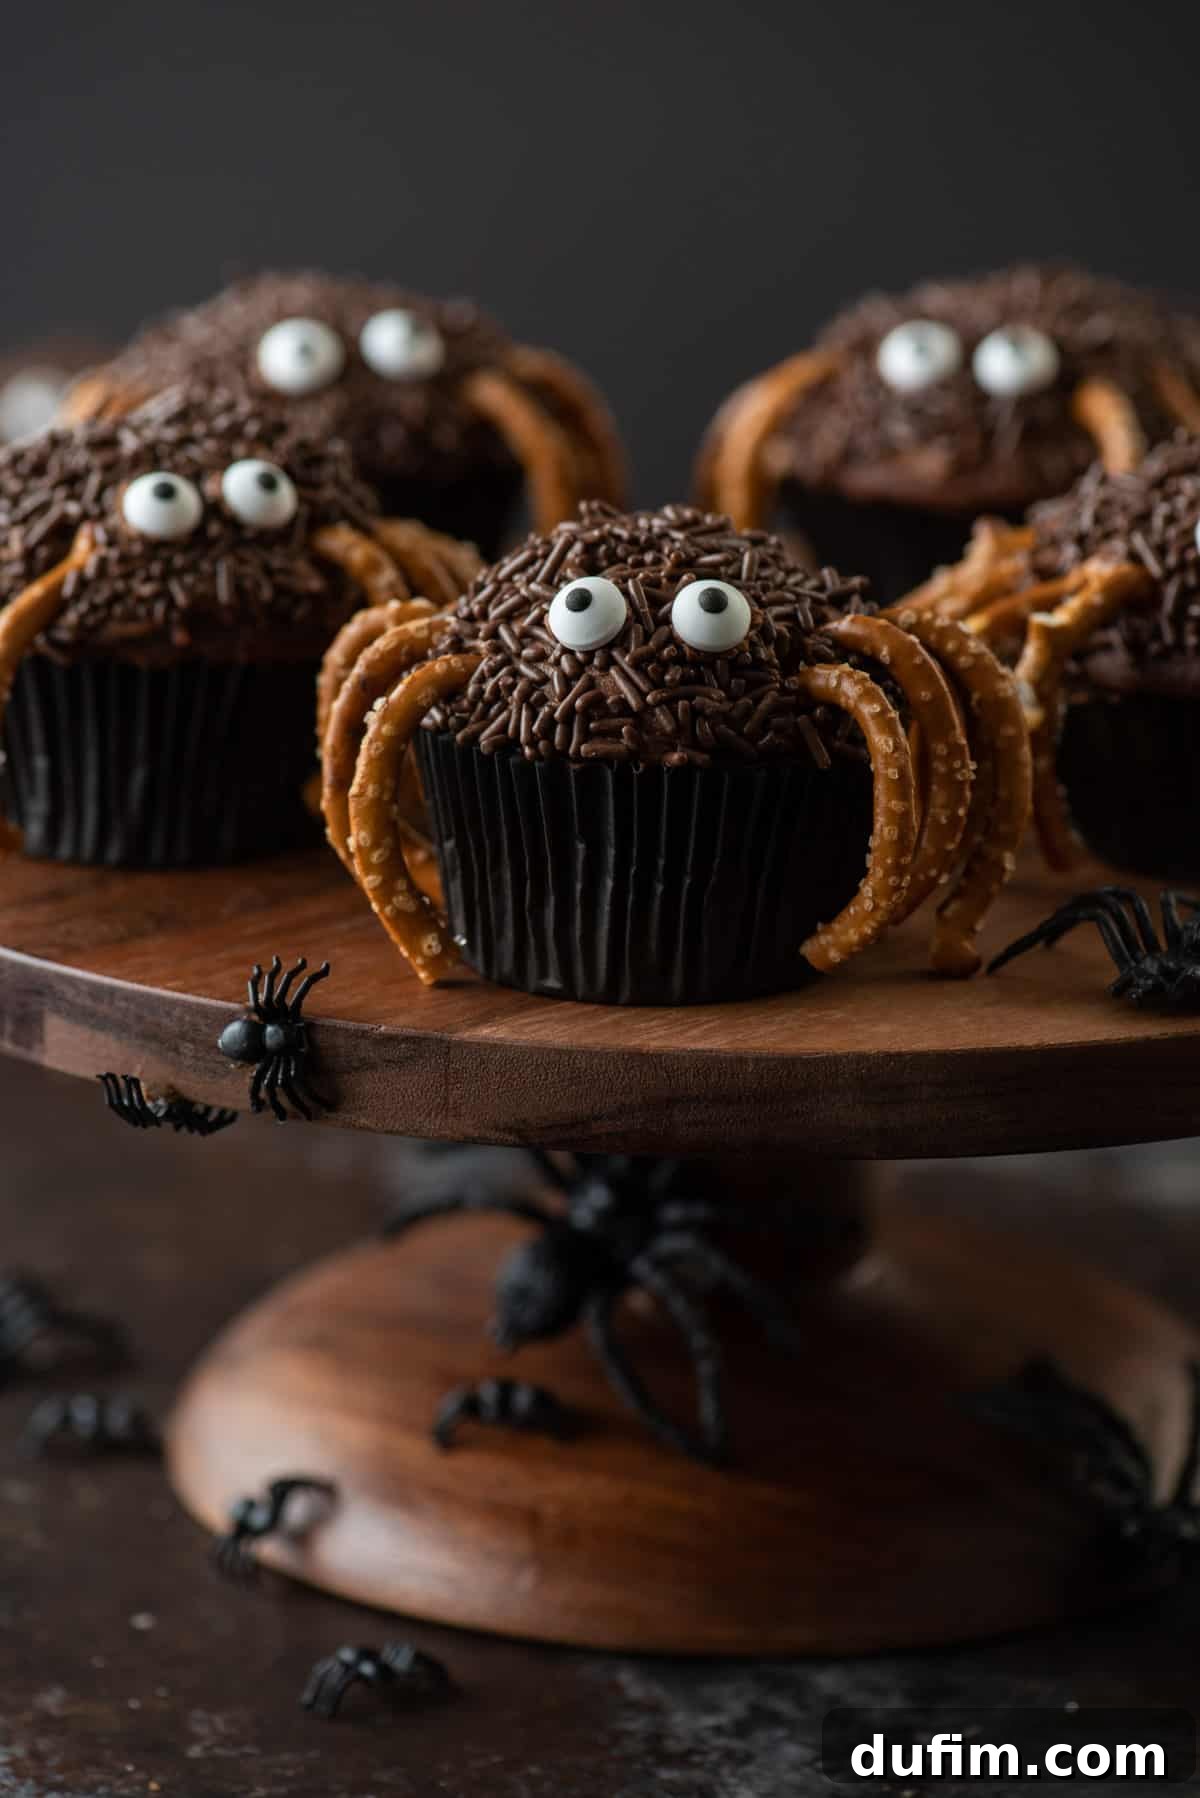
Why These Halloween Cupcakes Will Be Your New Favorite Treat
Our spider cupcakes are consistently a favorite, not just for their charming looks but also for their fantastic flavor and ease of preparation. Here are just a few reasons why you’ll adore making and sharing them:
- Irresistibly Kid-Friendly: Little ghouls and goblins can’t resist these fun Halloween cupcakes, especially the playful candy eyeballs. They’re a fantastic way to get children involved in the kitchen and bring smiles to their faces.
- Surprisingly Simple to Make from Scratch: Despite being entirely homemade, this recipe is designed for ease. You can whip up a batch of these delectable cupcakes and their frosting in under an hour, making them perfect for busy bakers.
- Rich, Deep Chocolate Flavor: We don’t skimp on chocolate! Both the cupcake batter and the buttercream frosting are loaded with natural unsweetened cocoa powder, and the cupcakes also feature a touch of bittersweet chocolate for an unparalleled depth of flavor that chocolate lovers will rave about.
- A Unique and Creative Touch: Stand out from the usual Halloween fare with these distinctive spider designs. They’re cute, slightly spooky, and far more memorable than plain cupcakes.
- Perfect Party Treat: These cupcakes are designed to impress. Their individual portions make them ideal for parties, avoiding the mess of slicing a cake while offering a delightful, personalized dessert.
- Customizable Fun: Easily adapt the decorations or even the cupcake flavor to suit your preferences, making them versatile for any occasion.
Gather Your Ingredients: The Essentials for Spooky Sweetness
Creating these delightful spider cupcakes requires just a few pantry staples for both the rich chocolate cupcakes and the creamy chocolate frosting. You’ll find some ingredients overlap, streamlining your shopping list. Exact measurements are provided in the detailed recipe card below, but here’s a breakdown of what you’ll need and why:
For the Decadent Chocolate Cupcakes
- All-Purpose Flour: The structural backbone of our moist cupcakes.
- Natural Unsweetened Cocoa Powder: Provides the fundamental chocolate flavor. Ensure it’s unsweetened to control the sweetness of the final product.
- Baking Soda & Baking Powder: The dynamic duo that gives our cupcakes their perfect rise and tender crumb.
- Salt: Essential for balancing flavors and enhancing the chocolate.
- Unsalted Butter (Room Temperature): Crucial for a smooth, creamy batter. Room temperature butter creams beautifully with sugar, incorporating air for a light texture.
- Granulated Sugar: Sweetens the cupcakes and contributes to their moistness.
- Bittersweet Chocolate Baking Bar: Elevates the chocolate flavor to another level, providing a rich, deep note that sets these cupcakes apart. Using a high-quality chocolate will make a noticeable difference.
- Large Eggs: Bind the ingredients, add richness, and help with the structure. Ensure they are also at room temperature for better emulsion.
- Buttermilk: The secret to incredibly moist and tender cupcakes. Its acidity reacts with the baking soda, contributing to a soft texture. If you don’t have buttermilk, you can easily make a substitute: add one tablespoon of lemon juice or white vinegar to a liquid measuring cup, then fill to the one-cup mark with whole milk. Stir gently and let it sit for 5 minutes until it slightly curdles.
- Hot Tap Water: Helps to bloom the cocoa powder, intensifying the chocolate flavor, and keeps the batter smooth.
For the Fluffy Chocolate Buttercream Frosting & Decoration
- Unsalted Butter (Room Temperature): The foundation of our creamy frosting. Room temperature butter whips up beautifully, creating a smooth and light texture.
- Natural Unsweetened Cocoa Powder: For a rich chocolate frosting color and taste.
- Powdered Sugar (Confectioners’ Sugar): Provides sweetness and structure to the frosting. Sifting it prevents lumps.
- Heavy Whipping Cream: Makes the frosting incredibly smooth, creamy, and pipeable, allowing for easy spreading.
- Vanilla Extract: Enhances the chocolate flavor and adds a touch of warmth.
- Salt: A pinch of salt balances the sweetness and chocolate intensity in the frosting.
- Brown Jimmie Sprinkles: These add a fuzzy, textured “body” to your spiders. We recommend these brown jimmie sprinkles for the best effect.
- Pretzels: Used for the spider legs. “Thin Twists” pretzels are ideal as their larger size ensures the legs extend nicely to the bottom of the cupcake liners, creating a more realistic spider silhouette.
- Candy Eyeballs: The final, most charming touch that brings your spider cupcakes to life!
Why “Thin Twist” Pretzels Make the Best Spider Legs
For these spider cupcakes, we specifically recommend “thin twist” pretzels. These aren’t your average small pretzels; they are notably larger, offering ample length for the spider legs. The extended length allows the pretzel legs to reach gracefully to the base of the cupcake liners, providing a more convincing and aesthetically pleasing spider appearance. This subtle detail truly elevates the visual impact of your Halloween treats.
Can I Use a Box Cake Mix for the Cupcakes?
Absolutely! While our homemade recipe is straightforward and yields incredibly delicious results, we understand that sometimes you need a shortcut. In a pinch, you can certainly use a good quality box cake mix for the cupcake base. If you’re looking for a “semi-homemade” option that elevates a basic box mix, we highly recommend trying this doctored-up chocolate cupcake recipe, which enhances the flavor and texture significantly. This flexibility makes these spider cupcakes accessible to all bakers, regardless of their experience level or time constraints.
How to Craft Your Spooky Spider Cupcakes: A Step-by-Step Guide
Even with their impressive appearance, these Halloween cupcakes are remarkably quick and easy to assemble. We’ll break down the process into three simple stages: baking the cupcakes, preparing the frosting, and finally, assembling your adorable spiders.
Phase 1: Bake the Perfectly Moist Chocolate Cupcakes
- Preheat Oven & Prepare Pan: Begin by preheating your oven to 350°F (175°C). Line a standard 12-cup muffin pan with paper cupcake liners. This ensures easy removal and cleanup.
- Melt the Bittersweet Chocolate: Roughly chop your bittersweet chocolate baking bar into small, uniform pieces. Place them in a microwave-safe bowl. Microwave on 50% power for 2 minutes, then stir. Continue microwaving in 30-second intervals at 50% power, stirring between each, until the chocolate is fully melted and smooth. Set aside to cool to room temperature. This prevents it from cooking the eggs when added to the batter.
- Combine Dry Ingredients: In a medium mixing bowl, whisk together the all-purpose flour, natural unsweetened cocoa powder, baking soda, baking powder, and salt. Set this mixture aside.
- Cream Butter & Sugar: In a separate large mixing bowl, using an electric mixer, beat the room temperature unsalted butter and granulated sugar together on medium-high speed for about 2 minutes, or until the mixture is pale, light, and fluffy.
- Incorporate Eggs & Cooled Chocolate: Add the large eggs one at a time, beating well after each addition. Then, pour in the cooled melted bittersweet chocolate and beat for another 30 seconds until just combined. Scrape down the sides of the bowl as needed.
- Alternate Wet & Dry Ingredients: With the mixer on low speed, begin adding the dry ingredient mixture and buttermilk alternately to the wet ingredients. Start by adding half of the buttermilk, mix for about 20 seconds. Then add half of the dry ingredients and mix until just incorporated. Next, add the remaining buttermilk along with the hot tap water, mixing until liquid is just combined. Finish by adding the remaining dry ingredients, beating on low speed until the batter is smooth and no streaks of flour remain. Be careful not to overmix, as this can lead to tough cupcakes.
- Bake to Perfection: Divide the cupcake batter evenly among the prepared muffin liners, filling each approximately 1/2 full. Bake for 17 to 19 minutes. The cupcakes are done when a wooden toothpick inserted into the center comes out with just a few moist crumbs attached. If it comes out clean, they are slightly over-baked.
- Cool Completely: Remove the muffin pan from the oven and let the cupcakes cool in the pan for 5-10 minutes before transferring them to a wire rack to cool completely. It is crucial for them to be completely cool before frosting, otherwise, your frosting will melt.
Phase 2: Create the Fluffy Chocolate Buttercream Frosting
- Whip the Butter: In a large mixing bowl, beat the room temperature unsalted butter on high speed with an electric mixer for a full 3 minutes. This step is vital for achieving a light and airy frosting texture.
- Add Dry Ingredients: Sift in the natural unsweetened cocoa powder and 3 cups of the powdered sugar. Sifting these ingredients is key to preventing lumps and creating a truly smooth, fluffy frosting. Beat on low speed until the ingredients are just combined and the frosting starts to thicken.
- Mix in Liquid & Flavor: Add 3 tablespoons of heavy whipping cream, vanilla extract, and salt to the frosting mixture. Beat on low speed until fully incorporated and creamy.
- Adjust Consistency: Gradually add the remaining 1-2 cups of powdered sugar, mixing on low speed until your desired frosting consistency is reached. If the frosting becomes too thick, you can beat in an additional tablespoon of heavy cream until it’s perfectly spreadable. Conversely, if it’s too thin, add a bit more powdered sugar, one tablespoon at a time.
Phase 3: Assemble Your Adorable Spider Cupcakes
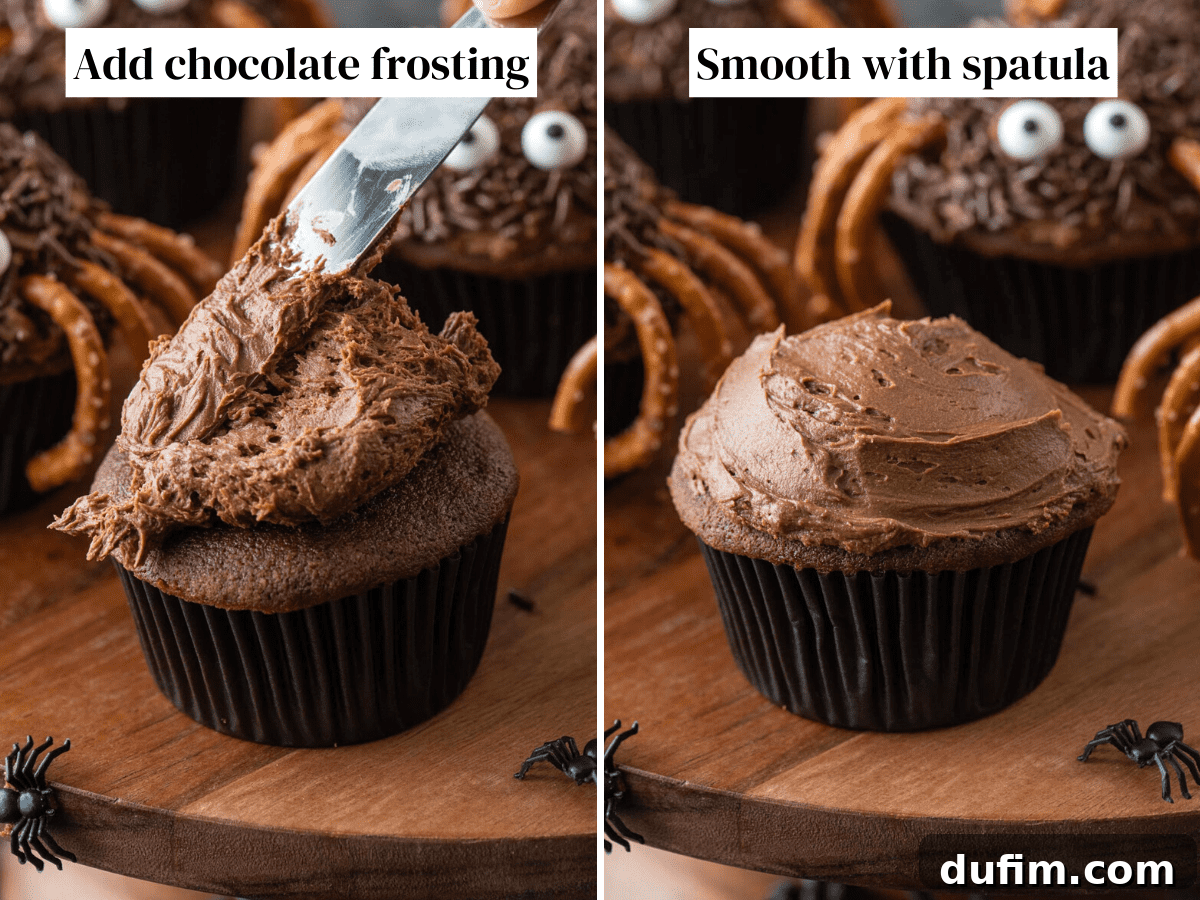
- Frost the Cupcakes: Once the cupcakes are completely cool, spread a generous dollop of the chocolate buttercream frosting onto the top of each cupcake. Use a small offset spatula or the back of a spoon to smooth the frosting evenly, creating a slightly domed surface for your spider’s body.
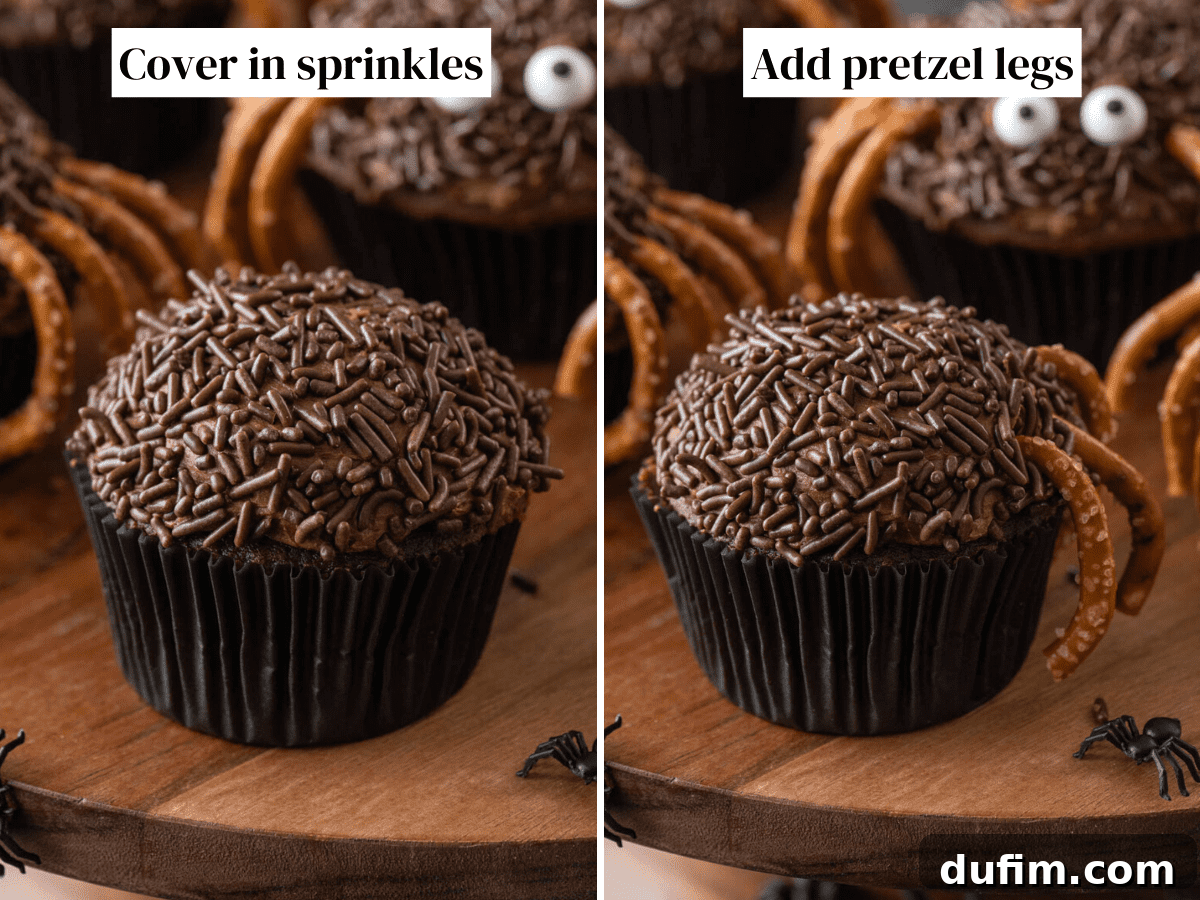
- Add the Sprinkles (Spider Body): Pour your brown jimmie sprinkles into a shallow bowl. Take a frosted cupcake, turn it upside down, and gently press the frosting into the sprinkles. This creates a wonderful textured, “furry” spider body.
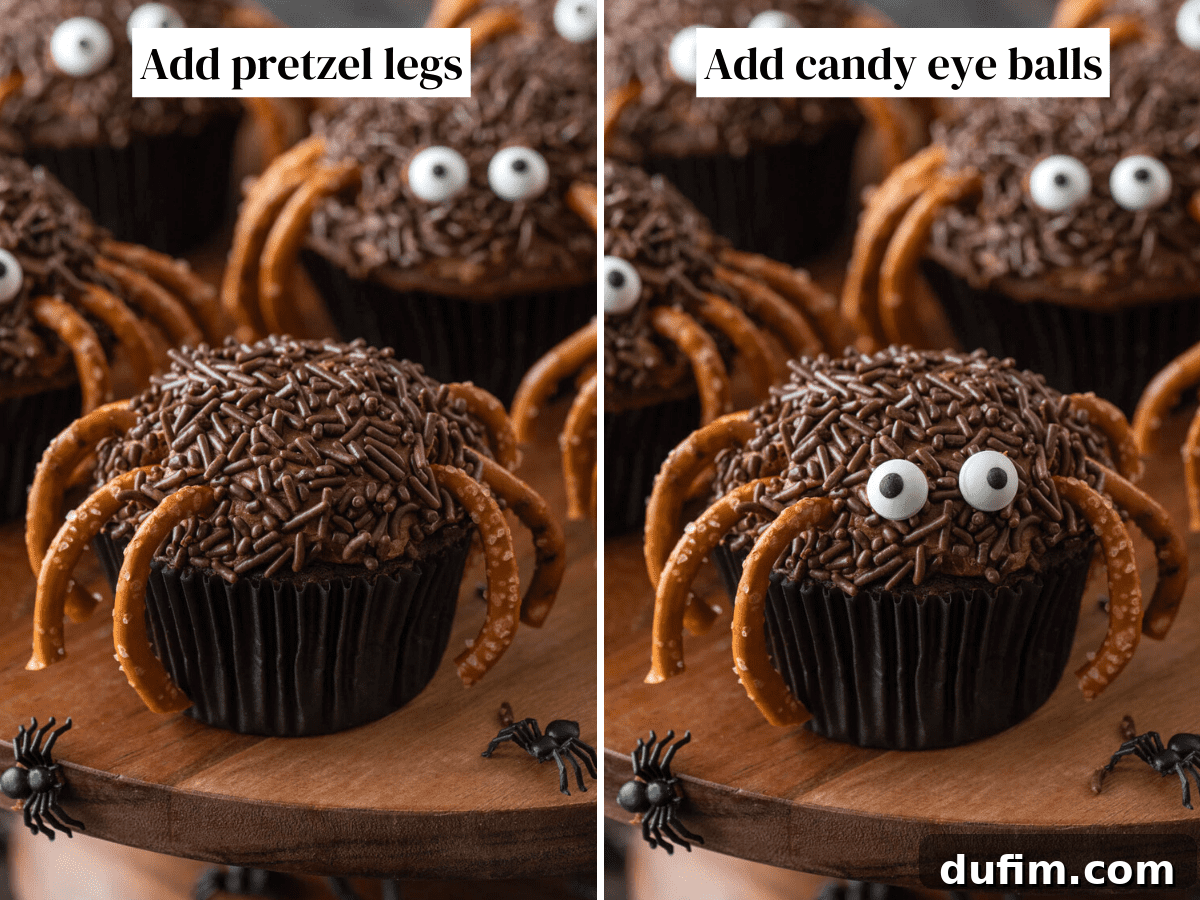
- Attach the Pretzel Legs: Carefully break the thin twist pretzels into smaller, leg-sized pieces. For each spider, gently press four pretzel pieces into each side of the cupcake, totaling eight legs. Arrange them so they look like they are crawling.
- Place the Candy Eyeballs: To attach the candy eyeballs, dab a tiny amount of frosting on the back of each eyeball. Carefully place two (or more, for an extra spooky effect!) candy eyeballs onto the front of each cupcake, just above the pretzel legs.
Essential Tips for Perfect Spider Cupcakes Every Time
Achieving perfectly moist cupcakes and fluffy, flavorful frosting is easier than you think, especially with these tried-and-true tips:
- Knowing When Your Cupcakes Are Done: The golden rule for chocolate cupcakes is to avoid over-baking. Insert a wooden toothpick into the center of a cupcake; it should come out with just a few moist crumbs clinging to it. A completely clean toothpick indicates they might be slightly over-baked, leading to a drier texture.
- The Magic of Sifting: For the ultimate smooth and light frosting, always sift your powdered sugar and cocoa powder. This simple step breaks up any clumps, ensuring a silky, airy buttercream without any gritty bits.
- Adjusting Frosting Consistency: Your frosting should be thick enough to hold its shape but soft enough to spread easily. If it turns out too thick after adding the initial powdered sugar, gradually beat in an additional tablespoon of heavy cream until it reaches your desired consistency. If it’s too thin, add more powdered sugar, one tablespoon at a time, until it stiffens up.
- Room Temperature Ingredients: For both the cupcakes and frosting, ensuring your butter and eggs are at room temperature is crucial. Room temperature ingredients emulsify better, creating a smoother, more uniform batter and a truly fluffy frosting.
- Don’t Overmix the Batter: Once you add the flour, mix the cupcake batter only until just combined. Overmixing develops the gluten in the flour, resulting in tough, dense cupcakes.
- Cool Completely Before Frosting: Patience is key! Frosting warm cupcakes will inevitably lead to melted, messy frosting. Ensure your cupcakes are entirely cool before you begin decorating.
Creative Variations & Customizations for Your Spooky Spiders
While our classic chocolate spider cupcakes are a guaranteed hit, don’t hesitate to get creative with these fun variations:
- Explore Different Cupcake Flavors: The spider decoration is versatile! You can easily adapt these cute creatures to other cupcake bases. Consider making them with Vanilla Cupcakes for a contrasting base, or try Peanut Butter Cupcakes for a delicious flavor twist that pairs wonderfully with chocolate.
- Alternative Spider Legs: Licorice & More: Pretzels offer a great crunch, but if you prefer a softer texture or a different look, black shoestring licorice makes excellent spider legs. Simply cut them to size and insert them into the frosting. If you happen to have black shoestring licorice on hand, you might also enjoy making our fun Oreo Spiders! Other ideas include chocolate-covered pretzel sticks (for an extra indulgence), thin chocolate cookie sticks, or even edible black marker drawn on white chocolate sticks.
- Colorful Frosting: While traditional black or brown frosting gives a realistic spider look, you can always add a few drops of food coloring to your buttercream to create vibrant purple, green, or orange spiders for an even more festive Halloween vibe!
- Web Effects: For an extra spooky touch, pipe thin lines of white frosting in a web pattern over the chocolate base before adding the sprinkles.
- Different Sprinkles: Instead of brown jimmie sprinkles, try chocolate sprinkles, crumbled Oreo cookies, or even black sanding sugar for varying textures and looks.
Storage Tips for Freshness
To ensure your spider cupcakes remain as delicious as possible, proper storage is key:
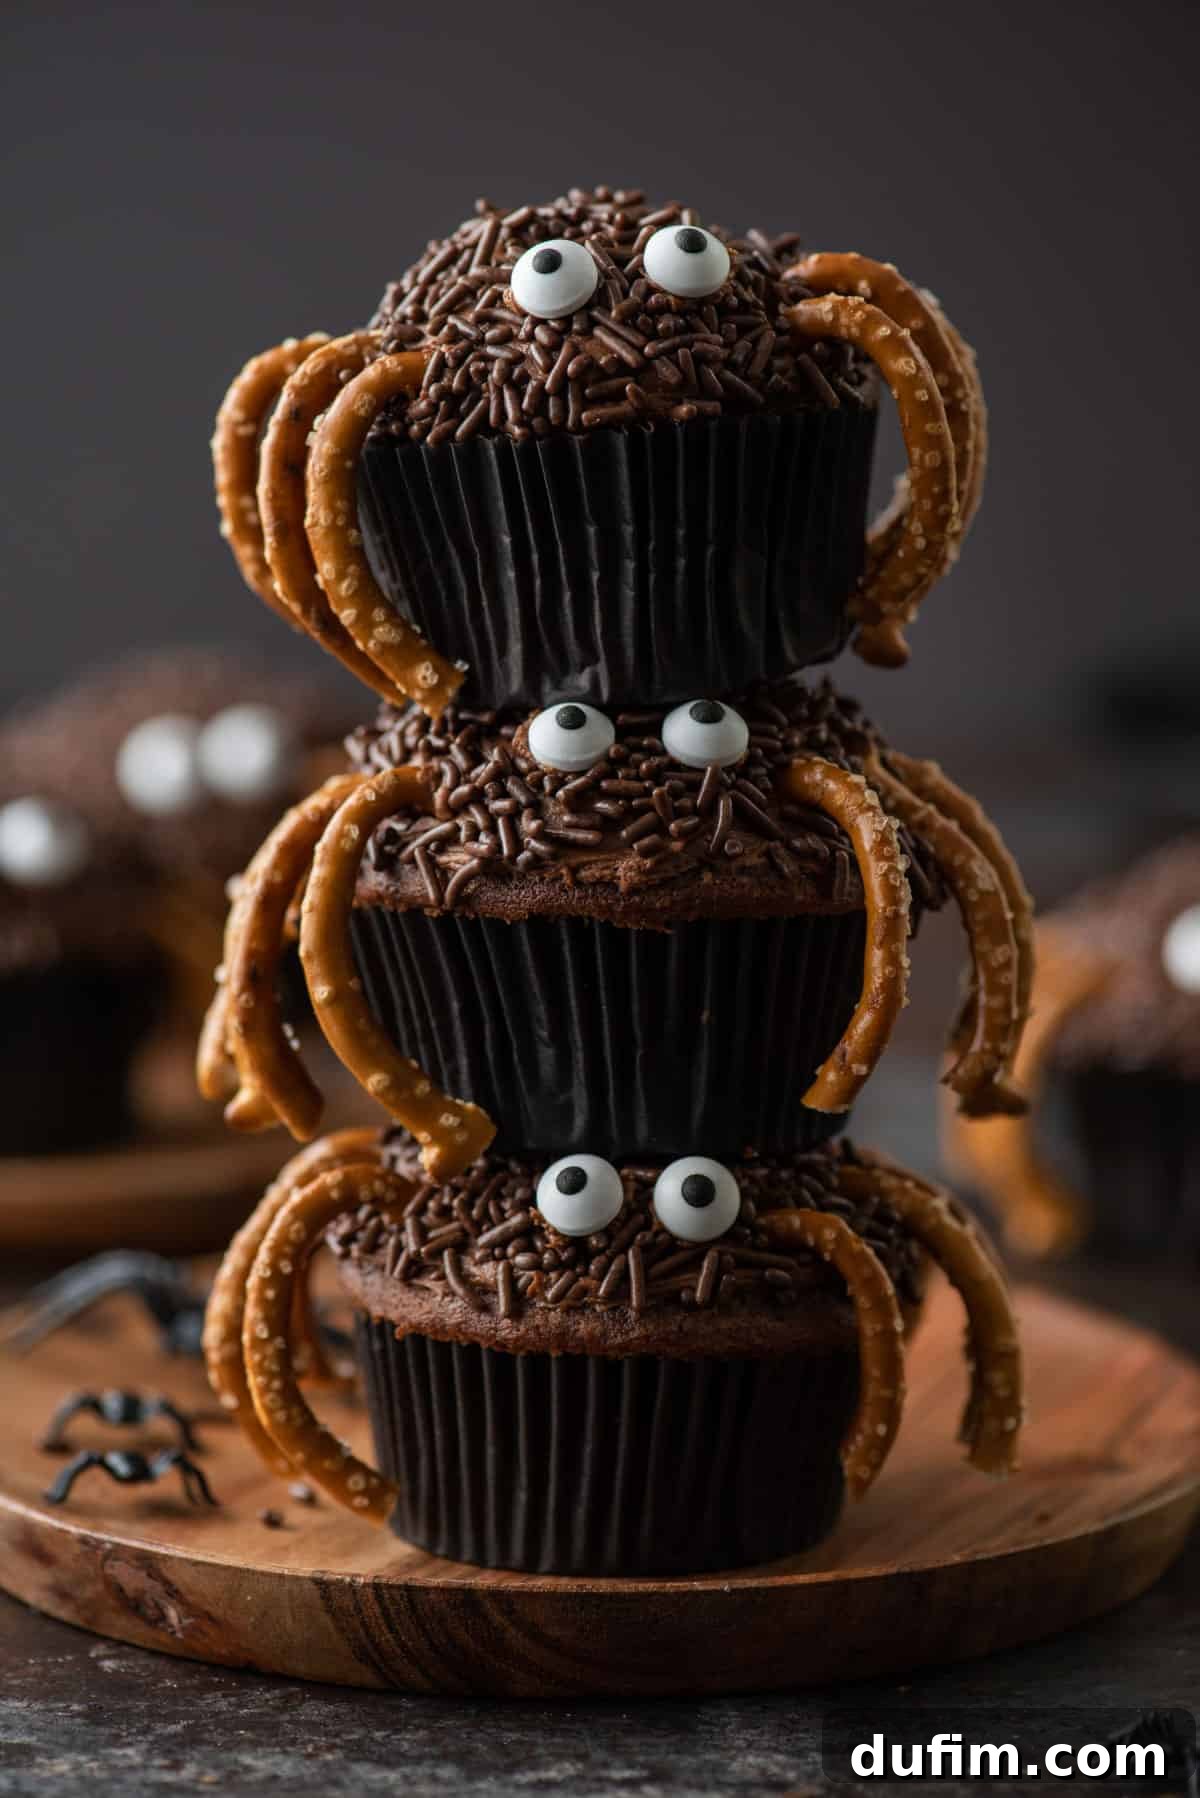
- Immediate Enjoyment: Due to the luscious buttercream frosting, these Halloween cupcakes are truly at their best when enjoyed on the day they are made. The freshness of the cake and the texture of the frosting are optimal.
- Short-Term Storage: If you have leftovers or need to make them a day in advance, store the frosted cupcakes in an airtight container at room temperature for up to 2 days. The airtight seal will help prevent them from drying out. Avoid refrigerating, as it can dry out the cake and stiffen the frosting.
- Advance Preparation: For those who like to plan ahead, you can bake the chocolate cupcakes a day or two in advance and store them unfrosted in an airtight container at room temperature. Prepare the chocolate frosting just before your event, and then assemble the spider cupcakes closer to serving time for the freshest taste and appearance. This strategy is perfect for party planning!
- Freezing (Unfrosted): You can freeze the unfrosted cupcakes for longer storage. Once completely cool, wrap each cupcake individually in plastic wrap, then place them in a freezer-safe bag or container. They can be frozen for up to 2-3 months. Thaw them at room temperature before frosting and decorating.
More Spooktacular Halloween Desserts to Try
If you’re looking for more festive treats to round out your Halloween celebration, explore some of our other favorite spooky recipes:
- Classic Halloween Cookies
- Whimsical Witch Hat Cookies
- Adorable Ghost Cupcakes
- Irresistible Peanut Butter Spider Cookies
Tap stars to rate!
Spider Cupcakes
Beth
25 minutes
19 minutes
44 minutes
24 cupcakes
Equipment
-
Glass Mixing Bowl
-
Spatula
-
Muffin Pan
-
Electric Mixer
Ingredients
For the Cupcakes
- 2 ½ cups (300g) all-purpose flour
- ⅓ cup (28g) natural unsweetened cocoa powder
- ½ tsp baking soda
- 1 tsp baking powder
- 1 tsp salt
- 1 stick unsalted butter, room temperature (1/2 cup)
- 1 ½ cups (297g) granulated sugar
- 3 oz bittersweet chocolate baking bar, melted & cooled
- 2 large eggs
- 1 cup (236ml) buttermilk
- ½ cup (118ml) hot tap water
For the Chocolate Frosting & Decorations
- 2 cups (452g) unsalted butter, 4 sticks, room temperature
- 1 cup (84g) natural unsweetened cocoa powder
- 4-5 cups (454-567g) powdered sugar
- 3-4 Tbsp heavy whipping cream
- 1 tsp vanilla extract
- ½ tsp salt
- Brown jimmie sprinkles
- Pretzels, Thin Twists recommended for longer legs
- Candy eyeballs
Instructions
For the Cupcakes
-
Preheat the oven to 350º F (175°C). Line a muffin pan with cupcake liners.
-
Roughly chop the bittersweet chocolate baking bar into smaller pieces. Place in a microwave-safe bowl and microwave for 2 minutes on 50% power. Stir and repeat until melted. Set aside to cool completely.
-
In a mixing bowl, combine the all-purpose flour, unsweetened natural cocoa powder, baking soda, baking powder, and salt. Set aside.
-
In a separate mixing bowl, beat the unsalted butter and granulated sugar with an electric mixer for 2 minutes, until pale and fluffy. Add in the eggs and cooled melted chocolate, beat again for 30 seconds until just combined.
-
Add in half of the buttermilk, beat for about 20 seconds. Add in half of the dry ingredients, beat until just combined. Add the remaining buttermilk plus the hot water, beat just until the liquid is mixed in. Then add the remaining dry ingredients and beat on low speed until combined, ensuring not to overmix.
-
Fill the muffin liners 1/2 full with batter. Bake for 17-19 minutes at 350º F (175°C) or until a toothpick inserted into the center comes out with just a few moist crumbs. Allow the cupcakes to cool completely on a wire rack before adding the frosting.
For the Chocolate Frosting
-
In a mixing bowl, beat the room temperature butter on high speed for 3 minutes until light and fluffy.
-
Sift in the cocoa powder and 3 cups of powdered sugar. Beat the frosting on low speed until combined and thick. Sifting helps prevent clumps and ensures a light, fluffy frosting.
-
Mix in 3 tablespoons of heavy cream, vanilla extract, and salt.
-
Add in the additional powdered sugar (1-2 cups), mixing on low speed until desired consistency is reached. If the frosting is too thick, beat in an additional tablespoon of heavy cream as needed.
To Assemble the Spider Cupcakes
-
Spread a dollop of chocolate frosting on each cooled cupcake, smoothing it with a spatula to create a slightly domed surface.
-
Dump the brown jimmie sprinkles into a shallow bowl. Turn each frosted cupcake upside down into the bowl and lightly press the frosting into the sprinkles to coat and create a textured spider body.
-
Break pretzels into appropriate lengths for spider legs (aim for 8 legs per cupcake). Gently press 4 pretzel pieces into each side of the cupcake, totaling 8 legs, ensuring they are securely placed.
-
Use a small dot of frosting on the back of each candy eyeball to attach them to the front of the cupcake, above the pretzel legs, bringing your spider to life.
Notes
Nutrition
Carbohydrates: 48g |
Protein: 3g |
Fat: 4g |
Saturated Fat: 2g |
Polyunsaturated Fat: 0.2g |
Monounsaturated Fat: 1g |
Trans Fat: 0.01g |
Cholesterol: 18mg |
Sodium: 204mg |
Potassium: 128mg |
Fiber: 2g |
Sugar: 34g |
Vitamin A: 71IU |
Vitamin C: 0.01mg |
Calcium: 35mg |
Iron: 2mg
Nutrition Disclosure
All nutritional values are approximate and provided to the reader as a courtesy. Changing ingredients and/or quantities will alter the estimated nutritional calculations.
Like this recipe? Rate and comment below!