
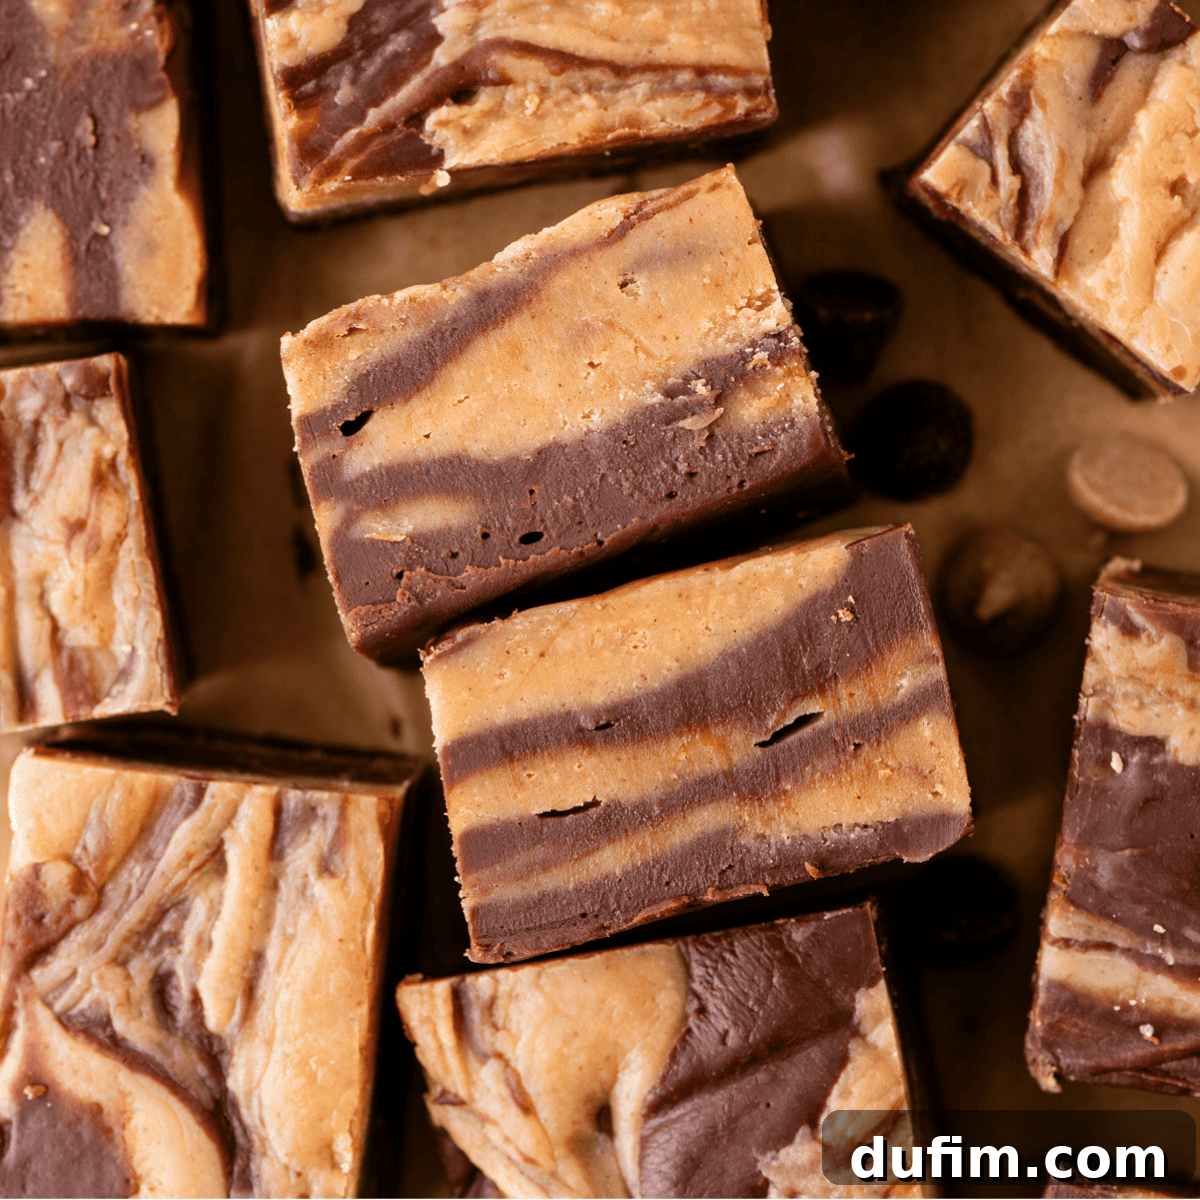
The Ultimate Guide to Perfectly Swirled Chocolate Peanut Butter Fudge
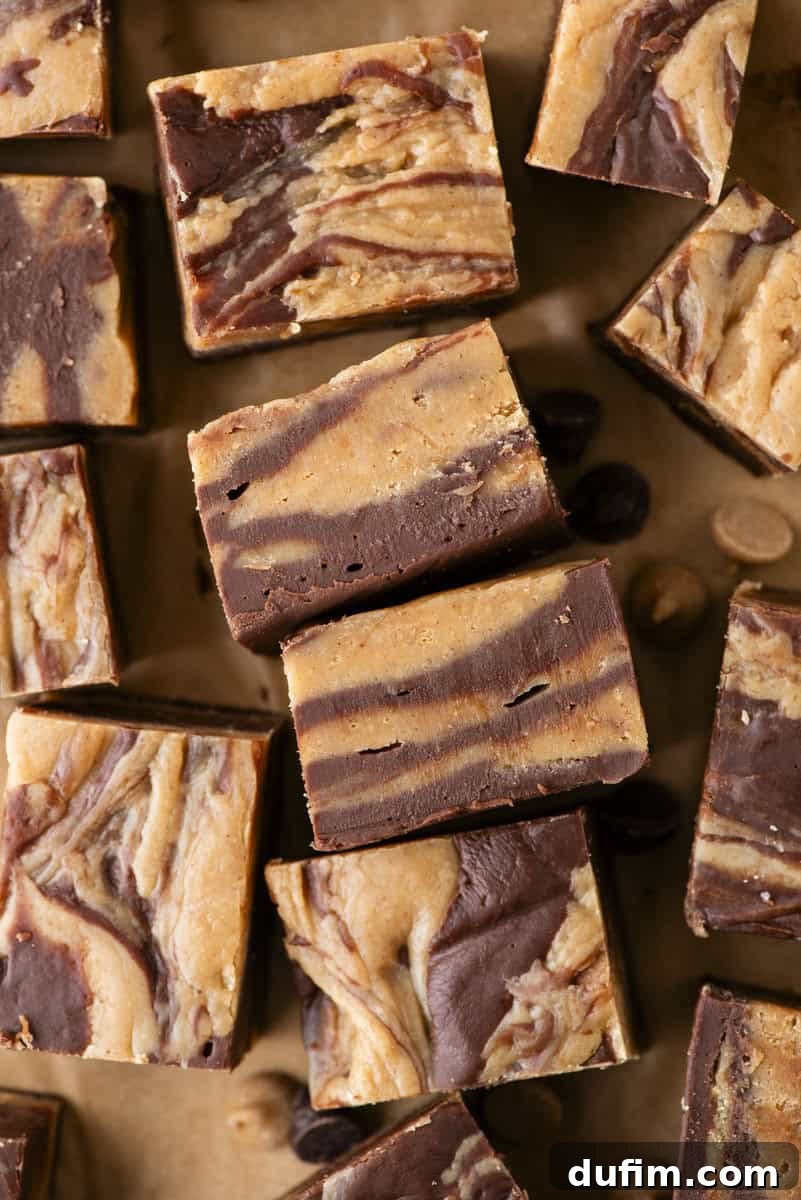
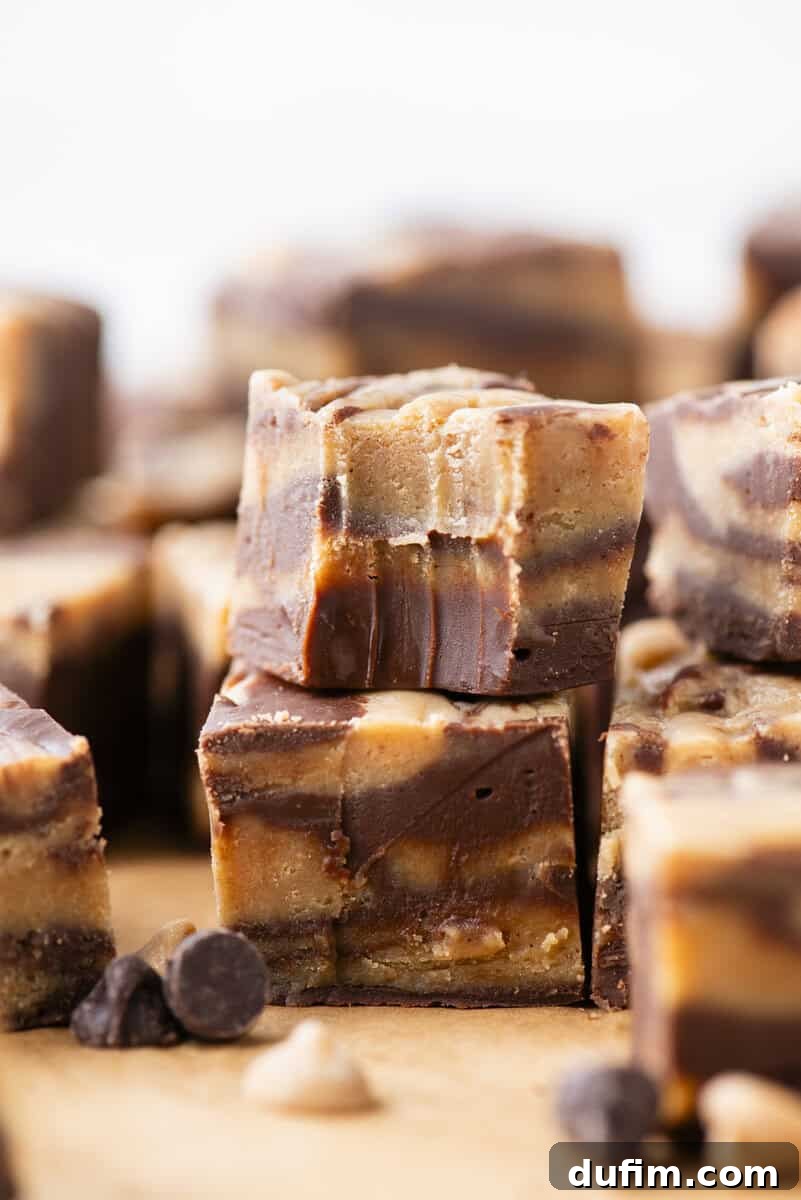
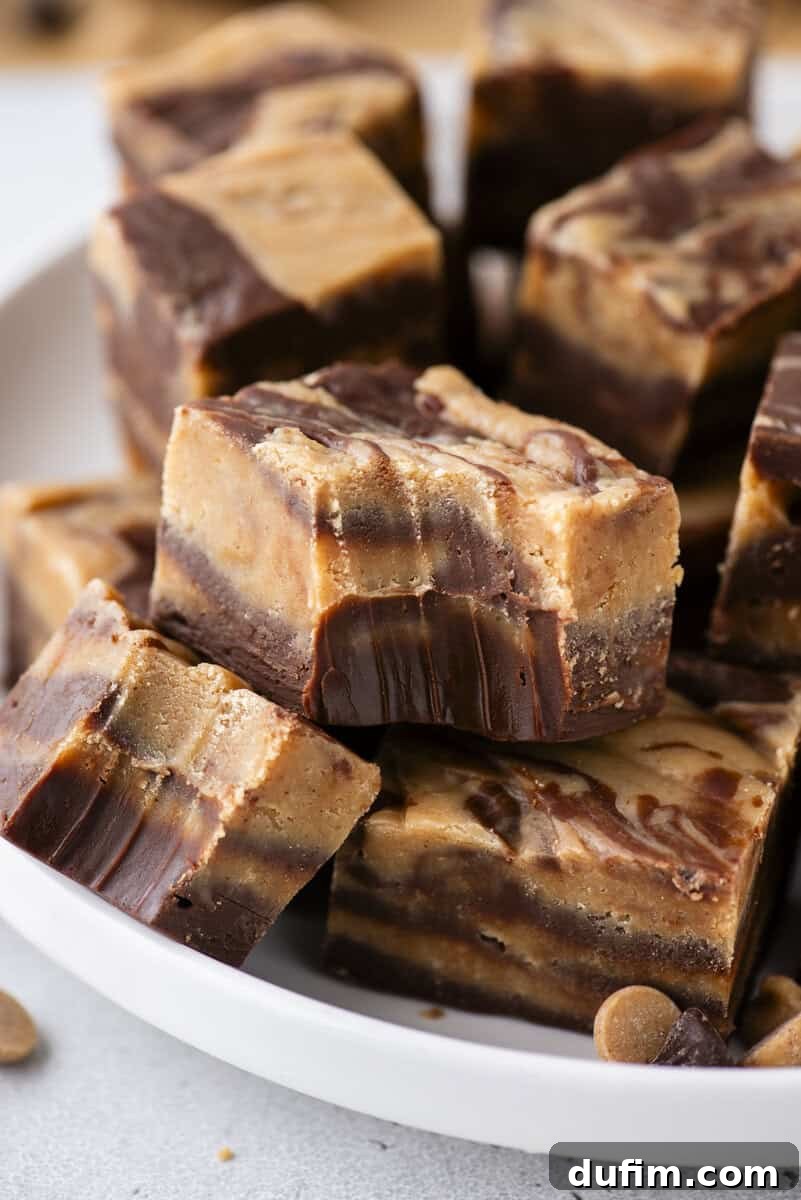
For many, the mere mention of chocolate peanut butter fudge evokes a wave of delicious nostalgia. It’s a classic pairing, a symphony of rich chocolate and creamy peanut butter that tantalizes the taste buds. Yet, creating that picture-perfect, beautifully swirled fudge can often feel like a baking enigma. Many home cooks embark on this sweet journey only to discover that one layer sets faster than the other, resulting in a less-than-ideal, messy blend instead of the elegant ribbons they envisioned. This comprehensive guide, born from extensive testing and refinement, aims to demystify the process, ensuring you achieve a flawless batch of **swirled chocolate peanut butter fudge** every single time. Prepare for thick, dramatic swirls, an intensely bold peanut butter flavor, and clean, effortless slices that will impress everyone.
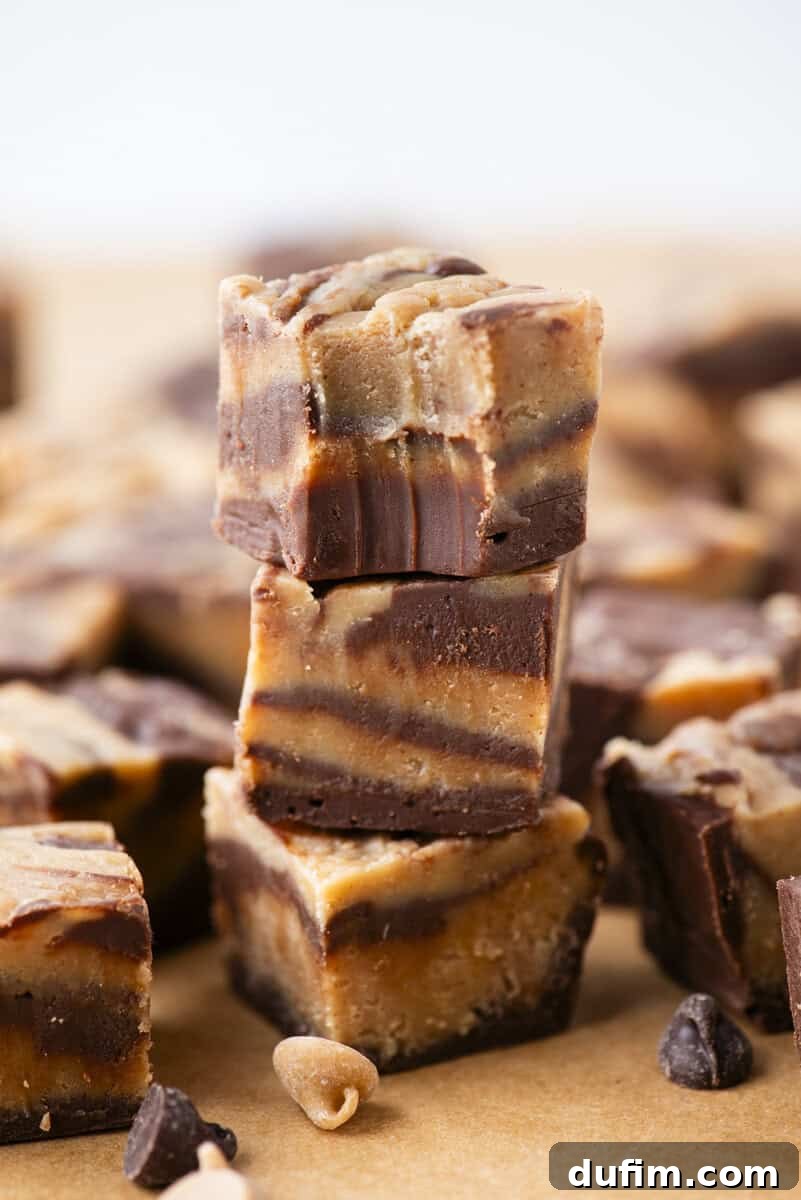
Unlocking the Secrets: Why This Chocolate Peanut Butter Fudge Recipe Excels
Crafting **homemade chocolate peanut butter fudge** that boasts elegant swirls is deceptively simple in concept, but notoriously challenging in execution. My initial attempts perfectly illustrated this difficulty: the chocolate fudge mixture thickened far too rapidly, while the peanut butter fudge remained stubbornly soft. The result was a sticky, unappealing mass, a stark contrast to the beautiful, distinct ribbons I was striving for. It was clear that the balance and timing were crucial to achieving a truly remarkable **swirled fudge**.
My first foray into the peanut butter layer involved white chocolate chips, hoping for a smooth texture. However, the critical **peanut butter flavor** was disappointingly muted. A pivotal shift to dedicated **peanut butter chips**, combined with creamy peanut butter, instantly elevated the taste, delivering that unmistakable, robust flavor profile essential for a rich **peanut butter fudge**. But this improvement brought a new hurdle: the peanut butter layer still lacked the necessary substance and volume to stand proudly against the robust chocolate. Visually and structurally, the fudge felt unbalanced.
Determined to perfect this beloved classic, I returned to the drawing board, meticulously adjusting ratios and fat content. I subtly decreased the quantity of chocolate chips and introduced a touch of butter to the chocolate mixture. This small but significant addition proved transformative, ensuring the chocolate remained luxuriously creamy and workable for a longer duration. Concurrently, I increased both the peanut butter chips and the creamy peanut butter in the second layer, scaling up its volume to achieve a similar richness and consistency to the chocolate. The breakthrough came when the sweetened condensed milk amounts for both layers were precisely matched. This synchronization ensured both mixtures melted and set at an identical rate, allowing for the creation of truly stunning, thick swirls that held their form beautifully.
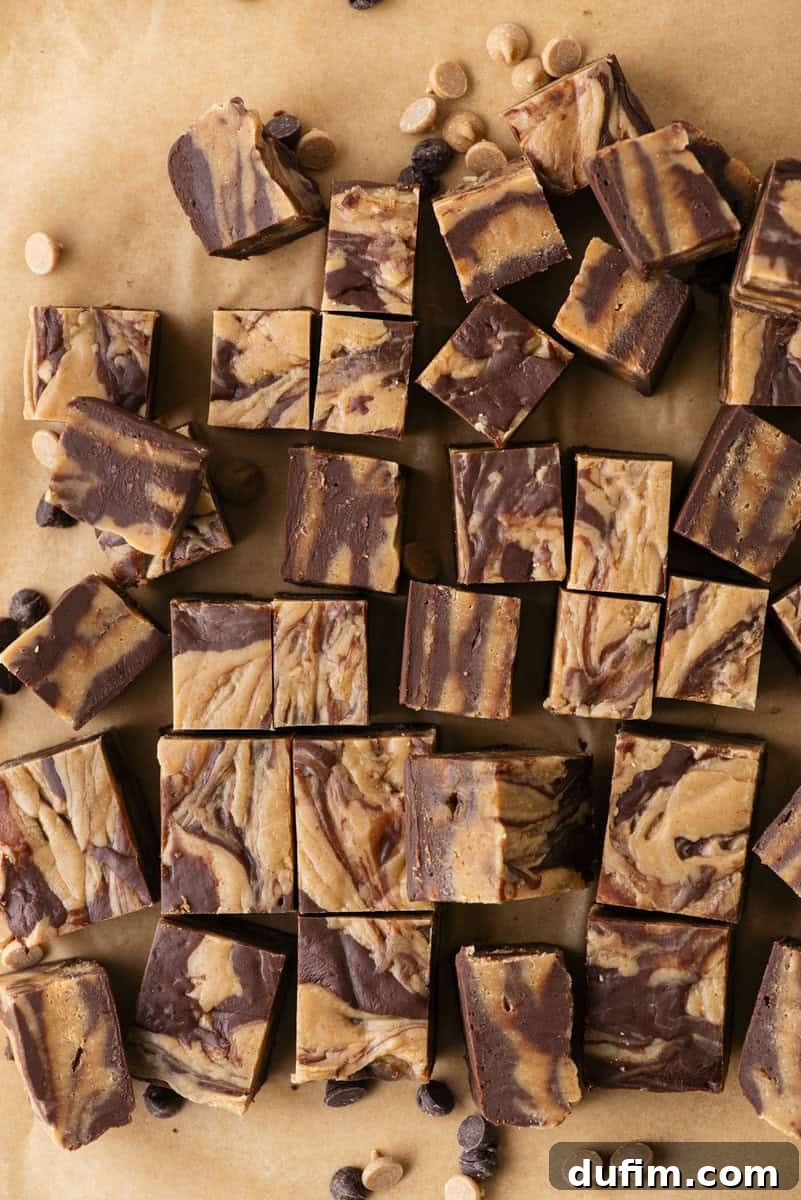
Beyond ingredient ratios, I discovered that precise timing is paramount for perfectly **marbled fudge**. The most effective method involves alternating the melting of the chocolate and peanut butter layers in the microwave, ensuring both reach optimal pourable consistency simultaneously. If one mixture begins to thicken prematurely, achieving those distinct swirls becomes an arduous task. The layering process is key: start with a base of chocolate, add dollops of peanut butter, gently swirl with a knife, and then repeat. On occasion, if a mixture starts to firm up too quickly, a brief 10 to 15-second rewarming in the microwave restores its pliability. While the final top swirl might appear slightly uneven, a gentle press with a spatula creates a smooth, professional finish. This refined approach guarantees a **creamy fudge recipe** with thick, dramatic swirls, an intense peanut butter flavor, clean slices, and no frustrating texture conflicts.
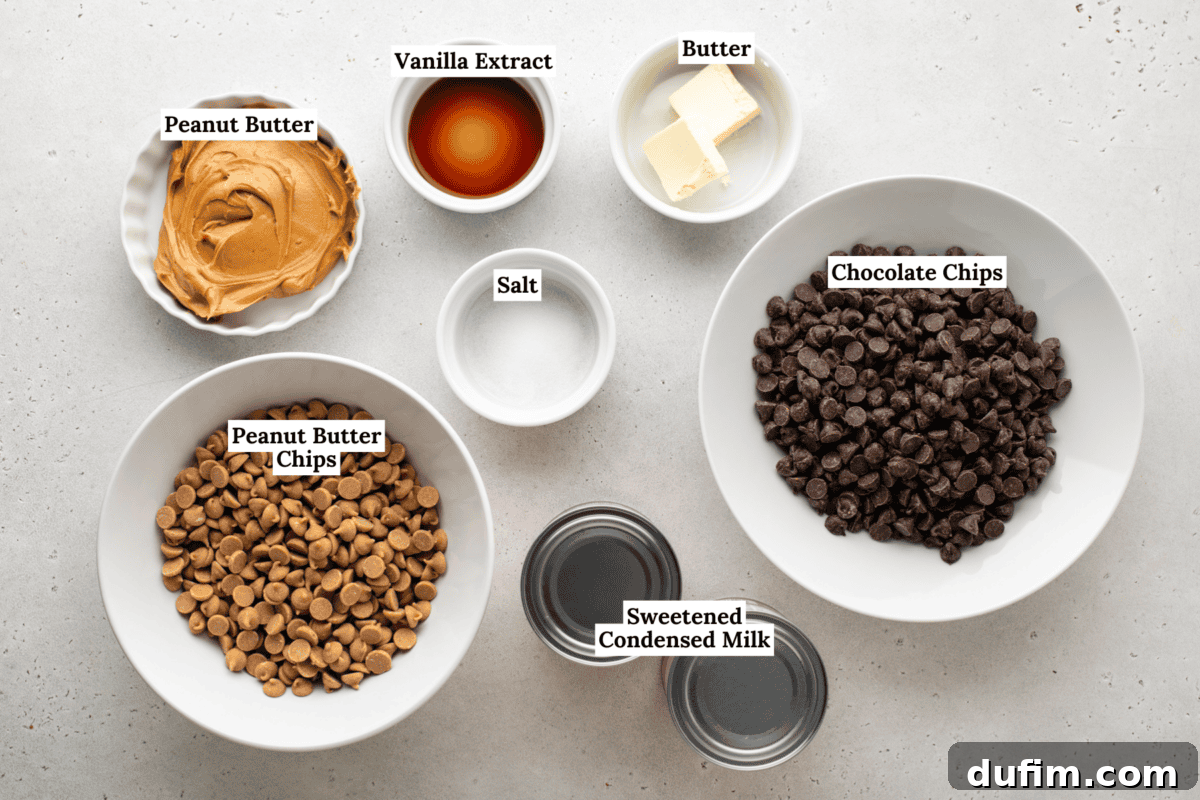
Essential Ingredients for Perfect Fudge
Each ingredient in this **easy chocolate peanut butter fudge recipe** plays a vital role in achieving its perfect texture, rich flavor, and beautiful swirls. Understanding their purpose will help you appreciate the careful balance required for this delightful dessert.
- Sweetened Condensed Milk: This is the foundation of our fudge, providing not only sweetness but also the essential structure that allows both the chocolate and peanut butter layers to set smoothly and uniformly. Its thick, syrupy consistency contributes significantly to the fudge’s characteristic creaminess.
- Semi-Sweet Chocolate Chips: These chips are chosen for their rich, deep chocolate flavor, which forms the robust base of one layer. The quality of your chocolate chips will directly impact the depth of flavor in your fudge.
- Peanut Butter Chips: Crucial for an authentic and intense peanut butter flavor, these chips deliver a more concentrated taste than white chocolate chips, preventing the peanut butter layer from being overshadowed by the chocolate. They also add to the layer’s overall structure.
- Creamy Peanut Butter: Beyond the chips, real creamy peanut butter adds a profound depth of authentic peanut butter taste and helps to balance the sweetness of the condensed milk. Its natural oils also contribute to the silky-smooth texture.
- Butter: A small but mighty addition, butter in the chocolate layer is key. It slightly softens the chocolate, ensuring it remains pliable and “swirlable” for a longer period, making it easier to create those beautiful marbled patterns without premature setting.
- Vanilla Extract: A flavor enhancer in both layers, vanilla extract brightens and harmonizes the rich chocolate and bold peanut butter profiles without overpowering their distinct tastes. Don’t skip this ingredient; it adds a subtle complexity.
Step-by-Step: Crafting Your Perfect Swirled Fudge
Follow these detailed, easy-to-understand instructions to create a batch of stunning **chocolate peanut butter fudge** that’s perfectly swirled and incredibly delicious.
Step 1: Prepare Your Baking Pan
Begin by preparing a 9×9 inch square baking pan. Line it thoroughly with parchment paper or aluminum foil, ensuring that you leave a generous overhang on two opposite sides. This overhang will serve as convenient handles, allowing you to easily lift the set fudge out of the pan later. Set the prepared pan aside.
Step 2: Prepare the Chocolate Fudge Layer
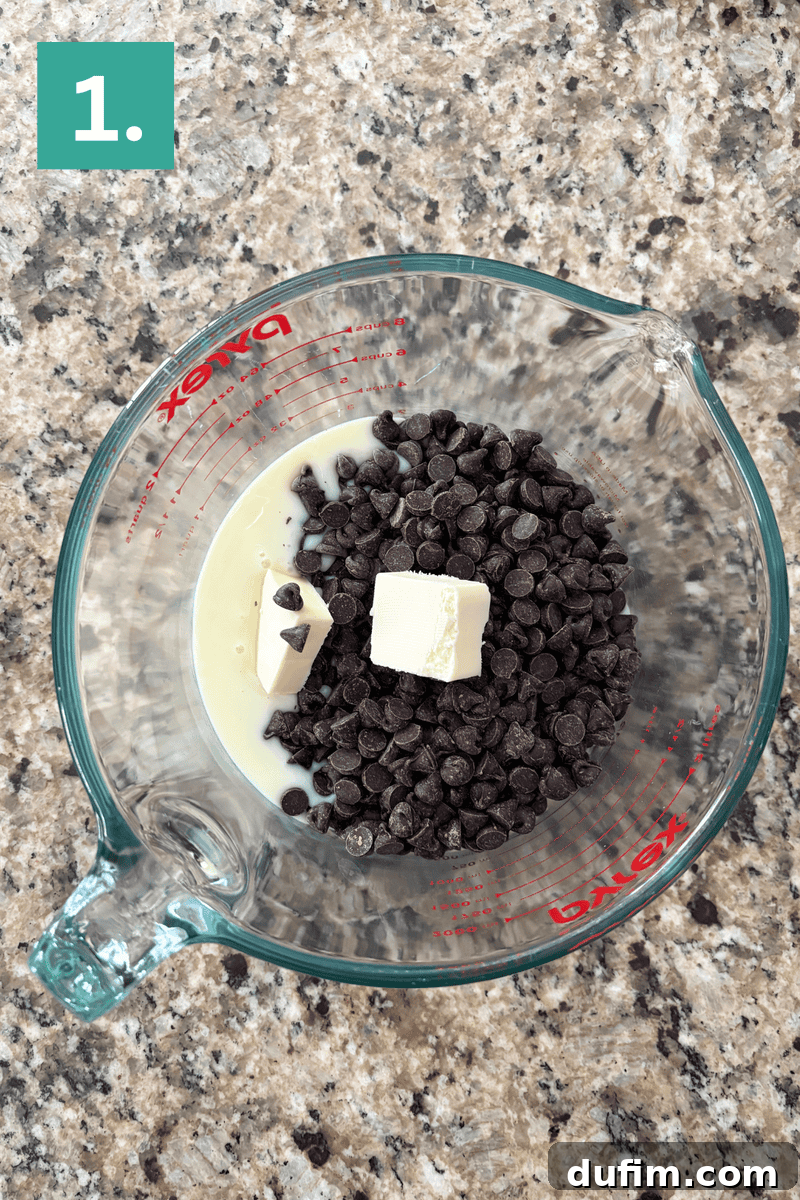
In a large, microwave-safe bowl, combine the entire can of sweetened condensed milk, the semi-sweet chocolate chips, the specified amount of butter, and a pinch of salt. Stir these ingredients together until they are just combined.
Step 3: Prepare the Peanut Butter Fudge Layer
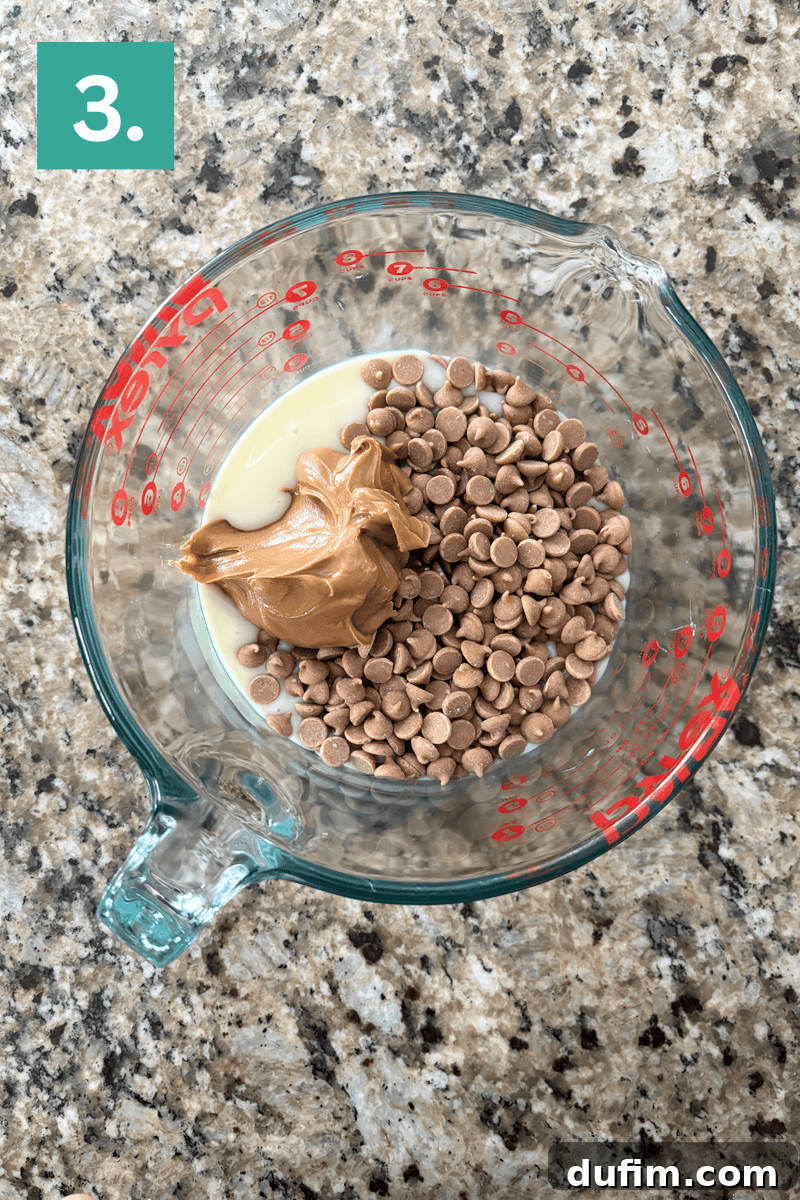
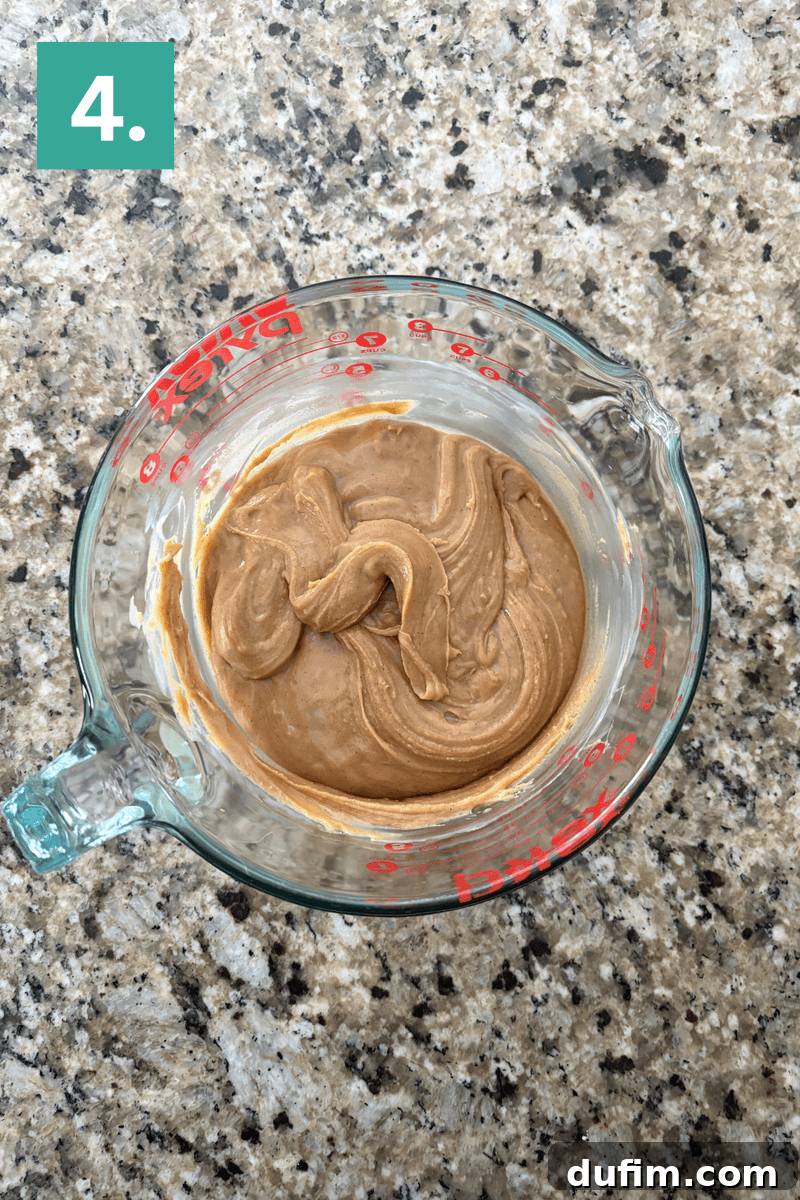
In a separate, second large microwave-safe bowl, combine the other can of sweetened condensed milk, the peanut butter chips, the creamy peanut butter, and a pinch of salt. Stir these ingredients until they are well mixed. Having both layers prepped and ready is crucial for successful swirling.
Step 4: Alternate Microwaving for Perfect Consistency
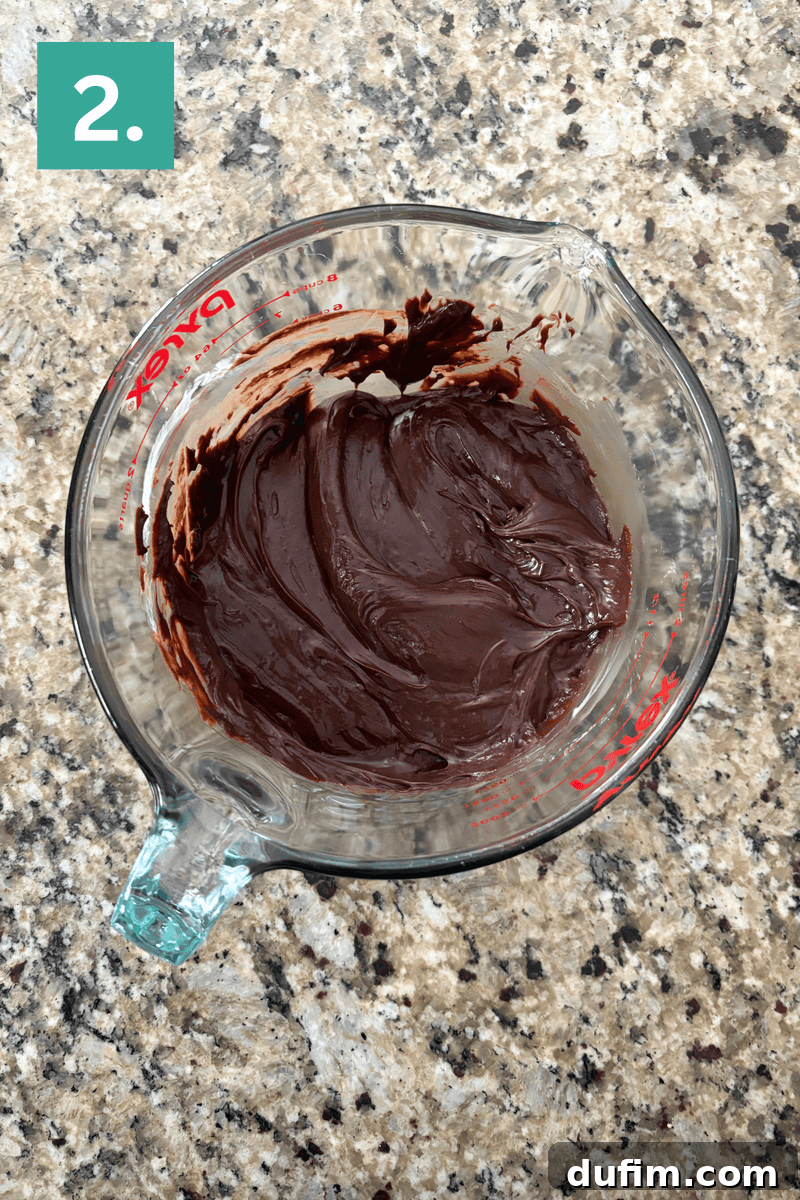
The secret to flawless swirls lies in ensuring both fudge mixtures are warm and equally pourable at the same time. Start by microwaving the chocolate mixture for 1 minute. Remove it from the microwave and stir thoroughly; it won’t be fully melted yet. Immediately place the peanut butter mixture in the microwave for 1 minute. Remove and stir. This alternating method prevents one layer from setting too quickly.
Step 5: Continue Melting in Short Intervals
Return the chocolate bowl to the microwave for another 30 to 45 seconds, then stir again. Repeat this process with the peanut butter bowl for 30 to 45 seconds, and stir. Continue these short, alternating microwave intervals as needed, stirring well after each, until both the chocolate and peanut butter mixtures are completely smooth, glossy, and fully melted with no lumps.
Step 6: Incorporate Vanilla Extract
Once both mixtures are perfectly melted and smooth, stir the vanilla extract into each individual bowl. This adds an extra layer of flavor complexity that complements both the chocolate and peanut butter beautifully. The vanilla in the peanut butter fudge is often a bit more generous to really make that flavor pop.
Expert Tip for Clean Swirls: The absolute key to creating distinct, beautiful swirls is maintaining the warm, pourable consistency of both mixtures. If you notice either the chocolate or peanut butter mixture starting to thicken or stiffen while you’re working, don’t hesitate! Pop it back into the microwave for a very brief 10 to 15 seconds. This will loosen it up and make it pliable again, ensuring your swirls remain clean and fluid.
Step 7: Layer and Swirl with Precision
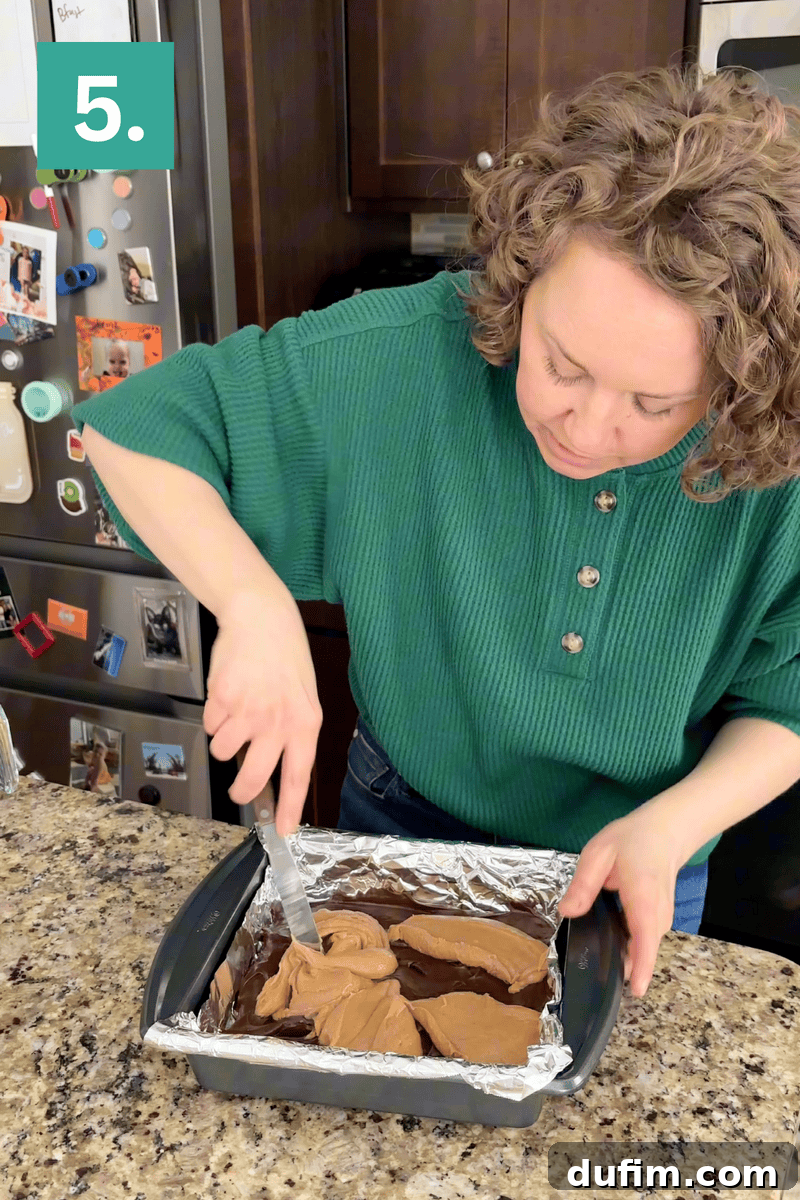
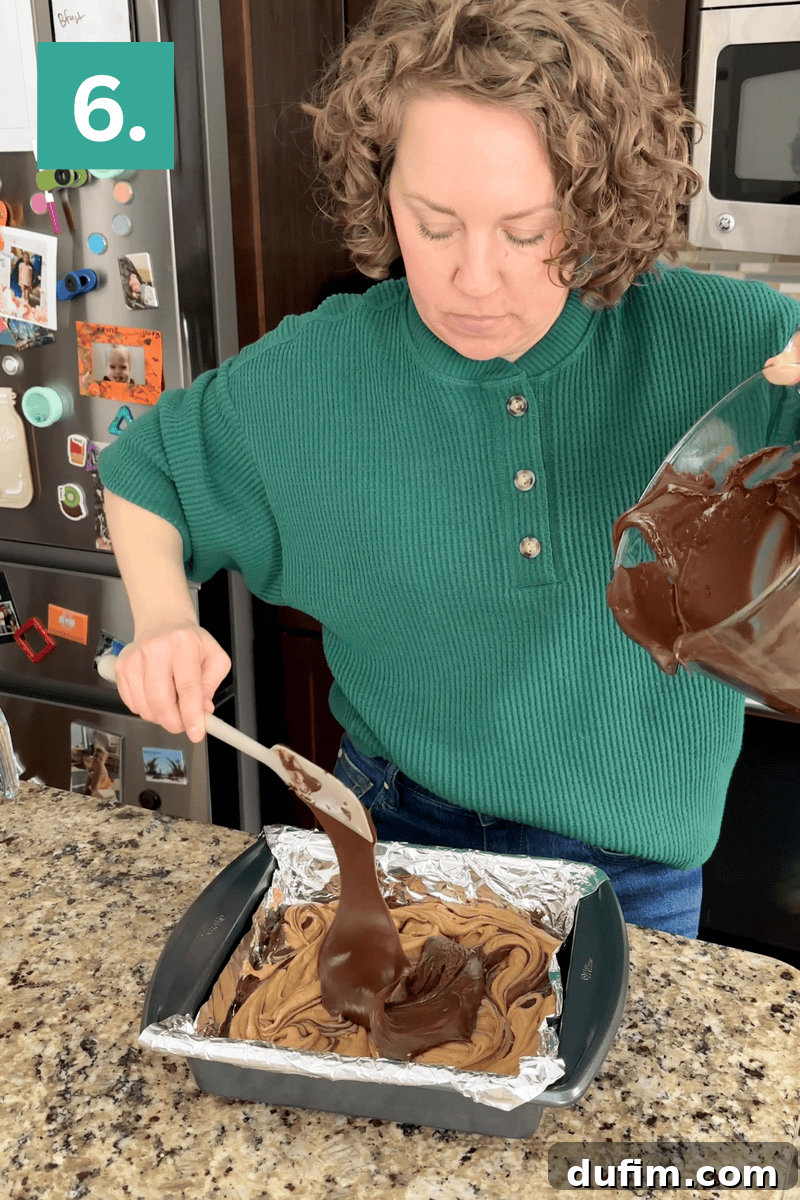
Now for the fun part! Spread approximately one-third of the chocolate mixture evenly into the bottom of your prepared 9×9 inch pan. Next, drop generous spoonfuls of the peanut butter mixture over the chocolate layer, distributing them somewhat evenly. Take a knife, skewer, or even a toothpick, and gently swirl the two layers together. Don’t overmix; just a few strokes are enough to create beautiful ribbons. Repeat this process: add another third of the chocolate, then more dollops of peanut butter, and swirl again.
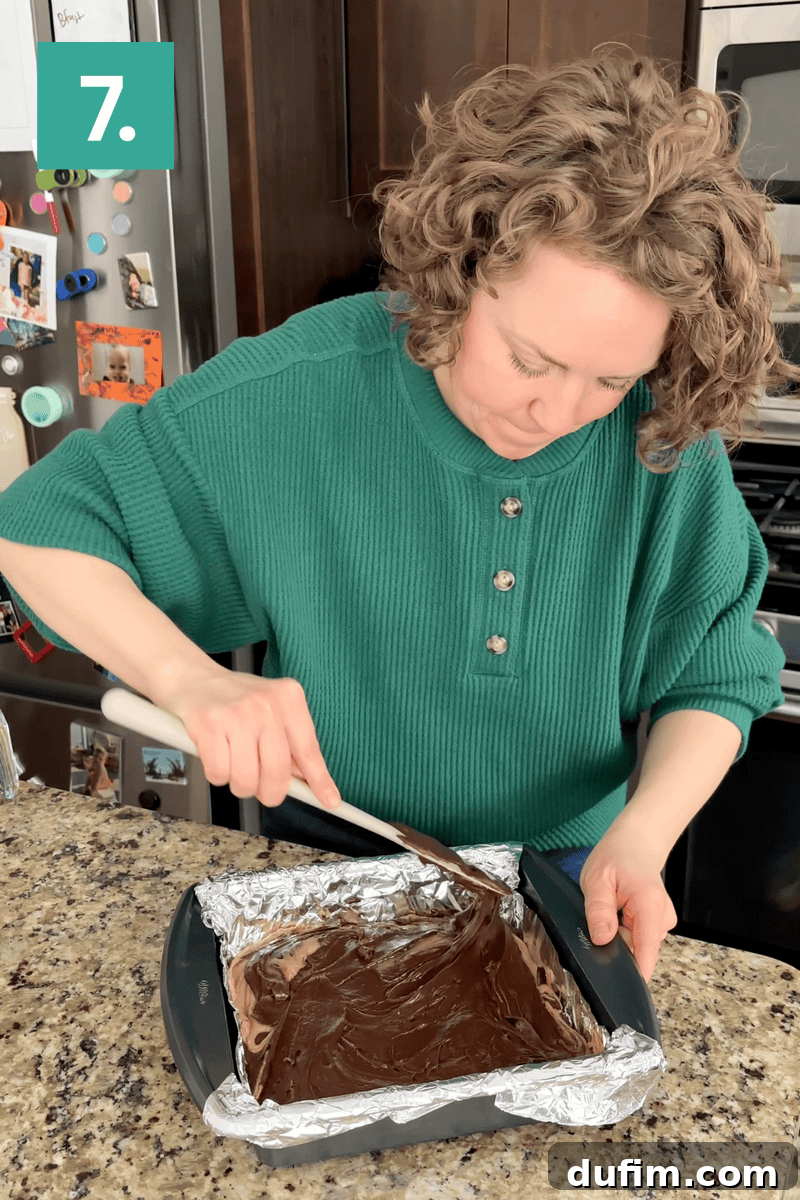
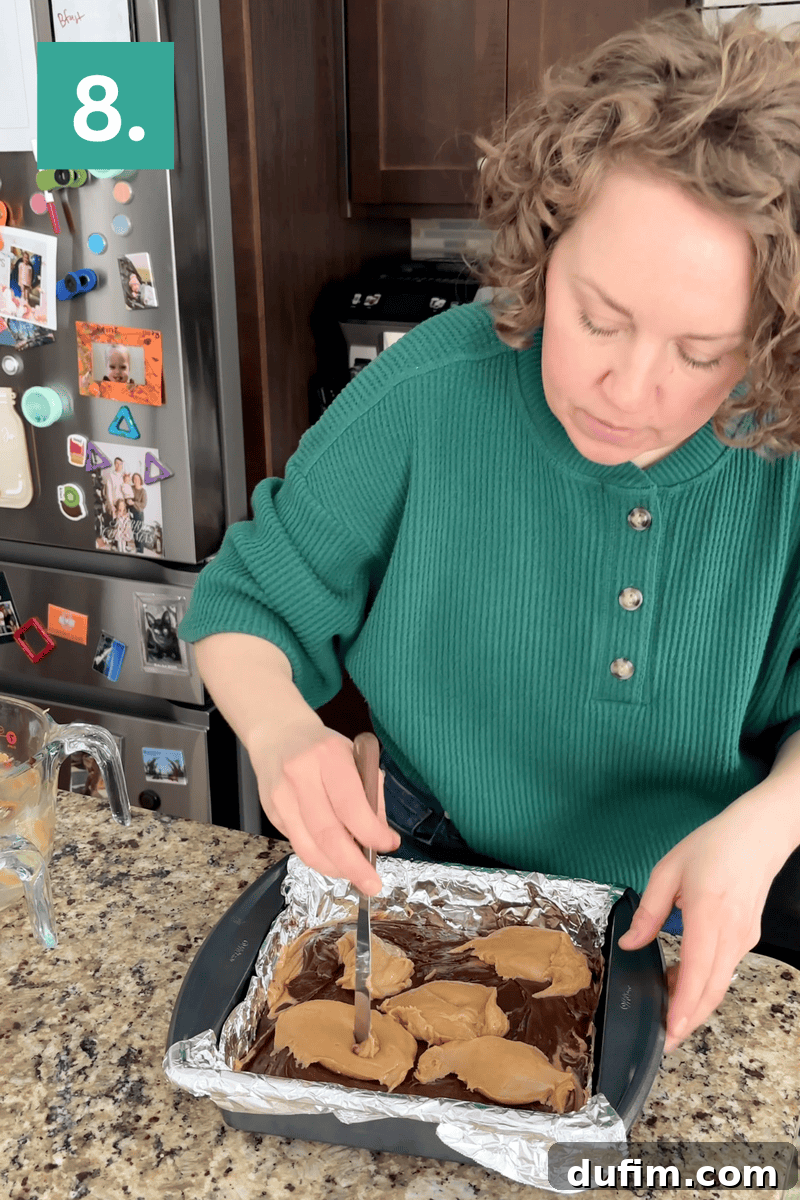
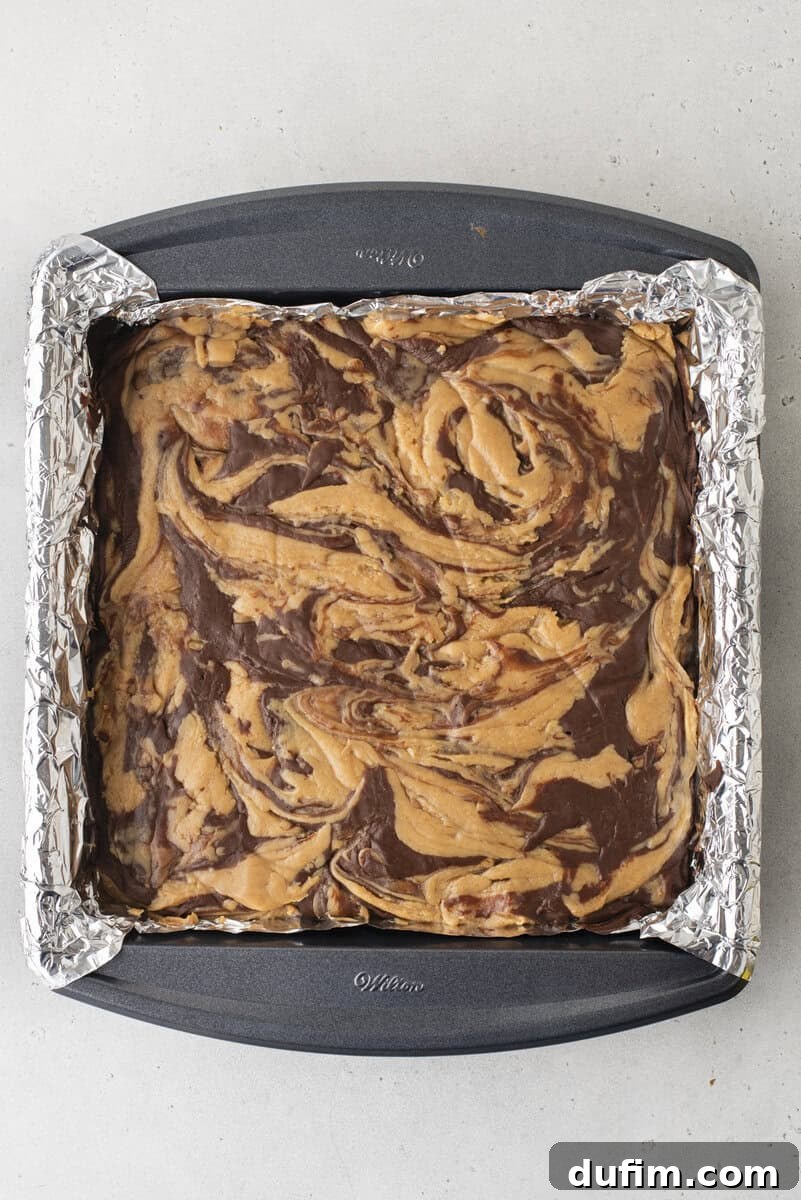
Continue this layering and swirling technique until both the chocolate and peanut butter mixtures have been fully used. As you reach the final layer, the fudge will naturally begin to thicken more rapidly, so work swiftly but gently. If your final swirl on top appears a little jagged or uneven, simply use a clean spatula to gently press and smooth the surface. Be careful not to overmix at this stage, as it can muddy the beautiful marbled effect.
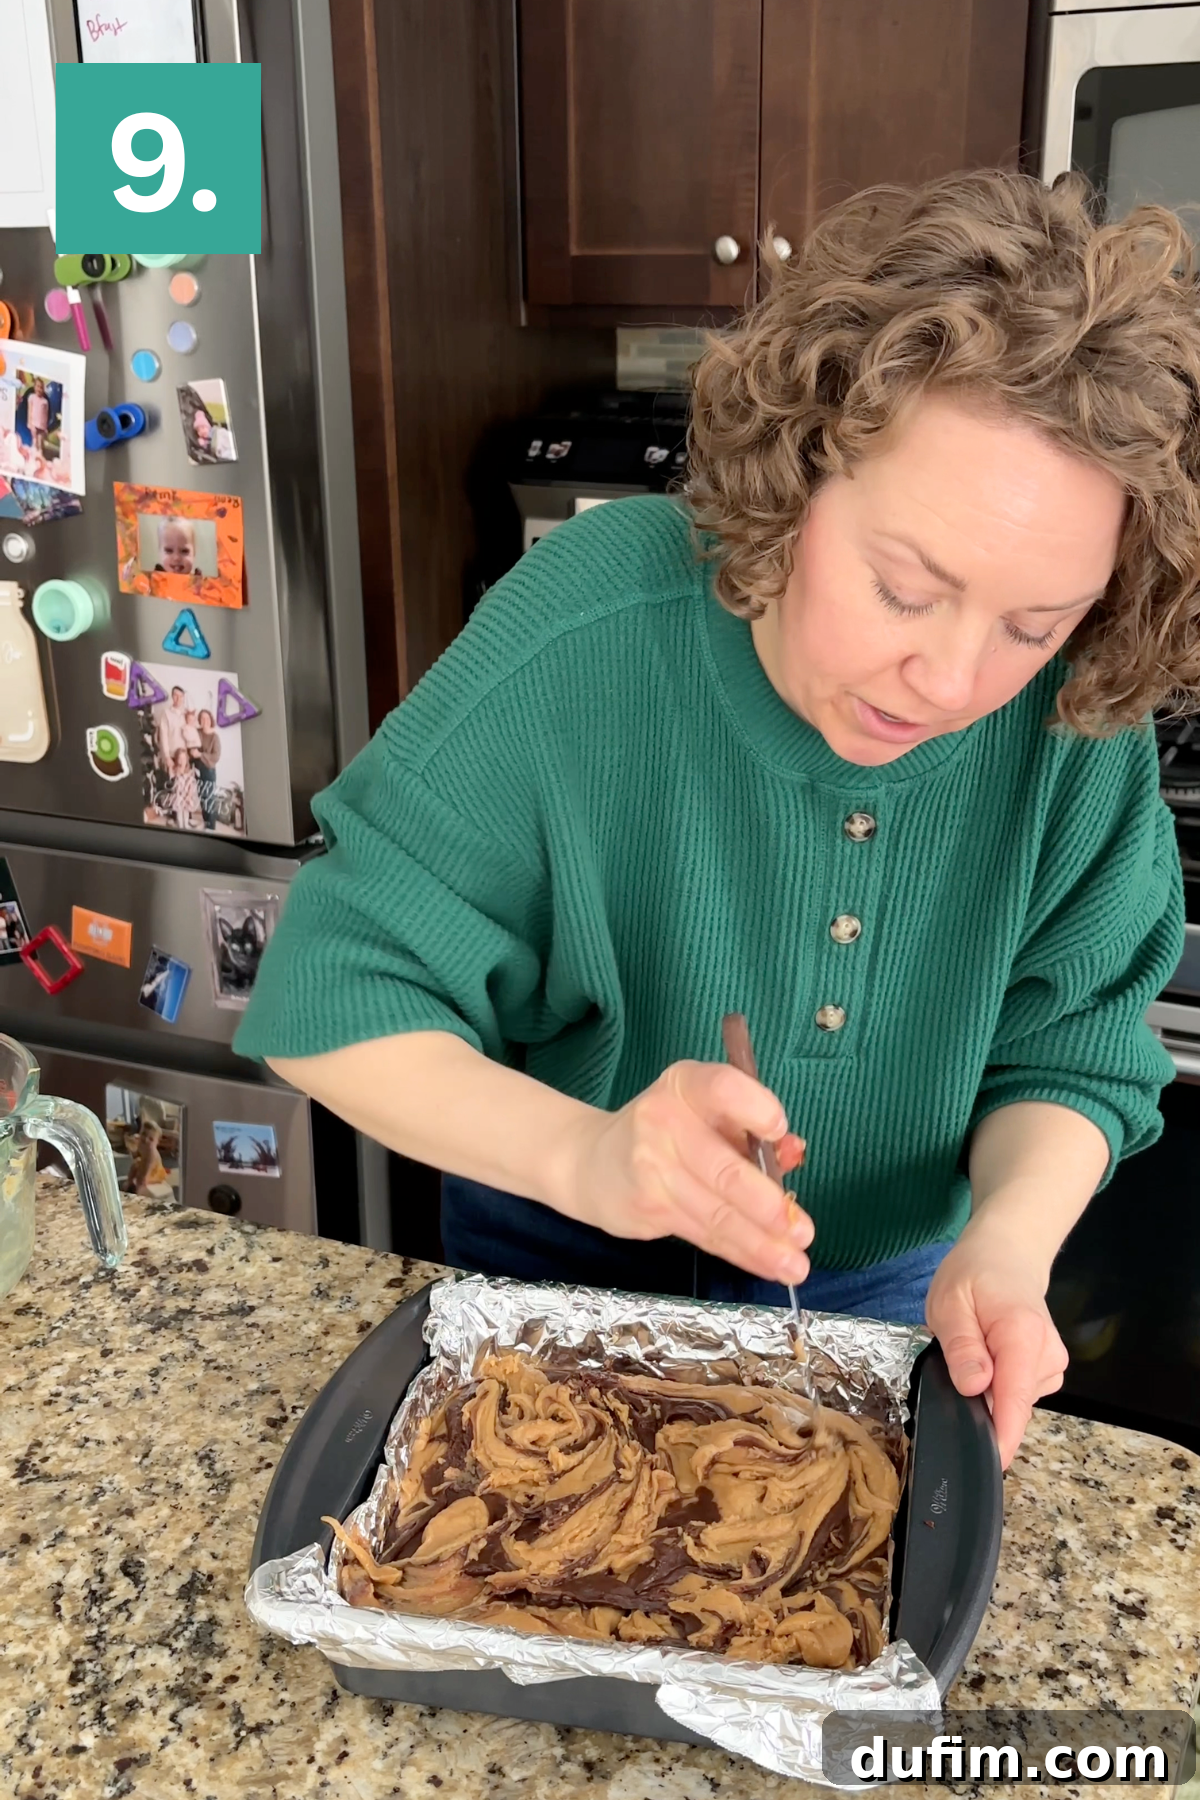
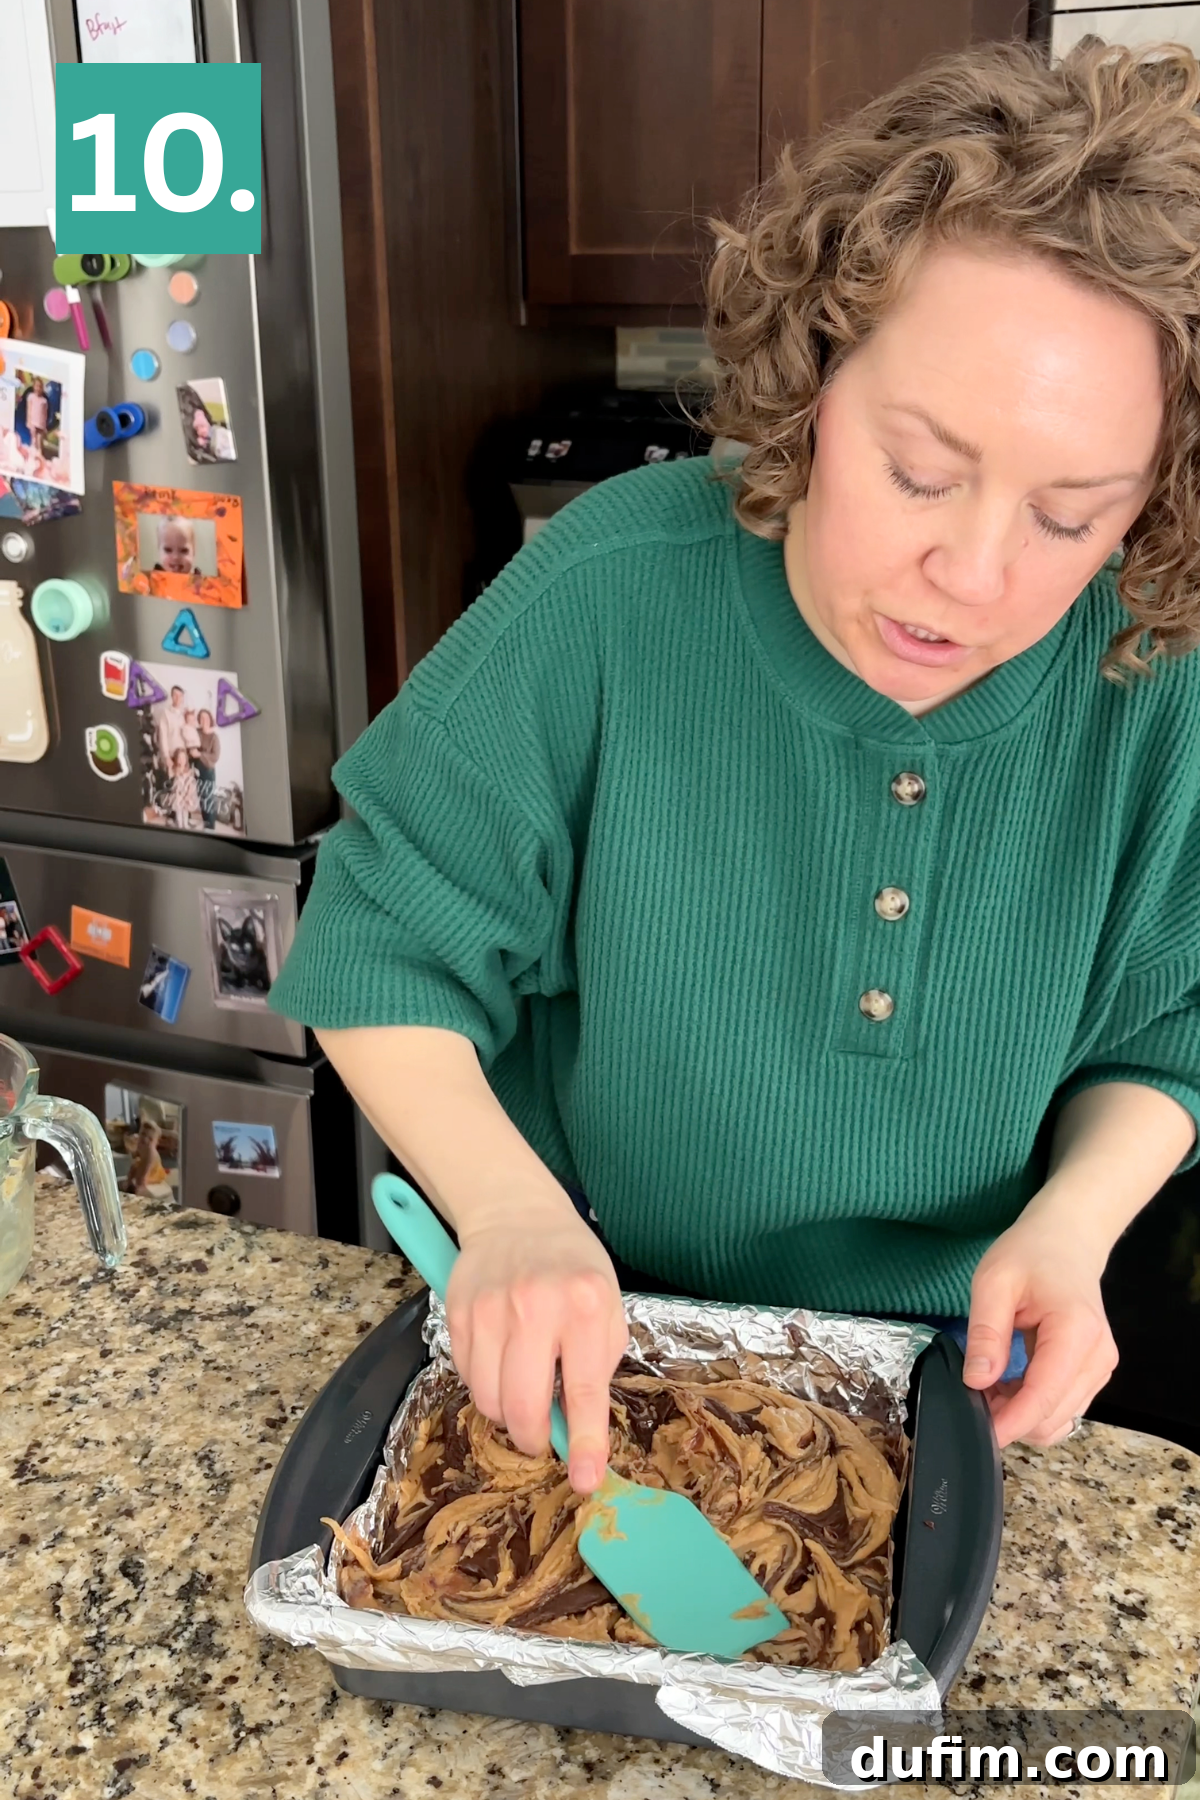
Step 8: Set and Slice Your Fudge
Allow the prepared fudge to set at room temperature for a minimum of 4 to 6 hours. For the absolute best results and cleanest slices, it’s highly recommended to let it set overnight. Once the fudge is completely firm, use the parchment or foil overhang to carefully lift the entire slab out of the baking pan. Place it on a cutting board. Using a sharp knife, cut the fudge into desired squares. For exceptionally neat edges, wipe the knife blade clean with a damp cloth between each cut. This attention to detail ensures every piece of your **homemade fudge** looks as good as it tastes.
Mastering the Swirl: Tips for Clean, Beautiful Patterns
Achieving those coveted, well-defined swirls in your **chocolate peanut butter fudge** is all about careful management of consistency and timing. The fundamental principle is to ensure both the chocolate and peanut butter mixtures are at the same, perfectly pourable consistency simultaneously. This is why alternating their melting in the microwave is so crucial – it prevents one from hardening while the other is still heating. If either mixture sits too long, it will inevitably thicken, making marbling a frustrating, messy endeavor.
Should you notice any mixture starting to firm up mid-process, a quick intervention is all it takes. A brief 10 to 15-second blast in the microwave will typically restore its smooth, fluid texture. When layering, adopt a methodical approach: spread a base layer of chocolate, then strategically drop spoonfuls of peanut butter mixture on top, followed by a gentle, deliberate swirl with a knife or skewer. Repeat this process until all mixtures are used. As you progress to the upper layers, the fudge will naturally begin to cool and thicken slightly. Work with purpose but without haste. If your final swirl on the surface appears a bit rugged, gently smooth it out with a spatula. Avoid vigorous stirring, as this will blend the colors too much, diminishing the beautiful marbled effect you’ve worked so hard to create.
Understanding Fudge Chemistry: Why Layers Set Differently
The science behind fudge setting involves more than just cooling; it’s intricately linked to the fat content and the specific ratios of ingredients, particularly within the chocolate and peanut butter components. Different types of chocolate chips, for instance, contain varying amounts of cocoa butter and sugar, which directly impact their melting points and how quickly they solidify. A chocolate mixture with a higher proportion of chocolate chips to liquid (like sweetened condensed milk) will invariably thicken and set faster.
Similarly, the peanut butter layer’s texture is highly sensitive to the balance between real creamy peanut butter and peanut butter flavored chips. Real peanut butter, with its natural oils, contributes to a softer, more pliable texture, while the chips provide structure. If your chocolate layer consistently hardens too quickly, it often signals a need for a slight increase in fat – such as the addition of a bit more butter, as incorporated in this perfected recipe – to help it retain its creamy state for longer. Conversely, if your peanut butter layer remains too soft, it might require additional structural support from more peanut butter chips or a slightly adjusted condensed milk ratio. The key to harmonious **swirled fudge** lies in carefully balancing the richness and volume of both layers, ensuring they achieve similar consistencies and set times, allowing them to meld beautifully rather than compete.
Storage, Make-Ahead, and Freezing Tips for Fudge
Proper storage is essential to maintain the freshness and delightful texture of your **homemade chocolate peanut butter fudge**. To keep it at its best, store the fudge in an airtight container at room temperature for up to one week. For optimal results and to prevent the pieces from sticking together, place small sheets of parchment paper or wax paper between the layers of fudge. If your kitchen tends to be on the warmer side, you can refrigerate the fudge to help it maintain its firmness. However, for the most luxurious and creamy texture, allow refrigerated fudge to come back to room temperature for about 15-20 minutes before serving.
This **easy fudge recipe** is an excellent candidate for making ahead, making it perfect for holiday gifts, parties, or when you simply want to prepare desserts in advance. You can confidently prepare a batch one to two days before you plan to serve it. This extra setting time ensures the fudge is fully firm and will yield beautifully clean, sharp slices.
For longer storage, **fudge freezes exceptionally well**. Once your fudge has fully set, wrap individual pieces or small blocks tightly in plastic wrap, ensuring no air can reach the surface. Then, place these wrapped pieces into a freezer-safe container or a heavy-duty freezer bag. Frozen fudge can be stored for up to three months without significant loss of quality. To thaw, simply transfer the wrapped fudge from the freezer to the refrigerator overnight, or let it sit at room temperature for a few hours. Thawing it while still wrapped helps prevent condensation from forming on the surface, which can affect the texture and appearance.
Explore More Delicious Fudge Recipes
If you loved making this **swirled chocolate peanut butter fudge**, you’ll be thrilled to discover the variety of other simple and delicious fudge recipes available. Expand your dessert repertoire with these fantastic options, perfect for any occasion:
- Microwave Peanut Butter Fudge: A quick and easy way to get that pure peanut butter fix.
- Oreo Fudge: A delightful treat combining creamy fudge with crunchy Oreo cookie pieces.
- Rocky Road Fudge: Indulge in a classic mix of chocolate, marshmallows, and nuts in fudge form.
- Caramel Apple Fudge: A seasonal delight that brings together the best flavors of fall.
Tap stars to rate!
Swirled Chocolate Peanut Butter Fudge
Beth
10 minutes
6 hours
24
squares
Rate
Ingredients
Chocolate Fudge
- 14 oz sweetened condensed milk
- 2¼ cups (383g) semi-sweet chips
- 2 Tbsp butter
- ¼ tsp salt
- ¼ tsp vanilla extract
Peanut Butter Fudge
- 14 oz sweetened condensed milk
- 1 ¾ cup (274g) peanut butter chips
- ½ cup (135g) creamy peanut butter
- ¼ tsp salt
- 1 tsp vanilla extract
Instructions
- Line a 9×9 inch pan with parchment paper or aluminum foil, leaving overhang on two sides for easy removal. Set aside.
- Prepare each fudge layer. In a large microwave safe bowl, combine the sweetened condensed milk, semi-sweet chocolate chips, butter, and salt. In a second large microwave safe bowl, combine the sweetened condensed milk, peanut butter chips, creamy peanut butter, and salt.
- Take turns microwaving the layers. The goal is for both mixtures to finish melting at the same time so they stay the same consistency. Microwave the chocolate mixture for 1 minute. Remove and stir. It will not be fully melted yet. Microwave the peanut butter mixture for 1 minute. Remove and stir. It will not be fully melted yet.
- Return the chocolate bowl to the microwave for 30 to 45 seconds, stir, then microwave the peanut butter bowl for 30 to 45 seconds and stir. Continue in short intervals if needed until both mixtures are smooth and fully melted.
- Stir the vanilla extract into each bowl.
- The key to clean swirls is keeping both mixtures warm and pourable. If one begins to thicken while you are layering, microwave it for 10 to 15 seconds to loosen it.
- Spread about one third of the chocolate mixture into the prepared pan. Drop spoonfuls of the peanut butter mixture over the chocolate and gently swirl with a knife. Repeat with more chocolate, more peanut butter, and swirl again. Continue layering and swirling until both mixtures are used. The final swirl may look slightly jagged as the fudge thickens. Use a spatula to gently press and smooth the surface without overmixing.
- Let the fudge set at room temperature for 4 to 6 hours, or ideally overnight, until firm. Lift the fudge out of the pan using the parchment overhang. Cut into squares with a sharp knife, wiping the blade clean between cuts for neat edges.
Notes
- To Store: Store in an airtight container at room temperature for up to 1 week. Place parchment paper between layers to prevent sticking.
- To Make Ahead: Prepare it 1 to 2 days in advance and allow it to fully set before wrapping in plastic wrap.
- To Freeze: Wrap the fully set fudge tightly in plastic wrap, then place it in a freezer-safe container or bag. Freeze for up to 3 months. Thaw at room temperature while still wrapped to prevent condensation on the surface.
- To Double: Double all ingredients and spread the fudge into a 9×13 inch pan. Work quickly when swirling so both layers stay warm and workable.

Nutrition
Calories: 245kcal |
Carbohydrates: 28g |
Protein: 5g |
Fat: 13g |
Saturated Fat: 7g |
Polyunsaturated Fat: 1g |
Monounsaturated Fat: 4g |
Trans Fat: 0.1g |
Cholesterol: 15mg |
Sodium: 123mg |
Potassium: 249mg |
Fiber: 2g |
Sugar: 25g |
Vitamin A: 126IU |
Vitamin C: 1mg |
Calcium: 107mg |
Iron: 1mg
Nutrition Disclosure
All nutritional values are approximate and provided to the reader as a courtesy. Changing ingredients and/or quantities will alter the estimated nutritional calculations.
Like this recipe? Rate and comment below!