
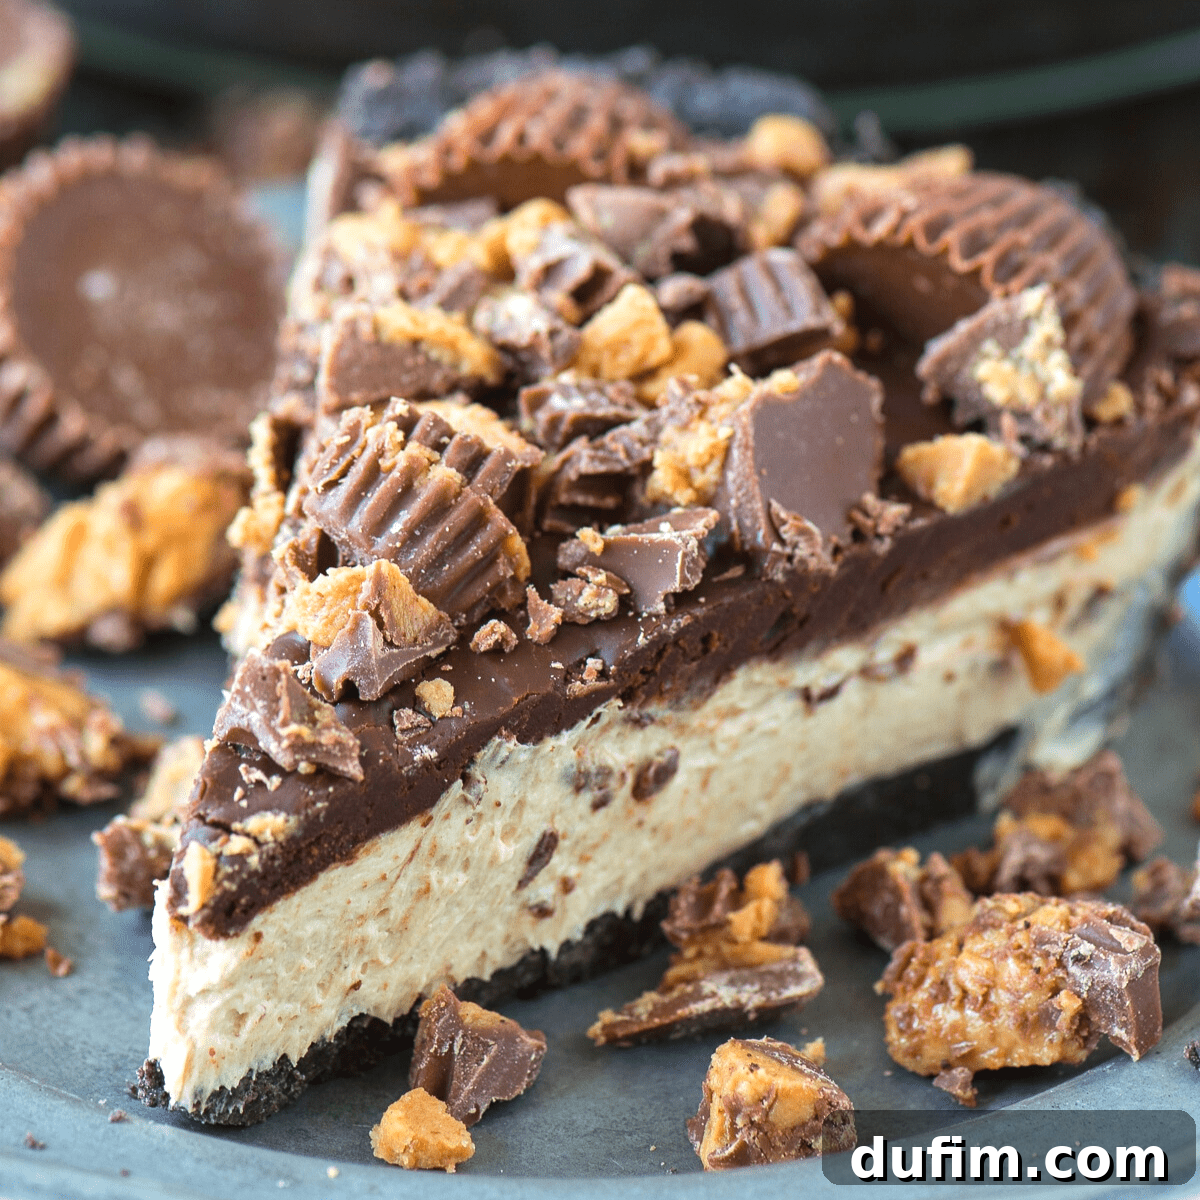
Prepare to be amazed by this incredible **Reese’s Peanut Butter Cup Pie recipe**! It consistently earns rave reviews and is so refreshingly easy to make, even a child can master it – just like Janell, whose experience we share below. If you’re seeking a dessert that delivers a major “wow” factor with minimal effort, this no-bake Reese’s pie is about to become your new best-kept secret for every gathering and celebration.
This pie is absolutely delicious and incredibly easy to make! My 10-year-old made it for our Thanksgiving gathering, and it was everyone’s favorite dessert on the table.
-Janell
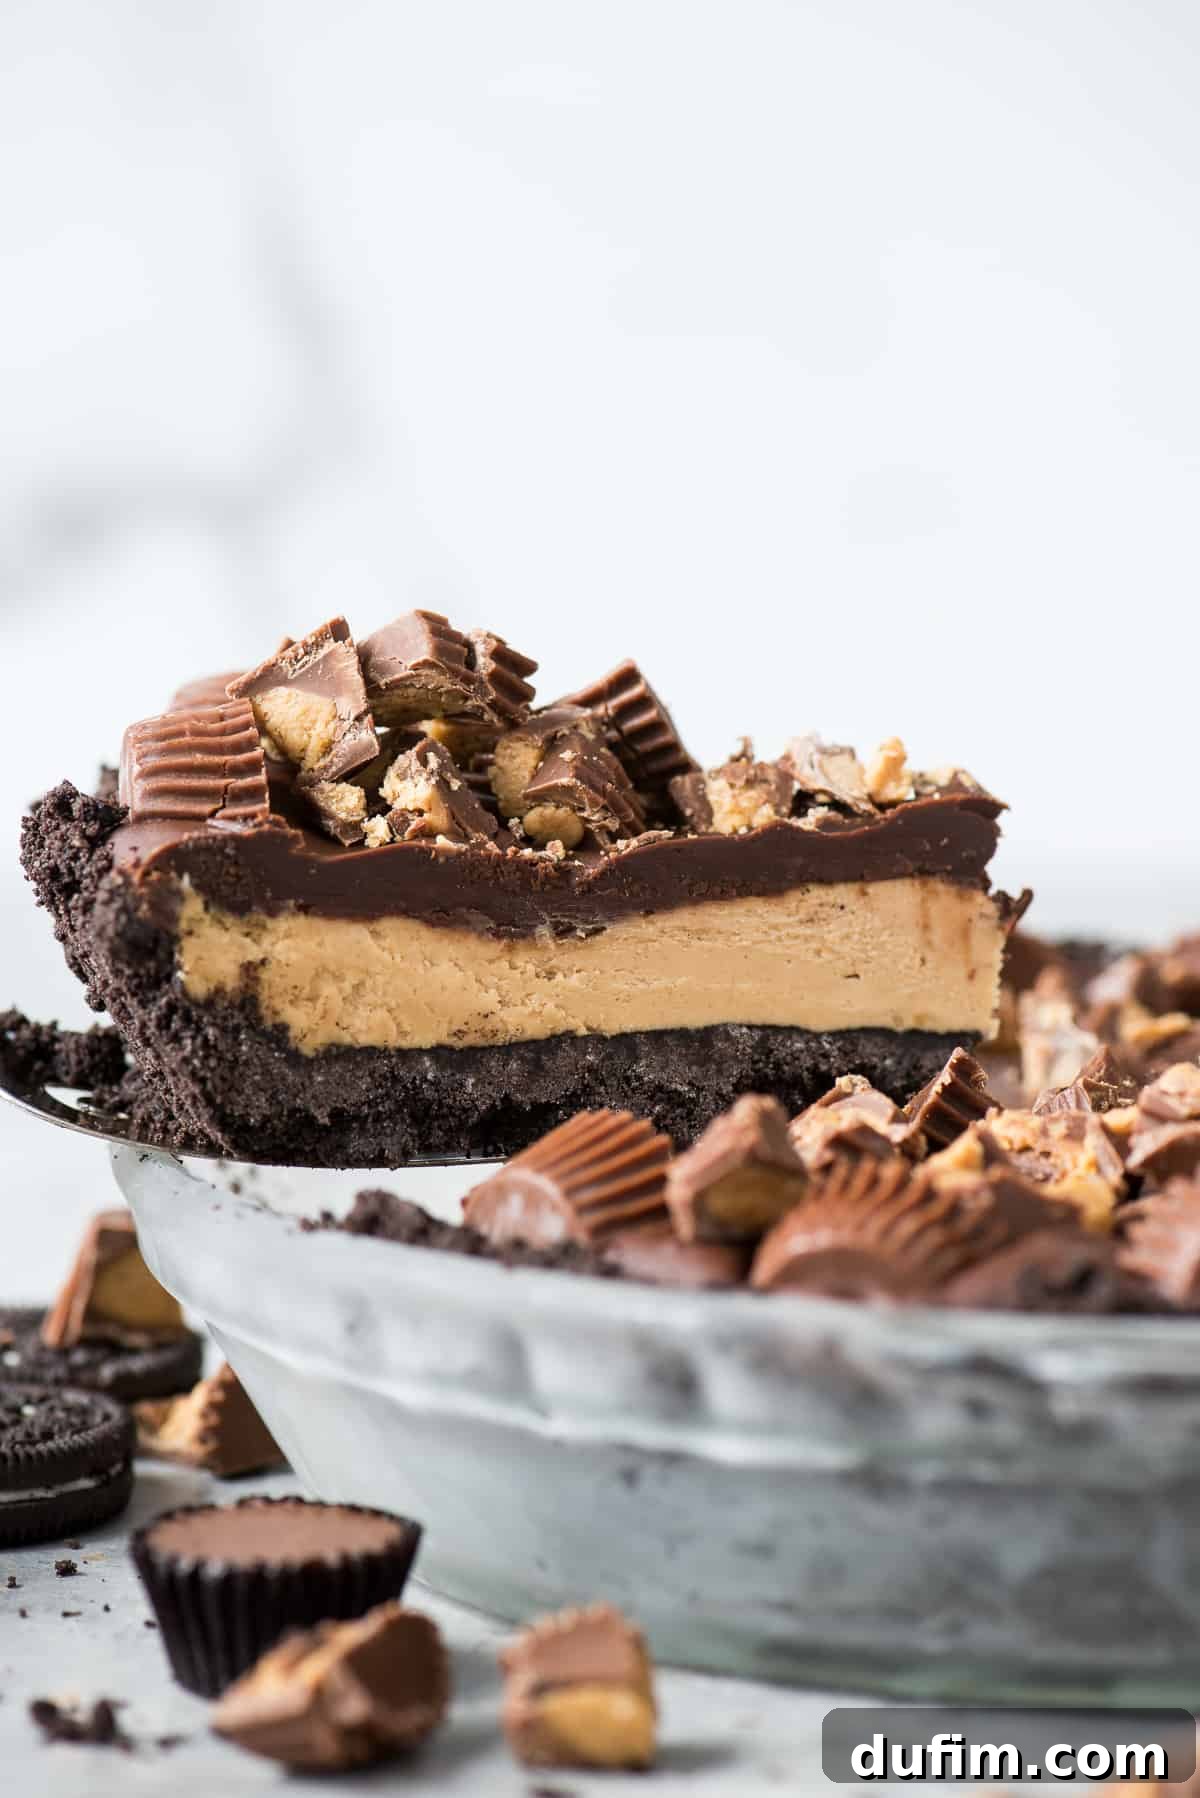
Indulge in the Ultimate No-Bake Reese’s Peanut Butter Cup Pie
If you’re an ardent fan of the iconic chocolate and peanut butter combination found in Reese’s Peanut Butter Cups, then this incredibly easy dessert is an absolute must-save recipe for your collection! Imagine biting into a giant, perfectly chilled peanut butter cup – that’s precisely the experience this delightful pie offers. It’s more than just a dessert; it’s a celebration of two beloved flavors coming together in perfect harmony.
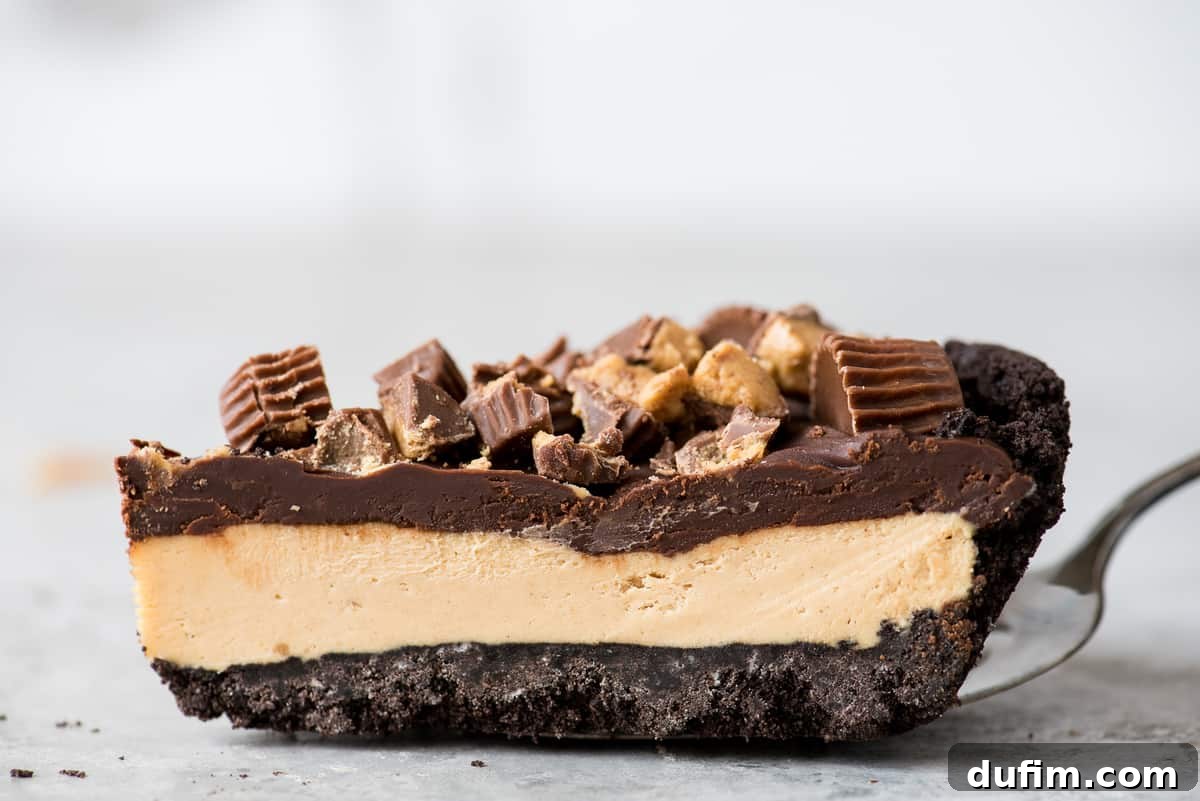
For devoted chocolate lovers, this pie features a robust **Oreo crust** providing a deep, crumbly foundation, generously topped with a thick, glossy layer of rich melted chocolate ganache. This decadent combination creates a symphony of textures and tastes that satisfies even the most intense chocolate peanut butter cravings. It has quickly become our go-to pie for any occasion that calls for a truly unforgettable treat.
My primary goal in developing this Reese’s Peanut Butter Cup Pie recipe was to keep it wonderfully simple and straightforward. Forget the complexities of traditional baking – there’s no oven required, no intricate pie crusts to master, and certainly no challenging lattice work to weave. This is a pie designed for maximum impact with minimum fuss.
If you can perform basic kitchen tasks like pressing ingredients into a pan, pouring a smooth filling, and chopping delightful toppings, then you possess all the skills needed to effortlessly recreate this peanut butter lover’s dream pie right in your own kitchen! It’s a testament to how easy truly impressive desserts can be.
Why This No-Bake Reese’s Pie is a Crowd-Pleaser
Our Reese’s Peanut Butter Cup Pie isn’t just a dessert; it’s a sensation! Here’s why this recipe consistently receives rave reviews and quickly becomes a family favorite:
- Effortless Preparation: It’s incredibly easy to make, requiring just a few simple, readily available ingredients and no complex techniques. Perfect for beginner bakers or busy schedules.
- No-Bake Brilliance: Free up your oven, especially during holiday seasons or warm summer months! This pie chills to perfection, making it an ideal stress-free dessert.
- Customizable Crust Options: While the classic Oreo pie crust offers a deep chocolate flavor, you can easily adapt it. Feel free to use a graham cracker crust for a different twist, or even a gluten-free Oreo crust for dietary needs.
- Perfect Flavor Harmony: It delivers the ultimate combination of rich chocolate and creamy peanut butter – a timeless pairing that delights nearly everyone.
- Versatile for Any Occasion: Whether it’s a festive holiday gathering, a casual weeknight treat, a birthday celebration, or just a spontaneous craving, this pie fits every special occasion.
- Make-Ahead Friendly: Its no-bake nature makes it perfect for preparing in advance, allowing flavors to meld beautifully and saving you time on the day of your event.
Essential Ingredients for Your No-Bake Reese’s Peanut Butter Pie
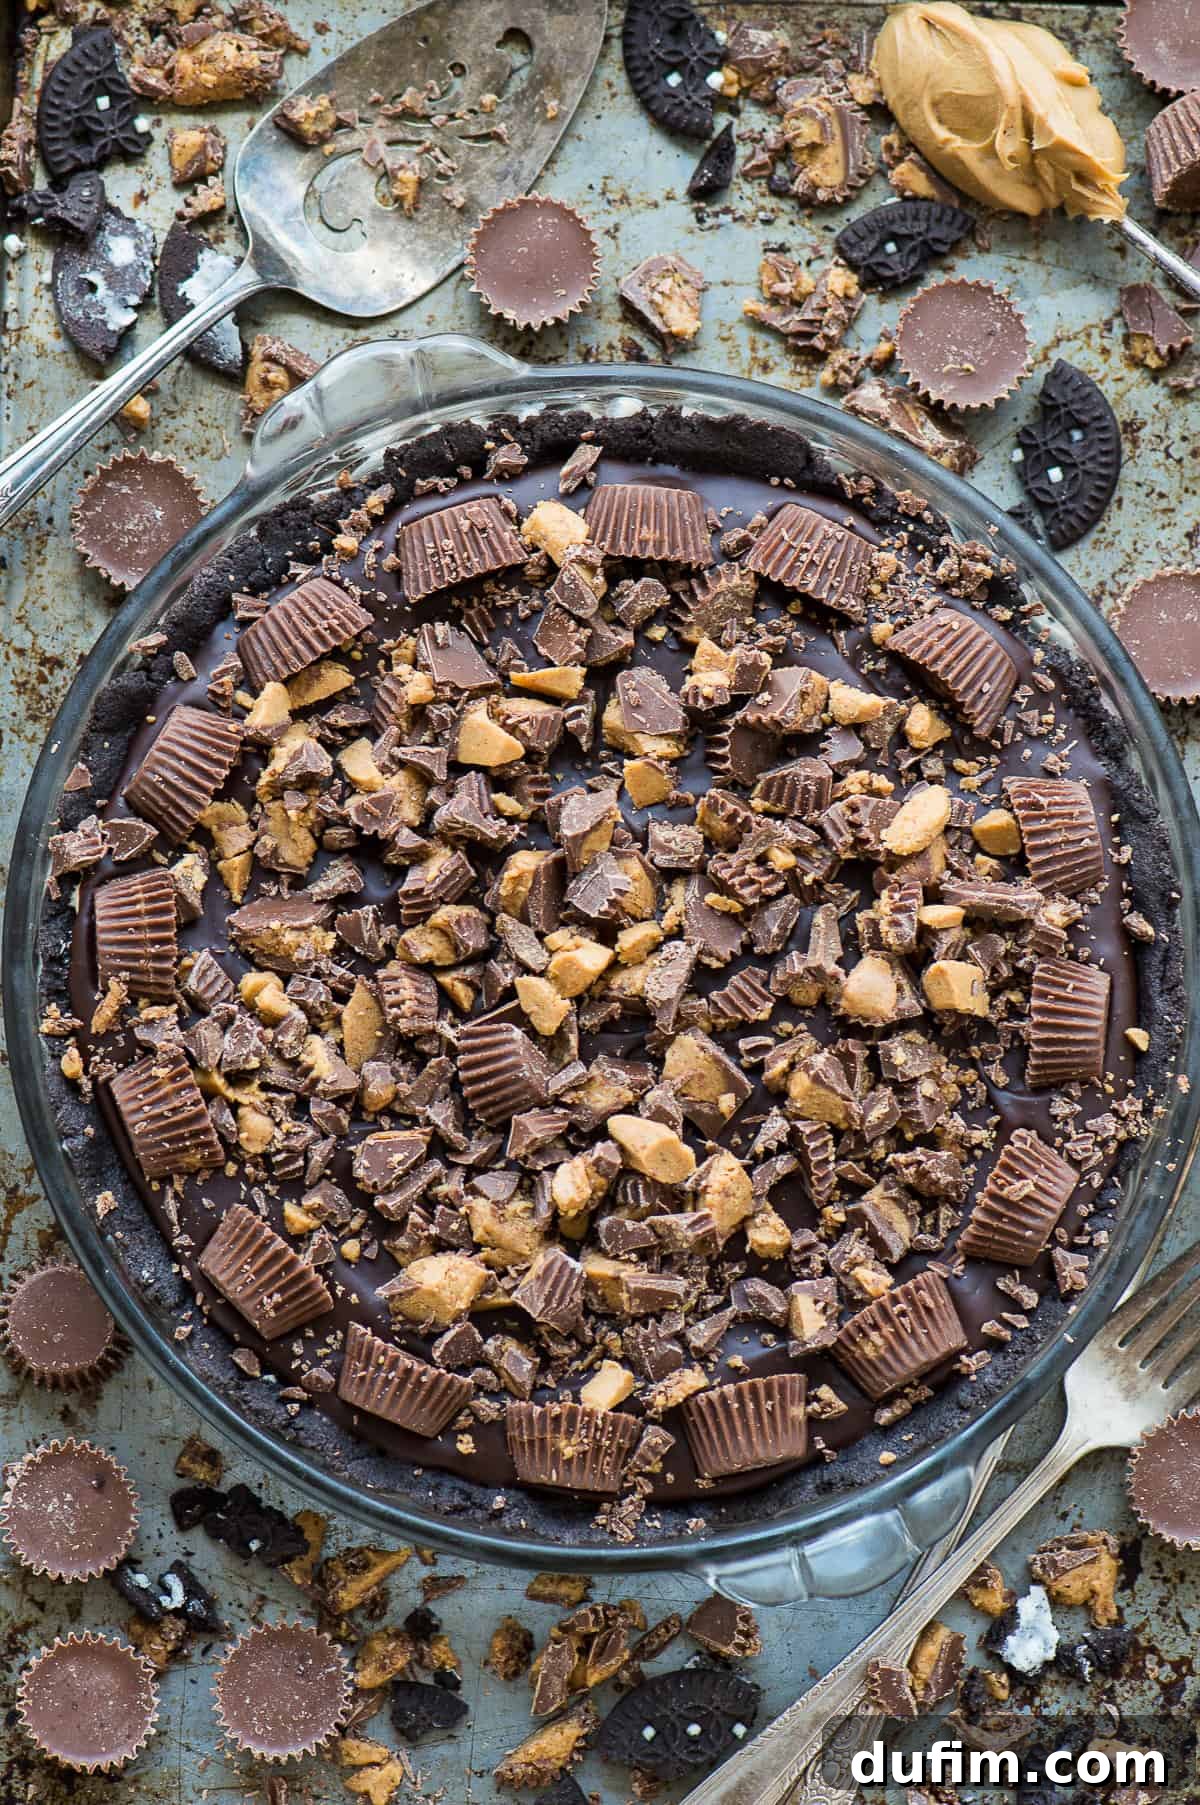
Crafting this sensational Reese’s Peanut Butter Cup Pie requires surprisingly few ingredients – just 8 simple items transform into a dessert masterpiece. The full, precise measurements can be found in the detailed recipe card below, but here’s a quick overview of what you’ll need to gather:
- Oreos: The secret to our classic, rich chocolate crust. Blended into fine crumbs, they create the perfect base. For a gluten-free version, simply opt for gluten-free Oreos.
- Unsalted Butter: Essential for binding the Oreo crumbs and forming a firm, flavorful crust.
- Cream Cheese: Softened cream cheese provides a delightful tang and contributes to the incredibly smooth, rich texture of the peanut butter filling. You can use regular or 1/3 less fat cream cheese, depending on your preference.
- Creamy Peanut Butter: The star of the show! We highly recommend creamy peanut butter for a consistently smooth filling. Natural peanut butter can sometimes separate, affecting the texture.
- Cool Whip: This whipped topping lightens the peanut butter filling, making it airy, fluffy, and perfectly sweet. Ensure it’s thawed before use.
- Heavy Cream: The foundation for our luxurious chocolate ganache. Heated heavy cream is poured over chocolate chips to create a silky-smooth topping.
- Semi-Sweet Chocolate Chips: These melt into a rich, decadent ganache. Feel free to experiment with milk chocolate or dark chocolate chips for varying levels of sweetness.
- Reese’s Peanut Butter Cups: The ultimate topping! Chopped and halved, they provide bursts of flavor and a beautiful visual appeal, making it clear what deliciousness awaits inside.
Crafting Your Reese’s Peanut Butter Pie: Step-by-Step Guide
Making this no-bake pie is a breeze, broken down into four simple layers. Follow these easy steps to assemble your decadent dessert:
Layer #1 – The Perfect Oreo Crust
The foundation of our pie is a rich, chocolatey Oreo crust that’s both simple to make and incredibly satisfying.
- In a blender or food processor, pulse the entire package of Oreos (cookies and cream filling included) until they are finely ground into uniform crumbs. This ensures a smooth, consistent crust.
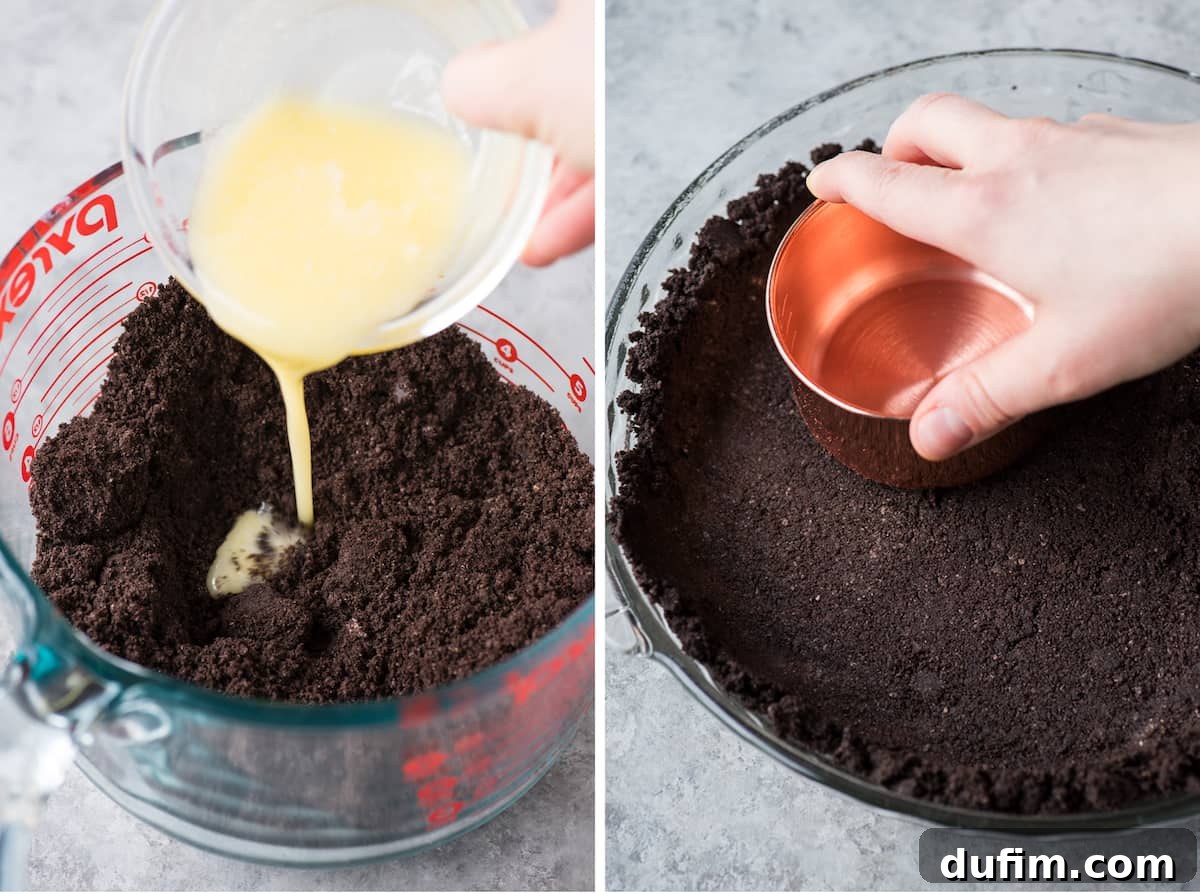
- In a medium bowl, combine these fine Oreo crumbs with the melted butter. Mix thoroughly until the crumbs are evenly moistened and resemble wet sand.
- Press the Oreo mixture firmly and evenly into a 9 or 10-inch pie plate. For best results, use the flat bottom of a measuring cup or a glass to pack the crust down tightly. This creates a sturdy base that won’t crumble when sliced.
- Chill the prepared crust in the refrigerator while you prepare the other layers. This helps it set and become even firmer.
Layer #2 – The Creamy Peanut Butter Filling
This is where the magic happens – a smooth, fluffy, and irresistibly peanut buttery filling!
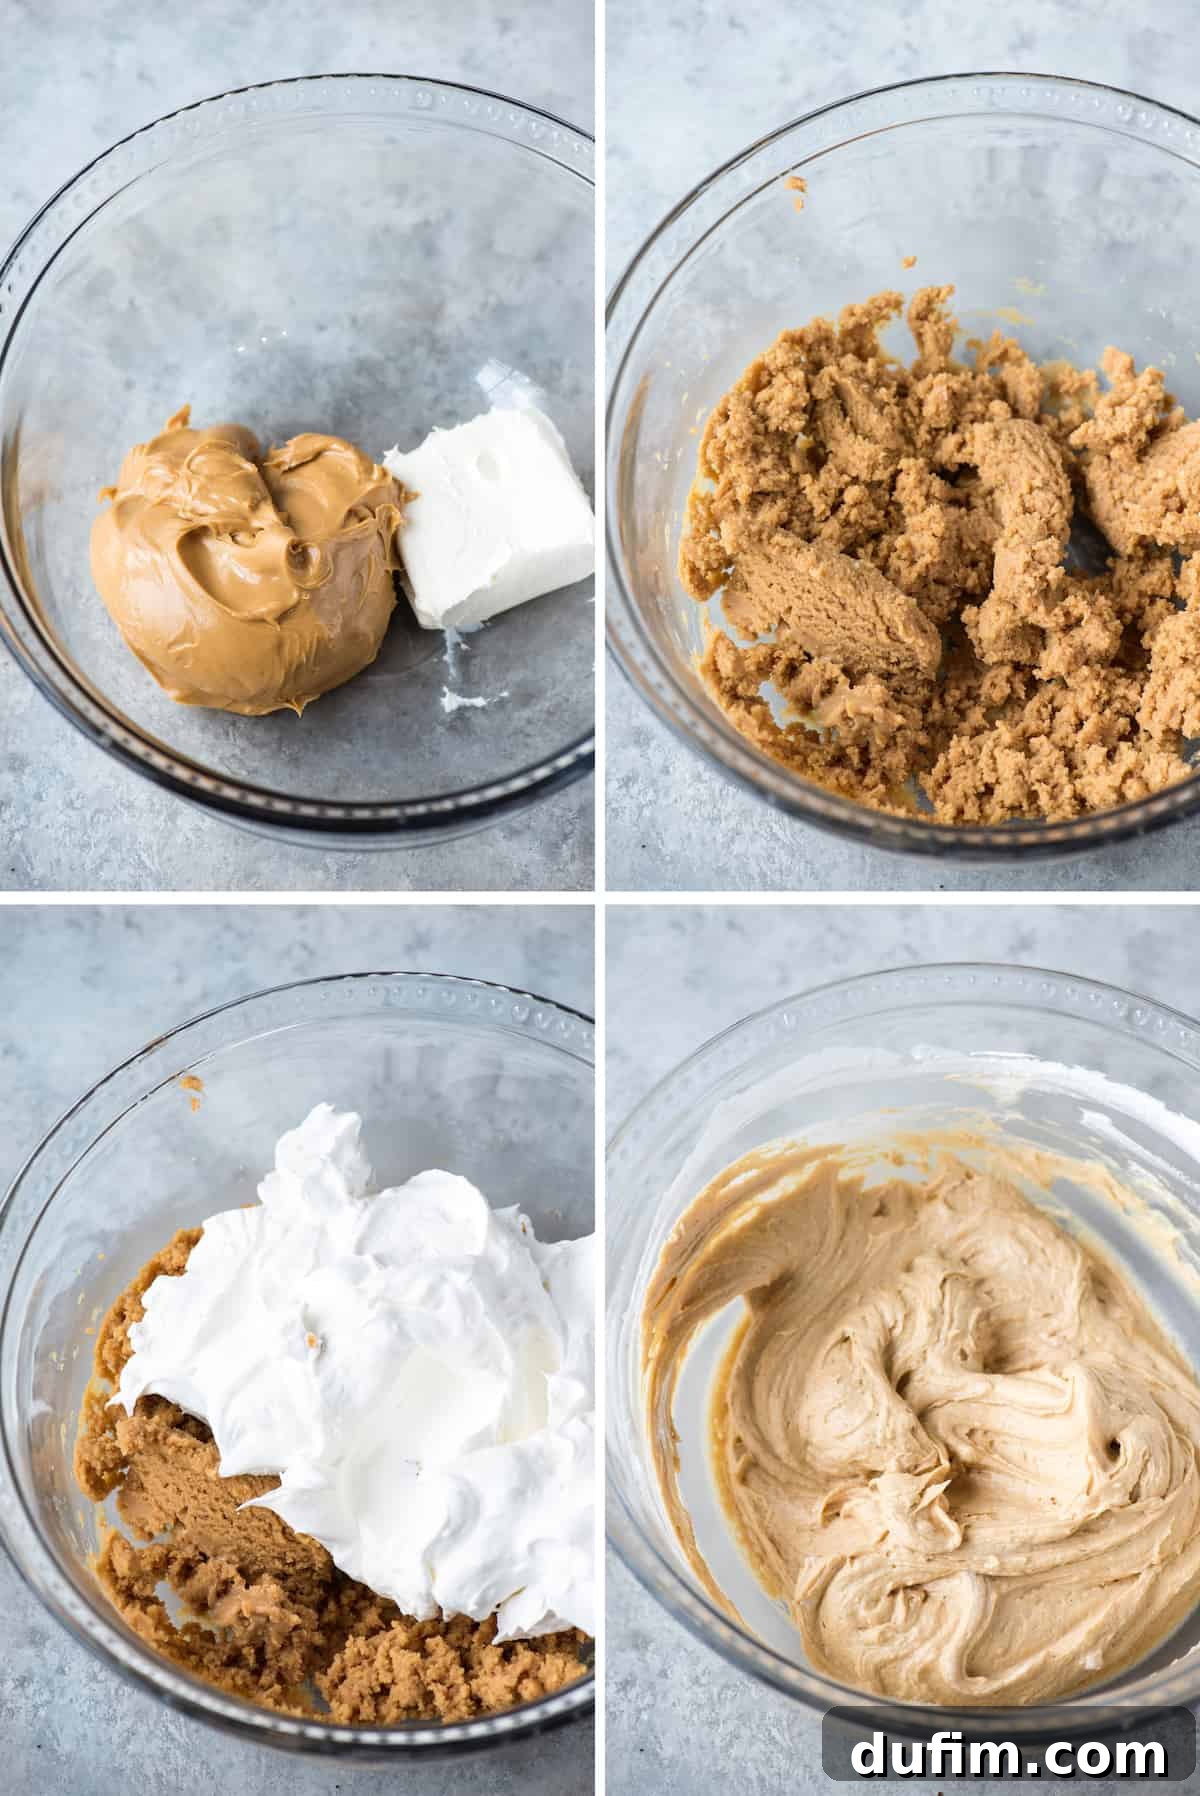
- In a large mixing bowl, using an electric mixer, beat the softened cream cheese and creamy peanut butter together until the mixture is light, smooth, and well combined. Ensure there are no lumps of cream cheese.
- Gently mix in the thawed Cool Whip. Fold it in carefully on a low speed or by hand to maintain its airy texture. Avoid overmixing, as this can deflate the Cool Whip.
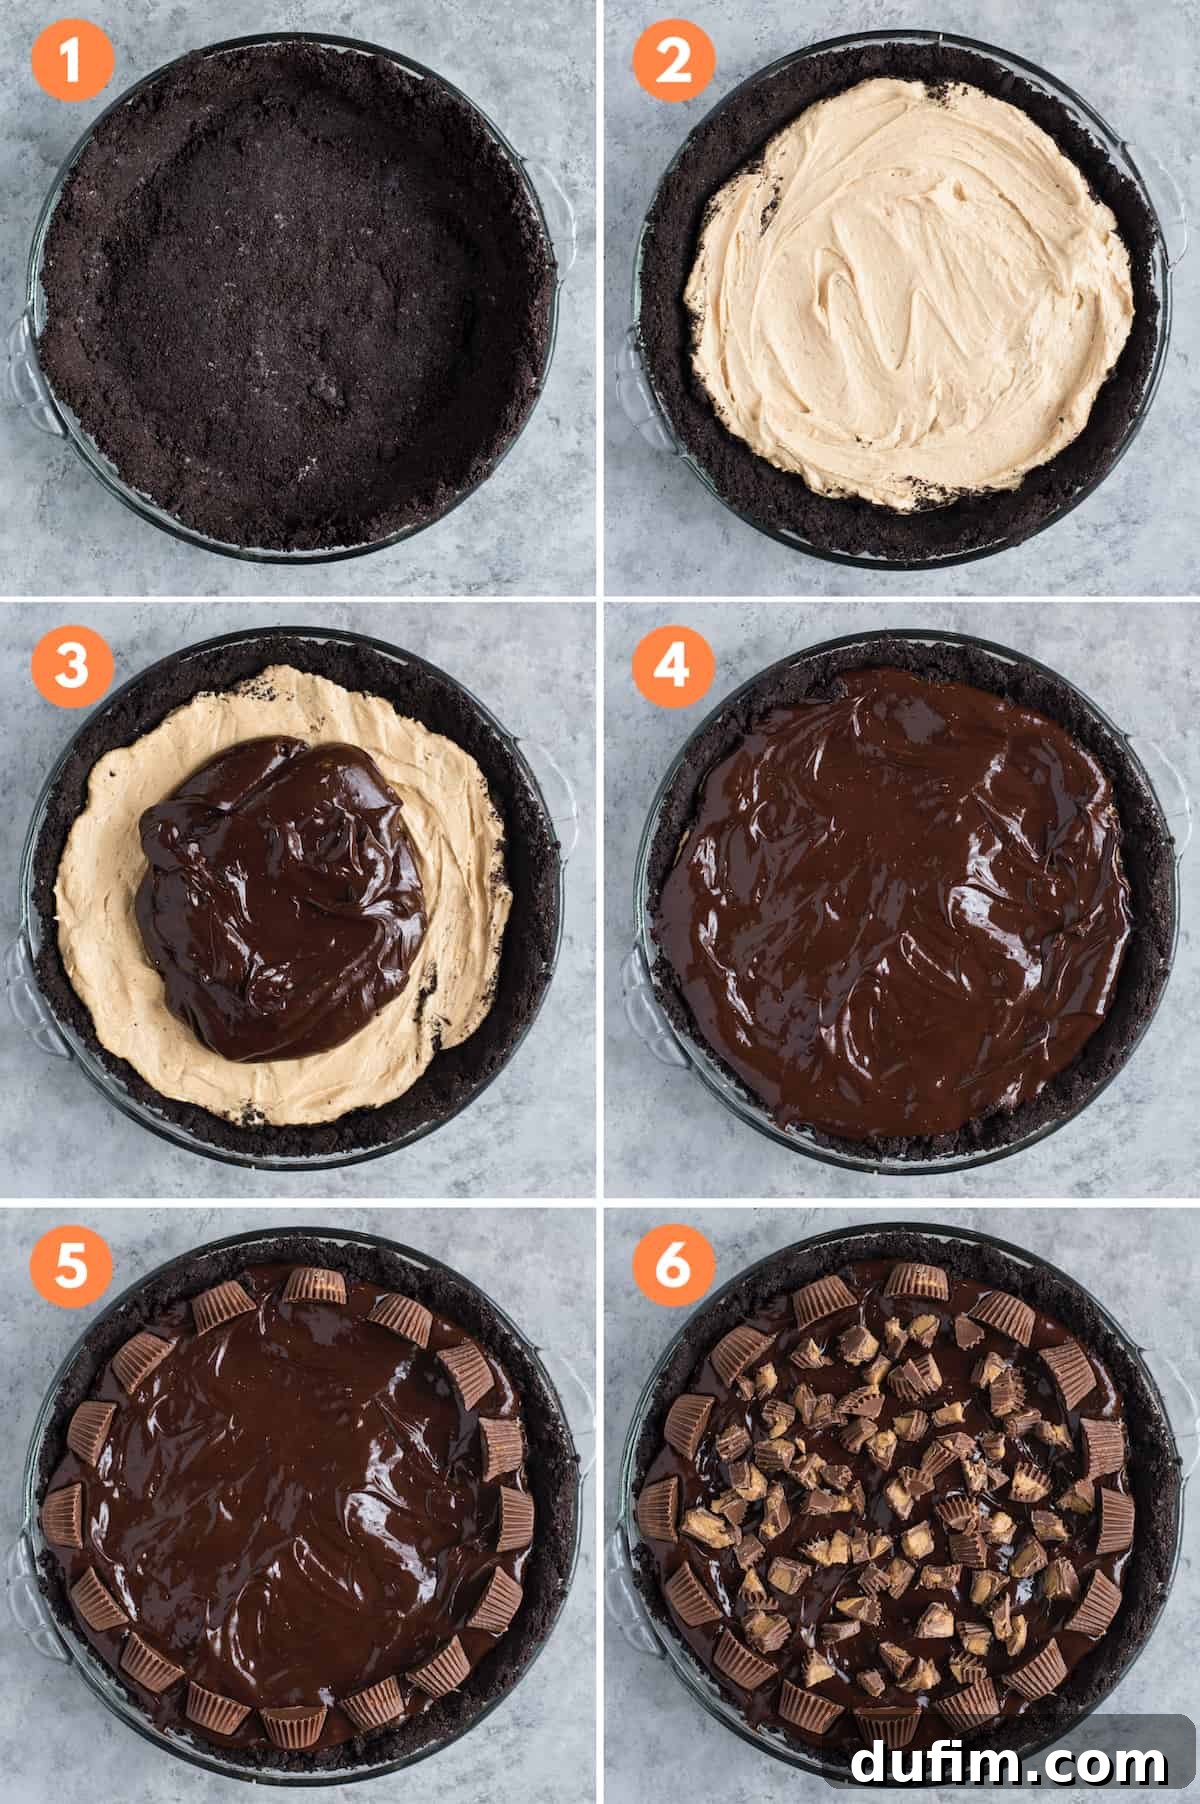
- Spread this delightful peanut butter filling evenly over the chilled Oreo crust. Use a spatula to create a smooth, consistent layer.
- Return the pie to the fridge while you prepare the chocolate ganache to keep the filling firm.
Layer #3 – Luxurious Chocolate Ganache
A silky, rich chocolate ganache adds a layer of deep chocolate flavor that perfectly complements the peanut butter.
- Place the semi-sweet chocolate chips in a medium, heat-proof bowl.
- In a small pot over low heat, gently heat the heavy cream until it just begins to simmer, showing small bubbles around the edges, but do not allow it to boil vigorously.
- Pour the hot heavy cream directly over the chocolate chips. Let the mixture stand undisturbed for 1-2 minutes. This allows the residual heat from the cream to melt the chocolate chips.
- After standing, use a spatula to gently stir the mixture from the center outwards until it is completely smooth, glossy, and free of any lumps. This creates a perfect ganache.
- Allow the ganache to come to room temperature. It should be slightly warm but not hot, otherwise, it might melt the peanut butter filling. Once cooled sufficiently, pour the chocolate ganache carefully over the peanut butter filling, using a spatula to spread it evenly across the surface.
Layer #4 – Reese’s Cup Topping & Chill Time
The grand finale! Adorn your pie with an abundance of Reese’s Peanut Butter Cups.
- Before the chocolate ganache fully sets, chop as many Reese’s Peanut Butter Cups as your heart desires. For an aesthetically pleasing finish, cut about 8 mini peanut butter cups in half and arrange them around the outer edge of the pie. Then, pile more chopped peanut butter cups generously into the center.
- Finally, refrigerate or freeze the pie until it is completely set. This usually takes at least 2 hours. Chilling is crucial for the pie to hold its shape and for the flavors to fully meld.
Optimal Storage for Your Reese’s Peanut Butter Cup Pie
One of the many benefits of this no-bake pie is its versatile storage options, offering different textural experiences depending on how you store it.
This pie can be kept beautifully in either the refrigerator or the freezer. When stored in the fridge, the pie offers a softer, lighter filling with a creamy consistency. However, for a truly unique and refreshing treat, it also tastes absolutely amazing directly from the freezer.
After making this pie numerous times, I’ve personally discovered a strong preference for enjoying it frozen rather than simply refrigerated. The frozen version develops a delightful, almost ice cream-like texture that is incredibly satisfying, especially on a warm day. For the best possible results, regardless of whether you choose to refrigerate or freeze, always ensure the entire pie is thoroughly covered with a layer of plastic wrap. This prevents freezer burn, maintains freshness, and keeps unwanted odors from permeating your delicious dessert.
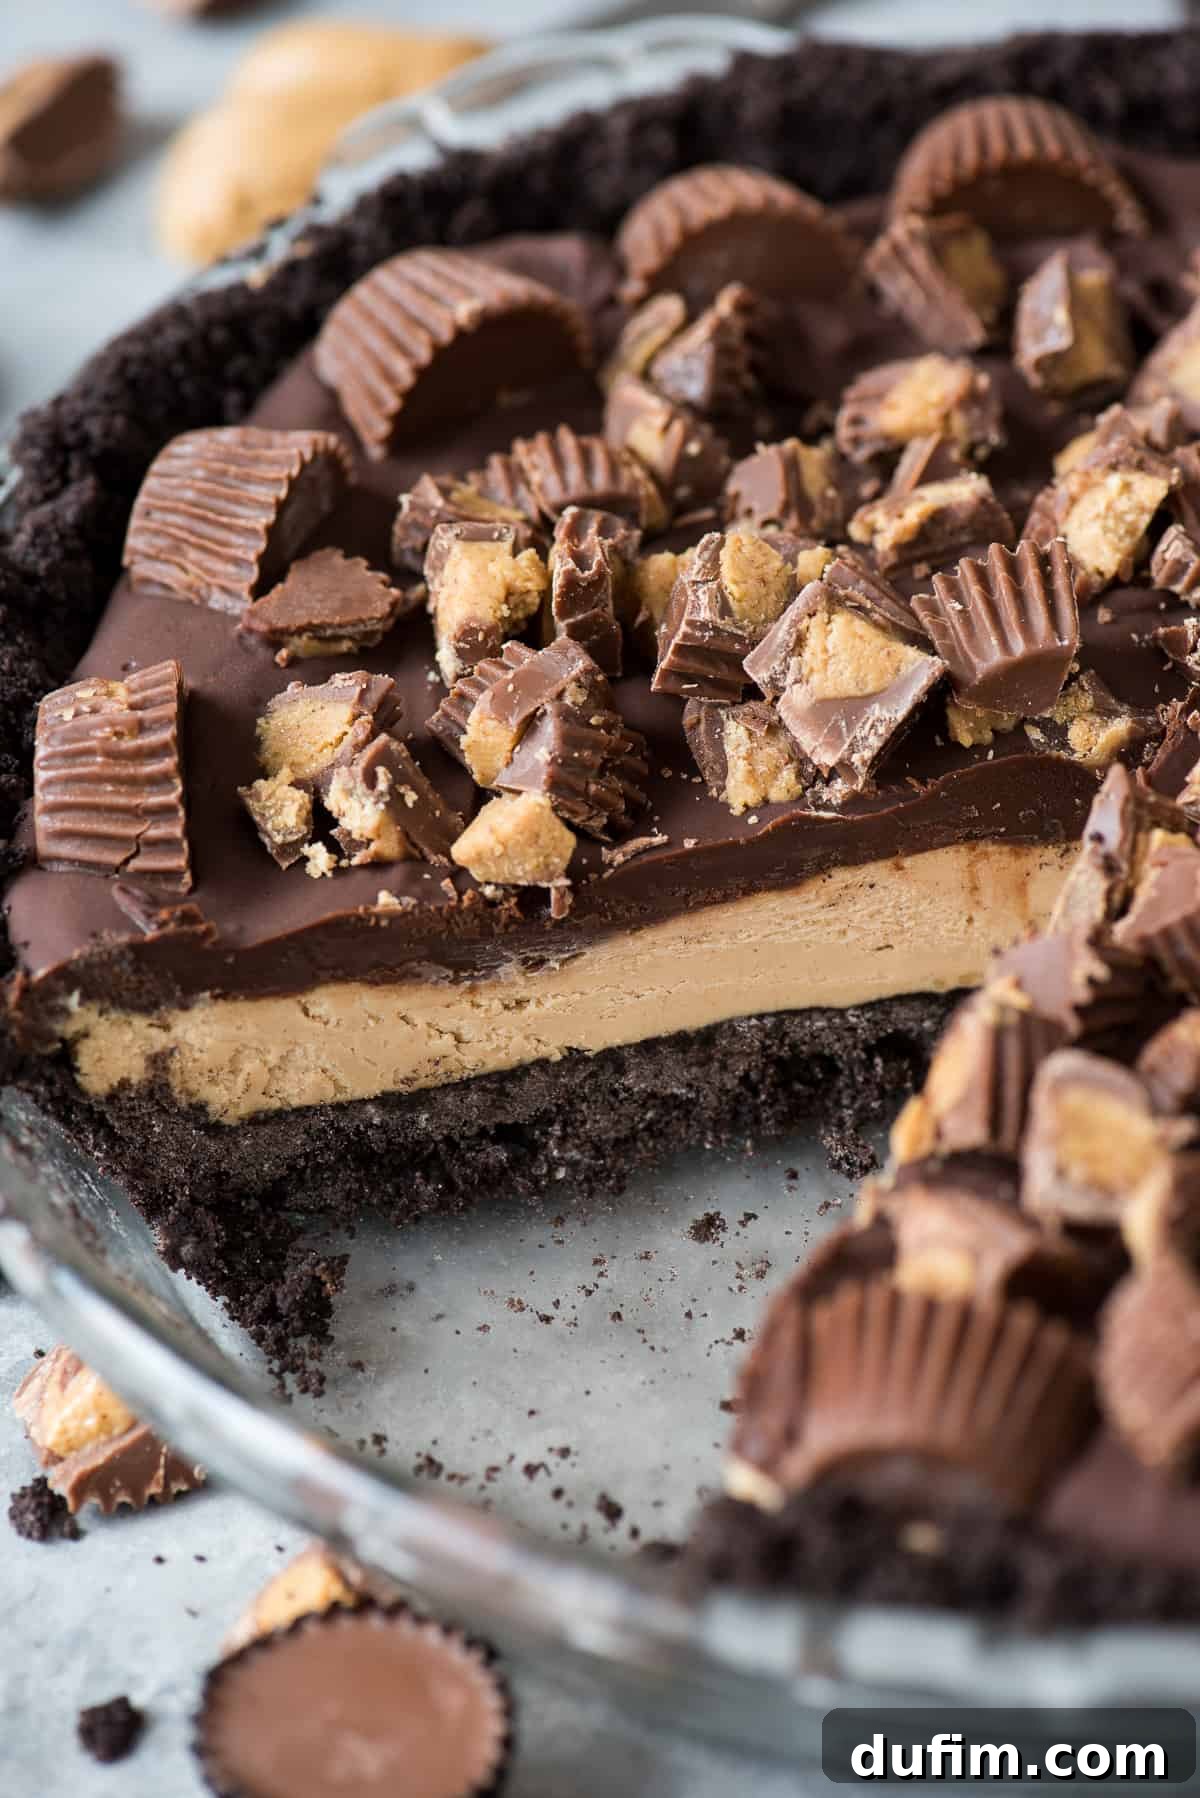
Even when “frozen,” the peanut butter filling retains a remarkable creaminess, making it surprisingly easy to slice through. The only part that might offer a little resistance is the Oreo crust, which becomes quite firm when frozen. But trust me, a little “elbow grease” is a small price to pay for a slice of this heavenly pie!
Time Commitment for Your Reese’s Peanut Butter Pie
This pie is celebrated for its quick active preparation time, making it ideal for when you need an impressive dessert without spending hours in the kitchen. Here’s a breakdown of the time required:
- 5 minutes to prepare the simple, crumbly Oreo crust.
- 5 minutes to whip up the luscious peanut butter filling.
- 10 minutes to create the smooth chocolate ganache and meticulously add the Reese’s cups topping.
- 2 hours (minimum) for chilling in the fridge or freezer, allowing all the layers to set perfectly and flavors to meld.
Total Active Time: Approximately 20 minutes. Total Time (including chilling): Roughly 2 hours 20 minutes.
Making Your Reese’s Peanut Butter Cup Pie Gluten-Free
Adapting this sensational Reese’s Peanut Butter Cup Pie recipe to be gluten-free is incredibly simple, requiring just one easy substitution. The only ingredient that typically contains gluten is the Oreo cookies used for the crust. To make this pie entirely gluten-free, simply swap out traditional Oreos for their widely available gluten-free counterparts. All other ingredients in this delicious recipe – including the peanut butter, cream cheese, Cool Whip, heavy cream, chocolate chips, and Reese’s Peanut Butter Cups – are naturally gluten-free!
This makes it a fantastic option for those with gluten sensitivities or dietary restrictions, ensuring everyone can enjoy a slice of this chocolate peanut butter heaven without compromise.
Expert Tips for the Best Reese’s Peanut Butter Pie
To ensure your Reese’s Peanut Butter Cup Pie turns out perfectly every time, keep these helpful tips in mind:
- Crush Whole Oreos: When making the crust, be sure to blend the entire Oreo cookie, including both the chocolate cookie and its creamy white filling. This creates a richer flavor and a more cohesive crust texture.
- Choose Creamy Peanut Butter: For the filling, I strongly recommend using creamy peanut butter over natural peanut butter. Natural peanut butter can often separate, leading to a thinner or oilier filling that doesn’t set as well. Standard creamy peanut butter provides the best consistency.
- Decorate with Flair: To create an attractive and enticing top for your pie, consider a strategic arrangement of Reese’s Peanut Butter Cups. A great technique is to cut about 8 mini peanut butter cups in half and artfully place these halves around the outside edge of the pie. Then, fill the center with a generous pile of additional chopped peanut butter cups. This provides both visual appeal and a satisfying crunch with every bite.
- Soften Cream Cheese: Ensure your cream cheese is properly softened to room temperature before mixing. This is crucial for achieving a perfectly smooth, lump-free peanut butter filling.
- Don’t Rush the Chill: The chilling time is vital! Allow the pie to set for at least 2 hours (or longer, up to overnight) in the refrigerator or freezer. This ensures all layers are firm, easy to slice, and that the flavors have ample time to develop and meld together beautifully.
- Ganache Temperature: When pouring the chocolate ganache over the peanut butter filling, make sure the ganache has cooled slightly to room temperature. If it’s too hot, it could melt the delicate peanut butter layer beneath it.
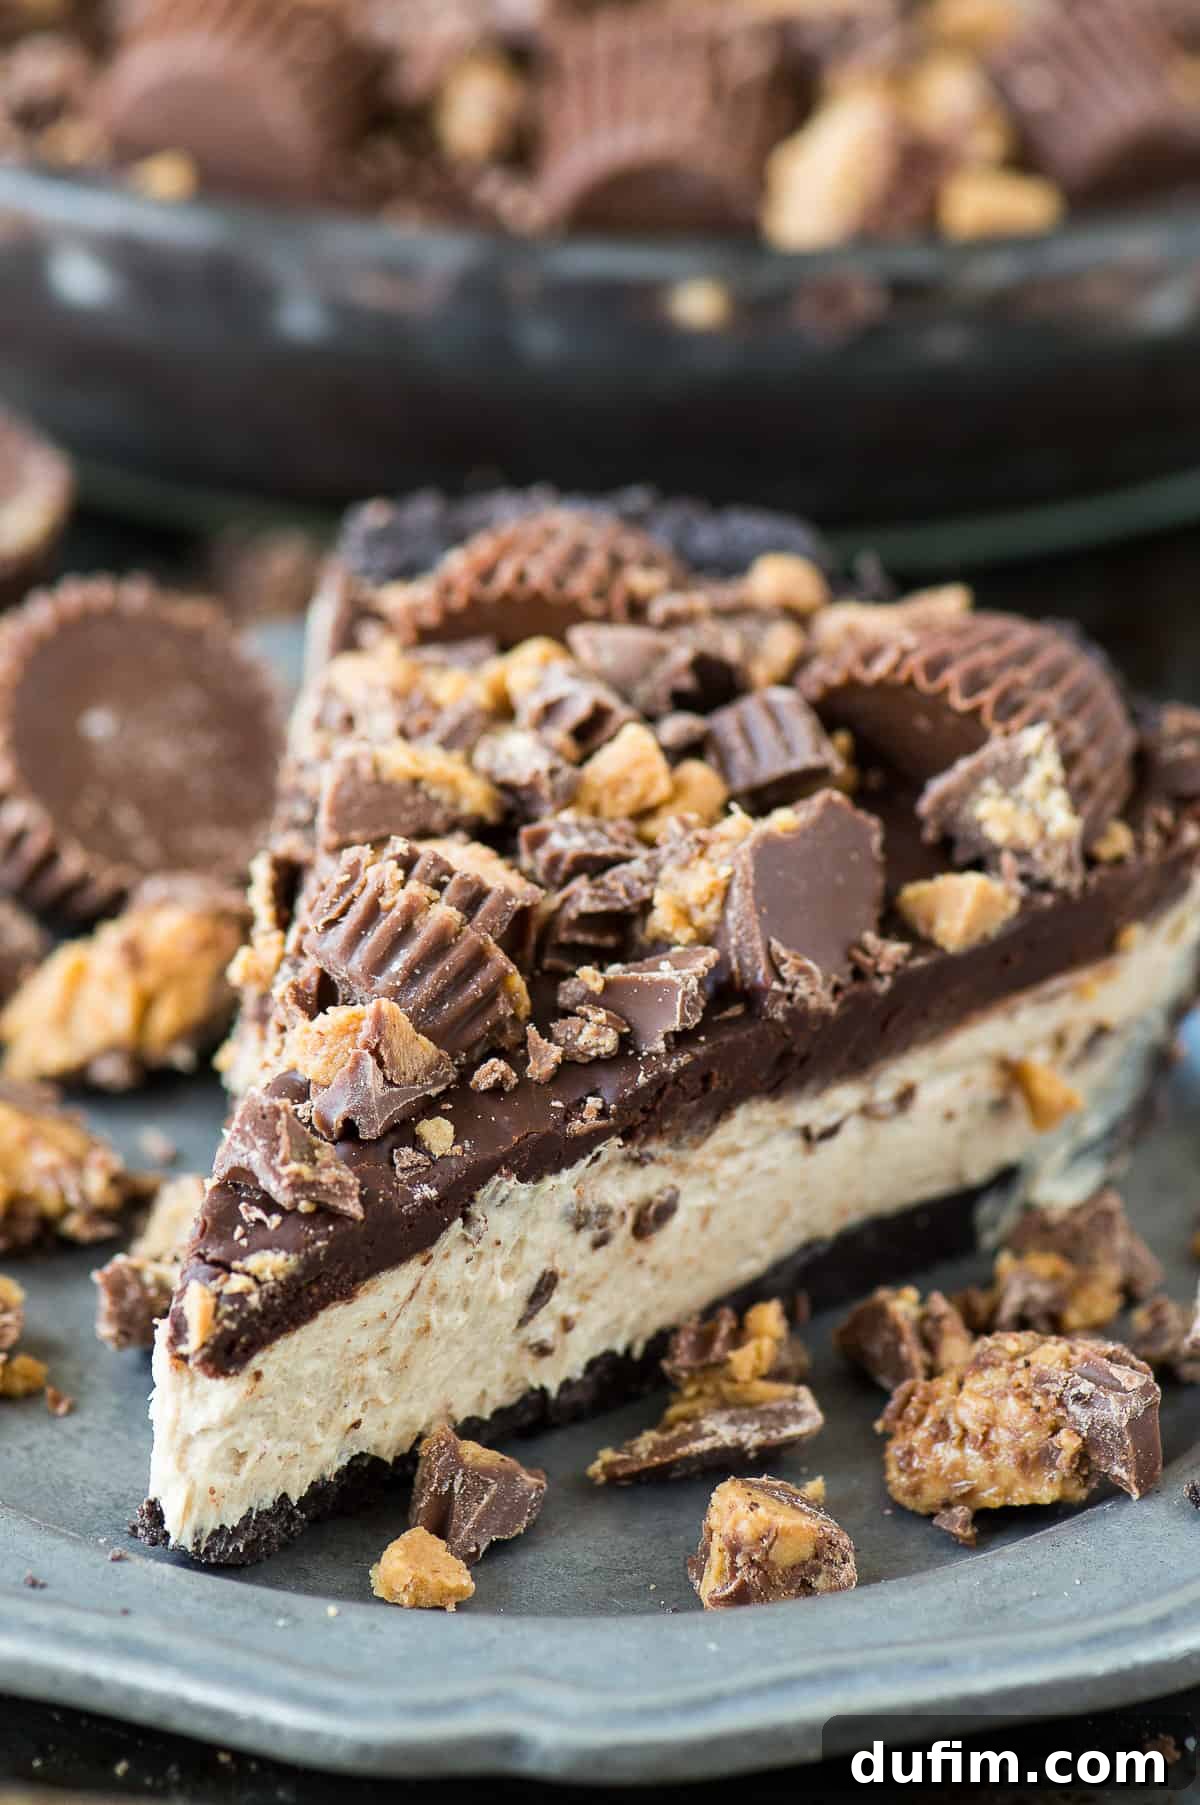
My husband is a chocolate and peanut butter fanatic! This pie was a huge hit with him, and I absolutely loved it too! It’s so easy to make, which I appreciate, and incredibly decadent. I will definitely be making it again, especially for his birthday and Father’s Day. I almost bought a store-bought chocolate crust to save time, but I’m so glad I didn’t! The homemade crust was excellent, and I just used generic Oreos – no one could tell the difference. That crust was to die for!
-Amey
Reese’s Peanut Butter Pie Recipe FAQs
I’ve personally only used creamy peanut butter in this recipe, as it ensures the smoothest, most consistent filling. However, if you’re a fan of an added textural crunch, you could certainly experiment with crunchy peanut butter!
For the rich chocolate ganache, I typically use semi-sweet chocolate chips. This provides a balanced sweetness that pairs wonderfully with the peanut butter. That said, feel free to use milk chocolate chips for a sweeter profile or dark chocolate chips for a more intense chocolate flavor.
Yes, absolutely. This recipe contains perishable ingredients such as cream cheese and Cool Whip, which require refrigeration to maintain their freshness, texture, and food safety. Always store the pie in the fridge for the best results.
When properly covered and stored in the refrigerator, this delectable pie will remain fresh and delicious for up to 5 days. However, given how irresistibly good it is, don’t be surprised if it disappears much sooner!
Yes, you absolutely can! Freezing this pie offers two great benefits: you can enjoy it as a delightful frozen dessert, or you can freeze it for longer-term storage. To freeze for later, assemble the pie completely, then wrap it very well in multiple layers of plastic wrap, followed by aluminum foil. Store it in the freezer for up to 3 months.
Yes, this pie is an excellent candidate for making ahead of time, which makes it perfect for holidays like Thanksgiving or any busy entertaining schedule. Assemble the pie as directed, then wrap it tightly in plastic wrap and store it in the freezer for up to 3 months. To thaw, simply place the wrapped pie in the refrigerator overnight before serving.
More Irresistible Pie Recipes to Try
- Effortless No-Bake Pumpkin Pie
- Refreshing Grasshopper Pie
- Decadent Oreo Pudding Pie
- Crunchy Butterfinger Pie
Discover More Delicious Recipes
- Easy Cream Cheese Frosting Recipe
- Fluffy Corn Muffins Recipe
- Simple Strawberry Lemonade Recipe
- Delicious Apple Cinnamon Muffins
- Pumpkin Cream Cheese Swirl Muffins
- Cool Whip Pumpkin Pie
- Our Best Pumpkin Muffins Recipe
- Classic Ambrosia Salad Recipe
- A Collection of Muffin Recipes
- 3-Ingredient Peanut Butter Cookies
Overall Rating: 4.51 out of 5 stars based on 178 ratings
No-Bake Reese’s Peanut Butter Cup Pie
By: Beth
Prep Time: 20 minutes
Additional Chill Time: 2 hours
Total Time: 2 hours 20 minutes
Servings: 12 servings
This no-bake Reese’s Peanut Butter Cup Pie recipe is an absolute showstopper, earning rave reviews with its effortless preparation. Featuring a decadent Oreo crust, a luscious creamy peanut butter filling, and a smooth chocolate ganache, all crowned with an abundance of chopped Reese’s candies, it’s the ultimate easy dessert to impress.
Equipment
- Glass Pie Plate
- Spatula
- Glass Mixing Bowl
- Food Processor or Blender
- Electric Mixer
- Small Pot
Ingredients
Oreo Crust
- 1 package Oreos, 14.3 oz (approximately 36 cookies)
- 7 Tbsp (98g) unsalted butter, melted
Peanut Butter Filling
- 1 cup (270g) creamy peanut butter
- 4 oz cream cheese, softened
- 1 container Cool Whip, 8 oz, thawed
Chocolate Ganache
- 1 cup (170g) semi-sweet chocolate chips
- 6 Tbsp (89ml) heavy whipping cream
Topping
- Reese’s peanut butter cups, some cut in half, others chopped (to your desired amount)
Instructions
Oreo Crust
- Process the entire package of Oreos (cookies and cream) in a food processor or blender until fine crumbs remain.
- In a large bowl, combine the crushed Oreos with the melted butter. Mix well until thoroughly combined.
- Press this mixture evenly into a 9 or 10-inch pie pan. Use the bottom of a measuring cup or a flat glass to pack the crust down firmly.
- Place the crust in the fridge to chill until ready to fill, at least 15-20 minutes.
Peanut Butter Filling
- In a large mixing bowl, combine the creamy peanut butter and softened cream cheese using an electric mixer until well blended and smooth.
- Gently fold in the thawed Cool Whip on low speed or by hand until just combined. Avoid overmixing.
- Spread this peanut butter mixture evenly over the chilled Oreo crust.
- Return the pie to the fridge while you prepare the ganache.
Chocolate Ganache
- Place the semi-sweet chocolate chips in a medium heat-proof bowl.
- In a small pot over low heat, heat the heavy cream until it is just about to boil (small bubbles forming around the edges).
- Pour the hot heavy cream over the chocolate chips. Allow the mixture to stand for 1-2 minutes to allow the chocolate to melt.
- Use a spatula to stir the mixture gently until it becomes smooth and glossy.
- Allow the ganache to cool to room temperature (it should still be pourable but not hot). Pour the ganache on top of the peanut butter filling, using a spatula to spread it evenly.
Topping & Chilling
- Before the chocolate ganache completely hardens, arrange the Reese’s peanut butter cups. Start by placing halved peanut butter cups around the edges of the pie. Then, add chopped peanut butter cups generously to the center of the pie.
- Cover the entire pie with plastic wrap or aluminum foil and return it to the fridge or freezer for at least 2 hours, or until fully set.
- Before serving, if frozen, remove the pie from the freezer and let it sit at room temperature for about 15 minutes to make cutting easier.
- Cover and refrigerate or freeze any leftovers.
Notes
Easily make this recipe gluten-free by using gluten-free Oreos for the crust!
Storage Tips
This pie can be kept in the fridge or the freezer. In the fridge, the pie will have a softer, lighter filling. However, it also tastes amazing directly from the freezer, offering an almost ice-cream like consistency. I personally prefer it frozen! Be sure to cover the entire pie in a layer of plastic wrap for best results and to prevent freezer burn while storing.
Even when “frozen,” the filling remains creamy and relatively easy to cut through. The only part that might give a little trouble is the Oreo crust, which becomes quite firm. But a little effort is well worth a piece of this delicious pie.
Can This Reese’s Pie Be Made Ahead of Time?
Yes, absolutely! This recipe is perfect for making ahead, especially for holidays like Thanksgiving or other gatherings. Assemble the pie completely, then wrap it really well in plastic wrap and store it in the freezer for up to 3 months.
To thaw: Simply place the wrapped pie in the fridge overnight before you plan to serve it.
Nutrition Facts
All nutritional values are approximate and provided to the reader as a courtesy. Changing ingredients and/or quantities will alter the estimated nutritional calculations.
Calories: 562 kcal | Carbohydrates: 48g | Protein: 10g | Fat: 39g | Saturated Fat: 17g | Polyunsaturated Fat: 5g | Monounsaturated Fat: 14g | Trans Fat: 1g | Cholesterol: 38mg | Sodium: 323mg | Potassium: 390mg | Fiber: 4g | Sugar: 29g | Vitamin A: 435IU | Vitamin C: 1mg | Calcium: 69mg | Iron: 5mg
Love this recipe? Show us some love by rating and commenting below! Your feedback helps us share more delicious creations.