
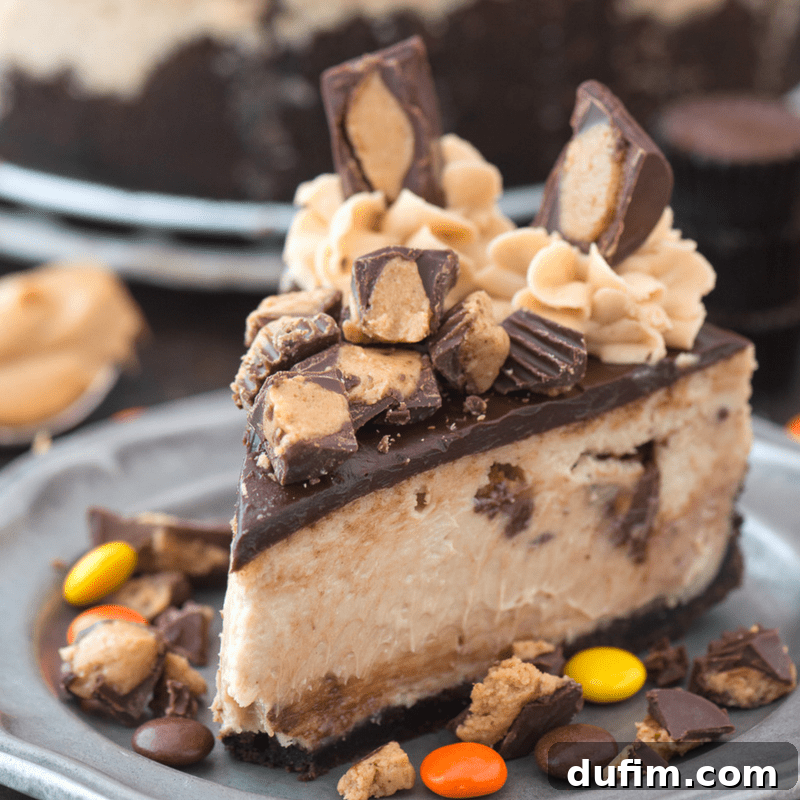
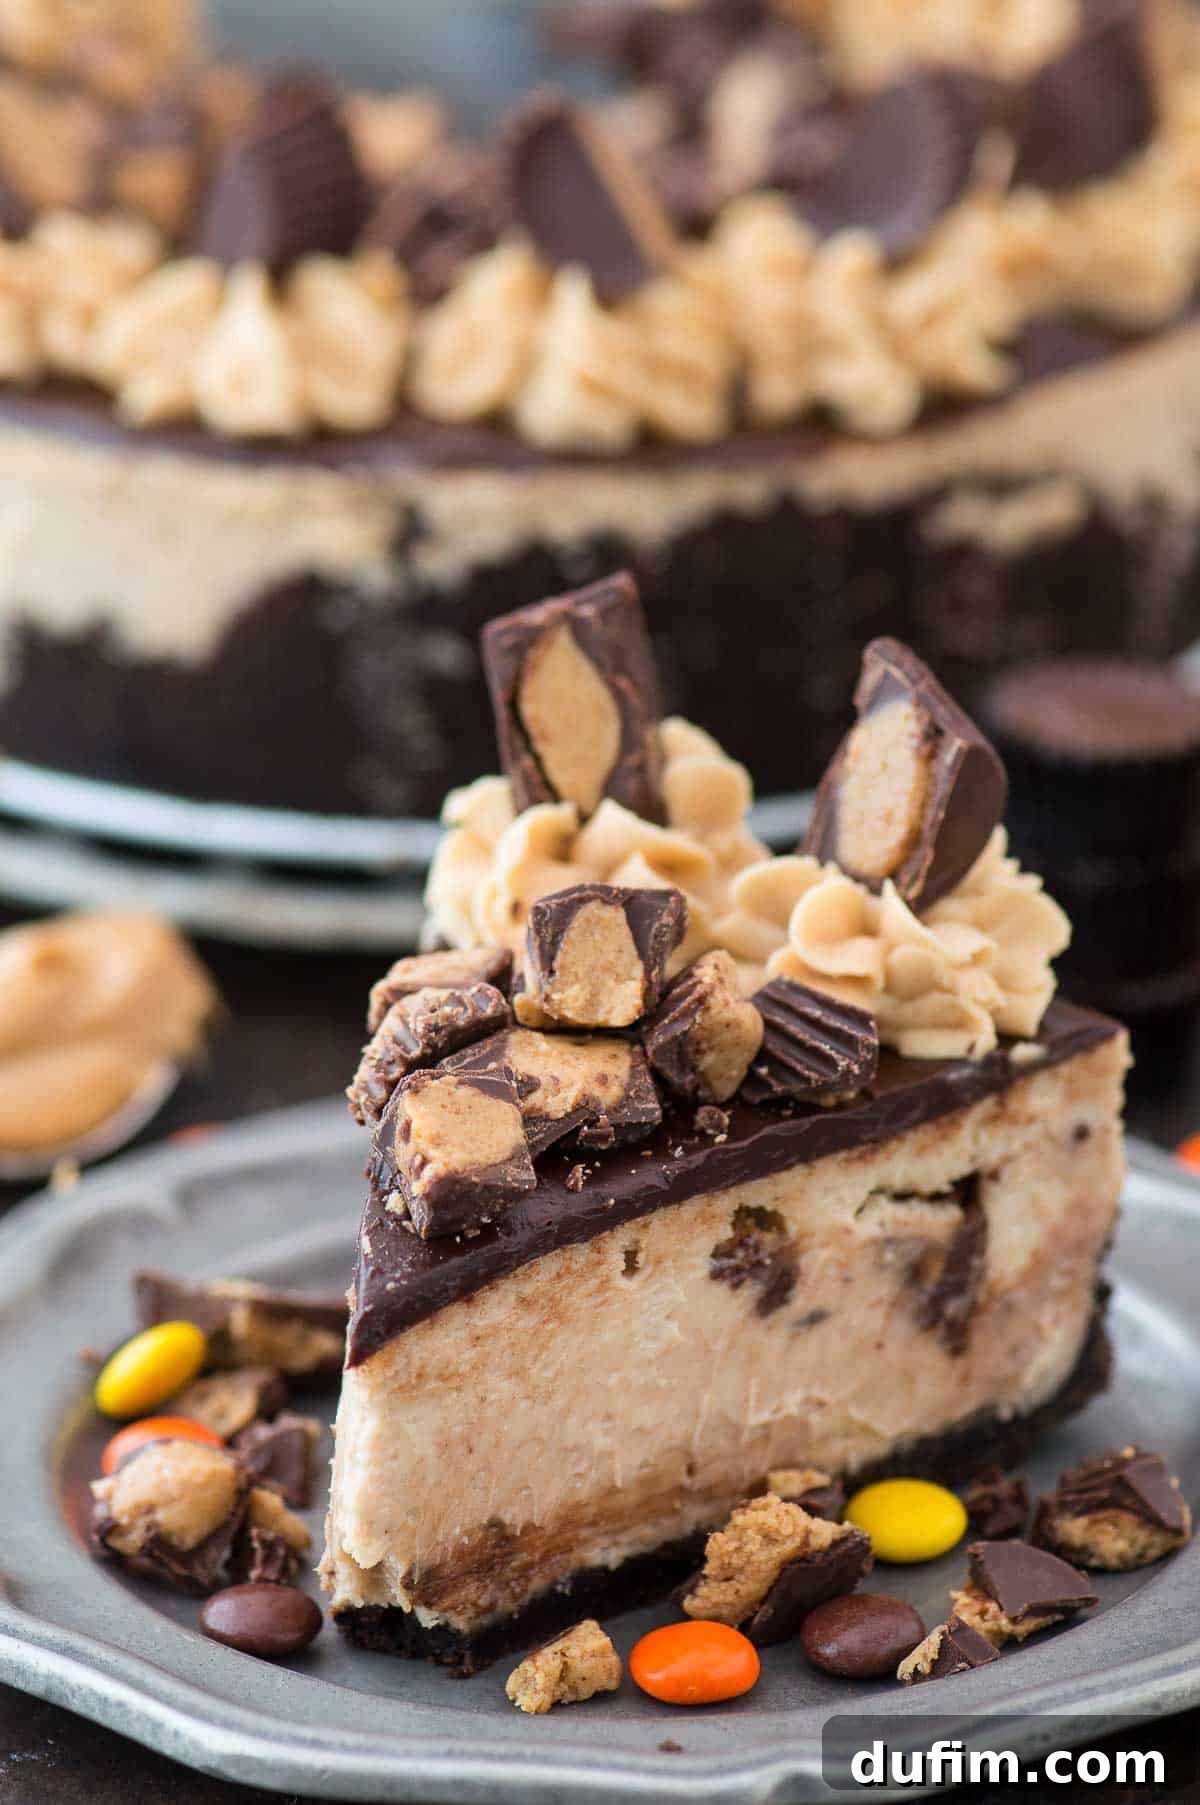
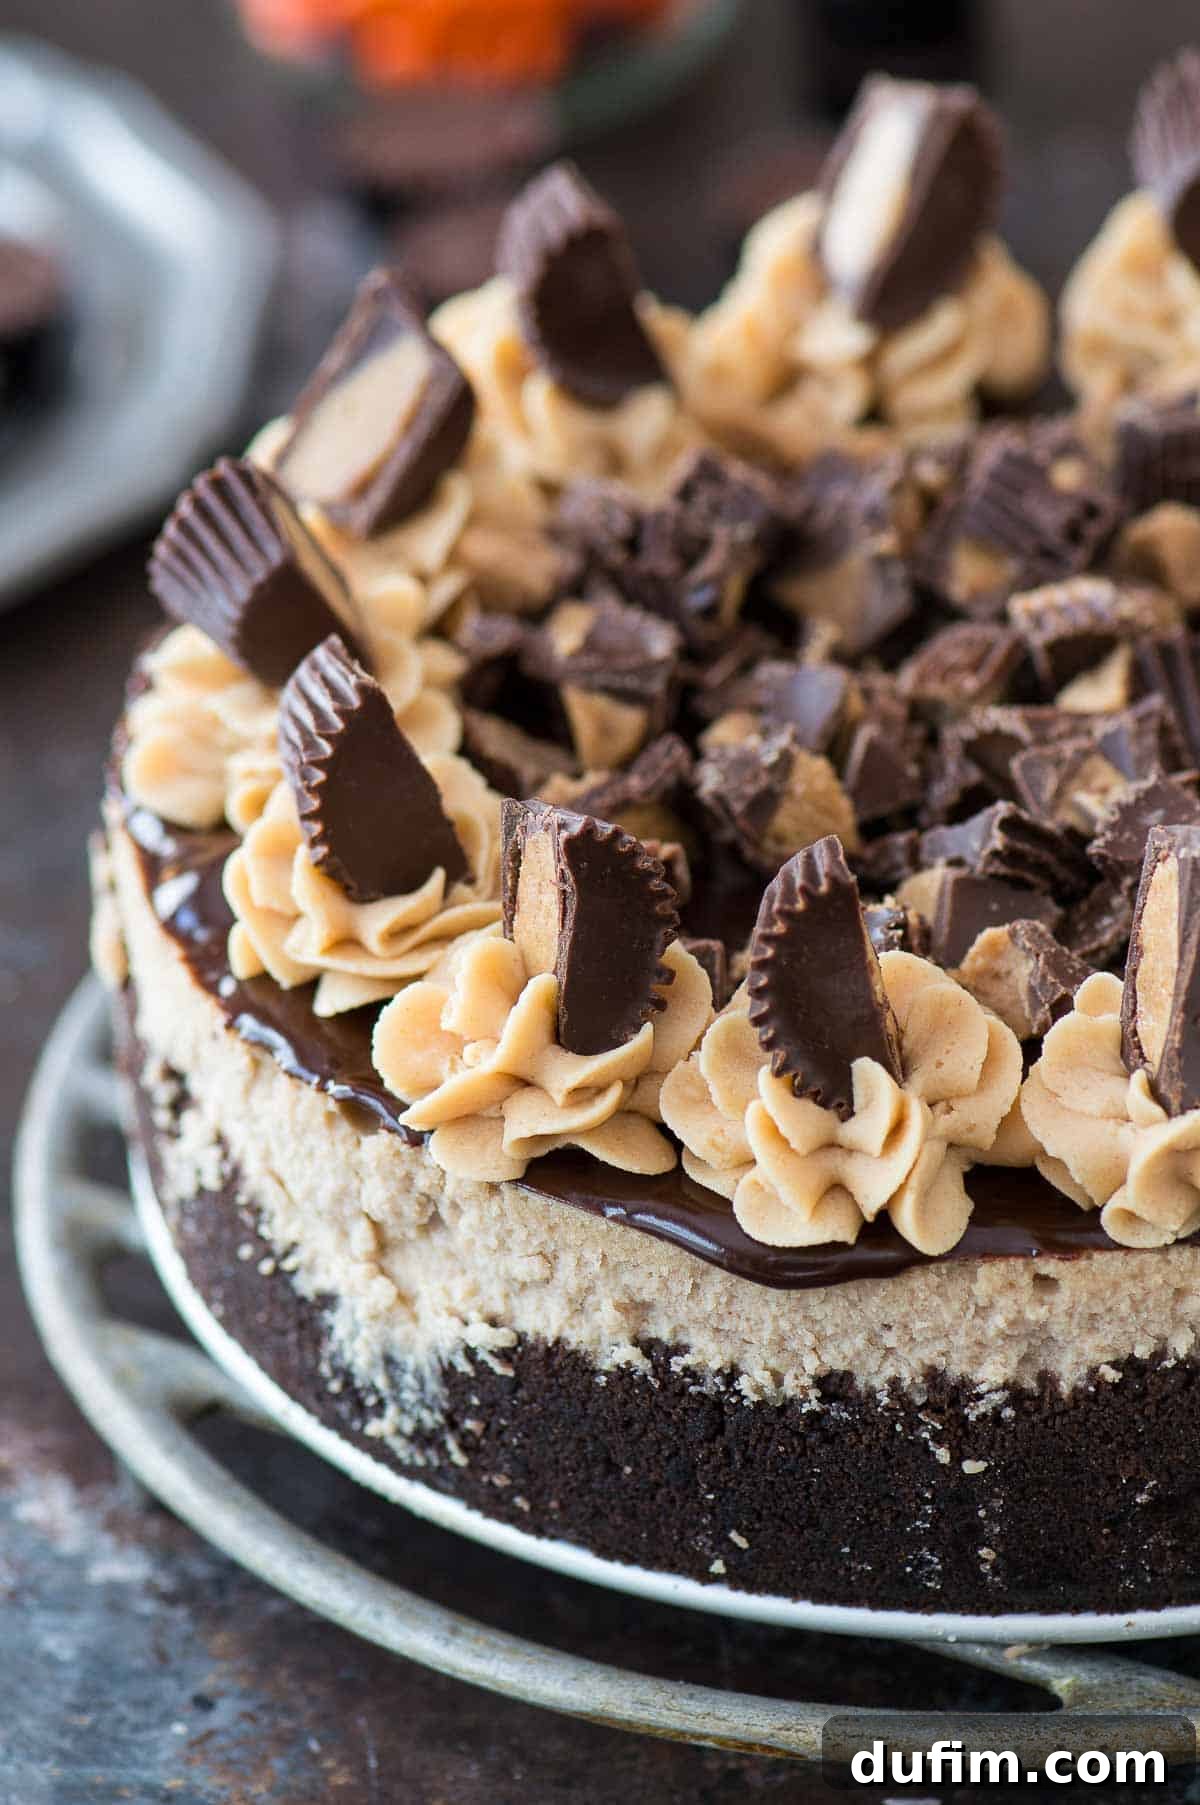
Prepare to be amazed by this Ultimate Reese’s Chocolate Peanut Butter Cheesecake – a true dream dessert for any enthusiast! This irresistible peanut butter cheesecake boasts a rich chocolate crust, a velvety Reese’s peanut butter cheesecake filling generously swirled with chopped Reese’s Cups, and a luscious layer of smooth chocolate ganache. Crowned with even more Reese’s Cups, this dessert promises a double dose of your favorite chocolate and peanut butter combination, making it an undeniable showstopper for any gathering.
“I made this for a family gathering and everyone absolutely loved it! It was just right—not sickeningly sweet. Will definitely be keeping this recipe!”
– Melissa
Why You’ll Adore This Extreme Reese’s Peanut Butter Cheesecake
This isn’t just any cheesecake; it’s an extreme celebration of the beloved Reese’s Peanut Butter Cup! Every layer is meticulously crafted to deliver maximum flavor and an unforgettable dessert experience. If you’re a fan of the iconic chocolate and peanut butter pairing, prepare to fall in love. Here’s a breakdown of what makes this cheesecake truly exceptional and an absolute must-try:
- Rich Chocolate Graham Cracker Crust: The perfect foundation for this masterpiece. A dark, crumbly crust made from chocolate graham crackers or Oreos provides a satisfying crunch and a deep chocolate flavor that beautifully complements the creamy filling. It’s sturdy enough to hold the generous layers, yet delicate enough to melt in your mouth.
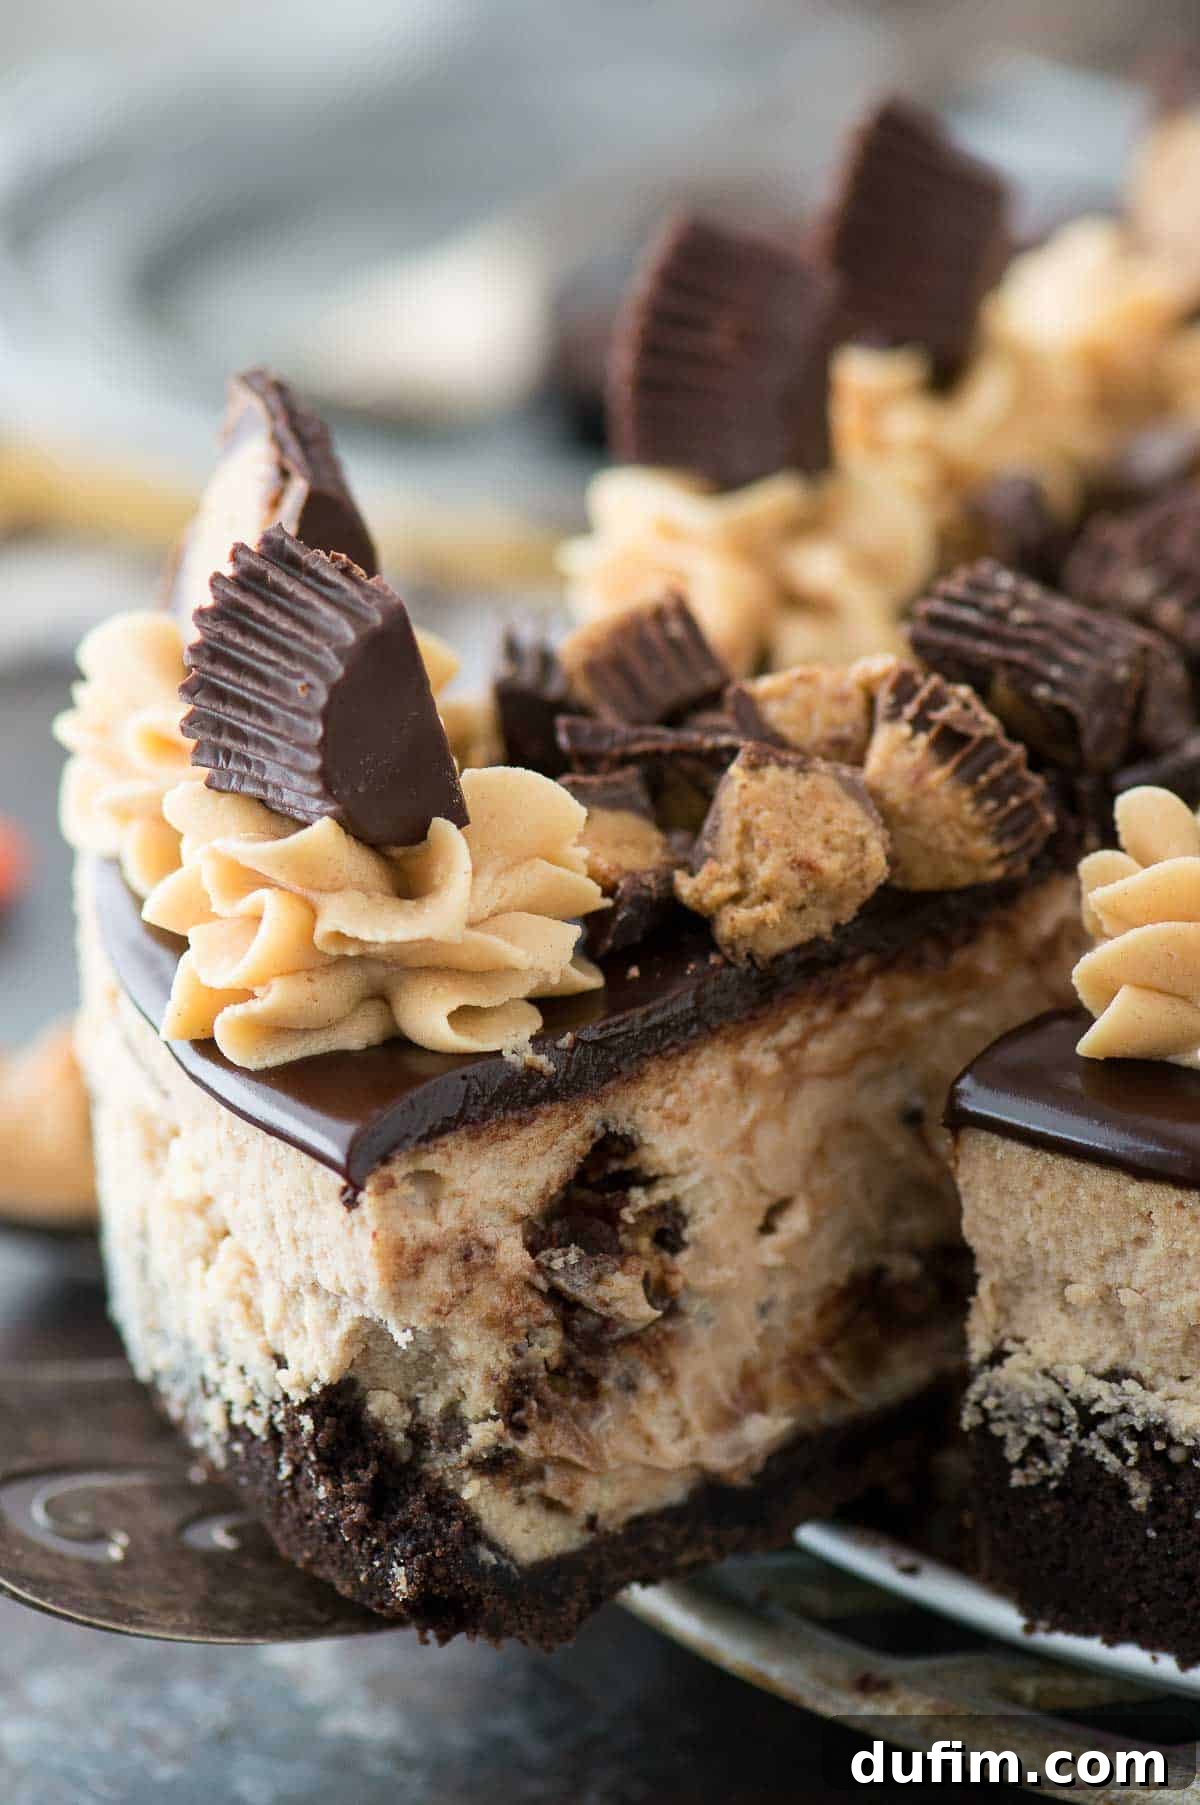
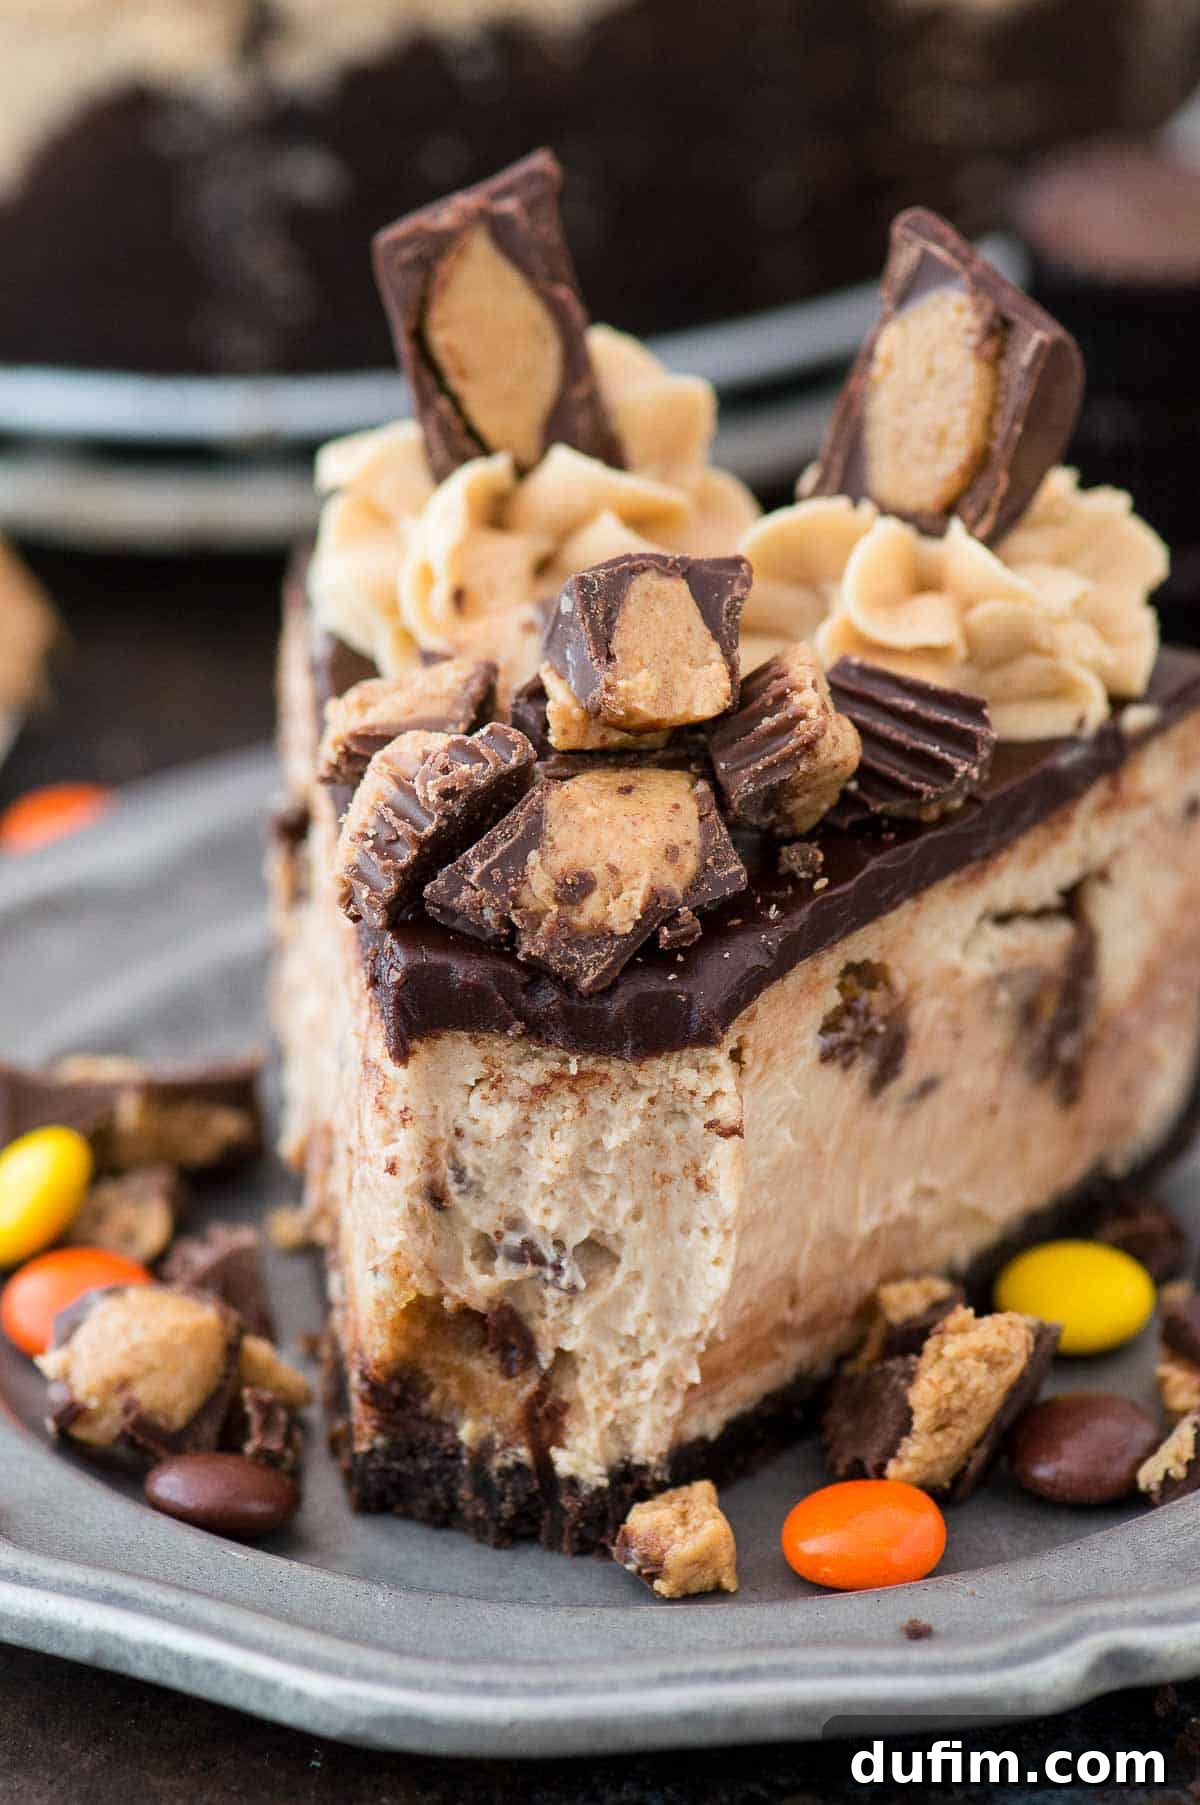
- Creamy Peanut Butter Cheesecake Filling: The heart of this dessert is a smooth, rich, and intensely peanut-buttery filling. We infuse it with genuine peanut butter flavor and generously fold in chopped Reese’s Peanut Butter Cups, ensuring a delightful surprise of chocolate and peanut butter candy in every single bite. The texture is luxuriously dense yet incredibly creamy.
- Silky Chocolate Ganache Topping: A decadent and glossy layer of homemade chocolate ganache blankets the cheesecake. This adds an extra dimension of rich chocolate flavor and a stunning visual appeal, making each slice look as inviting as it tastes. The contrast between the smooth ganache and the creamy cheesecake is simply divine.
- Optional Peanut Butter Buttercream Swirls: For those who truly want to go “over the top,” delicate swirls of homemade peanut butter buttercream adorn the edges. This optional flourish not only adds an extra burst of peanut butter sweetness but also elevates the presentation, making your cheesecake look professionally decorated.
- Abundant Reese’s Peanut Butter Cups: As if the cups baked inside weren’t enough, we crown this cheesecake with even more chopped Reese’s Cups. This ensures the signature flavor is present from the first glance to the last delicious bite, making it an undeniable treat for all Reese’s lovers.
While some garnishes are optional, we believe that if you’re going to indulge in a Reese’s Cheesecake, it’s worth going all out and embracing the full, luxurious experience. This is a dessert designed not just to satisfy, but to impress and delight every chocolate and peanut butter enthusiast!
Crafting the Perfect Chocolate Graham Cracker Crust
A great cheesecake begins with a great crust, and for this Reese’s masterpiece, a chocolatey base is essential. It provides the perfect structural and flavor contrast to the creamy peanut butter filling. Creating this crust is simple, requiring just two key ingredients and a few easy steps:
Your Simple Two-Ingredient Chocolate Crust
- Oreo Crumbs or Chocolate Graham Cracker Crumbs: You have the choice of using either crushed Oreo cookies (which include their creamy filling for added richness) or traditional chocolate graham crackers. For the best consistency, blend whole cookies or crackers in a food processor until they become very fine crumbs. Approximately 2 cups of fine crumbs will be needed, which usually comes from about half a standard package of Oreos. The finer the crumbs, the more cohesive and uniform your crust will be.
- Unsalted Butter: This is the indispensable binding agent that holds your crust together. When melted, butter coats the crumbs, allowing them to be pressed into a solid, sturdy base that will not crumble during slicing or serving. Using unsalted butter gives you control over the overall saltiness of the dessert.
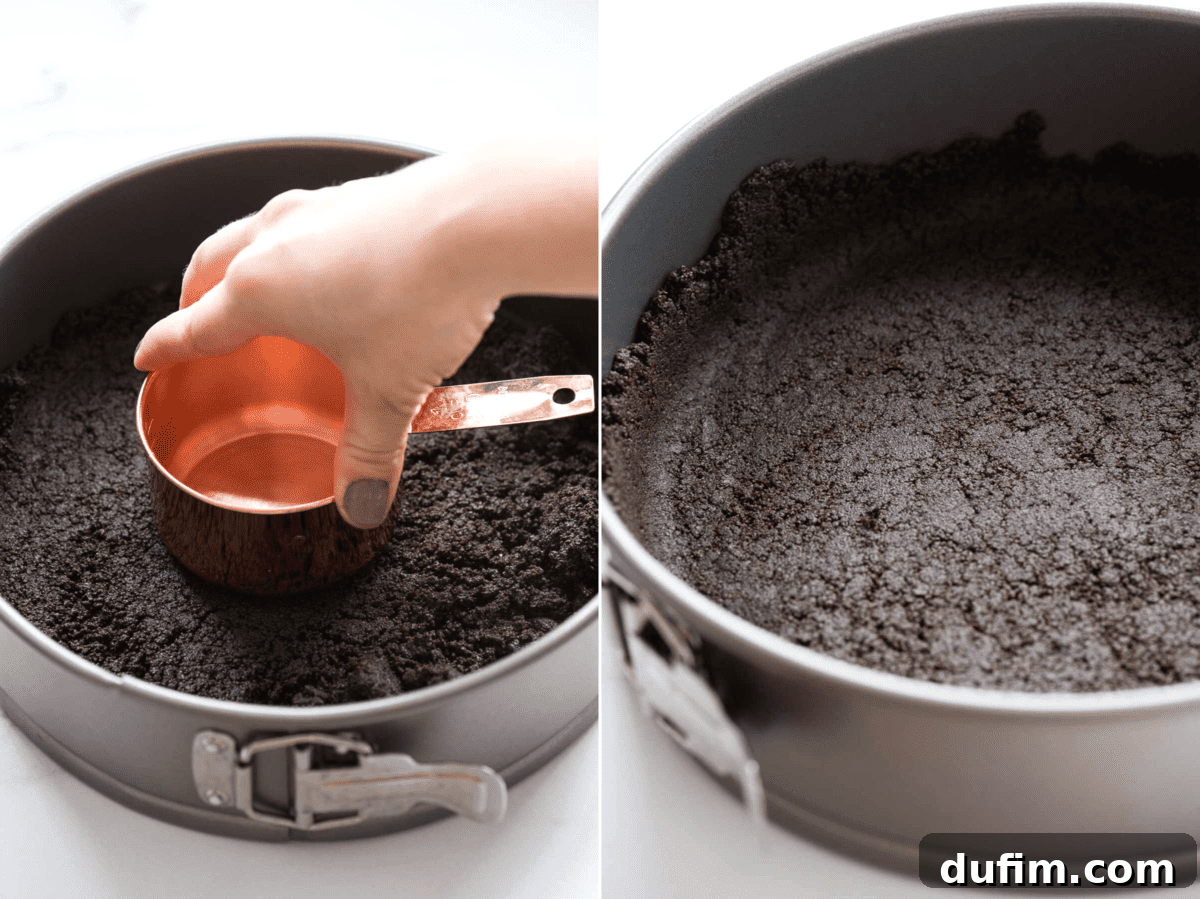
Step-by-Step Crust Preparation: Begin by combining your thoroughly crushed chocolate crumbs with the melted unsalted butter in a medium bowl. Mix them well until the crumbs are uniformly moistened, resembling wet sand. Next, transfer this mixture into the bottom of an 8 or 9-inch springform pan. Distribute the crumbs evenly, then firmly press them down and slightly up the sides of the pan. A great trick for achieving a compact and even crust is to use the flat bottom of a measuring cup or a glass to press the crumbs into place. This crucial step ensures your cheesecake has a delicious, stable, and perfectly formed foundation that will hold up beautifully under the weight of the rich filling.
Essential Ingredients for an Irresistible Reese’s Cheesecake Filling
Crafting the perfect Reese’s Peanut Butter Cheesecake filling requires high-quality ingredients and careful attention to detail. Our recipe streamlines the process by focusing on six key components that deliver unparalleled flavor and a wonderfully smooth texture. Each ingredient plays a vital role:
- Full-Fat Cream Cheese (24 oz / 3 standard 8 oz packages): This is arguably the most critical ingredient. For the best results, always use full-fat cream cheese, not low-fat or whipped varieties, as they can affect the texture and richness of your cheesecake. Ensure the cream cheese is at room temperature before you start mixing. This allows it to beat smoothly and evenly, preventing any lumps in your batter and ensuring a consistently creamy final product.
- Granulated Sugar (½ cup): Sugar serves a dual purpose here: it perfectly balances the inherent tanginess of the cream cheese, creating a harmonious sweet profile, and it contributes to the cheesecake’s tender, delicate crumb structure.
- Creamy Peanut Butter (¾ cup): The undeniable star of this cheesecake! Use a good quality creamy peanut butter for the best texture and the most authentic flavor. Avoid natural peanut butter, which tends to separate and can yield a less smooth filling. The creamy variety infuses the cheesecake with that beloved, comforting peanut butter taste that pairs exquisitely with chocolate.
- Peanut Butter Chocolate Coffee Creamer OR Heavy Cream (½ cup): This ingredient is a clever secret for an extra layer of indulgence. Using a Reese’s flavored coffee creamer (such as International Delight Reese’s creamer) will significantly amplify the chocolate peanut butter flavor and enhance the richness of the filling. If this specific creamer isn’t available, or if you prefer a simpler option, heavy cream is an excellent substitute that will still provide a beautifully rich and creamy texture without overpowering the primary flavors.
- Large Eggs (3): Eggs are crucial binders that provide structure and stability to the cheesecake as it bakes. They are the last ingredient added to the batter and require gentle handling. Mix them in one at a time, just until the yolk breaks and is barely incorporated. It is vital not to over-beat the eggs, as this introduces too much air into the batter, which is the number one cause of air bubbles and unsightly cracks in your finished cheesecake.
- Chopped Reese’s Cups (16): What’s a Reese’s cheesecake without the iconic candy itself? Roughly chopped Reese’s Cups are folded directly into the batter, creating delightful pockets of chocolate and peanut butter candy that add both exciting texture and an intense burst of flavor in every bite. This ensures a true “Reese’s experience” throughout the entire cheesecake.
Mastering the Art of Cheesecake Baking: Water Bath & Cooling Secrets
Achieving a perfectly smooth, crack-free, and incredibly creamy cheesecake can often seem like a daunting task, but it is entirely within your reach with the mastery of two fundamental techniques. These are the golden rules for any cheesecake recipe, especially for our glorious Reese’s Cup Cheesecake. Pay close attention to these steps, and you’ll be rewarded with a flawless dessert every time:
- Embrace the Water Bath (Bain-Marie): Do not let the idea of a water bath intimidate you. It is the undisputed secret weapon for baking cheesecakes that are consistently moist, perfectly baked, and free from cracks. It creates a gentle, humid environment that ensures even cooking.
- Respect the Cooling Process: Patience is an absolute virtue when it comes to cheesecake. Rushing the cooling is the fastest and most common way to invite unsightly cracks and compromise the velvety texture of your finished cheesecake.
Let’s delve deeper into each of these crucial steps to ensure your Reese’s Cheesecake turns out flawlessly, boasting a beautiful appearance and an even more incredible taste.
How to Implement a Cheesecake Water Bath
A water bath, often referred to by its French name, bain-marie, is an essential technique for cheesecake baking. It works by providing a gentle, diffused heat that prevents the edges of your cheesecake from baking faster than the center, thus avoiding overbaking, cracking, or developing a rubbery texture. Essentially, it creates a steamy, humid environment in your oven, which ensures a slow, uniform cooking process. The result is a cheesecake that is incredibly creamy, smooth, and cooked perfectly from edge to center.
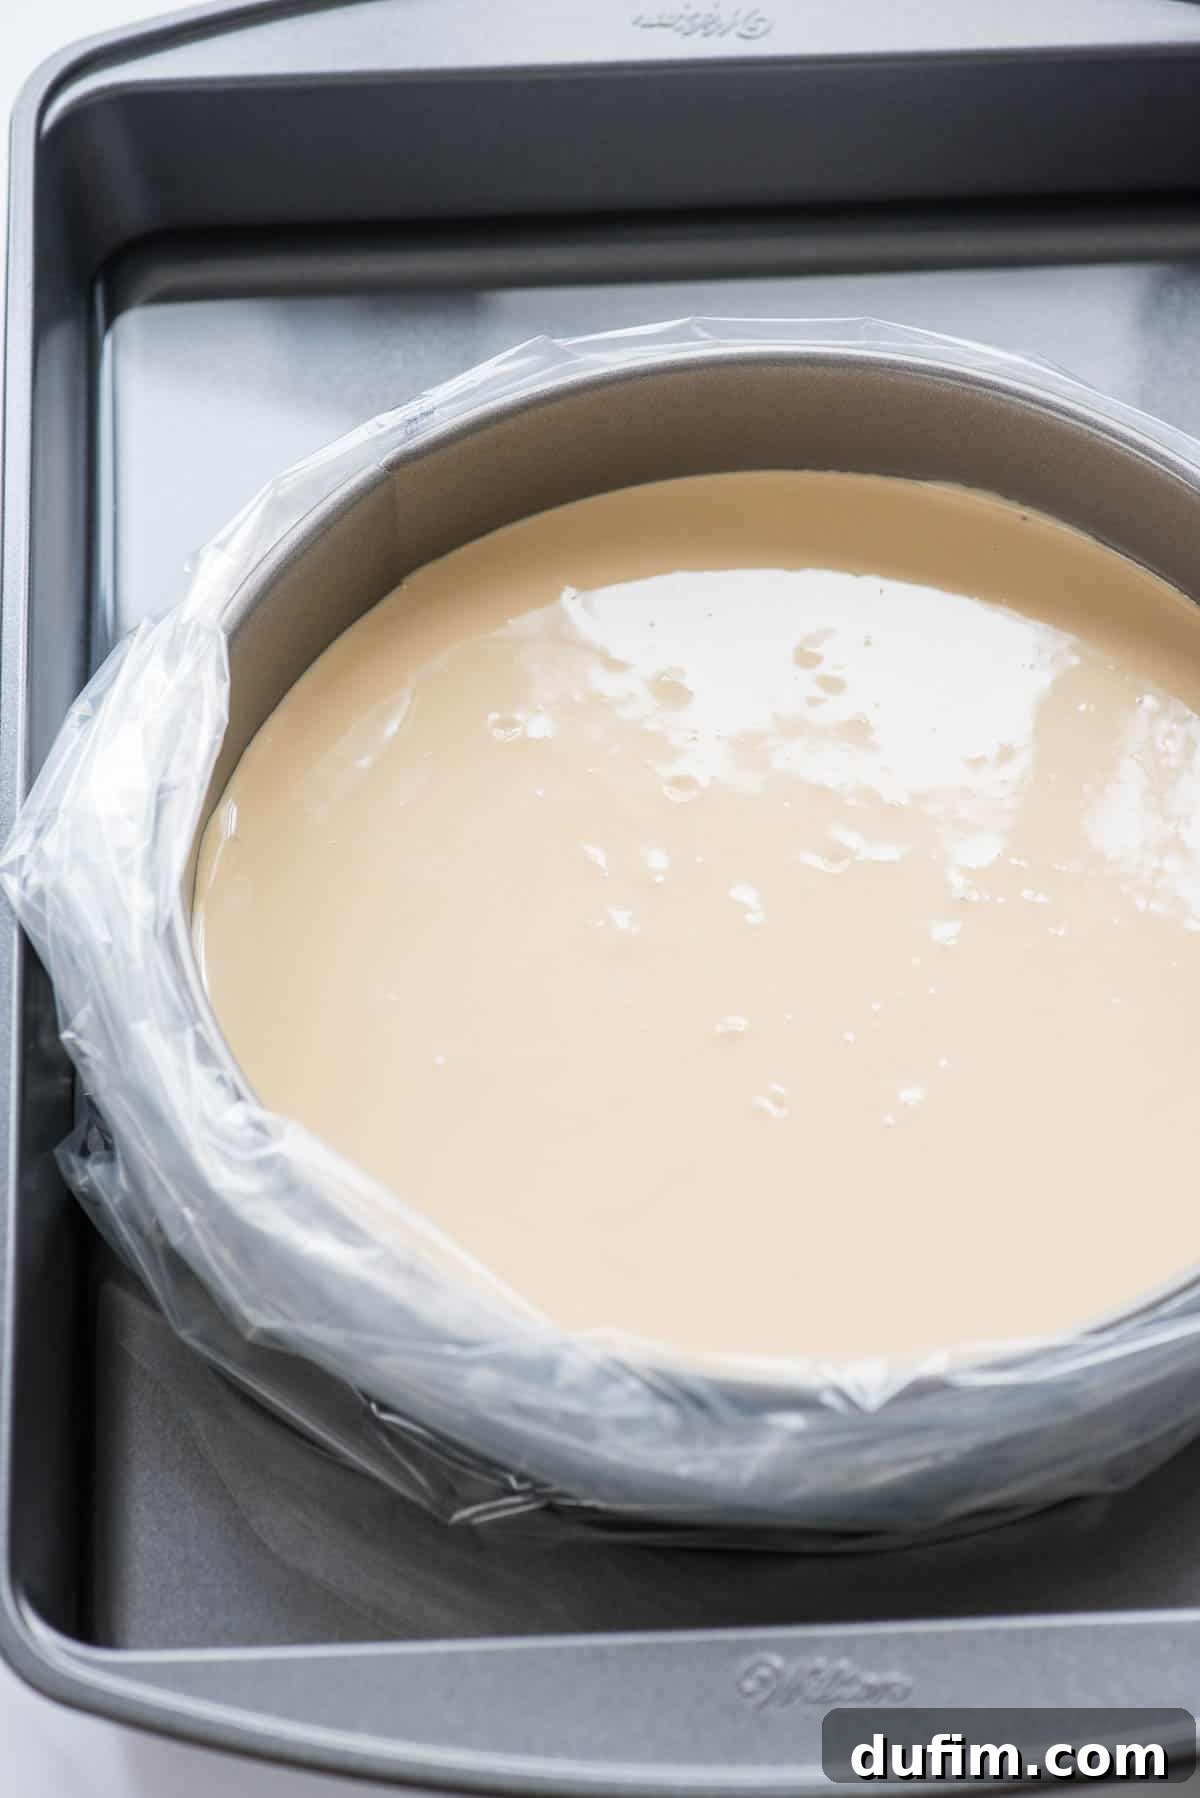
The Basic Setup for a Water Bath: To set up your water bath, you will need a larger, oven-safe pan. This could be a large cake pan, a roasting pan, or any deep dish that is significantly larger than your springform pan. First, place your springform pan (which contains the prepared cheesecake batter) inside this larger pan. Then, very carefully, fill the larger pan with about 1 inch of hot water. The water should come about halfway up the sides of your springform pan, but not so high that it risks splashing into the cheesecake itself. Once filled, place the entire assembly (roasting pan with springform inside) into your preheated oven. The steam generated from the hot water acts as a protective, temperature-regulating shield around your cheesecake, ensuring gentle and even baking.
How to Prevent Water Bath Leaks: A Foolproof Method
One of the most common anxieties when using a water bath is the fear of water leaking into the springform pan, which can ruin the cheesecake’s crust and texture. Fortunately, there’s a simple yet incredibly effective trick that will completely eliminate this worry, ensuring your cheesecake remains perfectly dry and delicious every time.
The Best Leak-Proof Trick Ever: Before you place your springform pan into the larger roasting pan for the water bath, take a large, oven-safe turkey bag or a slow cooker liner bag. Carefully place your entire springform pan (with the crust and filling inside) into this bag. Roll down the top edge of the bag so that it doesn’t cover the cheesecake itself, but creates a tight, watertight barrier around the sides and bottom of the springform pan. If there’s a significant amount of excess bag material, you can twist one side tightly near the pan and knot it securely, ensuring the bag fits snugly around the pan without touching the cheesecake batter. With your springform pan now safely encased and protected within the bag, place it into your larger roasting pan and then proceed to fill the roasting pan with water as usual. This ingenious method creates an impermeable barrier, guaranteeing that the water from the bath will not leak into your cheesecake, allowing you to bake with complete confidence and peace of mind.
How to Cool Cheesecake for a Flawless Finish
As we’ve emphasized, patience during the cooling process is just as crucial as using the water bath itself. A rapid change in temperature is the primary culprit behind cheesecake cracks. To achieve that coveted smooth, unblemished surface and perfect creamy texture, you must follow these cooling steps meticulously:
Remember: Do NOT rush the cooling process – it’s key to preventing cracks!
- Initial Oven Cooling: Once your cheesecake is perfectly baked (you’ll know it’s done when the edges are set and firm, but the very center still has a slight, delicate wobble when you gently jiggle the pan), immediately turn off your oven. Carefully remove the springform pan from the water bath and the protective oven-safe bag.
- Return to the Warm Oven: Place the cheesecake (still in its springform pan) back into the turned-off oven. To facilitate a slow and gradual temperature decrease, prop the oven door open slightly – about 2 to 3 inches – using a wooden spoon, a heat-proof oven mitt, or a rolled-up kitchen towel. This prevents thermal shock, which is a major cause of cracking. Allow the cheesecake to cool slowly in the oven for at least 60-90 minutes, or until it has reached room temperature. This slow transition helps the cheesecake settle and prevents it from contracting too quickly.
- Extended Refrigeration: Once the cheesecake has completely cooled to room temperature inside the oven, remove it. Loosely cover the cheesecake with aluminum foil or plastic wrap. Ensure the cover doesn’t touch the top surface of the cheesecake to avoid condensation marks. Then, transfer the cheesecake to the refrigerator. It is absolutely crucial to refrigerate your cheesecake overnight (ideally for at least 8-12 hours) before slicing and serving. This extended chilling period allows the cheesecake to fully set, firm up, and develop its optimal dense yet creamy texture and rich flavor. Trying to slice it sooner will result in a messy, unset cheesecake.
By diligently following this slow and gentle cooling method, you will be consistently rewarded with a cheesecake that is beautifully smooth, perfectly set, and utterly delicious, ready to impress everyone who tastes it.
Expert Tips for Your Best Reese’s Cheesecake Ever
Beyond the essential water bath and slow cooling techniques, a few additional expert pointers can help elevate your Reese’s Cheesecake from merely great to absolutely extraordinary. These tips address common pitfalls and ensure you achieve a professional-quality dessert every time:
- Room Temperature Ingredients are Key: Always ensure your cream cheese and any butter (for frosting) are at true room temperature before you begin mixing. Cold cream cheese will result in a lumpy batter that’s difficult to make smooth, while room temperature ingredients blend seamlessly, yielding a homogenous and creamy cheesecake batter.
- Gentle Egg Incorporation is Crucial: The eggs are always the last ingredient to be mixed into the cheesecake batter. Add them one at a time, beating just until the yolk breaks and is barely incorporated. The goal is to combine, not to aerate. Over-beating the eggs introduces too much air into the batter, which will cause the cheesecake to puff up significantly during baking and then dramatically fall and crack during cooling.
- Pan Size Matters for Baking Time: This recipe is specifically developed for an 8-inch or 9-inch springform pan. If you opt for a different size, be aware that the baking time will need to be adjusted accordingly. A smaller pan will result in a thicker cheesecake requiring a longer baking duration, while a larger pan will yield a thinner cheesecake that bakes more quickly. Keep a close eye on the cheesecake and adjust as needed, looking for that tell-tale slight wobble in the center.
- Allow Ample Oven Cooling Time: After the baking is complete, resist the urge to immediately remove the cheesecake from the oven. Instead, turn off the oven and leave the cheesecake inside with the oven door propped open (using a wooden spoon or oven mitt) for at least 60-90 minutes. This gradual transition from hot to warm is absolutely crucial for preventing thermal shock and subsequent cracking.
- The Power of Overnight Refrigeration: For the absolute best texture, stability, and flavor development, always plan to refrigerate your cheesecake overnight (for a minimum of 8-12 hours) before attempting to slice and serve it. This allows the cheesecake to fully set, firm up, and achieve its signature dense yet creamy consistency.
- Avoid Overmixing the Batter: Once the cream cheese is smooth and combined with sugar and peanut butter, mix only until the subsequent ingredients (creamer/heavy cream, then eggs) are just incorporated. Overmixing after the initial cream cheese beating can introduce too much air, leading to a less dense texture and a higher risk of cracks.
- Scrape Down the Bowl Frequently: As you mix, regularly stop and scrape down the sides and bottom of your mixing bowl with a rubber spatula. This ensures all ingredients are thoroughly combined and prevents unmixed pockets, contributing to a consistently smooth batter.
How to Properly Freeze a Whole Cheesecake
Freezing cheesecake is an excellent strategy for meal prepping desserts, managing leftovers efficiently, or simply ensuring you always have a delightful treat on hand for unexpected guests or sudden cravings. When frozen correctly, cheesecake can maintain its creamy texture and delicious flavor for several months. Here’s a detailed guide on how to successfully freeze a whole cheesecake:
- Ensure Complete Cooling and Chilling: This step is non-negotiable. Before even thinking about freezing, your cheesecake must be entirely cooled to room temperature, and then thoroughly chilled in the refrigerator overnight until it is completely firm. Attempting to freeze a warm or even partially chilled cheesecake will lead to significant ice crystal formation, which will severely compromise the smooth, creamy texture upon thawing.
- Prepare for Wrapping and Support: Once your cheesecake is perfectly chilled and firm, carefully run a thin knife around the inner edge of the springform pan to loosen it, then gently remove the outer ring. For added support during freezing and easier handling later, consider transferring the cheesecake to a round cardboard cake circle that matches its size. You can cover this cardboard circle with aluminum foil for an extra layer of protection. If your springform pan has a removable base, you can leave the cheesecake on the base for support.
- Wrap Meticulously to Prevent Freezer Burn: The key to successful long-term freezing is to prevent freezer burn, which can dry out and alter the flavor of your cheesecake. First, tightly wrap the entire cheesecake (without any toppings like ganache or frosting, as these are best added after thawing for optimal freshness and appearance) in several layers of plastic wrap. Ensure that there are no exposed areas; aim for an airtight seal. Next, wrap the plastic-wrapped cheesecake in a layer of heavy-duty aluminum foil for an additional protective barrier against freezer odors and temperature fluctuations.
- Freezing Duration and Thawing Instructions: Once securely wrapped, place the cheesecake in the freezer. It can be stored effectively for up to 2-3 months. When you’re ready to enjoy your frozen dessert, simply transfer the wrapped cheesecake from the freezer to your refrigerator. Allow it to thaw slowly overnight, or for at least 8-12 hours. This gradual thawing process helps to maintain the cheesecake’s original creamy texture. Once completely thawed, you can then add your desired toppings, such as fresh chocolate ganache, luscious peanut butter buttercream swirls, and a generous sprinkle of additional chopped Reese’s Cups, right before serving for the best possible presentation and taste experience.
By following these comprehensive steps, you can confidently freeze your delicious Reese’s Cheesecake and enjoy a perfect slice whenever you desire, without compromising on quality or flavor.
More Indulgent Peanut Butter & Chocolate Desserts
If your heart truly belongs to the classic, irresistible pairing of chocolate and peanut butter, then you’re in for an absolute treat! Explore these other fantastic and equally indulgent recipes that celebrate this iconic combination, perfect for satisfying any sweet craving:
- Mini Cheesecakes with Reese’s Peanut Butter Cup Bottom: These adorable and perfectly portioned mini cheesecakes hide a delightful secret—a whole Reese’s peanut butter cup nestled at the bottom of each one, offering a surprise burst of flavor in every bite.
- Reese’s Cupcakes: Dive into fluffy, moist chocolate cupcakes generously crowned with a rich, creamy peanut butter frosting and topped with a miniature Reese’s cup. They’re a bite-sized celebration of your favorite flavors.
- Reese’s Magic Bars: An incredibly easy-to-make bar dessert that layers the goodness! Featuring a buttery crust, sweet condensed milk, chocolate chips, and plenty of Reese’s pieces or chopped cups, these bars are pure magic.
Rated 4.25 out of 5 stars from 52 ratings
(Note: Rating displayed is illustrative; this is static HTML content.)
Reese’s Cheesecake
Rate Recipe
Print Recipe
This over-the-top Reese’s Cheesecake is a chocolate peanut butter cheesecake dream! It features a rich chocolate crust, a creamy Reese’s peanut butter cheesecake filling swirled with Reese’s cups, and a decadent layer of chocolate ganache. Top with more Reese’s cups for an irresistible double Reese’s cheesecake experience!
Equipment
- Glass Mixing Bowl
- Kitchen Scale
- KitchenAid 9-Speed Mixer (or similar electric mixer)
- 8 or 9 inch Springform Pan
- Spatula
Ingredients
Crust
- 2 cups (226g) chocolate graham cracker crumbs or Oreo crumbs
- 4 Tbsp (57g) unsalted butter, ½ stick, melted
Cheesecake Filling
- 24 oz (678g) full-fat cream cheese, at room temperature (3 standard 8 oz packages)
- ½ cup (99g) granulated sugar
- ¾ cup (201g) creamy peanut butter (not natural or oily)
- ½ cup (118ml) peanut butter chocolate coffee creamer (e.g., International Delight Reese’s creamer) OR substitute with heavy cream
- 3 large eggs
- 16 Reese’s cups, chopped into smaller pieces
Chocolate Ganache
- ¼ cup (59ml) heavy cream
- ¾ cup (129g) semi-sweet chocolate chips
Peanut Butter Frosting Swirls (Optional)
- ¼ cup (57g) unsalted butter, ½ stick, at room temperature
- ¼ cup (67g) creamy peanut butter
- 1 cup (113g) powdered sugar
Instructions
CRUST
- Preheat your oven to 350º F (175°C).
- Pulse whole Oreos (or chocolate graham crackers) in a blender or food processor until very fine crumbs are formed. Measure out 2 cups of these crumbs.
- In a small bowl, combine the measured crumbs with the melted unsalted butter. Mix thoroughly until all crumbs are well incorporated and moistened.
- Press the crumb mixture firmly into the bottom and slightly up the sides of an 8 or 9-inch springform pan. Use the bottom of a measuring cup or a flat glass to ensure an even and compact crust.
- Place the springform pan in the preheated oven and pre-bake the crust for 10 minutes.
- Remove the pan from the oven and allow the crust to cool completely to room temperature. To expedite cooling, you can place it in the refrigerator.
- Reduce the oven temperature to 325º F (160°C) for the cheesecake baking.
CHEESECAKE FILLING & BAKING
- To prepare for the water bath, place the springform pan (with the cooled crust) inside a large, oven-safe turkey roasting bag or slow cooker liner bag. Roll down the top of the bag so it doesn’t cover the cheesecake, creating a protective barrier against water leaks. Set aside.
- In a large mixing bowl, using an electric mixer, beat the 24 oz of room temperature cream cheese for 2-3 minutes until it is perfectly smooth and creamy, with no lumps.
- Add the granulated sugar, creamy peanut butter, and peanut butter chocolate coffee creamer (or heavy cream) to the cream cheese mixture. Beat again until just combined and smooth, scraping down the sides of the bowl as needed.
- Add the large eggs, one at a time. Beat each egg just until the yolk breaks and is incorporated into the batter, then add the next. Do not over-beat the eggs, as this introduces air and can lead to cracks. After all eggs are added, beat the mixture for just 1 additional minute to ensure everything is well combined without overmixing.
- Gently fold the chopped Reese’s cups into the cheesecake batter using a spatula. Pour the prepared cheesecake mixture evenly over the cooled chocolate crust in the springform pan.
- Place the springform pan (inside its protective bag) into a larger 9×13 inch baking pan or roasting pan. Carefully fill the larger pan with about 1 inch of hot water, ensuring it surrounds the springform without overflowing.
- Transfer the water bath with the cheesecake to the oven and bake at 325º F (160°C) for 65-85 minutes (see notes for specific times by pan size). The cheesecake is done when the edges appear set and firm, but the very center still has a slight wobble when the pan is gently jiggled.
- Once baked, turn off the oven. Carefully remove the springform pan from the water bath and the oven-safe bag. Place the cheesecake on a baking sheet and return it to the turned-off oven with the door propped open. Allow the cheesecake to cool slowly to room temperature inside the oven for 60-90 minutes.
- After it reaches room temperature, remove the cheesecake from the oven. Loosely cover it with foil (without touching the surface) and refrigerate overnight (at least 8-12 hours) to allow it to fully set and chill.
- Before serving, carefully unmold the cheesecake from the springform pan. Use a small, thin spatula to gently loosen any parts that may be sticking to the pan. The cheesecake should naturally separate as the springform is removed.
CHOCOLATE GANACHE
- Place the semi-sweet chocolate chips in a heatproof bowl.
- In a small saucepan over medium heat, bring the heavy cream to a gentle boil. As soon as it boils, remove it from the heat and pour the hot cream over the chocolate chips.
- Let the mixture sit undisturbed for 1 minute to allow the chocolate to melt. Then, stir well with a whisk or spatula until the ganache is smooth and glossy. Allow the ganache to cool for 5-7 minutes until it slightly thickens before pouring it over the chilled cheesecake.
TO ASSEMBLE & SERVE
- Pour or spoon the cooled chocolate ganache over the top of the chilled cheesecake. Use an offset spatula to gently spread it evenly across the surface.
- If desired, pipe peanut butter buttercream swirls around the edge of the cheesecake. Generously add additional chopped Reese’s cups on top.
- Slice and serve this magnificent Reese’s Cheesecake. Store any leftovers in an airtight container in the refrigerator for up to 3-4 days.
PEANUT BUTTER FROSTING (Optional)
- In a small mixing bowl, beat the room temperature unsalted butter with an electric mixer for 1 minute until smooth and light.
- Add the creamy peanut butter and powdered sugar. Beat on low speed until combined, then increase to medium-high and beat until light and fluffy.
- Transfer the buttercream to a piping bag fitted with a Wilton 1M tip (or a similar star tip) and use to decorate the cheesecake.
Notes
- 8-inch cheesecake baking time: Approximately 75-85 minutes.
- 9-inch cheesecake baking time: Approximately 65-75 minutes.
- Always ensure ingredients, especially cream cheese and butter for frosting, are at room temperature for optimal mixing and texture.
Nutrition
Carbohydrates: 54g |
Protein: 15g |
Fat: 56g |
Saturated Fat: 26g |
Polyunsaturated Fat: 6g |
Monounsaturated Fat: 19g |
Trans Fat: 1g |
Cholesterol: 142mg |
Sodium: 438mg |
Potassium: 396mg |
Fiber: 3g |
Sugar: 41g |
Vitamin A: 1190IU |
Vitamin C: 1mg |
Calcium: 113mg |
Iron: 2mg
Nutrition Disclosure
All nutritional values are approximate and provided to the reader as a courtesy. Changing ingredients and/or quantities will alter the estimated nutritional calculations. This information is for general guidance only and not a substitute for professional dietary advice.