
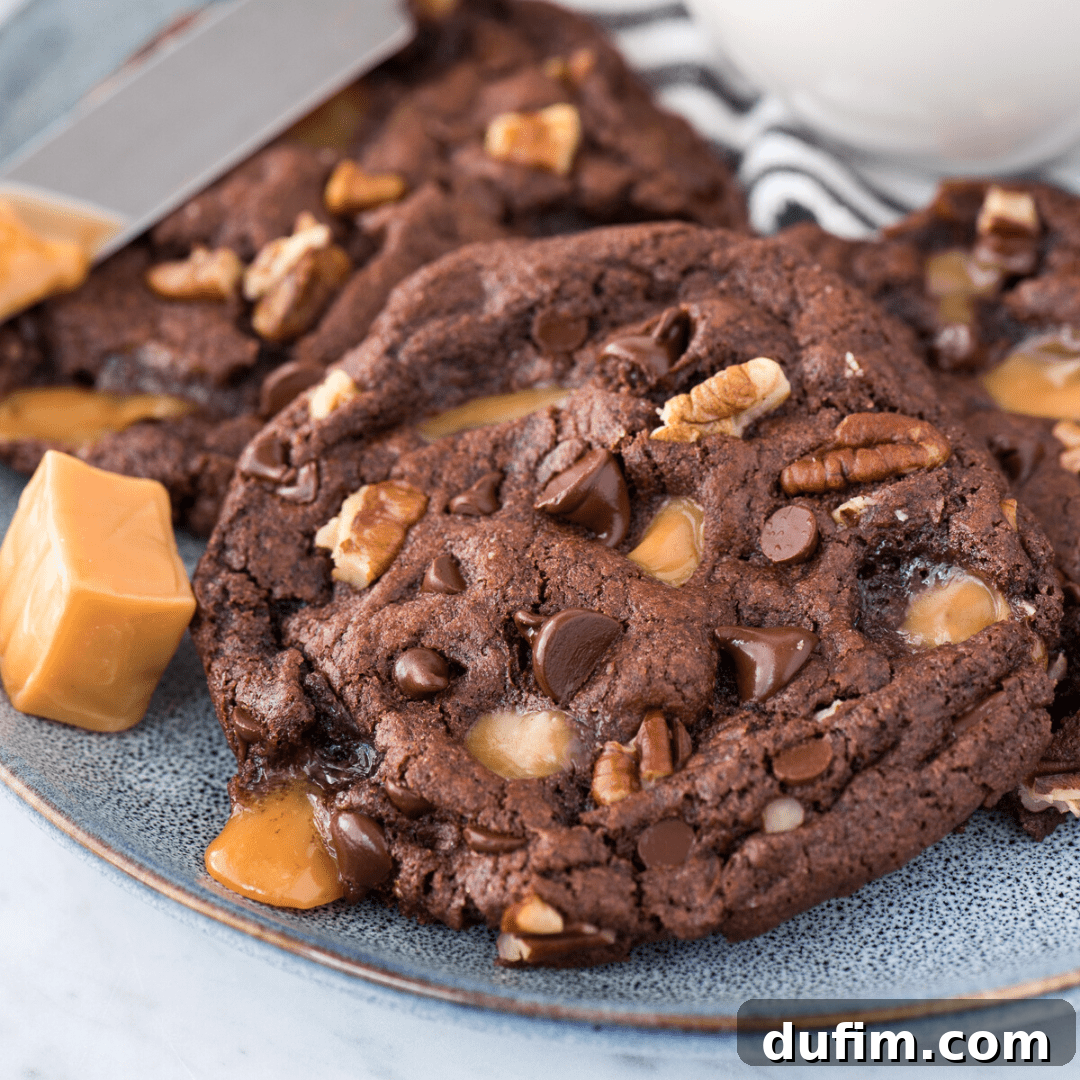
Indulge in the pure bliss of these insanely delicious Turtle Cookies, a perfect fusion of rich chocolate batter, gooey caramel pieces, crunchy pecans, and decadent chocolate chips. This recipe promises a delightful experience, delivering soft and chewy cookies that are ready to savor in just 30 minutes, without the hassle of chilling the dough!
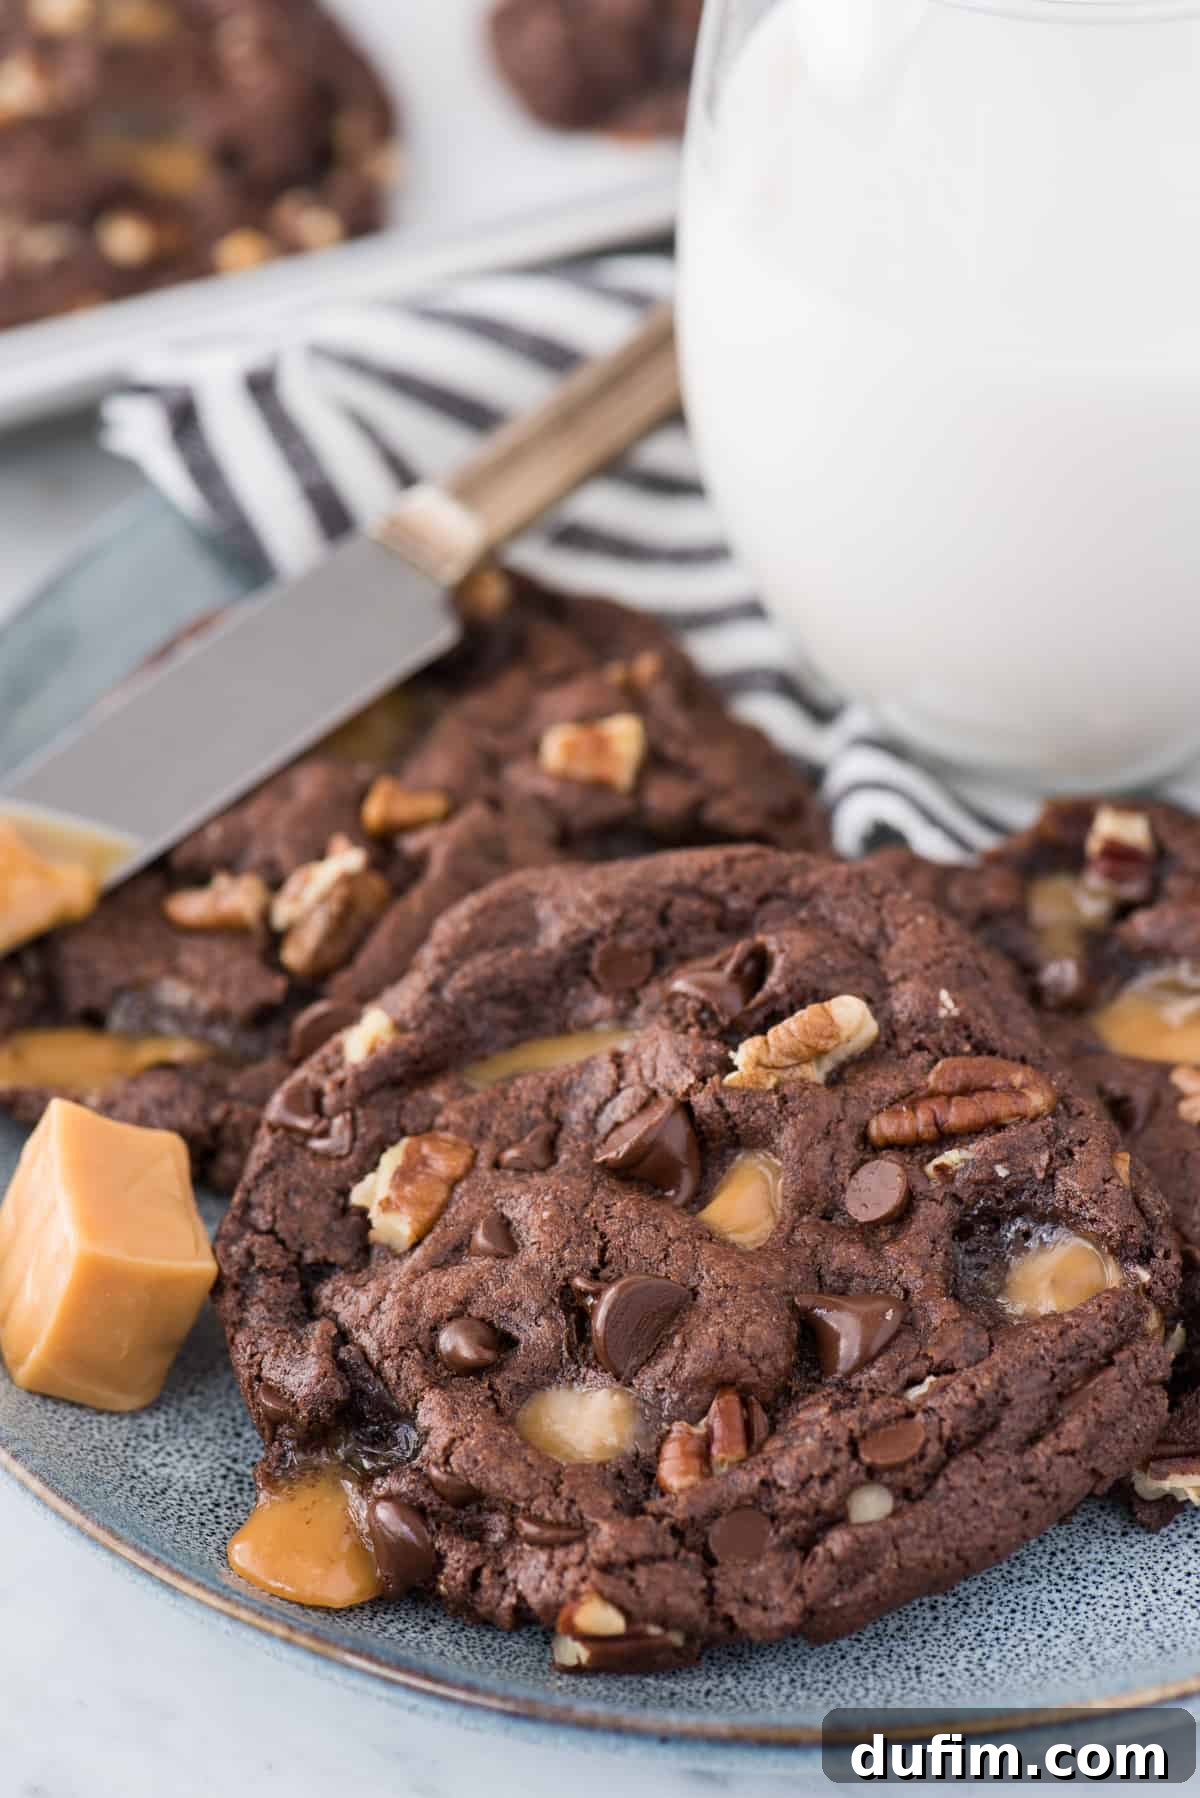
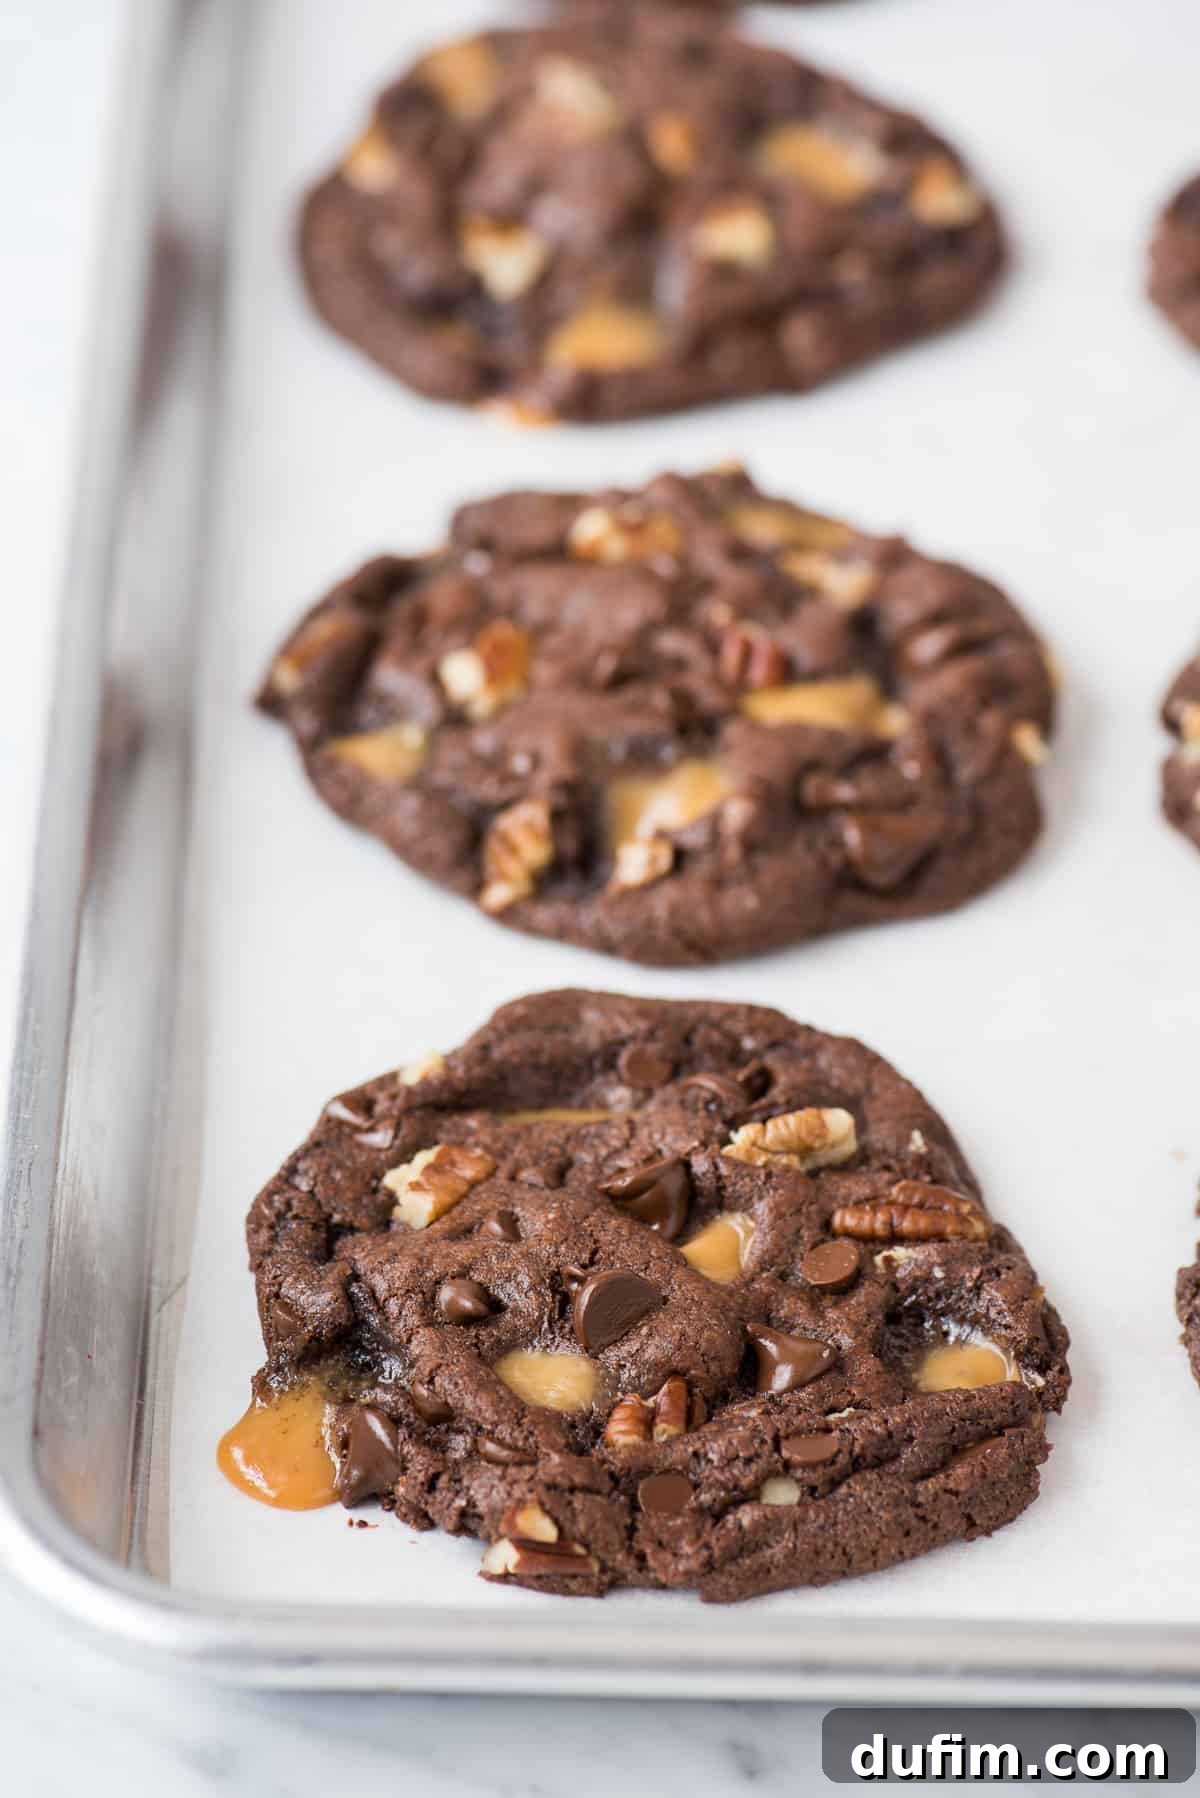
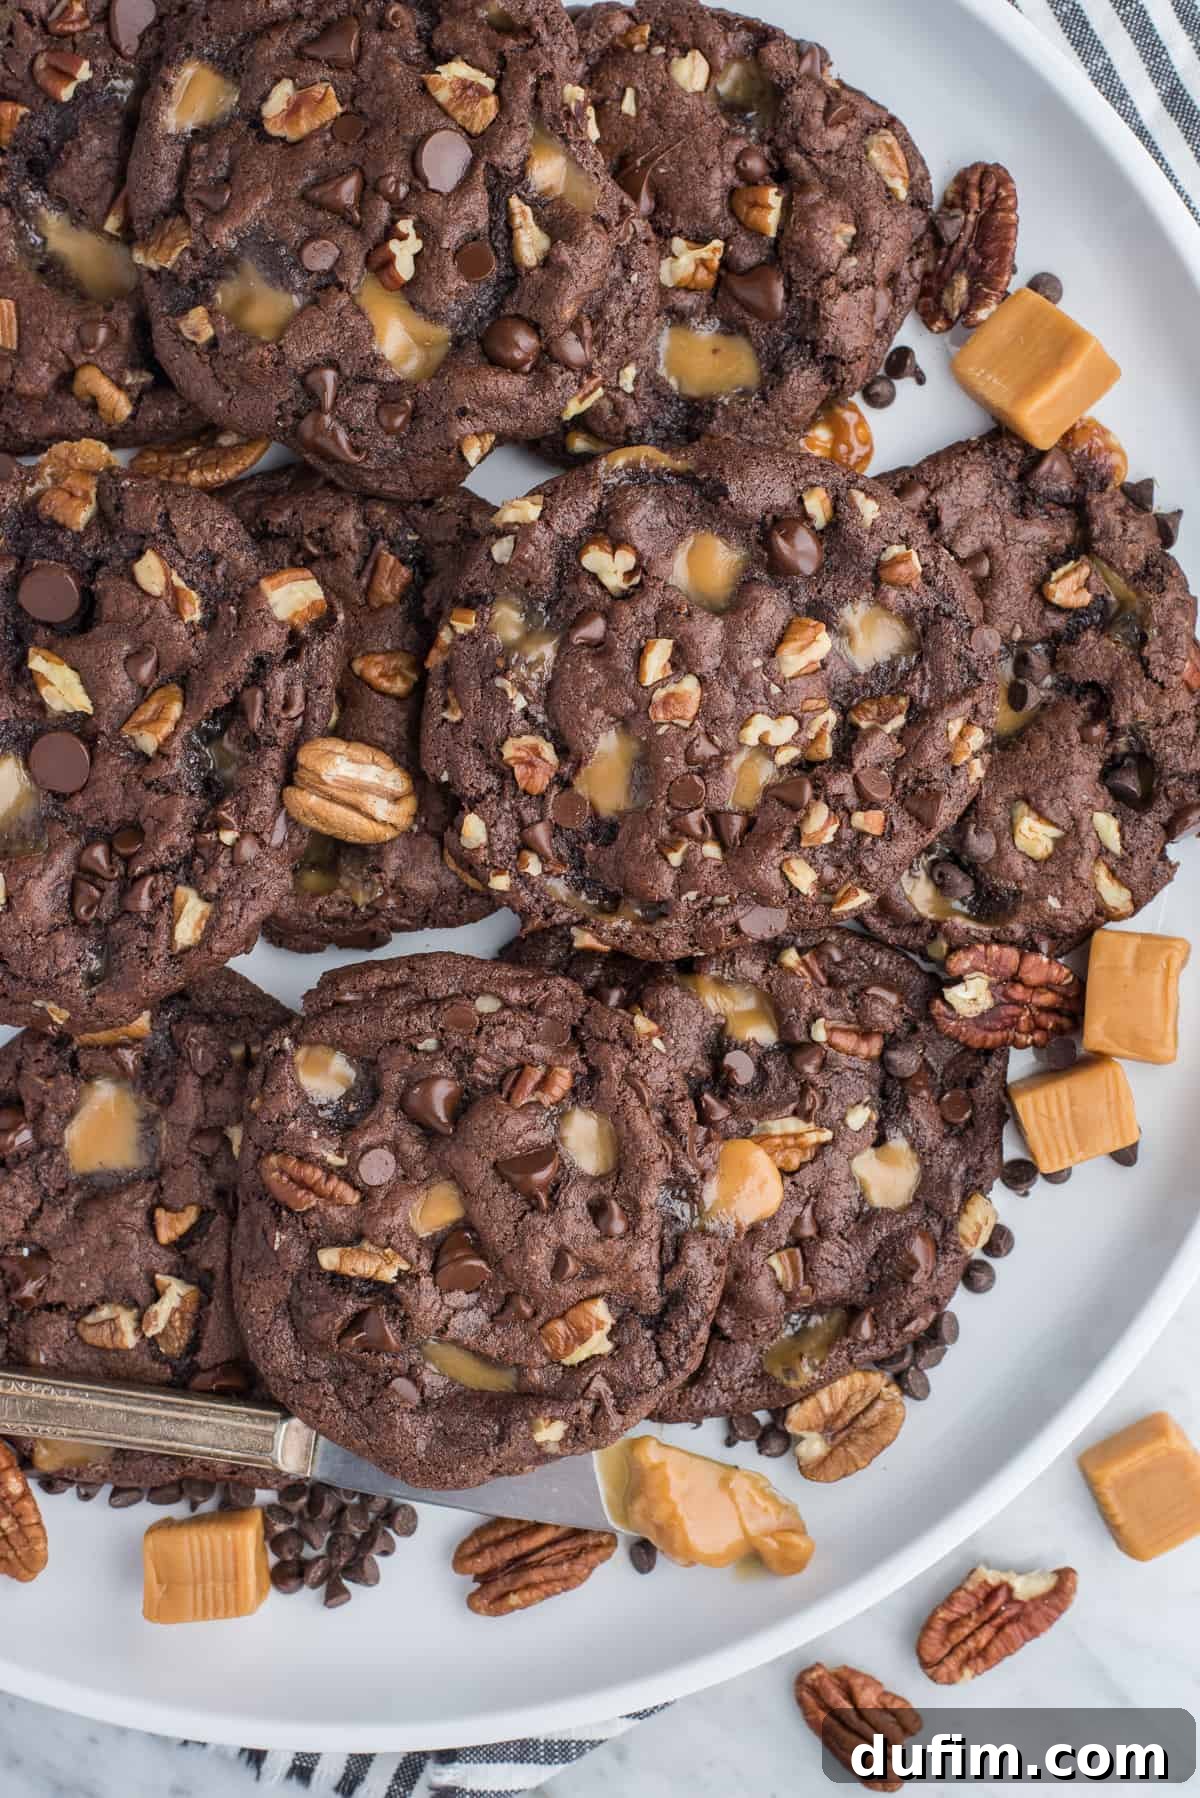
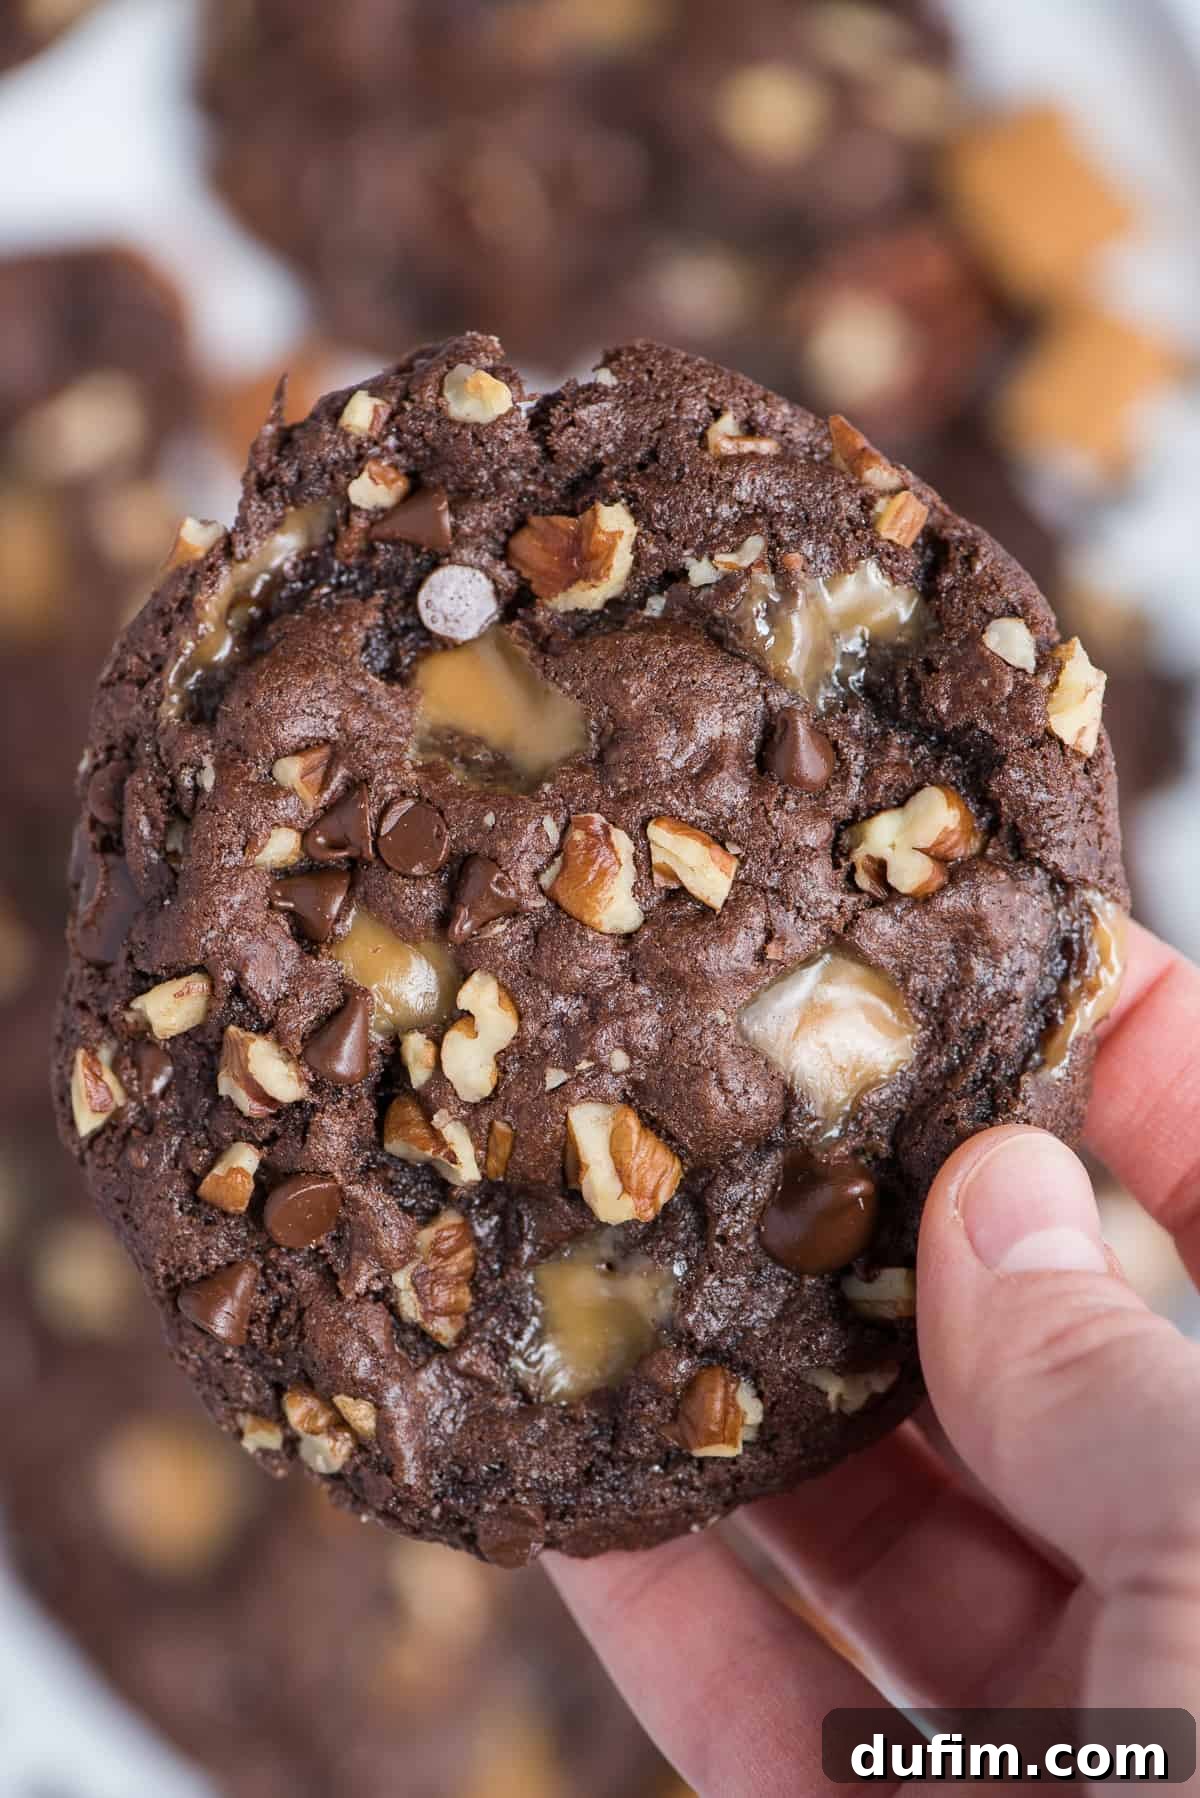
These chocolate caramel cookies are a true masterpiece, boasting an incredibly soft and chewy texture that will melt in your mouth. Just look at those irresistible puddles of caramel! The best part? You can whip up a batch of these delectable treats in under 30 minutes, as there’s absolutely no need to chill the cookie dough. This means less waiting and more enjoying your homemade goodness!
“These cookies hit all the right notes! The texture is perfect, the chocolatey and caramel flavors are absolutely amazing, and they’re decadent without being overly rich. They’ve become a new Christmas favorite in my home! It’s something a little different, yet universally loved. Truly a great recipe!”
– Emily
Why These Turtle Cookies Will Become Your New Favorite
Prepare to fall in love with these exceptional Turtle Cookies! They are not just another cookie; they are a symphony of flavors and textures designed to impress. Here’s why they stand out and why you’ll want to bake them again and again:
- Irresistibly Loaded: Each cookie is generously packed with luscious caramel pieces, crunchy pecans, and rich chocolate chips, ensuring a burst of flavor in every bite.
- Effortlessly Quick & Easy: Forget the waiting game! This recipe is incredibly straightforward and fast, primarily because there’s no need to refrigerate the dough before baking. This saves you valuable time and gets you to cookie enjoyment faster.
- Perfectly Chewy Texture: If you appreciate cookies that are slightly crisp on the outside and wonderfully chewy on the inside, these will hit every single craving. The texture is designed for ultimate satisfaction.
- A Holiday Showstopper: With their impressive appearance and rich taste, these cookies are a fantastic addition to any Christmas cookie platter or holiday gathering, sure to be a crowd-pleaser.
- Customizable Delights: The beauty of this recipe lies in its flexibility. Want to add more pecans for extra crunch? Go for it! Craving an intense chocolate experience? Double up on the chocolate chips! Desire bigger, more prominent caramel puddles? You have the freedom to adjust the amount of add-ins to suit your personal preference.
The classic combination of rich chocolate, savory pecans, and sweet, buttery caramel is absolutely spot-on in these cookies. It’s a timeless flavor profile that appeals to everyone, making these treats a guaranteed hit at any event or just for a cozy evening at home. Imagine them beautifully arranged on a Christmas cookie platter – they’re sure to be the star!
Recipe Video Walkthrough
A visual guide is available to walk you through each step of making these delicious turtle cookies. Watch how easily they come together!

For a detailed video demonstration, please visit the original blog post where you can find the full recipe video.
Essential Ingredients for Perfect Turtle Cookies
Crafting these extraordinary Turtle Cookies requires a selection of high-quality ingredients, each playing a crucial role in achieving that perfect taste and texture. Here’s a detailed look at what you’ll need:
- All-Purpose Flour: The foundation of our cookie structure. Flour provides the necessary body and chewiness to the cookies.
- Natural Unsweetened Cocoa Powder: This is key to developing that deep, rich chocolate flavor. Using natural unsweetened cocoa ensures a pure chocolate taste without added sugars, allowing you to control the sweetness.
- Baking Soda: A leavening agent that helps the cookies rise slightly, creating a soft, tender crumb and contributing to their signature chewiness.
- Salt: Essential for balancing the sweetness and enhancing all the other flavors in the cookie dough, especially the chocolate and caramel. Don’t skip it!
- Unsalted Butter (Softened): Butter not only imparts a rich, buttery flavor but also contributes to the tender texture of the cookies. Ensure it’s softened to room temperature for easier creaming with the sugars, which creates a lighter, airier dough.
- Brown Sugar: Adds a wonderful depth of flavor with its molasses notes, keeps the cookies incredibly moist, and is crucial for that desirable chewy texture.
- Granulated Sugar: Provides sweetness, aids in browning the edges of the cookies, and contributes to the overall delightful crisp-chewy balance.
- Large Egg: Acts as a binder, holding all the ingredients together and adding structure and richness to the cookie dough.
- Vanilla Extract: A flavor enhancer that complements the chocolate and caramel beautifully, adding a warm, aromatic note.
- Caramel Squares (Chopped): These are the stars of the show when it comes to gooey caramel puddles. I highly recommend using Kraft caramel squares, cut into small pieces. They melt perfectly, creating those irresistible pockets of melted caramel. Avoid caramel bits, as they tend to hold their shape too much.
- Chopped Pecans: Provides a delightful crunch and a nutty, earthy flavor that pairs exquisitely with chocolate and caramel. You can also substitute with walnuts if preferred.
- Semi-Sweet Chocolate Chips: The final chocolatey flourish! A mix of regular and mini-sized chips works wonderfully, offering varying textures and ensuring chocolate in every bite. Semi-sweet chocolate provides the perfect balance of sweetness against the rich cocoa.
Having all your ingredients measured and ready before you start (mise en place) will make the baking process smoother and more enjoyable!
Step-by-Step Guide: Crafting Your Own Turtle Cookies
Making these decadent Turtle Cookies is a rewarding and surprisingly simple process. Follow these detailed steps to achieve perfect, soft, and chewy cookies every time:
- Prepare Dry Ingredients: In a medium-sized bowl, whisk together the all-purpose flour, cocoa powder, salt, and baking soda. Sift them together if your cocoa powder tends to clump. Set this dry mixture aside.
- Cream Wet Ingredients: In a large mixing bowl, using an electric mixer (handheld or stand mixer with paddle attachment), cream together the softened unsalted butter, brown sugar, and granulated sugar. Beat on medium speed for about 1 minute until the mixture is light and fluffy.
- Incorporate Egg and Vanilla: Add the large egg and vanilla extract to the creamed butter and sugar mixture. Beat again until just combined, scraping down the sides of the bowl as needed to ensure everything is fully incorporated.
- Combine Wet and Dry & Add Mix-ins: Gradually add the reserved dry flour mixture to the wet ingredients, mixing on low speed or by hand with a spatula just until the flour streaks disappear. Be careful not to overmix, as this can lead to tough cookies. Once combined, fold in the chocolate chips, chopped pecans, and chopped caramel squares. The dough will be quite thick and rich!
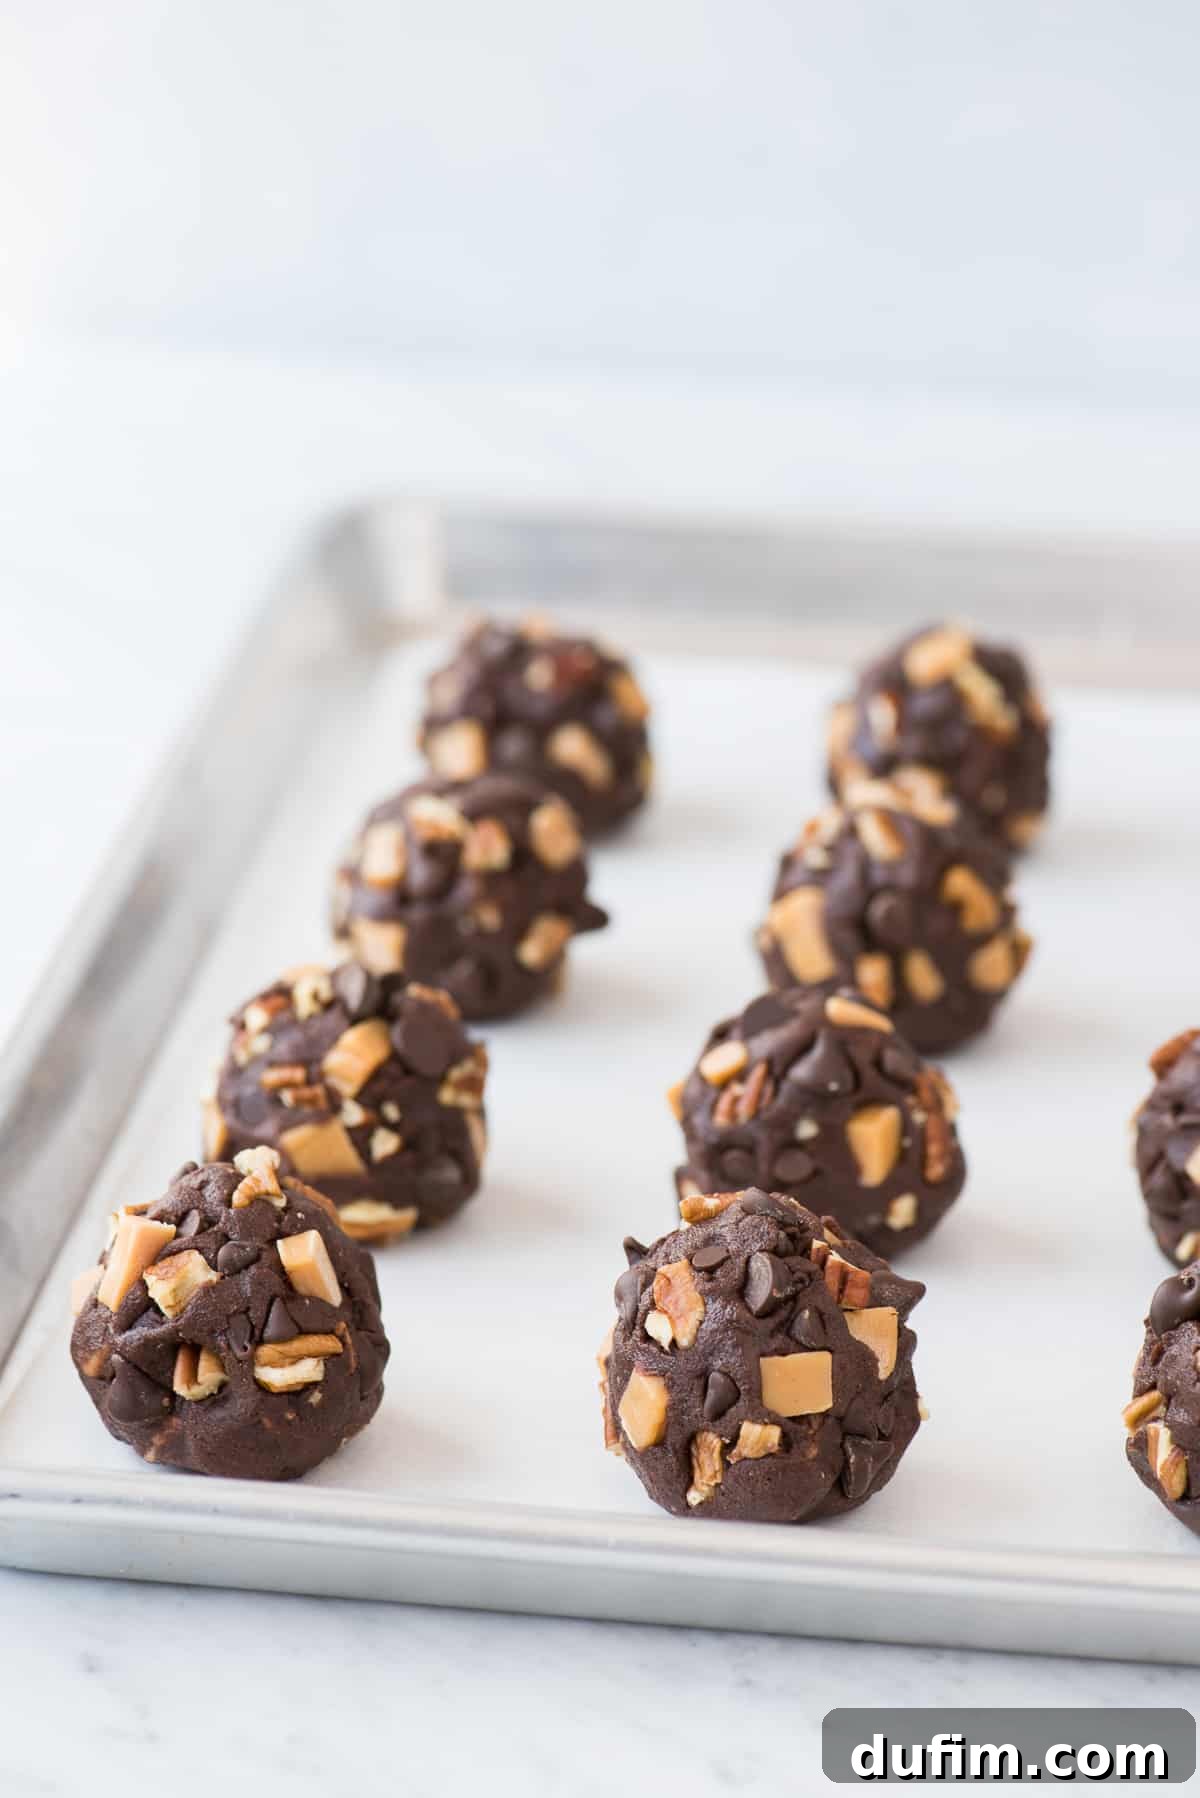
- Form Cookie Dough Balls: Using a cookie scoop (about 3 tablespoons in size for large cookies, or smaller for more petite treats), form uniform dough balls. For that picture-perfect “loaded” look, gently press additional chocolate chips, caramel pieces, and pecans onto the outside of each dough ball. This ensures those beautiful puddles of caramel and visible nuts on top after baking.
- Bake to Perfection: Arrange the dough balls about 3 inches apart on a baking sheet lined with a silicone mat or parchment paper. Bake in a preheated oven at 350ºF (175ºC) for 10-14 minutes, depending on the size of your cookies and your oven’s calibration. The edges should look slightly set and puffy, but the centers should still appear soft.
- Cool & Enjoy: Allow the cookies to cool on the baking sheet for about 10 minutes. This crucial step helps them set up and prevents them from breaking. After 10 minutes, carefully transfer them to a wire cooling rack to cool completely. Or, if you can’t resist, enjoy them warm!
Following these steps will ensure you create a batch of Turtle Cookies that are as delightful to look at as they are to eat!
Expert Baking Time Suggestions for Optimal Texture
Achieving the perfect texture for your Turtle Cookies largely depends on proper baking time. Here are some guidelines to help you:
For the large turtle cookies shown in the photos, each dough ball was approximately 3 tablespoons in size. These substantial cookies were baked for 12-14 minutes. The key is to watch for the edges of the cookies to just begin to look puffy and set, while the centers remain slightly soft. This method results in a gloriously soft and chewy chocolate caramel pecan cookie with a perfect melt-in-your-mouth interior.
If you opt to make smaller cookie dough balls, it’s essential to reduce the baking time accordingly. Over-baking smaller cookies will make them dry and hard, losing that signature soft and chewy quality. Start checking smaller cookies around the 8-minute mark and adjust as needed.
Remember that oven temperatures can vary, so it’s always best to know your oven and adjust baking times as necessary. A perfectly baked cookie should be slightly underdone in the center when removed from the oven, as it will continue to cook slightly on the hot baking sheet.
Effortless & Quick: Time Required to Make Turtle Cookies
One of the many benefits of this Turtle Cookies recipe is its efficiency. You can enjoy homemade, gourmet-quality cookies without spending hours in the kitchen. Here’s a breakdown of the time you’ll need:
- Prep Time: Approximately 15 minutes to measure ingredients, chop caramel and pecans, and mix the dough.
- Bake Time: 10-14 minutes per batch, depending on cookie size.
- Cooling Time: 10 minutes on the baking sheet before transferring to a rack for further cooling.
From start to finish, you can have these incredible cookies ready to eat in roughly 30-40 minutes, making them perfect for last-minute cravings or unexpected guests!
Smart Prep: How to Freeze Turtle Cookie Dough for Later
Planning ahead? Freezing cookie dough is a fantastic way to ensure you always have fresh-baked cookies within reach. These Turtle Cookies freeze beautifully, making them ideal for meal prepping your desserts or having a convenient treat for unexpected occasions. Here’s how to do it:
- Portion the Dough: First, prepare the cookie dough according to the recipe instructions. Then, scoop the dough into individual cookie dough balls, just as you would for baking.
- Add Extra Mix-ins: For an enhanced appearance and texture, gently press extra caramel pieces, pecans, and chocolate chips onto the outside of each dough ball. This ensures they look just as magnificent as the freshly baked ones.
- Flash Freeze: Place the formed dough balls onto a baking sheet lined with a silicone mat or parchment paper. You can place them relatively close together since they won’t spread during this freezing stage. Place the entire baking sheet into the freezer and flash freeze until the cookie dough balls are solid, typically about 1 hour.
- Store Long-Term: Once frozen solid, transfer the individual cookie dough balls from the baking sheet into a heavy-duty ziplock freezer bag or an airtight container. Make sure to label the bag with the recipe name, date, and baking directions (oven temperature and adjusted baking time).
- Freezer Life: The cookie dough can be frozen for up to 3 months, ensuring you have delicious homemade treats on demand.
- To Bake from Frozen: When you’re ready to bake, simply remove the desired number of dough balls from the freezer. Preheat your oven to 350ºF (175ºC). Place the frozen cookies on a lined baking sheet and bake for 14-17 minutes. Frozen cookies may require an additional 1-2 minutes of baking time compared to fresh dough. There’s no need to thaw!
Freezing cookie dough is a fantastic hack for busy bakers, allowing you to enjoy warm, gooey cookies anytime with minimal effort.
Gluten-Free Delight: Adapting Your Turtle Cookies
For those with gluten sensitivities or preferences, you can absolutely enjoy these incredible Turtle Cookies! I’ve successfully made this recipe multiple times using King Arthur’s Gluten-Free Measure for Measure Flour. This particular blend is designed to be a direct 1:1 substitute for regular all-purpose flour in most recipes, yielding fantastic results without compromising on taste or texture. When substituting, always ensure your chosen gluten-free flour blend specifically states it’s a 1:1 replacement for best outcomes.
Pro Tips for Baking the Best Turtle Cookies
Elevate your cookie-baking game with these expert tips, ensuring your Turtle Cookies turn out perfectly delicious and visually stunning every time:
- Accurate Flour Measurement: Precision is key in baking. Always measure your all-purpose flour using the “spoon and sweep” method. Lightly spoon the flour into your measuring cup until it overflows, then level it off with the back of a knife. Avoid scooping directly with the measuring cup, as this can compact the flour and result in too much flour, leading to dry, dense cookies.
- Room Temperature Butter: For easier and more effective creaming of the butter and sugar, ensure your unsalted butter is at true room temperature. This means it should be soft enough to indent with your finger without melting. Room temperature butter creates a light and fluffy mixture, incorporating air that contributes to the cookies’ tender texture.
- Choose the Right Caramel: Through extensive testing, I’ve found that using caramel squares (like Kraft caramels) chopped into smaller pieces yields superior results compared to pre-made caramel bits. The chopped caramel squares melt more naturally and beautifully in the oven, creating those irresistible, gooey puddles of caramel throughout each cookie, enhancing both flavor and presentation.
- Uniform Cookie Scooping: For consistently sized cookies that bake evenly, invest in a good cookie scoop. Using a scoop ensures each cookie is the same size, preventing some from burning while others are underbaked.
- Boost Presentation with Extra Mix-ins: To achieve that stunning “loaded cookie” appearance seen in the photos, gently press additional caramel pieces, pecans, and chocolate chips onto the outside of the dough balls just before baking. This ensures these delicious additions are prominently visible on the surface of the baked cookies, making them even more appealing.
- Make Ahead Dough: If you want to prepare the cookie dough a day in advance, simply follow the recipe directions to make the dough. Once mixed, wrap it tightly in plastic wrap (or place in an airtight container) and refrigerate for up to 24 hours. When ready to bake, let the dough sit at room temperature for about 15-20 minutes to soften slightly before scooping and baking.
- Don’t Overmix: After adding the dry ingredients, mix just until combined. Overmixing develops the gluten in the flour, which can lead to tough, dense cookies.
- Silicone Mats are Your Friend: Baking on silicone mats (or parchment paper) prevents sticking and encourages even baking, making cleanup a breeze.
“These cookies turned out absolutely perfectly! I made several batches, and everyone who received them couldn’t stop raving about how much they loved them. A definite keeper!”
– Christine
Expand Your Baking Repertoire: More Delicious Recipes
If you loved these Turtle Cookies, you’re in for a treat! Explore more delightful recipes from our collection that are perfect for any occasion. From rich chocolate desserts to fruity delights, there’s something for everyone to enjoy:
- Brownie Cheesecake Bars
- Homemade Chocolate Cheesecake
- Donut Recipe (Easy)
- Cool Whip Fruit Dip
- Chocolate Whipping Cream Frosting
- Oreos Ice Cream
- Banana Nut Bars
- Funfetti Sugar Cookies Recipe
- Chocolate Muffins Recipe From Scratch
- Recipe for Homemade Angel Food Cake
- Gluten Free Donuts Recipe
- Recipe For Vanilla Frosting
- Gluten-Free Cupcakes
- Pistachio Fluff Salad
- Kool Aid Pie Recipe With Cool Whip
Rated 4.26 out of 5 stars by 791 users.
Tap stars to rate! (Note: Interactive rating functionality is removed as per instructions, this is static text.)
Ultimate Chocolate Caramel Pecan Turtle Cookies
Beth
15 minutes
10-14 minutes
30 minutes
16 large cookies
Rate Recipe
Print Recipe
Equipment
-
Silicone Baking Mat
-
My favorite spatula!
-
KitchenAid 9-Speed Mixer
-
Kitchen Scale
-
Glass Mixing Bowl
-
Cookie Scoop (3 tbsp)
Ingredients
For the Dry Ingredients:
- 1 ¼ cups (150g) all-purpose flour
- ¼ cup (21g) natural unsweetened cocoa powder
- ½ tsp salt
- ½ tsp baking soda
For the Wet Ingredients:
- ½ cup (113g) unsalted butter, softened to room temperature
- ½ cup (107g) brown sugar, packed
- ½ cup (99g) granulated sugar
- 1 large egg
- 1 tsp vanilla extract
For the Delicious Mix-ins:
- ½ cup (85g) semi-sweet chocolate chips (regular or mini size)
- ½ cup chopped caramel squares (use a knife to cut into small pieces, such as Kraft caramels)
- ½ cup (57g) chopped pecans
Instructions
-
Begin by preparing your caramel. Carefully cut the caramel squares into small, manageable pieces using a sharp knife. This ensures they melt evenly within the cookies.
-
In a small bowl, combine the semi-sweet chocolate chips, chopped pecans, and chopped caramel pieces. Mix them gently until evenly distributed. Set aside about 1/2 cup of this mixture to press onto the outside of your cookie dough balls later for a beautiful presentation.1/2 cup (85g) semi-sweet chocolate chips,
1/2 cup (57g) chopped pecans,
1/2 cup chopped caramel squares -
Preheat your oven to 350ºF (175ºC). Line a baking sheet with a silicone baking mat or parchment paper for easy release and even baking.
-
In a separate small bowl, thoroughly mix together the all-purpose flour, cocoa powder, salt, and baking soda. Whisk well to ensure all dry ingredients are combined.1 ¼ cups (150g) all-purpose flour,
¼ cup (21g) natural unsweetened cocoa powder,
½ tsp salt,
½ tsp baking soda -
In a large mixing bowl, cream together the softened unsalted butter, brown sugar, and granulated sugar until the mixture is light and fluffy, usually about 1 minute with an electric mixer. Next, add the large egg and vanilla extract, beating again until well combined. Gradually add the prepared dry flour mixture into the wet ingredients. Mix on low speed or use a spatula, incorporating just until everything is combined and no dry streaks remain. Finally, fold in the main portion of your mix-ins (chocolate chips, pecans, and caramel, excluding the 1/2 cup you reserved). The dough will be quite thick.½ cup (113g) unsalted butter, softened,
½ cup (107g) brown sugar,
½ cup (99g) granulated sugar,
1 large egg,
1 tsp vanilla extract -
Using a cookie scoop (approximately 3 tbsp for large cookies), form uniform dough balls. Now, take the 1/2 cup of reserved mix-ins and gently press them onto the outside of each dough ball. This step is optional but highly recommended as it creates those visually appealing, “loaded” cookies with visible chocolate chips, caramel puddles, and pecans on top, just like in the photos.
-
Place the prepared cookies about 3 inches apart on your lined baking sheet to allow for proper spreading. Bake for 10-14 minutes (for large cookies). The edges should appear set and slightly golden, while the centers remain soft. Allow the cookies to cool on the baking sheet for 10 minutes before carefully transferring them to a wire cooling rack to cool completely.
Notes
If you opt to make smaller cookie dough balls, it is crucial to reduce the baking time accordingly. Over-baking smaller cookies will make them excessively crisp and diminish their wonderful chewy texture. Start checking for doneness a few minutes earlier.
Nutrition Information
Calories:
229kcal
|
Carbohydrates:
30g
|
Protein:
3g
|
Fat:
12g
|
Saturated Fat:
5g
|
Polyunsaturated Fat:
1g
|
Monounsaturated Fat:
4g
|
Trans Fat:
1g
|
Cholesterol:
28mg
|
Sodium:
133mg
|
Potassium:
108mg
|
Fiber:
1g
|
Sugar:
20g
|
Vitamin A:
201IU
|
Vitamin C:
1mg
|
Calcium:
29mg
|
Iron:
1mg
Nutrition Disclosure
All nutritional values provided are approximate and are offered to the reader as a courtesy. Please note that changing ingredients and/or quantities will alter these estimated nutritional calculations. For precise dietary information, professional analysis is recommended.
Loved this recipe? Share your thoughts below!