
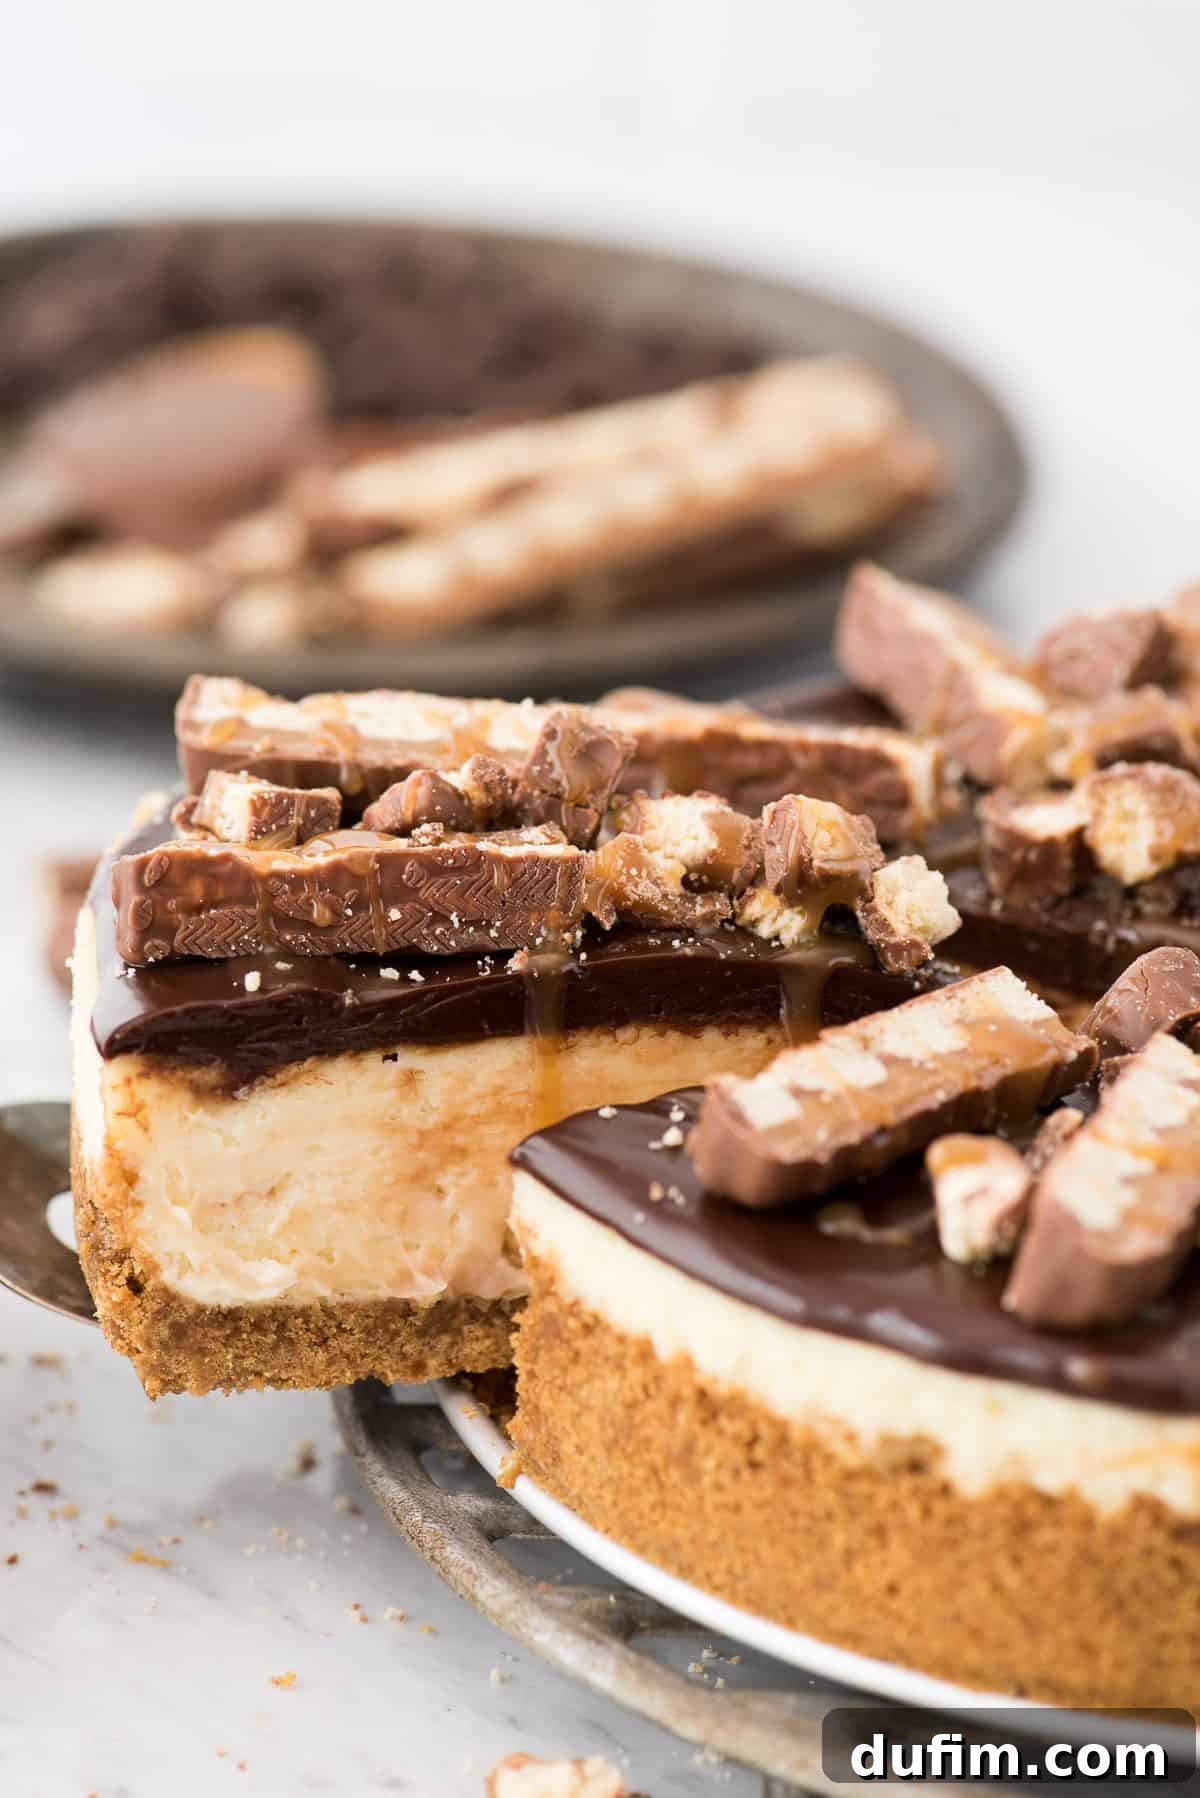
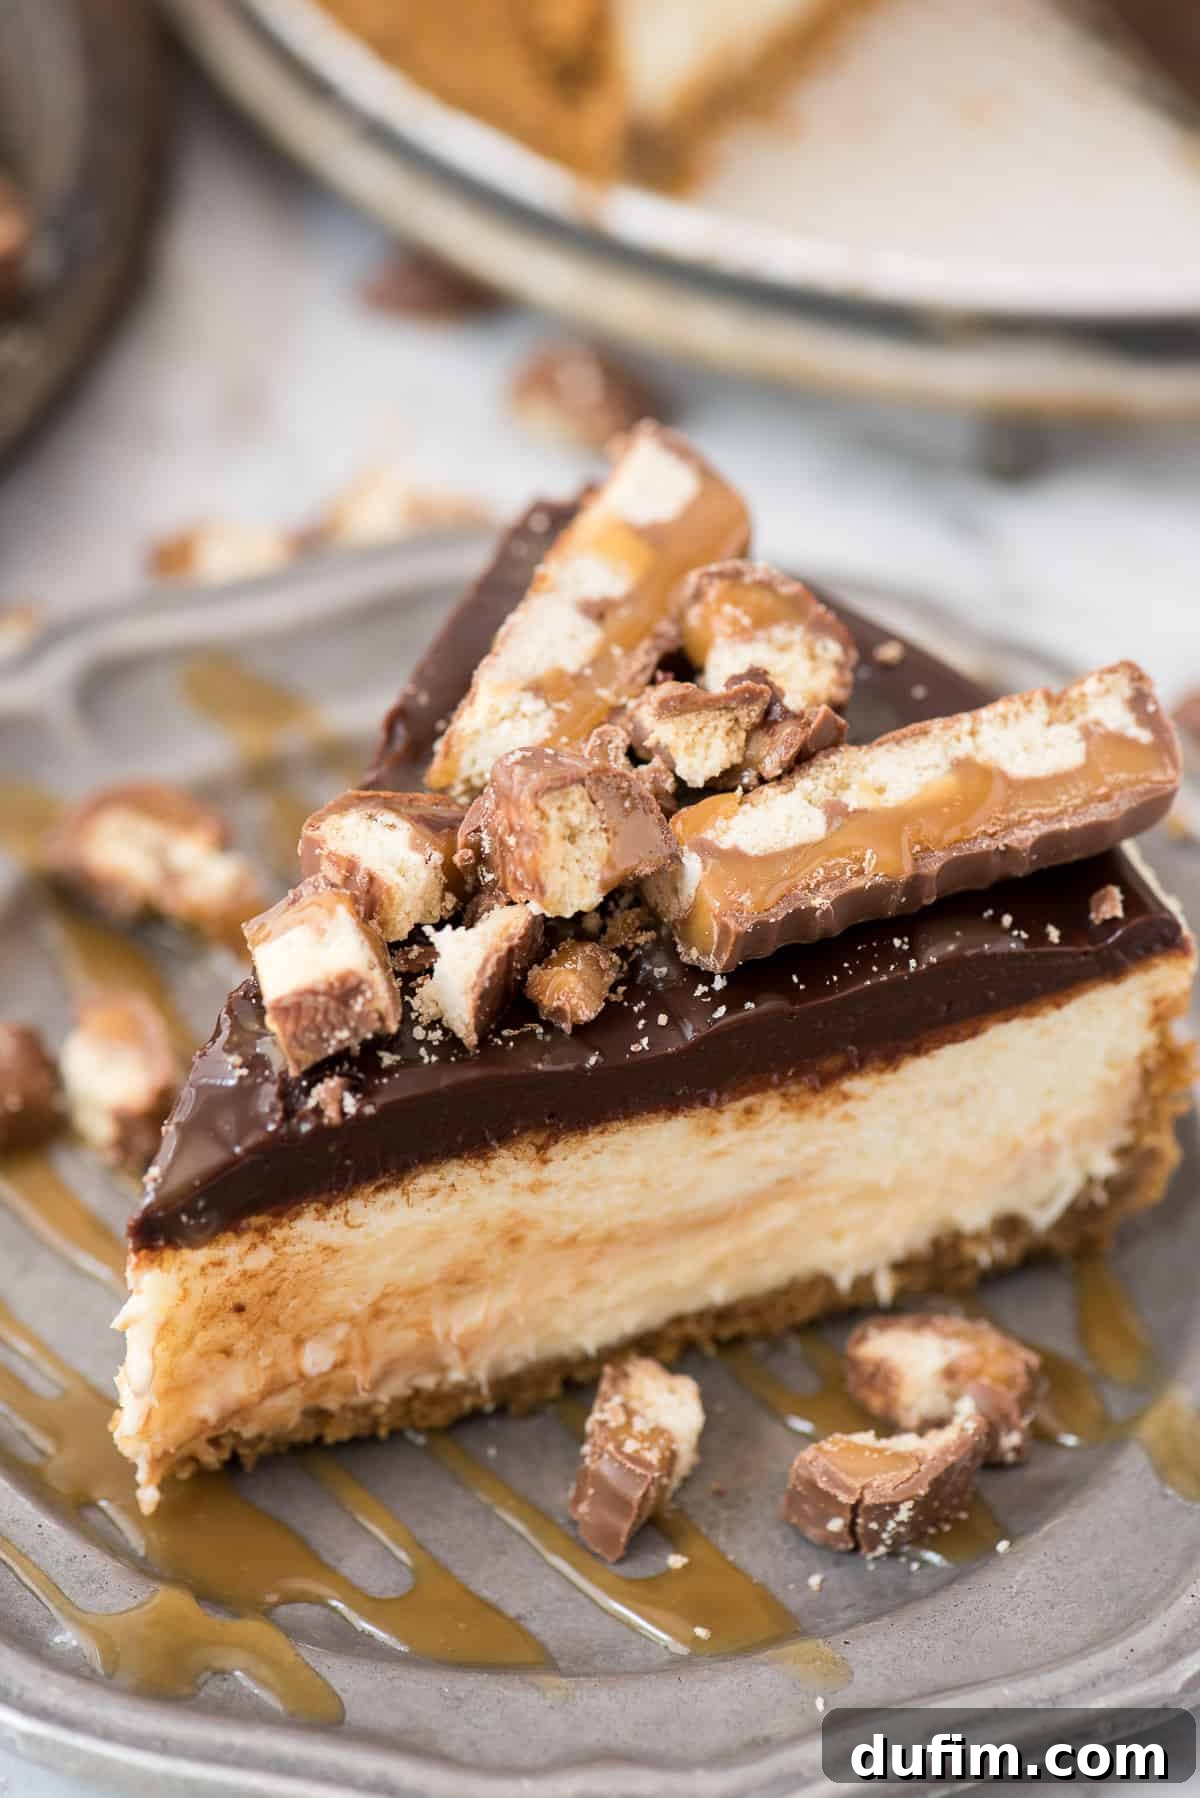
Experience pure indulgence with this Twix Cheesecake, a masterpiece boasting all your favorite caramel and chocolate flavors. This creamy, Philadelphia-style cheesecake features luscious caramel sauce swirled directly into the batter, a thick, decadent layer of chocolate ganache, and is generously topped with chopped Twix candy bars and an extra drizzle of caramel sauce. Get ready for a dessert that disappears in minutes!
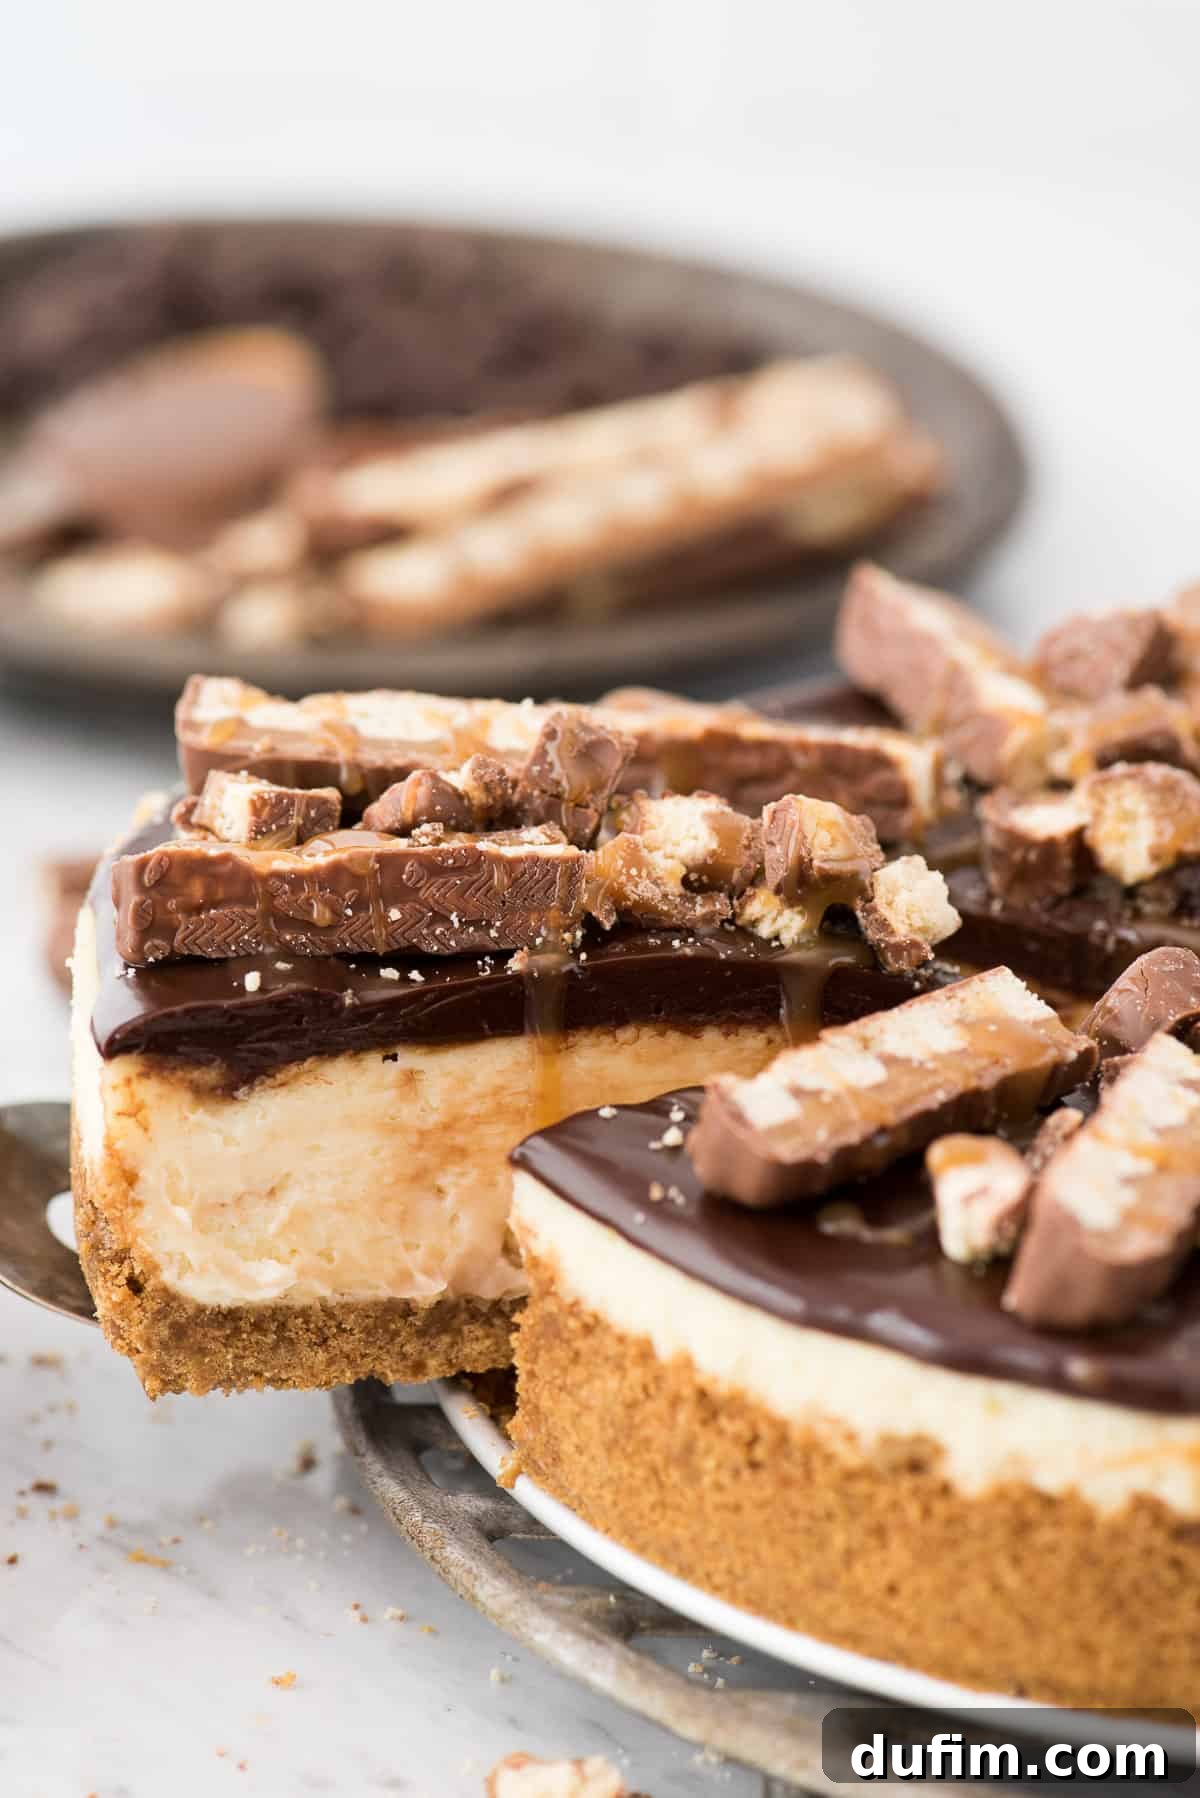
“Made this for a co-worker’s birthday! He and his family loved it! Thank you for this recipe!”
-Larry
It seems some desserts are just destined for immediate adoration. My husband Ryan once brought this very cheesecake to work at 7 AM, and by 8:15 AM, the empty pan was returned to his desk. This isn’t just a dessert; it’s a phenomenon. So, I think it’s safe to say, this Twix Cheesecake recipe is an absolute “must-make” for any occasion!
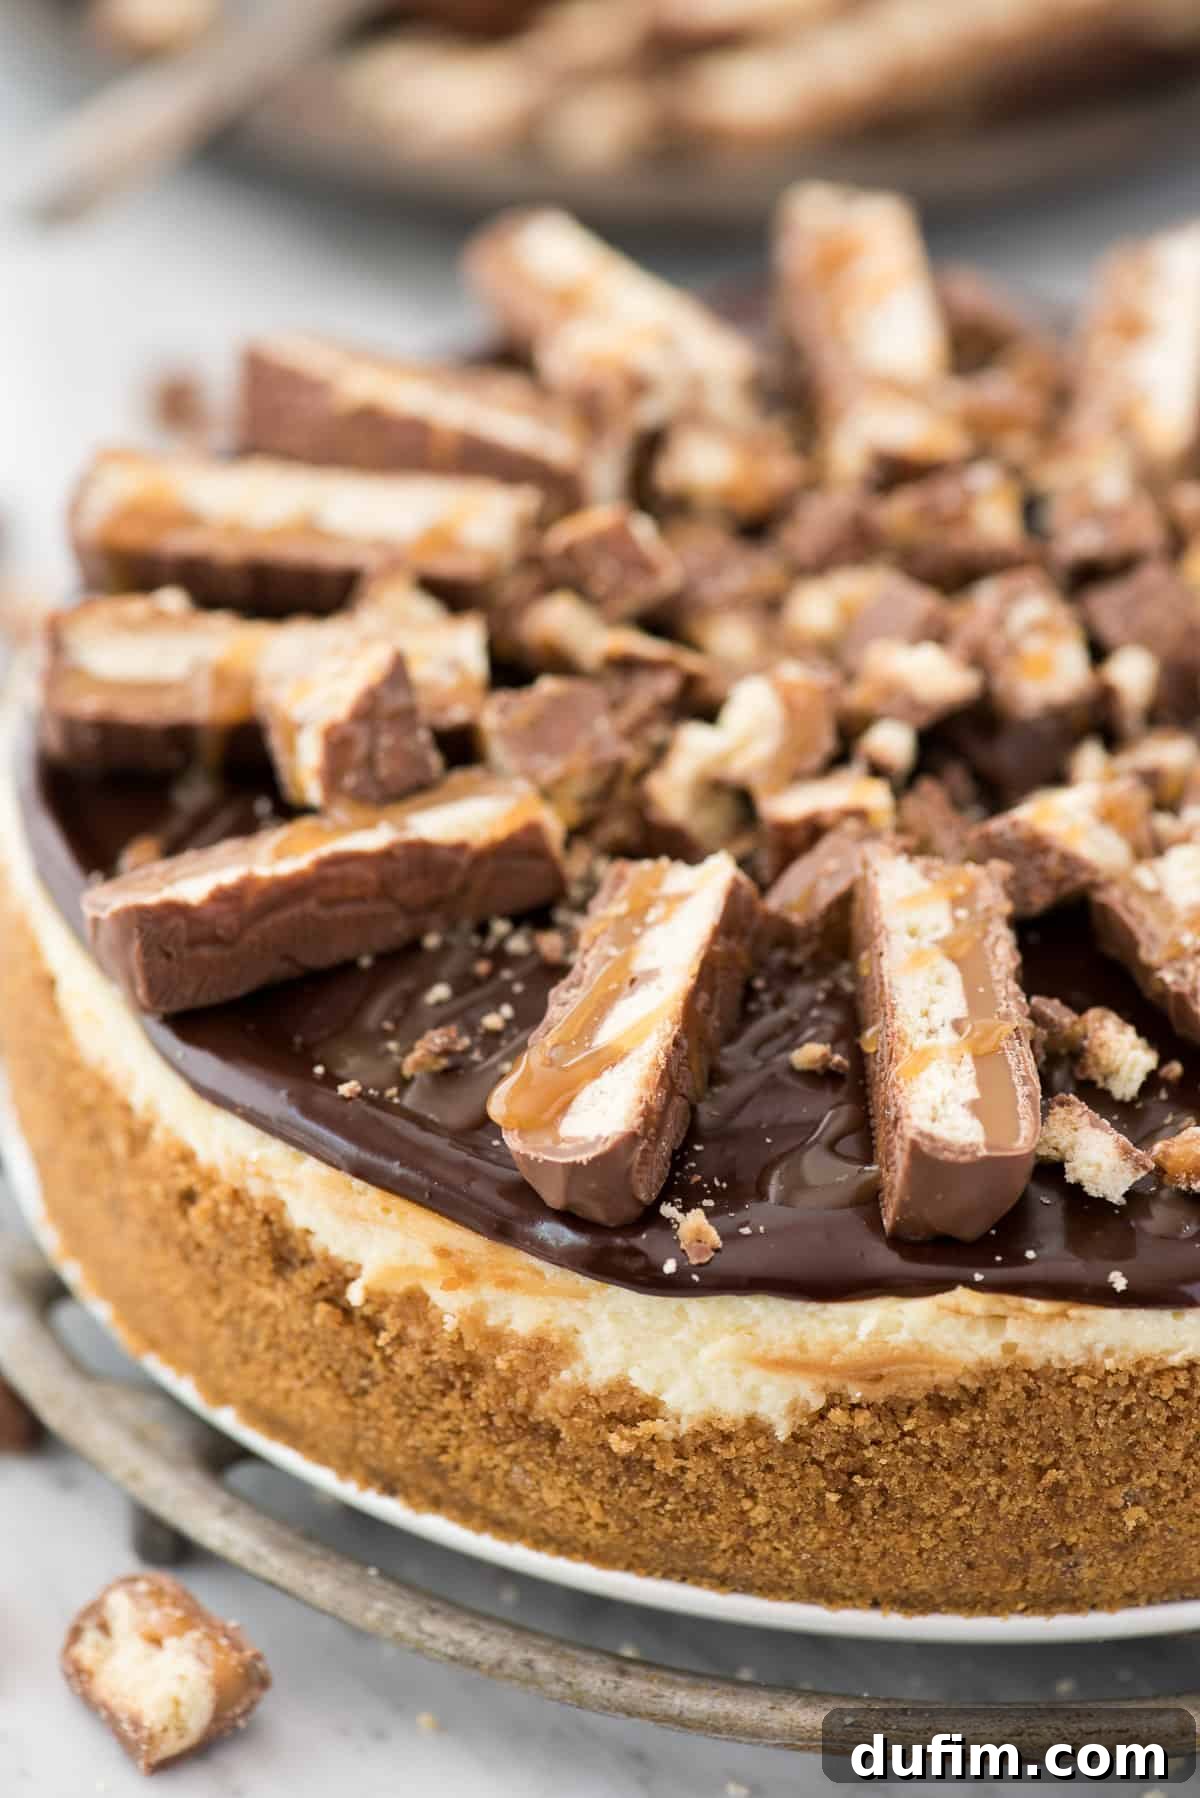
This Twix Cheesecake truly encapsulates all the beloved elements of a Twix bar, transformed into an unforgettable dessert. You’ll savor the crunchy cookie texture from the perfectly baked graham cracker crust, the rich, buttery caramel swirled throughout the silky cheesecake filling, and the luxurious, thick chocolate ganache blanketing the top. And, of course, it’s crowned with generous pieces of real Twix candy!
For those who crave an even more intense caramel experience, feel free to increase the amount of caramel sauce swirled into the cheesecake batter. Want to take it up another notch? Consider folding in some finely chopped Twix pieces directly into the cheesecake mixture before baking for an extra surprise in every slice!
Crafting the Ultimate Twix Cheesecake: A Step-by-Step Guide
Creating a cheesecake that’s both stunning and delicious can seem daunting, but with these detailed steps and essential tips, you’ll achieve perfection. We’ll break down each component, from the foundational crust to the glorious topping, ensuring a smooth, crack-free, and incredibly flavorful dessert.
Building the Perfect Graham Cracker Crust for Cheesecake
The foundation of any great cheesecake is its crust. For this Twix-inspired delight, a classic graham cracker crust provides that essential cookie crunch, perfectly complementing the creamy filling.
Essential 4-Ingredient Graham Cracker Crust
Our simple yet robust graham cracker crust requires just four key ingredients:
- Graham Cracker Crumbs: Did you know you can often find pre-crushed graham cracker crumbs in the baking aisle of most grocery stores? They’re usually located near the pre-made pie crusts. Using these saves a significant amount of time and ensures a consistent texture, but you can certainly crush whole crackers yourself in a food processor.
- Brown Sugar: This isn’t just for sweetness; brown sugar imparts a deeper, richer flavor to the crust compared to white sugar. More importantly, its molasses content helps bind the crumbs and butter together, creating a sturdy base that won’t crumble apart when sliced.
- Cinnamon: A subtle hint of cinnamon adds a wonderful warmth and delicate spice that elevates the overall flavor profile without overpowering the main cheesecake. It’s a classic pairing with graham crackers for a reason!
- Melted Butter: This is arguably the most critical ingredient for binding the crust. Melted butter coats each crumb, acting as the “glue” that holds the crust firmly in place, preventing it from becoming a pile of loose crumbs.
To prepare, simply mix all the crust ingredients thoroughly in a bowl until the crumbs are evenly moistened. Then, firmly press the mixture into the bottom and slightly up the sides of your chosen springform pan. For the best compaction, use the flat bottom of a measuring cup or a drinking glass to evenly and tightly pack the crust. This ensures a solid, non-crumbly base for your cheesecake.
After mixing and pressing, a short pre-bake helps to set the crust, making it crispier and preventing it from getting soggy once the cheesecake batter is added. This crucial step is key to a truly delightful cheesecake experience.
Crafting the Silky Caramel Swirl Cheesecake Filling
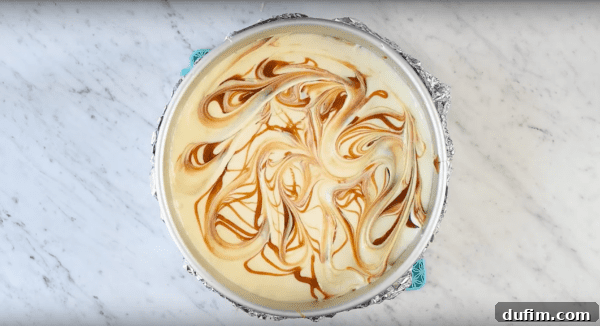
The heart of our Twix Cheesecake is its incredibly smooth, rich, and tangy-sweet filling, enhanced with a mesmerizing caramel swirl. This Philadelphia-style cheesecake recipe is surprisingly simple, calling for just five essential ingredients to achieve its signature creamy texture.
- Cream Cheese: You’ll need three 8 oz (226g) packages. For the best, richest, and most consistent results, always opt for full-fat cream cheese. Low-fat varieties contain more water, which can alter the texture and lead to a less decadent cheesecake. Ensure your cream cheese is at room temperature before you begin mixing – this is vital for a lump-free, silky batter.
- Granulated Sugar: Sugar serves a dual purpose here: it provides sweetness to balance the natural tanginess of the cream cheese and contributes to the overall structure and creamy consistency of the cheesecake.
- Vanilla Extract: A teaspoon of high-quality vanilla extract is enough to significantly enhance and round out the flavors of the cheesecake, adding a subtle warmth and aromatic depth.
- Large Eggs: Eggs are crucial for binding the cheesecake ingredients and providing structure during baking. The key to incorporating them correctly is to add them one at a time and mix *just until the yolk breaks*. Over-beating the eggs is the leading cause of air bubbles in the batter, which can expand during baking and cause unsightly cracks on the surface of your finished cheesecake.
- Jarred Caramel Sauce: For that irresistible caramel swirl, a good quality jarred caramel sauce works beautifully. Lightly heating it makes it more pourable and easier to swirl gracefully into the cheesecake batter, creating beautiful ribbons of caramel throughout. Don’t be shy – if you adore caramel, add a little extra!
By following these guidelines, you’ll create a cheesecake filling that is perfectly smooth, wonderfully balanced, and ready to be infused with the rich, golden goodness of caramel.
Secrets to a Flawless Twix Cheesecake: Essential Baking Techniques
Achieving a cheesecake that is perfectly smooth, creamy, and free from cracks often comes down to mastering two critical techniques. These are the golden rules I share for every cheesecake recipe, ensuring consistently spectacular results:
1. Embrace the Water Bath: Don’t let this technique intimidate you. It’s the secret to a moist, evenly baked, and crack-free cheesecake.
2. Master the Cooling Process: Patience is paramount here. Rushing the cooling is the enemy of a perfect cheesecake.
Let’s dive into the details of each tip to equip you with all the knowledge needed for your best Twix Caramel Cheesecake yet!
The Essential Cheesecake Water Bath: Demystified
The concept of baking a cheesecake in a water bath (bain-marie) might sound a little unusual, but it is truly the secret weapon for creating cheesecakes with an unparalleled creamy texture and a perfectly smooth, uncracked surface. This gentle baking method ensures that the cheesecake cooks slowly and evenly, preventing it from drying out or cracking due to rapid temperature changes.
The basic setup for a water bath is straightforward: place your springform pan, which contains the cheesecake, inside a larger cake pan or a sturdy roasting pan. Once in the oven, you’ll carefully fill the larger pan with about 1 inch of hot water. This creates a steamy, humid environment around your cheesecake, mimicking a slow-cooker effect that results in that signature melt-in-your-mouth consistency.
Ingenious Trick: How to Prevent Your Springform Pan from Leaking
One common concern with the water bath method is the potential for water to seep into your springform pan, ruining your beautiful cheesecake. But fear not! I have an incredibly effective trick that guarantees a leak-proof water bath every single time, safeguarding your dessert.
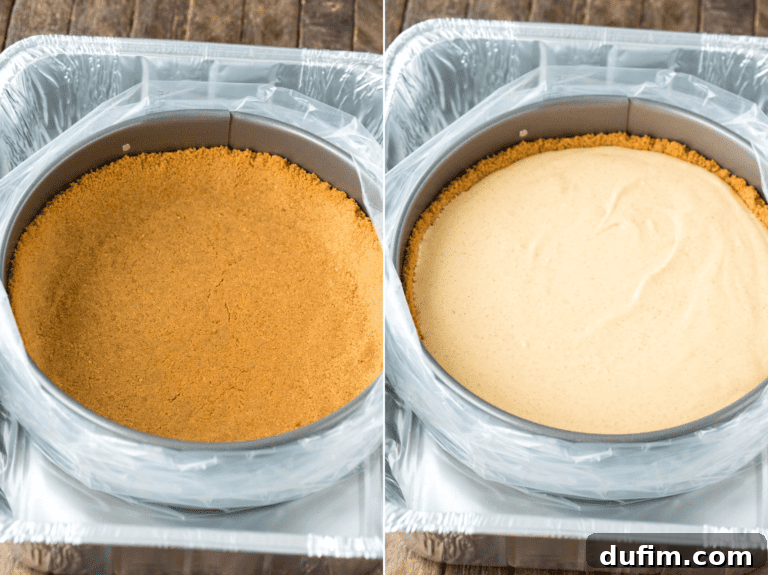
The secret is to use a large, oven-safe turkey roasting bag or a slow cooker liner bag. Here’s how:
- Carefully place your assembled springform pan (with the crust and cheesecake batter inside) into one of these large, oven-safe bags.
- Roll down the top edge of the bag so that it doesn’t cover the cheesecake itself. You want to create a seal around the base and sides of the pan, but leave the top exposed for even baking.
- If there’s a lot of excess bag material, you can twist one side tightly and knot it, creating a snug fit around the pan. The goal is to ensure the bag acts as a protective barrier without touching the cheesecake batter.
- Once the springform pan is securely inside the bag, place this entire assembly into your large roasting pan.
- Now, you can confidently fill the roasting pan with about 1 inch of hot water, knowing that the turkey bag will create an impenetrable barrier. Your cheesecake will be perfectly safe from any water leakage!
This simple yet brilliant trick provides peace of mind, allowing you to enjoy the benefits of a water bath without any of the worry about soggy crusts or ruined cheesecakes.
Mastering the Art of Cooling Your Cheesecake for a Flawless Finish
Remember this golden rule: Never rush the cooling process! This is just as vital as the water bath for preventing cracks in your cheesecake and ensuring a smooth, luxurious texture. Sudden temperature changes are the primary culprits behind cheesecake cracks.
Here’s the ideal cooling sequence:
- Initial Oven Cool-Down: Once your cheesecake is perfectly baked (the edges are set, but the center still has a slight wobble), turn off the oven. Gently remove the springform pan from the water bath and its protective oven-safe bag. Place the cheesecake (still in its springform pan) back onto a baking sheet and return it to the turned-off oven.
- Door Cracked Cooling: Crucially, leave the oven door slightly ajar (cracked open by about an inch or two). This allows the oven to cool down very gradually, preventing any abrupt temperature shocks to the delicate cheesecake. Let it cool this way for at least 60-90 minutes, or until it reaches room temperature. This slow transition is key to maintaining its integrity.
- Room Temperature Rest: After its slow cool-down in the oven, remove the cheesecake and let it rest on your countertop until it is completely at room temperature. This might take another hour or so.
- The All-Important Refrigeration: Once at room temperature, loosely cover the cheesecake with aluminum foil or plastic wrap (ensure it doesn’t touch the surface of the cheesecake) and transfer it to the refrigerator. This step is non-negotiable for setting the cheesecake fully and allowing its flavors to meld beautifully. For the best taste and texture, refrigerate your cheesecake overnight (ideally for at least 8 hours) before slicing and serving. This extended chilling time ensures every slice is firm, clean, and utterly delicious.
By patiently following this cooling regimen, you’ll be rewarded with a gorgeous, crack-free Twix cheesecake that’s perfectly set and ready to impress.
Expert Tips for Your Best Twix Caramel Cheesecake
To ensure your Twix Caramel Cheesecake turns out absolutely perfect every single time, keep these expert tips in mind:
- Room Temperature Cream Cheese is Non-Negotiable: Always allow your cream cheese to come to a complete room temperature before you start beating it. Cold cream cheese will result in a lumpy batter, no matter how much you beat it, leading to a less smooth final texture. Plan ahead and take it out of the fridge at least 1-2 hours before you begin baking.
- Gentle Egg Incorporation is Key: The eggs are the last ingredient added to the cheesecake batter for a reason. Mix them in one at a time, and only beat until the yolk has just broken and is barely combined. Over-beating the eggs introduces too much air into the batter, which expands during baking and is the primary cause of unsightly cracks on the cheesecake’s surface.
- Mind Your Springform Pan Size: This recipe is designed for an 8 or 9-inch springform pan. If you use a different size, be aware that the baking time will change. A larger pan will result in a thinner cheesecake that bakes faster, while a smaller pan will yield a taller cheesecake requiring more baking time. Always keep an eye on the wobble – a slight jiggle in the center indicates it’s done.
- The Slow Oven Cool-Down: After baking, turn off your oven and leave the cheesecake inside with the oven door propped open for at least 60-90 minutes. This slow, gradual cooling prevents rapid temperature changes that can shock the cheesecake and cause cracks.
- Overnight Refrigeration for Perfection: Do not skip the overnight chilling! Refrigerating your cheesecake for at least 8 hours (or preferably overnight) is crucial. This allows the cheesecake to fully set, firm up, and lets all the delicious flavors meld together, resulting in the best possible texture and taste.
Freezing Your Twix Cheesecake for Future Indulgence
Have leftover cheesecake or want to bake ahead for a special occasion? Freezing a whole cheesecake is a fantastic option. Here’s how to do it properly to preserve its quality and flavor:
- Complete Cooling is Essential: Before even thinking about freezing, ensure your cheesecake is completely cooled. It can either cool fully on the counter after its oven-cooling process, or you can chill it in the fridge overnight before moving to the freezer. Never freeze a warm or even slightly warm cheesecake, as this can lead to ice crystals and a compromised texture.
- Prepare for Wrapping: Once thoroughly chilled, use a thin knife or offset spatula to carefully run around the edge of the springform pan before removing the outer ring. Then, gently slide the cheesecake off the pan bottom. Place the cheesecake onto a round cardboard cake circle that is the same size as your cheesecake. If you don’t have one, you can use a sturdy plate or a piece of cardboard covered in aluminum foil.
- Double-Wrap for Protection: To prevent freezer burn and absorb freezer odors, wrap the entire cheesecake (without any toppings like ganache or Twix pieces, which should be added fresh after thawing) very tightly in several layers of plastic wrap. Ensure there are no gaps or exposed areas. Then, add an additional layer of protection by wrapping the plastic-wrapped cheesecake tightly in aluminum foil. This double-wrapping is key!
- Freeze and Thaw: Place the securely wrapped cheesecake in the freezer. It can be stored for up to 3 months. When you’re ready to enjoy it, transfer the frozen cheesecake to the refrigerator and allow it to thaw slowly overnight. Once thawed, you can add your fresh chocolate ganache, Twix pieces, and caramel drizzle before slicing and serving.
Enjoying a homemade Twix cheesecake weeks or months after baking is a delightful treat!
Explore More Irresistible Cheesecake Creations
If you’ve fallen in love with making cheesecakes, be sure to explore some of our other fantastic recipes:
- Mini Funfetti Cheesecakes: Perfect individual portions bursting with celebratory sprinkles.
- Decadent Chocolate Cheesecake: A rich, intense chocolate experience for true cocoa lovers.
- Cream Cheese Swirl Brownies: The best of both worlds – fudgy brownies with a creamy cheesecake swirl.
- Rich Espresso Cheesecake: A sophisticated dessert with a delightful coffee kick.
Rate this recipe!
Twix Cheesecake
Print Recipe
Equipment
-
8 or 9 inch Springform Pan
-
Large Mixing Bowl
-
Electric Mixer (stand or hand mixer)
-
Rubber Spatula
-
Large Roasting Pan (for water bath)
-
Oven-safe Turkey Bag or Slow Cooker Liner
Ingredients
For the CRUST
- 2 cups (226g) graham cracker crumbs
- ¼ cup (54g) packed brown sugar
- ¼ tsp ground cinnamon
- 6 Tbsp (86g) unsalted butter, melted
For the CHEESECAKE FILLING
- 24 oz (678g) full-fat cream cheese, at room temperature (three 8oz packages)
- 1 cup (198g) granulated sugar
- 1 tsp pure vanilla extract
- 3 large eggs
- 3 Tbsp jarred caramel sauce, slightly heated for easy pouring (use more for an intense caramel flavor!)
For the CHOCOLATE GANACHE
- 1 cup (170g) semi-sweet chocolate chips
- ½ cup (118ml) heavy whipping cream
For GARNISH
- Twix bars, sliced in half or chopped
- Extra caramel sauce (for drizzling)
Instructions
CRUST Preparation
- Preheat your oven to 350º F (175º C).
- If using whole graham crackers, pulse them in a blender or food processor until very fine crumbs are formed. Measure out 2 cups of these crumbs. In a medium bowl, combine the graham cracker crumbs with the brown sugar, ground cinnamon, and melted unsalted butter. Mix thoroughly until all crumbs are evenly moistened and resemble wet sand.
Ingredients: 2 cups (226g) graham cracker crumbs, ¼ cup (54g) brown sugar, ¼ tsp cinnamon, 6 Tbsp (86g) unsalted butter
- Pour the crumb mixture into an 8 or 9-inch springform pan. Distribute the crumbs evenly across the bottom, then use the bottom of a measuring cup or a flat-bottomed glass to firmly press the crumbs into the pan. For a neat edge, you can gently press some crumbs slightly up the sides of the pan if desired.
- Place the prepared crust in the preheated oven and pre-bake for 8-10 minutes, or until it turns a light golden brown and smells fragrant.
- Remove the pan from the oven and allow the crust to cool completely to room temperature before adding the cheesecake mixture. This prevents the crust from becoming soggy.
- Reduce the oven temperature to 325º F (160º C).
CHEESECAKE FILLING & BAKING
- Prepare your water bath pan. Place the cooled springform pan (with the crust inside) into a large, oven-safe turkey bag or slow cooker liner bag. Roll down the top edge of the bag so it doesn’t cover the top of the cheesecake. If there’s excess bag material, twist and knot one side tightly to make it snug around the pan. Set this aside.
- In a large mixing bowl (using a stand mixer with a paddle attachment or a hand mixer), beat the room temperature cream cheese on medium speed until it is completely smooth and creamy, about 2-3 minutes. Scrape down the sides of the bowl as needed. Add the granulated sugar and vanilla extract, then beat again until just combined, about 1 minute.
Ingredients: 24 oz (678g) cream cheese at room temperature, 1 cup (198g) sugar, 1 tsp vanilla extract
- Add the large eggs, one at a time. Beat each egg *just until the yolk breaks* and is barely incorporated into the batter, then add the next. Do not overmix the eggs, as this introduces air and can cause cracks in the cheesecake. Beat the entire mixture for one additional minute after the last egg is added. Pour this smooth cheesecake mixture over the cooled graham cracker crust in the springform pan.
- Gently drizzle the slightly warmed caramel sauce over the top of the cheesecake batter. Use a small spatula or a knife to gently swirl the caramel into the batter, creating beautiful patterns. Be careful not to mix it in completely.
Ingredients: 3 Tbsp jarred caramel sauce
- Place the bagged springform pan into your larger roasting pan. Carefully fill the roasting pan with about 1 inch of hot water (this creates the water bath).
- Carefully transfer the roasting pan (with the water bath and cheesecake inside) to the preheated oven (set to 325º F). Bake for 60-75 minutes. The cheesecake is done when the edges appear set and slightly puffed, but the very center (about 2-3 inches) still has a slight, gentle wobble when you lightly jiggle the pan. Do not overbake!
- Once baked, turn off the oven. Carefully remove the springform pan from the water bath and the oven-safe bag. Place the cheesecake (still in its springform pan) onto a baking sheet and return it to the turned-off oven with the oven door propped open by about 1-2 inches. Allow the cheesecake to cool slowly to room temperature inside the oven; this critical step can take 60-90 minutes or even longer.
- After the cheesecake has reached room temperature, remove it from the oven. Loosely cover the cheesecake with aluminum foil or plastic wrap (ensuring it doesn’t touch the surface) and transfer it to the refrigerator. Chill overnight (at least 8 hours) for optimal setting, texture, and flavor development.
- Before serving, carefully unmold the cheesecake. Run a thin knife or offset spatula around the inside edge of the springform pan before releasing the ring. Gently slide the cheesecake off the pan’s bottom.
CHOCOLATE GANACHE Preparation
- Place the semi-sweet chocolate chips into a heatproof bowl.
Ingredients: 1 cup (170g) semi-sweet chocolate chips
- In a small saucepan over medium heat, bring the heavy whipping cream to a gentle boil. As soon as it boils, remove it from the heat and immediately pour the hot cream over the chocolate chips in the bowl. Let the mixture sit undisturbed for 1 minute to allow the chocolate to melt. Then, stir well with a whisk or spatula until the ganache is completely smooth and glossy. Allow the ganache to cool slightly for 5-7 minutes before pouring it over the chilled cheesecake – it should be thick but still pourable.
Ingredients: ½ cup (118ml) heavy whipping cream
TO ASSEMBLE & SERVE
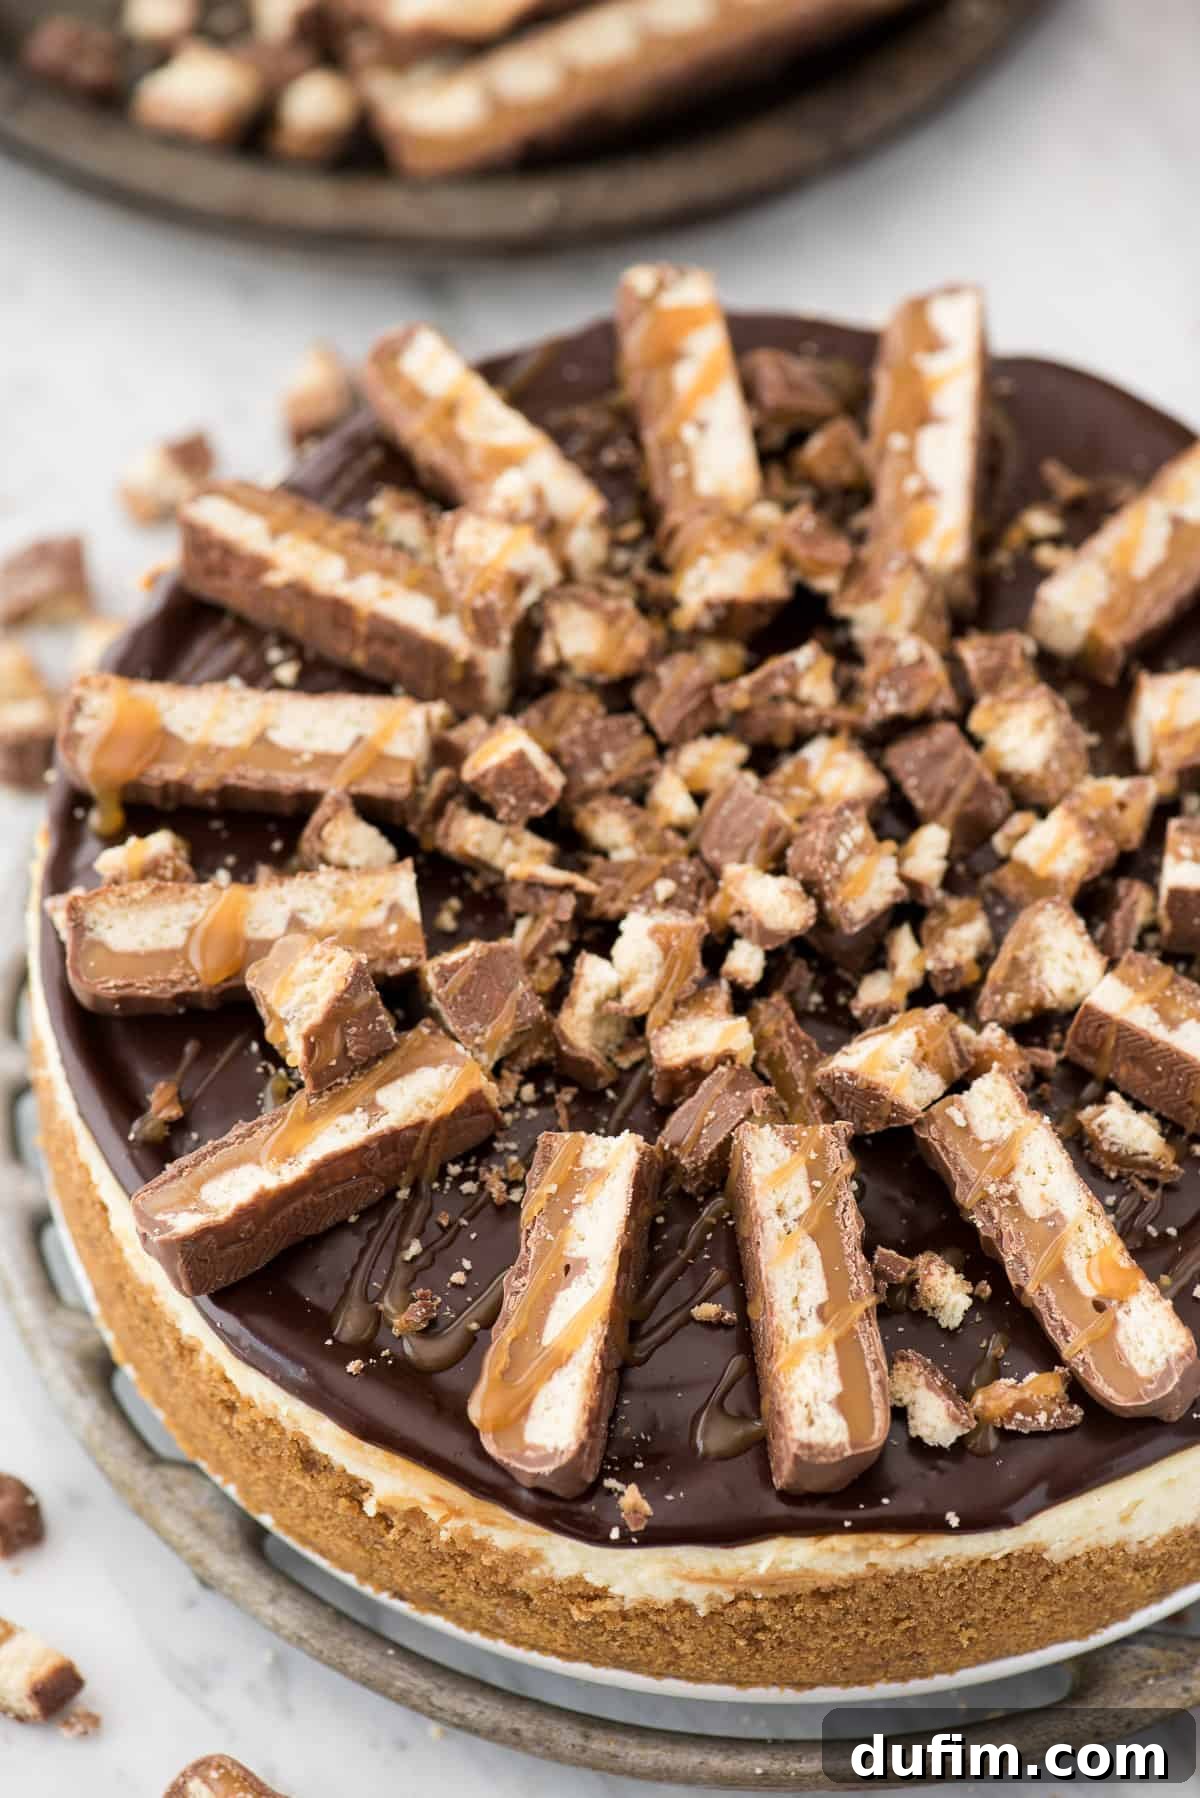
- Pour or spoon the cooled chocolate ganache evenly over the top of the chilled cheesecake. Use an offset spatula to gently spread it to the edges. While the ganache is still soft, arrange the sliced Twix bars artfully around the outside edge of the cheesecake. If desired, sprinkle some chopped Twix pieces over the center and finish with an extra drizzle of caramel sauce.
Ingredients: Twix bars, Extra caramel sauce (optional)
- Refrigerate the assembled cheesecake for another 30 minutes to allow the ganache to set. Then, slice with a sharp, warm knife (wipe knife clean between slices for neat cuts) and serve immediately. Enjoy your irresistible Twix Cheesecake!
Recipe Notes
- Baking Time for 8-inch Cheesecake: Approximately 65-75 minutes.
- Baking Time for 9-inch Cheesecake: Approximately 60-70 minutes.
- Always rely on the “wobble test” (slight jiggle in the center) rather than strict timing, as oven temperatures can vary.
Nutrition Information (Approximate Per Serving)
Carbohydrates: 46g |
Protein: 7g |
Fat: 37g |
Saturated Fat: 21g |
Polyunsaturated Fat: 2g |
Monounsaturated Fat: 10g |
Trans Fat: 1g |
Cholesterol: 138mg |
Sodium: 317mg |
Potassium: 226mg |
Fiber: 2g |
Sugar: 32g |
Vitamin A: 1162IU |
Vitamin C: 1mg |
Calcium: 98mg |
Iron: 2mg
Nutrition Disclosure
All nutritional values provided are approximate and intended as a courtesy. Changes to ingredients or quantities will alter the estimated nutritional calculations.
Loved this recipe? Share your thoughts and rate it below!