
Festive Christmas Tree Brownies: Your Ultimate Holiday Baking Guide
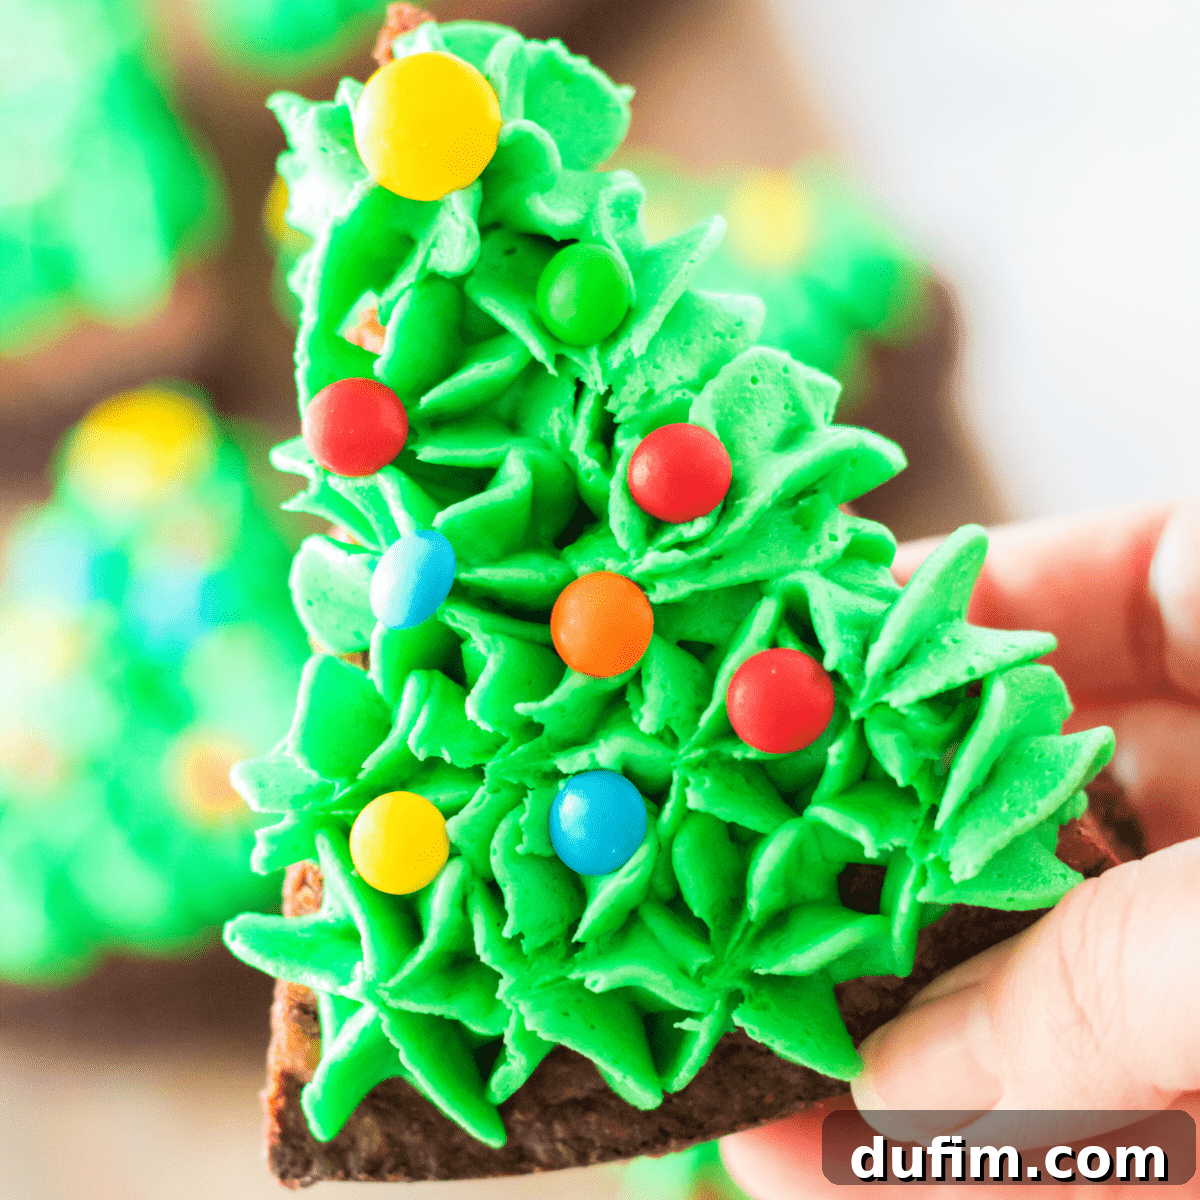
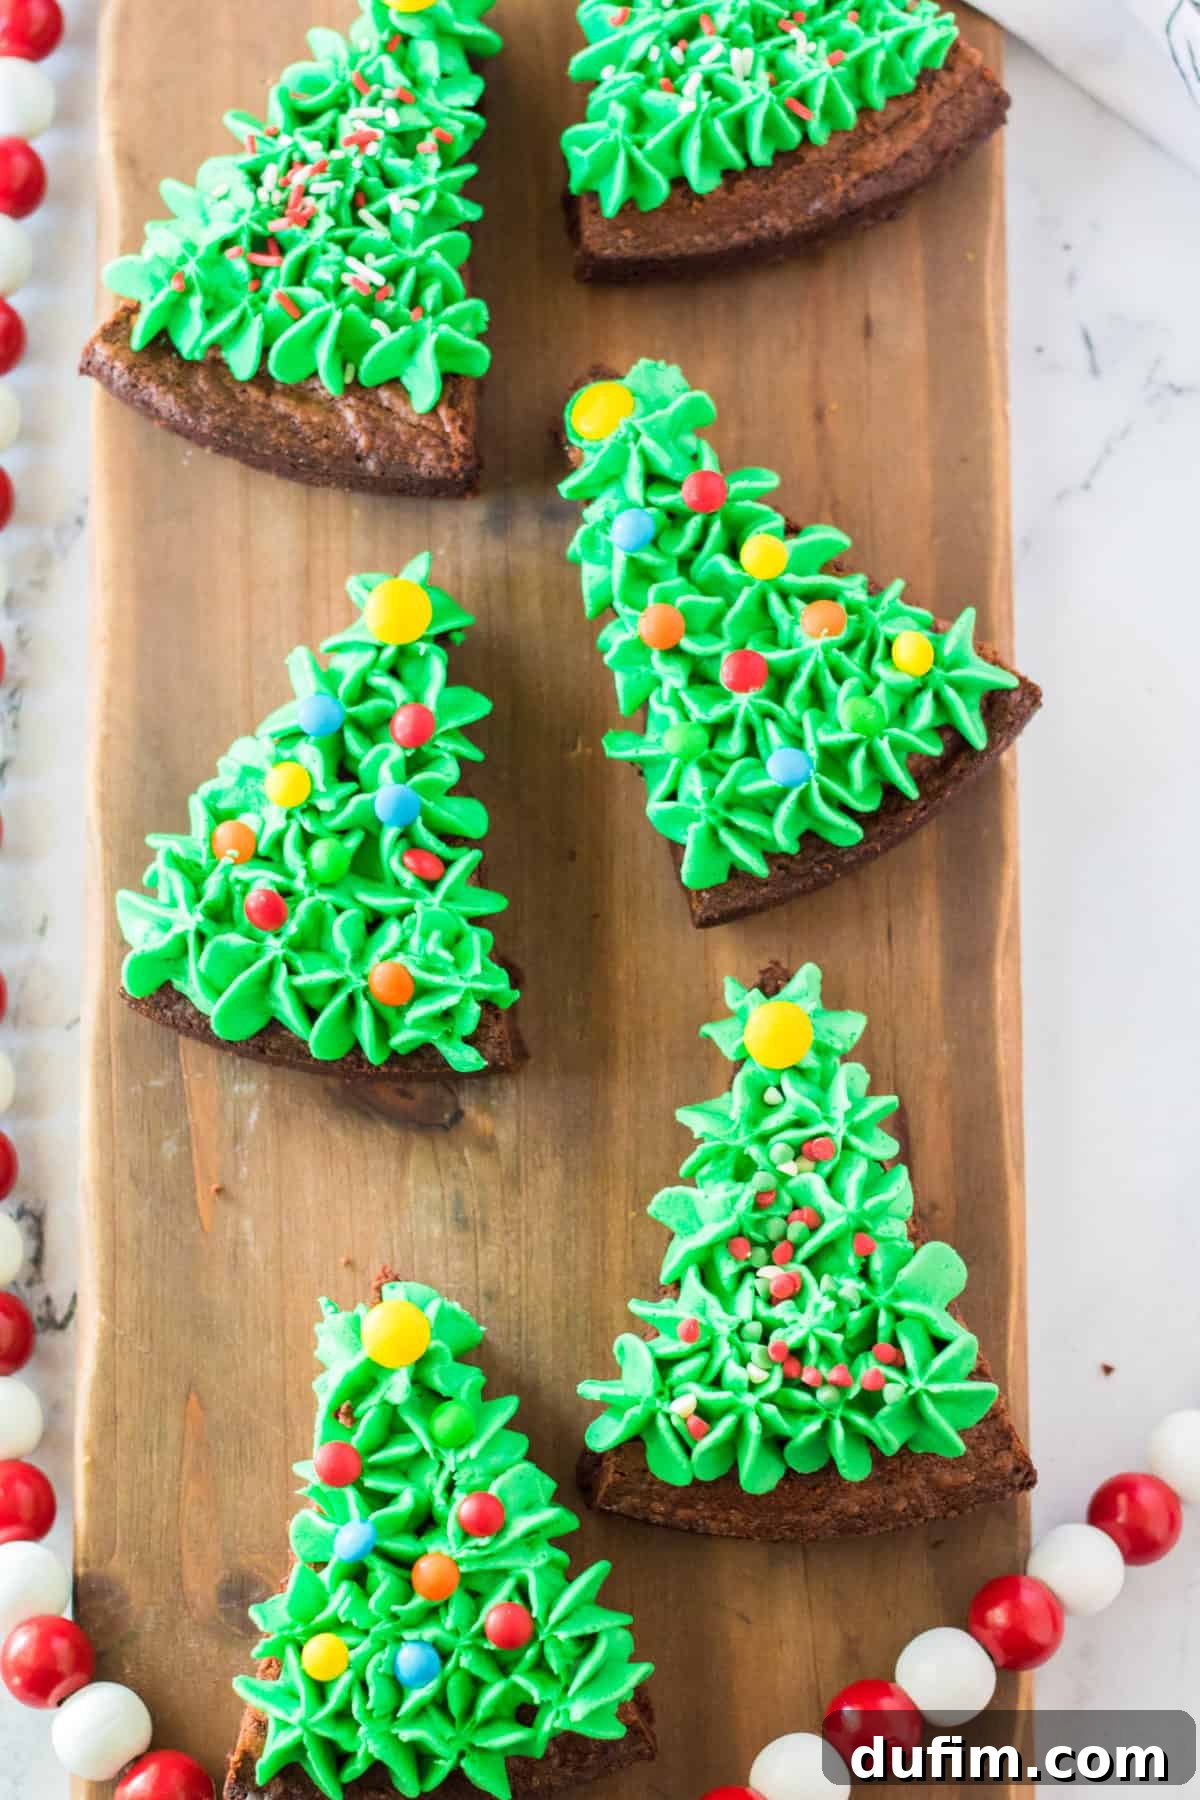
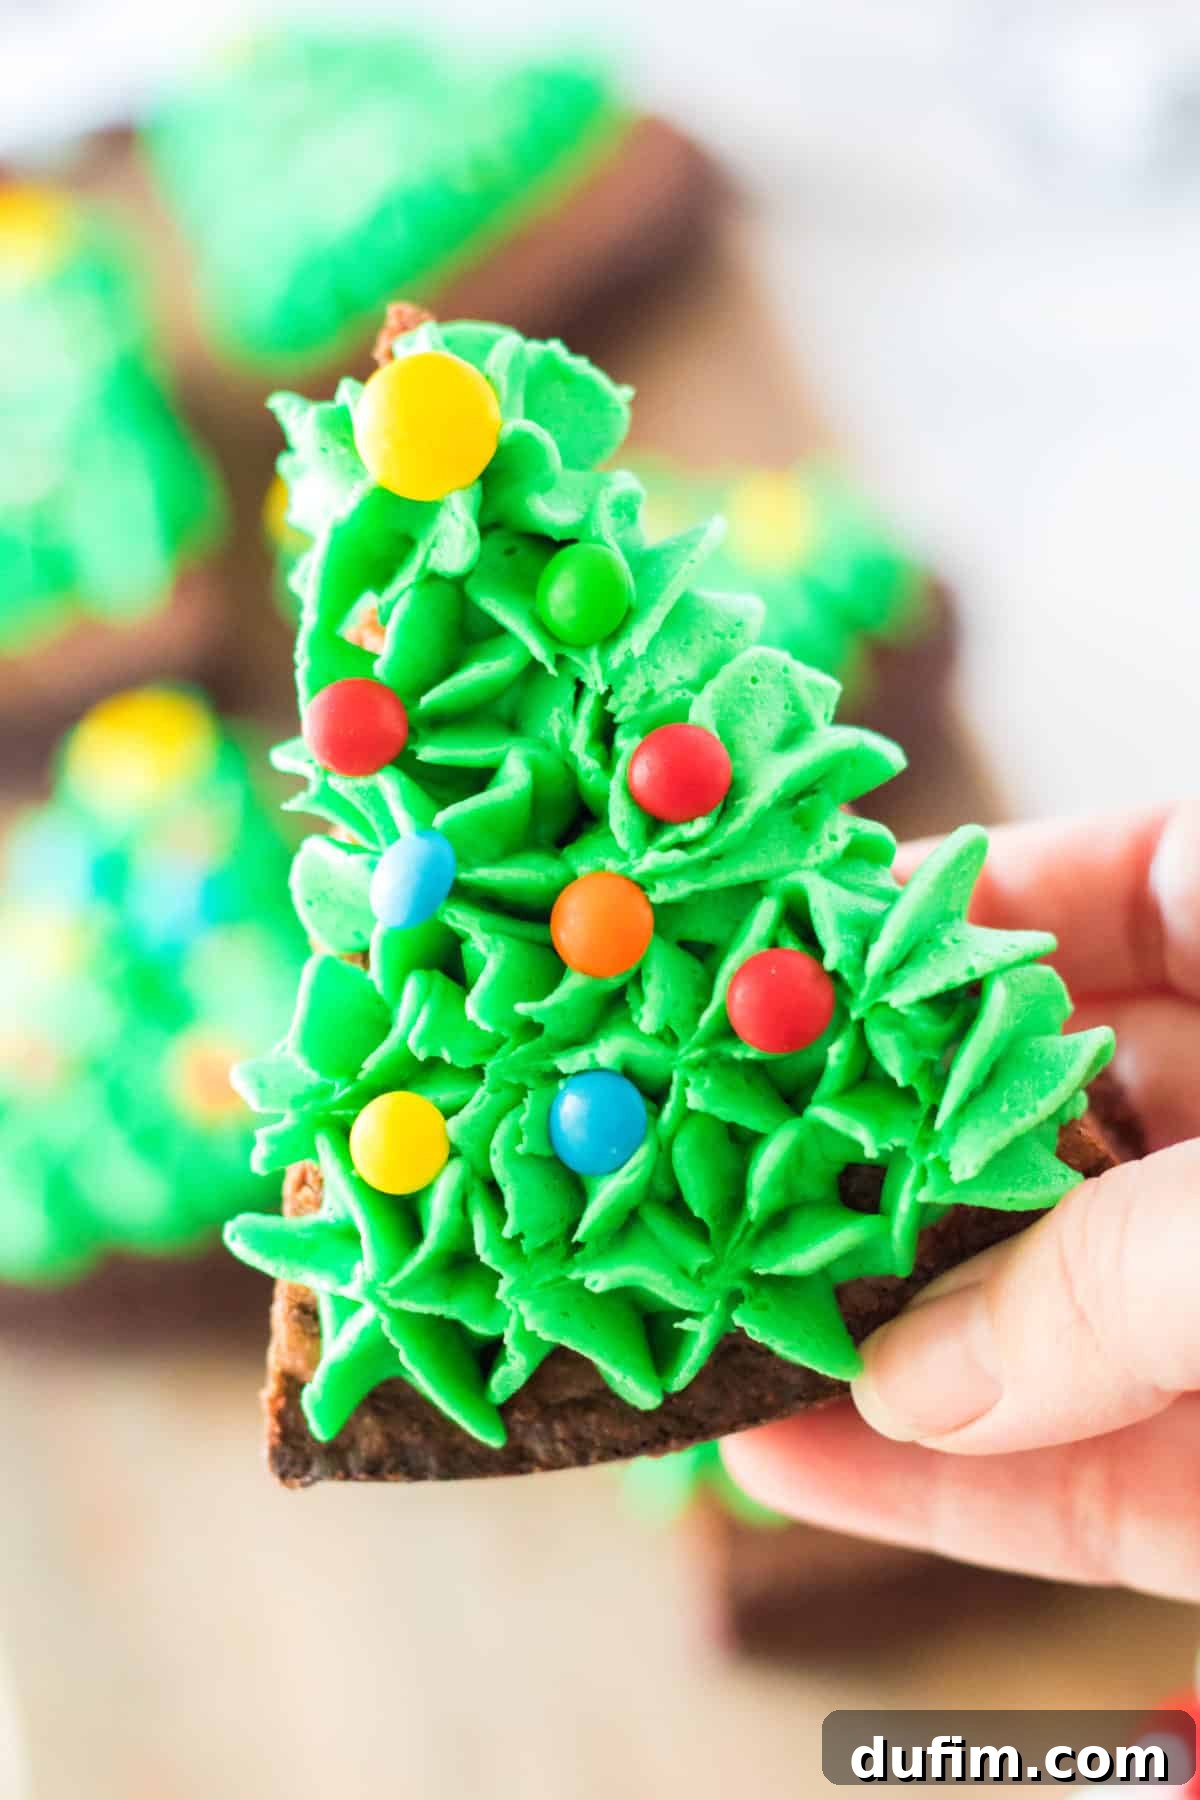
Step into the most wonderful time of the year with a delightful and easy baking project that’s sure to bring smiles! Transform classic fudgy brownies into whimsical Christmas tree brownies by artfully cutting them into triangles and adorning them with vibrant green frosting, cheerful sprinkles, and an assortment of colorful candies. This festive activity is perfect for gathering the family, creating cherished memories, and enjoying a deliciously decorative holiday treat!
These were de-li-cious! Everyone loved them at Christmas!
-Christelle
Why These Christmas Tree Brownies Will Be Your Holiday Favorite
Get ready to add a new favorite to your holiday baking repertoire! These Christmas tree brownies aren’t just delicious; they’re also incredibly fun to make and perfectly capture the joyous spirit of the season. Here’s why this recipe stands out:
- **Kid-Friendly Fun:** This recipe is designed to involve the whole family! From mixing the batter to the exciting decoration phase, children will love participating in creating these festive treats. It’s an excellent way to bond and make lasting holiday memories.
- **Flexible Brownie Base:** Whether you prefer the simplicity of a box mix or the rich depth of a homemade brownie, this recipe adapts perfectly. Choose what works best for your schedule and baking preferences without compromising on flavor or texture.
- **Endless Decoration Options:** Unleash your creativity! The decorating possibilities are truly limitless. Think beyond traditional sprinkles – try different candies, edible glitter, mini chocolate chips, or even tiny edible stars for a personalized touch.
- **Make-Ahead Convenience:** Plan your holiday baking stress-free! The brownies can be baked up to two days in advance and stored until you’re ready for the fun part – decorating. This flexibility makes them ideal for busy holiday schedules.
- **Perfect for Holiday Parties:** These charming brownies are guaranteed to be a hit at any Christmas gathering, school party, or festive family dinner. Their whimsical appearance and decadent taste make them an irresistible treat.
Why not host a delightful Christmas decorating party? Alongside these enchanting Christmas tree brownies, consider preparing our classic cut-out sugar cookies ahead of time. This way, both are ready for a grand decorating session! For the perfect festive beverage, serve homemade hot chocolate bombs to ensure a truly merry holiday celebration for everyone.
Bringing These Brownies to Life: Total Time Required
Crafting these delicious and decorative Christmas tree brownies is a straightforward process, broken down into manageable steps. Here’s an estimate of the time you’ll need from start to finish:
- **10 minutes** to prepare the rich, fudgy brownie batter.
- **35-40 minutes** for baking the brownies to perfection in your oven.
- **30-60 minutes** to allow the brownies to cool completely, a crucial step for clean cuts and perfect frosting.
- **5 minutes** to whip up the creamy, vibrant green buttercream frosting.
- **10 minutes** to cut the brownies into festive triangles and assemble your delightful Christmas tree brownies.
With a total active time of approximately 25 minutes and cooling time, you can easily fit this recipe into your busy holiday schedule, creating a show-stopping dessert with minimal fuss.
Mastering the Perfect Brownie Base
The foundation of any great Christmas tree brownie is, of course, a phenomenal brownie! Achieving that perfect balance of fudgy texture and rich chocolate flavor is key. Here are some insights into ensuring your brownie base is nothing short of amazing.
The Art of Measuring Flour for Optimal Texture
Properly measuring flour is a fundamental step often overlooked, yet it significantly impacts the final texture of your brownies. Too much flour can lead to dry, cakey brownies, while too little can result in a overly soft or crumbly texture. Follow these simple steps for an accurate measurement every time:
- **Fluff the Flour:** Before scooping, use a fork or whisk to gently fluff up the flour in its container. Flour can settle and compact, leading to inaccurate measurements if not loosened.
- **Spoon into Measuring Cup:** Instead of directly scooping with the measuring cup, use a spoon to lightly scoop the flour into your measuring cup. This prevents overpacking.
- **Level Off:** Use the flat edge of a butter knife or a straight spatula to level off the top of the measuring cup, ensuring you have an exact amount without packing it down.
Remember, if you stick the measuring cup straight into the bag of flour, you’re likely to pack in too much, which can indeed result in noticeably dry brownies. A little precision here goes a long way towards achieving that wonderfully moist and fudgy texture we all crave.
Elevate Your Brownies: Delicious Add-Ins and Variations
While these brownies are fantastic on their own, incorporating add-ins can take them to the next level, offering delightful textural contrasts and flavor bursts. You can typically add anywhere from 1/2 cup to 3/4 cup of your favorite mix-ins to the batter before baking. The options are endless, allowing you to customize your Christmas tree brownies to suit any palate:
- **Classic Nuts:** Chopped walnuts, pecans, or almonds add a satisfying crunch and earthy flavor.
- **Chocolate Galore:** Enhance the chocolatey goodness with extra chocolate chips (milk, dark, or white), chocolate chunks, or even a swirl of melted chocolate.
- **Creamy Indulgences:** Peanut butter chips, white chocolate chips, or butterscotch chips introduce creamy, sweet notes.
- **Festive Flavors:** For a true holiday twist, consider adding mint chocolate pieces, crushed candy canes, or even a hint of espresso powder to deepen the chocolate flavor.
- **Caramel & Toffee:** Caramel bits or toffee pieces can provide a chewy, buttery sweetness that complements the rich brownie base.
- **Colorful Candies:** Mini Reese’s Pieces or M&Ms can add both color and flavor, especially if you’re not planning extensive frosting decorations.
Experiment with combinations to find your perfect brownie mix! Just remember to fold them in gently to ensure even distribution throughout the batter.
Crafting the Vibrant Green Buttercream Frosting
The iconic green frosting is what transforms these fudgy brownies into delightful Christmas trees. A creamy, smooth buttercream is easy to make and provides the perfect canvas for all your holiday decorations. Here’s how to ensure your frosting is as delicious and vibrant as can be.
Flavoring Your Buttercream Frosting: Beyond Vanilla
While classic vanilla buttercream is always a winner, the holiday season is the perfect time to experiment with unique flavors that can make your Christmas tree brownies truly special. A simple yet effective trick is to add flavored coffee creamer to your frosting. When beating in the powdered sugar, incorporate a tablespoon or two of your favorite creamer. This effortlessly infuses the frosting with a delightful taste that perfectly complements the rich brownies. Some fantastic holiday-inspired creamer flavors to try include:
- **Peppermint:** For a refreshing, cool burst that pairs beautifully with chocolate.
- **Eggnog:** To bring a rich, spiced, and creamy holiday essence to your trees.
- **Caramel Macchiato:** Adds a sweet, buttery, and slightly coffee-infused flavor.
- **Gingerbread:** Offers a warm, spicy note that screams holiday cheer.
- **Hazelnut:** For a nutty, luxurious twist that enhances the chocolate.
Not only do these creamers add incredible flavor, but they also contribute to the frosting’s smooth and luscious texture, making your Christmas tree brownies extra delicious and memorable!
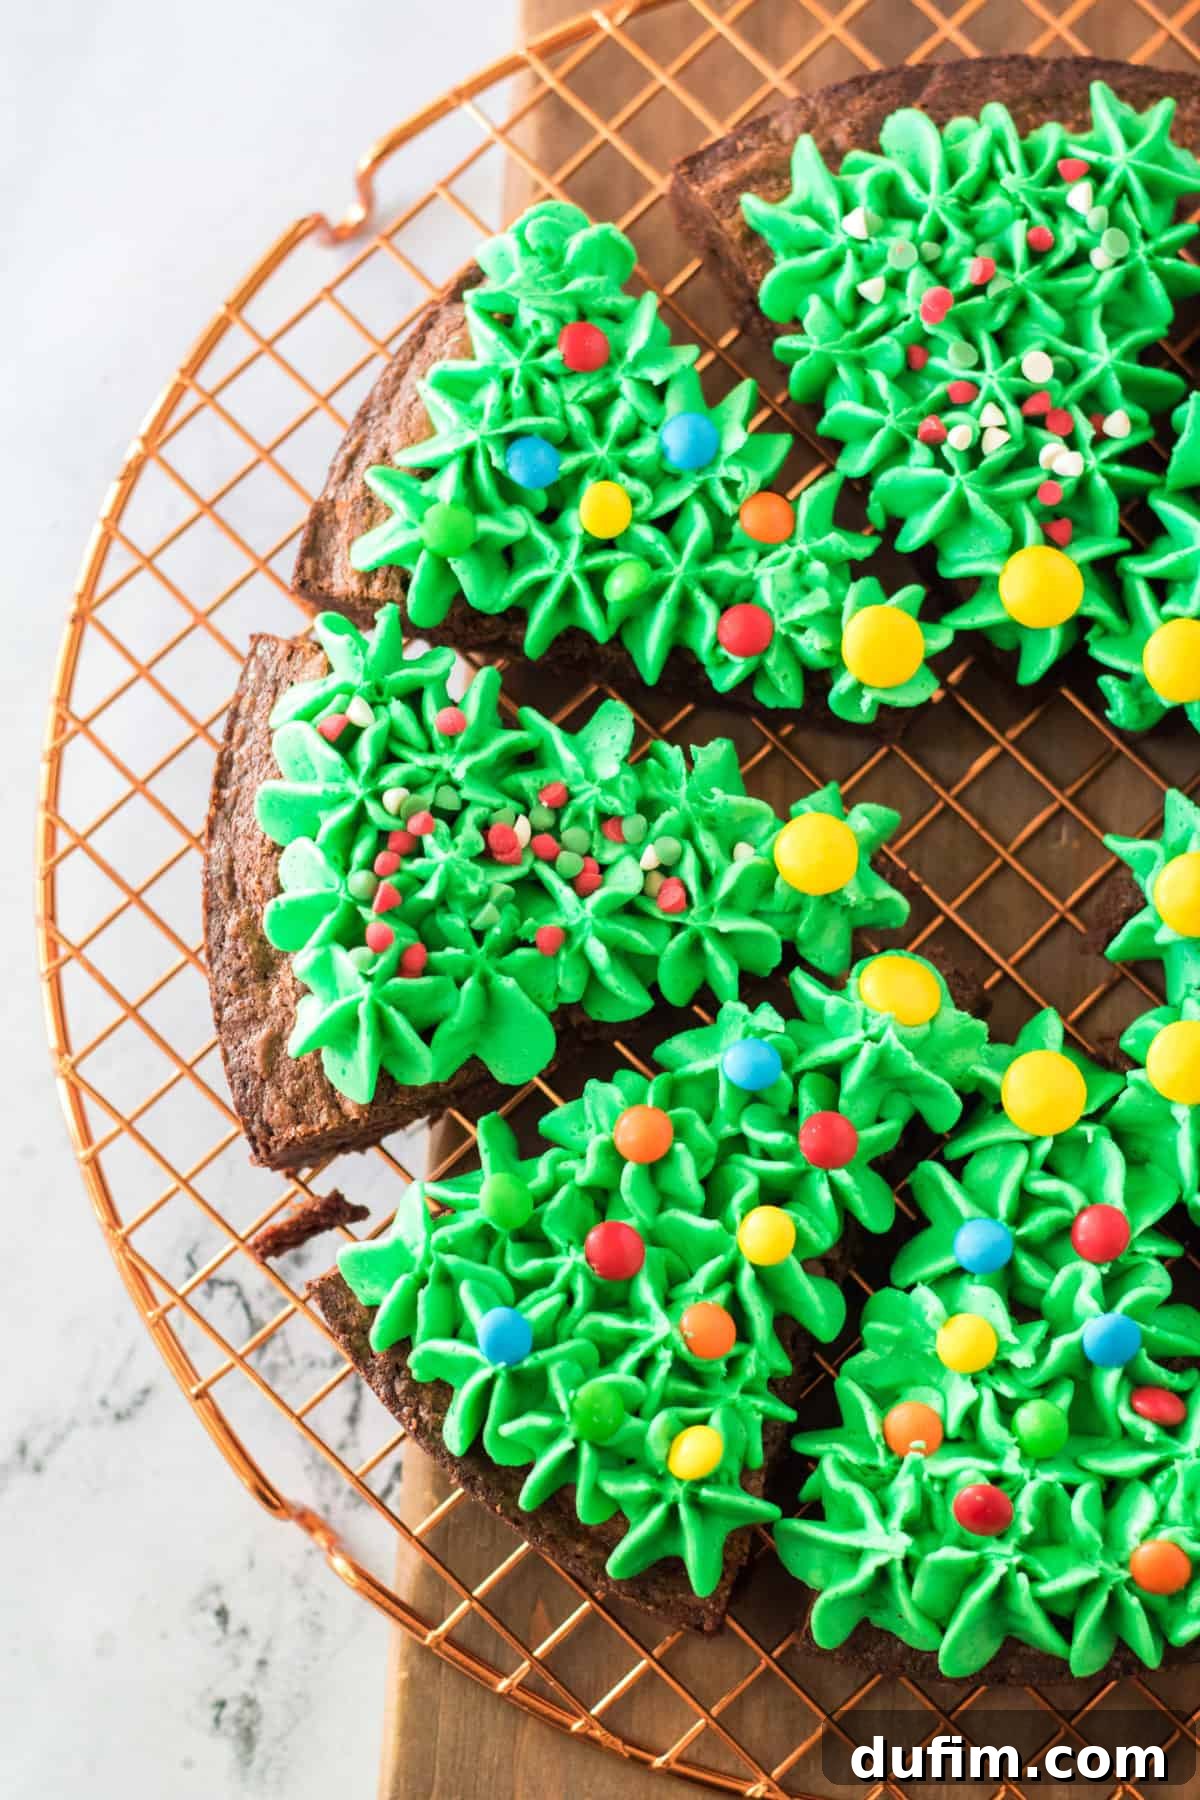
Clever Decorating Hacks: No Piping Bags or Tips? No Problem!
Don’t let a lack of fancy equipment deter you from creating beautifully frosted Christmas tree brownies. There are plenty of clever ways to achieve a lovely decorated look without specialized piping bags and tips. Creativity is your best tool in the kitchen!
The simplest alternative for a piping bag is a sturdy **Ziploc bag**. Spoon your prepared green buttercream frosting into one corner of the bag, push it down, and then snip off a small corner with scissors. This creates an instant makeshift piping bag. While the frosting pattern might look a little less intricate than with a specialized star tip, it serves the exact same purpose – allowing you to pipe the frosting neatly onto your brownie triangles. You can create a classic “Christmas tree branch” effect with a simple back-and-forth motion, or pipe small dots for a textured look.
For those who prefer a smoother finish, you can also use a small offset spatula or the back of a spoon to gently spread the frosting over the brownie triangles. This creates a more rustic, hand-painted look that is equally charming and still provides a perfect base for sprinkles and candies. Don’t be afraid to experiment with different spreading techniques to find what you like best!
Top Tips for Brownie Perfection
Achieving bakery-worthy Christmas tree brownies is easier than you think with a few simple tricks up your sleeve. These tips will help ensure your brownies are fudgy, your frosting is vibrant, and your decorating is a breeze, making your holiday baking experience enjoyable and successful.
- **Pan Versatility:** If you don’t have a 9-inch round springform pan, don’t worry! You can absolutely bake these delicious Christmas brownies in an 8 or 9-inch square pan. The baking time will be quite similar, approximately 30-40 minutes. Once cooled, simply cut the square brownie into triangles by cutting it in half diagonally, then each half into smaller triangles. This method works perfectly and yields equally festive results.
- **Advance Preparation is Key:** To spread out your holiday tasks, consider making the brownies ahead of time. They can be baked up to 2 days in advance. Once completely cooled, store them in an airtight container at room temperature on your counter until you’re ready for the fun decorating session. This allows you to focus solely on the creative part when the time comes.
- **Vibrant Frosting Power:** For truly eye-catching, richly colored green frosting, always opt for gel food coloring over liquid drops. Gel food coloring is much more concentrated, delivering intense color without significantly altering the consistency of your buttercream. Start with a small amount and gradually add more until you achieve your desired festive shade of green.
- **Thorough Cooling is Non-Negotiable:** Patience is a virtue, especially when it comes to cooling brownies. Ensure your brownies are completely cool before attempting to cut or frost them. Warm brownies will crumble when cut and cause your frosting to melt into a messy puddle. Allowing them to cool fully (even chilling them for a bit in the fridge) makes them much easier to handle and decorate cleanly.
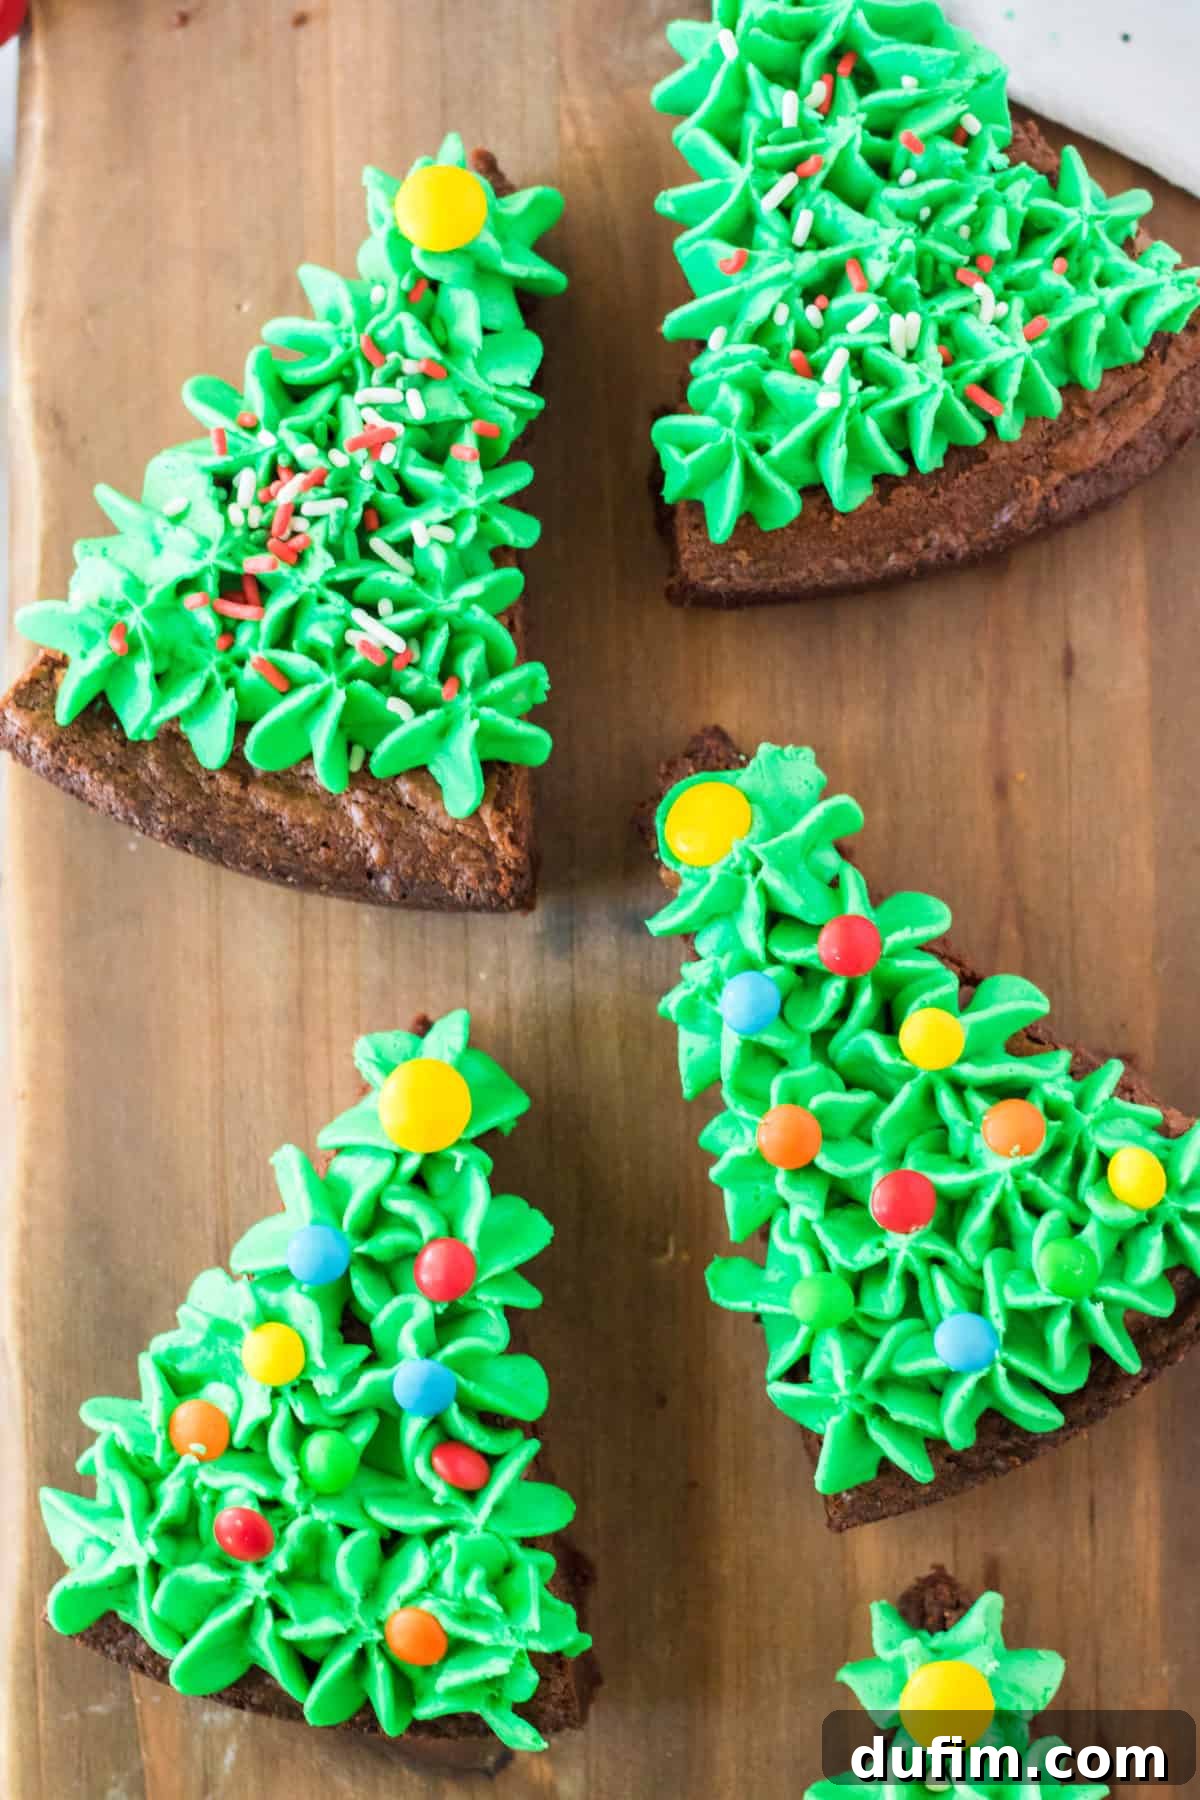
- **The Perfect Tree Trunk:** To complete the Christmas tree illusion, don’t forget the trunk! Small pretzel sticks make excellent rustic tree trunks, adding a delightful salty crunch. Alternatively, you can use short pieces of candy canes for a minty twist and an extra festive look. Insert them gently into the base of each brownie triangle after frosting.
Frequently Asked Questions (FAQ)
Have some lingering questions about making these delightful Christmas Tree Brownies? We’ve got you covered with answers to common queries to ensure your baking experience is smooth and successful.
- Can I use a different size or shape pan for the brownies?
- Absolutely! While a 9-inch round springform pan works wonderfully for cutting perfect triangles, an 8×8 or 9×13 inch square or rectangular pan can also be used. For a square pan, you’ll still get a good number of triangles by cutting the square into quarters, then each quarter diagonally. For a 9×13 pan, you’ll simply yield more brownies. Adjust baking time slightly if using a shallower or larger pan – keep an eye out for the toothpick test!
- How far in advance can I make these Christmas tree brownies?
- The brownies themselves can be baked up to 2-3 days in advance. Once completely cooled, store them in an airtight container at room temperature. The buttercream frosting can also be made a day or two ahead and stored in the refrigerator; just let it come to room temperature and re-whip until fluffy before piping. For the freshest look, decorate the brownies within 24 hours of serving, but they will still be delicious for several days after decorating when stored properly.
- What are some other creative decoration ideas?
- The sky’s the limit for decorating! Beyond mini M&Ms and holiday sprinkles, consider using:
- Silver or gold edible pearls for a touch of elegance.
- Tiny candy stars as tree toppers.
- Crushed peppermints for a festive crunch and flavor.
- Mini chocolate candies in various colors.
- Edible glitter for a shimmering effect.
- Small pieces of dried fruit like cranberries for a natural, colorful touch.
- You can also pipe different patterns with the frosting, such as a swirled effect or simple zigzags, before adding toppings.
- Can I freeze these brownies?
- Yes, you can! For best results, freeze the undecorated brownies. Once cooled completely, wrap them tightly in plastic wrap, then again in aluminum foil. They can be frozen for up to 2-3 months. Thaw them in the refrigerator overnight or at room temperature for a few hours before decorating. While you can freeze decorated brownies, the frosting and sprinkles might not look quite as fresh after thawing, but they will still be tasty.
- What if my frosting is too thick or too thin?
- If your frosting is too thick, add milk (or flavored coffee creamer!) one teaspoon at a time, beating after each addition until you reach a pipeable consistency. If it’s too thin, add more powdered sugar, one tablespoon at a time, until it thickens up to your liking. Temperature also plays a role; if your kitchen is warm, the frosting might be softer. A quick chill in the fridge (5-10 minutes) can help firm it up.
More Festive Holiday Treats
The holiday season is a wonderful time for baking and creating delightful treats. If you loved making these Christmas tree brownies, you’re sure to enjoy these other festive recipes, perfect for sharing with family and friends or for your next holiday party:
- Sticky Paws Williams Sonoma Copycat: Indulge in these chewy, chocolatey, and caramel-laden clusters, a perfect homemade version of a beloved classic.
- Stained Glass Church Window Cookies: These beautiful no-bake cookies with colorful marshmallow “windows” are as lovely to look at as they are to eat.
- Candy Cane Oreo Balls: Simple to make, these festive no-bake treats combine the classic flavors of Oreo cookies and refreshing peppermint.
- Christmas Wreath Cookies: A classic holiday cookie that’s easy to make and looks just like a mini festive wreath, complete with candies.
Tap stars to rate!
Christmas Tree Brownies
Rate
Equipment
- 9 inch springform pan (or 8 or 9 inch square pan)
- Glass Mixing Bowl
- KitchenAid 9-Speed Mixer (or hand mixer)
- Spatula
- Piping bags and star tip (Wilton 1M or similar), or a large Ziploc bag
Ingredients
For the Fudgy Brownies
- 1 cup (198g) granulated sugar
- 1 cup (213g) brown sugar
- 2 tsp vanilla extract
- ½ tsp salt
- 2 large eggs
- 2 large egg yolks
- ½ cup (113g) unsalted butter (1 stick), melted
- 1 ⅓ cups (227g) semi-sweet chocolate chips
- ½ cup (118ml) vegetable oil
- 1 ¼ cup (150g) all purpose flour
- ¼ cup (21g) unsweetened cocoa powder
For the Green Buttercream Frosting & Decorations
- 1 cup (226g) unsalted butter (2 sticks), room temperature
- 4 ½ cups (510g) powdered sugar
- ½ tsp vanilla extract
- 1 Tbsp milk, as needed (or flavored coffee creamer for a twist!)
- Green gel food coloring
- Mini M&Ms or other small colorful candies
- Holiday sprinkles (various shapes and colors)
- Optional: pretzel sticks or small candy canes for the tree trunk
Instructions
Making the Brownies
- Preheat your oven to 350º F (175º C). Lightly spray a 9-inch round springform pan with non-stick spray, or line an 8 or 9-inch square pan with parchment paper, leaving an overhang on two sides for easy removal.
- In a large mixing bowl, combine the granulated sugar, brown sugar, vanilla extract, salt, whole eggs, and egg yolks. Using an electric mixer, beat until the mixture is well combined and slightly lightened in color, about 1 minute. Set this mixture aside.
- In a separate microwave-safe bowl, melt the unsalted butter and semi-sweet chocolate chips together. Heat in 30-second intervals, stirring between each, until the mixture is fully melted and smooth.
- Whisk the vegetable oil into the melted chocolate and butter mixture until fully incorporated. Carefully pour this rich chocolate mixture into the sugar and egg mixture. Mix with the electric mixer on low speed until everything is fully combined.
- To the wet ingredients, add the all-purpose flour and unsweetened cocoa powder. Mix on low speed just until the dry ingredients are fully incorporated into the batter. Be careful not to overmix, as this can lead to tougher brownies.
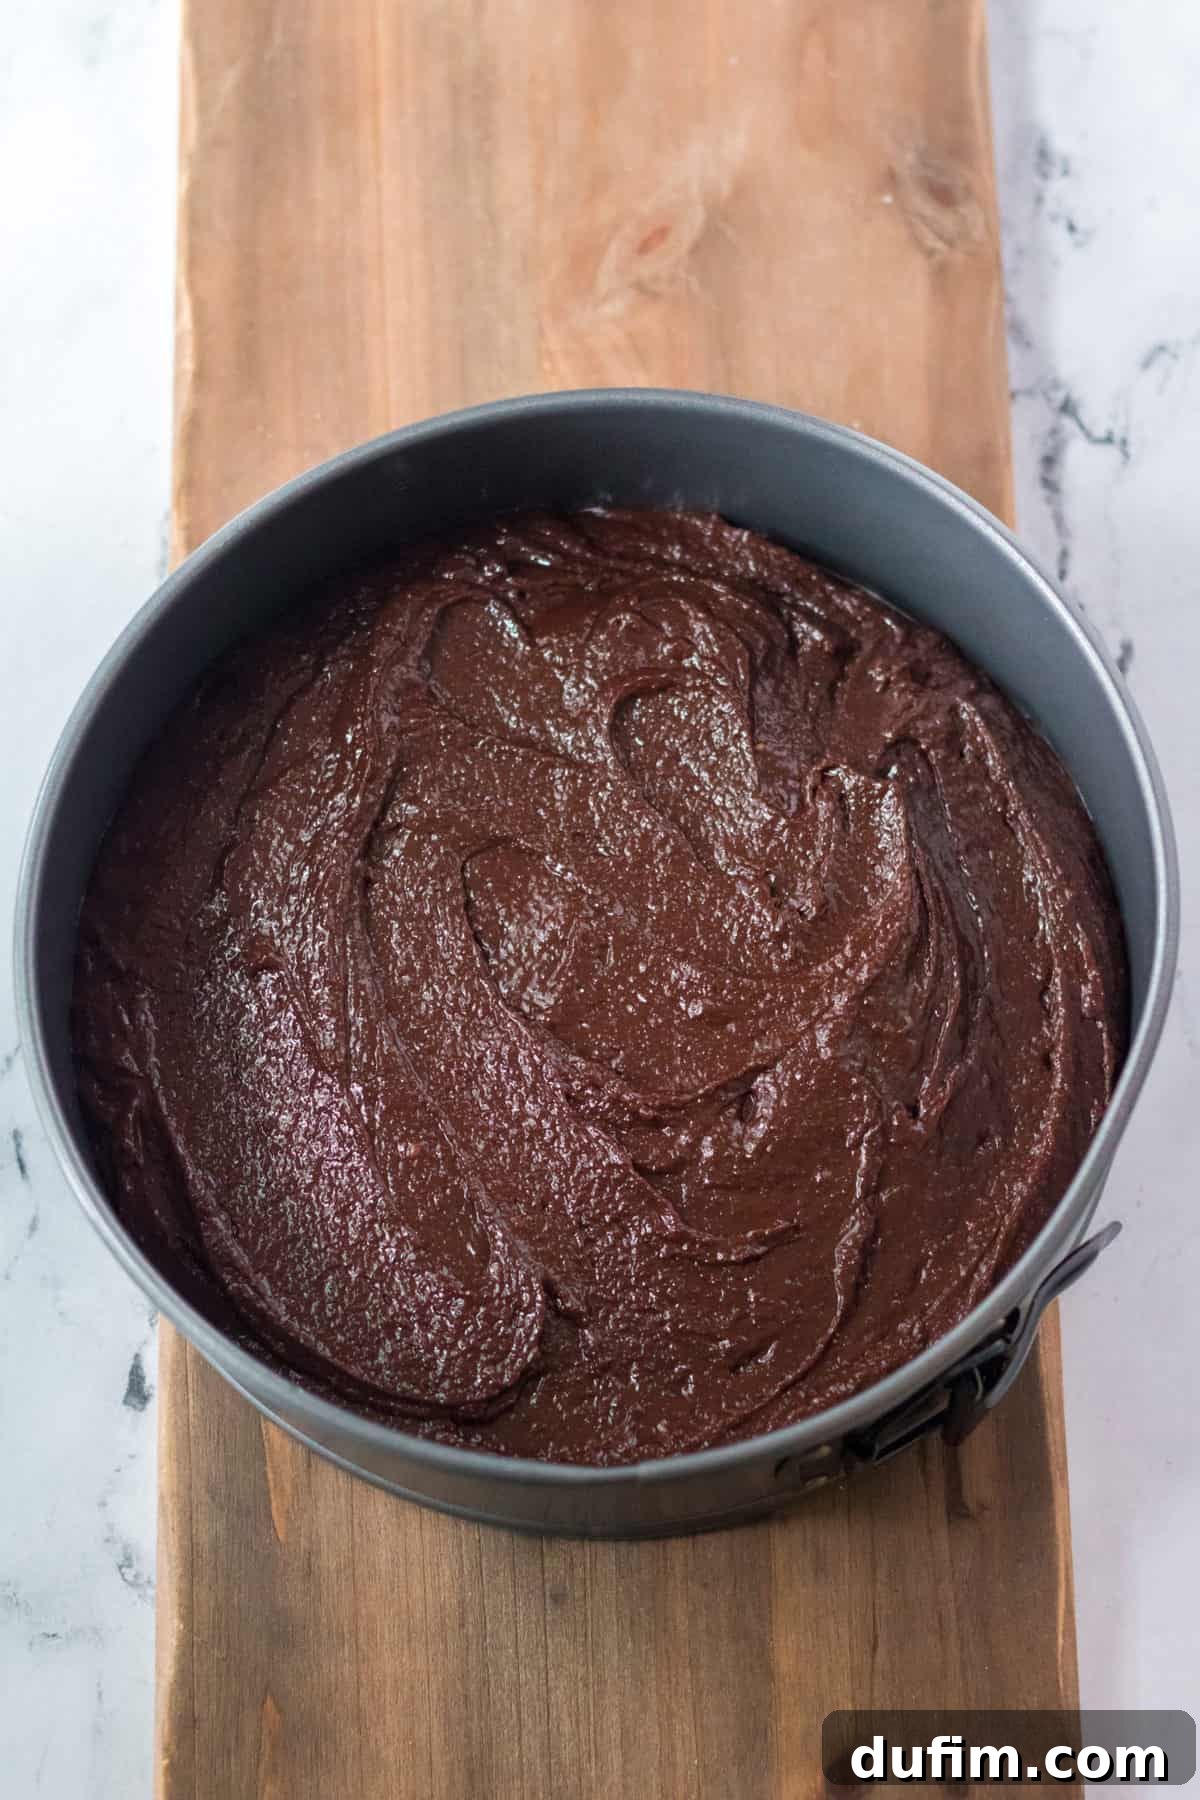
- Pour the brownie batter evenly into your prepared pan. Bake for 35-40 minutes, or until a toothpick inserted into the center of the brownie comes out with moist crumbs, but no wet batter.
- Once baked, remove the pan from the oven. If using a springform pan, immediately run a knife around the edge of the pan to loosen the brownie. Let the brownie cool in the pan for at least 30 minutes. After this initial cooling, carefully remove the springform edge (or lift by the parchment paper overhang if using a square pan) and allow the brownies to cool completely on a wire rack before frosting. This step is crucial for clean cuts and perfect frosting.
Decorating Your Christmas Tree Brownies
- Once the brownies are completely cooled, begin preparing your vibrant buttercream frosting. In a large mixing bowl, beat the room temperature unsalted butter with an electric mixer for 1-2 minutes until light and fluffy.
- Gradually add in the powdered sugar, vanilla extract, and green gel food coloring. Start with a few drops of food coloring and add more as needed to achieve your desired festive green shade. Beat until the frosting is fully combined, smooth, and fluffy. If the frosting becomes too thick for piping, add milk (or flavored creamer) one tablespoon at a time, beating until it reaches a pipeable consistency.
- Transfer the green buttercream into a piping bag fitted with a star tip (like a Wilton 1M) or use a sturdy Ziploc bag with a corner snipped off.
- Using a large, sharp knife, carefully cut the cooled brownie into 8 even triangle slices. For a 9-inch round brownie, you can cut it into 8 wedges, resembling pizza slices. If using a square brownie, cut it diagonally from corner to corner to make two large triangles, then cut each of these into smaller triangles.
- Begin to frost each brownie triangle. Use a press and release pattern with your piping bag to create a textured, branch-like effect, covering the entire top surface of the brownie with the green frosting.
- Now for the fun part: decorate your Christmas trees! Adorn them with mini M&Ms, a variety of holiday sprinkles, or similar colorful candies, placing them like ornaments on the tree. For a finishing touch, top each tree with a yellow star-shaped candy or a small round yellow candy. Optionally, for a realistic tree trunk, gently press a small pretzel stick or a piece of a candy cane into the bottom, widest part of each brownie triangle.
Nutrition
Nutrition Disclosure
All nutritional values are approximate and provided to the reader as a courtesy. Changing ingredients and/or quantities will alter the estimated nutritional calculations. This information is intended for general guidance only and should not be considered a substitute for professional nutritional advice.
Your feedback helps us create more delicious content for you.