
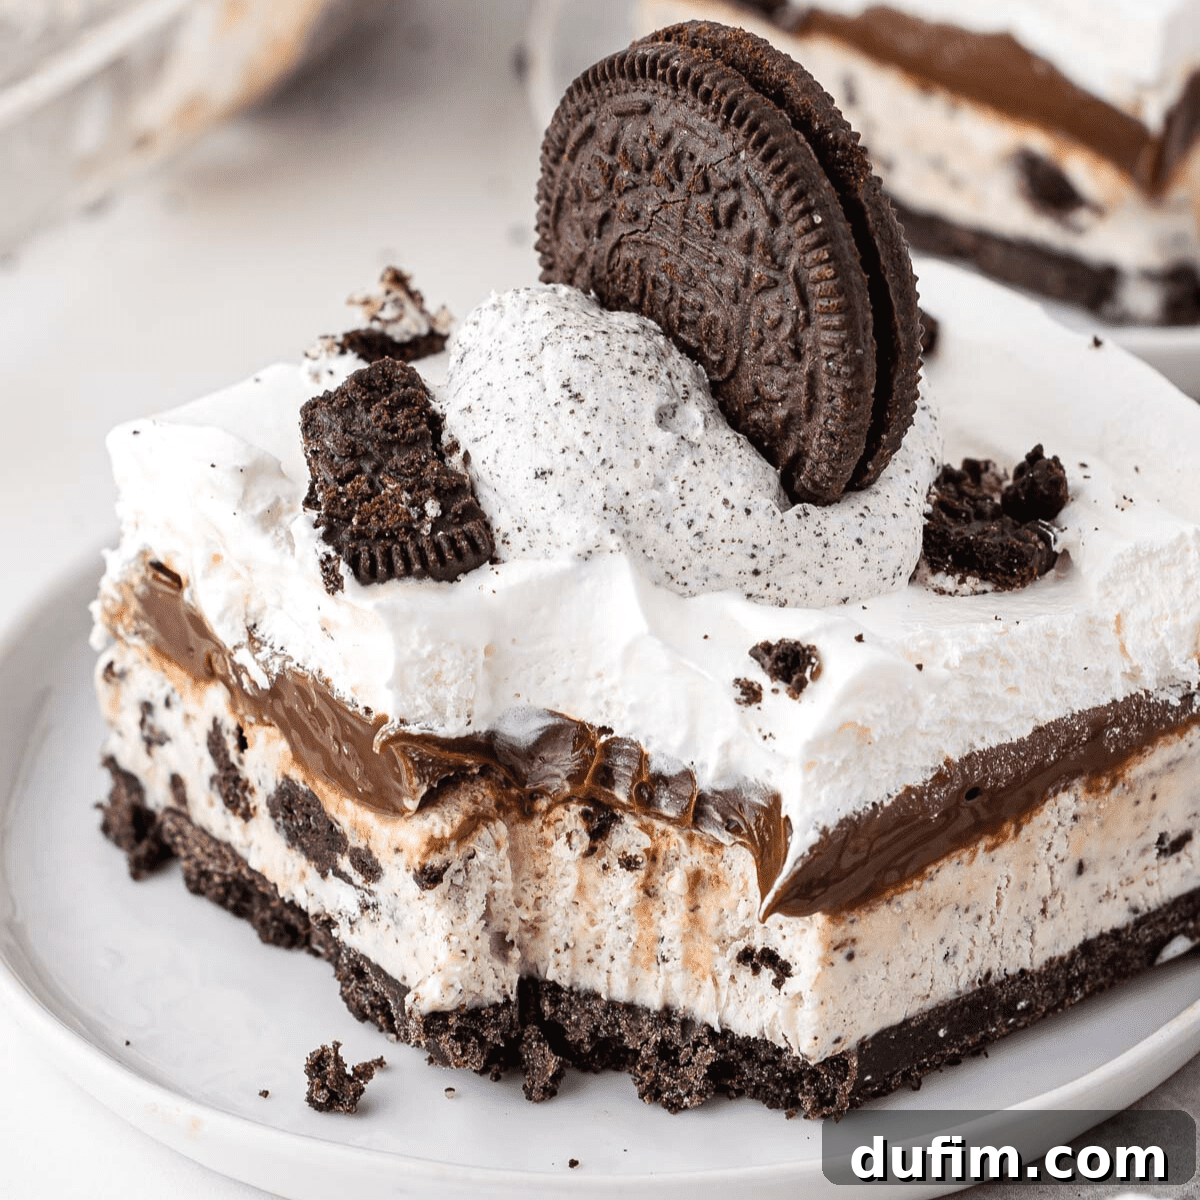
Prepare to delight your guests with a homemade Oreo Ice Cream Cake that far surpasses any store-bought version! This incredible dessert is not only bursting with flavor but also incredibly simple to make. With just 5 readily available ingredients and 4 easy steps, you’ll create a show-stopping Oreo cookie ice cream cake that will have everyone asking for seconds.
Beyond the recipe itself, I’ll share all my top tips for mastering ice cream cakes, from achieving perfectly distinct layers to slicing it like a professional chef. Get ready to elevate your dessert game!
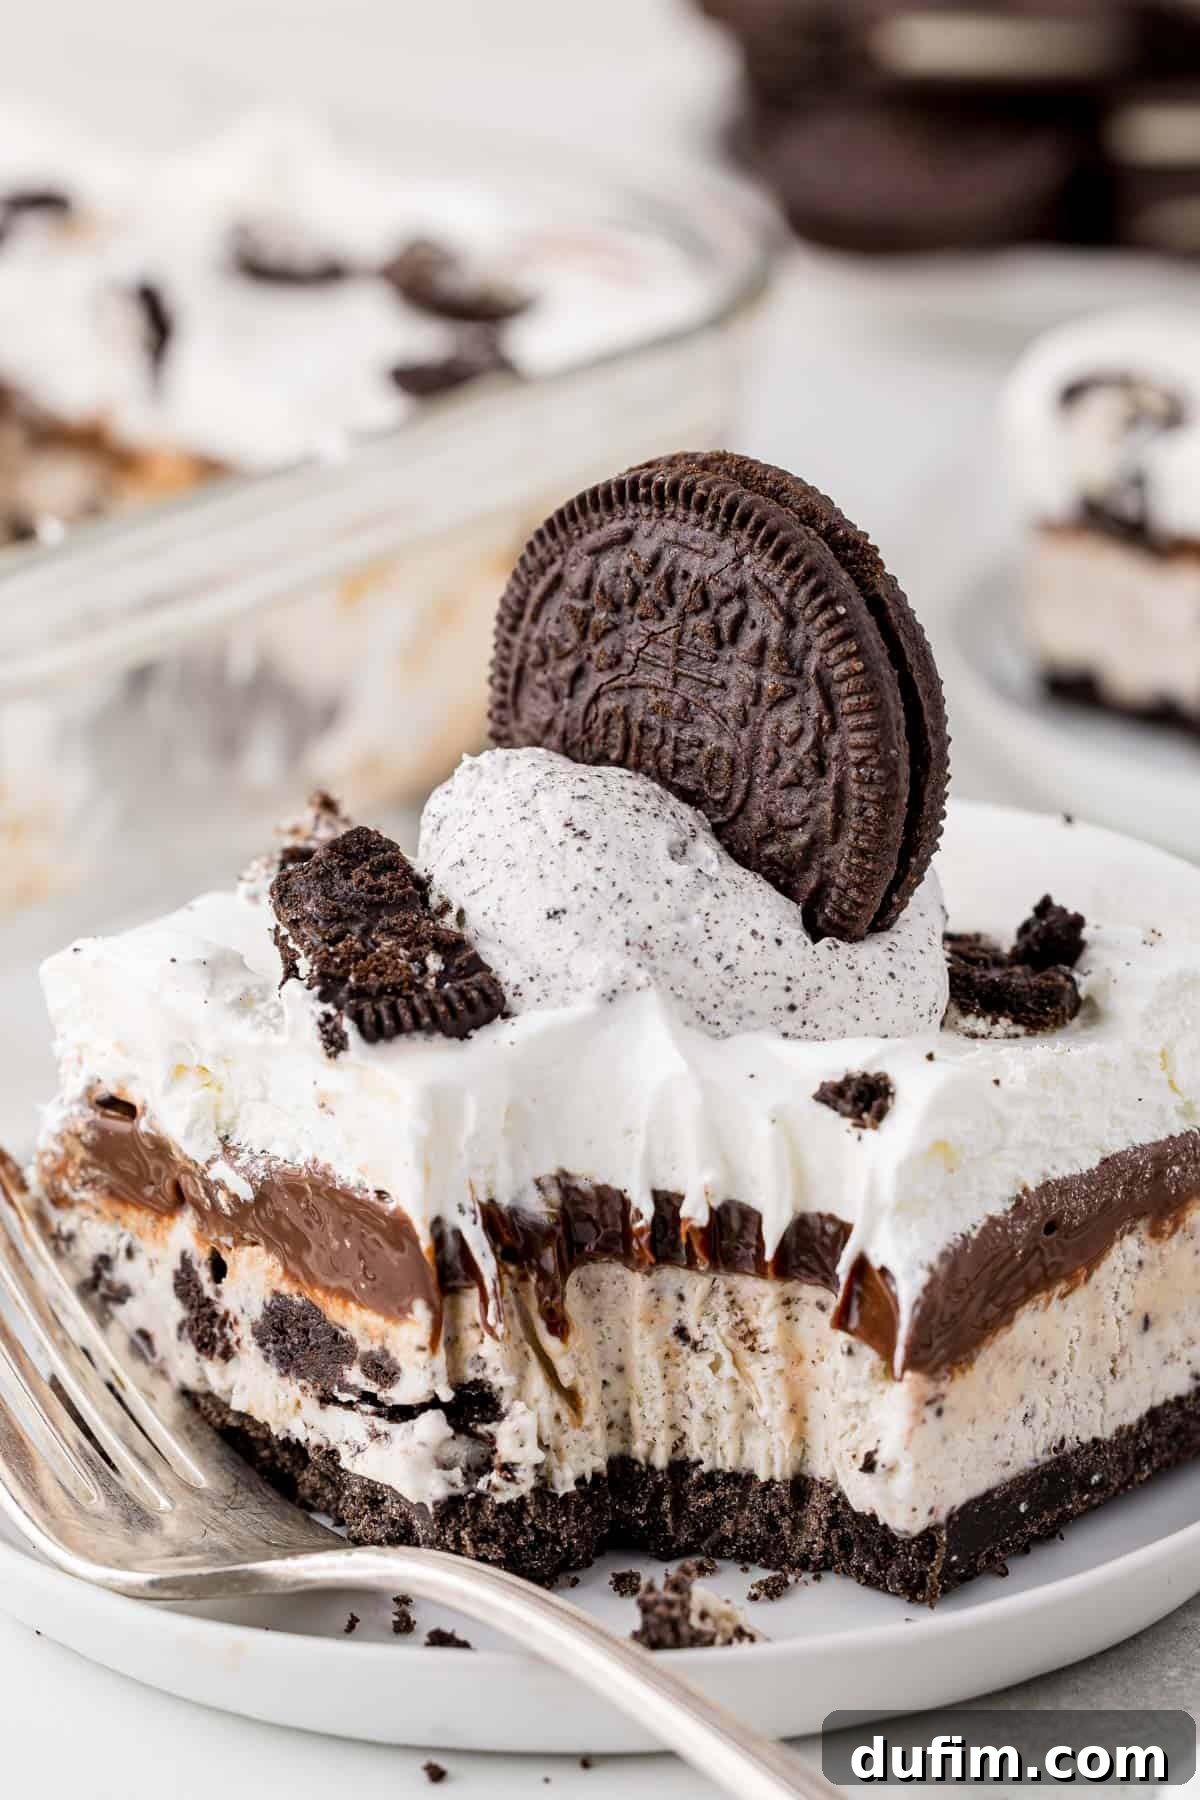
The Ultimate No-Bake Oreo Ice Cream Cake Recipe
Is there such a thing as too many Oreos? Absolutely not! My love for these iconic cookies runs deep, inspiring a variety of delightful treats. From my favorite Oreo ice cream and luscious no-bake Oreo pie to dreamy Oreo frosting and decadent Oreo cheesecake, I’m always finding new ways to incorporate their classic chocolatey crunch. Given my passion for ice cream cakes, it was only natural to combine two of my favorite things into one irresistible dessert: the Oreo Cookie Ice Cream Cake!
This Oreo ice cream cake recipe isn’t just a dessert; it’s the quintessential centerpiece for any summer gathering. Whether you’re celebrating a summer birthday, hosting a backyard cookout, or enjoying Fourth of July festivities, this incredibly easy and utterly heavenly homemade treat is guaranteed to be a hit. Its simple construction and make-ahead convenience make it an ideal choice for effortless entertaining.
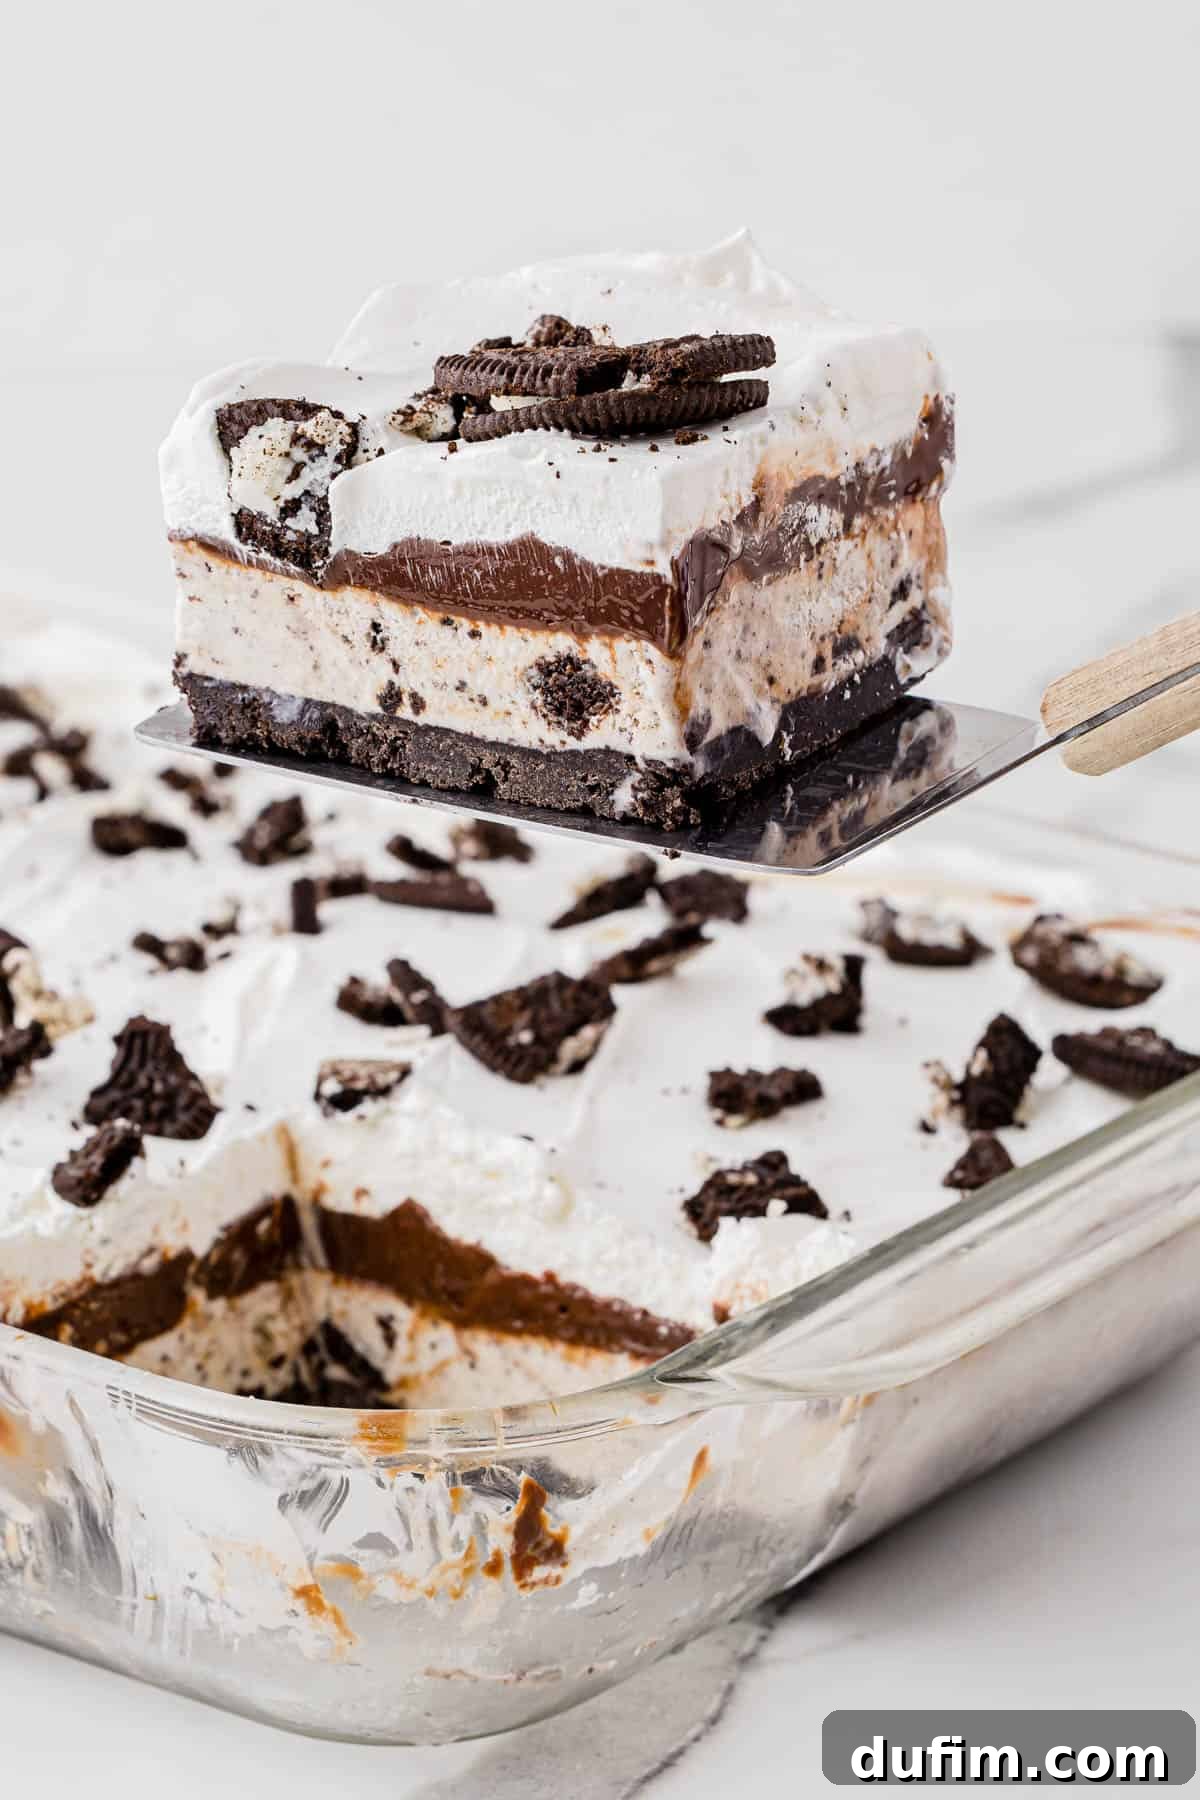
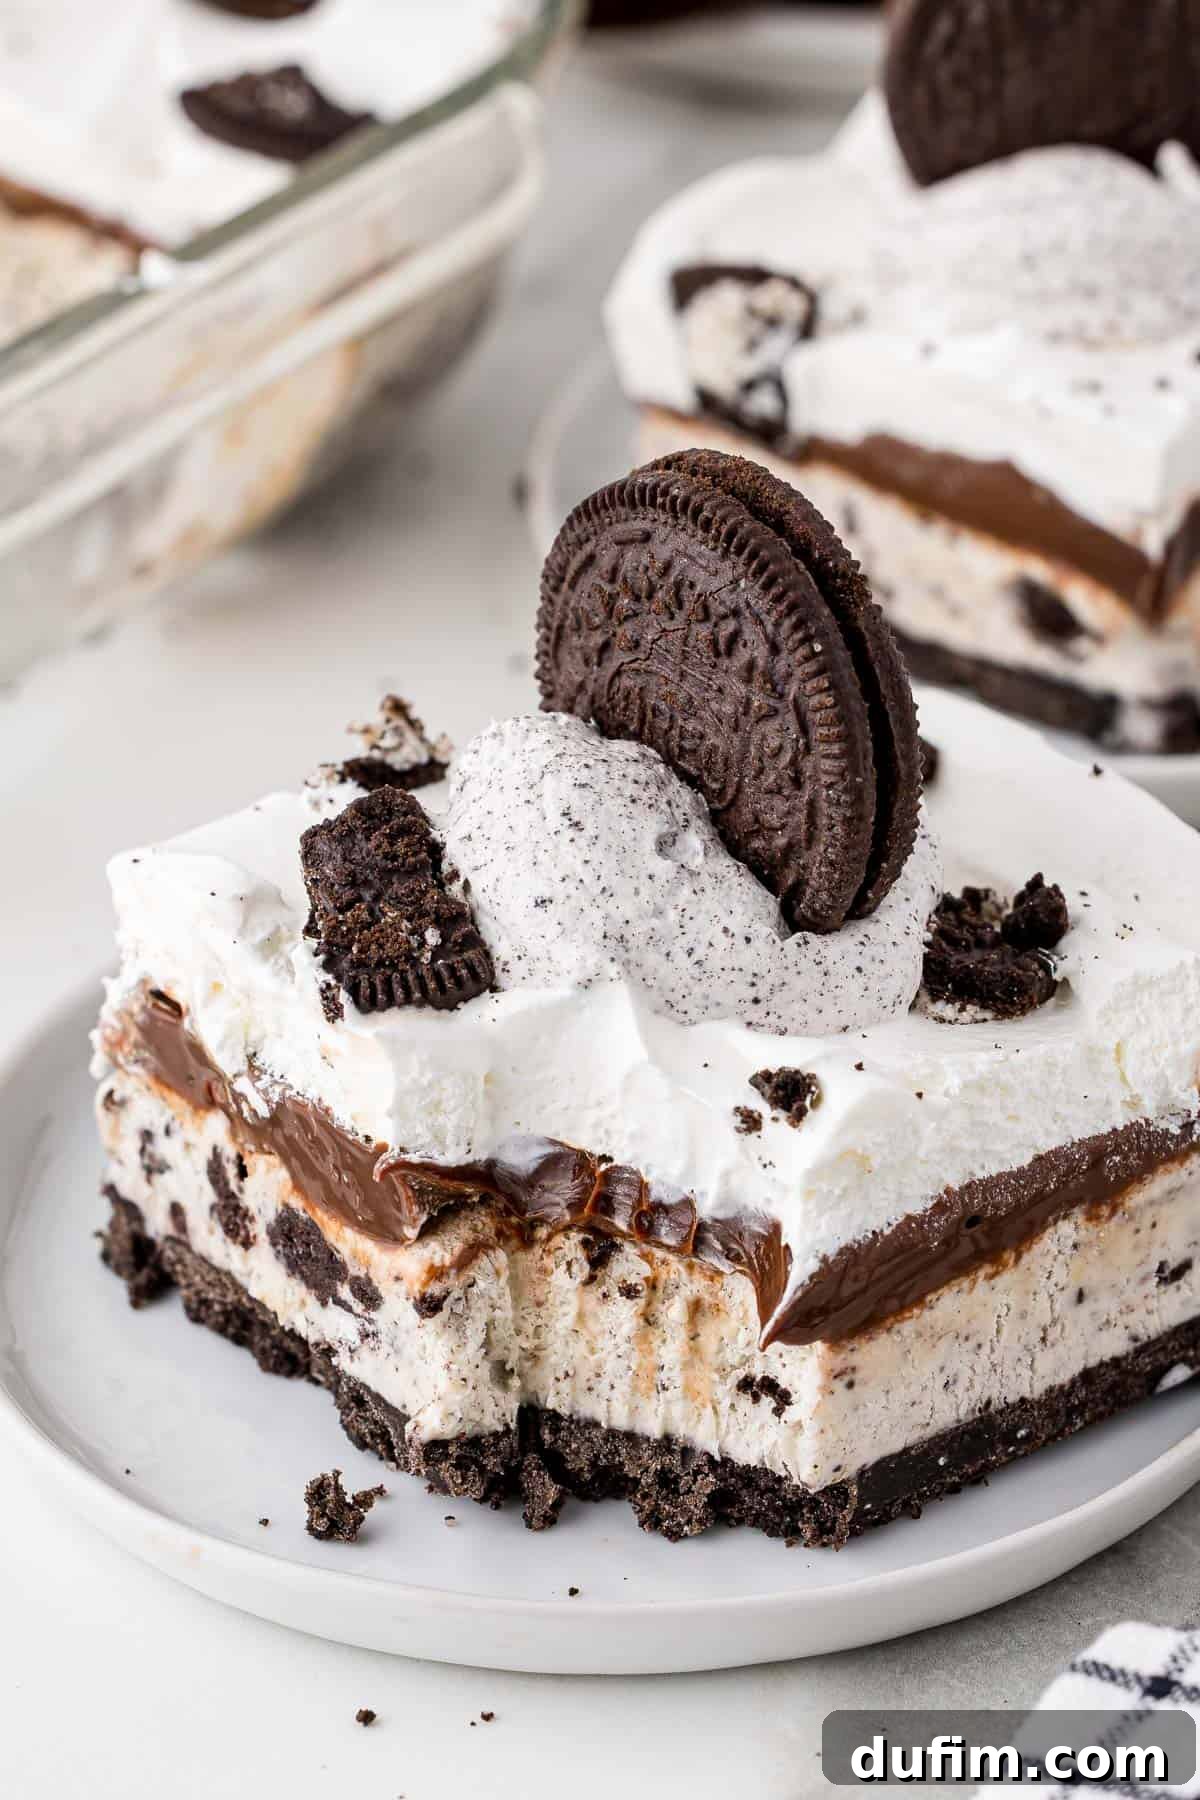
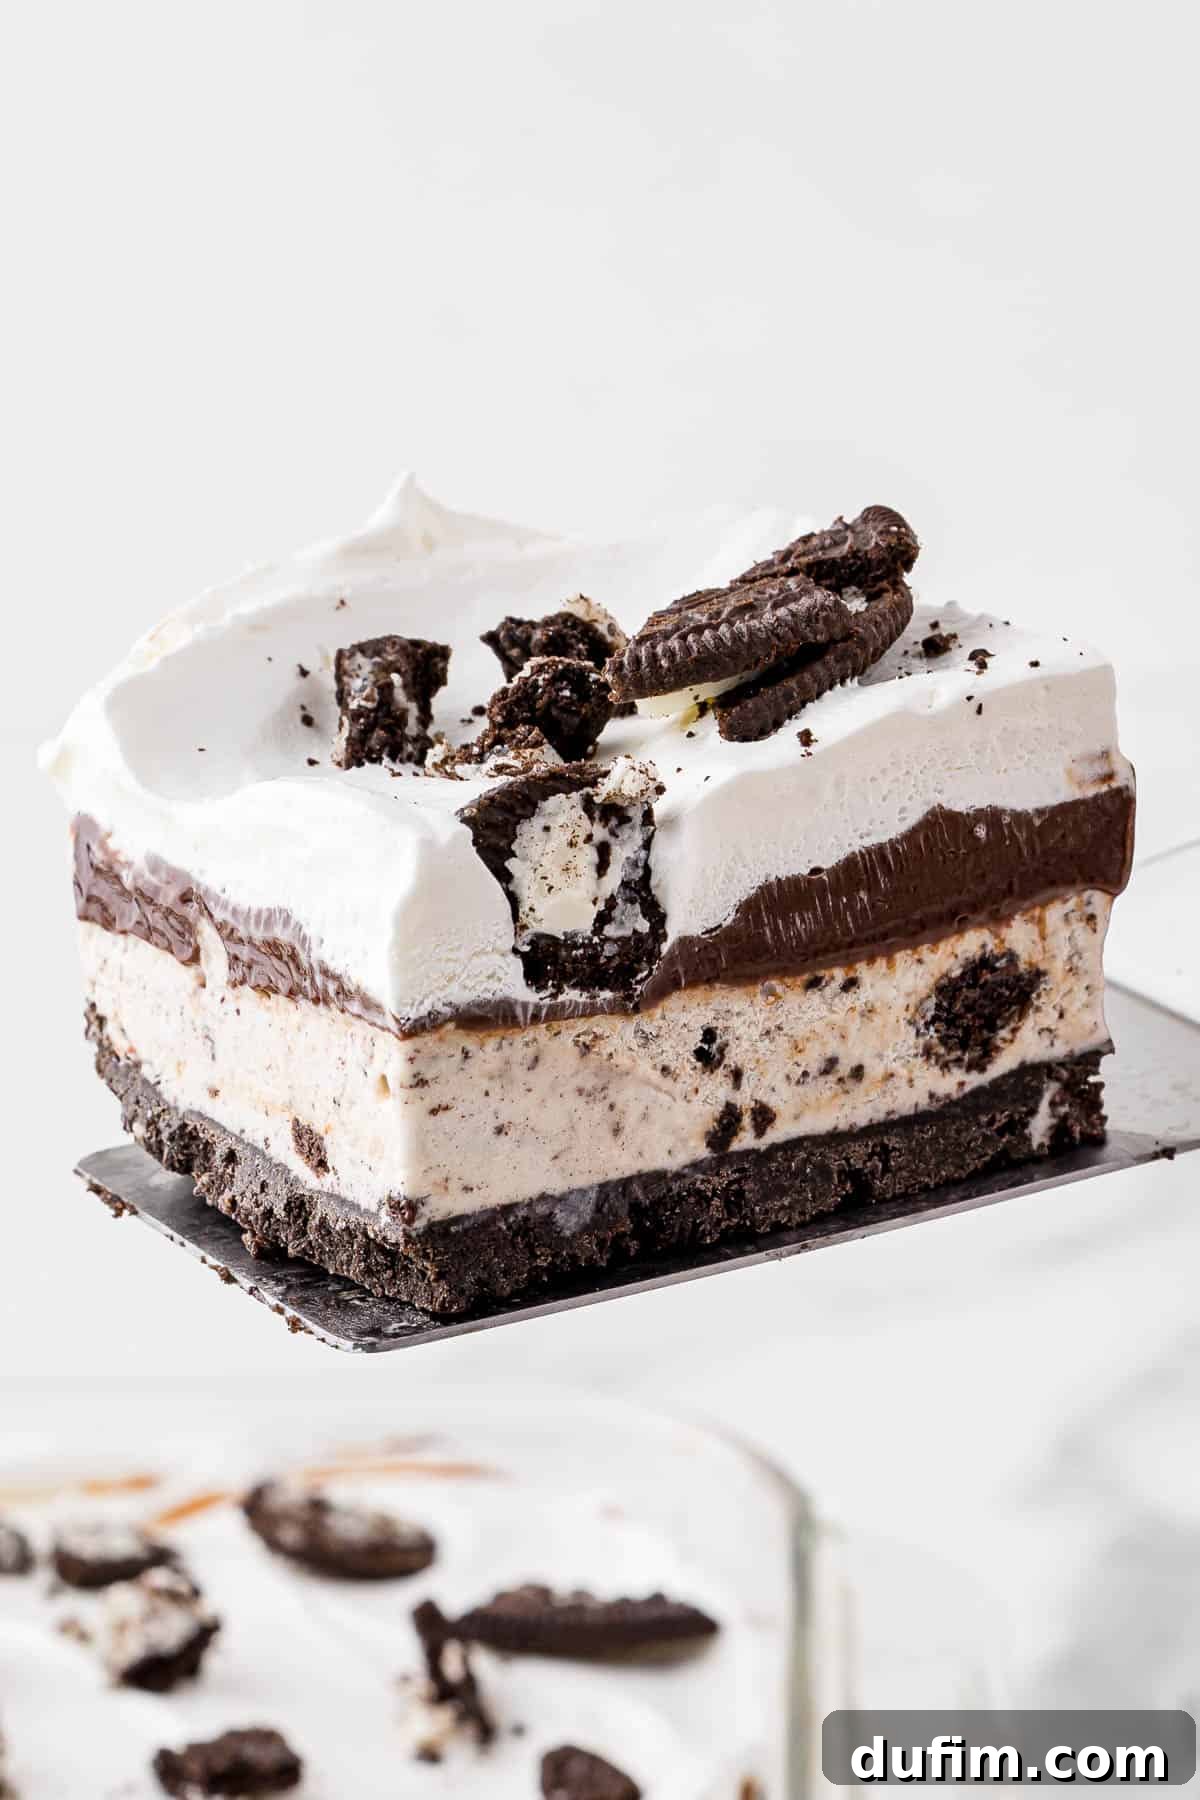
The magic of this homemade Oreo ice cream cake lies in its perfectly balanced layers. It begins with a rich and crunchy base made from crushed Oreos mixed with melted butter. This forms the foundational crust, which is then generously topped with a creamy layer of softened cookies and cream ice cream. Next comes a luscious blanket of hot fudge, followed by a cloud of airy whipped topping. The grand finale? A final sprinkle of more crushed Oreos, adding both visual appeal and an extra burst of cookie goodness. Each layer freezes beautifully, creating a symphony of textures and flavors that come together in every bite.
Why You’ll Absolutely Love This Oreo Crust Ice Cream Cake
This isn’t just another dessert; it’s a game-changer for anyone who loves easy, impressive, and utterly delicious treats. Here’s why this Oreo crust ice cream cake will quickly become your new favorite:
- Effortlessly No-Bake: Forget turning on the oven! This fantastic dessert requires absolutely no baking, making it perfect for hot summer days or when you just want a simple, stress-free recipe.
- Only 5 Simple Ingredients: You won’t believe how much flavor comes from so few ingredients. With just Oreos, butter, cookies and cream ice cream, hot fudge, and whipped topping, you have everything you need.
- Ideal for Any Summer Gathering: From casual backyard barbecues to festive holiday celebrations like the Fourth of July, this ice cream cake is always a crowd-pleaser. Its cool, refreshing nature is a welcome treat on warm days.
- Perfect Make-Ahead Dessert: Prepare this cake hours or even a day in advance! It needs ample freezing time, which makes it an excellent option for busy hosts who want to minimize last-minute kitchen stress. Just assemble, freeze, and serve when you’re ready.
- Customizable for Any Taste: While we adore the classic Oreo and cookies and cream combination, this recipe is incredibly versatile. You can easily swap out ice cream flavors or add different toppings to suit individual preferences.
Essential Ingredients for This Delicious Oreo Ice Cream Cake
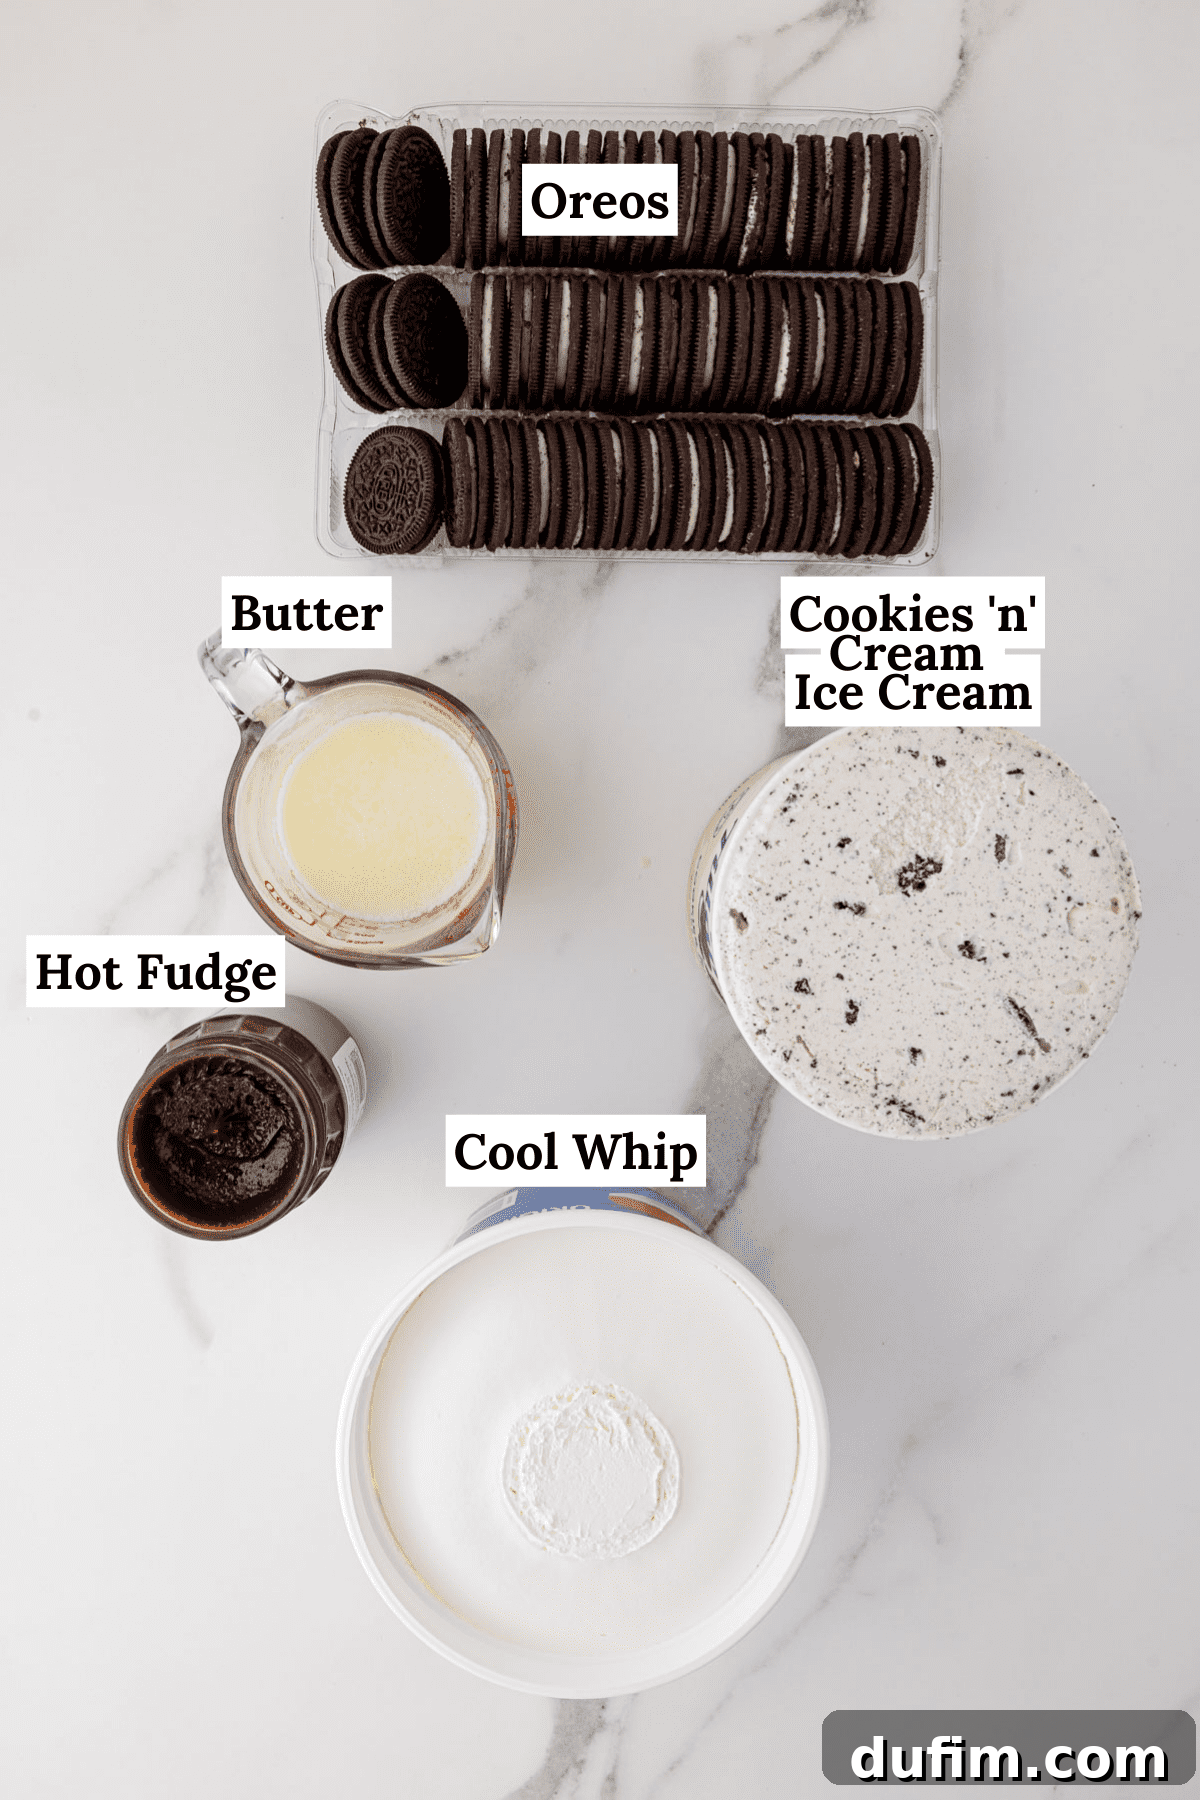
Creating this irresistible ice cream cake requires only a handful of common ingredients that layer beautifully to form a truly spectacular dessert. You’ll find the full measurements and detailed instructions in the recipe card below, but here’s a closer look at what you’ll need:
- Oreos: The star of our show! You’ll need enough to create both the sturdy crust and a generous topping. The classic Oreo provides that iconic chocolate cookie crunch and creamy filling that makes this cake so special.
- Unsalted Butter, Melted: This binds the crushed Oreos together to form a perfect crust. It’s crucial to let the melted butter cool to room temperature before mixing it with the cookie crumbs to prevent the crust from becoming greasy or dissolving the cookies prematurely.
- Cookies and Cream Ice Cream: This flavor perfectly complements the Oreo crust, intensifying the cookies and cream experience. Choose your favorite high-quality brand for the best results, ensuring it’s slightly softened for easy spreading.
- Hot Fudge Sauce: A thick, rich layer of hot fudge adds a decadent chocolate element and a wonderful textural contrast. You can use your favorite store-bought brand for convenience or whip up a batch of homemade hot fudge for an extra special touch. Just ensure it’s cooled before spreading.
- Cool Whip: This light and airy whipped topping provides a delicate, creamy layer that perfectly balances the richness of the fudge and ice cream. It’s stable when frozen and adds a beautiful finish to the cake.
Creative Substitutions & Variations for Your Ice Cream Cake
While the classic Oreo and cookies and cream combination is undoubtedly a winner, this recipe is wonderfully versatile, allowing for numerous substitutions and variations to cater to different tastes or dietary needs. Get creative and make this cake truly your own!
- Swap Out the Ice Cream Flavor: Don’t limit yourself to cookies and cream! Experiment with your favorite ice cream flavors. Chocolate chip cookie dough, mint chocolate chip, coffee, strawberry, or even plain vanilla bean ice cream would make fantastic alternatives. Imagine a birthday cake customized with the guest of honor’s absolute favorite ice cream!
- Alternative Crusts: Instead of Oreos, consider other cookie crusts. Graham cracker crusts, Nilla wafer crusts, or even brownie crusts could offer a delicious twist. Simply follow the same ratio of crushed cookies to melted butter.
- Different Toppings: While crushed Oreos are classic, get creative with your final topping. Drizzle with caramel sauce, sprinkle with chocolate chips, add chopped nuts, fresh berries, or even mini marshmallows. A fun idea is to use different types of crushed candy bars for a “kitchen sink” ice cream cake!
- Make it Vegan/Dairy-Free: It’s surprisingly easy to adapt this recipe for those with dairy allergies or following a vegan diet! Oreos themselves are accidentally vegan. Just substitute plant-based alternatives for the other dairy ingredients: use vegan butter (like Earth Balance), your favorite dairy-free cookies and cream ice cream (many brands now offer delicious options), vegan hot fudge sauce, and a plant-based whipped topping (such as CocoWhip or homemade coconut cream whipped topping). You’ll have an equally delicious and inclusive dessert!
- Add a Layer of Candy: For an extra indulgent treat, sprinkle a layer of chopped candy (like M&M’s, Reese’s Pieces, or chopped Snickers) over the hot fudge layer before adding the whipped topping.
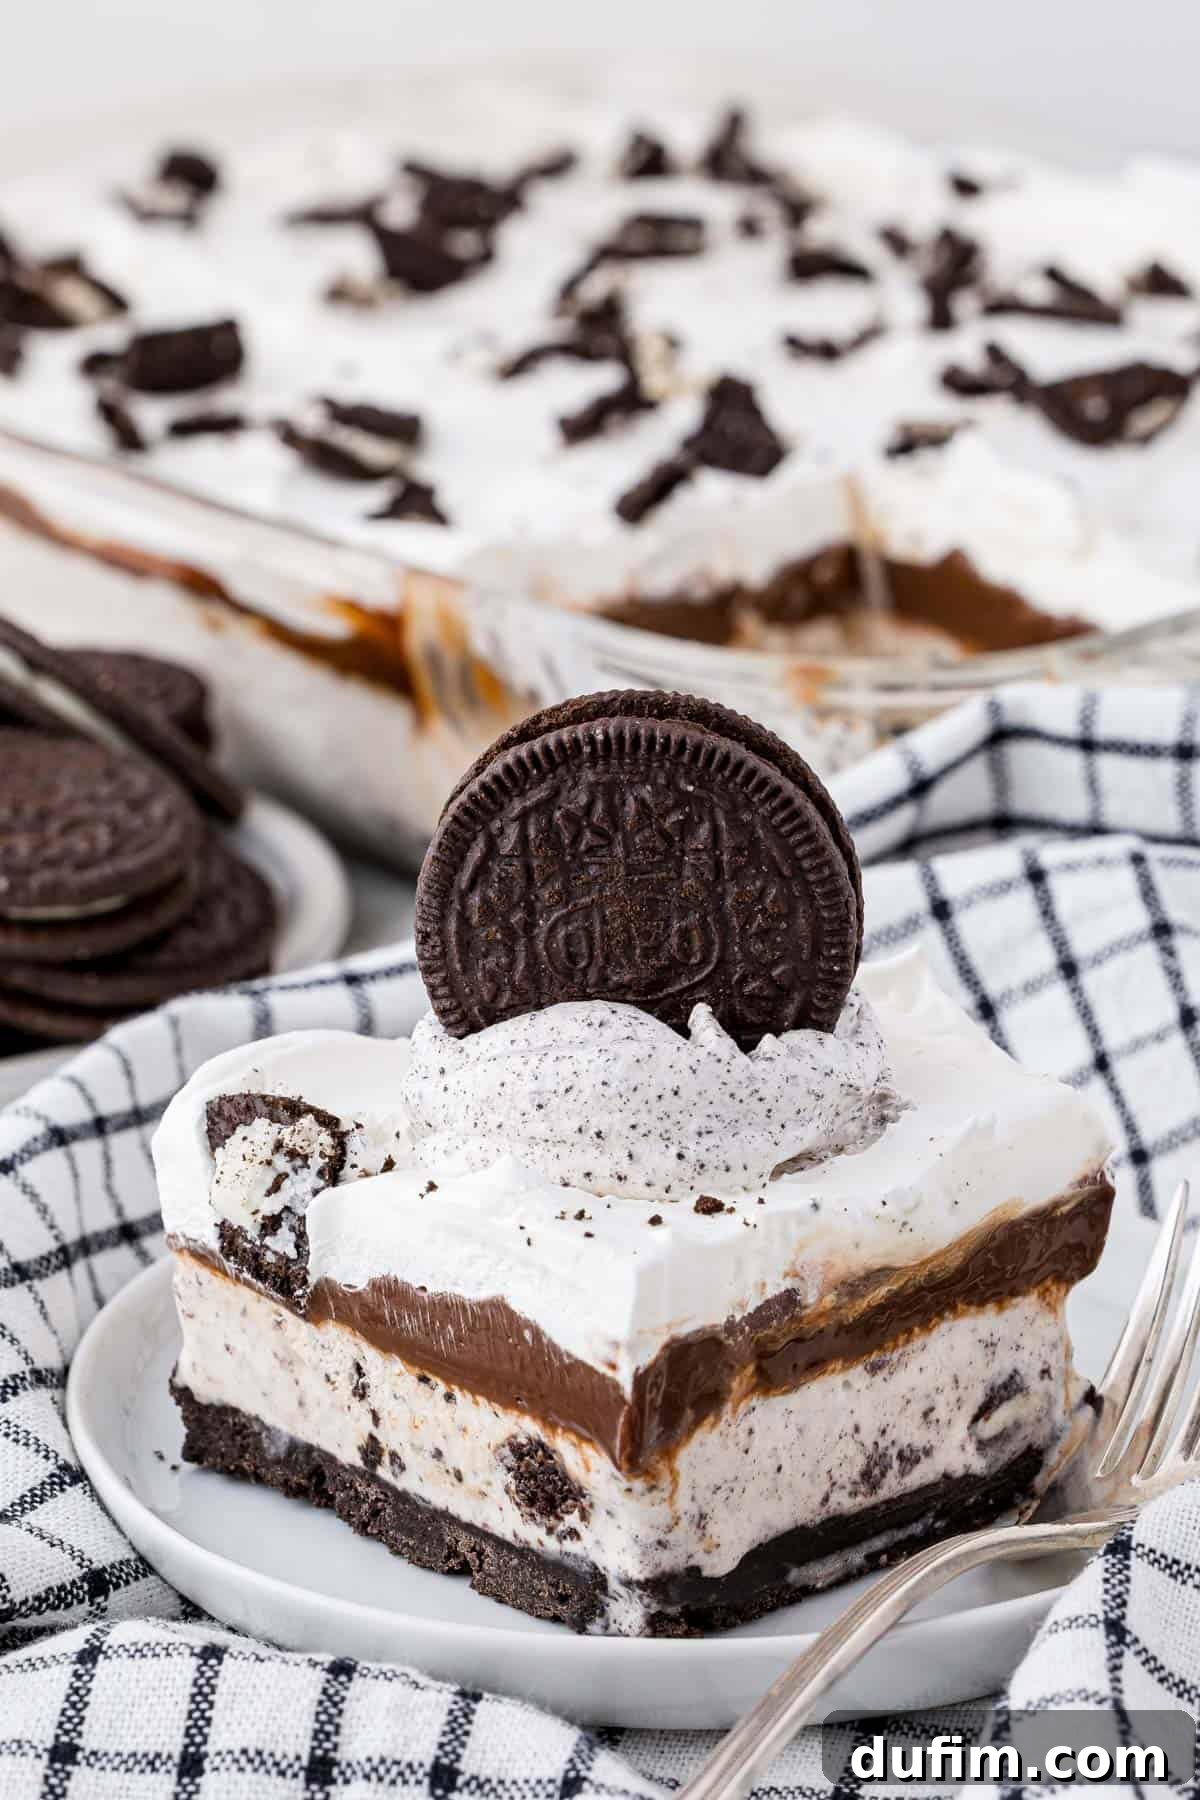
How to Make the Perfect Oreo Cookie Ice Cream Cake: Step-by-Step
Making an Oreo ice cream cake is truly the best way to prepare a show-stopping dessert ahead of time for any summer party or special occasion. All the Oreo lovers in your life will be incredibly grateful for this delightful creation! Here’s a detailed guide to assembling your incredible cake:
- Prepare the Irresistible Oreo Crust:
In a food processor or a sturdy blender, finely crush 36 Oreo cookies. Ensure you blend the entire cookie – both the chocolate wafers and the cream filling – until they resemble fine crumbs. Transfer the crushed Oreos to a medium-sized bowl. Pour in the melted butter, which should be at room temperature, and stir thoroughly until the mixture is thick and evenly combined. This rich, sticky mixture will form the base of your cake. Press this Oreo crust mixture firmly into an ungreased 9×13 inch baking pan. For an even and compact layer, use the bottom of a flat-bottomed cup or glass to press down the crumbs. This creates a solid foundation that won’t crumble when sliced.
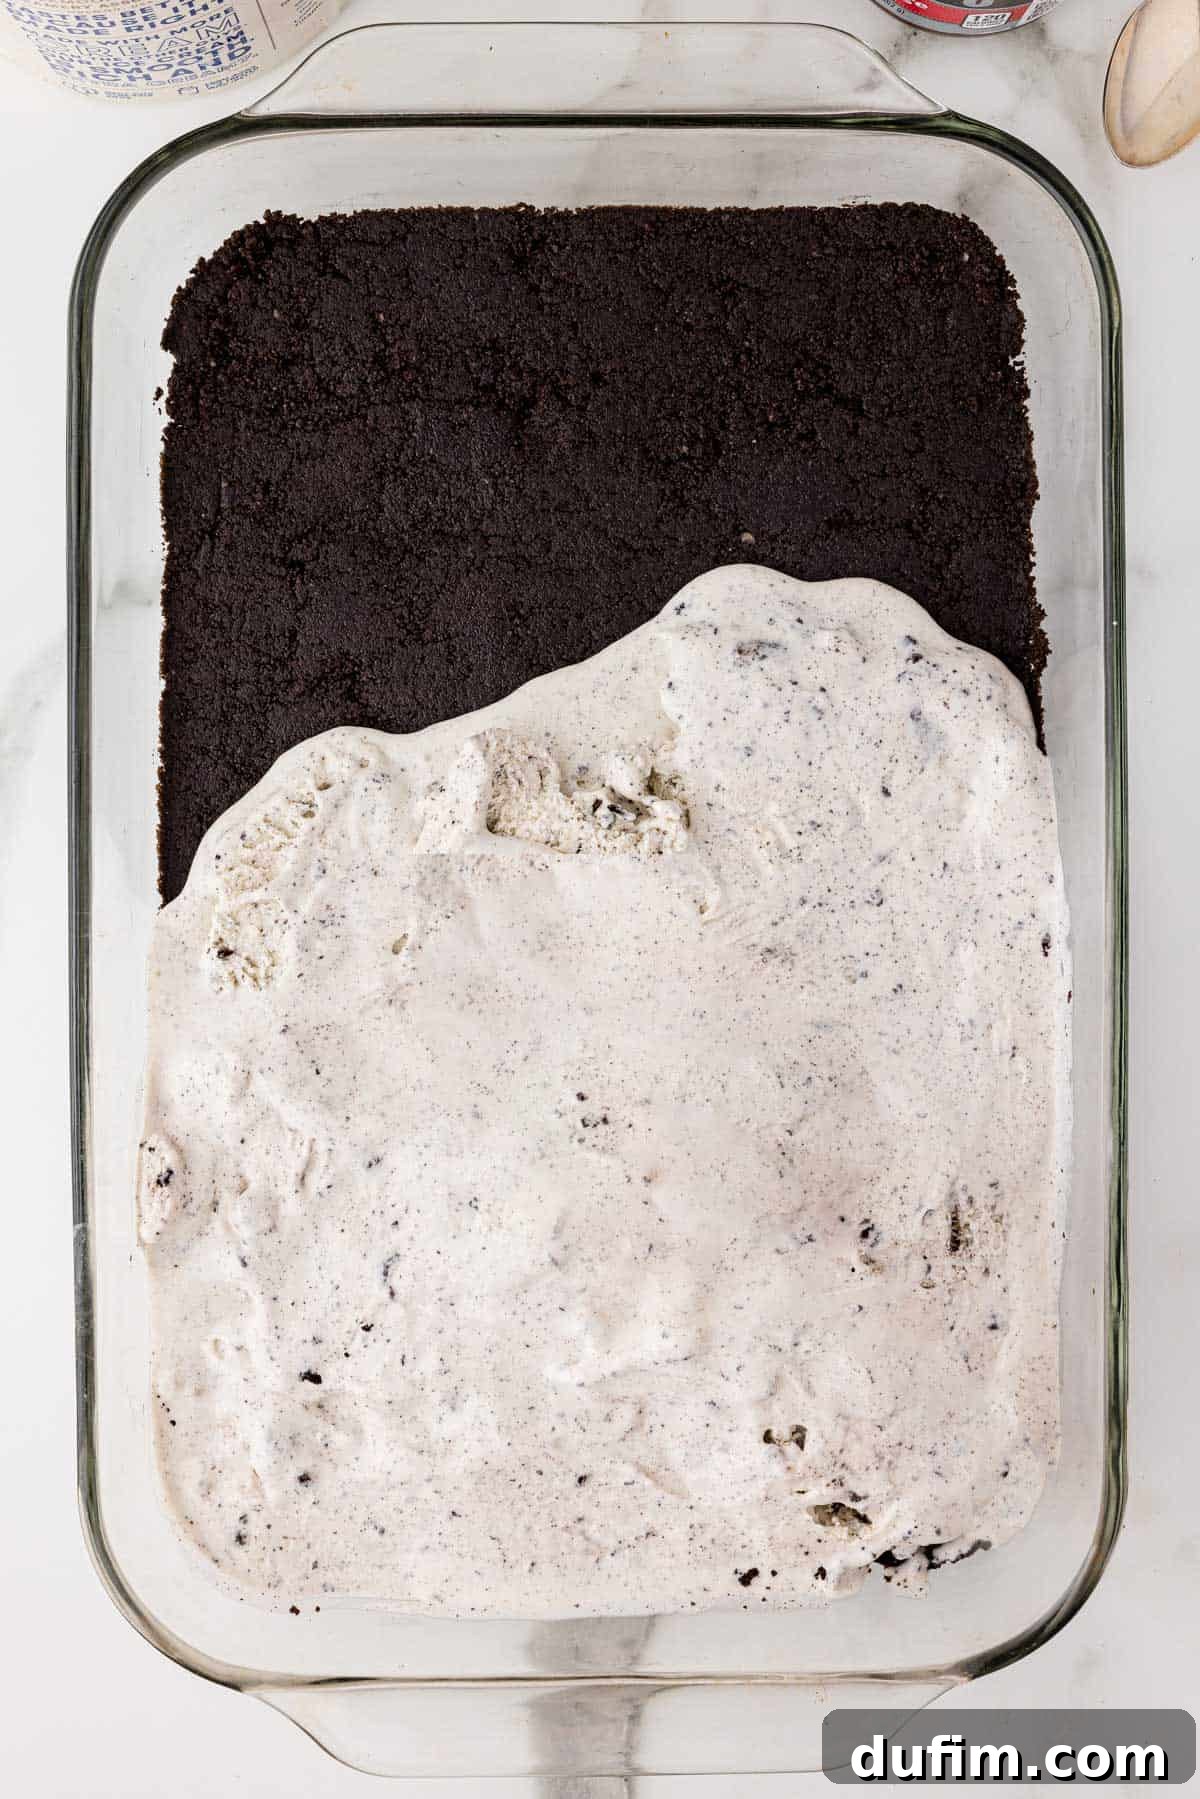
- Add the Creamy Ice Cream Layer:
Allow your cookies and cream ice cream to soften slightly at room temperature for about 10-15 minutes, making it easier to work with. Using a sturdy spatula or an offset spatula, carefully spread the softened ice cream evenly over the prepared Oreo crust. Ensure the layer is smooth and reaches all edges of the pan. Once spread, cover the pan tightly with plastic wrap or aluminum foil and transfer it to the freezer for at least 1 hour. This crucial freezing step ensures each layer sets properly and prevents them from melding together.
- Apply the Rich Hot Fudge Layer:
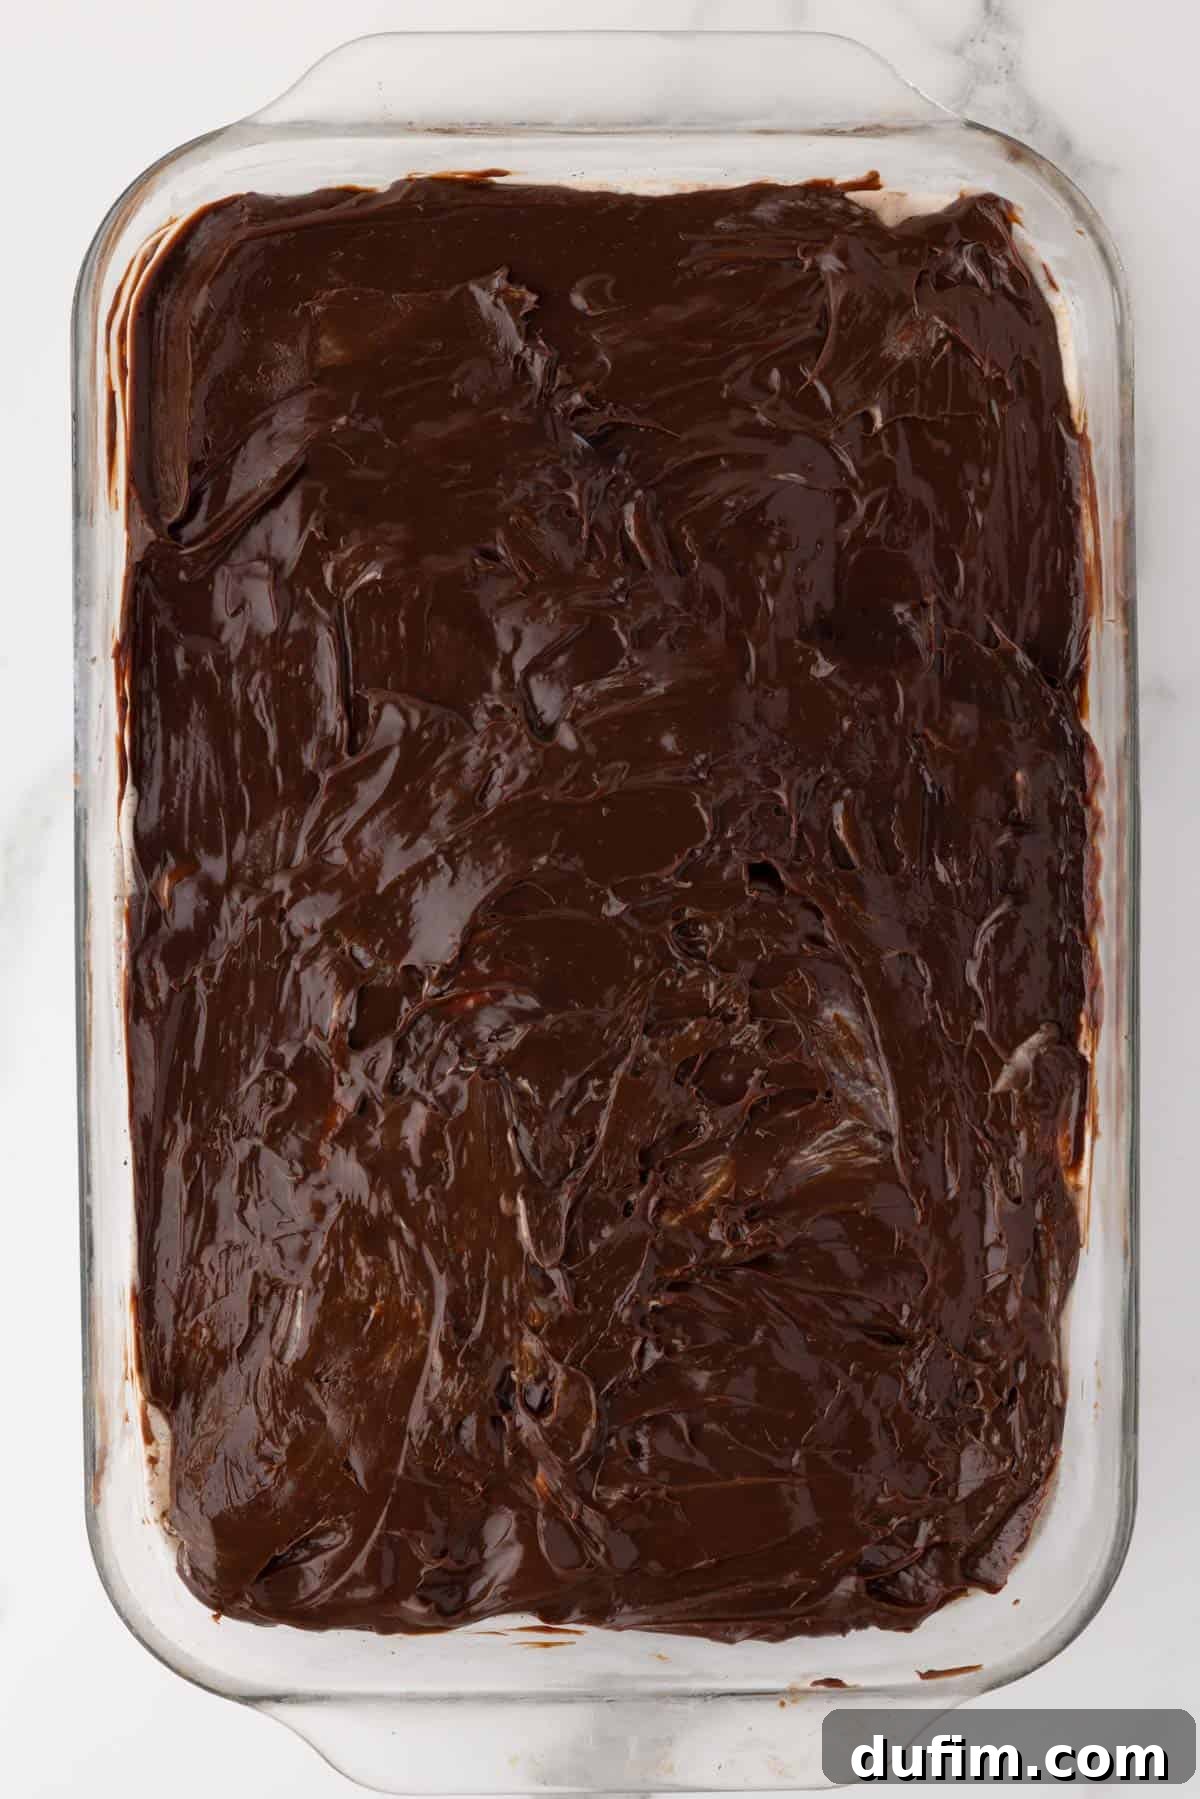
Once the ice cream layer is firm, remove the cake from the freezer. Spread the entire jar of hot fudge sauce evenly over the frozen ice cream. For a smoother application, you might warm the hot fudge slightly (if it’s too stiff) but ensure it’s not hot, just spreadable. Cover the pan again and return it to the freezer for another hour to allow the fudge layer to firm up.
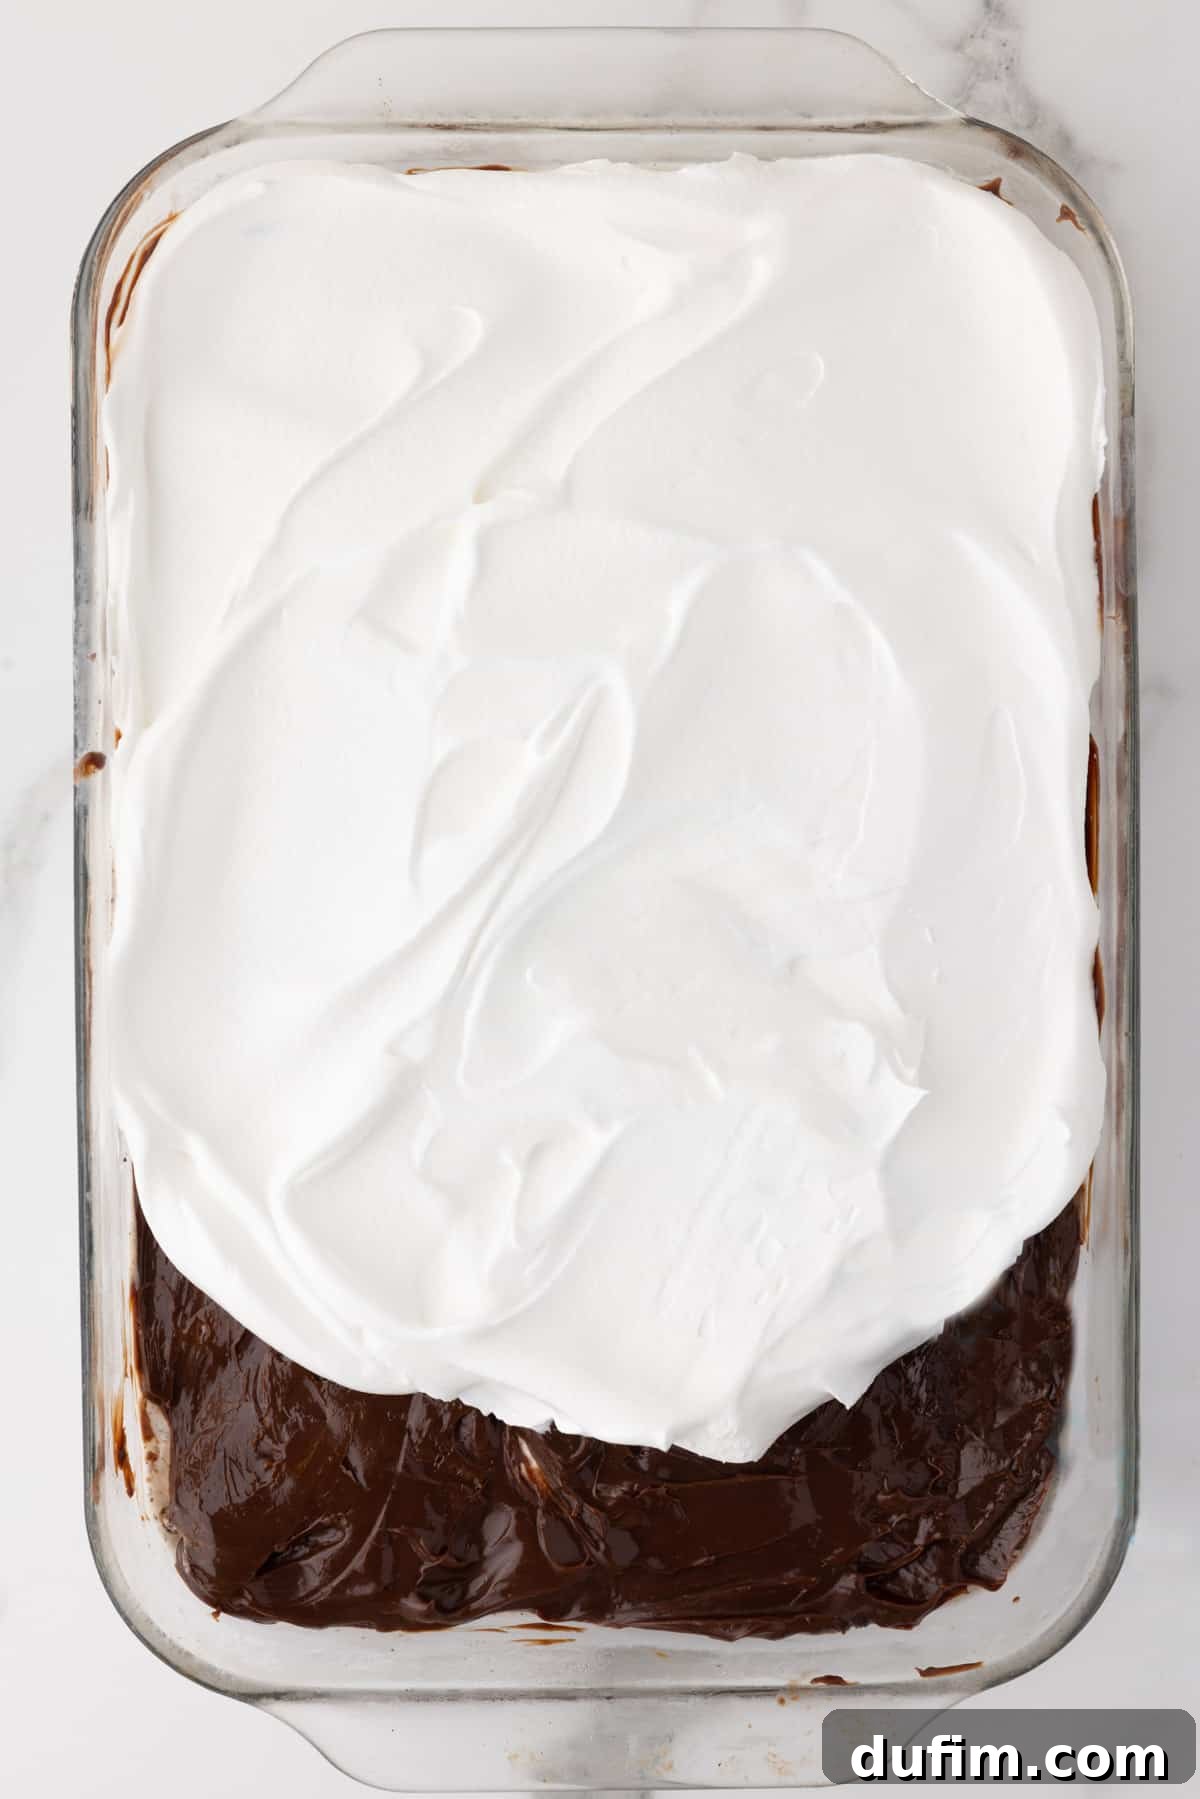
- Add the Fluffy Whipped Topping Layer & Final Freeze:
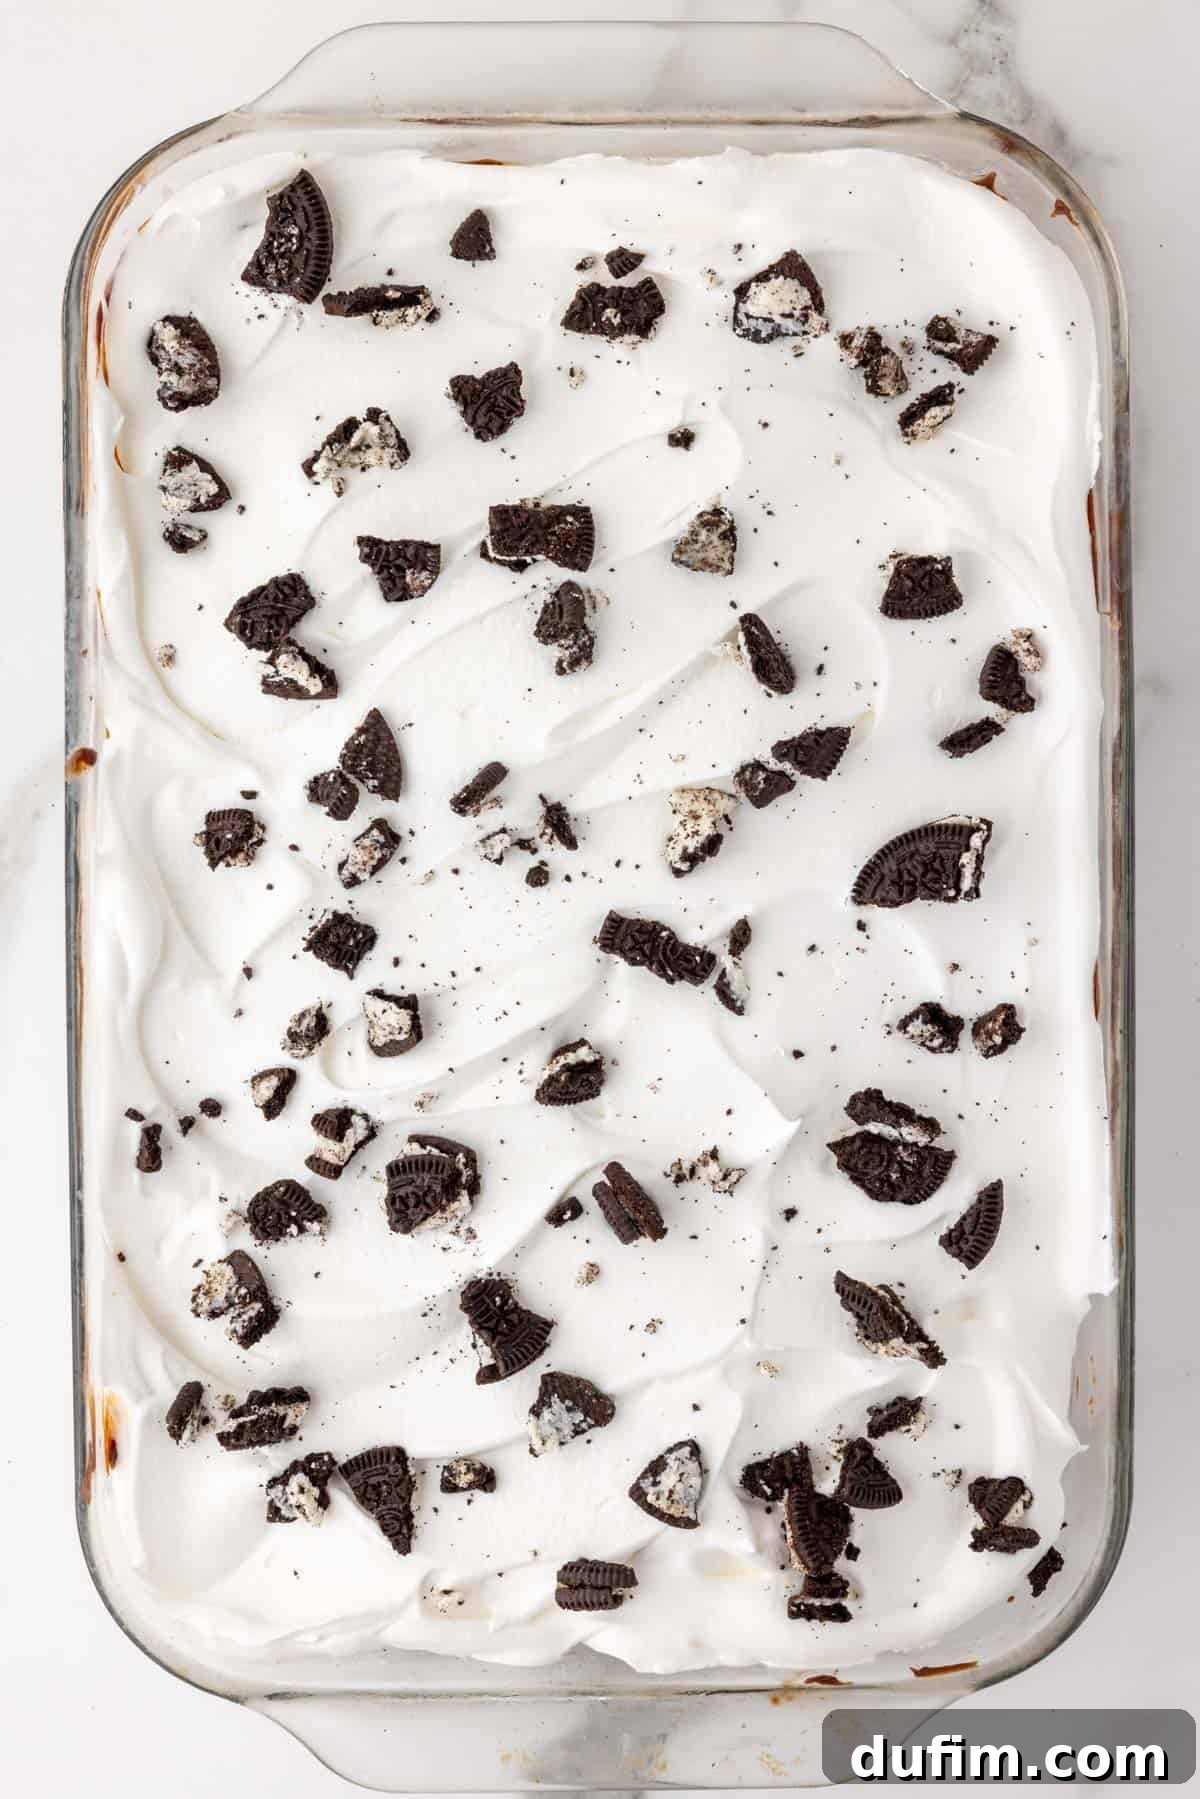
Carefully spread the entire container of Cool Whip evenly over the now-firm hot fudge layer. For an extra flourish and texture, sprinkle a few extra crushed Oreo cookies over the top of the Cool Whip. If desired, a delicate drizzle of chocolate fudge sauce can also be added for an elegant finish. Cover the cake once more and return it to the freezer for a minimum of 3-4 hours, or ideally, overnight. This extended freezing time ensures the cake is completely set and easy to slice.
- Serve & Enjoy!
When you’re ready to serve, remove the cake from the freezer and allow it to sit at room temperature for 5-10 minutes. This slight softening makes it much easier to cut. For perfectly clean slices, use a hot, sharp knife (run it under hot water and wipe dry between each cut). Slice and serve immediately to your eager guests!
- Properly Store Leftovers:
Any remaining slices should be returned to the freezer immediately. Ensure they are covered tightly in an airtight, freezer-safe container to prevent freezer burn and maintain freshness.
How to Cut Ice Cream Cake Like a Pro
Achieving clean, beautiful slices of ice cream cake can be tricky, but with these simple tips, you’ll master the art of cutting like a pro. First, always remove your cake from the freezer and let it sit at room temperature for about 5 to 10 minutes. This allows the ice cream and layers to soften just enough without melting. The real secret for perfect cuts is to use a sharp knife that has been warmed under hot running water. Wipe the blade dry, then make your cut. Repeat this process for each slice – warm the knife, wipe, cut – and you’ll get neat, distinct portions every time.
Expert Tips for the Best Oreo Cookie Ice Cream Cake
To ensure your Oreo Ice Cream Cake is nothing short of perfection, keep these expert tips in mind. They’ll help you achieve flawless layers, easy serving, and a truly delicious result:
- Effortless Removal from the Pan: If you plan to remove your ice cream cake from the pan for a more elegant presentation, opt for a springform pan. Alternatively, line a regular baking dish with parchment paper, leaving an overhang on the sides. This “sling” will allow you to easily lift the entire cake out once it’s frozen solid.
- Don’t Skip Freezing Between Layers: This is arguably the most critical tip! Each layer needs adequate time to set completely before the next one is added. If you rush this process, your layers will melt into each other, resulting in a less defined and messier cake. Patience here truly pays off.
- Homemade vs. Store-Bought Hot Fudge: While store-bought hot fudge is perfectly acceptable for convenience, a homemade hot fudge sauce can add an extra depth of flavor. If you choose to make your own, ensure it is completely cooled to room temperature, or even slightly chilled, before spreading it over the ice cream layer to prevent melting.
- Room Temperature Butter for the Crust: When mixing your crushed Oreos for the crust, ensure your melted butter has cooled to room temperature. Adding hot butter can prematurely soften the cookie crumbs, potentially leading to a greasy or crumbly crust instead of a firm, cohesive base.
- Slightly Soften the Ice Cream: Before spreading, allow your cookies and cream ice cream to sit out at room temperature for 10-15 minutes. It should be soft enough to spread smoothly but not completely melted or liquid. This consistency ensures an even layer without overly compressing the crust.
- Prepare for Perfect Slicing: To achieve clean, beautiful slices, remove your easy Oreo ice cream cake from the freezer about 10-15 minutes before you intend to serve it. This short resting period allows the cake to soften slightly, making it much easier to cut through while still maintaining its frozen integrity. It prevents the cake from being too hard to slice or melting into a puddle.
- The Hot Knife Trick: For truly professional-looking cuts, run your sharp knife under very hot water for a few seconds, then quickly wipe it dry. The warm blade will glide through the frozen layers, creating crisp, clean edges. Repeat this warming and wiping process for each slice.
How to Store Your Cookies and Cream Ice Cream Cake
Proper storage is essential to keep your Oreo ice cream cake fresh, delicious, and free from freezer burn. This cake relies on being frozen, so it needs to be treated with care when not being served.
Always keep your cookies and cream ice cream cake in the freezer when it’s not being enjoyed. The key is to protect its delicate layers from the harsh freezer environment. The best way to do this is by storing it in an airtight, freezer-safe container. This prevents ice crystals from forming on the surface and keeps any strong freezer odors from permeating your cake, ensuring that every bite tastes as fresh as when you first made it.
Before you even begin making this delightful dessert, make sure you have sufficient space in your freezer to accommodate the entire cake. And remember, when you’re ready to serve, take it out about 10-15 minutes beforehand. This small waiting period will make it much easier to cut perfectly portioned slices without damaging the layers or struggling with a rock-hard dessert.
Oreo Ice Cream Cake FAQs
What is the difference between Oreo ice cream and cookies and cream ice cream?
Technically, Oreo is a specific brand name owned by Nabisco. “Cookies and cream” is the generic flavor profile, which typically refers to vanilla ice cream studded with chocolate sandwich cookies that have a white cream filling. So, while all Oreo ice cream is cookies and cream, not all cookies and cream ice cream uses actual Oreo brand cookies.
Is ice cream cake different than regular ice cream?
Yes, ice cream cake is distinctly different from regular ice cream. While both contain ice cream as a primary component, ice cream cake is a layered dessert, often built on a crust (like an Oreo crust), with layers of ice cream, fudge, whipped topping, and other delicious additions, all assembled and frozen in a pan to be sliced and served.
How many people does an Oreo ice cream cake serve?
A standard 9×13 inch Oreo ice cream cake typically serves between 16 to 20 people. For easy portioning, I recommend cutting the cake into 4 even rows lengthwise, and then cutting each row into 4-5 individual pieces.
Can I make this Oreo ice cream cake in a round pan?
Absolutely! You can easily adapt this recipe for a round springform pan (9 or 10-inch). You might need to adjust the quantities slightly, particularly for the crust and hot fudge, to ensure adequate coverage. Using a springform pan is ideal for a beautiful presentation, as it allows for easy removal of the entire cake.
How long does homemade ice cream cake last in the freezer?
When stored properly in an airtight, freezer-safe container, your homemade Oreo ice cream cake can last for up to 2-3 weeks in the freezer. Beyond that, while it will still be safe to eat, the quality and freshness might start to diminish, and it could be more prone to freezer burn.
I absolutely adore this recipe! It’s incredibly easy to follow and uses so few ingredients for such a spectacular result. A definite keeper!
-Tasya
More Irresistible Oreo Recipes to Satisfy Your Cravings
If this Oreo Ice Cream Cake has further fueled your love for these iconic cookies, you’re in luck! Here are a few more of my favorite Oreo-inspired recipes that are sure to become new household favorites. Dive into more deliciousness!
- Decadent Oreo Cake (9×13 inch)
- Luscious Oreo Cupcakes
- Easy No-Bake Oreo Pie
- Classic Homemade Oreo Cookies
Enjoyed this recipe? Please rate it below!
Cookies and Cream Ice Cream Cake
Beth
20 minutes
4 hours
20 servings
Print Recipe
Equipment
- 9×13 inch glass pan (or a springform pan for easy removal)
- Sturdy spatula
- Blender or Food Processor
Ingredients
- 36 Oreos (approximately 19.1 oz family size package, leaving extra for topping)
- ½ cup (113g) unsalted butter, melted and cooled to room temperature (1 stick)
- ½ gallon cookies and cream ice cream, slightly softened
- 1 jar hot fudge sauce, (12-14 oz), cooled if homemade
- 8 oz (226g) Cool Whip, thawed (*Note: one container is for the cake, use a second if making Oreo whipped cream for garnish)
Instructions
Oreo Crust
- In a blender or food processor, blend 36 Oreo cookies (the whole cookie – cream and wafer). Transfer the crumbs to a bowl and stir in the cooled melted butter. The mixture will be thick and stick together. Press the Oreo crust firmly into an ungreased 9×13 inch pan, using the bottom of a cup to create an even, compact layer.
Ice Cream Layer
- Allow the cookies and cream ice cream to soften slightly (10-15 minutes). Using a sturdy spatula, spread the softened ice cream evenly over the crust. Cover the pan with plastic wrap or foil and freeze for 1 hour until firm.
Hot Fudge Layer
- Spread the entire jar of hot fudge sauce evenly over the frozen ice cream layer. Cover and return to the freezer for another 1 hour to set.
Whipped Topping
- Spread the Cool Whip evenly over the hot fudge layer. Top with a few extra crushed Oreo cookies, and if desired, a light drizzle of chocolate fudge sauce. Cover and return to the freezer for a final freeze of 3-4 hours, or preferably overnight, to ensure all layers are fully set.
Serve
- To serve, remove the cake from the freezer and let it sit at room temperature for 5-10 minutes. Use a hot, sharp knife (wiped clean between slices) to cut the cake into portions.
- Return any leftovers to an airtight container in the freezer immediately.
Notes
Only one 8 oz container of Cool Whip is required for the cake itself. Some photos may show additional “Oreo whipped cream” dollops on top of slices; if you wish to make this (crushed Oreos + whipped cream), you would need an additional container of Cool Whip.
Nutrition Information (Estimated per Serving)
Calories: 354 kcal | Carbohydrates: 41g | Protein: 5g | Fat: 20g | Saturated Fat: 11g | Polyunsaturated Fat: 1g | Monounsaturated Fat: 6g | Trans Fat: 0.2g | Cholesterol: 56mg | Sodium: 168mg | Potassium: 253mg | Fiber: 1g | Sugar: 31g | Vitamin A: 560IU | Vitamin C: 1mg | Calcium: 139mg | Iron: 3mg
Nutrition Disclosure
All nutritional values are approximate and provided to the reader as a courtesy. Changing ingredients and/or quantities will alter the estimated nutritional calculations.