
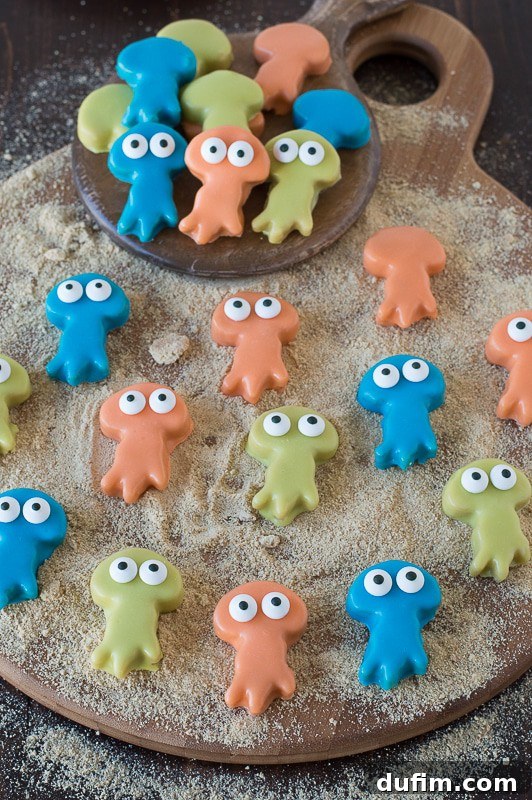
Jellyfish Oreo Balls: Make Waves at Your Next Under-the-Sea Party!
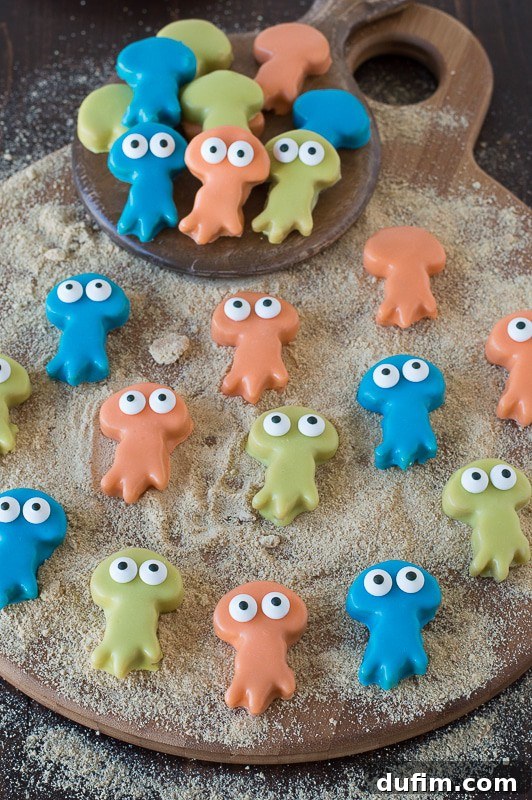
Planning an unforgettable under-the-sea themed party? You’ve come to the right place for creative and delicious treats! We’ve been diving deep into oceanic culinary adventures this week, sharing fantastic recipes that are sure to make a splash. If you haven’t already, make sure to check out our charming Octopus Cupcakes and the incredibly simple yet delightful Under the Sea Graham Crackers.
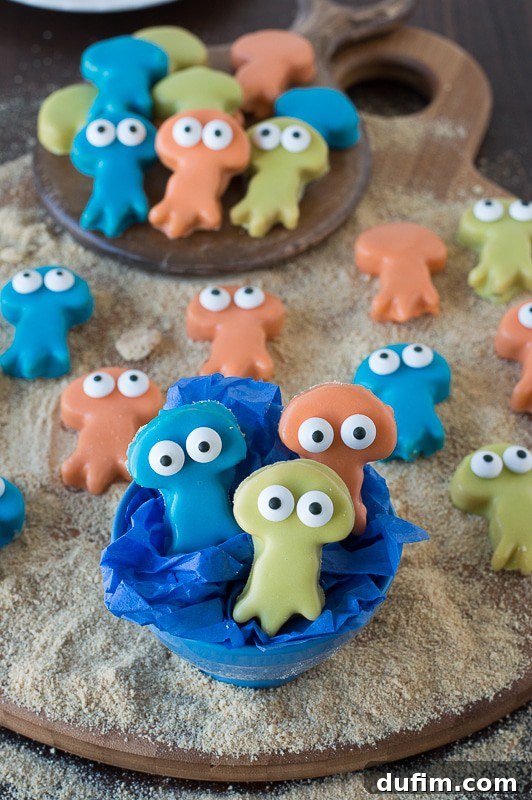
But today, we’re unveiling a dessert that I’ve been bubbling with excitement to share: these absolutely adorable Jellyfish Oreo Balls! I held back from giving a sneak peek on social media because I wanted the full reveal to be a moment of pure joy for everyone. The anticipation was real, and believe me, these sweet, whimsical jellyfish are worth the wait. They bring a unique charm to any celebration and are surprisingly easy to create. Prepare to impress your guests with these delightful ocean-inspired treats!
What Exactly Are Oreo Balls (or Oreo Truffles)?
If you’re new to the wonderful world of Oreo balls, prepare for a revelation in simplicity and deliciousness. At their core, Oreo balls, also known as Oreo truffles, are a no-bake dessert made from just two primary ingredients: crushed Oreo cookies and cream cheese. The process is straightforward: a package of your favorite Oreo cookies is finely blended into crumbs, then mixed thoroughly with a block of softened cream cheese. This rich, moldable mixture is then typically rolled into bite-sized spheres and dipped in melted chocolate or candy melts, creating a decadent and irresistible treat that everyone adores.
The beauty of Oreo balls lies not only in their ease of preparation but also in their incredible versatility. While traditional versions are round, the creative possibilities are endless once you have that perfect base mixture. They’re a crowd-pleaser for all ages and adaptable for any theme or occasion, making them a go-to for impromptu desserts or elaborate party spreads.
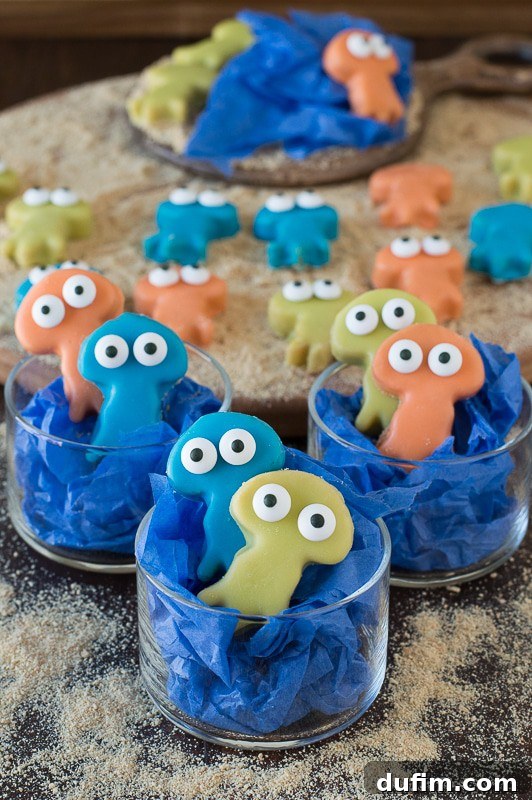
Beyond the Sphere: The Art of Shaped Oreo Balls
While the classic round shape of an Oreo ball is always a hit, my culinary curiosity led me to believe that these delightful treats could take on almost any form. And oh, what a journey it has been! My experimentation with shaped Oreo balls began with the cozy embrace of autumn, crafting charming Oreo Ball Acorns. These tiny, edible masterpieces perfectly captured the essence of fall foliage and harvest festivals.
As the seasons changed, so did the shapes. For the festive Christmas season, I transformed them into whimsical Candy Cane Oreo Balls and adorable Gingerbread Men Oreo Balls, adding a touch of holiday magic to every plate. When Super Bowl Sunday rolled around, it was time for a sporty twist, and out came the clever Football Oreo Balls, scoring major points with game-day guests.
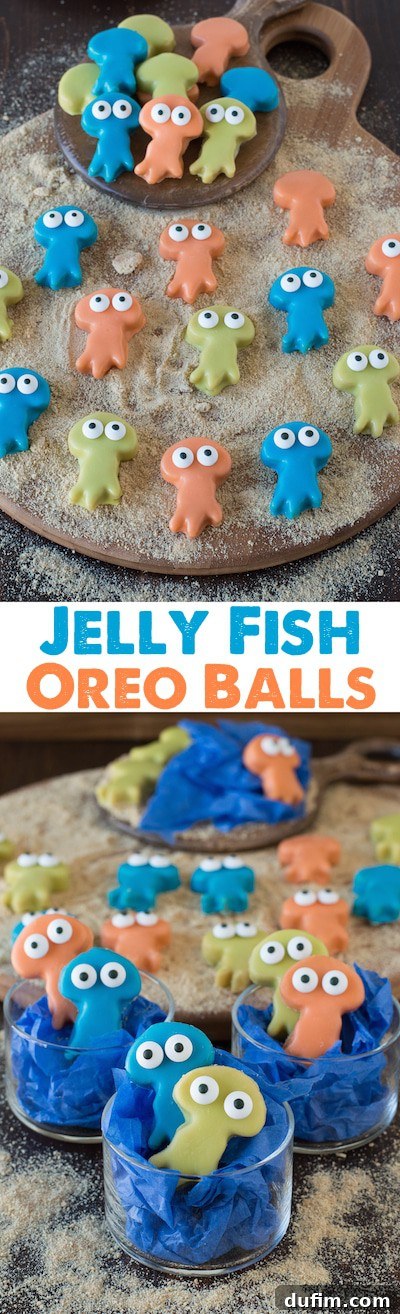
Each themed creation has proven that Oreo balls are far more than just simple truffles; they are a blank canvas for confectionery artistry. This journey of shaping has culminated in our latest, and perhaps cutest, innovation: the Jellyfish Oreo Balls. They embody the same beloved taste and texture but elevate the presentation to a whole new level, making them absolutely perfect for any under-the-sea celebration.
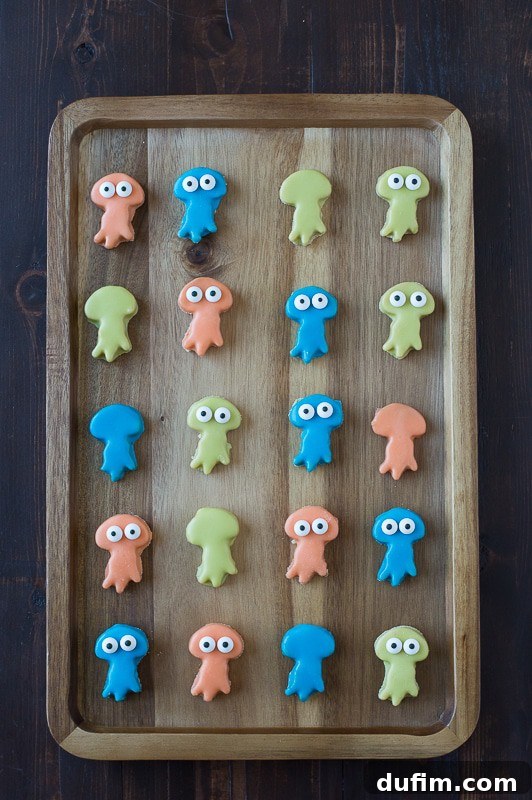
The Essential Tool: A Jellyfish Cookie Cutter (and My Confession of a Cookie Cutter Obsession)
To bring these enchanting Jellyfish Oreo Balls to life, the star of the show is undeniably a jellyfish-shaped cookie cutter. Specifically, a mini 2-inch cutter works wonders for creating perfectly portioned and adorable treats. I discovered the ideal tool at AffordableCookieCutters.com, where you can find this little gem for an incredible $0.99! It’s a small investment that yields huge returns in terms of cuteness and party appeal.
Speaking of AffordableCookieCutters.com, it truly is both the best and worst thing that ever happened to my kitchen. It’s the best because their prices are unbeatable – most cutters are just $0.99 each, with the highest I’ve seen around $1.25. And the quality? Top-notch! These aren’t flimsy cutters; they’re sturdy and reliable, designed to last through countless baking sessions.
However, it’s also the “worst” in the most delightful way possible. One visit to their site and I found myself adding twenty new cookie cutters to my ever-growing collection. Now, I’m faced with a glorious dilemma: finding a way to store and display them all! I’ve even started hinting to Ryan that I might need a custom wall-mounted storage solution that doubles as an art display. It’s official: I have a serious, unapologetic cookie cutter problem, and I wouldn’t have it any other way. Each cutter sparks new creative ideas, and these jellyfish are just the latest in a long line of fun, shaped treats!
Why Jellyfish Oreo Balls are the Perfect Party Treat
Oreo balls have an undeniable charm and are consistently a massive hit at any gathering, big or small. Their rich flavor, delightful texture, and ease of preparation make them a go-to dessert for hosts. But when you transform them into these whimsical jellyfish, you elevate them from a simple treat to a memorable centerpiece for your under-the-sea themed party!
Imagine a platter adorned with these colorful, smiling jellyfish, each one a miniature work of edible art. They instantly spark joy and conversation, drawing smiles from both children and adults alike. Their vibrant colors, achieved through various candy melts, can perfectly complement your party’s decor, creating a cohesive and enchanting underwater atmosphere. Plus, the bite-sized nature of these treats makes them ideal for mingling guests – no forks or plates required, just pure, unadulterated sweetness on a stick (or simply picked up!).
Beyond their visual appeal, these Jellyfish Oreo Balls are surprisingly simple to execute. The basic Oreo truffle recipe is incredibly forgiving, and using a cookie cutter streamlines the shaping process, ensuring consistent and charming results every time. Even if you’re not a seasoned baker, you can confidently create these show-stopping desserts that taste as good as they look. They’re a testament to how a little creativity and a special cookie cutter can turn a classic dessert into an extraordinary experience, making your party truly unforgettable.
Rated 5 out of 5 stars by 2 reviewers.
Jellyfish Oreo Balls
Rate This Recipe
Print Recipe
Oreo balls (or truffles) are a quick and easy dessert everyone loves. I love to press them flat and use cookie cutters because – why not?
Equipment
- Glass Mixing Bowl: Essential for combining your ingredients.
- Silicone Baking Mat: Provides a non-stick surface for chilling and dipping.
- Baking Sheet: Used for chilling the Oreo mixture and holding dipped truffles.
- Food Processor: Crucial for achieving fine Oreo crumbs.
- Mini Jellyfish Cookie Cutter (approx. 2-inch): The key to shaping these adorable treats.
- Small Saucepan or Microwave-Safe Bowl: For melting candy melts.
- Spoon & Fork: For dipping and handling the truffles.
- Toothpick: Helpful for delicate placement after dipping.
Ingredients
- 1 package Oreos, (approx. 14.3 oz/400g). For a unique twist, consider using Golden Oreos for a lighter “jellyfish” look.
- 8 oz (227g) regular cream cheese, softened to room temperature. It’s important to use full-fat cream cheese, not low-fat, for the best consistency and flavor.
- Assorted candy melts, in colors like blue, pink, purple, or green to mimic ocean hues. Approximately 12 oz per color, depending on how many colors you use.
- Vegetable shortening, about 1 tablespoon for every 1/2 cup of candy melts. This helps achieve a smooth, dippable consistency.
- Candy eye balls: For giving your jellyfish charming little faces!
Instructions
- Prepare Cream Cheese: Ensure your cream cheese is at room temperature before you begin. This is crucial for achieving a smooth, well-blended mixture with the Oreo crumbs.
- Make Oreo Crumbs: Place half of the Oreo cookies in a food processor and pulse until they form fine crumbs. Add the remaining half of the Oreos and pulse again until all cookies are uniformly fine. The finer the crumbs, the smoother your truffle base will be.
- Combine Ingredients: Once the cream cheese is soft and pliable, add the Oreo crumbs to the bowl. Mix thoroughly until the oreos and cream cheese are very well blended and form a cohesive, slightly sticky dough. You might need to use your hands for the final mix to ensure no dry spots remain.
- Chill the Mixture: Line a baking sheet with wax paper or plastic wrap. Press the Oreo mixture evenly across the pan, aiming for a uniform thickness (about 1/2 to 3/4 inch). This consistent thickness is important for uniform cookie-cutter shapes. Place the pan in the freezer for 20-30 minutes, or until the mixture is firm enough to cut.
- Cut Jellyfish Shapes: Remove the chilled Oreo mixture from the freezer. Use your mini jellyfish cookie cutter to carefully cut out the shapes. Place these jellyfish onto another baking sheet lined with wax paper or a silicone baking mat. Return them to the freezer for another 20 minutes to ensure they are very cold, which helps prevent them from breaking apart during dipping.
- Melt Candy Melts: While the jellyfish chill, prepare your candy melts. In a small saucepan over very low heat, or in a microwave-safe bowl in 30-second intervals, combine your chosen color of candy melts with a small amount of vegetable shortening. Stir continuously if on the stovetop, or between microwave intervals, until completely smooth. The vegetable shortening is key here; it thins the candy melts to the perfect dipping consistency without making them too thick or clumpy. Add more shortening a little at a time until the chocolate easily drips off your spoon or spatula. Keep the heat low to prevent scorching.
- Dip the Jellyfish: Take about 5 jellyfish Oreo balls out of the freezer at a time to prevent the others from softening too much. Let them sit at room temperature for just about 1 minute before dipping. This slight temperature adjustment can help prevent the chocolate from cracking later.
- Dipping Technique: Place one jellyfish into the melted chocolate. Use a spoon to gently coat the top if needed. To remove, carefully lift the jellyfish with a fork. Gently tap your wrist (holding the fork) against your other hand two times to allow excess chocolate to drip off. Scrape the bottom of the fork on the edge of the saucepan to remove any remaining excess. Using a toothpick, gently slide the dipped jellyfish onto a baking sheet lined with a silicone baking mat.
- Harden and Repeat: Continue this process until all jellyfish are dipped, changing the color of your candy melts as desired to create a vibrant assortment. Allow the dipped jellyfish to harden completely at room temperature. This can take an hour or two depending on your environment.
- Add Candy Eyes: Once the chocolate coating is fully set, use a tiny dab of leftover melted candy melt as “glue” to attach two candy eyeballs to each jellyfish. This simple step brings them to life and adds an extra layer of cuteness!
- Store Properly: Since these treats contain cream cheese, they must be stored in an airtight container in the refrigerator. However, be aware that storing them in the cold can sometimes cause the chocolate coating to crack. For best results, consume them within a few days and try to bring them closer to room temperature for serving if possible to minimize cracking.
Notes and Pro Tips
Equipment used: For those specific items that make this recipe a breeze, we recommend: candy eye balls and candy melts.
Cream Cheese Temperature: Don’t rush this! Properly softened cream cheese is crucial for a smooth, lump-free mixture.
Oreo Crumb Consistency: Aim for very fine, almost flour-like crumbs. Larger chunks can make the mixture harder to shape and might show through the chocolate coating.
Chilling is Key: The repeated chilling steps are vital. A firm, cold Oreo base will hold its shape better and be less prone to breaking when dipped. It also helps the chocolate set quickly and smoothly.
Dipping Smart: Work in small batches from the freezer. If your melted chocolate starts to thicken, gently reheat it on low or in short microwave bursts, adding a tiny bit more shortening if needed.
Preventing Chocolate Cracks: The primary reason chocolate coating cracks is a significant temperature difference between the cold truffle and the warm chocolate, or fluctuating storage temperatures. Allowing the truffles to warm up for a minute or so before dipping, and then letting them set at room temperature instead of immediately refrigerating, can help. However, due to the cream cheese, refrigeration is necessary for food safety.
Creative Tentacles: For an extra touch of realism, you can pipe thin lines of contrasting melted candy onto the bottom edge of the jellyfish after they’ve set, to resemble tentacles.
Nutrition Information
Calories: 121kcal |
Carbohydrates: 14g |
Protein: 2g |
Fat: 7g |
Saturated Fat: 3g |
Polyunsaturated Fat: 1g |
Monounsaturated Fat: 2g |
Trans Fat: 1g |
Cholesterol: 10mg |
Sodium: 117mg |
Potassium: 54mg |
Fiber: 1g |
Sugar: 8g |
Vitamin A: 127IU |
Calcium: 13mg |
Iron: 2mg
Nutrition Disclosure
All nutritional values are approximate and provided to the reader as a courtesy. Changing ingredients and/or quantities will alter the estimated nutritional calculations.
Like this recipe? We’d love to hear from you! Rate and comment below to share your creations and feedback!
Dive into Deliciousness: Conclusion
These Jellyfish Oreo Balls are more than just a dessert; they’re a centerpiece of fun and creativity for any under-the-sea celebration. Combining the beloved flavors of classic Oreo truffles with an irresistibly cute shape, they are guaranteed to bring smiles and compliments from all your guests. From the simple process of crushing Oreos and mixing with cream cheese to the satisfying act of dipping and decorating, every step is a joy.
Whether you’re hosting a child’s birthday party, a summer gathering, or simply looking for a whimsical treat to brighten your day, these jellyfish truffles are the perfect choice. They prove that with a little imagination and the right tools (like that indispensable jellyfish cookie cutter!), ordinary ingredients can be transformed into extraordinary delights. So go ahead, gather your ingredients, unleash your inner pastry artist, and prepare to make waves with these delightful, easy-to-make Jellyfish Oreo Balls. Happy baking, and may your party be as sweet and charming as these treats!