
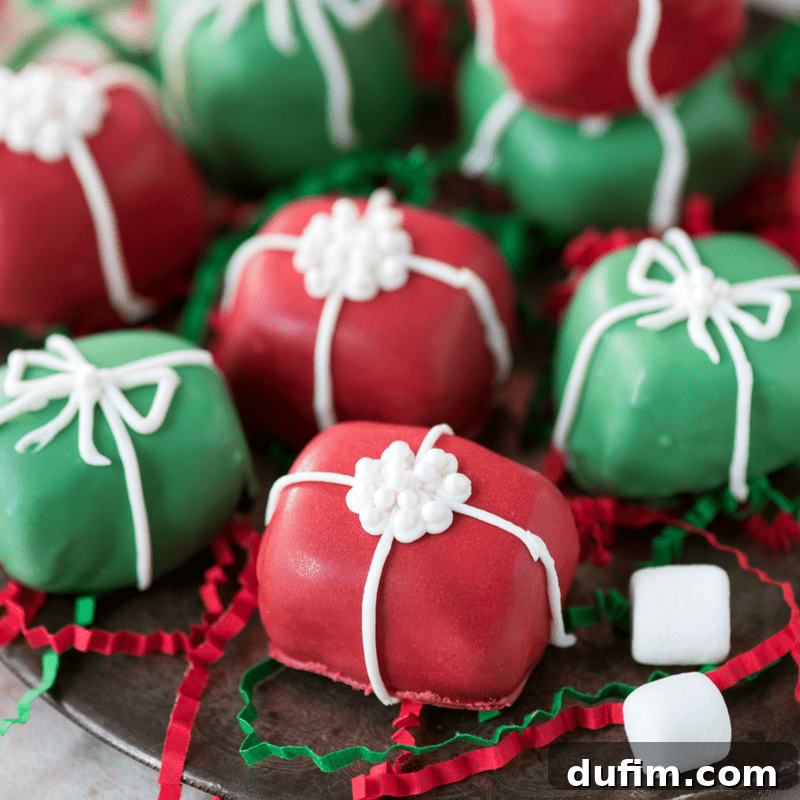
Your family will want to make these Christmas present Oreo balls each season!
Transforming the classic Oreo ball into delightful edible presents, this recipe offers one of the best no-bake holiday treats for a truly festive season. These charming confectionery gifts are not only a feast for the eyes but also incredibly easy to create, making them a perfect activity for the whole family during the most wonderful time of the year. 🎁
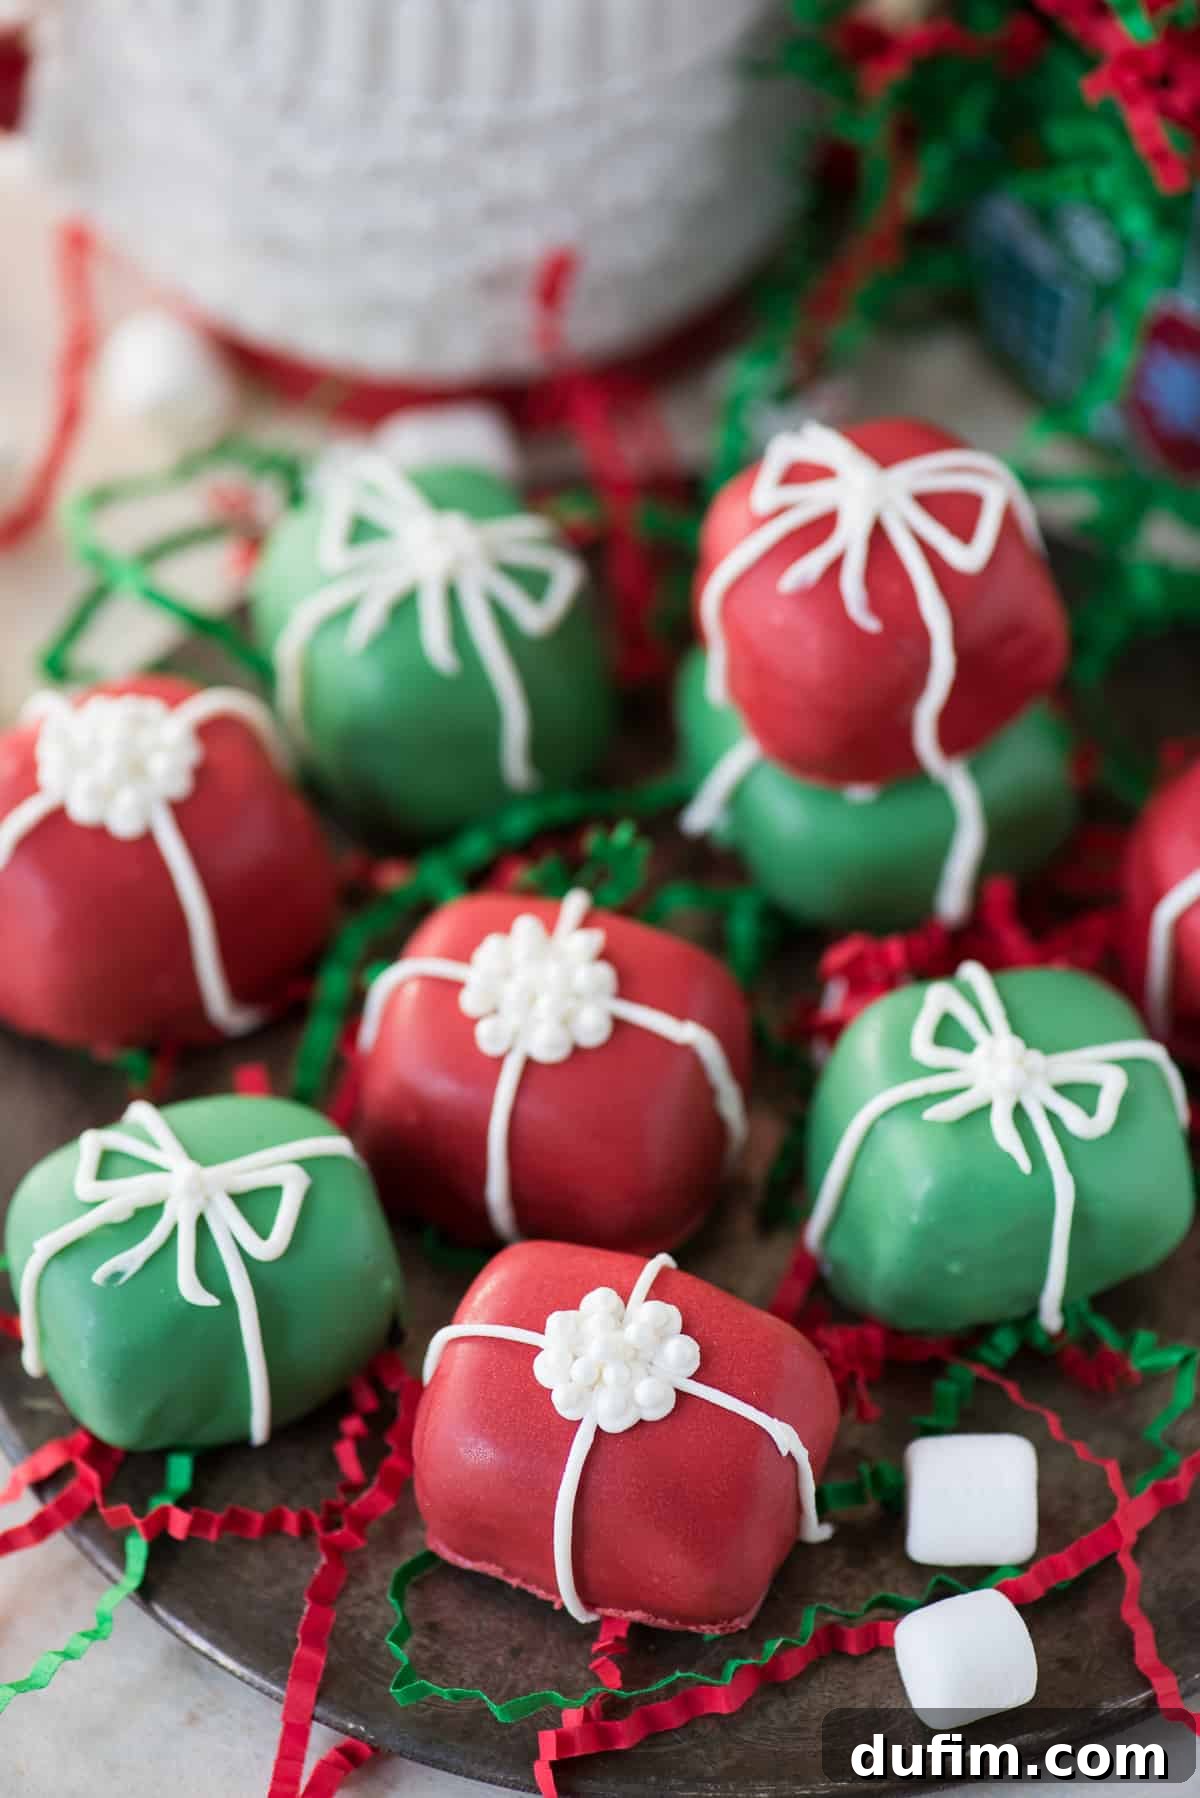
Imagine the joy of surprising your loved ones with these miniature edible gifts! I bet you can think of countless people on your Christmas list who would absolutely adore receiving a batch of these unique sweet treats. My husband, for instance, is always thrilled with food gifts, and now I can present him with a gift that not only looks like a beautifully wrapped present but is also utterly delicious. It’s truly a win-win, covering all the necessary bases for thoughtful and delightful holiday gifting!
Why You’ll Love These Christmas Oreo Balls
Oreo balls are a beloved no-bake dessert, known for their irresistible combination of crushed Oreos and cream cheese, often dipped in melted chocolate. These edible present Oreo balls take that classic delight to an entirely new level of adorableness. While traditional Oreo balls are typically rolled into spheres, we’re stepping up our game by shaping them into perfect little squares, making them instantly recognizable as festive presents. The vibrant red and green candy melts, coupled with delicate royal icing bows, elevate these treats from simple confections to truly show-stopping holiday masterpieces. They are incredibly cute to look at and even more delightful to eat!

There are so many reasons why these delightful Christmas Present Oreo Balls will become a treasured part of your holiday tradition:
- Simple Pantry Ingredients: You won’t need to hunt for exotic items. These treats call for readily available ingredients typically found in any kitchen, making them easy to whip up anytime.
- No Baking Required: Perfect for busy holiday schedules, this recipe bypasses the oven entirely. This means less heat in your kitchen and more time for festive fun, along with a significantly reduced prep time.
- A Christmas Treat the Whole Family Can Help Make: From crushing Oreos to shaping the squares and adding decorative bows, there are tasks for every age group. It’s a wonderful way to create lasting holiday memories together.
- Customizable Depending on Your Preferences: While we love the classic red and green, these Oreo balls are a blank canvas for your creativity. Experiment with different colors, flavors, and decorations to match any holiday theme.
- Perfect for Gifting: Their charming present shape makes them ideal for edible gifts, cookie exchanges, or festive party platters, guaranteed to impress anyone who receives them.
If you’re looking for more fun Oreo ball ideas to add to your repertoire, be sure to explore recipes for peppermint Oreo balls, candy cane Oreo balls, and turtle Oreo balls – each offering a unique twist on this beloved dessert.
Ingredients for Christmas Present Oreo Balls
Crafting these adorable edible presents requires just a handful of simple ingredients. Here’s a breakdown of what you’ll need and why each component is essential:
- Oreos: The star of the show! Use classic Oreos for the iconic chocolate flavor, or experiment with seasonal varieties like peppermint or gingerbread Oreos for an extra festive twist. Ensure they are crushed into fine crumbs for the best texture.
- Cream Cheese: This acts as the binder, giving the Oreo mixture its rich, tangy flavor and a firm yet smooth consistency. Make sure it’s softened to room temperature for effortless blending.
- Peppermint Extract (Optional): A small touch of peppermint extract adds a refreshing, wintry flavor that pairs beautifully with the chocolate Oreos and holiday theme. If peppermint isn’t your preference, vanilla or almond extract can also be used.
- Red and Green Candy Melts: These vibrant candy melts provide the colorful “wrapping” for your present-shaped treats. They melt smoothly and harden quickly, offering a beautiful, glossy finish. A little vegetable shortening or oil will help achieve the perfect dipping consistency.
- Royal Icing Ingredients (or White Buttercream): For the decorative bows, you’ll need ingredients for royal icing (powdered sugar, egg whites or meringue powder, water) or a simple white buttercream (butter, powdered sugar, milk/cream). We’ll discuss how to prepare a basic buttercream later.
How To Make Christmas Present Oreo Balls: A Step-by-Step Guide
Follow these detailed steps to create your own batch of charming Christmas present Oreo balls:
1. Prepare the Oreo Base
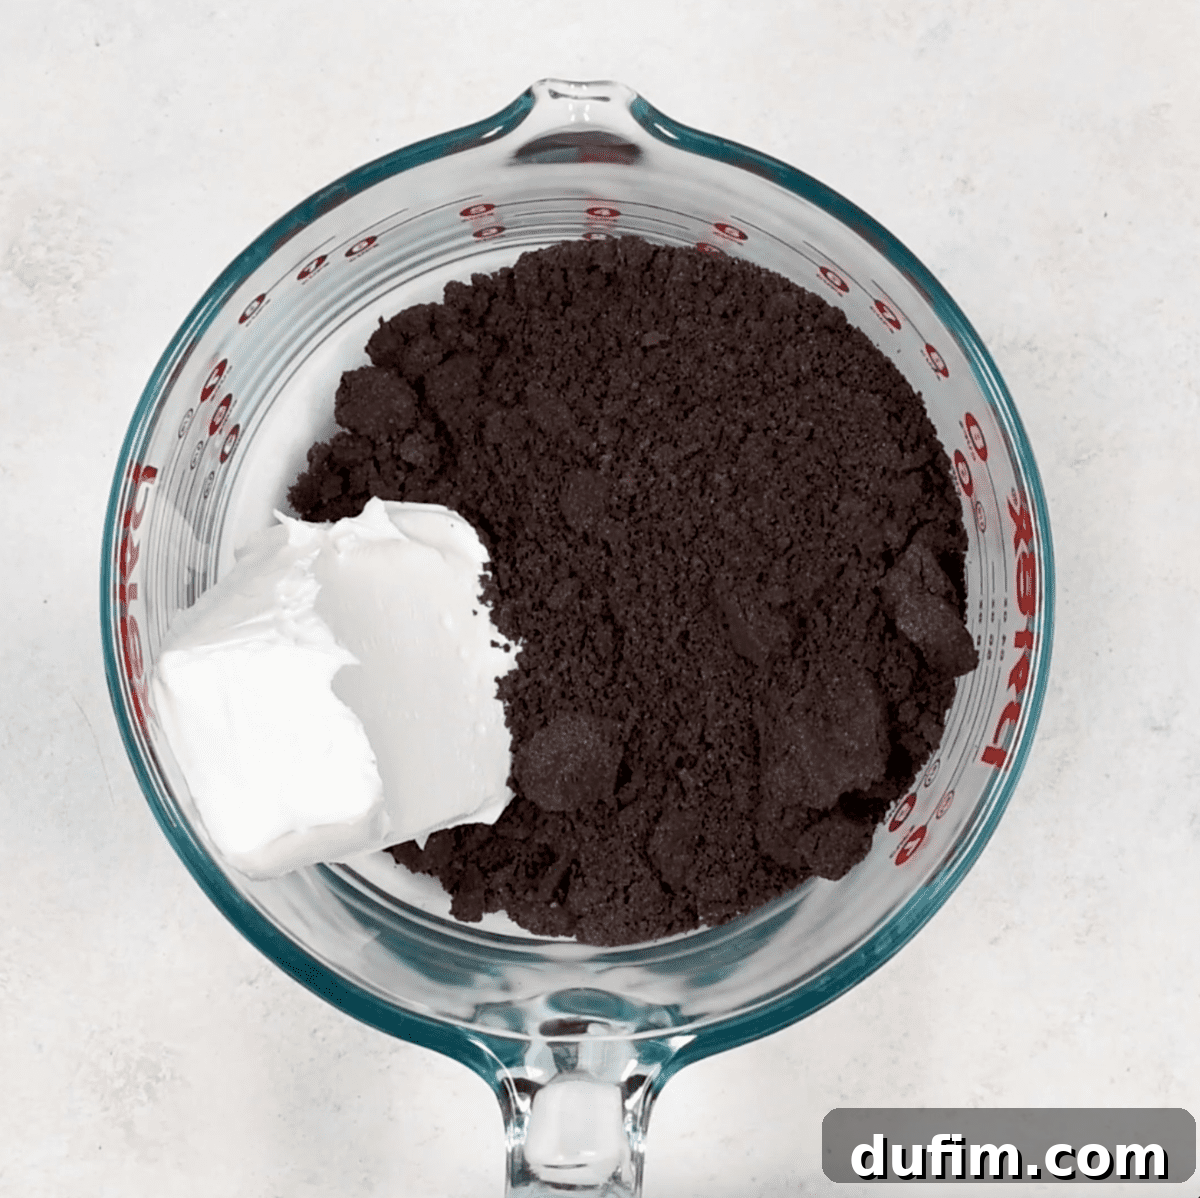
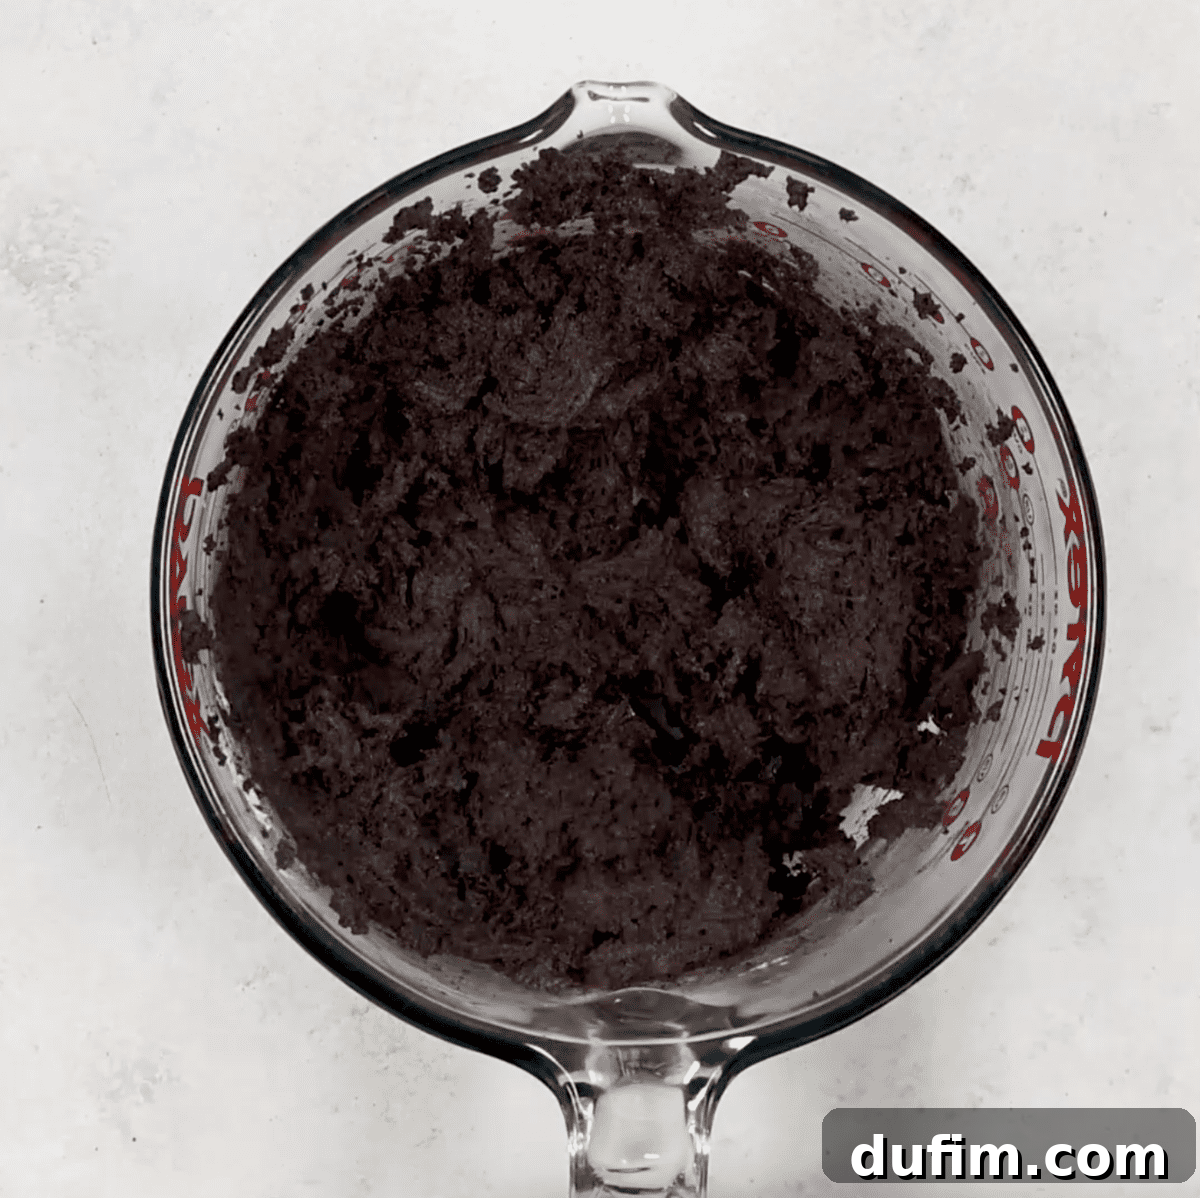
Combine the finely crushed Oreo crumbs with softened cream cheese and any optional extracts (like peppermint). Mix these ingredients thoroughly using an electric mixer or a sturdy spoon until the mixture is thick, well-combined, and resembles a dense dough. The consistency should be firm enough to hold its shape when rolled.
2. Form the Present Shapes
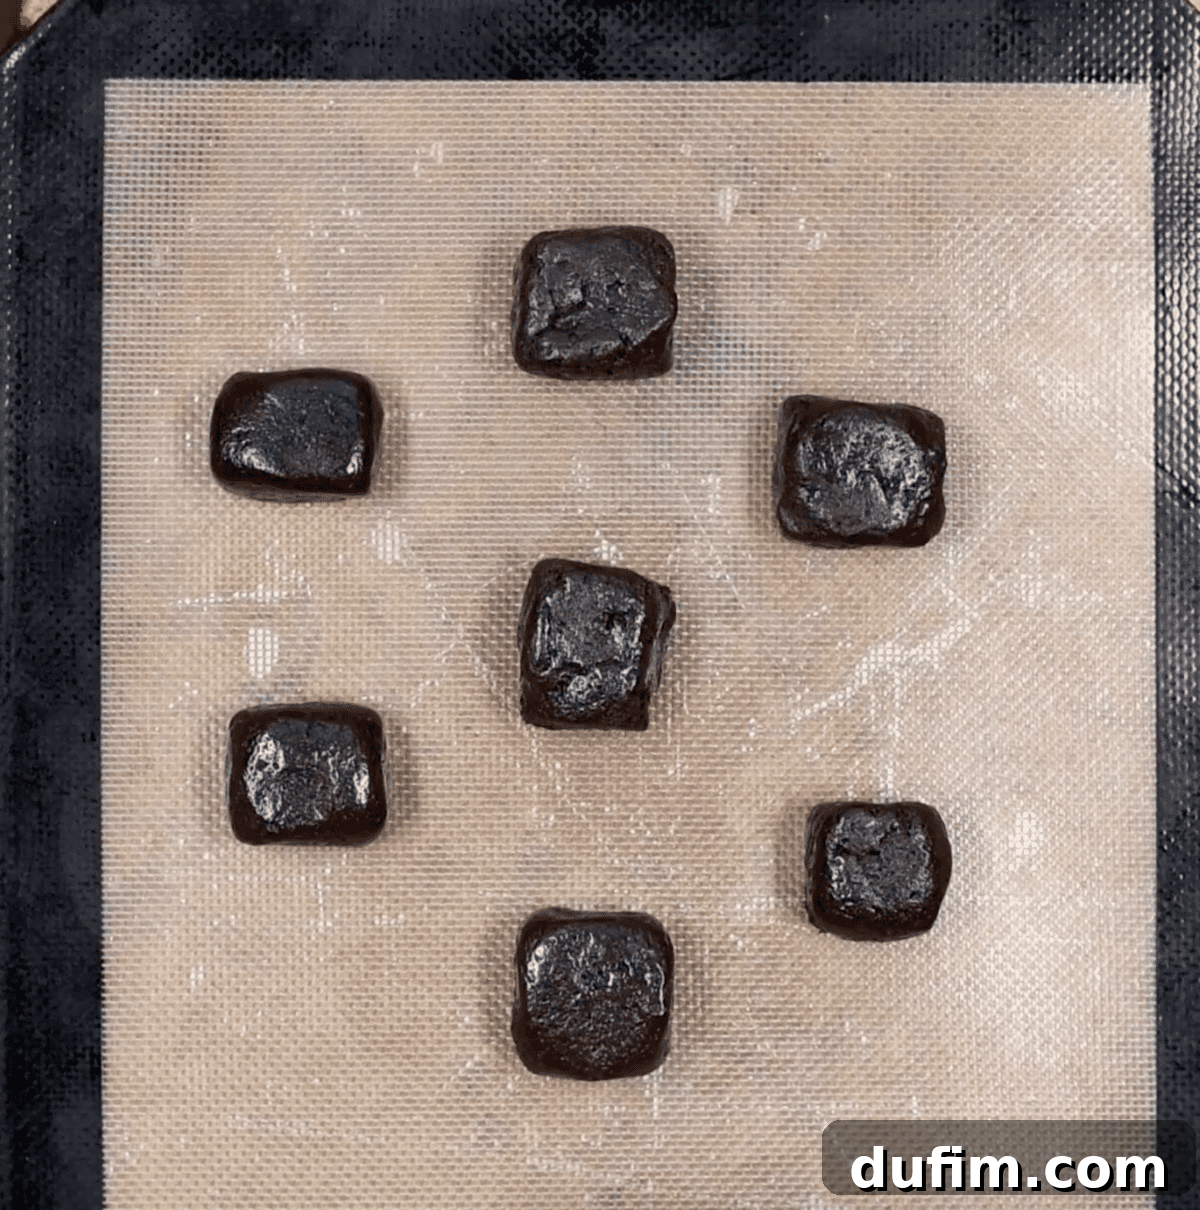
Form a square. Line a baking sheet with a silicone baking mat or parchment paper. Use a small cookie scoop (about 1.5 tablespoons) to portion out uniform amounts of the Oreo mixture. Instead of rolling them into traditional balls, use your hands to gently press and shape each portion into a small, neat square, resembling a gift box. Aim for consistent sizes for a professional look.
3. Chill Thoroughly
Refrigerate the formed Oreo squares on the lined baking sheet for at least 20 minutes. This chilling step is crucial as it helps the treats firm up, making them easier to dip and preventing the chocolate coating from cracking later due to temperature differences. For best results, ensure they are firm but not frozen.
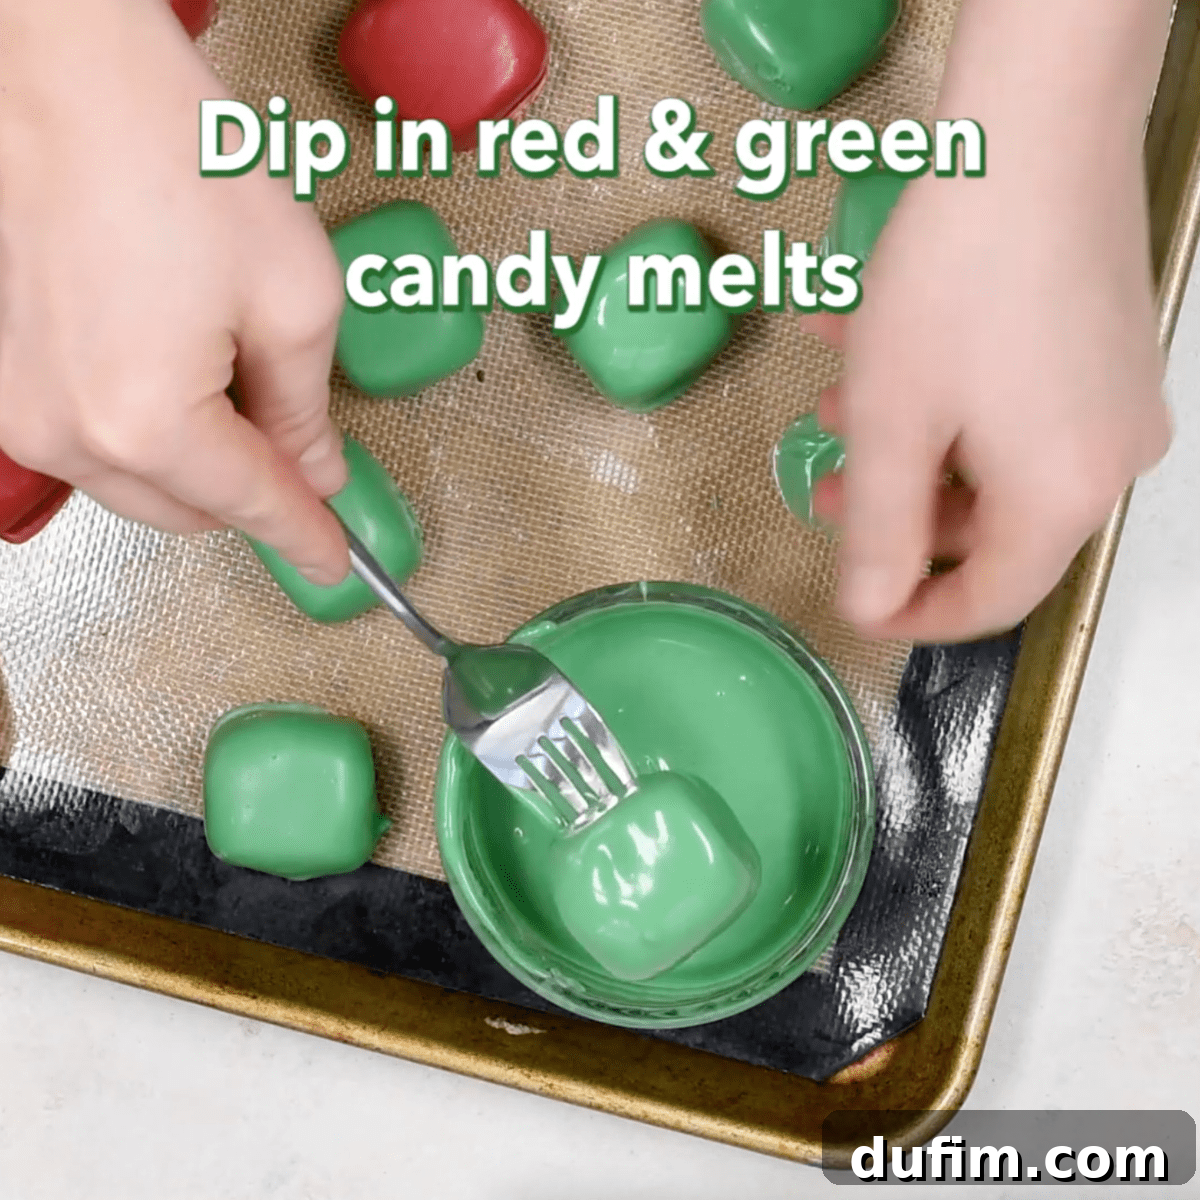
4. Melt and Dip
Melt the candy melts. In a small, deep pot or a microwave-safe bowl, gently melt the red and green candy melts according to package directions. For a smoother, more fluid consistency, stir in about 1-2 teaspoons of vegetable shortening or oil per bag of candy melts. Work with one color at a time to keep them separate.
Carefully dip one chilled Oreo present into the melted candy coating at a time. Use a fork or a dipping tool to submerge the entire square, then gently tap the fork against the side of the pot to remove any excess coating. Ensure the coating is smooth and even, then transfer the dipped treat back onto the silicone-lined baking sheet.
5. Allow to Harden
Harden. Allow the dipped Oreo presents to harden completely at room temperature. This usually takes about 15-30 minutes, depending on your room’s temperature and humidity. Resist the urge to refrigerate them immediately, as this can sometimes cause the coating to crack. Once firm, they are ready for the final decorative touch.
6. Decorate with Bows
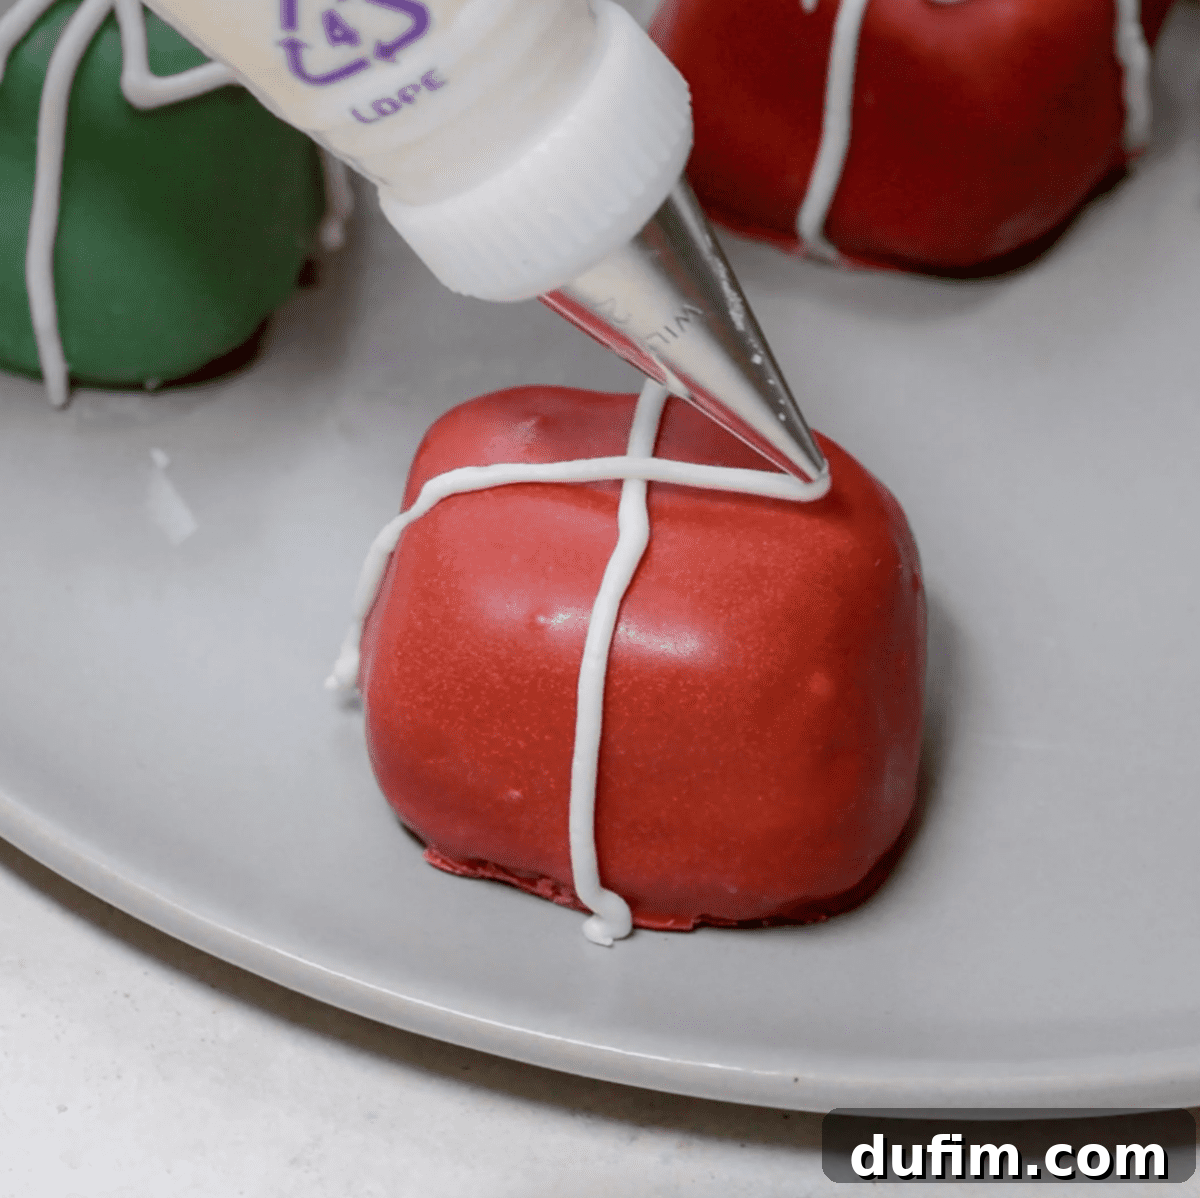
Pipe the bows onto the hardened Oreo presents. Using white buttercream or royal icing in a piping bag fitted with a small round tip, create the classic “ribbon” look by piping one line across the center of the square, then another perpendicular line. Finish by piping a delicate bow on top. You can add extra flair with edible sprinkles or pearl ball candies for a truly dazzling effect. The possibilities for creativity are endless!
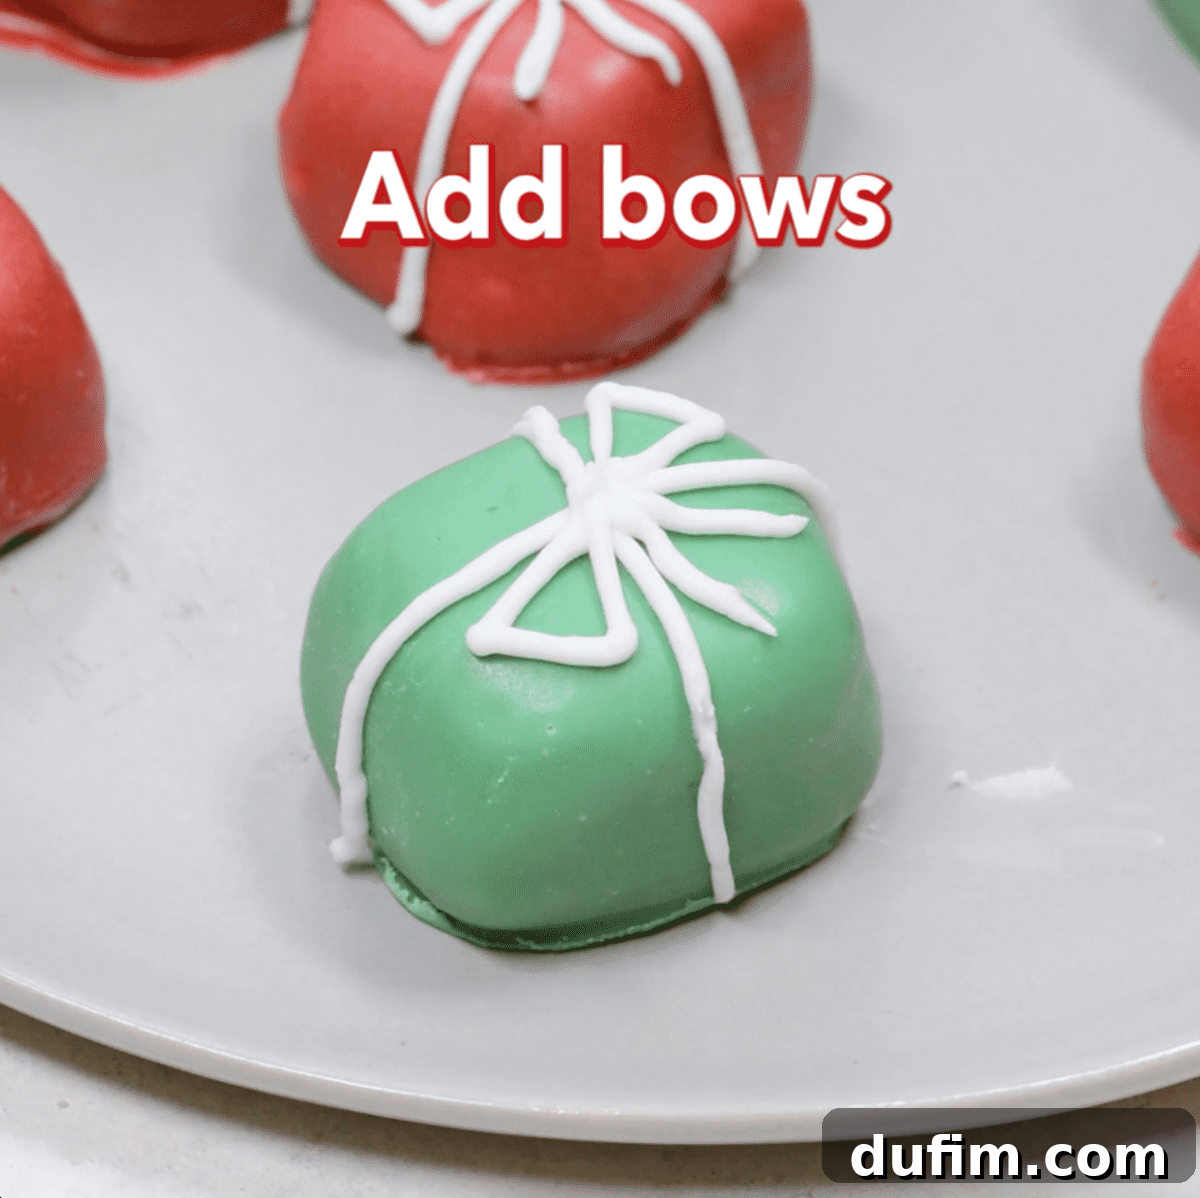
While I chose classic red and green candy melts to maintain a traditional Christmas aesthetic, feel free to unleash your creativity! You could experiment with different colors, add edible glitter to the candy melts for a shimmering effect, or sprinkle sanding sugar on them immediately after dipping for a frosted, sparkling finish. The key is to have fun and make them uniquely yours!
Expert Tips for Flawless Christmas Oreo Balls
Achieving perfectly coated Oreo balls can sometimes be tricky, but with these expert tips, you’ll master the art in no time:
- Optimal Oreo Ball Temperature: It’s crucial that your Oreo balls are not too cold or frozen before dipping. If you dip frozen or very cold Oreo balls, the warm chocolate coating will experience an extreme temperature change, leading to cracking as it sets. The best way to avoid this is to chill the formed Christmas Oreo balls in the fridge for about 20 minutes – just enough to firm them up without making them icy cold.
- Choosing the Right Dipping Container: Use a small, deep bowl or pot for your melted candy melts. This allows for easier, more complete submersion of the Oreo balls with less coating needed.
- Achieving the Perfect Coating Consistency: If your candy melts seem too thick after melting, add a small amount of vegetable shortening (like Crisco) or a neutral oil (like coconut oil) teaspoon by teaspoon, stirring until you reach a smooth, pourable consistency. Be careful not to add too much, or the coating might become too thin.
- Dipping Technique: To dip effectively, place one Oreo ball in the melted chocolate. Use a spoon to drizzle chocolate over the top to ensure full coverage. To remove, gently lift the ball out with a fork. Lightly tap the fork against the edge of the pot to allow any excess chocolate to drip off, preventing puddles on your baking sheet.
- Working in Batches: Especially if you have a large batch, consider keeping half of your Oreo balls in the fridge while you work on dipping the other half. This helps maintain their optimal chilling temperature for dipping.
- Patience is Key: Don’t rush the hardening process. Allowing the chocolate coating to set naturally at room temperature will yield the smoothest and most crack-free finish.
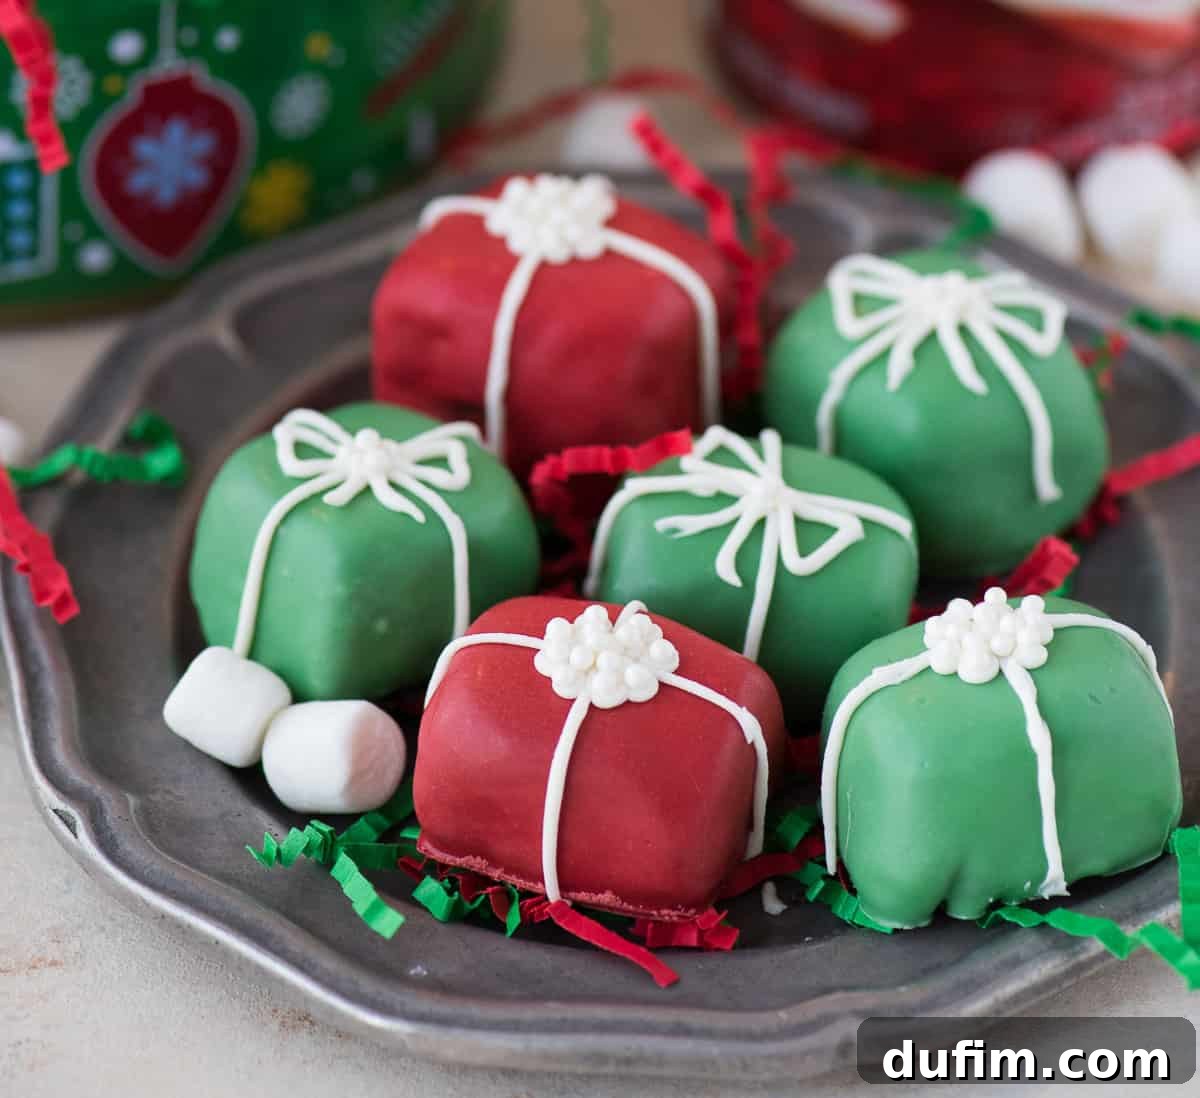
How to Make the Bows and Creative Variations
Now for the truly fun part – the bows! I used white buttercream frosting in a small piping bag fitted with a tiny round piping tip to add these delicate details. In this recipe, I showcase two different bow ideas, allowing for variety and personalization. You can further expand on this by experimenting with different colors of buttercream, various sprinkle designs, or even small edible sugar decorations. For instance, consider using gold or silver edible glitter for a luxurious touch, or tiny star-shaped sprinkles to complement the holiday theme. Get creative and make each “present” a unique work of art!
Beyond the classic present look, these Oreo balls offer endless possibilities for variations:
- Flavor Boost: Besides peppermint, try adding a few drops of almond extract, orange zest, or even a hint of rum extract for adult-friendly versions.
- Different Oreo Flavors: The market offers numerous Oreo flavors throughout the year. Imagine using Golden Oreos with white chocolate coating, or peanut butter Oreos for a nutty twist.
- Coating Alternatives: Instead of candy melts, use tempered white, milk, or dark chocolate. You could also roll them in sprinkles, shredded coconut, cocoa powder, or finely chopped nuts before the coating sets.
- Holiday Shapes: While squares are perfect for presents, you could also use small cookie cutters (stars, trees) on flattened Oreo mixture before chilling for other festive shapes.
How long will Christmas Oreo balls keep?
When stored properly in an airtight container, these delicious Christmas Oreo balls will maintain their freshness and flavor for up to 1 week in the refrigerator. If you need them to last even longer for extended holiday celebrations or advance preparation, read on for tips about freezing them!
Do Oreo balls need to be refrigerated?
Yes, due to the cream cheese content, Oreo balls should ideally be kept in the fridge until you are ready to serve them. Not only does refrigeration help maintain their structure and freshness, but many people also find that Oreo balls taste best when cold. The firm, cool texture enhances their rich flavor.
While they are best chilled, Oreo balls can be left at room temperature for a short period. According to FDA guidelines, perishable foods containing ingredients like cream cheese can safely be left out at room temperature for up to 2 hours. Beyond that, it’s best to return them to the refrigerator to ensure food safety and optimal quality.
If you’re serving them at a party, aim to put them out shortly before guests arrive and store any leftovers promptly.
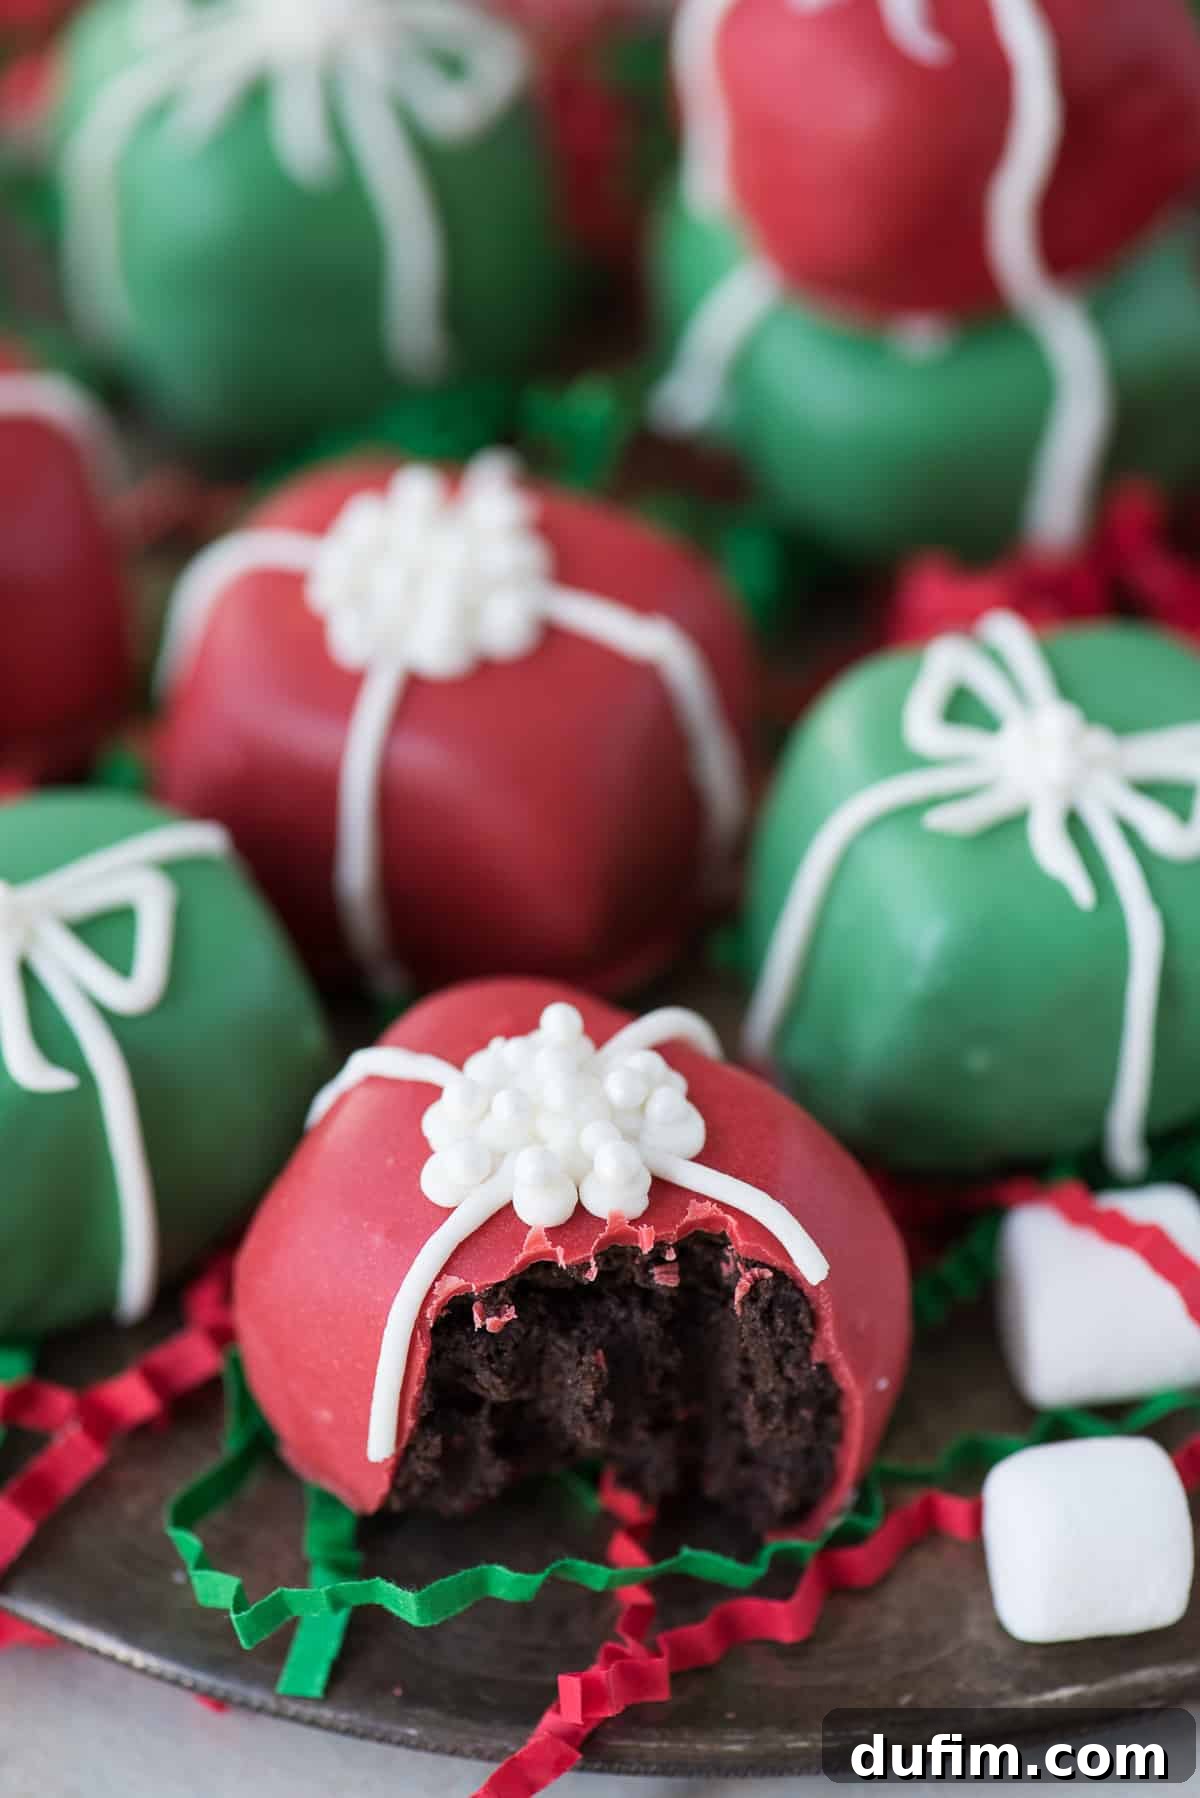
These adorable and delicious Christmas present Oreo balls are the perfect festive addition to your holiday cookie plate, dessert table, or as thoughtful homemade food gifts for friends and family. Their simple preparation and charming appearance make them an instant holiday classic!
More Irresistible Christmas Treats
Looking to expand your holiday baking repertoire? Here are more delightful Christmas treats that are sure to spread cheer:
- Tiger Butter
- Chocolate Cherry Cookies
- Peppermint Bark
- Peanut Butter Balls
Tap stars to rate!
Christmas Oreo Balls (Edible Presents)
Beth
20
1
1
20
-25 oreo balls
Leave a Comment
Print Recipe
Equipment
-
Glass Mixing Bowl
-
KitchenAid 9-Speed Mixer
-
Favorite Spatula
-
Silicone Baking Mat
Ingredients
- 1 package Oreos, about 36 cookies, (15.25 oz)
- 8 oz (226g) cream cheese, softened
- ¼ tsp peppermint extract, optional
- Red and green candy melts plus vegetable shortening or oil
White Buttercream (for bows)
- 3 Tbsp (43g) unsalted butter, room temperature
- ⅓ cup (38g) powdered sugar
- Pearl ball candies, optional, for decoration
Instructions
-
Allow the cream cheese to come to room temperature for easier blending.
-
Place half of the Oreos into a food processor and pulse until they form fine crumbs. Add the remaining Oreos and pulse again until all cookies are uniformly fine crumbs. Transfer the Oreo crumbs to a large mixing bowl.1 package Oreos, about 36 cookies
-
Add the softened cream cheese and the optional peppermint extract to the bowl with the Oreo crumbs. Using an electric mixer, blend the ingredients together until the mixture is thick, smooth, and thoroughly combined.8 oz (226g) cream cheese, 1/4 tsp peppermint extract
-
Line a baking sheet with a silicone baking mat or parchment paper. Use a small cookie scoop to portion out the Oreo mixture, then use your hands to gently shape each portion into a small square, creating the “present” shape.
-
Place the shaped Oreo squares on the lined baking sheet. Refrigerate the Oreo balls for at least 20 minutes to chill and firm up.
-
After 20 minutes, begin to melt the red and green candy melts. Place candy melts (one color at a time) with about 2 teaspoons of vegetable shortening or oil in a small pot over very low heat on the stove, or in a microwave-safe bowl in short intervals. Stir occasionally until completely melted and smooth.Red and green candy melts plus vegetable shortening or oil
-
Remove the chilled Oreo squares from the fridge. To dip, place one Oreo square into the pot with melted chocolate. Use a spoon to fully coat the top if needed. To remove the Oreo ball, use a fork to carefully lift it out of the chocolate. Scrape the bottom of the fork gently against the edge of the pot to remove excess chocolate, then place the dipped Oreo square back on the silicone baking mat. Continue this process until all the Oreo squares are dipped.
-
Allow the dipped Oreo presents to harden completely at room temperature before adding the decorative bows.
-
Meanwhile, prepare the buttercream. In a small mixing bowl, beat the softened unsalted butter until it’s smooth and creamy. Gradually add in the powdered sugar, beating until fully combined and fluffy. Transfer the buttercream to a piping bag fitted with a small round piping tip.3 Tbsp (43g) unsalted butter, 1/3 cup (38g) powdered sugar
-
Pipe the bows onto the hardened Oreo presents. First, pipe one line across the center of the ball, then pipe another line perpendicular to it, creating a cross-shape like a ribbon. Then, pipe the bow on top – you can try various styles like a triangular bow or a fluffy round bow. For an extra festive touch, carefully add small pearl ball candies to the center of each bow.Pearl ball candies
-
Serve and enjoy these delightful edible Christmas presents! Store any leftovers in an airtight container in the refrigerator.
Video
Nutrition Information (per serving)
Calories: 168kcal |
Carbohydrates: 18g |
Protein: 2g |
Fat: 10g |
Saturated Fat: 5g |
Polyunsaturated Fat: 1g |
Monounsaturated Fat: 3g |
Trans Fat: 1g |
Cholesterol: 17mg |
Sodium: 141mg |
Potassium: 65mg |
Fiber: 1g |
Sugar: 12g |
Vitamin A: 205IU |
Calcium: 17mg |
Iron: 2mg
Nutrition Disclosure
All nutritional values are approximate and provided to the reader as a courtesy. Changing ingredients and/or quantities will alter the estimated nutritional calculations.
Like this recipe? We’d love to hear from you!
Rate this recipe and leave a comment below to share your experience and creations.