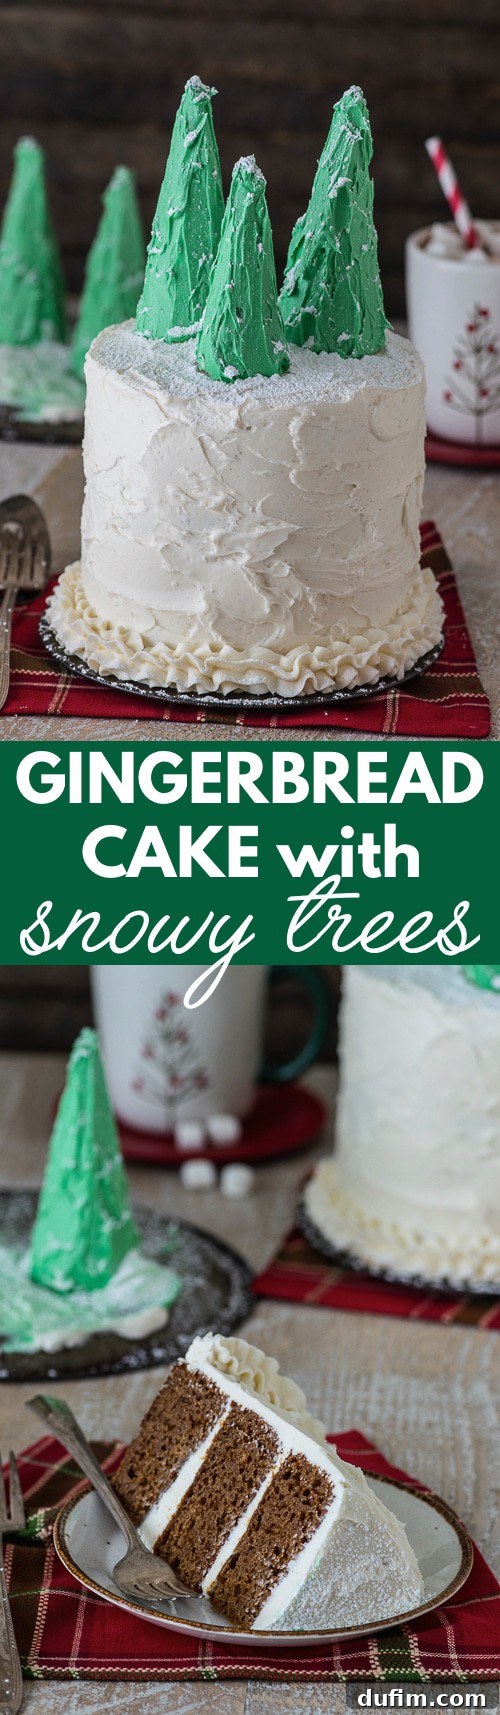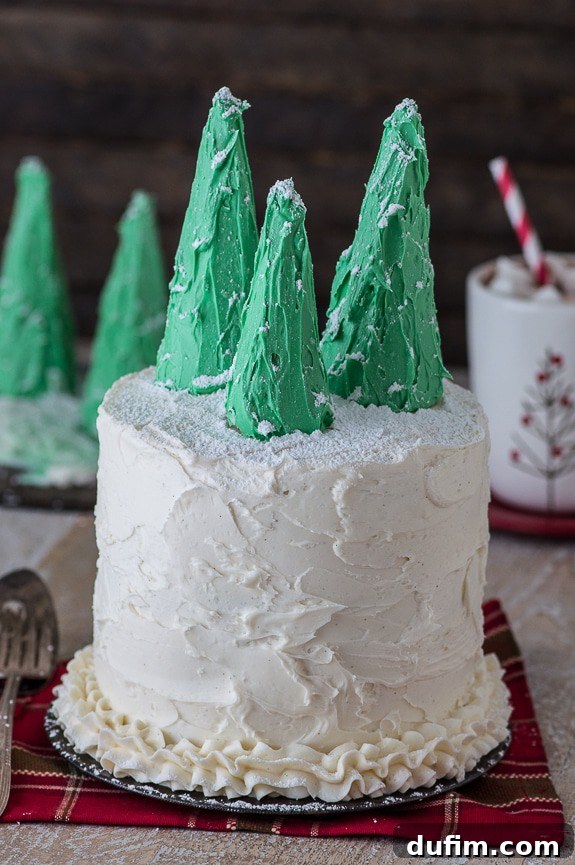
Easy 3-Layer Gingerbread Cake with Vanilla Bean Buttercream & Snowy Christmas Trees
As someone who spent 22 years enduring the frosty grip of MinneSNOWta winters, you might assume I have a fondness for snow. Or perhaps a tolerance for the cold, shovels, heavy winter jackets, and the peculiar pastime of ice fishing. The truth, however, is quite the opposite. None of those things appeal to me in the slightest. In fact, the thought of a warm, snow-free December brings a certain kind of joy!
This year, where I reside, we’ve been blessed with an incredibly mild winter—no snow yet! On a recent Saturday, temperatures soared to a delightful 60 degrees, allowing me to enjoy a refreshing run outdoors in December. It makes me wonder if this is what life in Florida or California feels like; a truly dreamy prospect. If a move ever materialized, I’d happily trade my North Face jacket for a shopping spree in the baking aisle!
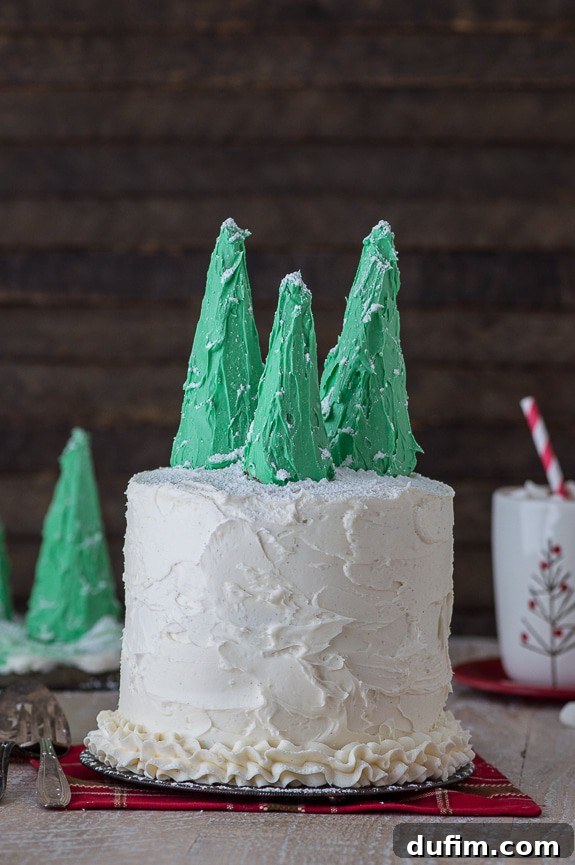
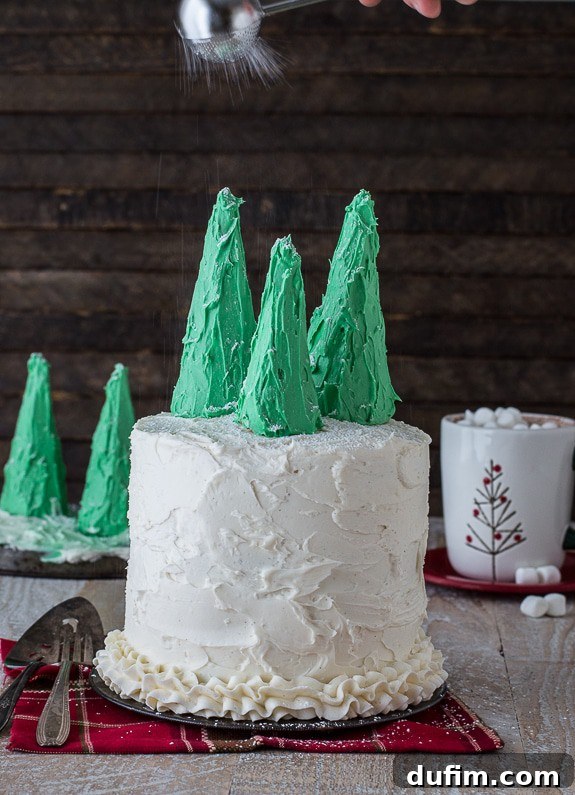
However, there is one instance where I absolutely adore a touch of “snow”: delicately dusted atop a beautiful cake. It transforms a simple dessert into a winter wonderland masterpiece, evoking all the magic of the holiday season without any of the actual chill.
Why This Gingerbread Cake Will Be Your Holiday Favorite
I must confess, I’m not sure I’ll ever be able to bake a “normal” cake again. My creative process for recipes always starts with a flavor, but then my mind inevitably leaps to elaborate cake toppers. Whether it’s green Christmas trees, elegant chocolate shards, vibrant confectionery decorations, or perfectly toasted marshmallows, the topping is always a crucial part of the vision. If you’re considering a cake topping intervention, I’ll understand, but deep down, I hope you enjoy these playful additions as much as I do!
The Irresistible Flavor of Homemade Gingerbread
Embracing the festive spirit, the heart of this creation is a truly homemade gingerbread cake. It’s a magnificent three-layer spectacle, promising a delightful sensory experience with every forkful. Gingerbread, with its warming spices and rich molasses undertones, embodies the very essence of the holidays. Each bite offers a comforting blend of cinnamon, ginger, and other festive flavors that have captivated my cravings ever since perfecting this recipe. Making gingerbread from scratch ensures a depth of flavor and a moist, tender crumb that store-bought mixes simply cannot replicate. It’s an investment of time that pays off in unparalleled taste and aroma, filling your home with the inviting scent of Christmas.
Lush Vanilla Bean Buttercream
To complement the bold flavors of the gingerbread, I’ve paired it with a classic vanilla bean buttercream. This frosting is exquisitely simple, yet incredibly elegant. Its smooth, creamy texture and the subtle, aromatic notes of real vanilla bean provide the perfect balance, ensuring it enhances rather than overpowers the cake. The visible specks of vanilla bean add a touch of sophistication and remind you of the quality ingredients used. This buttercream is light, fluffy, and just sweet enough, making it the ideal canvas for layering between the spiced cake layers and for decorating the exterior.
Whimsical Snowy Christmas Tree Toppers
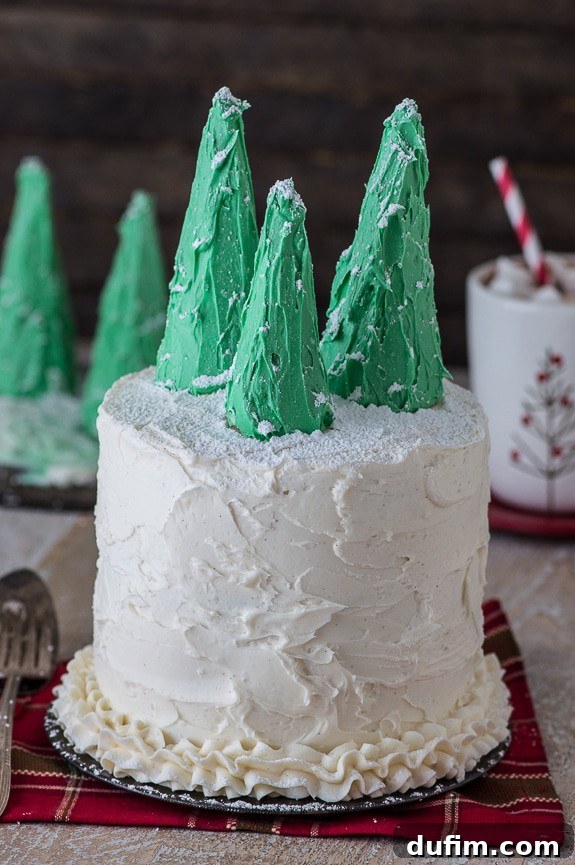
The enchanting Christmas tree toppers are incredibly easy to create, adding a charming, snowy touch to your festive dessert. These aren’t just any trees; they’re made from ordinary sugar ice cream cones, cleverly transformed into miniature frosted evergreens. I used two regular-sized cones and then broke a third to create a smaller tree, adding variety to the winter scene. Each cone is generously coated in a vibrant green buttercream and then delicately dusted with powdered sugar, mimicking freshly fallen snow. It’s a playful and straightforward decoration that elevates the cake from delicious to absolutely magical, making it a true centerpiece for any holiday gathering.
The Art of Crafting the Perfect Gingerbread Layers
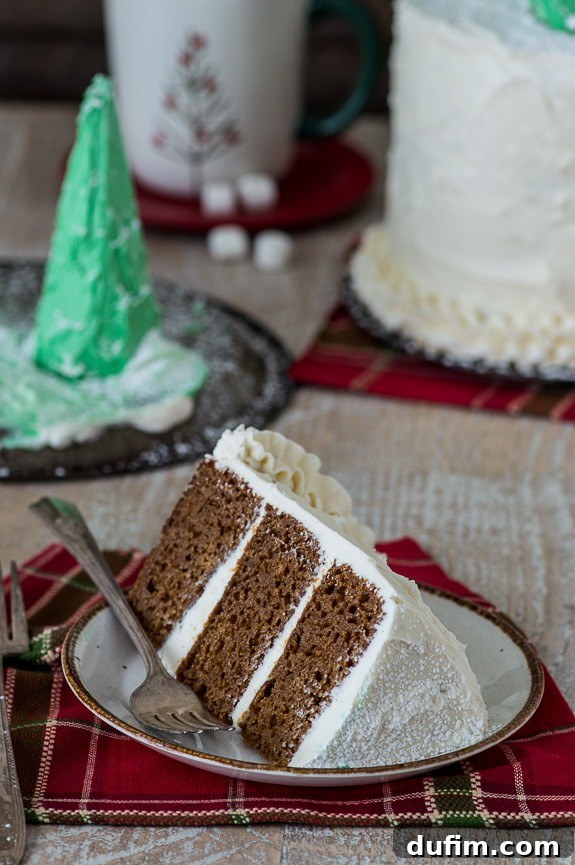
Creating a truly exceptional gingerbread cake begins with understanding the role of each ingredient and mastering a few essential techniques. This recipe yields three perfectly moist and flavorful layers, forming the foundation of our festive treat.
Key Ingredients for Success
- **All-Purpose Flour:** Provides the structure for the cake.
- **Warm Spices (Cinnamon, Ginger):** These are the stars, delivering the characteristic gingerbread flavor. Use fresh, high-quality spices for the best aroma and taste.
- **Baking Powder & Baking Soda:** The leavening agents that ensure your cake is light and fluffy.
- **Salt:** Balances the sweetness and enhances the flavors of the spices.
- **Butter (Room Temperature):** Contributes richness and tenderness. Room temperature butter creams beautifully with sugar.
- **Brown Sugar:** Adds moisture and a deeper, caramelized sweetness compared to white sugar.
- **Large Eggs:** Bind the ingredients together and add moisture. Again, ensure they are at room temperature.
- **Molasses:** The quintessential ingredient for gingerbread, providing its signature dark color, distinct flavor, and incredible moisture.
- **Milk:** Adds necessary liquid to the batter, contributing to its tender texture.
Tips for a Moist and Flavorful Cake
Achieving a perfectly baked gingerbread cake requires attention to detail. Firstly, ensure all your cold ingredients, such as butter and eggs, are at room temperature. This allows them to emulsify properly with other ingredients, resulting in a smoother batter and a more uniform bake. When combining dry and wet ingredients, mix gently. Overmixing can develop the gluten in the flour too much, leading to a tough cake. Instead, fold the flour mixture into the wet ingredients just until no streaks of dry flour remain. This technique keeps your cake wonderfully tender and moist.
For even baking and perfectly flat cake layers, I highly recommend using bake-even strips. These fabric strips, dampened with water and wrapped around your cake pans, insulate the sides of the pan. This slows down the baking around the edges, allowing the cake to rise more evenly in the center and preventing doming. You can easily make your own by cutting a towel or old t-shirt to fit your pans, thoroughly wetting them (squeezing out excess water so they don’t drip), and securing them with a safety pin. This small step makes a significant difference in the final presentation of your layered cake.
After baking, allow the cakes to cool in their pans for about 10 minutes before carefully inverting them onto a wire rack. This initial cooling helps the cakes set without breaking. Once on the rack, let them cool completely. Only then should you remove the parchment paper from the bottom and level the tops if necessary, using a cake leveler or a serrated knife. If you’re not assembling the cake immediately, wrap the cooled layers tightly in plastic wrap and refrigerate them. They will stay fresh and moist for up to five days, making this a great make-ahead option for busy holiday schedules.
Whipping Up Silky Vanilla Bean Buttercream
A cake is only as good as its frosting, and this vanilla bean buttercream is truly exceptional. It’s light, fluffy, and bursting with fragrant vanilla, providing the perfect counterpoint to the spiced gingerbread.
The Secret to Smooth Frosting
The key to a light and fluffy buttercream lies in starting with room temperature butter and vegetable shortening. These fats need to be soft enough to cream together smoothly, which creates air pockets that give the frosting its desirable airy texture. Beat them together with an electric mixer for at least two minutes until they are truly fluffy and pale. When adding the powdered sugar, do so gradually, about 1-2 cups at a time. It’s always best to start mixing by hand before switching to the electric mixer; this prevents a cloud of powdered sugar from coating your kitchen! Continue beating until the frosting reaches your desired consistency and sweetness. You might not need all the powdered sugar, or you might need a little extra, depending on humidity and personal preference.
Vanilla Bean Paste vs. Extract
While vanilla extract is perfectly fine, vanilla bean paste is highly recommended for this recipe. Vanilla bean paste not only provides a more intense and complex vanilla flavor, but it also contains tiny, visible specks of vanilla bean. These specks add a gourmet touch and a beautiful visual appeal, signaling to anyone who sees (and tastes!) the cake that real vanilla beans were used. If you don’t have paste, a high-quality vanilla extract or the seeds scraped from a vanilla bean pod can be used as a substitute, but the paste truly elevates the experience.
Designing Your Snowy Christmas Tree Toppers
These festive tree toppers are not only adorable but also surprisingly simple to construct, adding a charming, edible decoration to your gingerbread masterpiece.
Simple Yet Stunning
The process begins with creating a dedicated green buttercream. Just like the vanilla buttercream, combine room temperature butter and vegetable shortening until light and fluffy. Add green food coloring gradually until you achieve your desired shade of festive green. Then, slowly incorporate powdered sugar, mixing until the frosting is smooth and pipeable. The beauty of these trees lies in their simplicity. You can use a small offset spatula or a butter knife to spread the green frosting onto the ice cream cones, creating a textured, tree-like effect.
Customization Ideas
To add even more flair to your snowy forest, consider these customization ideas:
- **Sprinkles:** Before the frosting sets, sprinkle edible glitter, small star sprinkles, or colorful nonpareils onto the trees to represent ornaments.
- **Varying Sizes:** As suggested in the recipe, breaking a cone to create a smaller tree adds depth and visual interest to your cake’s landscape. You could even use miniature cones for a truly diverse forest.
- **Edible Dusts:** Beyond powdered sugar, consider using iridescent edible dusts for an extra sparkly “snow” effect.
Assembling Your Holiday Masterpiece
Putting together a layered cake can seem daunting, but with a few simple steps, you’ll achieve a professional-looking finish that will impress all your holiday guests.
Layering with Precision
Begin by securing your first cake layer onto a 6-inch round cardboard cake circle with a small dollop of buttercream. This prevents the cake from sliding while you work. Apply a generous, even layer of vanilla bean buttercream over the first cake layer using an offset spatula. Consistency is key here; aim for roughly 1/3 to 1/2 cup of frosting between each layer to ensure a balanced flavor and stable structure. Repeat this process with the remaining cake layers, stacking them carefully to keep the cake level.
The Importance of the Crumb Coat
Once all layers are stacked and filled, it’s time for the crucial crumb coat. This thin layer of frosting acts as a seal, trapping any loose cake crumbs and preventing them from showing through your final, decorative frosting layer. Apply a thin, even layer of buttercream around the sides and top of the cake. Don’t worry about perfection at this stage; its purpose is purely functional. After applying the crumb coat, place the entire cake in the freezer or refrigerator for at least 20 minutes. This allows the crumb coat to firm up, creating a stable base for your final frosting layer.
Final Frosting & Decoration
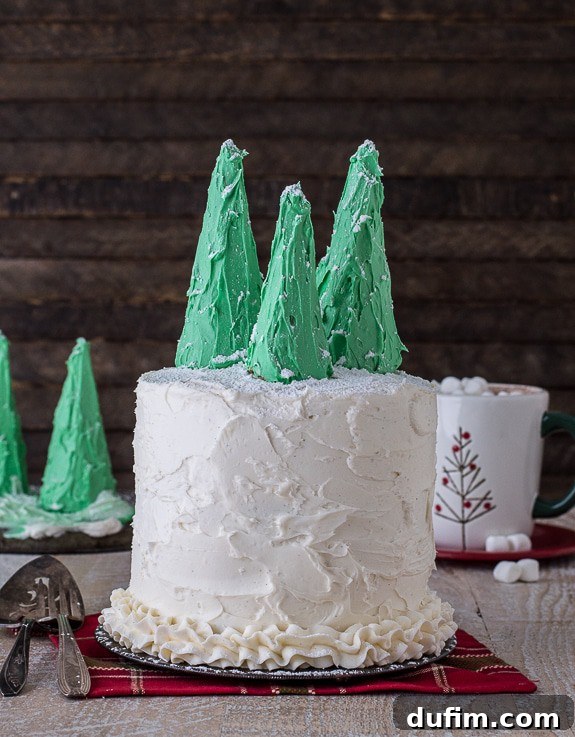
With the crumb coat chilled and firm, it’s time for the final layer of frosting. Apply a thicker, more even layer of buttercream to the top of the cake, spreading it out smoothly. Then, work your way around the sides, covering the entire cake. For a charming, rustic look, use a small offset metal spatula to create gentle textures and swirls in the frosting. Transfer your beautifully frosted cake to your desired serving plate. To add an extra touch of elegance, use a piping bag fitted with a star tip (like Wilton 1M) to pipe a decorative border around the base of the cake.
Finally, carefully arrange your homemade snowy Christmas trees on top of the cake. Gently dust them with extra powdered sugar to enhance the illusion of freshly fallen snow, bringing your festive winter wonderland to life. Now, all that’s left is to slice into this magnificent creation and serve it to eager guests!
Enjoy this recipe!
Gingerbread Cake Topped with Snowy Trees
Beth
20 minutes
30 minutes
10 minutes
1 hour
16 servings
Print Recipe
Ingredients
Gingerbread Cake
- 2 ½ cups all purpose flour
- 2 tsp cinnamon
- 1 ½ tsp ginger
- ½ tsp salt
- 1 tsp baking powder
- 1 tsp baking soda
- 1 stick butter, room temperature (1/2 cup)
- ¾ cup brown sugar
- 2 large eggs
- ¾ cup molasses
- 1 cup milk
Vanilla Bean Buttercream
- 3 sticks butter, room temperature (1 1/2 cups)
- ½ cup vegetable shortening
- 1 tsp vanilla bean paste, or extract or vanilla bean pods
- 3-4 cups powdered sugar
Christmas Trees
- 3 regular sugar ice cream cones
- 1 stick butter, room temperature (1/2 cup)
- ¼ cup vegetable shortening
- green food coloring
- 2 cups powdered sugar, plus extra for dusting
Instructions
Gingerbread Cake
-
Preheat the oven to 350º F (175°C).
-
Prepare three 6-inch round cake pans or springform pans. Lightly grease the bottoms and sides with butter, then line the bottoms with a round piece of parchment paper. For perfectly level cakes, wrap a dampened bake-even strip around the exterior of each pan. You can make your own by cutting a towel or shirt to size, thoroughly wetting it, squeezing out excess water (it should be damp, not dripping), and securing it with a safety pin.
-
In a small mixing bowl, whisk together the flour, cinnamon, ginger, salt, baking powder, and baking soda. Set aside.
-
In a larger mixing bowl, cream together the room temperature butter and brown sugar using an electric mixer until light and fluffy, about 2-3 minutes. Add the eggs one at a time, beating lightly after each addition until just combined.
-
Stir in the molasses by hand with a spatula until fully incorporated.
-
Add half of the dry flour mixture to the wet ingredients. Gently fold it in with a spatula until no dry flour streaks remain. Avoid overmixing.
-
Pour in the milk and stir gently. Then, add the remaining half of the flour mixture, folding it in and scraping the sides and bottom of the bowl to ensure everything is well combined without overmixing.
-
Evenly divide the batter among the three prepared pans, approximately 1 ½ cups in each.
-
Bake for 27-30 minutes, or until a toothpick inserted into the center of a cake comes out clean.
-
Once baked, let the cakes cool in their pans on a wire rack for 10 minutes. After 10 minutes, carefully remove the cakes from the pans (if using springform pans, remove the sides and bottom). Allow them to cool completely on the cooling rack before proceeding. Remove the parchment paper rounds from the bottom of the cooled cakes. If needed, level the tops of your cakes using a cake leveler or a sharp serrated knife.
-
If assembling the cake later, wrap each cooled cake layer tightly in plastic wrap to prevent them from drying out. Store them in the refrigerator for up to 5 days.
Vanilla Bean Buttercream
-
In a large mixing bowl, combine the room temperature butter and vegetable shortening. Beat with an electric mixer on medium-high speed for about 2 minutes, until light and fluffy.
-
Add the vanilla bean paste (or extract/vanilla bean seeds) and beat until well combined.
-
Gradually add the powdered sugar, about 1-2 cups at a time. Begin by mixing by hand with a spatula to prevent sugar dust, then switch to the electric mixer. Continue adding and mixing until the frosting reaches your desired consistency and sweetness.
Christmas Trees
-
In a separate mixing bowl, combine the room temperature butter and vegetable shortening. Beat with an electric mixer until fluffy, about 2 minutes.
-
Add the green food coloring and beat until the color is evenly distributed.
-
Begin to add the powdered sugar, about 1 cup at a time, mixing by hand first, then with the electric mixer. Continue adding powdered sugar until the frosting is smooth and pipeable. Add more green food coloring if you desire a darker shade.
-
Carefully spread the green frosting onto the ice cream cones. For variety, use two regular-sized cones and break the bottom of a third cone to create a smaller tree.
How to Assemble the Cake
-
Place a small dollop of vanilla bean buttercream on a 6-inch round cardboard cake circle to secure the cake. Position your first cake layer on top of the cardboard. Spread an even layer of buttercream (about 1/3 to 1/2 cup) on top of this layer using an offset spatula.
-
Repeat this process for each subsequent cake layer, stacking them carefully. Once all layers are stacked and filled, spread a thin layer of frosting (the same amount as between layers) on the very top of the cake.
-
Now, apply a crumb coat. Using your offset spatula, spread a thin layer of buttercream around the sides and top of the entire cake. This traps any loose crumbs, ensuring a smooth final finish. It’s often easiest to start with a little more frosting on the cake and then remove the excess as you spread.
-
Place the cake in the freezer or refrigerator for 20 minutes to allow the crumb coat to firm up. This step is crucial for a clean, professional finish.
-
Remove the cake from the fridge/freezer and apply the second, final layer of frosting. Spread an even layer of buttercream on the top of the cake, then around the sides. Use a small offset metal spatula to create a lovely textured look on the frosting, if desired.
-
Carefully transfer the finished cake to your desired serving plate. Using a piping bag fitted with a decorative tip (such as Wilton 1M), pipe a beautiful border of buttercream around the bottom edge of the cake.
-
Finally, arrange your frosted ice cream cone Christmas trees on top of the cake. Lightly dust the trees and the top of the cake with extra powdered sugar to create a magical snowy effect.
-
Slice and serve your stunning holiday gingerbread cake!
Nutrition
Calories:
664kcal
|
Carbohydrates:
76g
|
Protein:
4g
|
Fat:
40g
|
Saturated Fat:
21g
|
Polyunsaturated Fat:
4g
|
Monounsaturated Fat:
12g
|
Trans Fat:
2g
|
Cholesterol:
101mg
|
Sodium:
447mg
|
Potassium:
307mg
|
Fiber:
1g
|
Sugar:
60g
|
Vitamin A:
942IU
|
Vitamin C:
1mg
|
Calcium:
91mg
|
Iron:
2mg
Nutrition Disclosure
All nutritional values are approximate and provided to the reader as a courtesy. Changing ingredients and/or quantities will alter the estimated nutritional calculations.
We hope you enjoy baking and sharing this delightful 3-layer gingerbread cake. It’s truly a labor of love that brings warmth and cheer to any holiday table. Share your creations with us in the comments below!