
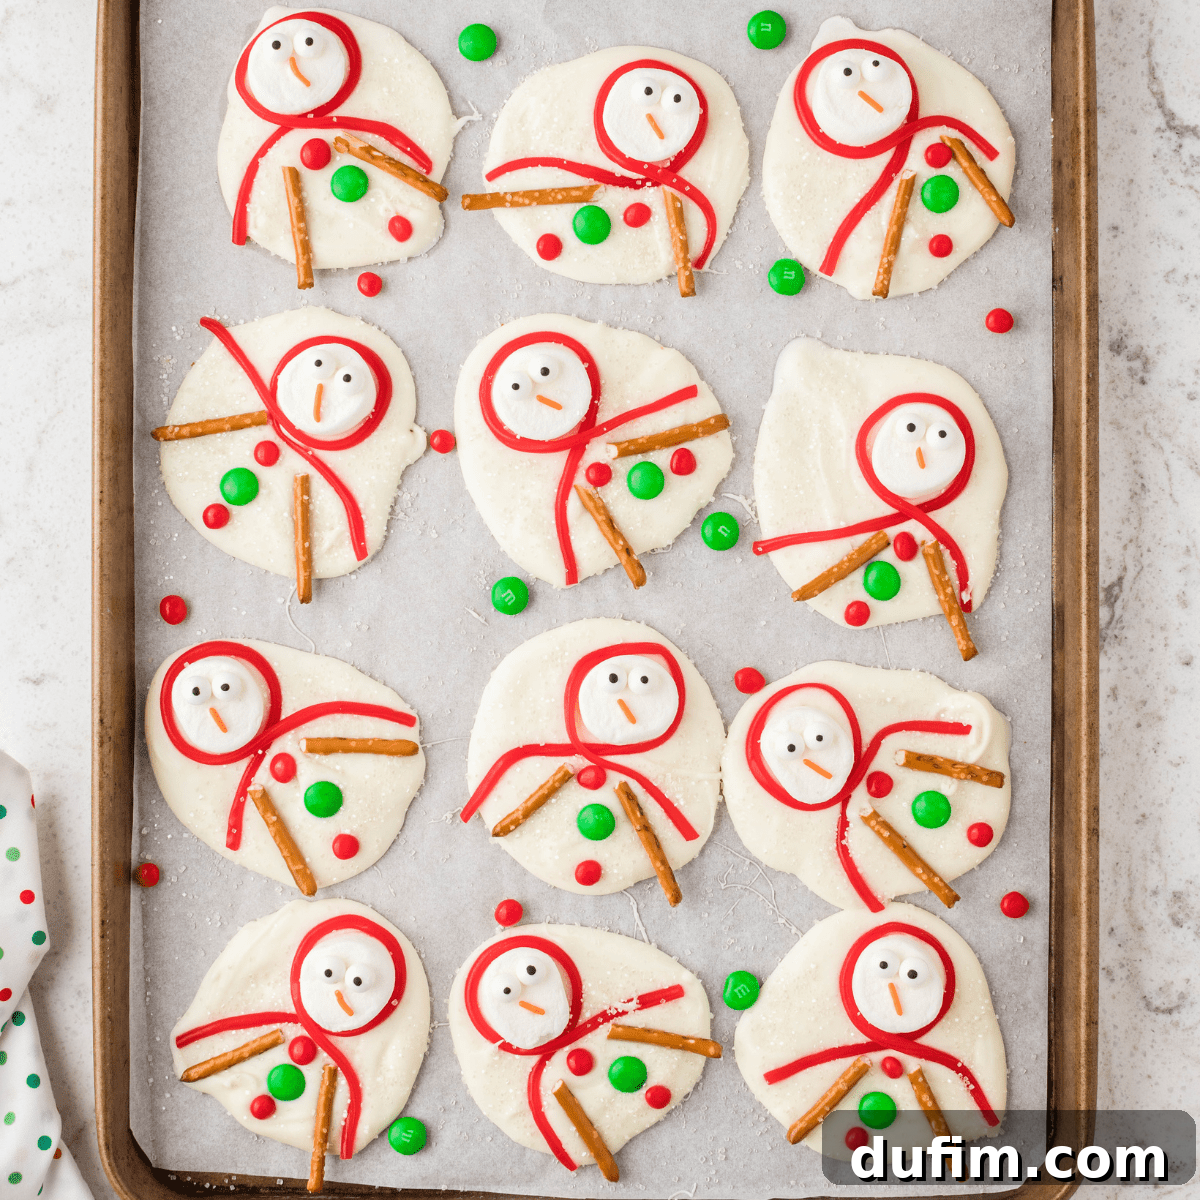
Embrace the magic of winter and the festive spirit of Christmas with an unbelievably simple yet charming treat: Melted Snowman Bark. This delightful, easy-to-make recipe is perfect for getting the whole family involved in holiday baking, creating lasting memories and delicious edible crafts.
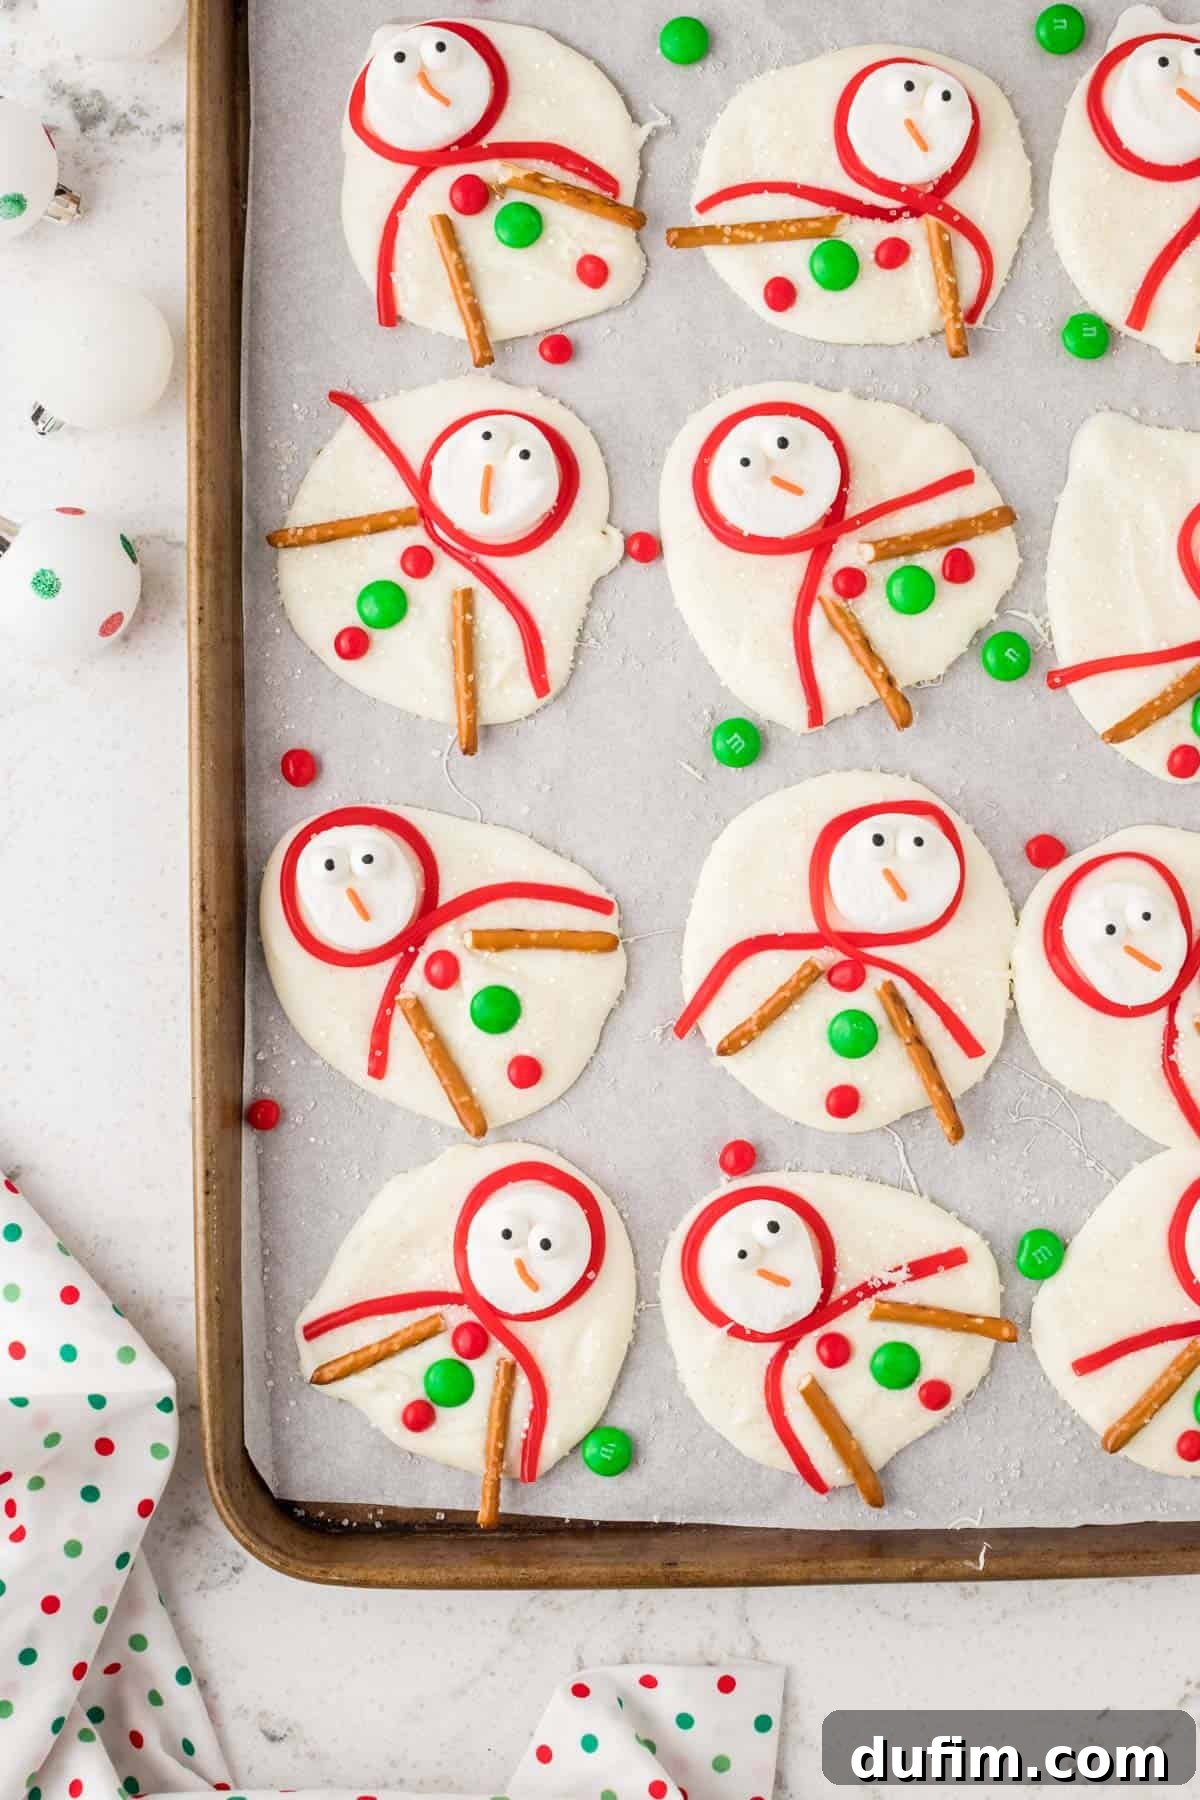
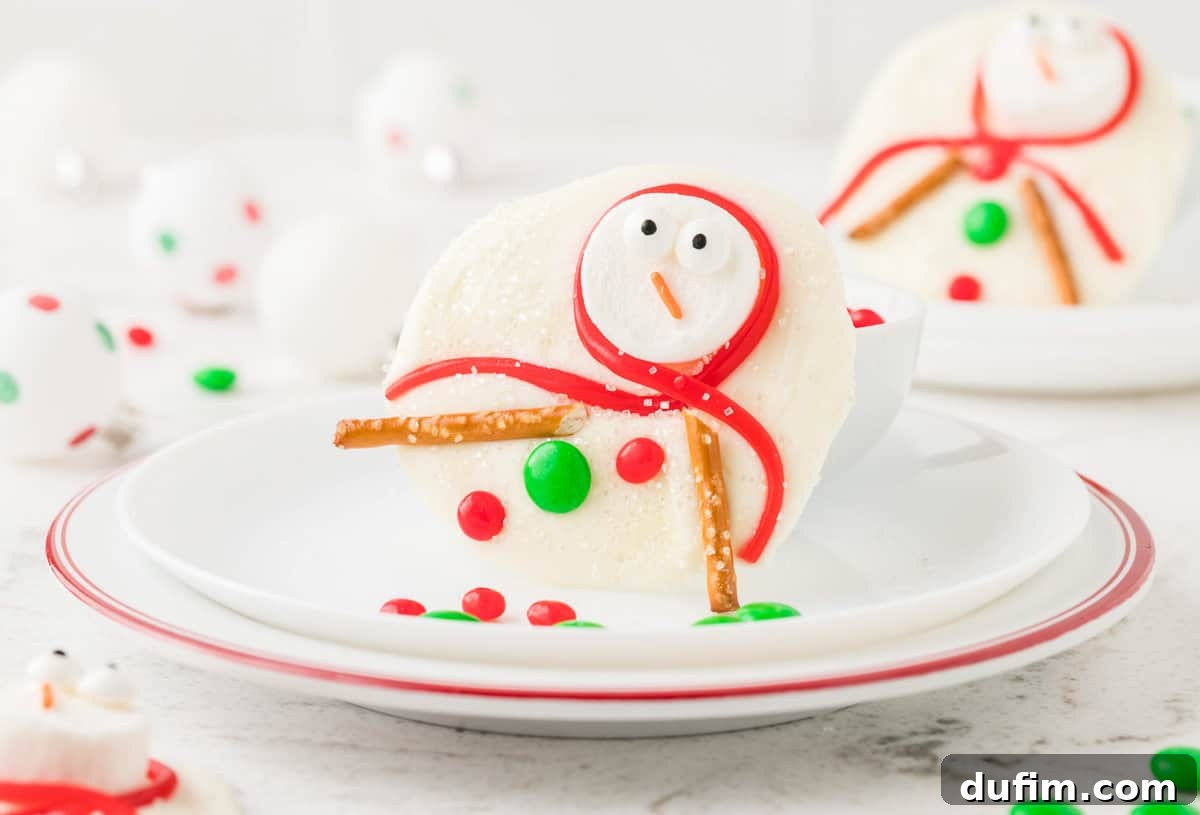
Melted snowman bark is more than just a sweet treat; it’s a heartwarming holiday activity that transforms simple ingredients into an enchanting edible craft. Imagine the joy on children’s faces as they assemble their quirky, adorable snowmen, complete with candy eyes, carrot noses, and pretzel stick arms. This recipe is designed to be accessible for all ages, making it a fantastic way to spend quality time together during the festive season. And let’s be honest, a few ingredients might mysteriously disappear into eager little mouths along the way – part of the fun!
Beyond its undeniable charm, this white chocolate bark is incredibly versatile and makes a wonderful addition to any Christmas celebration. Whether you’re filling festive cookie tins for friends and neighbors, setting up a holiday dessert buffet, or simply looking for a quick and satisfying sweet snack, melted snowman bark fits the bill perfectly. It pairs beautifully with other homemade Christmas candies. Why not extend the holiday fun by creating a batch of white chocolate peppermint bark, some adorable Christmas tree brownies, or rich tiger butter alongside your snowmen?
Why Melted Snowman Bark is a Holiday Favorite
This festive confection consistently earns rave reviews and a special place in our holiday traditions for several compelling reasons:
- Effortlessly Simple Ingredients: You won’t need to hunt for obscure items. This recipe uses readily available candies and chocolate chips, making your shopping trip a breeze. Simplicity means less stress and more enjoyment!
- A Dreamy No-Bake Recipe: During the busy holiday season, oven space is often at a premium. This incredible no-bake bark eliminates the need for baking, freeing up your oven for other festive delights like roasts or cookies. It’s a perfect option when you need a quick dessert without the fuss.
- Unleash Your Creativity with Customization: While our suggested decorations create classic snowmen, this recipe is a blank canvas for your imagination. Feel free to use different colors of candy, various sprinkles, or even small chocolate candies for buttons. Each snowman can be a unique character, reflecting individual personalities.
- An Adorable Addition to Christmas Cookie Tins: Elevate your holiday gift baskets and cookie exchanges with these charming snowmen. Their whimsical appearance makes them an instant hit and a memorable treat that stands out amongst traditional cookies. They add a touch of playful elegance to any festive assortment.
- Perfect for All Skill Levels: From seasoned bakers to kitchen novices, everyone can successfully create this bark. The steps are straightforward, making it an ideal project for young children eager to help in the kitchen.
- Quick Setting Time: Unlike some elaborate desserts that require hours of chilling, this bark sets relatively quickly, meaning you can enjoy your delicious creations sooner!
Essential Ingredients for Your Snowman Bark
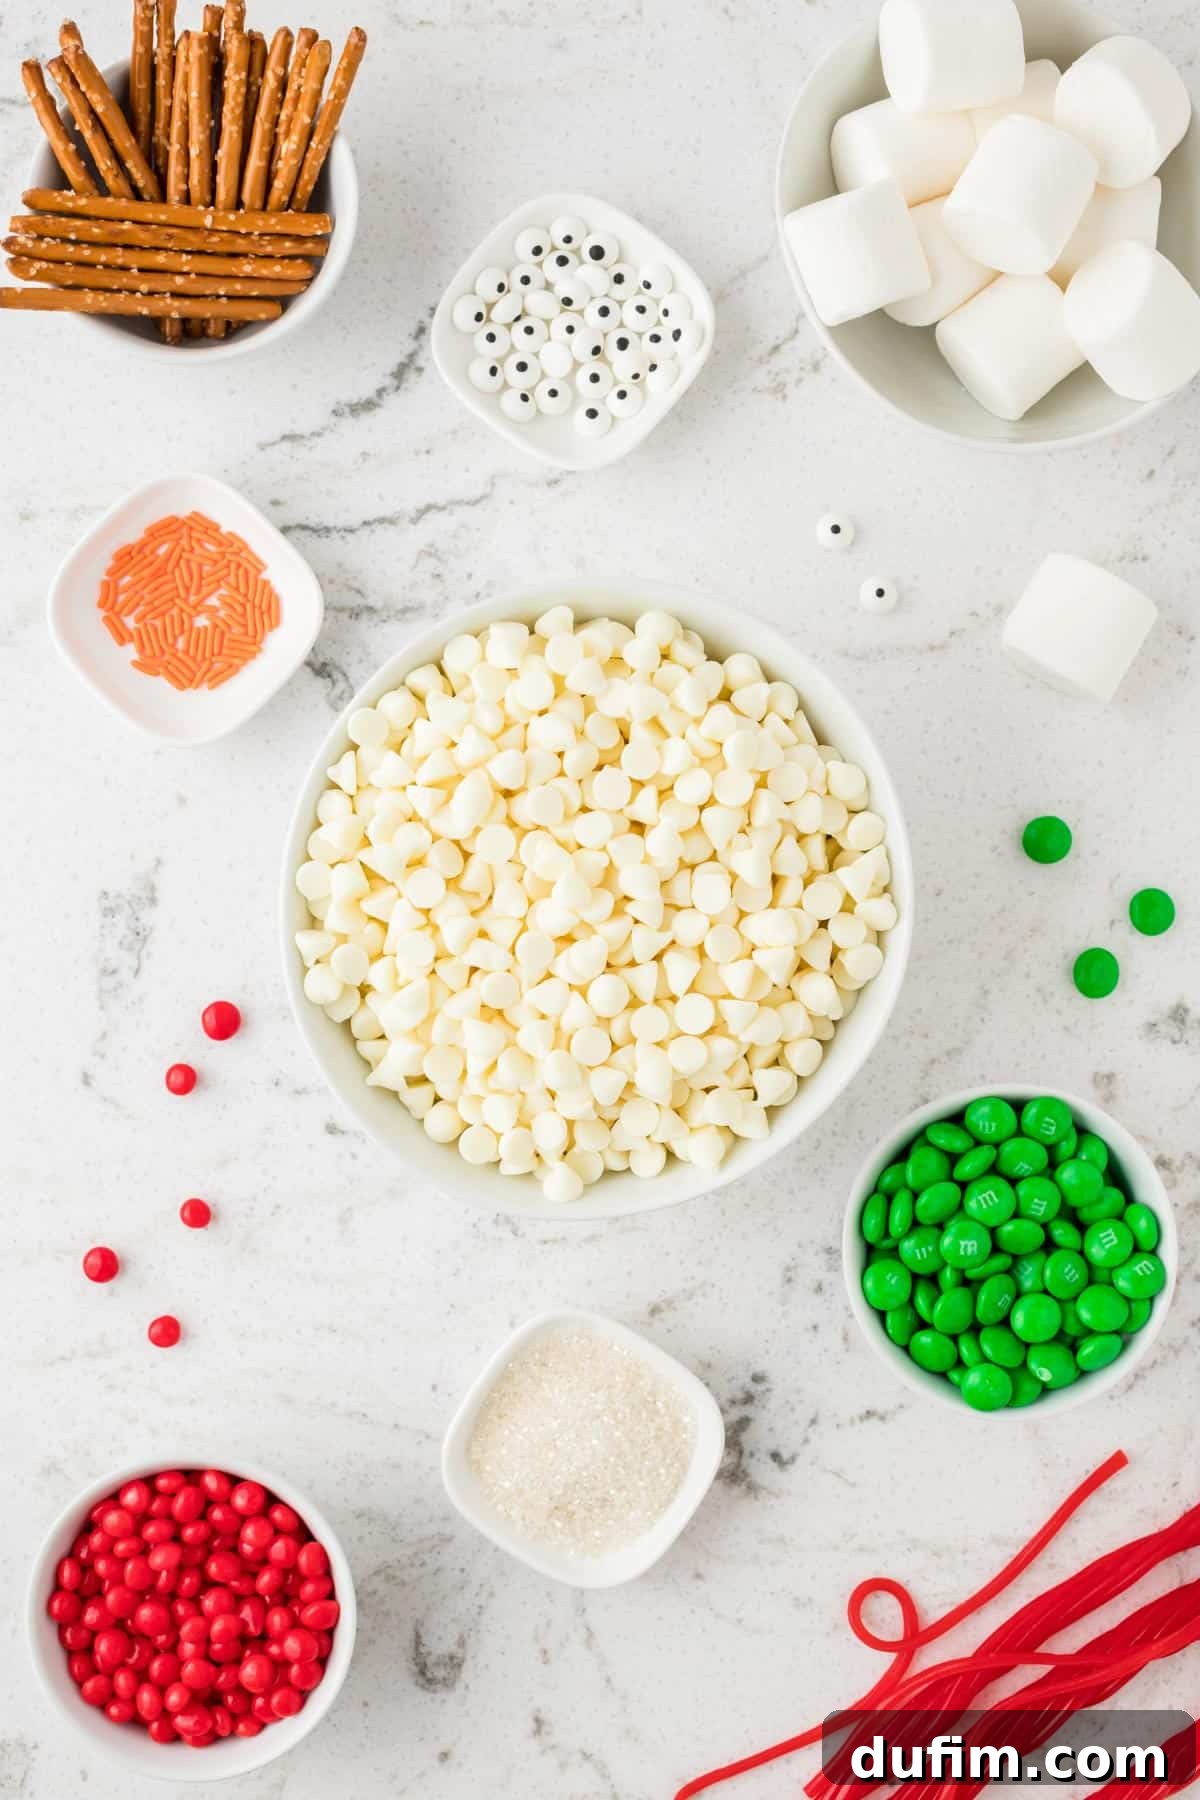
Gathering your ingredients for this melted snowman bark is part of the fun, as it brings together classic holiday candies and everyday kitchen staples. Here’s what you’ll need to create these adorable festive treats:
- Large Marshmallows: These form the heads of your charming snowmen. Their soft, chewy texture is a perfect contrast to the crisp bark.
- Twizzlers Pull ‘n’ Peel Candy: The vibrant strands of these candies are ideal for crafting colorful, edible scarves for your snowmen.
- Edible Candy Eyeballs: These instantly bring your snowmen to life with a playful, cartoonish look.
- Orange Jimmies (or Sprinkles): A single orange jimmy provides the perfect tiny “carrot nose” for each snowman.
- White Chocolate Chips (or White Almond Bark): This forms the base of your bark and the “melted snow.” Ensure you have enough for both the snowman heads and the main bark. Two 11-12 oz bags are typically recommended for a good batch.
- Cinnamon Hots Candies: These classic red candies make excellent little buttons for your snowmen, adding a touch of festive color. Alternatively, red M&M’s work wonderfully.
- Green M&M’s: Adding green M&M’s alongside the cinnamon hots provides a lovely complementary color for the snowman buttons, enhancing the Christmas theme.
- Pretzel Sticks: Broken in half, pretzel sticks transform into the perfect twig arms for your snowmen, adding a nice salty crunch.
- Sanding Sugar Sprinkles: A dusting of sanding sugar creates a magical, glistening “snowy” effect over your finished bark, making it truly sparkle.
Expert Tip for Cutting Marshmallows: Marshmallows can be notoriously sticky. To effortlessly cut large marshmallows in half for your snowman heads, simply dip your kitchen scissors in a bit of water before each cut. Re-dip as needed to keep the marshmallow from sticking and ensure clean, neat halves.
Crafting Your Adorable Melted Snowman Bark
Creating this festive melted snowman bark is a joyful process that comes together quickly. The key to success is having all your decorative elements ready before you start melting the chocolate. Follow these simple steps for a perfect batch:
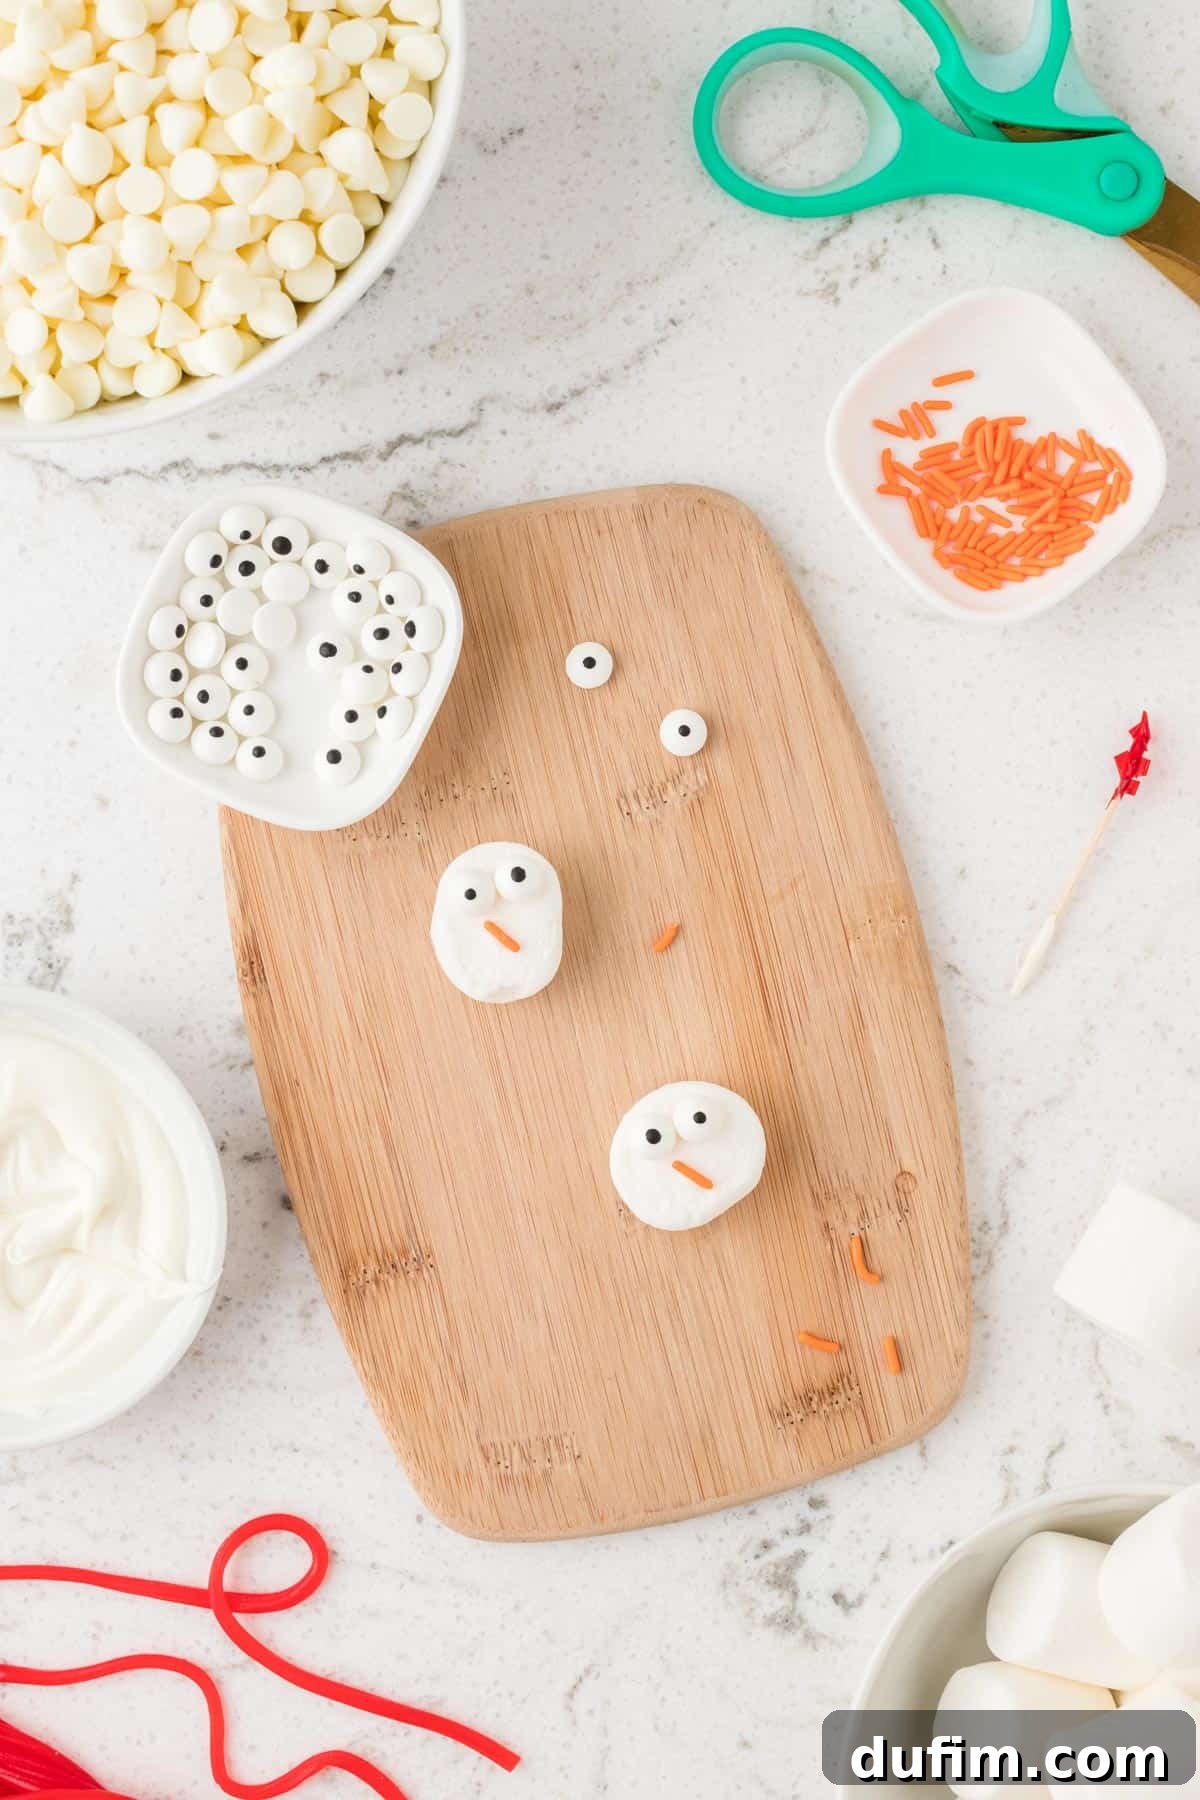
Step 1: Prepare All Your Decorations. This initial step is crucial for smooth assembly. Begin by unraveling your Twizzlers Pull ‘n’ Peel candy into individual strands; these will become the snowmen’s scarves. Next, take your large marshmallows and use water-dipped kitchen scissors to cut each marshmallow in half, creating the snowman heads. Finally, break your pretzel sticks into halves to form the arms. Have all your candy eyeballs, orange jimmies, cinnamon hots, green M&M’s, and sanding sugar readily accessible and organized on your workspace.
Step 2: Assemble the Snowman Heads. With your marshmallow halves prepared, it’s time to give them personality. Gently melt a small amount of white chocolate chips (about 1-2 tablespoons) in a microwave-safe bowl. Microwave on 50% power for 30 seconds, stir, then continue at 20-second intervals until just melted and smooth. Using a toothpick or the tip of a small knife, dab a tiny amount of melted chocolate onto the back of two candy eyeballs and one orange jimmy. Carefully press these onto the flat side of each marshmallow half to create the snowman’s face. Set these aside on a separate piece of parchment paper to allow the chocolate to set and secure the features.
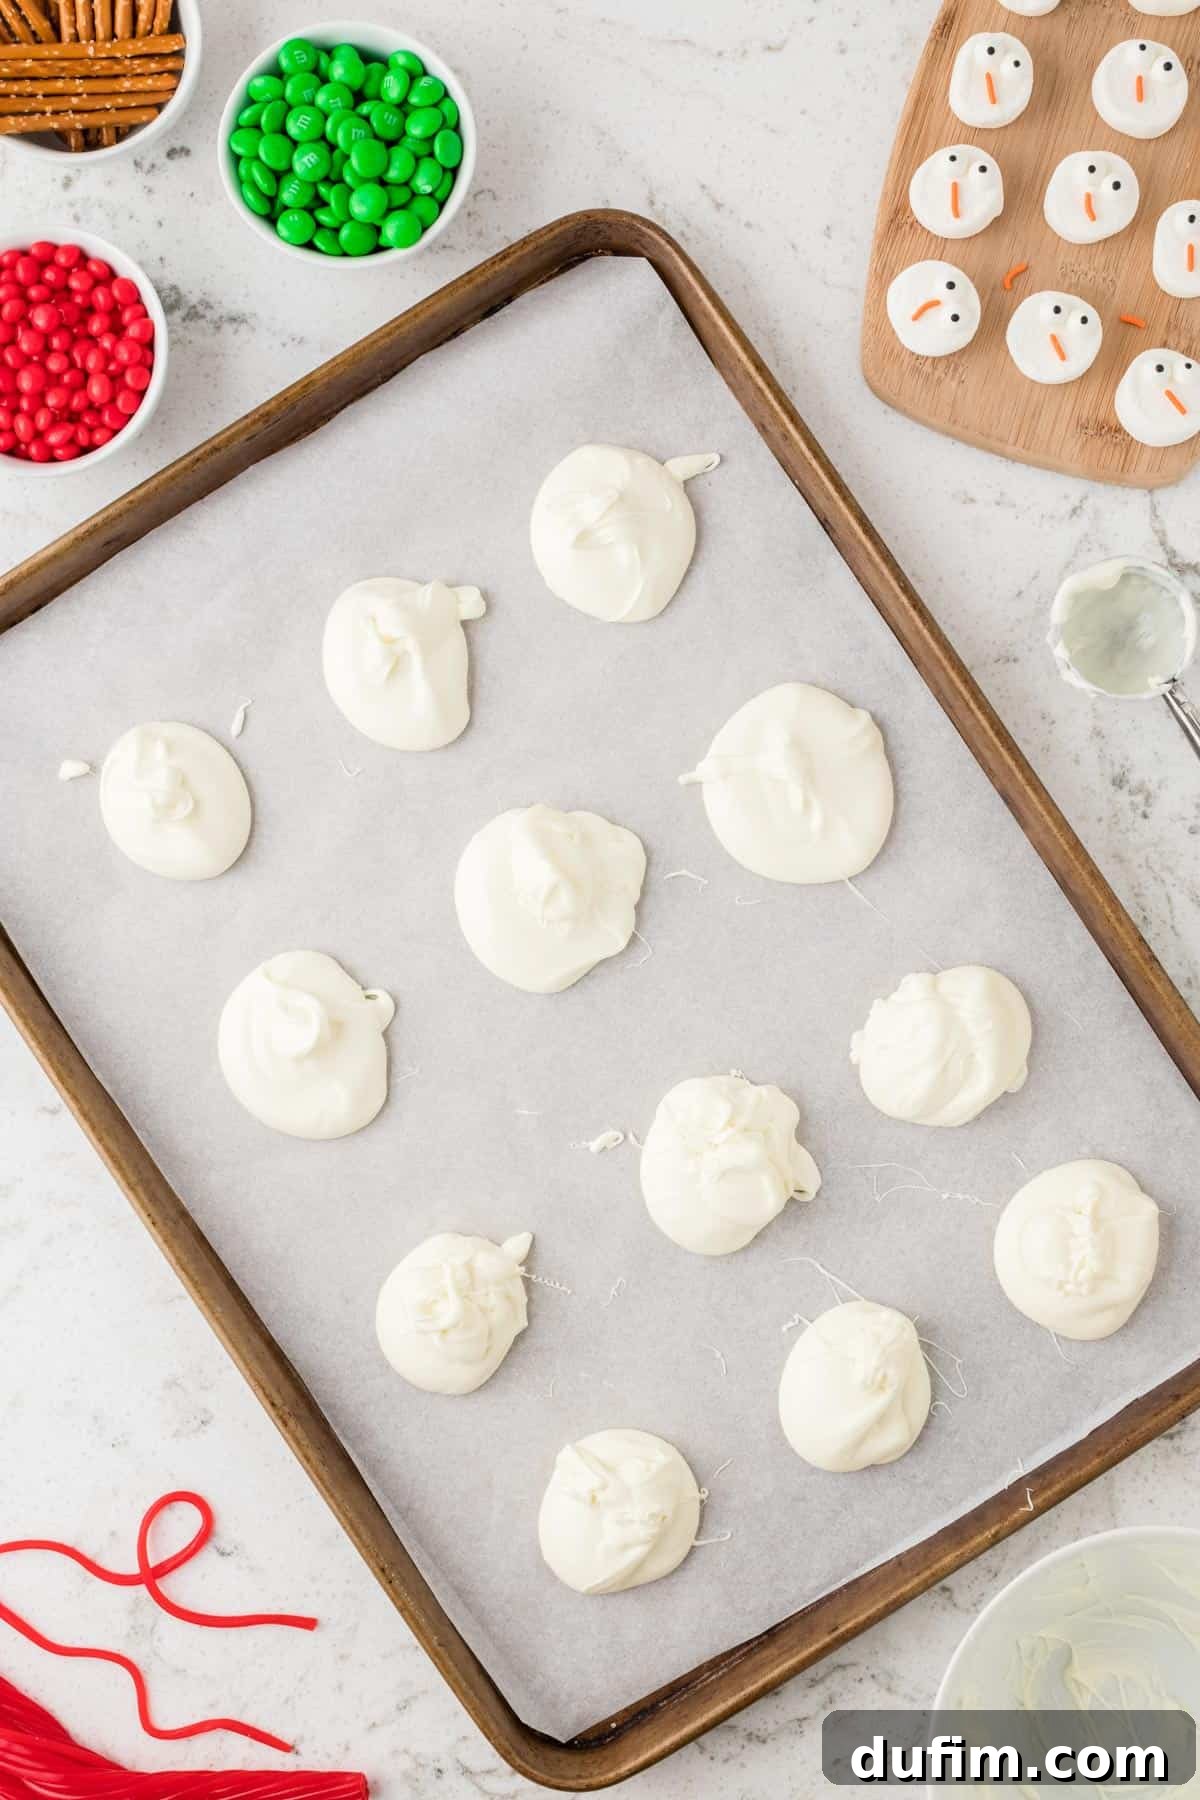
Step 3: Prepare Your Baking Surface and Melt the Main White Chocolate. Line a large baking sheet with either parchment paper or a silicone baking mat. This step is essential to prevent sticking and ensure easy removal of your bark. Now, melt the remaining white chocolate chips. Place them in a large microwave-safe bowl. Microwave on 50% power for 2 minutes, then stir thoroughly. Continue microwaving at 50% power for 1-minute intervals, stirring well after each, until the chocolate is completely smooth and melted. Be careful not to overheat, as white chocolate can seize easily.
Step 4: Create the Bark Base. Working quickly while the chocolate is still warm and pliable, use a cookie scoop or a large spoon to drop dollops of the melted white chocolate onto your prepared baking sheet. Aim for roughly circular shapes, spaced out enough to accommodate your snowman heads and decorations. Then, use an icing spatula or the back of a spoon to gently spread each dollop into a slightly flattened, irregular circle, mimicking the look of melted snow or a flattened snowman body.
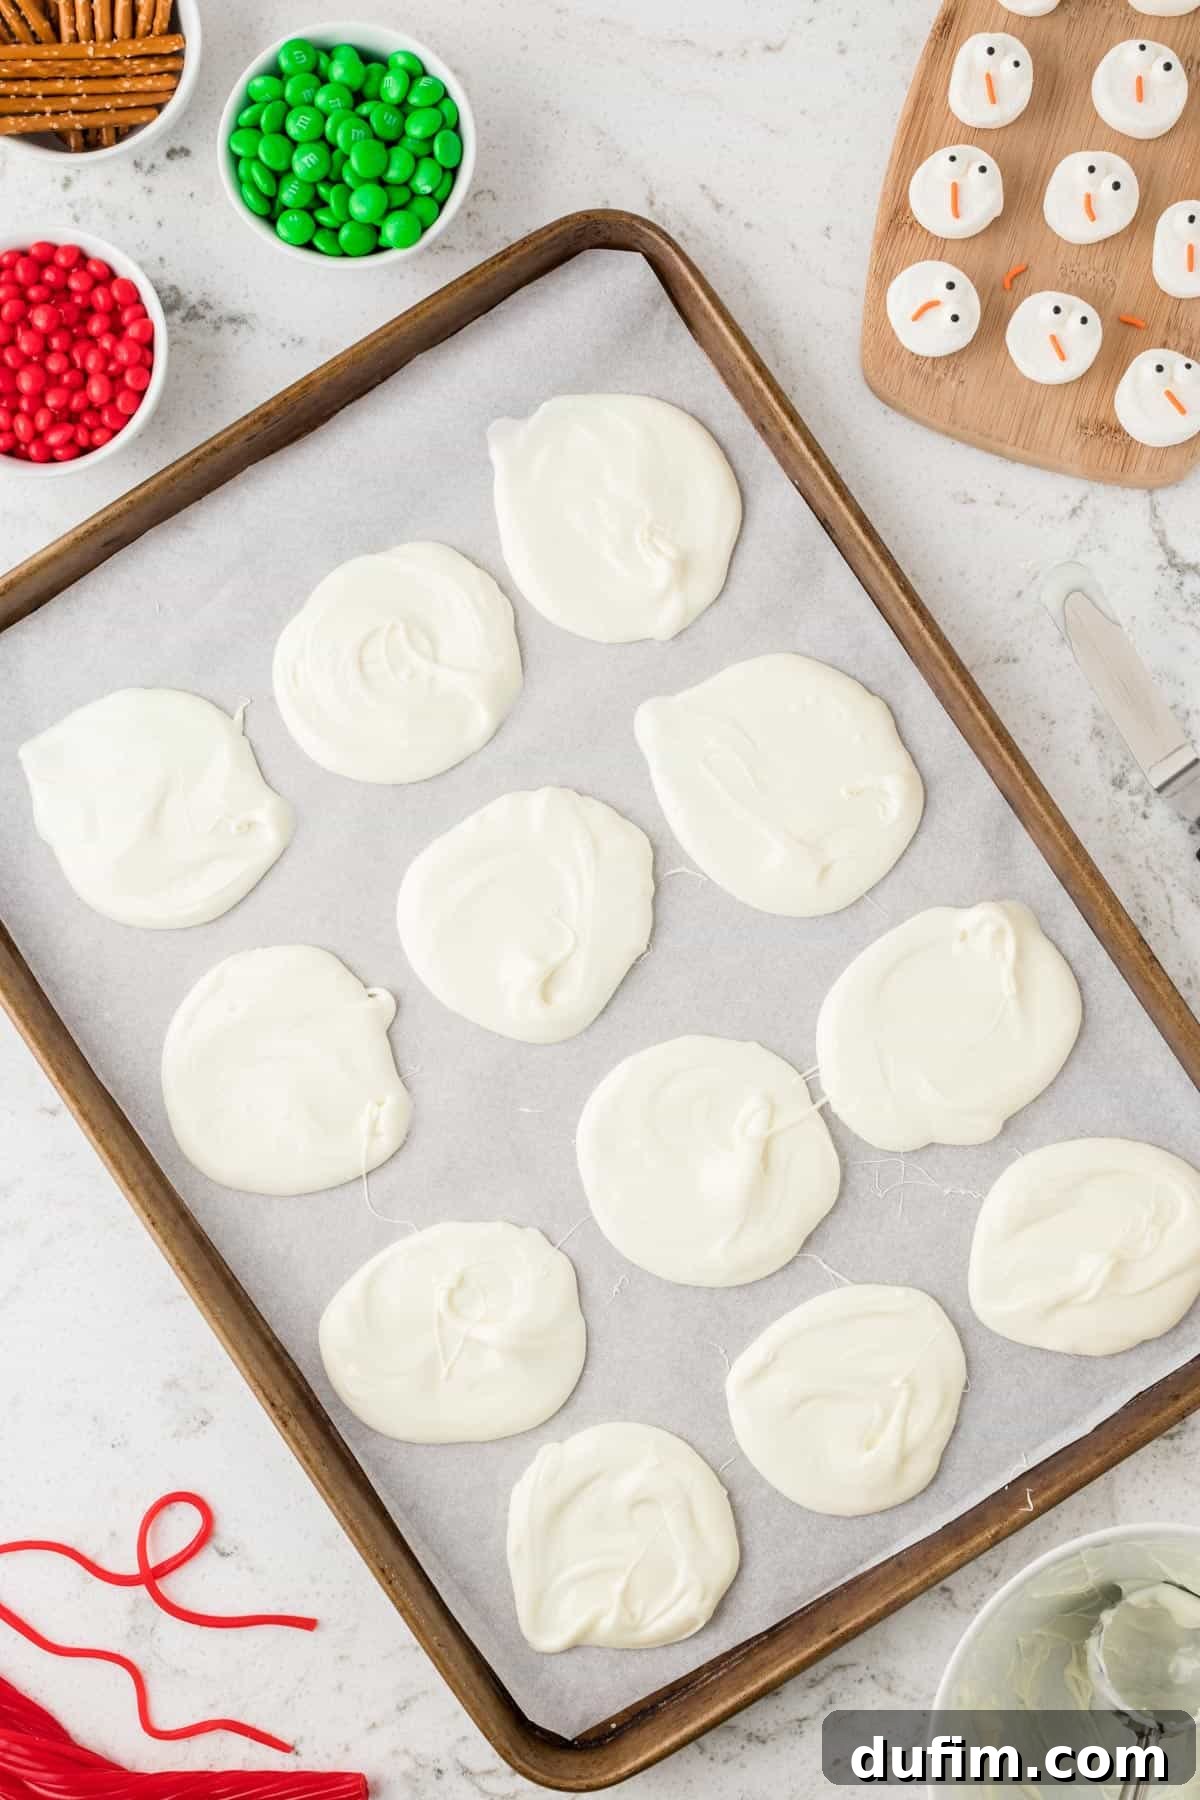
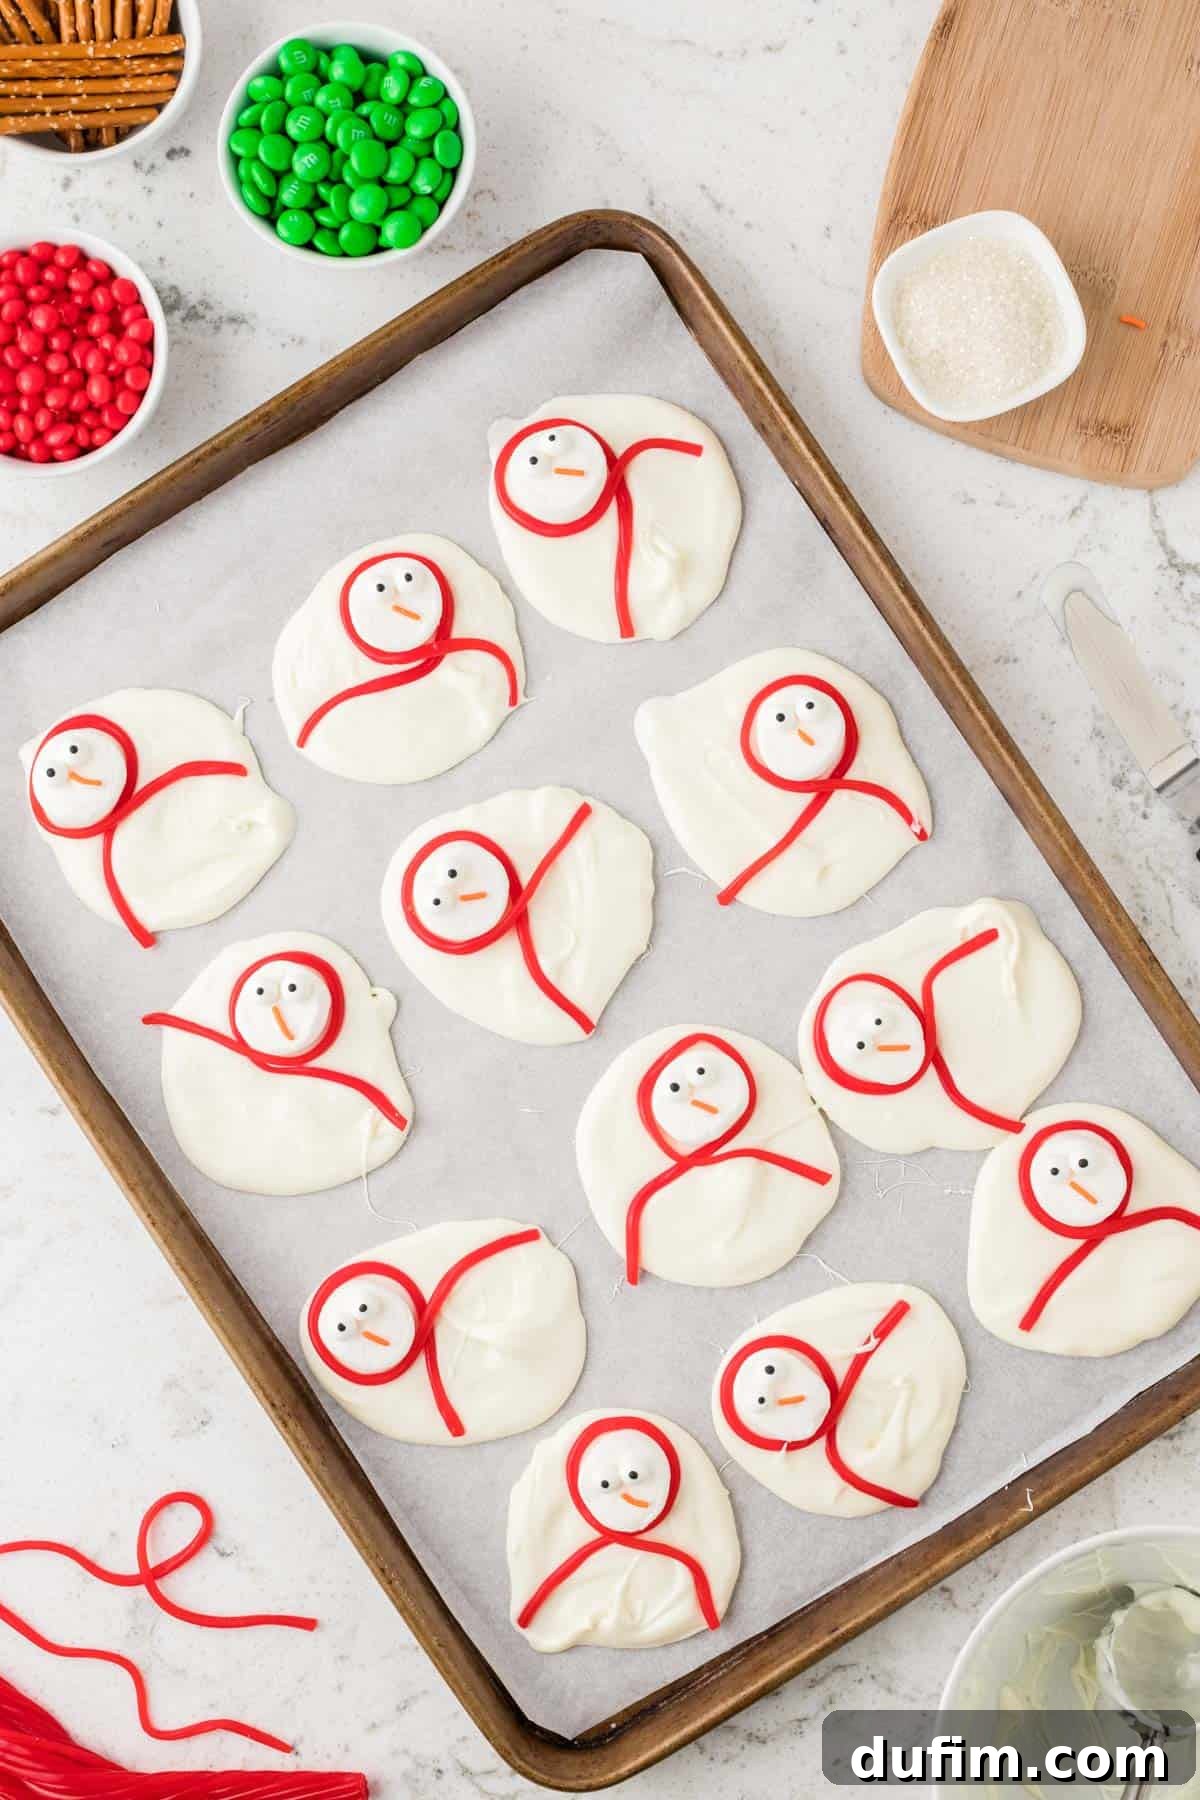
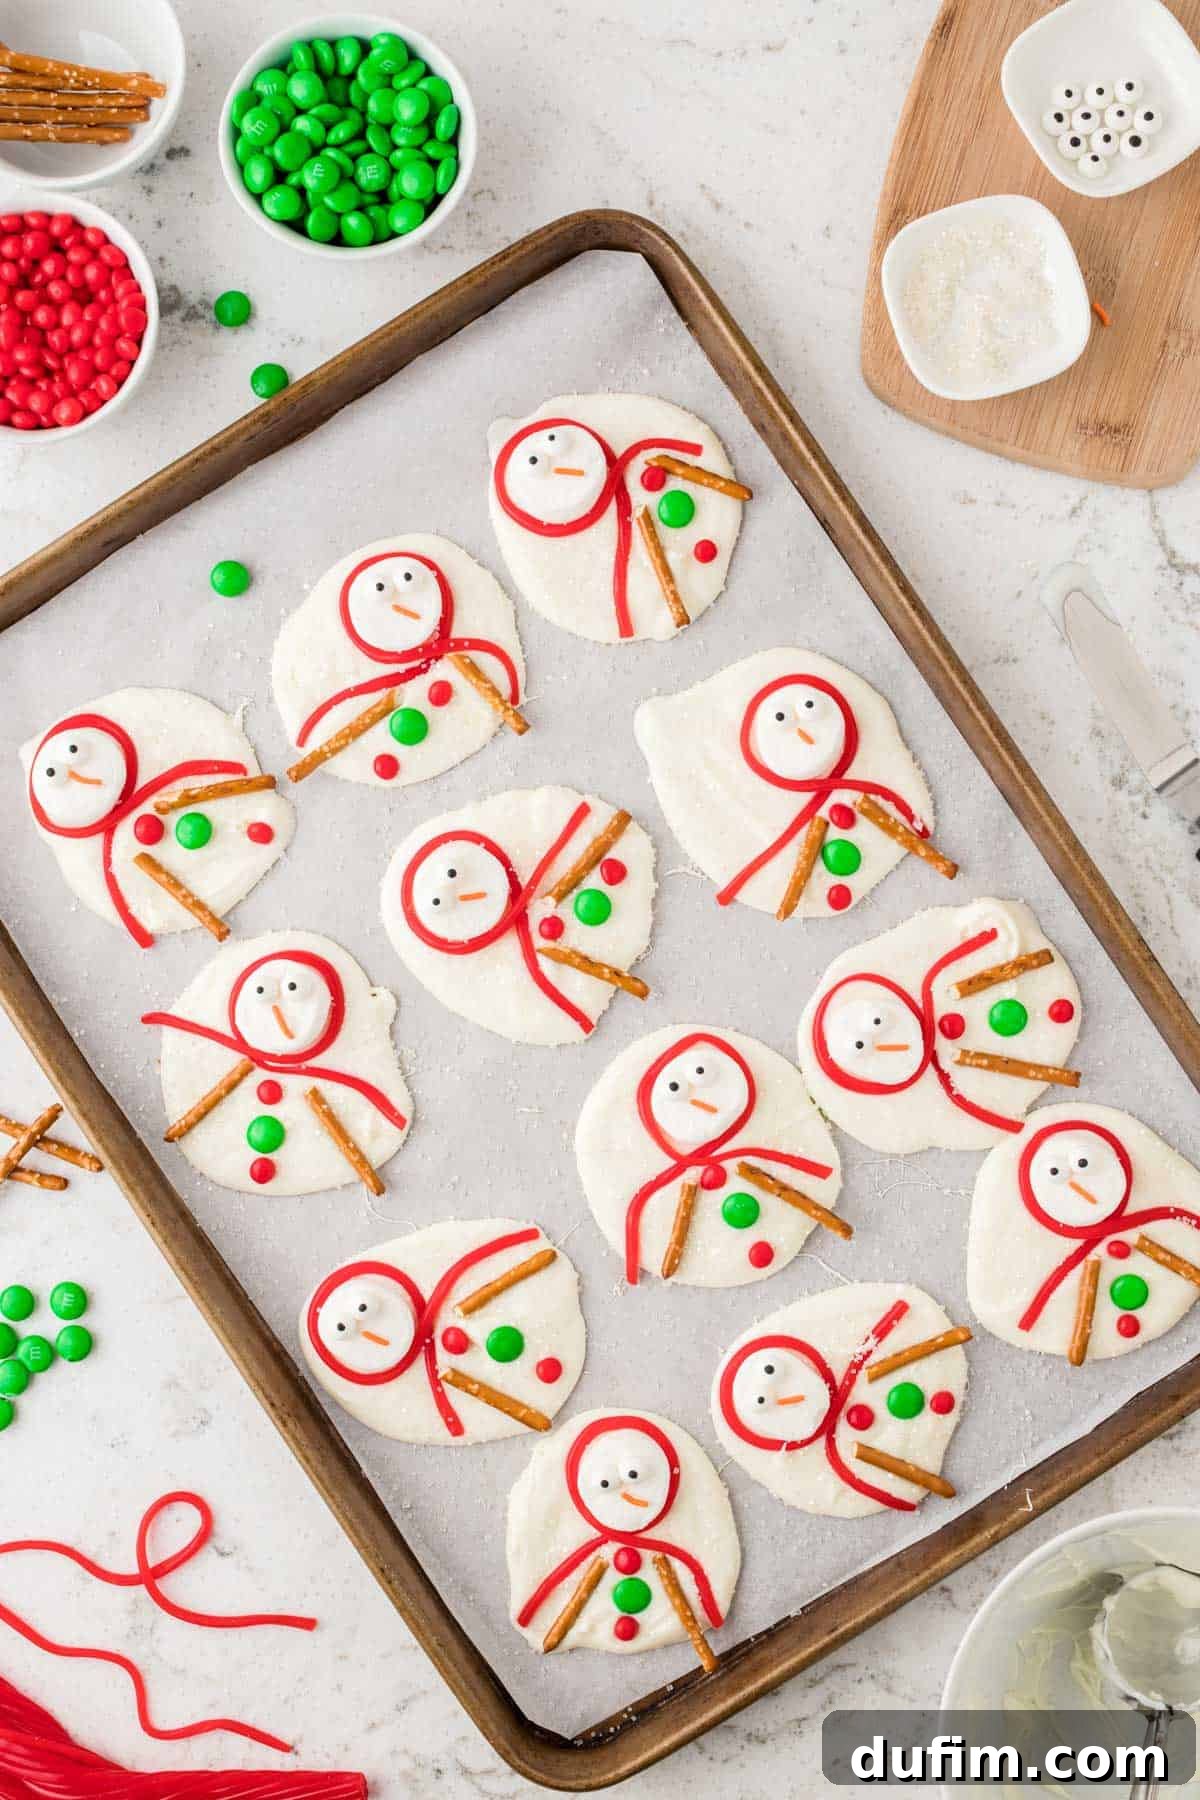
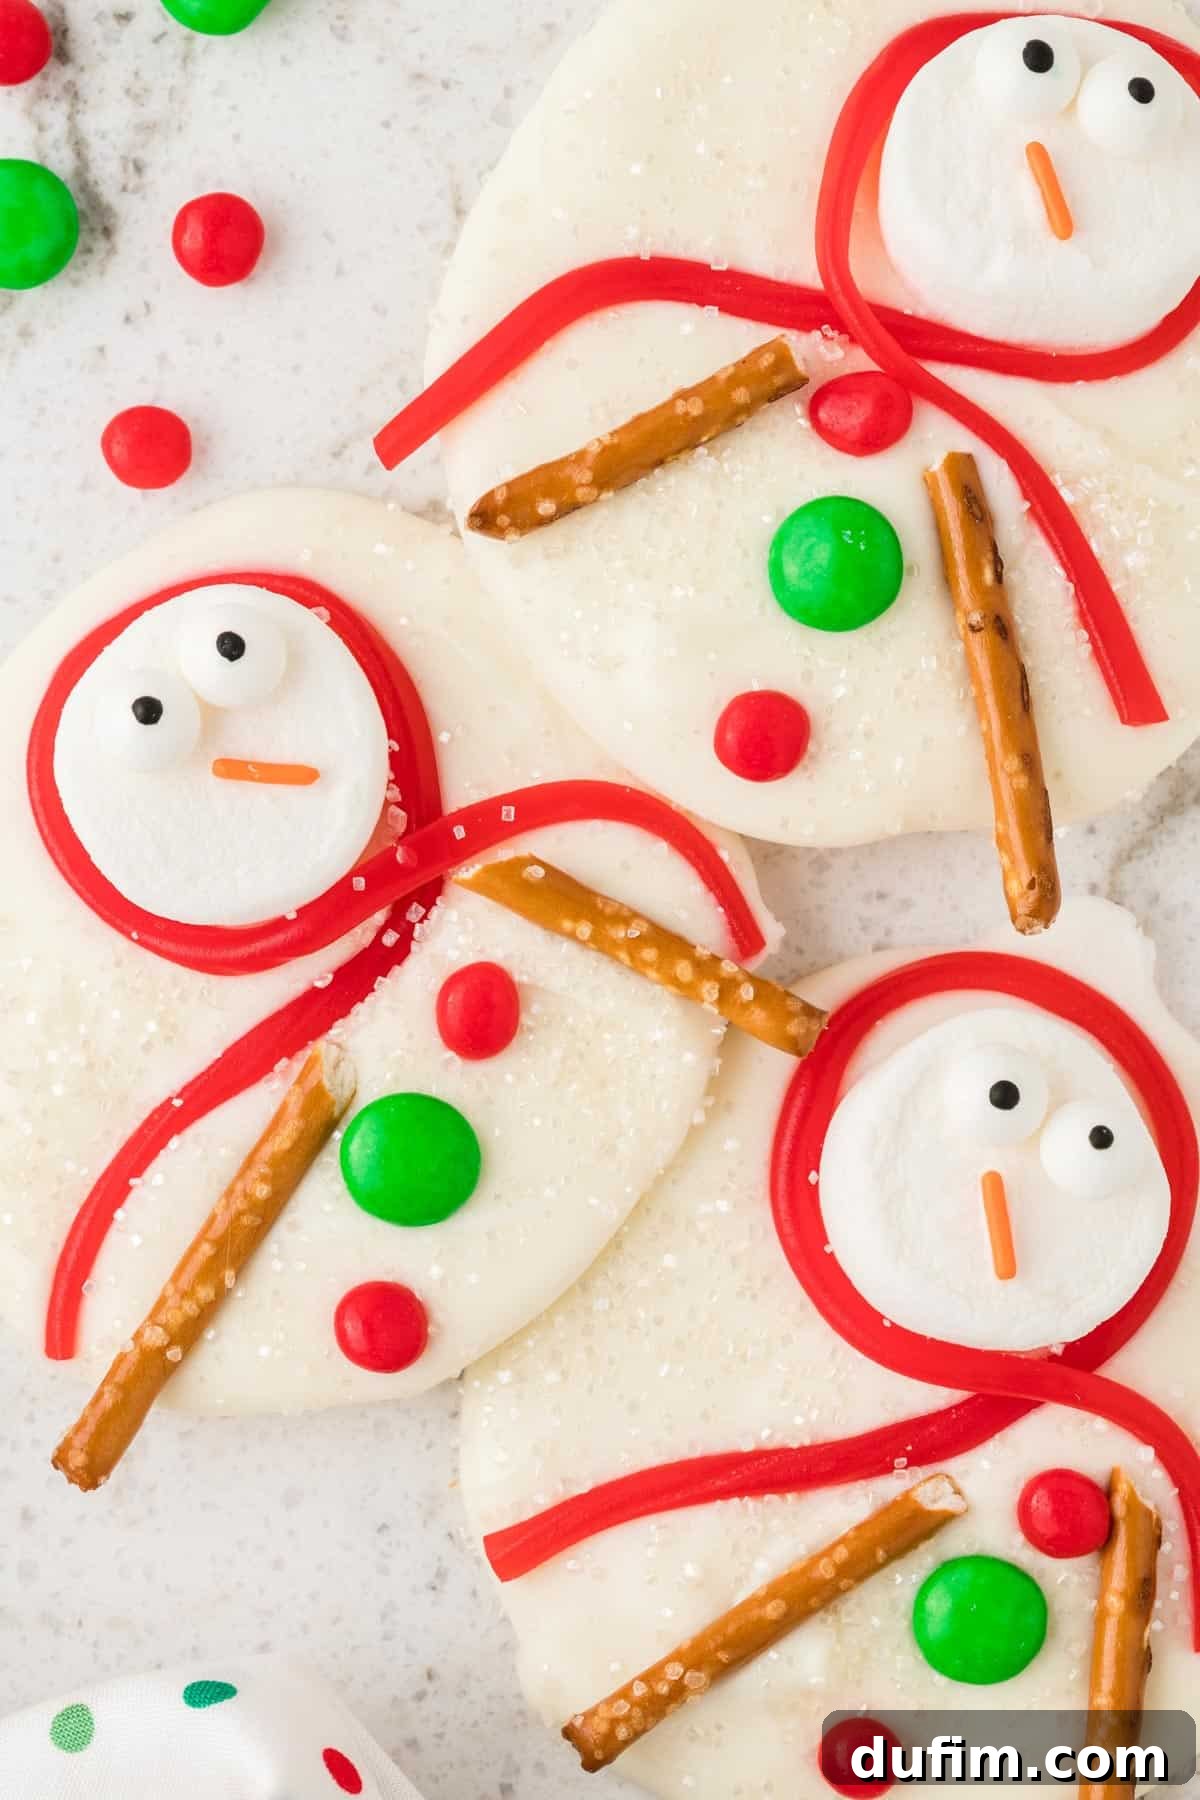
Step 5: Decorate Your Snowmen. This is where the magic happens! While the chocolate base is still wet, carefully place one of your pre-assembled marshmallow snowman heads onto each chocolate dollop. Immediately after, take a strand of Twizzlers and gently wrap it around the “neck” of each snowman head to create a colorful scarf. Next, insert two pretzel stick halves on either side of the snowman’s “body” to form the arms. Finally, add a few cinnamon hots and green M&M’s down the center of the chocolate body for the buttons. This entire step must be done quickly before the chocolate begins to set.
Step 6: Add a Snowy Finish. For a truly enchanting winter wonderland effect, generously sprinkle sanding sugar over the entire baking sheet. This adds a beautiful sparkle and mimics freshly fallen snow, making your melted snowmen even more charming.
Storing Your Melted Snowman Bark for Freshness
Proper storage ensures your delightful melted snowman bark stays fresh, crunchy, and delicious for as long as possible. White chocolate bark, especially when decorated with candies, is quite stable, but a cool environment is key to prevent softening or melting.
For immediate enjoyment and to maintain its crisp texture, store the bark at a cool room temperature (below 70°F or 21°C) or, ideally, in the refrigerator. Place the bark in an airtight container to protect it from moisture and odors. When stored in the refrigerator, it will remain fresh and firm for up to 1 week, making it perfect for preparing in advance for holiday gatherings.
If you find yourself in a cold climate, like I often do during the winter months, and run out of fridge space, a cool garage or unheated pantry can also serve as a temporary storage solution for Christmas goodies. Just ensure the location is consistently cool and dry.
For longer-term preservation, melted snowman bark freezes exceptionally well. Store it in a freezer-safe, airtight container, ideally with layers separated by parchment paper, for up to 3 months. When you’re ready to enjoy, simply transfer the container to the refrigerator overnight or let it sit at room temperature for about 30 minutes to an hour until thawed. This way, you can enjoy the festive charm of these snowmen long after the holidays have passed.
Time Commitment for This Festive Treat
One of the many appeals of Melted Snowman Bark is how quickly it comes together, making it an ideal last-minute holiday dessert or a fun weekend project.
- Prep Time: Approximately 15 minutes. This includes gathering all ingredients, unwrapping candies, cutting marshmallows, and breaking pretzels. Getting everything ready beforehand is the secret to a smooth process.
- Chocolate Melting Time: About 3-5 minutes. White chocolate melts relatively quickly in the microwave. Be sure to use short intervals and stir frequently to avoid burning or seizing.
- Setting Time: Roughly 30-60 minutes. The bark needs time for the chocolate to firm up completely. You can speed this up slightly by placing the baking sheet in the refrigerator, but room temperature setting works perfectly well, especially if your kitchen isn’t overly warm.
In total, you’re looking at less than 1.5 hours from start to finish, with most of that being hands-off setting time. This efficiency is truly a holiday blessing!
Creative Variations for Your Snowman Bark
While the classic Melted Snowman Bark is undeniably charming, don’t hesitate to experiment with these fun variations to suit your taste or what you have on hand. Each swap can bring a new flavor profile or texture to your festive treat:
- White Almond Bark: Instead of white chocolate chips, you can use white almond bark (also known as vanilla candy coating). It’s designed to melt smoothly and set quickly, often resulting in a slightly firmer, snappier bark.
- Chocolate Almond Bark: For a delicious contrast, try using chocolate almond bark as your base. The dark or milk chocolate will create a striking background for the white marshmallow snowmen, adding a rich, decadent flavor.
- Chow Mein Noodles: Replace the pretzel sticks with crispy chow mein noodles for a different kind of “arm.” These offer a unique savory crunch that complements the sweet chocolate beautifully.
- Fruit Roll-Ups or Sour Gummy Belts: If Twizzlers aren’t your preference, thinly sliced fruit roll-ups or colorful sour gummy belts can make vibrant, pliable scarves for your snowmen. They add a chewy texture and a burst of fruity flavor.
- Mini Chocolate Chips: For smaller, more delicate buttons, use mini chocolate chips instead of cinnamon hots or M&M’s.
- Shredded Coconut: Instead of sanding sugar, sprinkle some shredded coconut over the bark for a more textured, fluffy snow effect.
- Peppermint Extract: Add a few drops of peppermint extract to your melted white chocolate for a refreshing minty twist, perfect for the holiday season.
- Colored Candy Melts: Use colored candy melts for the bark base to create a fun, vibrant backdrop for your snowmen – think blue for a winter sky or green for a festive lawn!
Planning Ahead: Can This Bark Be Made in Advance?
Absolutely! Melted Snowman Bark is an excellent candidate for making ahead, which is a huge advantage during the hectic holiday season. Preparing it in advance allows you to tackle your holiday to-do list with ease and ensures you have a delightful treat ready for any occasion. You can make this charming bark up to a week ahead of time.
To store it properly for future enjoyment, simply place the completely set bark in an airtight container. Keep the container in a cool, dry place, such as your pantry, or for optimal freshness and to prevent any softening, store it in the refrigerator. If stacking layers, place a sheet of parchment paper between them to prevent sticking. This way, your melted snowman bark will retain its delightful texture and festive appearance, ready to be presented or enjoyed whenever the holiday spirit calls.
Expert Tips for Perfect Melted Snowman Bark
Achieving picture-perfect and delicious melted snowman bark is simple when you follow a few expert guidelines:
- Always Line Your Baking Sheet: This is a non-negotiable step. Whether you use parchment paper or a silicone baking mat, lining your sheet will prevent the melted chocolate from sticking, making for effortless removal and clean-up. This ensures your beautifully shaped bark comes off the tray intact.
- Pre-Assemble Snowman Heads Before Melting Chocolate: Efficiency is your friend when working with melted chocolate. Because melted chocolate begins to set relatively quickly, you need to have all your decorative elements, especially the snowman faces, ready to go. Assemble all your marshmallow heads with their candy eyes and orange jimmy noses beforehand so you can place them onto the wet chocolate immediately.
- Work Swiftly Once Chocolate is Melted: Time is of the essence! As soon as your main batch of white chocolate is melted and spread onto the baking sheet, you must work quickly to place all your marshmallow heads, Twizzler scarves, pretzel arms, and candy buttons. If the chocolate hardens before you’ve finished decorating, your embellishments won’t adhere properly. Having everything prepped and within arm’s reach is critical for a smooth and successful assembly.
- Control Chocolate Melting Temperature: When melting white chocolate, always use low heat and short bursts in the microwave, stirring frequently. White chocolate can seize (become thick and clumpy) if overheated. A double boiler method is also excellent for gentle, even melting.
- Cool Completely Before Breaking: Allow the bark to set and cool completely before attempting to break it into pieces. If you try to break it while it’s still warm or soft, it will crack unevenly and potentially crumble. Patience ensures clean, crisp pieces.
More Irresistible Christmas Treats to Explore
If you love the ease and festive appeal of Melted Snowman Bark, you’ll surely enjoy these other beloved holiday recipes. They are perfect for adding more delicious variety to your Christmas celebrations and gift-giving:
- Homemade Turtle Bark: Indulge in the rich combination of chocolate, caramel, and pecans with this easy-to-make, decadent bark.
- Colorful Church Window Cookies: These no-bake, stained-glass-like cookies are as beautiful as they are tasty, featuring vibrant marshmallows and chocolate.
- Festive Christmas Donuts: Start your holiday mornings or sweeten your afternoons with these delightful, decorated donuts.
Melted Snowman Bark
By: Beth
Prep Time: 15 minutes
Additional Time (Setting): 1 hour
Servings: 12
Print Recipe
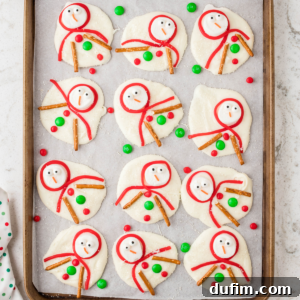
Celebrate the winter season with this charming Melted Snowman Bark. This easy, no-bake Christmas recipe is perfect for families to make together and share!
Equipment
- Glass Mixing Bowl
- Baking Sheet
- Silicone Baking Mat or Parchment Paper
- Kitchen Scissors
- Cookie Scoop (optional, for portioning chocolate)
- Icing Spatula or back of a spoon
Ingredients
- Large marshmallows (about 8, to make 16 halves for 12 snowmen, plus extra for snacking!)
- Twizzlers Pull ‘n’ Peel candy (enough to create 12 scarves)
- Edible Candy Eyeballs (24 for 12 snowmen)
- Orange Jimmies (12 for noses)
- 2 bags White chocolate chips (11-12 oz bags each), or white almond bark
- Cinnamon Hots Candies (for buttons)
- Green M&M’s (for buttons, optional)
- Pretzel sticks (about 12-15 sticks, to be broken in half for arms)
- Sanding Sugar (for snowy effect)
Instructions
- Prepare Your Baking Surface: Line a large baking sheet with parchment paper or a silicone baking mat. This will prevent sticking and make for easy cleanup.
- Prepare Scarves and Marshmallow Heads: Unravel the Twizzlers Pull ‘n’ Peel candy into individual strands. Using kitchen scissors dipped in water (to prevent sticking), cut the large marshmallows in half. Set aside.
- Assemble Snowman Heads (First Melt): In a small microwave-safe bowl, melt about 1-2 tablespoons of white chocolate chips. Microwave on 50% power for 30 seconds, stir, then continue at 20-second intervals until just melted and smooth. Use a toothpick or small knife to dab melted chocolate onto the back of 2 edible candy eyeballs and 1 orange jimmy, then press them onto the flat side of each marshmallow half to create a snowman face. Place these pre-assembled heads on a separate piece of parchment paper to dry and set completely.
- Melt Main White Chocolate: In a large microwave-safe bowl, melt the remaining 2 bags of white chocolate chips. Microwave on 50% power for 2 minutes, stir thoroughly. Continue microwaving on 50% power for 1-minute intervals, stirring after each, until the chocolate is fully melted and smooth. Be cautious not to overheat.
- Create Bark Base: Once the chocolate is melted, work quickly. Use a cookie scoop or a spoon to drop dollops of the warm white chocolate onto the prepared baking sheet. Leave enough space between each dollop. Gently spread each dollop with an icing spatula or the back of a spoon into an irregular, flat circle, mimicking a melted snowman body.
- Decorate the Snowmen: While the chocolate base is still wet and warm, immediately place one pre-assembled marshmallow snowman head onto each chocolate dollop. Wrap a Twizzler rope around each snowman’s neck to form a scarf. Break the pretzel sticks in half and place two halves on either side of the snowman’s “body” to create arms. Finally, add cinnamon hots candies and green M&M’s down the center of the chocolate for the buttons.
- Add Snowy Effect: Liberally sprinkle sanding sugar over the entire bark, covering the chocolate base for a sparkling, snowy finish.
- Set the Bark: Allow the melted snowman bark to set completely at room temperature for about 1 hour. To speed up the process, you can carefully place the baking sheet in the refrigerator or a cool garage if you live in a cold climate, for about 15-30 minutes. Once firm, break the bark into individual snowman pieces.
Nutrition Disclosure
All nutritional values are approximate and provided to the reader as a courtesy. Changing ingredients and/or quantities will alter the estimated nutritional calculations.
Like this festive recipe? We’d love to hear from you! Please consider sharing your thoughts and rating it below in the comments section!