
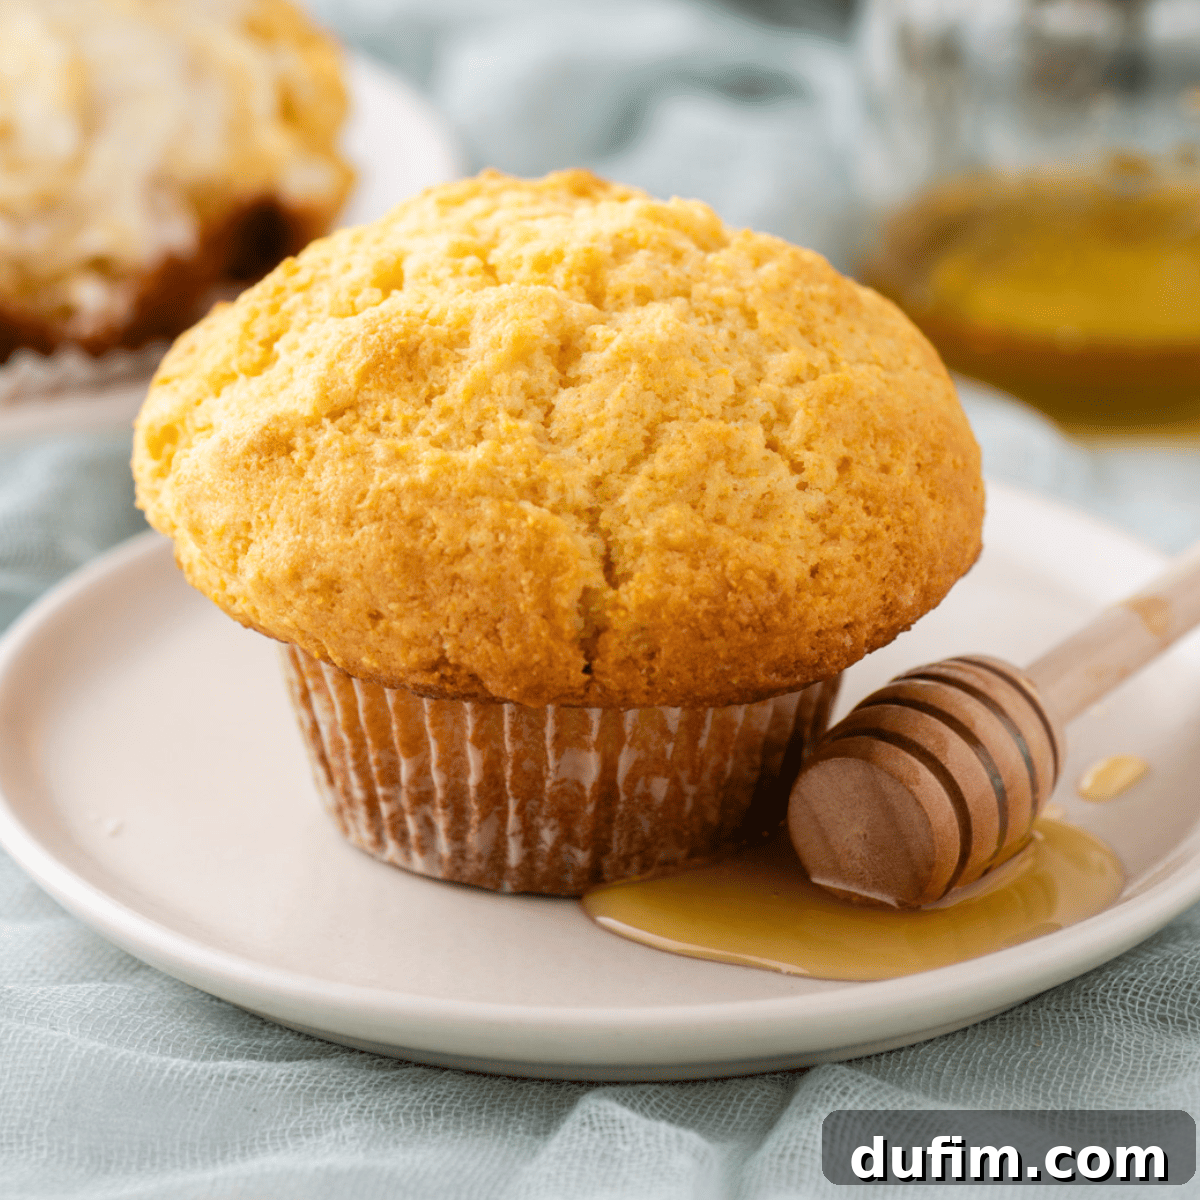
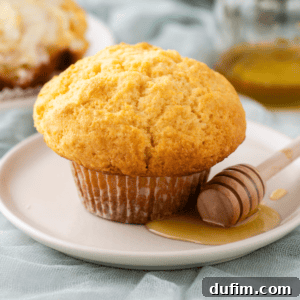
After a dedicated two-week journey filled with rigorous testing and seven batches of adjustments, I am thrilled to unveil the ultimate recipe for bakery-style corn muffins. This isn’t just any corn muffin recipe; it’s the one my loyal audience has been requesting for over a year and a half – a recipe that promises a magnificent “super dome,” unparalleled tenderness, and the perfect balance of sweetness.
My quest involved a radical departure from the conventional. I shattered the traditional 1:1 flour-to-cornmeal ratio, discovering that a precise blend of 3 cups of all-purpose flour to 1 cup of fine-ground cornmeal yields the ideal harmony of structure, texture, and authentic corn flavor. Coupled with a generous 2 tablespoons of baking powder for an extraordinary lift, a strategic combination of butter and oil for exquisite moisture, and a critical 30-minute chill in the refrigerator, these corn muffins emerge tall, incredibly tender, and just sweet enough to satisfy every craving.
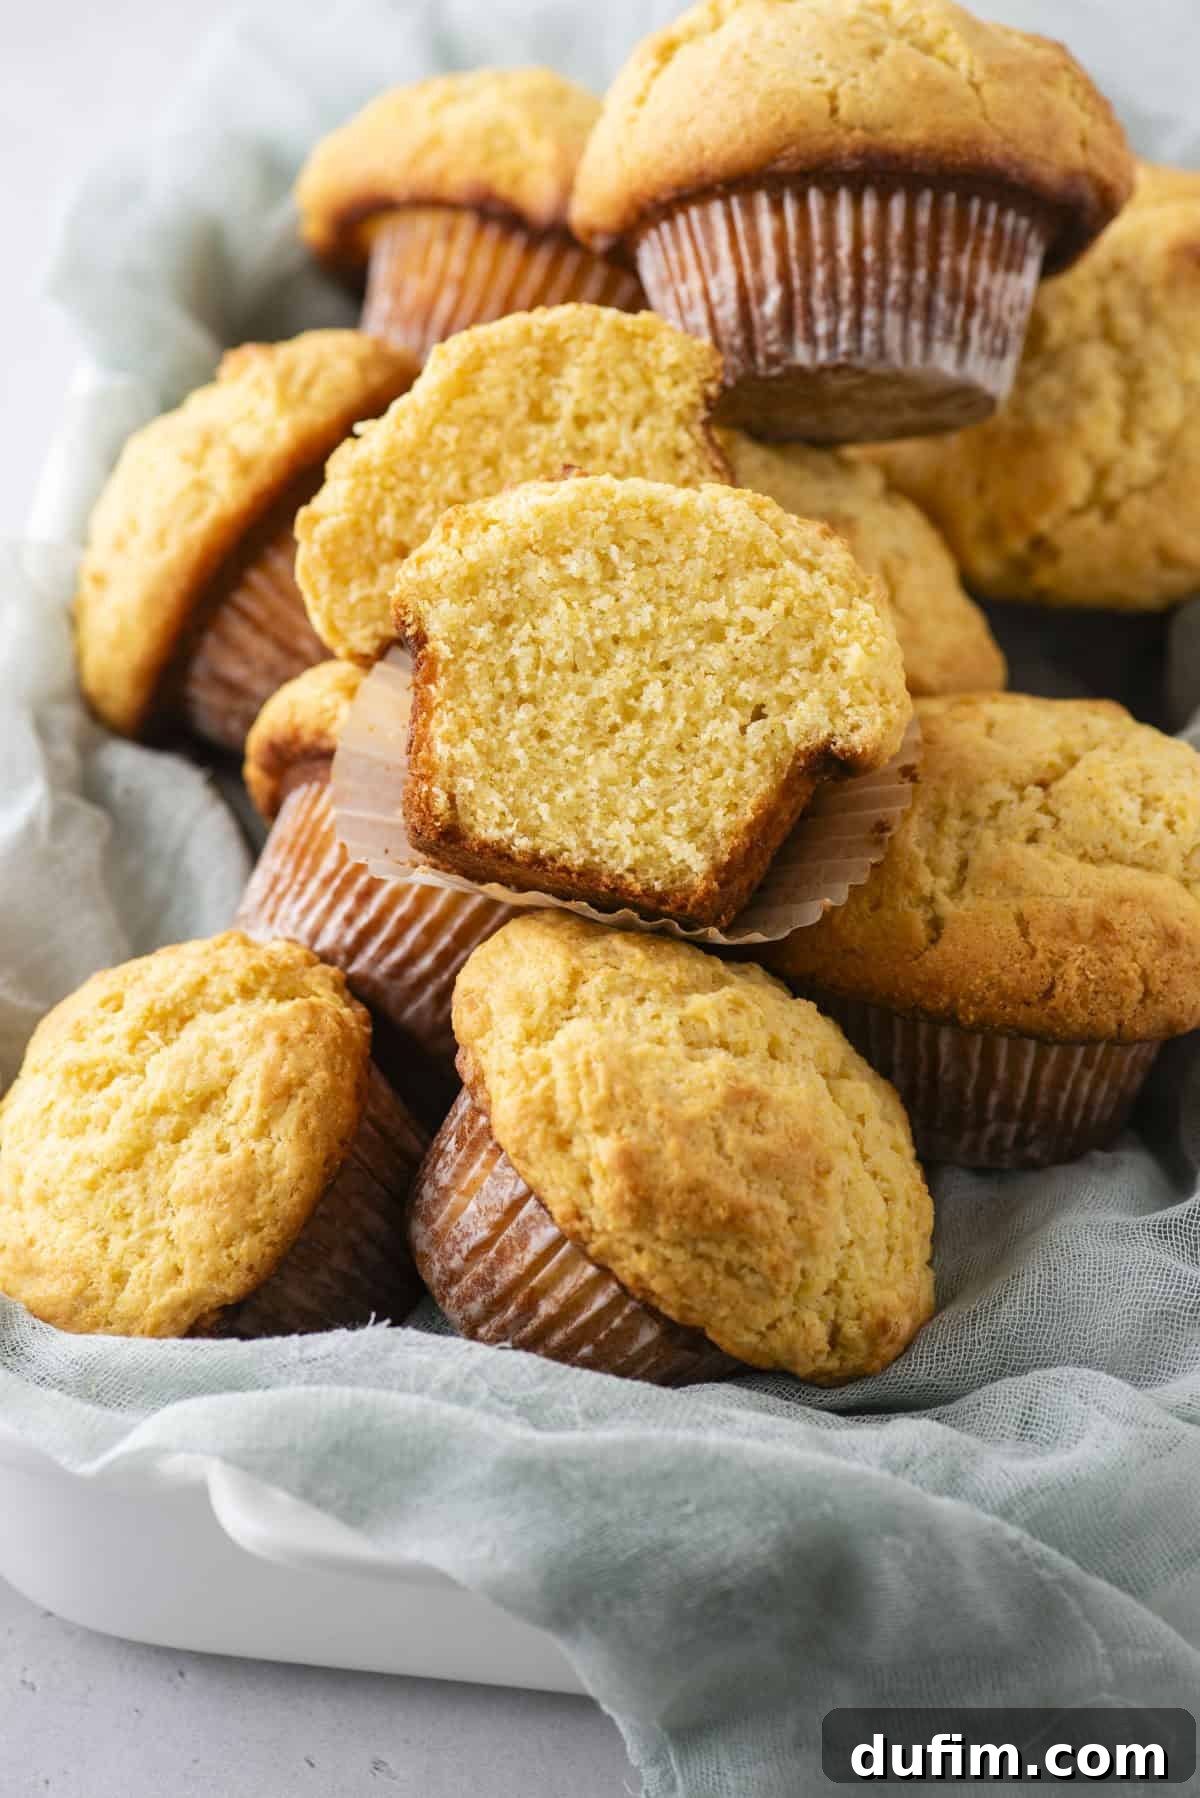
These corn muffins are, without a doubt, the best we have ever tasted. The recipe was incredibly straightforward to follow, and the results were truly spectacular. Every bit worth the effort, and undeniably superior to any boxed mix we’ve ever tried.
– Denise
The Quest for Perfection: My Journey to the Best Corn Muffins
For weeks, my kitchen transformed into a corn muffin laboratory. The goal was ambitious: to develop the most sought-after muffin recipe yet – a bakery-style corn muffin that not only delivers on flavor but also boasts that iconic, sky-high dome. Honestly, I initially hesitated. My background didn’t include a lifetime of baking traditional corn muffins, and I wasn’t sure I could truly become an “expert.” However, after meticulously fine-tuning seven distinct test batches, adjusting everything from ingredient ratios to mixing techniques and baking temperatures, I can now confidently declare mission accomplished. I’ve unlocked the secrets to perfectly risen, tender, and incredibly delicious bakery-style corn muffins.
This journey wasn’t just about mixing ingredients; it was about understanding the science of baking, listening to my audience, and pushing the boundaries of conventional recipes. Each batch brought new insights, leading me closer to the ideal texture and taste that define a truly exceptional corn muffin. The result is a recipe that not only meets but exceeds expectations, proving that with enough dedication, even a non-expert can master a beloved classic.
Understanding the Desire: What My Audience Truly Wanted
Before even cracking an egg, I reached out to my community to understand their ideal corn muffin. Their feedback was invaluable and crystal clear. Two primary desires emerged as non-negotiable:
- A Huge Super Dome: This was perhaps the most emphatic request. That signature, proud dome is a hallmark of bakery-quality muffins, and it happens to be a particular area of expertise for me. My followers wanted muffins that didn’t just rise, but soared, creating a visually appealing and satisfyingly substantial top.
- A Sweeter Corn Muffin: While not wanting something overly saccharine, there was a definite preference for a corn muffin that offered more sweetness than a typical, often more savory, cornbread. The goal was a delightful treat that could stand alone, yet still evoke the comforting warmth of corn.
Armed with these specific requests, I knew exactly what my benchmarks were. Every subsequent test batch was evaluated against these two criteria, ensuring that the final recipe would deliver precisely what everyone was dreaming of.

Reimagining the Ratio: Breaking the Traditional Corn Bread Muffin Formula
The vast majority of traditional corn muffin recipes adhere to a 1:1 ratio of flour to cornmeal. Naturally, my first test batch followed this widely accepted standard. The outcome, however, was far from ideal. The muffins were dense, heavy, and disappointingly dry. They struggled to achieve any significant rise, and that coveted “super dome” my audience longed for was utterly absent. It was clear that this traditional approach simply wouldn’t deliver the light, fluffy texture I was aiming for.
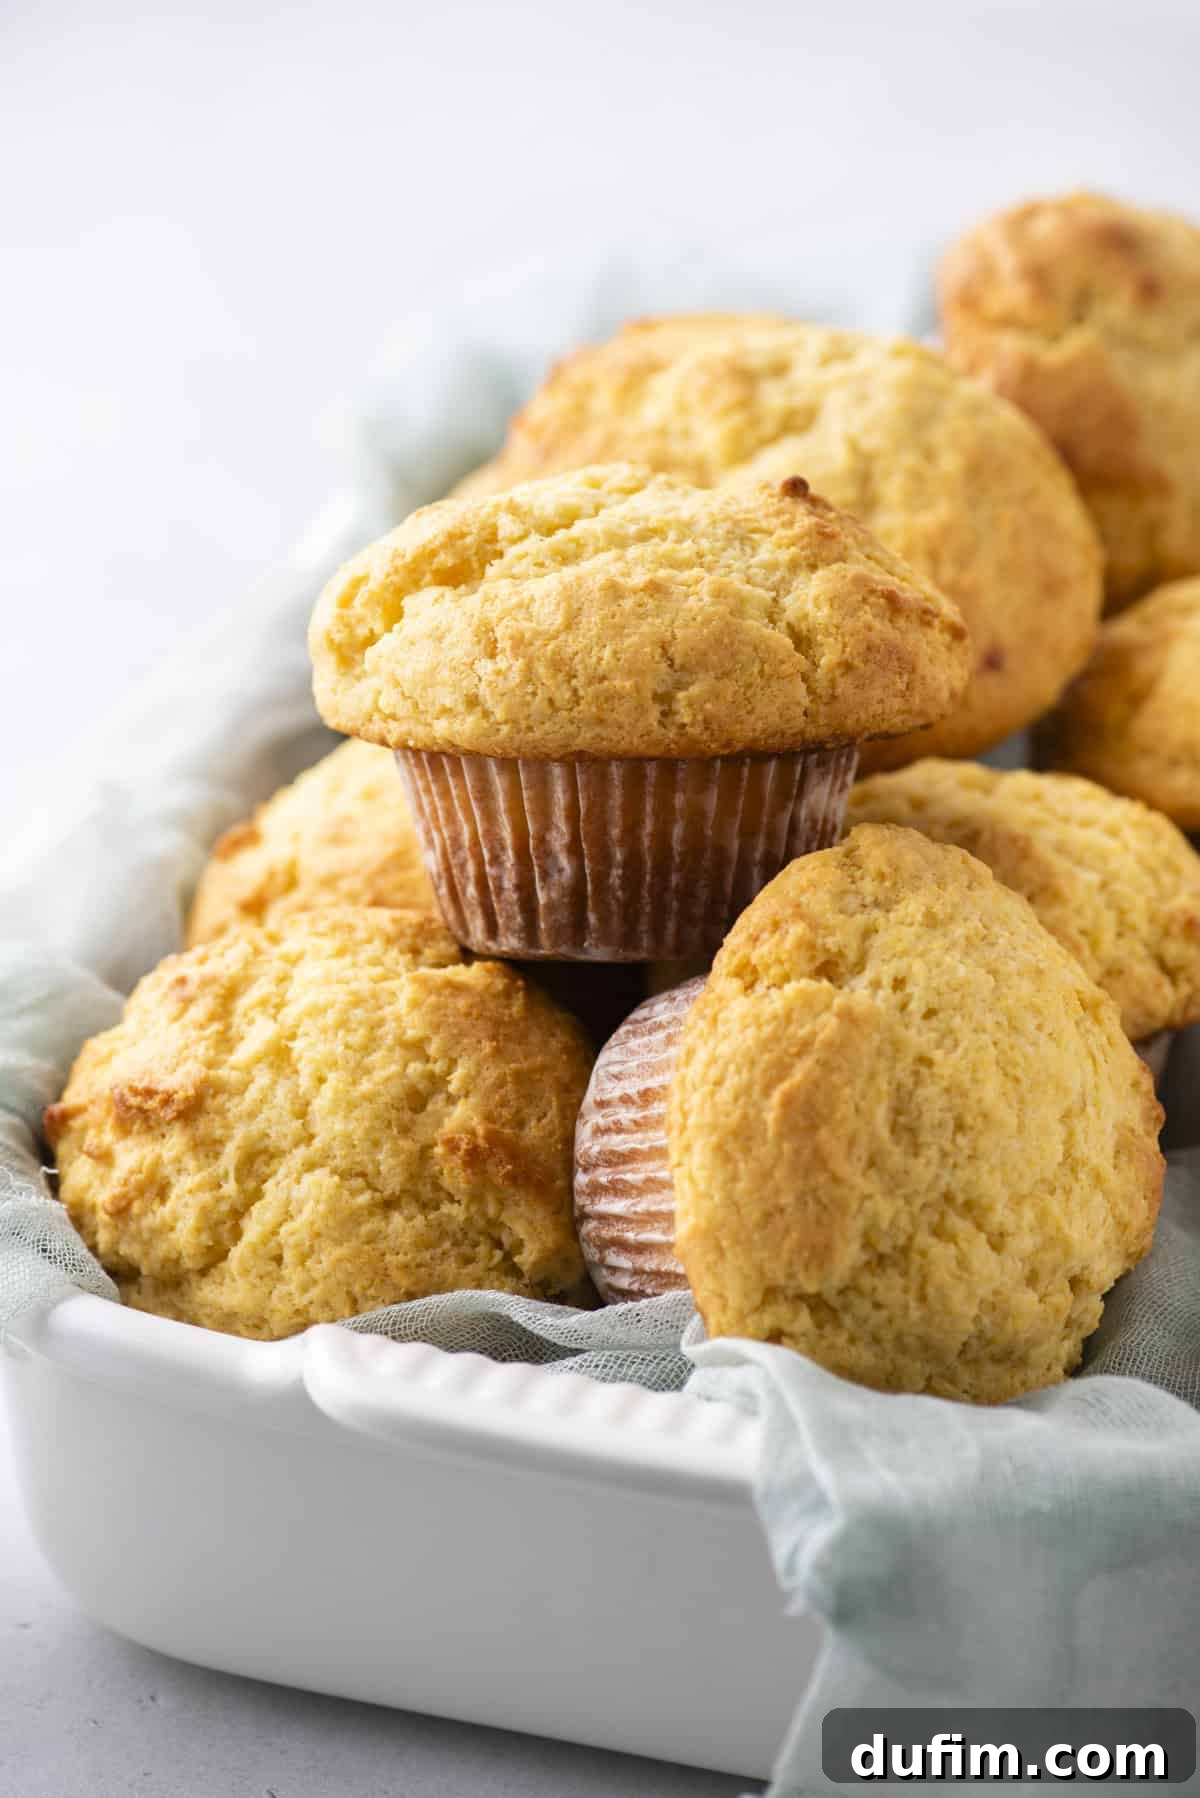
Recognizing the need for innovation, I made a bold decision: to deviate from tradition. After several iterations, I settled on a revolutionary 3 cups of all-purpose flour to just 1 cup of cornmeal. This seemingly simple alteration proved to be the game-changer. This new ratio provided sufficient corn flavor and a delightful hint of texture, without making the muffin too heavy. Crucially, it allowed the batter to rise beautifully, ensuring each muffin baked up tall, soft, and moist. The higher flour content provided the necessary gluten structure for that impressive dome, while the cornmeal still imparted its signature character.
The Dynamic Duo: Sugar and Leavening for That Perfect Lift
With the ratio solved, the next challenge was achieving the desired level of sweetness. My audience wanted muffins sweeter than traditional cornbread but far from a cupcake. I meticulously experimented with varying amounts of granulated sugar until I found the precise quantity that offered a delightful sweetness without overpowering the subtle corn flavor. It’s a delicate balance that took several tries, but the final result is perfectly sweet, enhancing the muffin without turning it into a dessert.
Then came the critical aspect of leavening. Initially, I tested both baking powder and baking soda, a common combination in many quick bread recipes. However, I quickly observed that baking soda contributed to a crumbly texture, which was the opposite of the tender crumb I envisioned. So, I made another crucial decision: to eliminate baking soda entirely. Instead, I leaned heavily on baking powder, using a full 2 tablespoons. While this might seem like an unusually large amount, it is precisely what these slightly denser, flour-rich muffins require to achieve their impressive, sky-high lift. This powerful leavening agent ensures a light, airy internal structure, perfectly complementing the rich exterior and satisfying dome.
The Secret to Moisture and Structure: The Power of Butter, Oil, and a Cold Rest
Achieving the perfect texture – moist, tender, and never dry – was paramount. My solution involved a strategic combination of fats: both butter and neutral oil. Butter is indispensable for imparting a rich, irresistible flavor that deepens the overall taste profile of the muffins. Its characteristic aroma and subtle sweetness elevate the experience. However, butter alone can sometimes lead to a drier crumb once cooled. This is where oil steps in; it’s the unsung hero for ensuring the muffins remain incredibly soft, tender, and moist for days, preventing them from drying out prematurely.
Another crucial lesson, honed from my experience with perfecting lemon muffins, is the power of a chilled batter. For muffin batters containing butter, a 30-minute rest in the refrigerator is not merely recommended; it’s absolutely essential. This extended rest time, longer than the typical 15-minute counter rest, plays a dual role in creating that coveted “super dome” and superior texture:
- The butter solidifies: As the butter chills, it firms up within the batter. This solidification creates a more stable, sturdier structure, which helps the muffins hold their shape and rise vertically rather than spreading outwards during baking.
- The baking powder activates more effectively: The cold temperature slows down the initial reaction of the baking powder, reserving its full leavening power for when the batter hits the hot oven. This delayed, more powerful reaction, combined with the flour’s starch molecules having more time to absorb liquid and swell, results in an even thicker batter. This ultimately leads to a more dramatic, impressive rise and that signature domed top we all love.
These combined techniques ensure a muffin that is not only flavorful and moist but also boasts the structural integrity and impressive aesthetic of a true bakery masterpiece.
The Ultimate Reward: Worth Every Single Test Batch
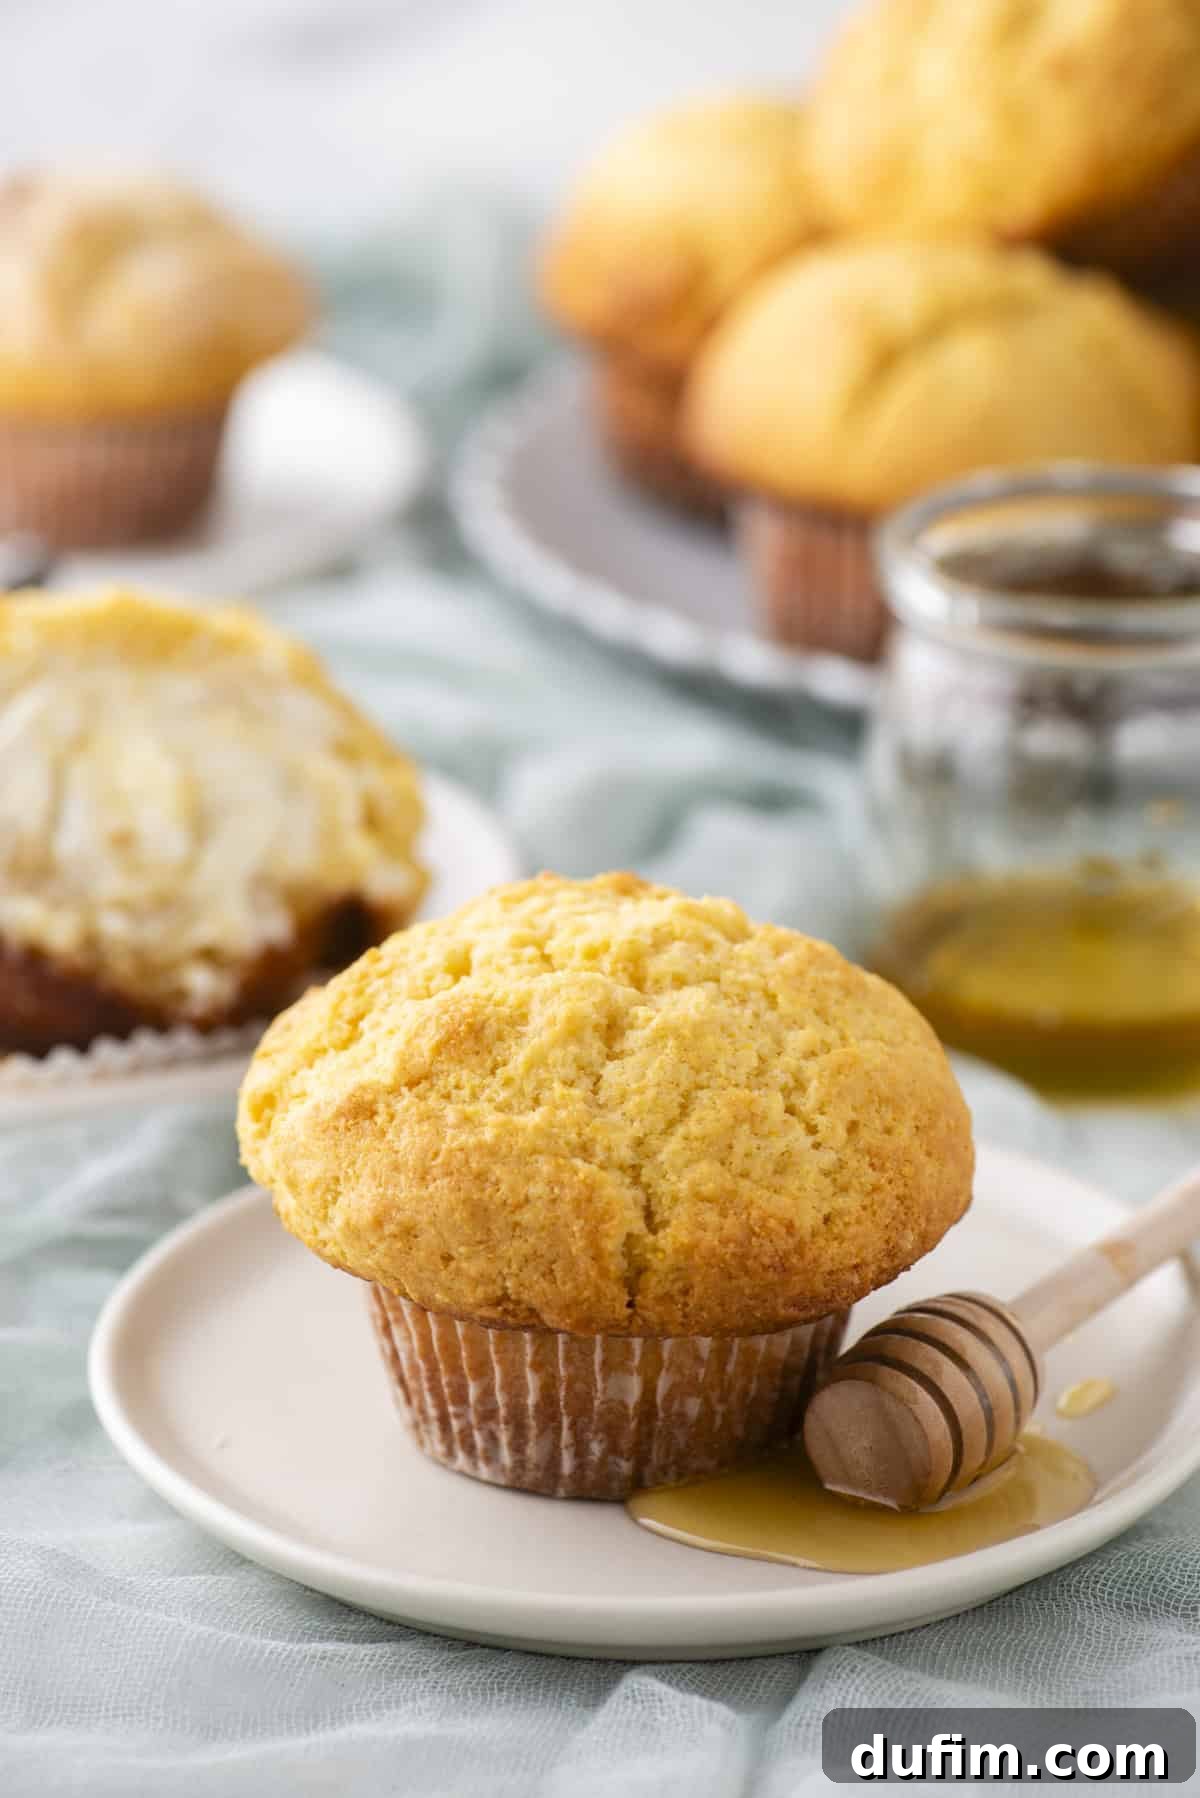
The journey was long, but the destination is pure delight. These bakery-style corn muffins proudly tick every box on the ideal muffin checklist:
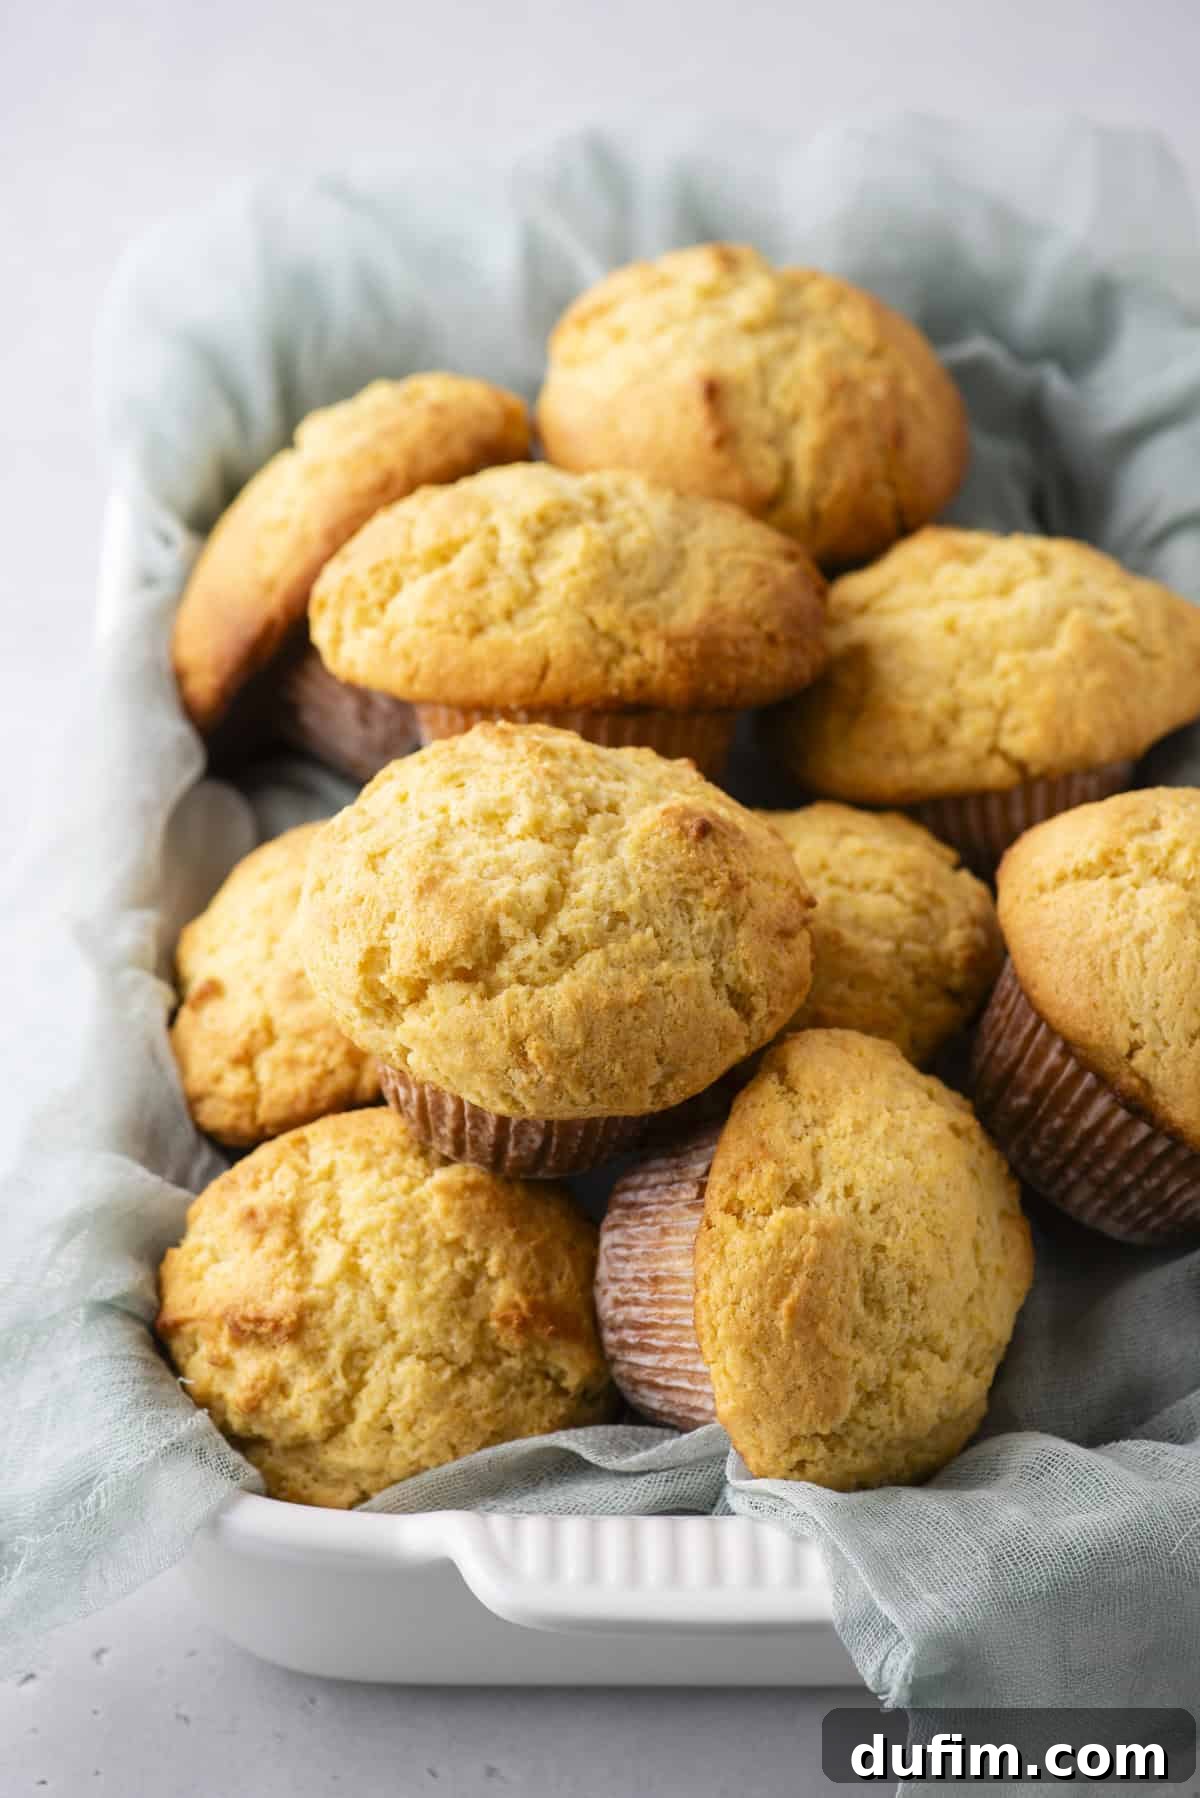
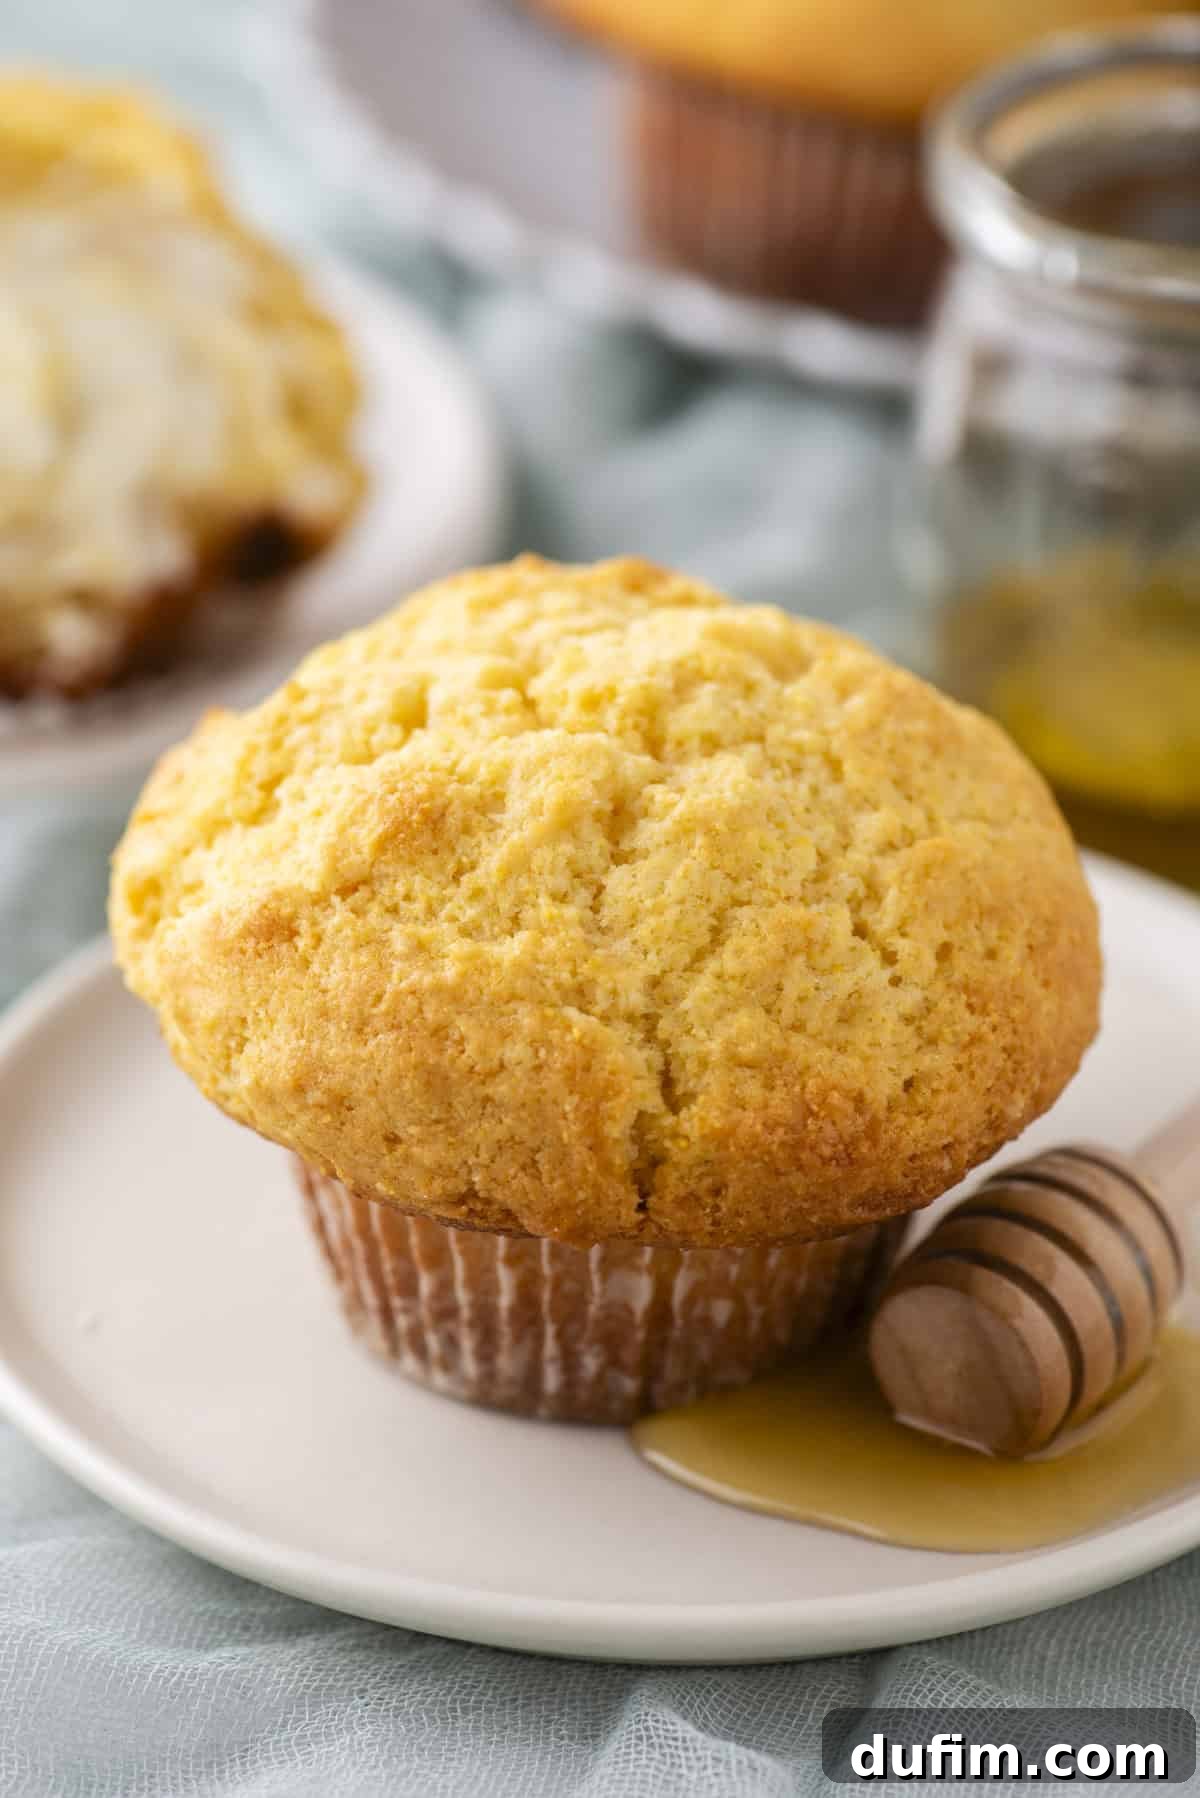
- A majestically tall, perfectly formed super dome.
- A wonderfully balanced corn flavor that is both comforting and distinctive.
- An incredibly moist, tender crumb with just the right amount of sweetness, melting in your mouth with every bite.
After two intensive weeks and seven exhaustive test batches, I can now, with absolute conviction, present this as the definitive corn muffin recipe. And with this achievement, I believe I can finally, and officially, claim the title of bakery-style corn muffin expert!
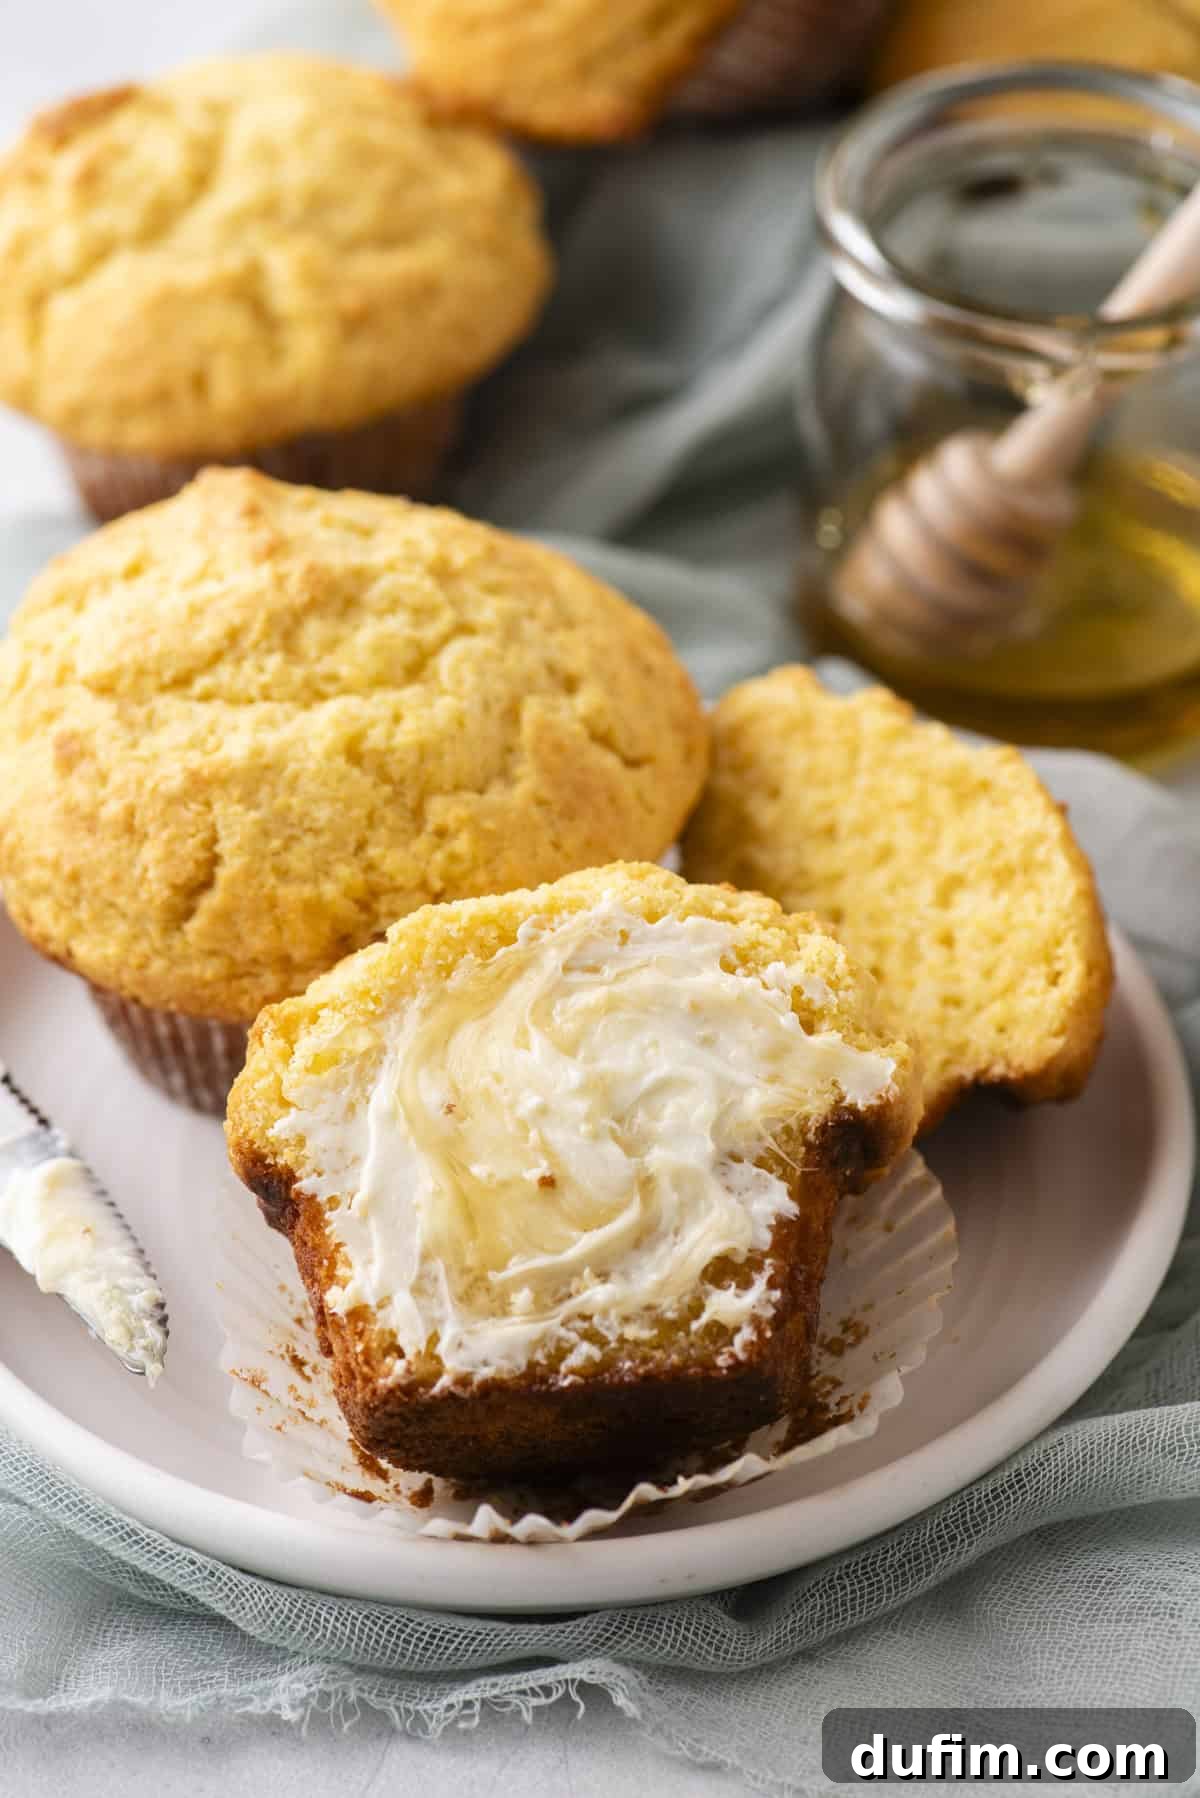
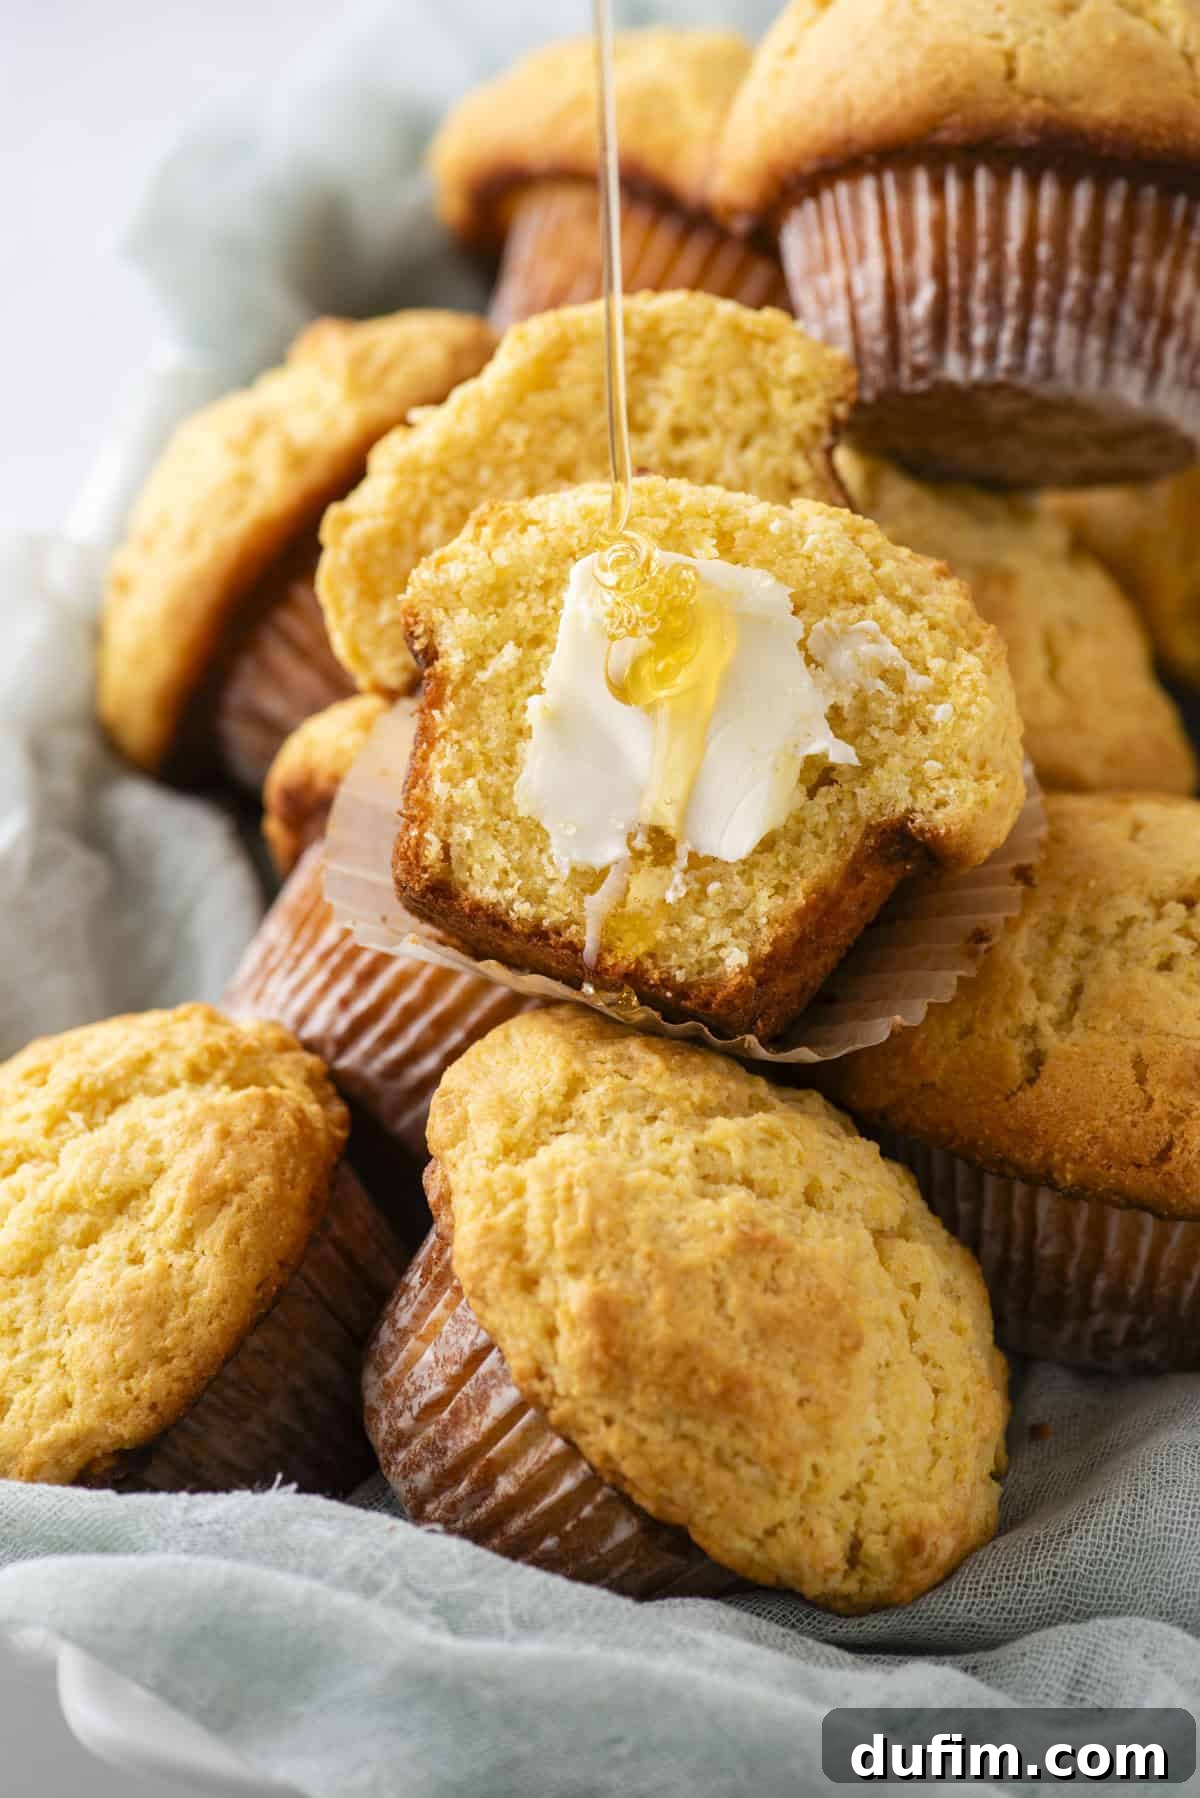
But wait, there’s more! We cannot, under any circumstances, overlook the pièce de résistance: the honey butter glaze. Because what truly is a bakery-style corn muffin without that extra touch of luxurious indulgence? This dreamy, luscious glaze, crafted from a harmonious blend of rich butter, golden honey, a splash of milk, and silky powdered sugar, is the perfect finishing touch. It’s designed to be either a generous dip or a delicate drizzle, elevating these already phenomenal muffins to an entirely new level of deliciousness. Imagine warm, golden muffins, their tender crumb soaking up the sweet, buttery goodness – because sometimes, more truly is more. It’s an optional, yet highly recommended, addition that transforms a great muffin into an unforgettable experience. 😍
Essential Ingredients for Our Cornbread Muffin Recipe
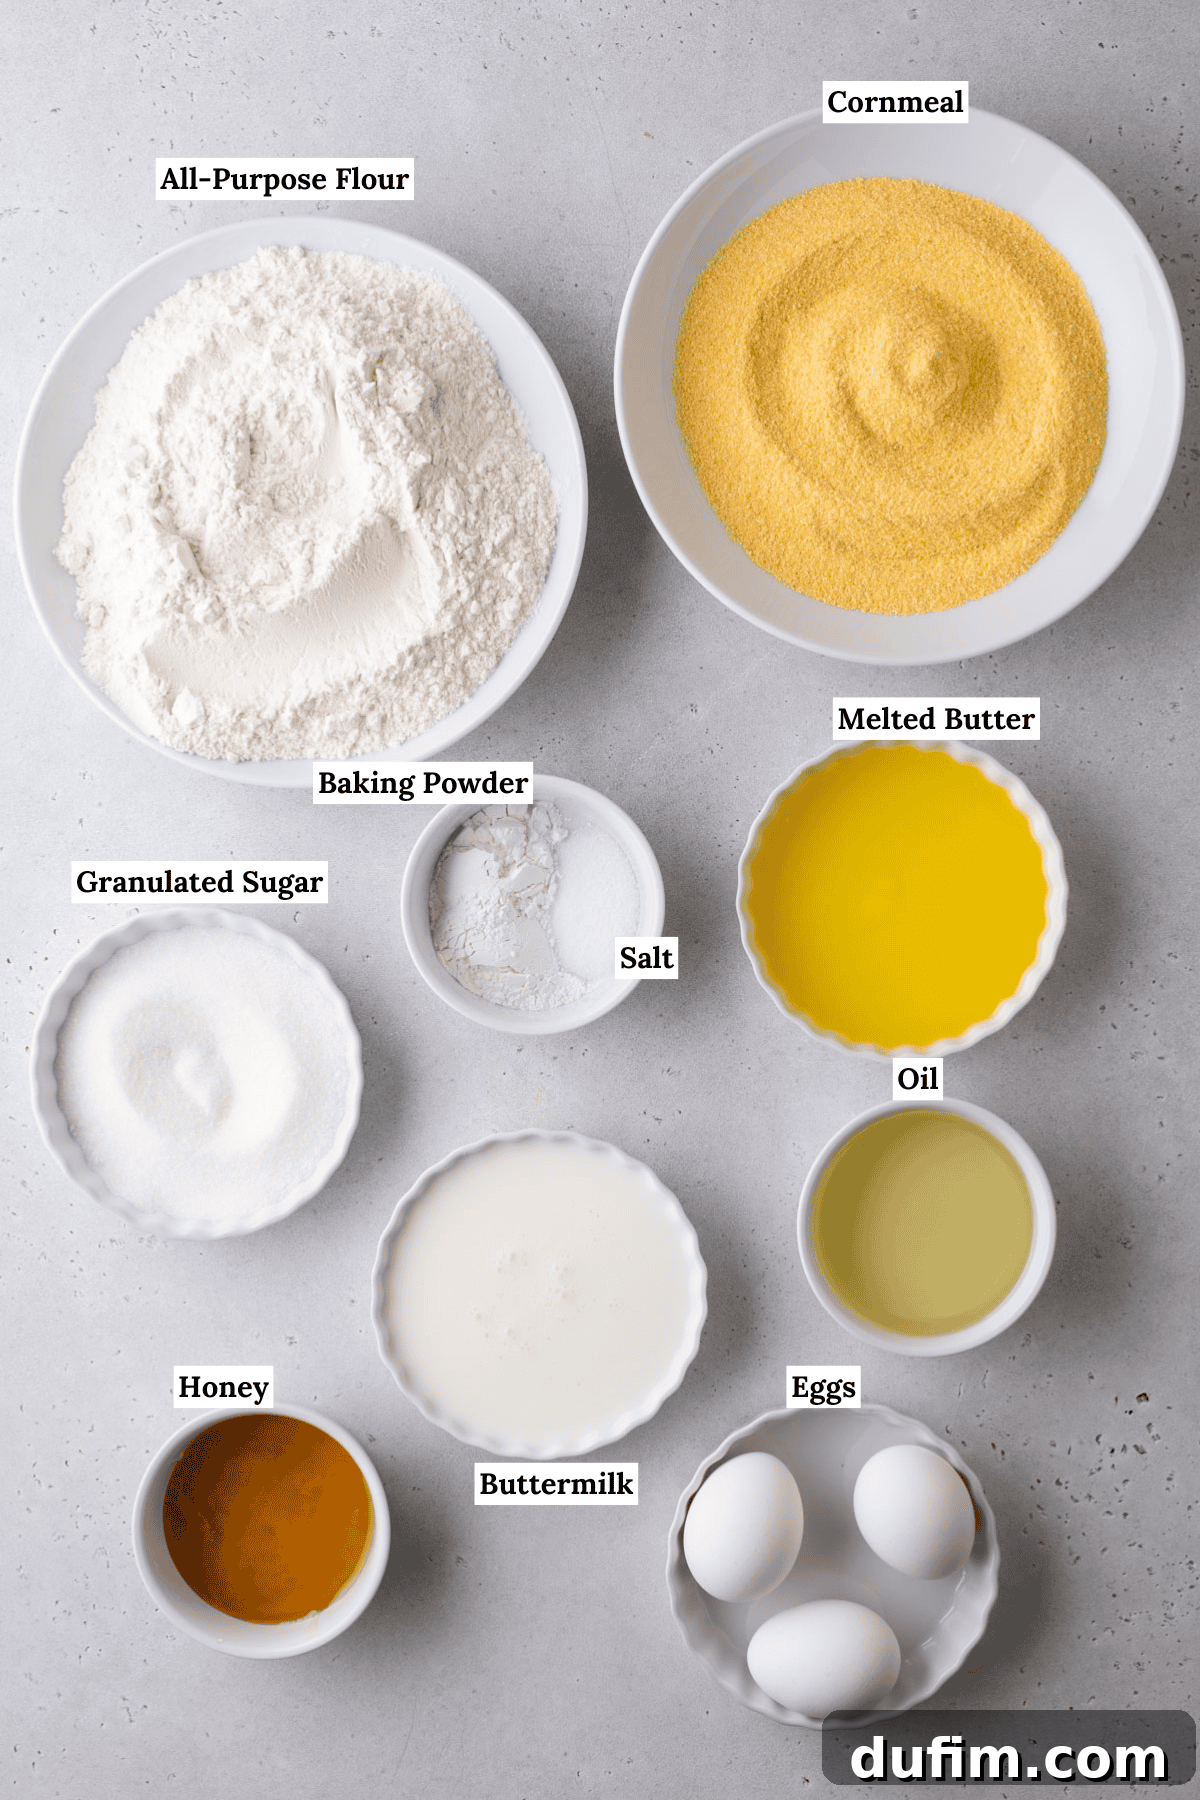
Crafting the perfect corn muffin starts with understanding the role each ingredient plays. Here are the key players in achieving our super dome, tender-crumbed delights:
- Cornmeal: I strongly prefer using 100% fine ground yellow cornmeal for a smooth, tender crumb that still has that lovely corn essence. While medium grind can also work, avoid anything labeled “cornmeal mix,” as these often contain added flour and leavening agents which would disrupt our carefully balanced ratios.
- Buttermilk: This is a non-negotiable ingredient! Buttermilk provides essential acidity that reacts with the baking powder, ensuring a powerful rise. More importantly, it contributes significantly to the muffins’ moisture content and their signature soft, tender texture.
- Baking Powder: Yes, a full 2 tablespoons! This generous amount is critical for giving these flour-rich muffins the intense lift needed to form impressive domes. We skip baking soda entirely in this recipe, as I found it made the muffins undesirably crumbly during my testing phase.
- Butter: Crucial for flavor and richness. Melted and cooled unsalted butter infuses the muffins with a luxurious, deep buttery taste that enhances the overall experience and contributes to a beautiful golden-brown crust.
- Oil: The secret weapon for lasting moisture and tenderness. A neutral oil (like canola, vegetable, olive, or avocado oil) ensures the muffins remain soft and moist for days, preventing them from drying out, a common pitfall in many muffin recipes.
Step-by-Step Guide: How to Make The Best Cornbread Muffins
Achieving bakery-quality corn muffins at home is simpler than you think when you follow these precise steps. Attention to detail, especially regarding the batter’s rest, is key to success:
- Important Notes Before You Begin: This recipe demands a mandatory 30-minute rest for the batter in the refrigerator before baking – do not skip this step! For the most accurate measurement of flour, a kitchen scale (weighing in grams) is highly recommended. If you don’t have a scale, use the following method: First, aerate your all-purpose flour by whisking or spooning it to fluff it up, as flour settles and compacts over time. Then, gently spoon the aerated flour into your measuring cup. Avoid tapping the cup against the counter, which would re-compact the flour. Finally, use the flat back of a butter knife to level off any excess flour, ensuring a precise measurement. This recipe yields 8 generous, super-domed muffins.
- Combine Dry Ingredients: In a medium mixing bowl, whisk together the all-purpose flour, fine ground yellow cornmeal, granulated sugar, baking powder, and salt until uniformly combined. Set this bowl aside.
- Combine Wet Ingredients: In a separate, larger mixing bowl, combine the large eggs, buttermilk, neutral oil, cooled (but still liquid) melted unsalted butter, and honey. Whisk thoroughly until all wet ingredients are well integrated and smooth.
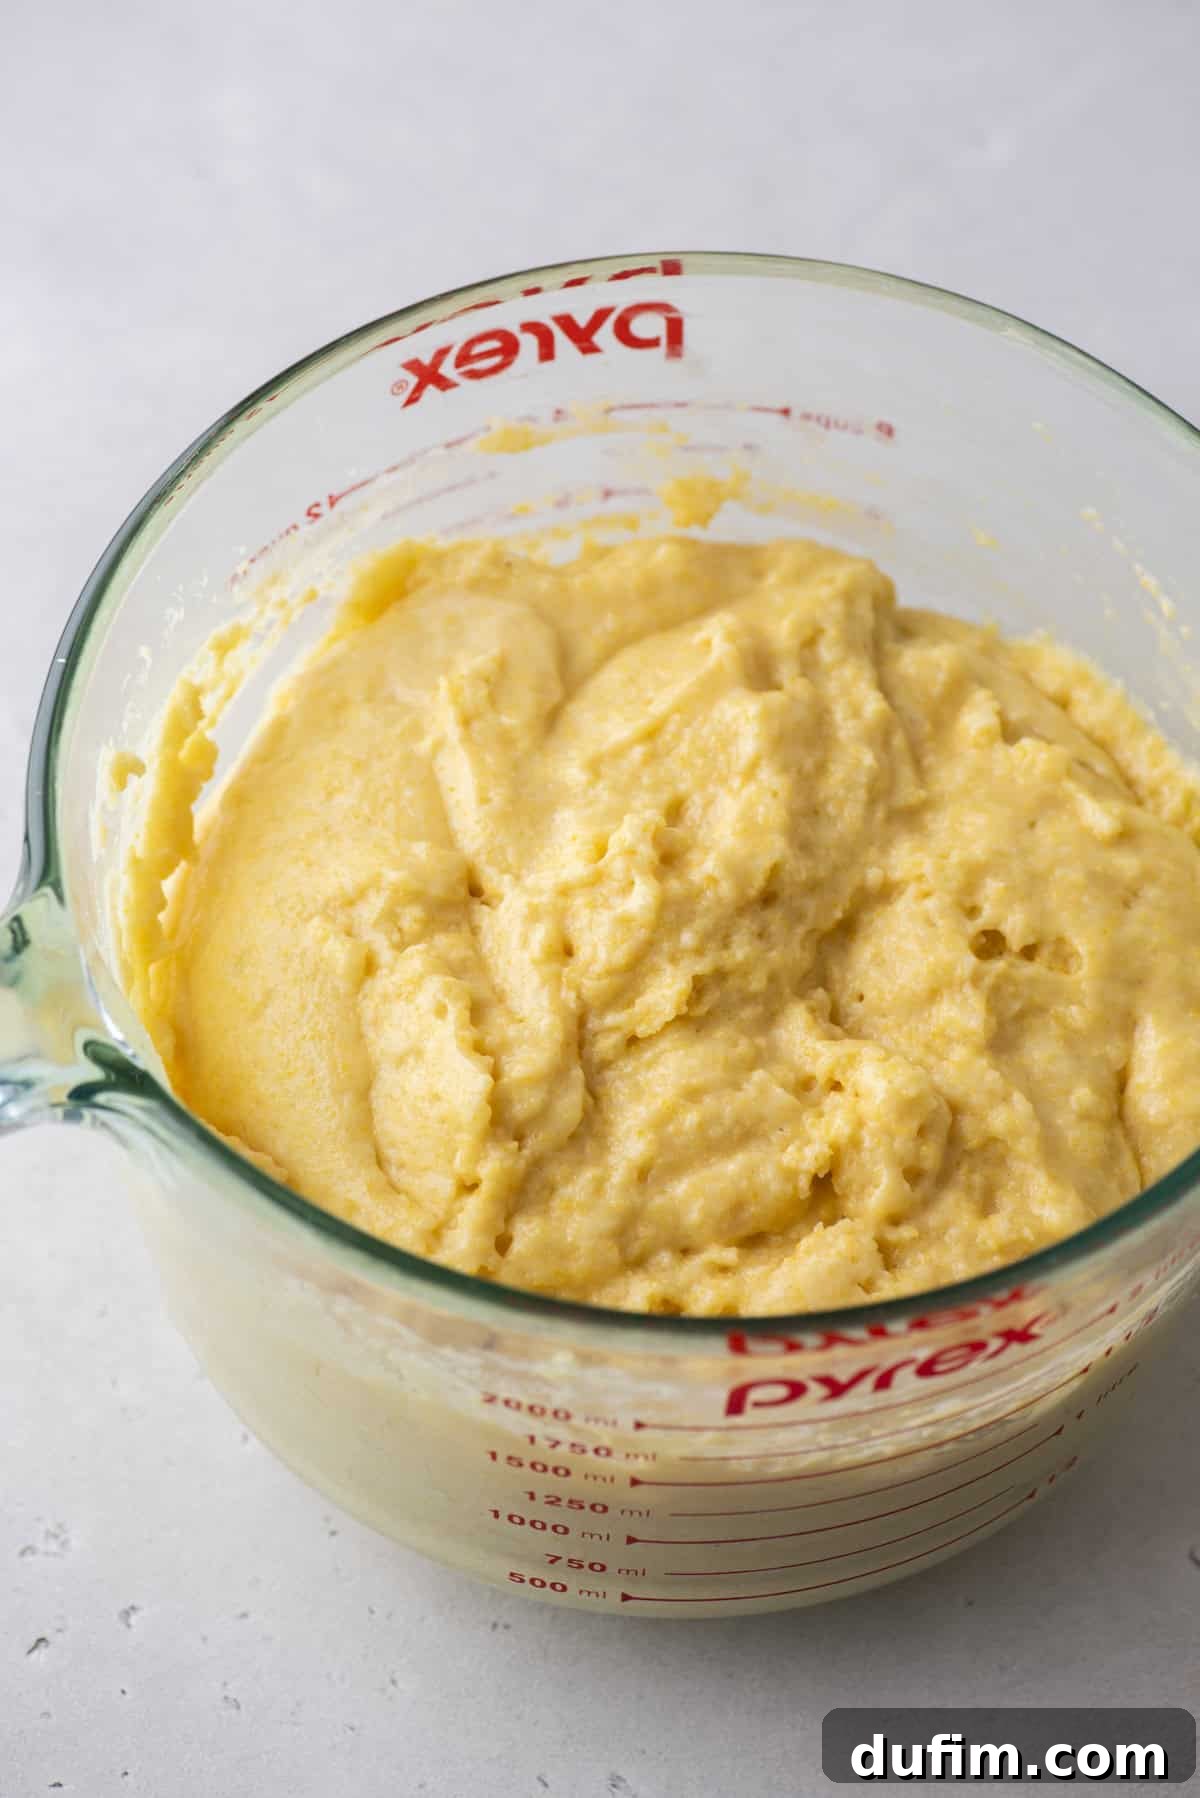
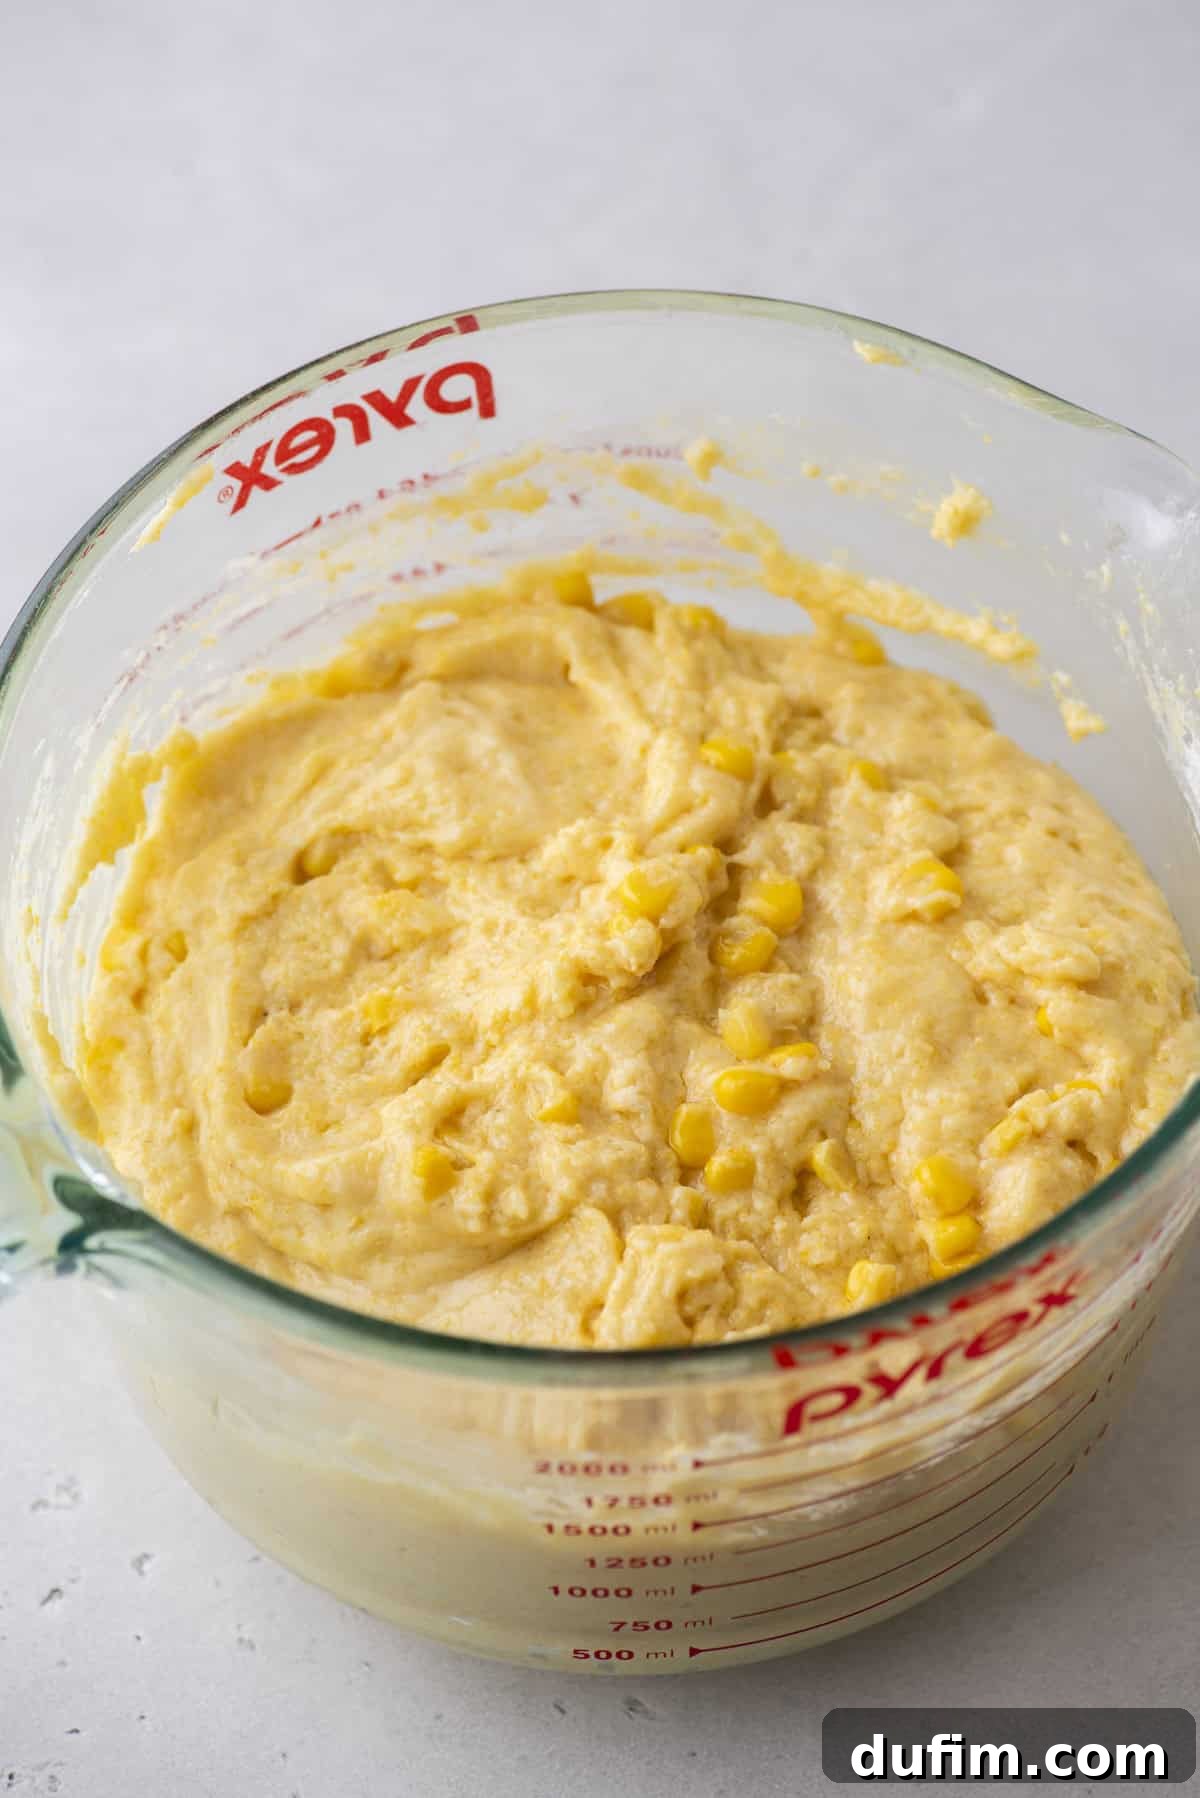
- Gently Combine Wet and Dry: Gradually add the dry ingredient mixture into the wet ingredients. Mix just until they are combined. Be careful not to overmix; a few lumps are perfectly fine. The batter will be notably thick – this is exactly what you want for those impressive domes! If you are incorporating any variations (like jalapeños, cheese, or corn kernels), gently fold them in at this stage.
- Rest the Batter and Preheat Oven: Cover the bowl containing the thick batter with plastic wrap. Place it in the refrigerator and allow the batter to rest for precisely 30 minutes. About 10 minutes before the rest period is complete, preheat your oven to 425ºF (220ºC). This ensures the oven is fully heated and ready for the batter.
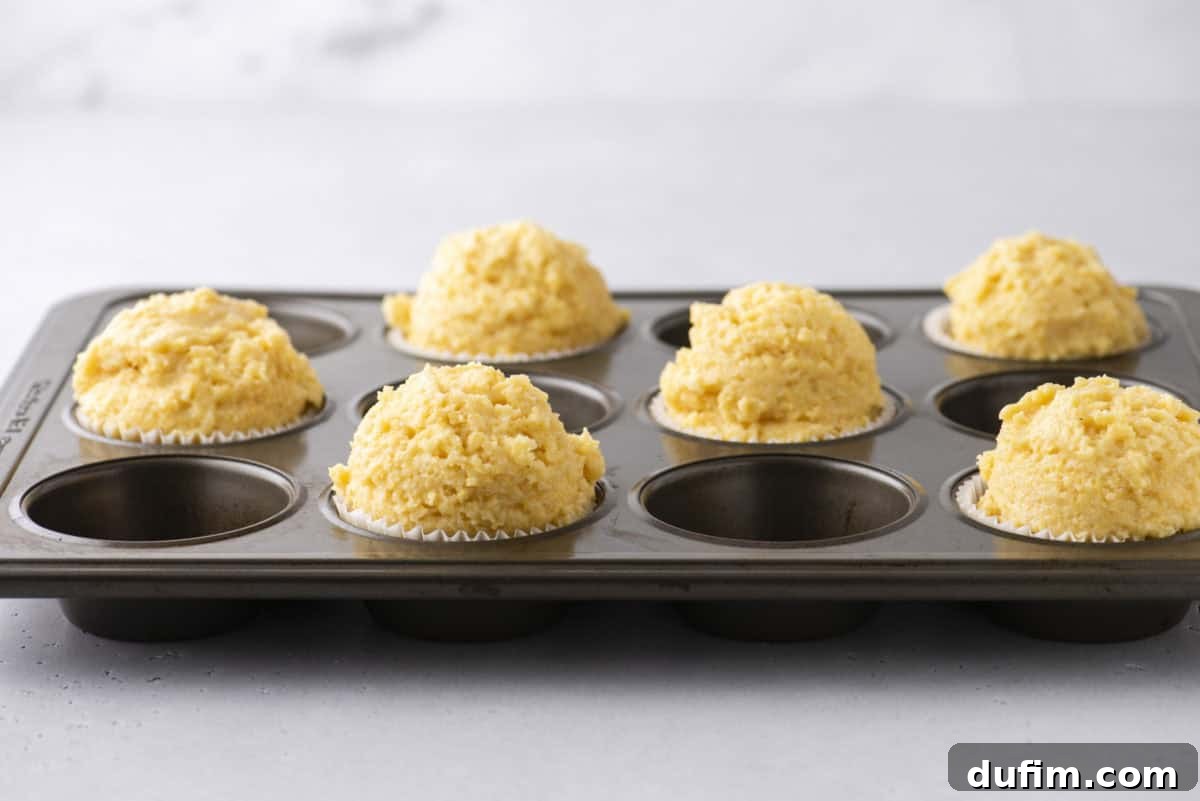
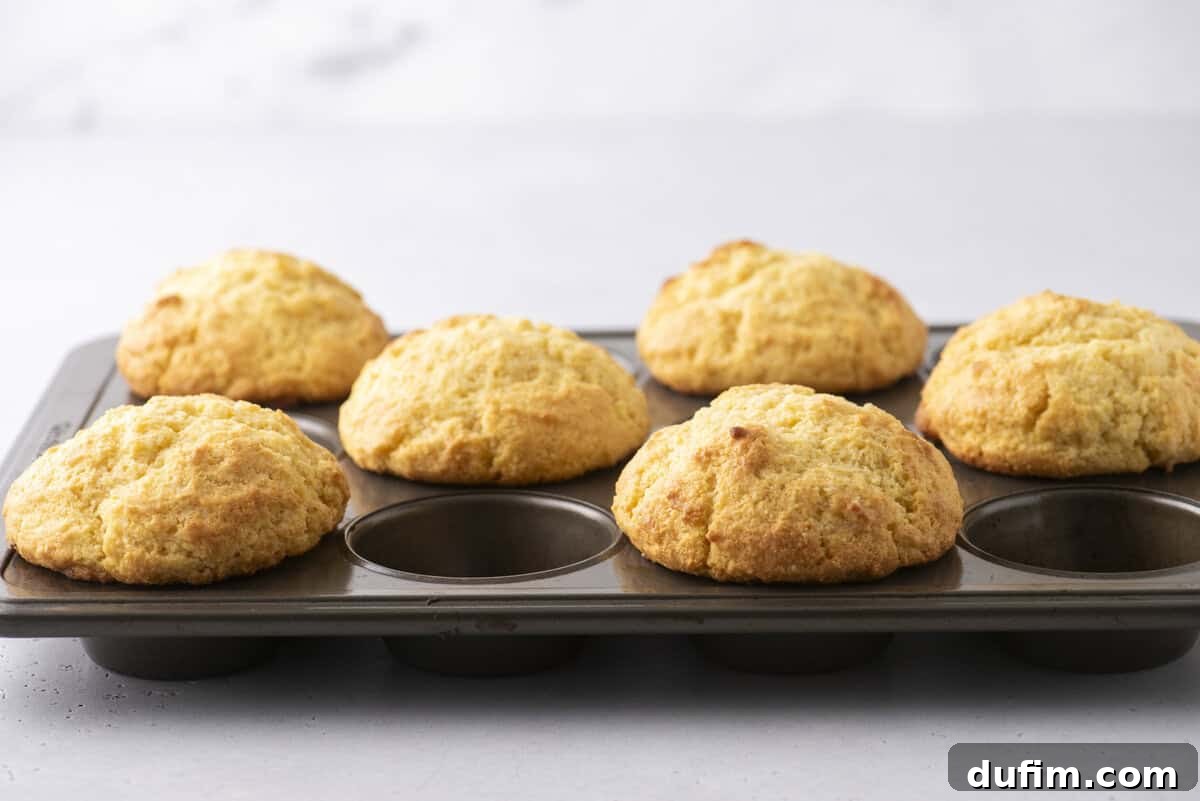
- Prepare Muffin Pan and Fill: To achieve true bakery-style muffins, line a standard 12-count muffin pan with only 6 muffin liners. Critically, you will fill every other muffin well with batter, leaving empty wells between each filled one. This technique allows for better heat circulation and prevents the muffins from crowding, promoting a superior rise and dome. Fill each lined cup with 6-8 heaping tablespoons of the chilled batter. For reference, the photos illustrate using approximately a heaping ½ cup of batter per liner. Cover the bowl with any remaining batter and return it to the fridge until ready for the next batch.
- Bake with Dual Temperatures and Cool: Place the prepared muffin pan in the center rack of your preheated 425ºF (220ºC) oven. Bake for an initial 7 minutes at this high temperature. This initial blast of heat is vital for creating that impressive dome. Without opening the oven door, immediately reduce the oven temperature to 350ºF (175ºC) and continue baking for an additional 15-18 minutes, or until a wooden toothpick inserted into the center of a muffin comes out clean. The exact baking time at 350ºF may vary slightly depending on how much batter you’ve placed in each well. Once baked, allow the muffins to cool completely in the pan on a wire rack. If baking a second batch, remember to increase the oven temperature back to 425ºF (220ºC) before placing the next pan in.
Elevate Your Muffins: To Make the Honey Butter Glaze
This optional, yet highly recommended, honey butter glaze adds a decadent touch that truly sets these bakery-style corn muffins apart. It’s quick to prepare and incredibly versatile for dipping or drizzling.
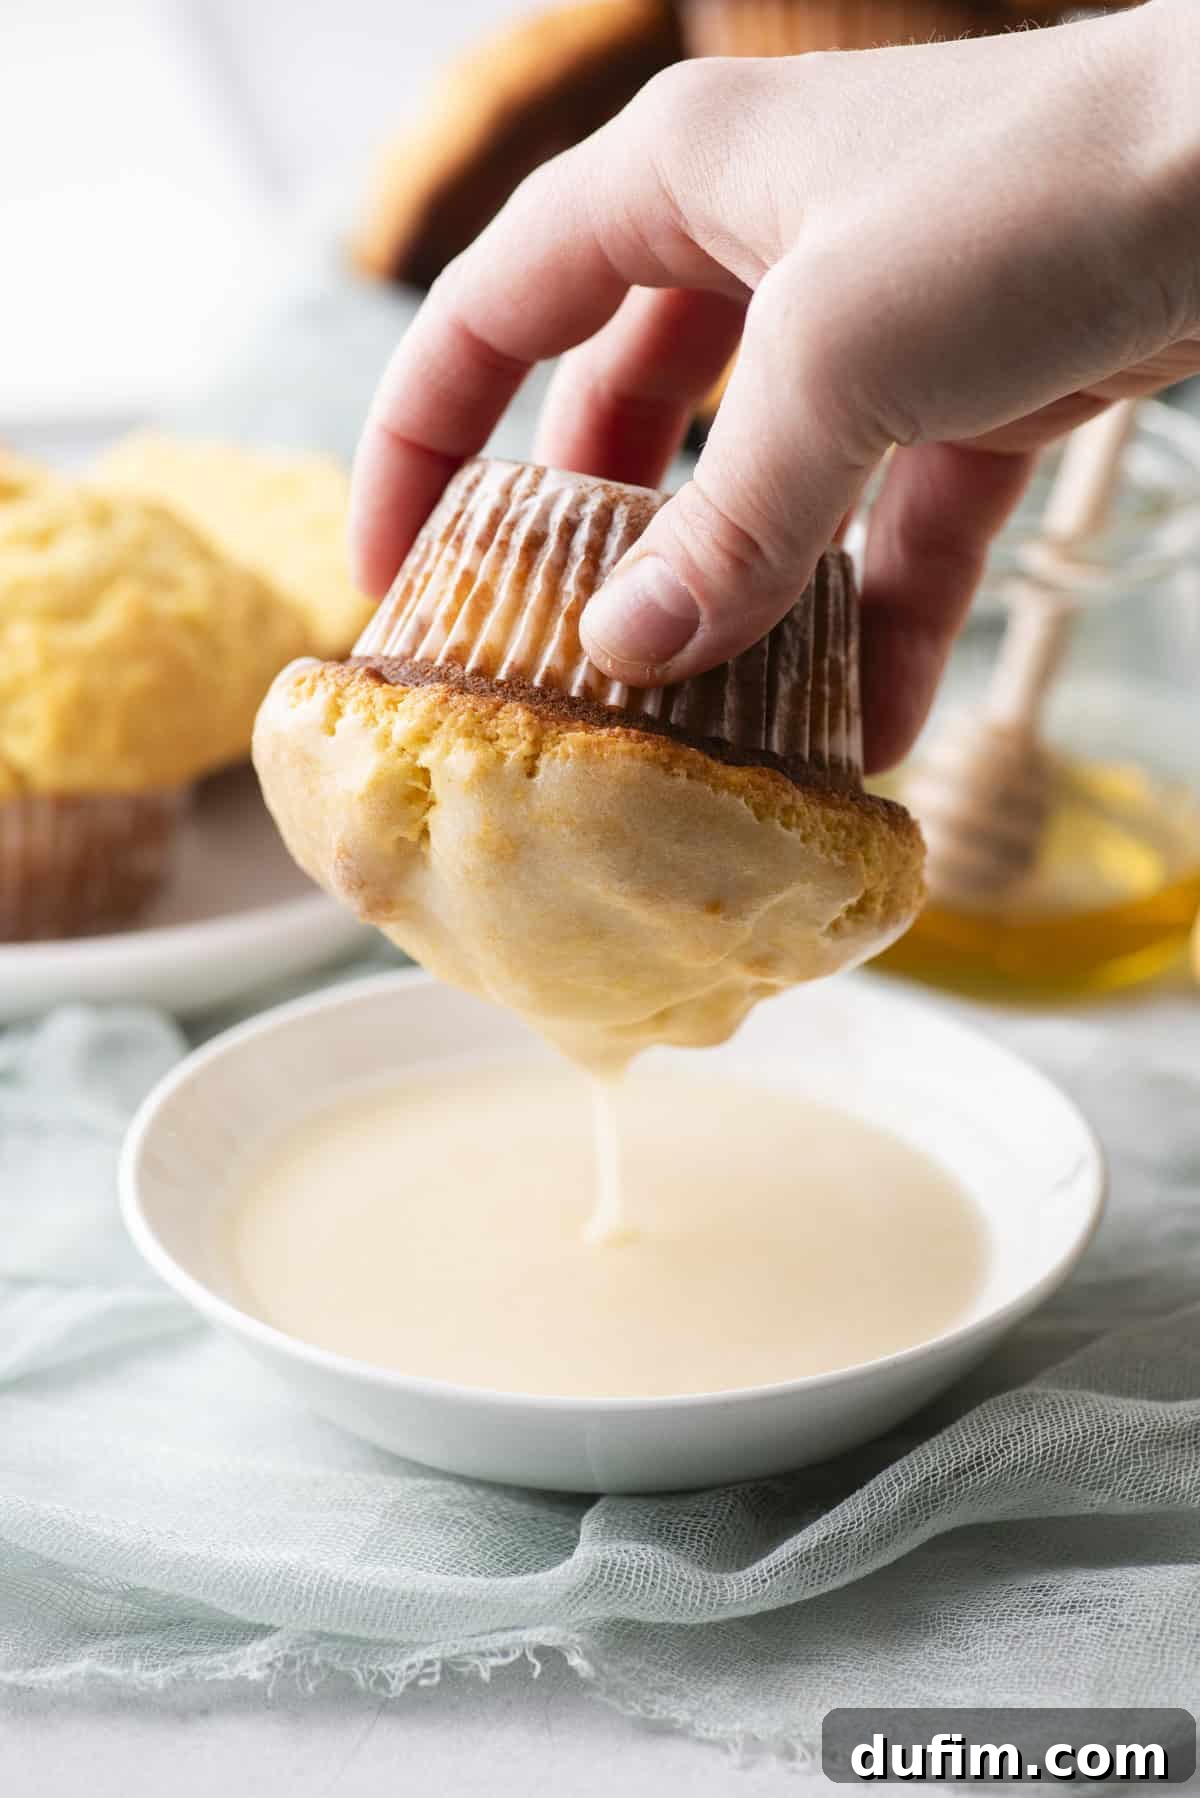
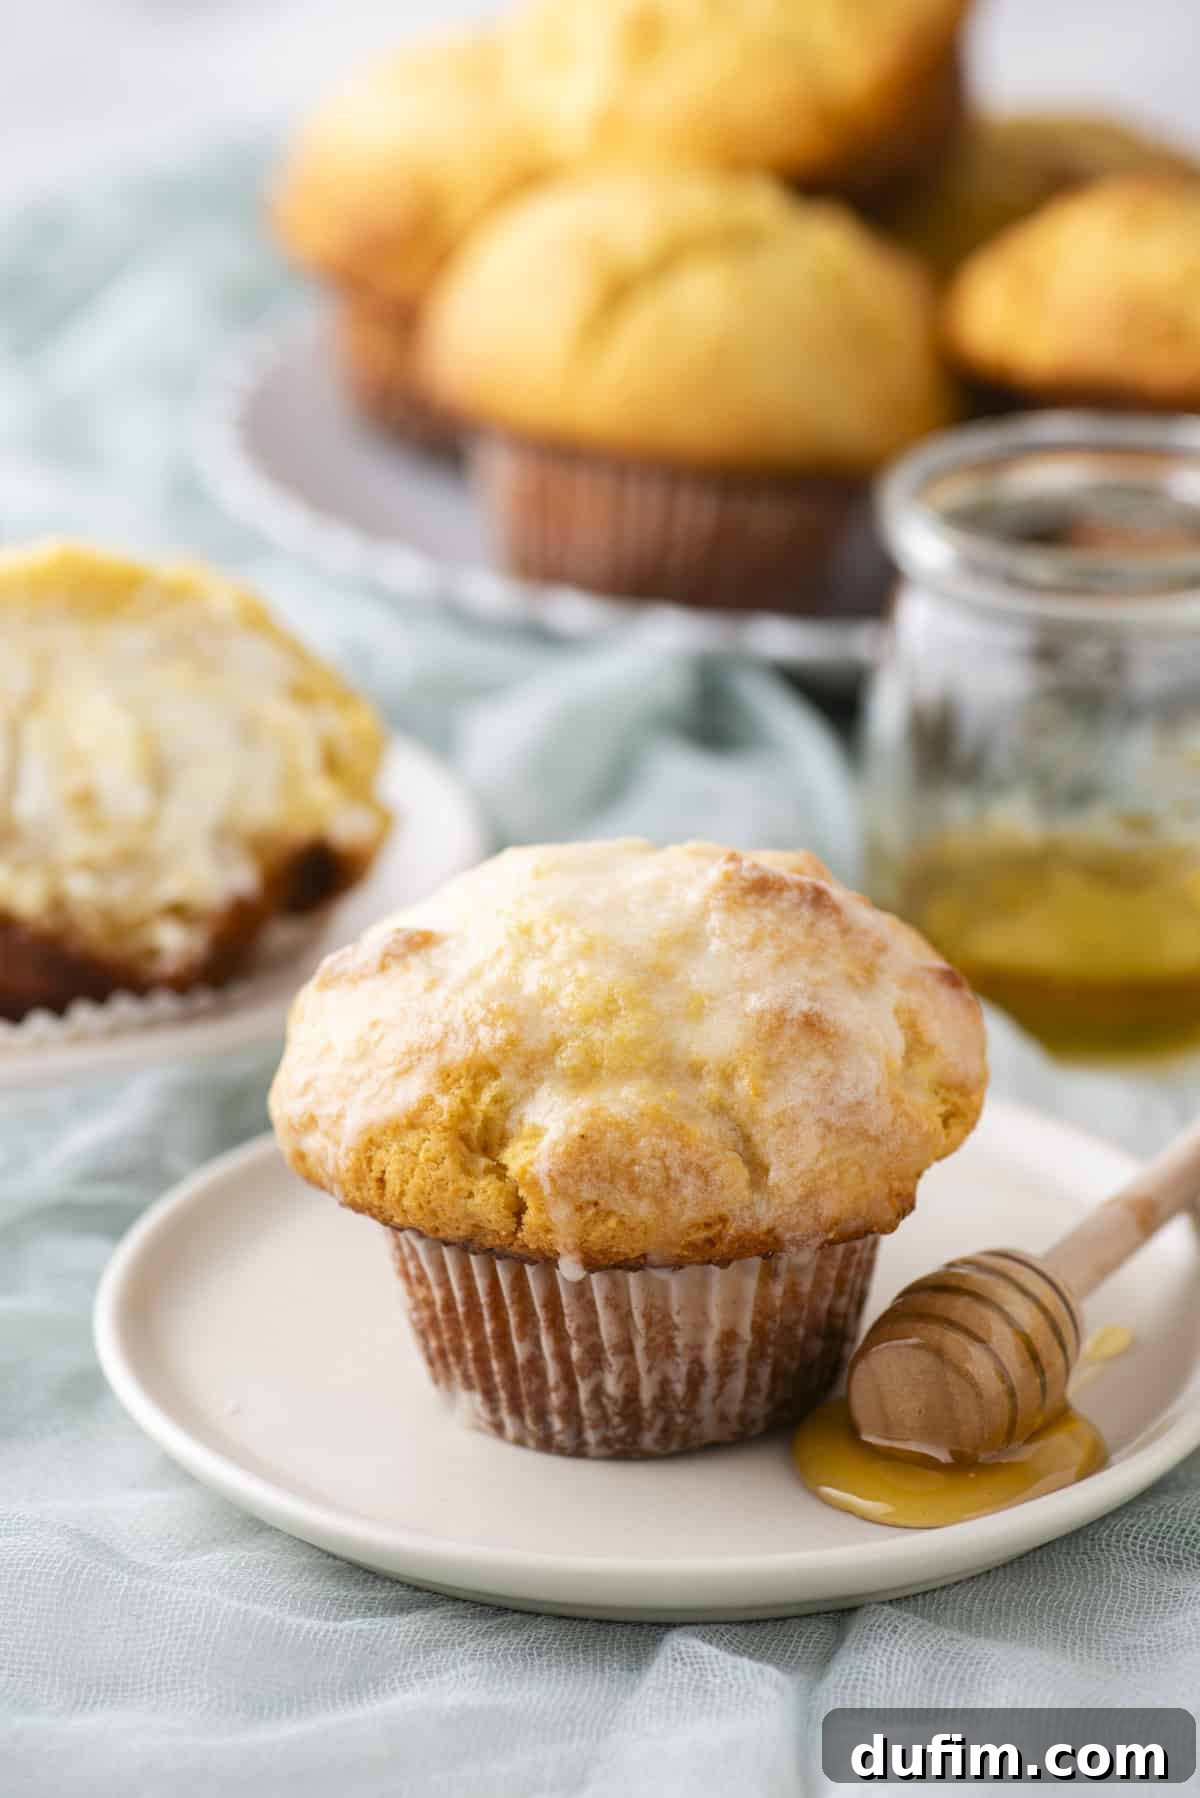
- Melt Wet Ingredients: In a microwave-safe bowl, combine the unsalted butter, honey, and milk. Microwave on high for approximately 30 seconds, or until the butter is fully melted. Whisk the mixture well until it’s smooth and homogenous.
- Incorporate Powdered Sugar: To ensure a perfectly smooth, lump-free glaze, it is essential to sift the powdered sugar before adding it. Gradually whisk the sifted powdered sugar into the warm butter-honey-milk mixture until a smooth consistency is achieved.
- Adjust Consistency and Serve: If the glaze appears too thick, add a tiny bit more milk, one teaspoon at a time, until you reach your desired runny consistency. The goal is a glaze that is thin enough to easily dip or drizzle. Once prepared, either dip the tops of your cooled muffins into the glaze or artfully drizzle it over them. Serve immediately and enjoy the extra layer of sweet, buttery flavor!
The Ultimate Guide: How to Create Bakery Style Muffins
Bakery-style muffins are instantly recognizable by their glorious, towering domes – a feature that elevates them from a simple baked good to a truly impressive treat. Mastering this characteristic dome involves a few key techniques that I’ve perfected through countless batches. Here’s how you can achieve those coveted tops:
1. The Crucial Rest Period for Supreme Structure
When your muffin batter contains butter, a 30-minute rest in the refrigerator is not merely a suggestion; it’s a critical step for achieving those tall, bakery-style domes. During this essential chilling time, several magical things happen:
- The butter solidifies: As the butter chills, it becomes firm within the batter. This solid fat contributes significantly to creating a sturdier batter structure, which is vital for the muffins to rise upwards rather than spreading outwards.
- The flour hydrates fully: The starch molecules in the flour have ample time to absorb the liquid ingredients and swell. This hydration leads to a softer, more tender crumb in the finished muffin.
- The baking powder activates optimally: The cold batter helps to slow down the initial reaction of the baking powder. This delayed activation ensures that when the batter finally hits the high heat of the oven, the baking powder unleashes its full leavening power, causing a rapid, dramatic rise. This results in an even thicker batter that bakes up with that signature, impressive “super dome.”
2. Strategically Fill Every Other Muffin Cup
This ingenious tip is a true game-changer for achieving those perfectly domed, bakery-quality muffin tops! When preparing your 12-count muffin pan, only line and fill 6 muffin cups, ensuring you leave an empty well between each filled cup. By filling every other cup, you create ample space around each muffin. This allows for superior air circulation, which promotes a more even bake and encourages the batter to spread and dome upwards without colliding with neighboring muffins. Furthermore, this technique helps the muffin tops to brown beautifully, developing that attractive golden crust that is synonymous with professional bakery muffins.
3. Generously Fill Them To The Top
Contrary to common baking advice, when aiming for those impressive bakery-style domes, you must fill your muffin liners almost to the very top with batter. Yes, this goes against the traditional wisdom of filling cups only two-thirds full, but it’s a non-negotiable step for encouraging maximum height. A fuller cup provides more batter to rise, giving the leavening agents the volume they need to push upwards and create that magnificent, towering top.
4. Initiate Baking at a High Temperature
The secret to triggering an explosive rise at the beginning of the baking process lies in starting your muffins off at a high temperature. Begin by baking the muffins at 425ºF (220ºC) for the initial few minutes (7 minutes in this recipe). This intense burst of heat rapidly activates the leavening agents and causes the edges of the batter to set quickly. As the center continues to rise, it pushes upwards against the set edges, creating that distinct, impressive dome shape. After this initial high-heat blast, the temperature is lowered to 350ºF (175ºC) to ensure the muffins cook through evenly without burning, allowing the interior to bake perfectly and remain tender.
How to Properly Measure Flour for Consistent Results
Accurate flour measurement is one of the most crucial, yet often overlooked, steps in baking. Even a slight variation can drastically alter the texture of your baked goods. The most precise method for measuring flour is to use a kitchen scale, weighing it in grams.
If a kitchen scale isn’t available, follow this tried-and-true method to ensure you’re not adding too much flour:
- Aerate the flour: Before scooping, use a whisk or spoon to gently fluff up the flour in its container or bag. Flour tends to settle and become heavy and compact over time. Aerating it ensures a lighter, more accurate volume measurement. This is fluffing, not sifting, unless your recipe specifically calls for sifting.
- Spoon into the measuring cup: Using a spoon, gently sprinkle the aerated flour into your dry measuring cup. Do not use the measuring cup itself to scoop the flour, as this compacts it, leading to an excess amount.
- Level off: Once the cup is overflowing, use the flat back of a butter knife or a straight edge to level off the excess flour, ensuring a perfectly even measure. Resist the urge to tap the cup against the counter, as this will compact the flour and lead to an over-measurement.

Delicious Twists: Cornbread Muffin Recipe Variations
While the classic bakery-style corn muffin is a star in itself, sometimes it’s fun to experiment with new flavors and textures. I’ve tested and absolutely loved these variations, offering exciting ways to customize your batch:

- Cheddar & Jalapeño Cornbread Muffins: For a delightful savory and slightly spicy kick, simply fold in 1-2 finely sliced jalapeños (for extra heat, keep some of the seeds!) and ¾ cup of shredded sharp cheddar cheese into the prepared batter. The jalapeños provide a vibrant warmth, while the cheese melts beautifully, creating pockets of rich, savory flavor that perfectly complement the sweet corn.
- Cornbread Muffins with Whole Corn Kernels: If you love added texture and a burst of natural sweetness, mix 1 cup of either well-drained canned corn or thawed frozen corn kernels into the batter. These little bursts of sweet corn in every bite make these muffins even more irresistible and visually appealing.
- Bacon Cheddar Cornbread Muffins: Elevate the savory experience by adding ½ cup of cooked, crumbled crispy bacon along with ¾ cup of shredded cheddar cheese. The smoky, salty bacon adds an incredible depth of flavor and a delightful textural contrast to the tender muffin, making it a perfect accompaniment to chili or soups.
- Chili-Spiced Cornbread Muffins: For those who appreciate a deeper, earthy flavor profile with a subtle warmth, stir ½ teaspoon of chili powder and ¼ teaspoon of smoked paprika into the dry ingredients. This blend introduces a gentle, smoky heat that enhances the corn flavor and makes these muffins an excellent partner for hearty stews.
Storing and Freezing Your Perfect Muffins
Muffin Storage: Best Practices
To keep your bakery-style corn muffins at their peak freshness and prevent them from becoming soggy, proper storage is crucial. Here’s how to ensure they remain delicious:
If you plan to devour the muffins within 24 hours of baking, you can simply leave them uncovered on your countertop. The rich moisture content of these muffins ensures they won’t dry out quickly within this timeframe. In fact, storing freshly baked, moist muffins in an airtight container immediately can trap too much moisture, potentially making them soggy and causing those delightful crunchy, sugary tops to soften or disappear.
However, for longer storage (2-4 days), I have a clever trick to combat excess moisture: paper towels. Line the bottom of an airtight container with a single layer of paper towels. Arrange the cooled muffins in a single layer on top of the paper towels, then cover the muffins with an additional layer of paper towels before sealing the container. The paper towels act as a natural sponge, absorbing any moisture the muffins release as they sit, thus preserving their texture. If you notice the paper towels becoming damp around day 2 or 3, simply replace them with fresh ones to maintain optimal freshness.
How To Freeze Muffins for Long-Term Enjoyment
These corn muffins freeze beautifully, making them perfect for meal prep or unexpected cravings. Follow these steps for best results:
Once the muffins are completely cooled, individually wrap each muffin tightly in plastic wrap. This prevents freezer burn and keeps them fresh. Then, place the individually wrapped muffins into a freezer-safe ziploc bag or an airtight container. Store them in the freezer for up to 3 months. For an extra layer of protection, you can even place the wrapped muffins in a larger freezer bag before putting them in the container.
To thaw your frozen muffins, you have a couple of convenient options:
- Room Temperature Thawing: Simply remove the desired number of individually wrapped muffins from the freezer and let them sit at room temperature. They should be fully defrosted and ready to enjoy in about 1 hour.
- Quick Microwave Thawing: For a faster option, unwrap a frozen muffin and microwave it in 20-second intervals until it’s defrosted and warm to the touch. Be careful not to overheat, as this can make them tough.
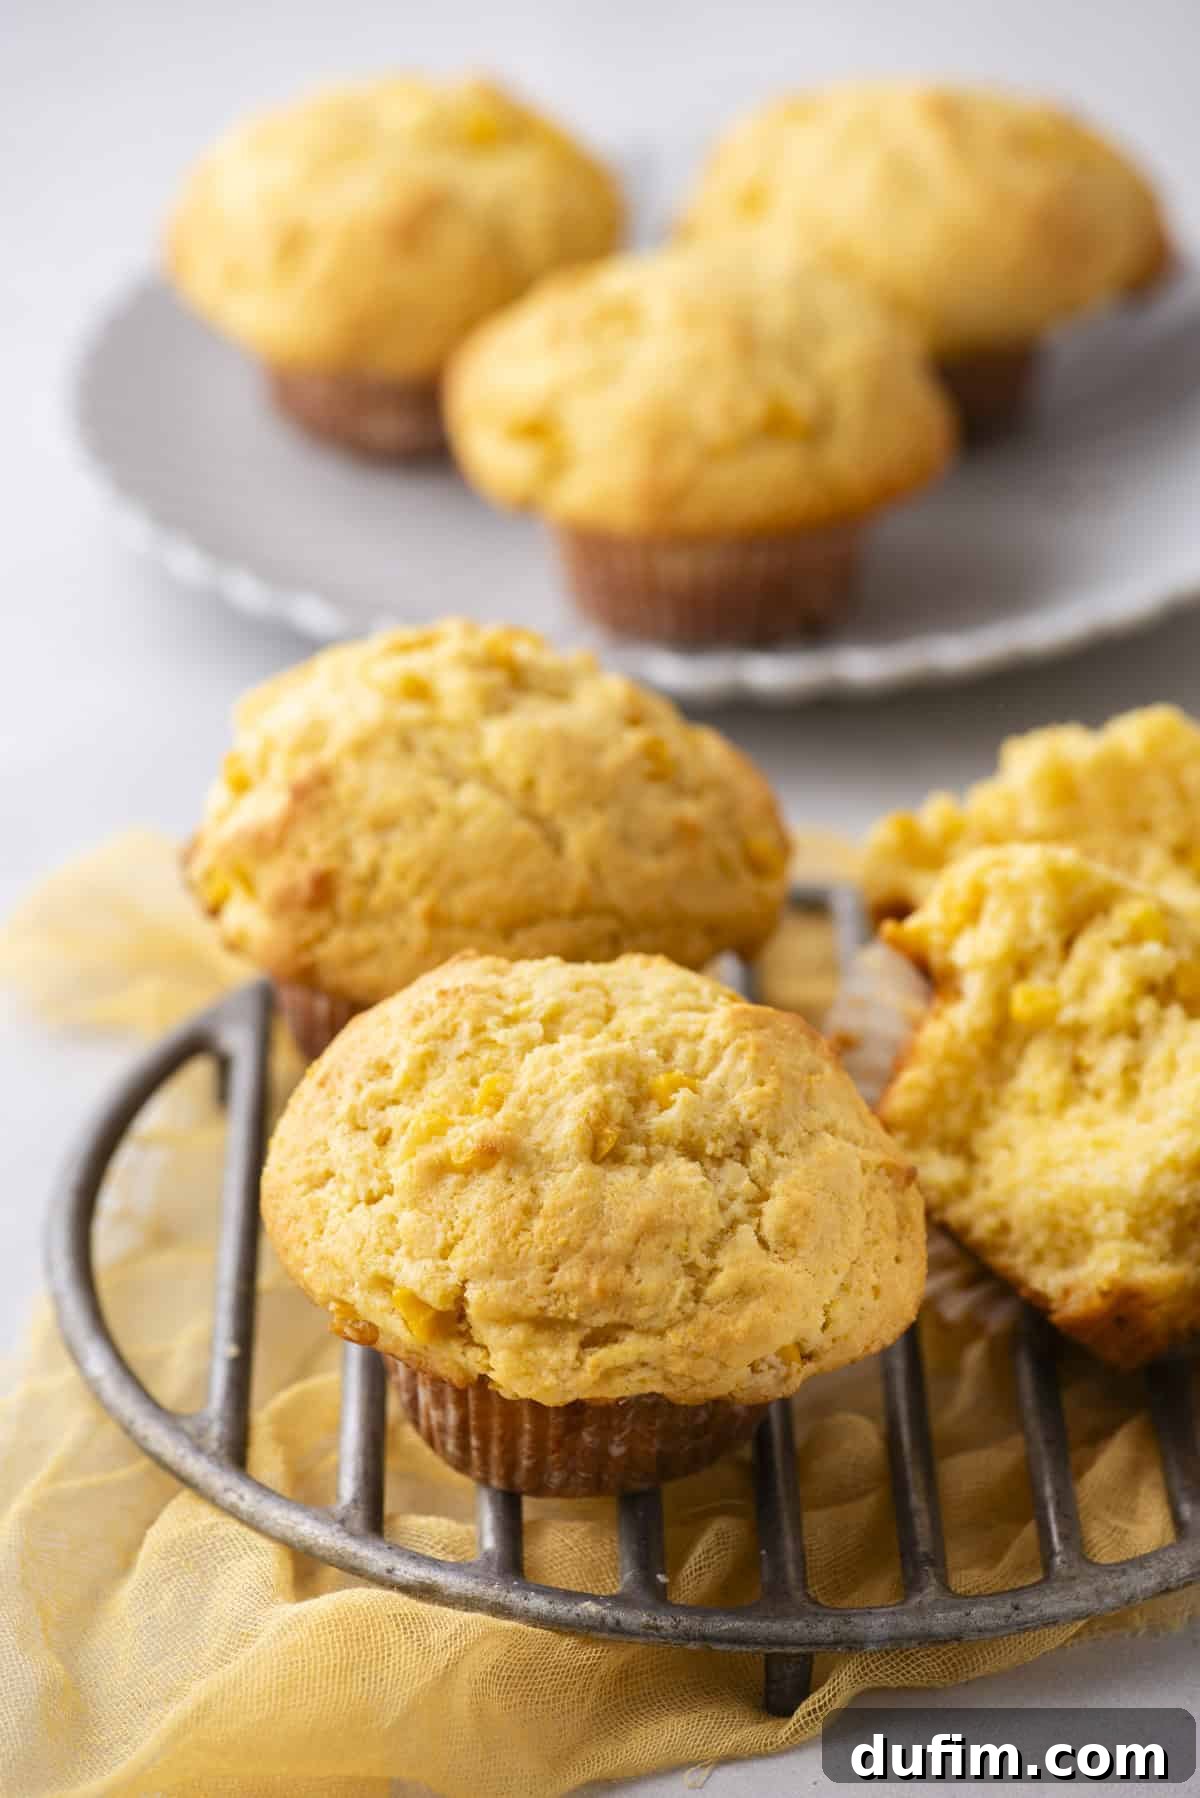

Absolutely love these corn muffins! I didn’t have any honey left for the glaze, but I’m certain it would only make them even better, if that’s even possible! They were wonderfully moist and perfectly sweetened. I achieved the ideal dome, exactly as the recipe promised – I adore when that happens. They were a massive hit with the entire family. I’m already looking forward to trying them again with the honey butter glaze. These are truly a winner!
– Sharon
Explore More Muffin Recipes
If you’ve loved mastering these bakery-style corn muffins, be sure to explore my other highly requested and perfected muffin recipes. Each one promises the same dedication to flavor, texture, and that signature bakery-style dome:
- Best Chocolate Chip Muffin Recipe
- White Chocolate Raspberry Muffins
- Bright & Zesty Orange Muffins
- Irresistible Coffee Cake Muffins
Tap stars to rate!
Cornbread Muffin Recipe
Rate
Equipment
-
Muffin Pan
-
4 Tbsp Scoop
-
Kitchen Scale
Ingredients
Corn Muffins
- 3 cups (360g) all-purpose flour
- 1 cup (156g) fine ground yellow cornmeal, *see note
- ½ cup (99g) granulated sugar
- 2 Tbsp baking powder
- 1 tsp salt
- 3 large eggs
- 1 cup (240ml) buttermilk
- 8 Tbsp (113g) unsalted butter, melted & cooled
- ½ cup (118ml) neutral oil, can also use olive oil, avocado oil, or canola oil
- ¼ cup honey
Honey Butter Glaze
- 2 Tbsp unsalted butter
- 2 Tbsp honey
- 3 Tbsp milk
- 1 ½ cup (169g) powdered sugar, sifted to avoid a clumpy glaze
Variations
- For a cheesy, slightly spicy twist, add 1-2 sliced jalapeños (keep the seeds for extra heat) and ¾ cup shredded cheddar cheese to the batter.
- For extra texture and a little natural sweetness, mix 1 cup of corn into the batter. You can use drained canned corn or thawed frozen corn—both work well!
- Add ½ cup of cooked, crumbled bacon and ¾ cup shredded cheddar cheese for a smoky, savory muffin.
- For a bold, subtly spicy flavor, add ½ tsp chili powder and ¼ tsp smoked paprika to the dry ingredients.
Instructions
Corn Muffins
-
Notes: 1. This recipe requires a 30-minute rest of the batter in the fridge before baking. 2. The most accurate way to measure flour is to use a kitchen scale, weighing it in grams. If you don’t have a kitchen scale, follow this method: Aerate the flour with a whisk or spoon. Flour becomes heavy and compact as it sits. Aerating is the same as fluffing the flour. Use a spoon to sprinkle the flour into the measuring cup. Do not tap the cup against the counter, as this will compact the flour. Use the back of a butter knife to level off the excess. 3. This recipe yields 8 super dome muffins.
-
In a mixing bowl combine the flour, cornmeal, granulated sugar, baking powder, and salt. Stir with a spoon to combine, set aside.3 cups (360g) all-purpose flour,
1 cup (156g) fine ground yellow cornmeal,
1/2 cup (99g) granulated sugar,
2 Tbsp baking powder,
1 tsp salt -
In a larger mixing bowl combine the eggs, buttermilk, oil, cooled & melted butter, and honey. Stir to combine.3 large eggs,
1 cup (240ml) buttermilk,
8 Tbsp (113g) unsalted butter,
½ cup (118ml) neutral oil,
¼ cup honey -
Gradually mix the dry ingredients into the wet ingredients, mixing just until combined. The batter will be very thick! If following a variation, add in the sliced jalapeños, cheese or corn, stir to combine.
-
Cover the bowl with plastic wrap, place in the fridge to allow the batter to rest for 30 minutes. Preheat the oven to 425ºF / 220ºC when 10 minutes is remaining.
-
For bakery style muffins, line a 12-count muffin pan with 6 muffin liners, meaning you’ll only fill every other muffin well with batter. Fill the liners with 6-8 heaping tablespoons of batter. The photos show a heaping ½ cup of batter. Cover the bowl with the remaining batter and return to the fridge.
-
Place one pan in the center of the oven and bake for 7 minutes at 425ºF / 220ºC, then keep the muffins in the oven, turn the temperature down to 350ºF and bake for 15-18 minutes or until a toothpick inserted in the center comes out clean. The bake time at 350ºF is variable and will ultimately depend on how much batter you put in each well. Allow the muffins to cool in the pan. Repeat with the remaining batter, bumping the temperature back up to 425ºF.
Honey Butter Glaze, optional
-
In a microwave-safe bowl, combine the butter, honey, and milk. Microwave until the butter is melted, about 30 seconds. Whisk to combine.2 Tbsp unsalted butter,
2 Tbsp honey,
3 Tbsp milk -
Sift the powdered sugar to avoid a clumpy glaze. Whisk the powdered sugar into the mixture.1 ½ cup (169g) powdered sugar
-
Add more milk if necessary. You want the glaze to be runny. Dip the muffins into the glaze or drizzle over the tops.
Notes
- Cornmeal: I used 100% fine ground cornmeal, which I personally prefer over medium grind. However, you can use either. Do not use anything that says cornmeal mix, as that contains flour and leavening.
- Gluten Free: I’ve had great success making this recipe with gluten-free flour! I recommend using King Arthur’s Gluten Free Measure for Measure Flour as a direct 1:1 substitute for all-purpose flour.
Nutrition
Serving: 1muffin
|
Calories: 530kcal
|
Carbohydrates: 86g
|
Protein: 9g
|
Fat: 18g
|
Saturated Fat: 10g
|
Polyunsaturated Fat: 1g
|
Monounsaturated Fat: 5g
|
Trans Fat: 1g
|
Cholesterol: 111mg
|
Sodium: 673mg
|
Potassium: 139mg
|
Fiber: 1g
|
Sugar: 49g
|
Vitamin A: 598IU
|
Vitamin C: 0.1mg
|
Calcium: 241mg
|
Iron: 3mg
Nutrition Disclosure
All nutritional values are approximate and provided to the reader as a courtesy. Changing ingredients and/or quantities will alter the estimated nutritional calculations.
Like this recipe? Rate and comment below!