
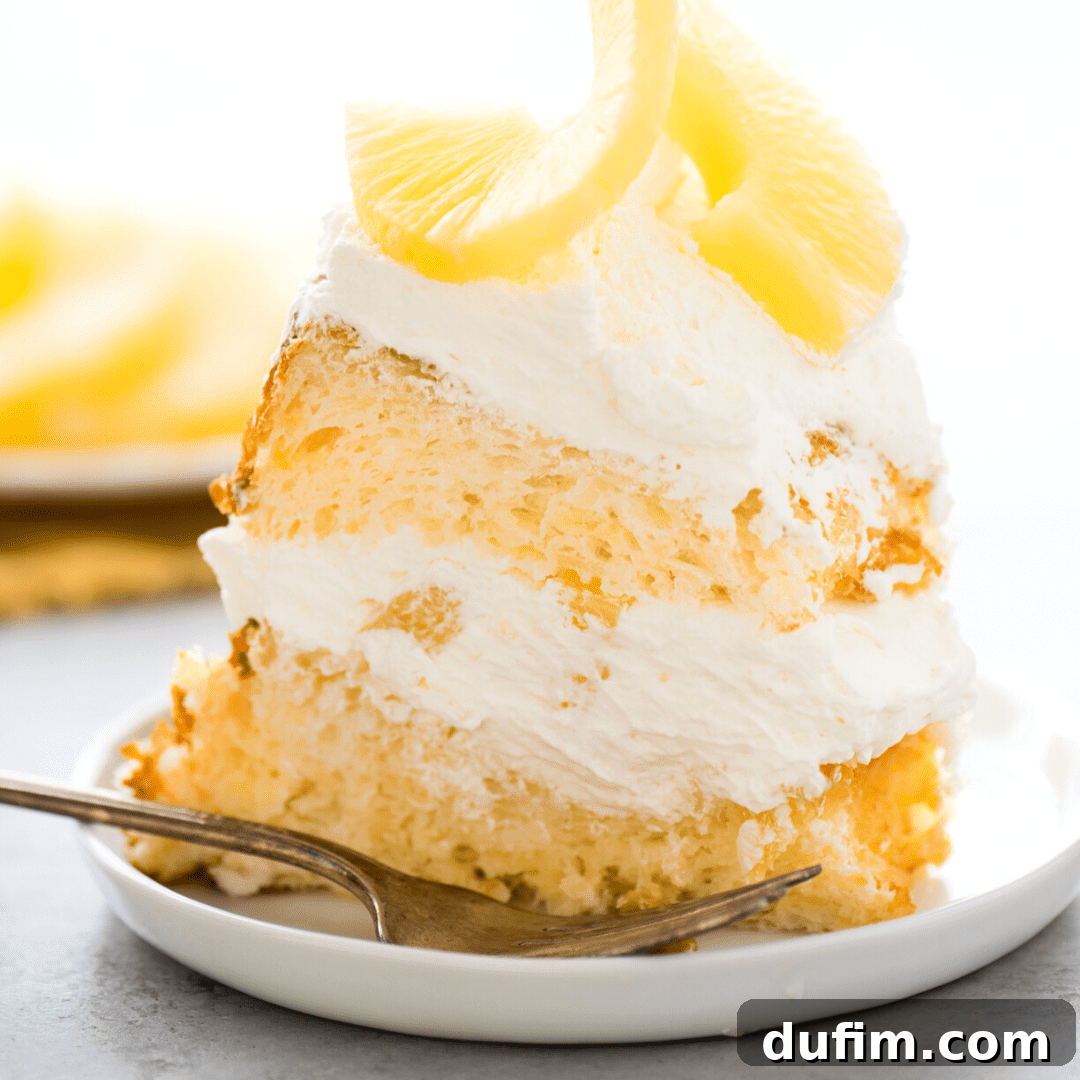
Elevate your dessert game with an unbelievably simple yet remarkably delicious **Pineapple Angel Food Cake**! This delightful recipe starts with just **two primary ingredients**, making it a perfect choice for busy bakers or anyone craving a light, fruity treat. We’ll guide you through not only creating the incredibly fluffy base but also transforming it into a show-stopping layered cake, complete with luxurious homemade whipped cream and juicy pineapple pieces. Get ready for a dessert that’s effortlessly elegant and bursting with tropical flavor!
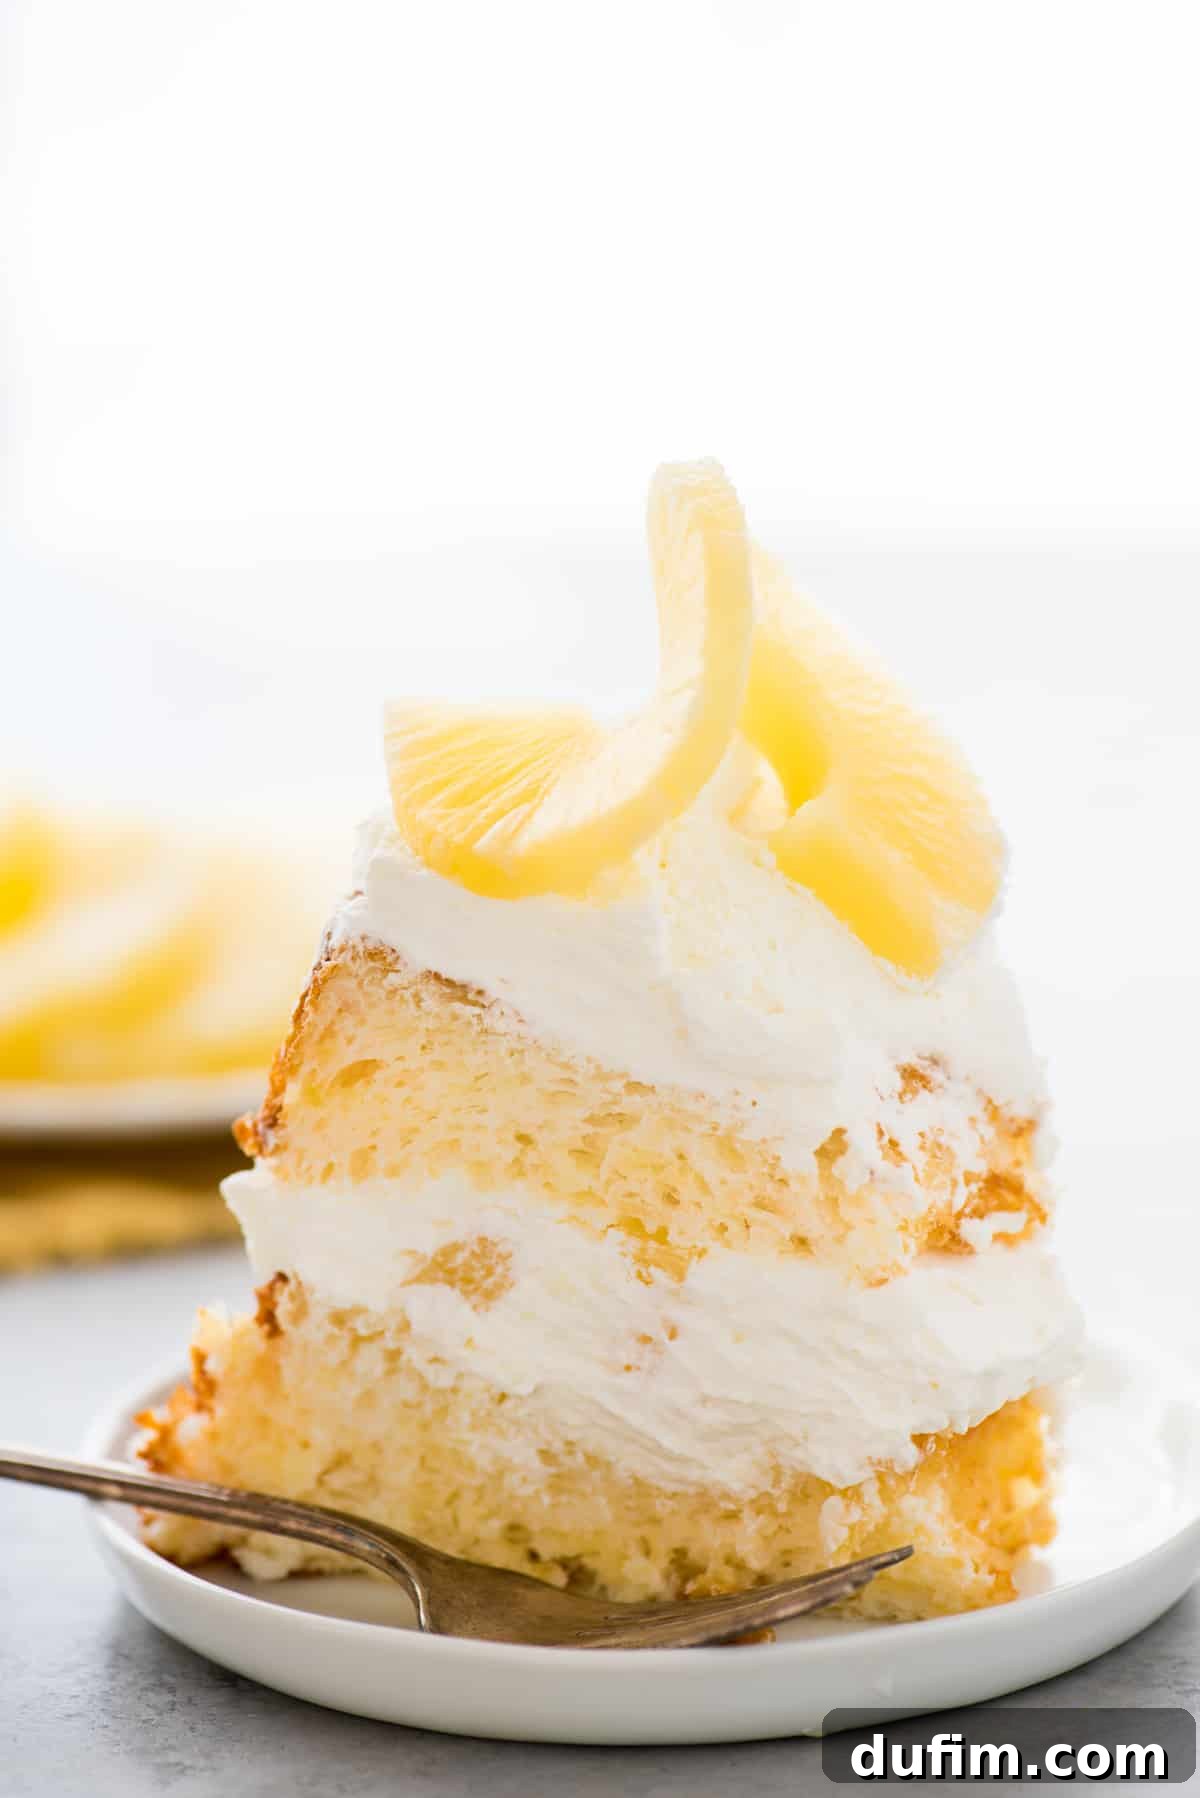
The genius behind the classic two-ingredient angel food cake and crushed pineapple combination is often attributed to a clever Weight Watchers recipe hack. By substituting water with a can of crushed pineapple, you achieve a marvelously moist cake without adding extra fats or complex steps. The pineapple not only imparts a vibrant, tangy flavor but also infuses the cake with incredible moisture and delightful little pieces of fruit, baking directly into the airy crumb. This simple swap significantly enhances the cake’s texture and taste, creating a truly unique dessert.
While the basic two-ingredient cake is fantastic on its own, we believe in taking deliciousness to the next level. We’ve enhanced this already incredible angel food cake by slicing it horizontally and creating luscious layers filled with freshly whipped cream and generous chunks of sweet pineapple. This simple upgrade transforms a humble cake into a sophisticated, multi-textured dessert that’s perfect for gatherings, celebrations, or simply treating yourself to something special. The contrast between the light, airy cake and the rich, creamy topping with bursts of juicy fruit is absolutely irresistible.
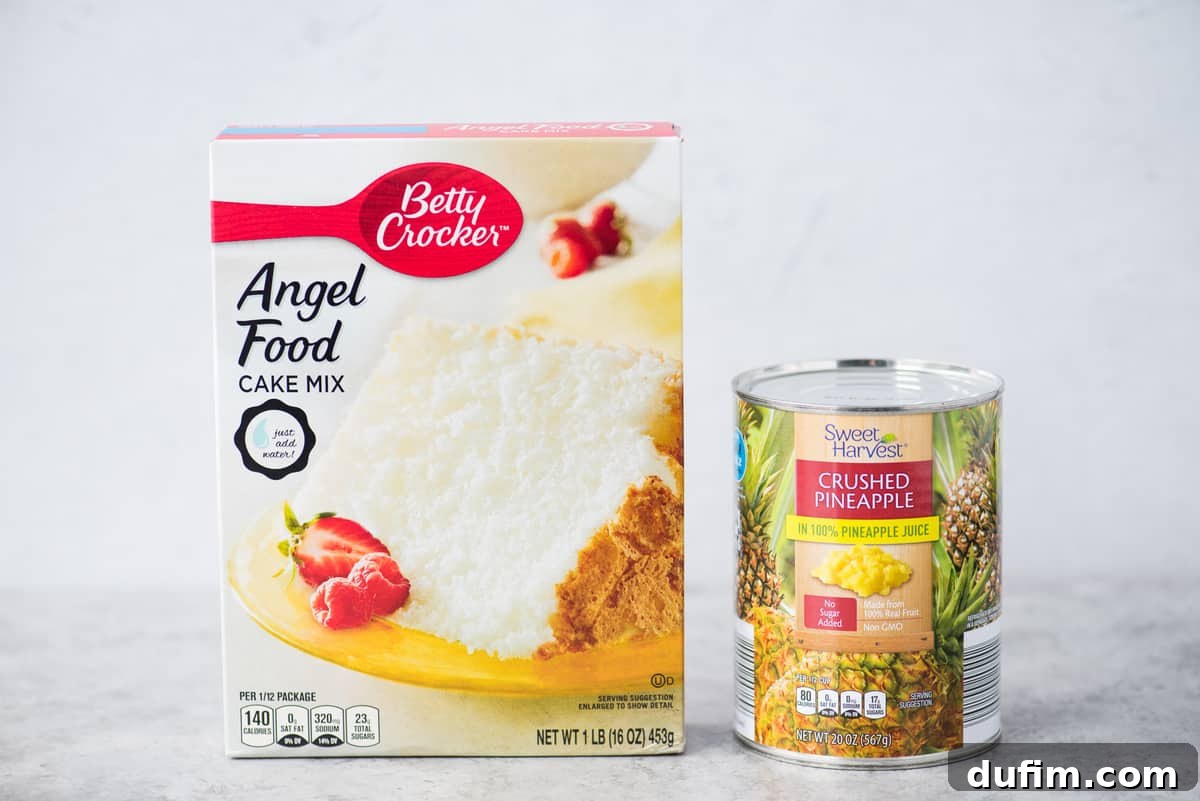
Essential Ingredients for Your Pineapple Angel Food Cake
While the base cake only requires two items, elevating it to a layered masterpiece calls for a few additional components for the luscious whipped cream and fruit topping. Here’s what you’ll need to gather:
- For the Angel Food Cake:
- 1 box (approx. 16 oz) angel food cake mix (ensure it’s the “just add water” variety for the hack)
- 1 can (20 oz) crushed pineapple in juice, undrained (the magic ingredient for moisture and flavor)
- For the Homemade Whipped Cream:
- 2 cups (473ml) heavy whipping cream (for that luxurious, fluffy topping)
- ½ cup (59g) powdered sugar (also known as confectioners’ sugar, for sweetness and stability)
- 1 tsp pure vanilla extract (to enhance the overall flavor profile)
- For Topping and Filling:
- 1 can (20 oz) pineapple chunks or pineapple slices, drained and cut into smaller, bite-sized pieces (for layering and garnish)
Using quality ingredients, especially for your heavy cream and vanilla, will make a noticeable difference in the final taste and texture of your gourmet pineapple angel food cake. Freshly cut pineapple for the topping also adds a wonderful bright, tangy contrast to the sweet cake and cream.
How To Make This Irresistible Pineapple Angel Food Cake
Crafting this elegant dessert is surprisingly straightforward. Follow these detailed steps to achieve a perfectly fluffy cake and a beautifully layered presentation:
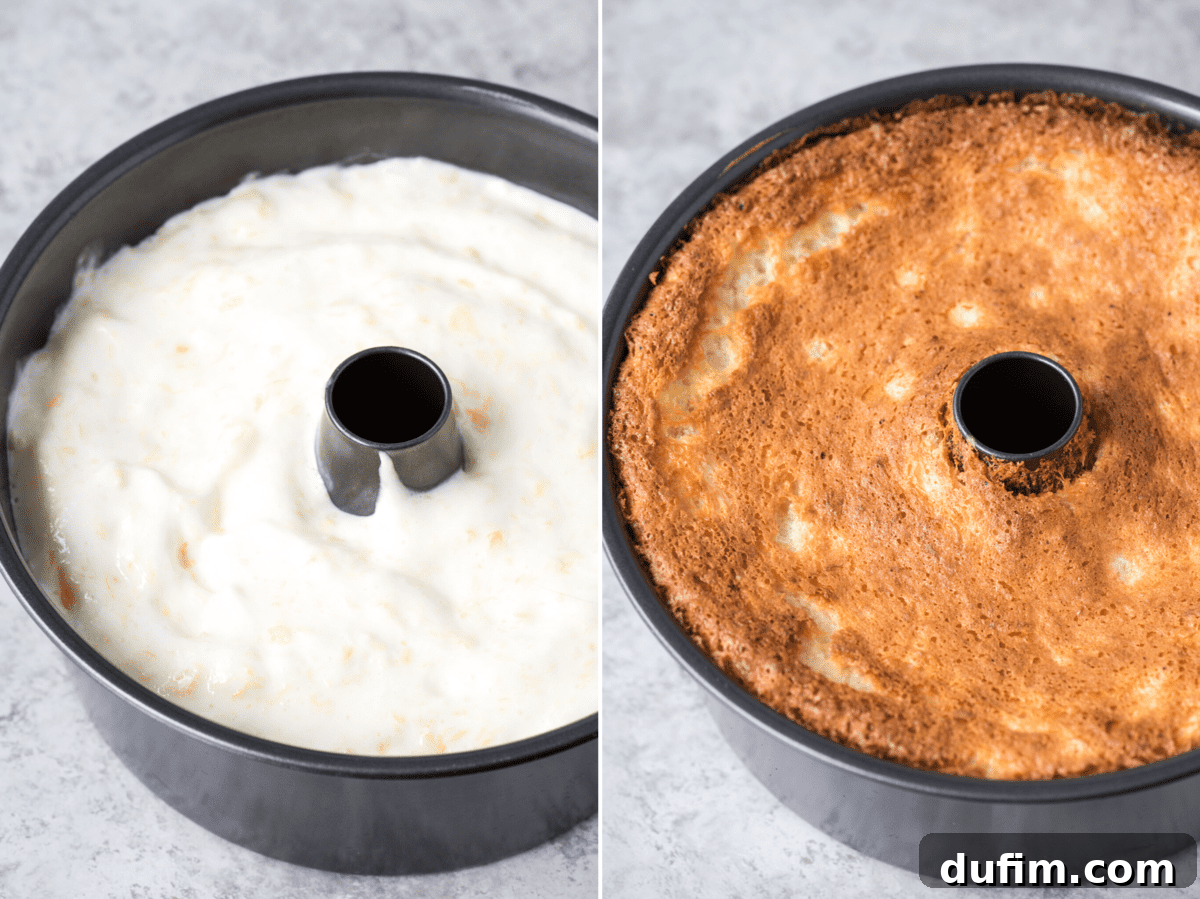
- Prepare the Batter and Bake: Begin by preheating your oven to 350°F (175°C). In a spacious mixing bowl, combine the entire box of angel food cake mix with the undrained 20 oz can of crushed pineapple. Beat these two ingredients together on medium speed for precisely 60 seconds. You’ll observe the batter dramatically increase in volume, becoming wonderfully light and aerated.
- Pour and Bake: Carefully pour the fluffy batter into an un-greased 10-inch tube pan. It’s crucial not to grease the pan, as angel food cake batter needs to cling to the sides to rise properly. Bake for approximately 40-50 minutes, or until the cake’s top turns a beautiful golden brown and a gentle touch reveals no jiggle in the center.
- Cool Completely, Inverted: The moment the cake emerges from the oven, immediately invert the tube pan. This vital step prevents the delicate cake from collapsing on itself as it cools. You can rest the center tube over the neck of a bottle or a mug. Allow the cake to cool fully in this inverted position for at least 2-3 hours. Patience here is key for a perfectly structured cake.
- Prepare for Assembly: While the cake cools, prepare your mixing bowl and beaters for the whipped cream by placing them in the freezer for about 15 minutes. Once the cake is completely cool, run a thin spatula or knife along the outer edges and around the center tube to gently release the cake from the pan. Transfer the cooled cake to your chosen serving plate or stand.
- Craft the Whipped Cream Topping: Remove your chilled bowl and beaters from the freezer. Pour in the cold heavy whipping cream, powdered sugar, and vanilla extract. Beat with an electric mixer on high speed for 4-5 minutes, or until stiff peaks form and the cream is wonderfully thick and scoop-able, holding its shape beautifully.
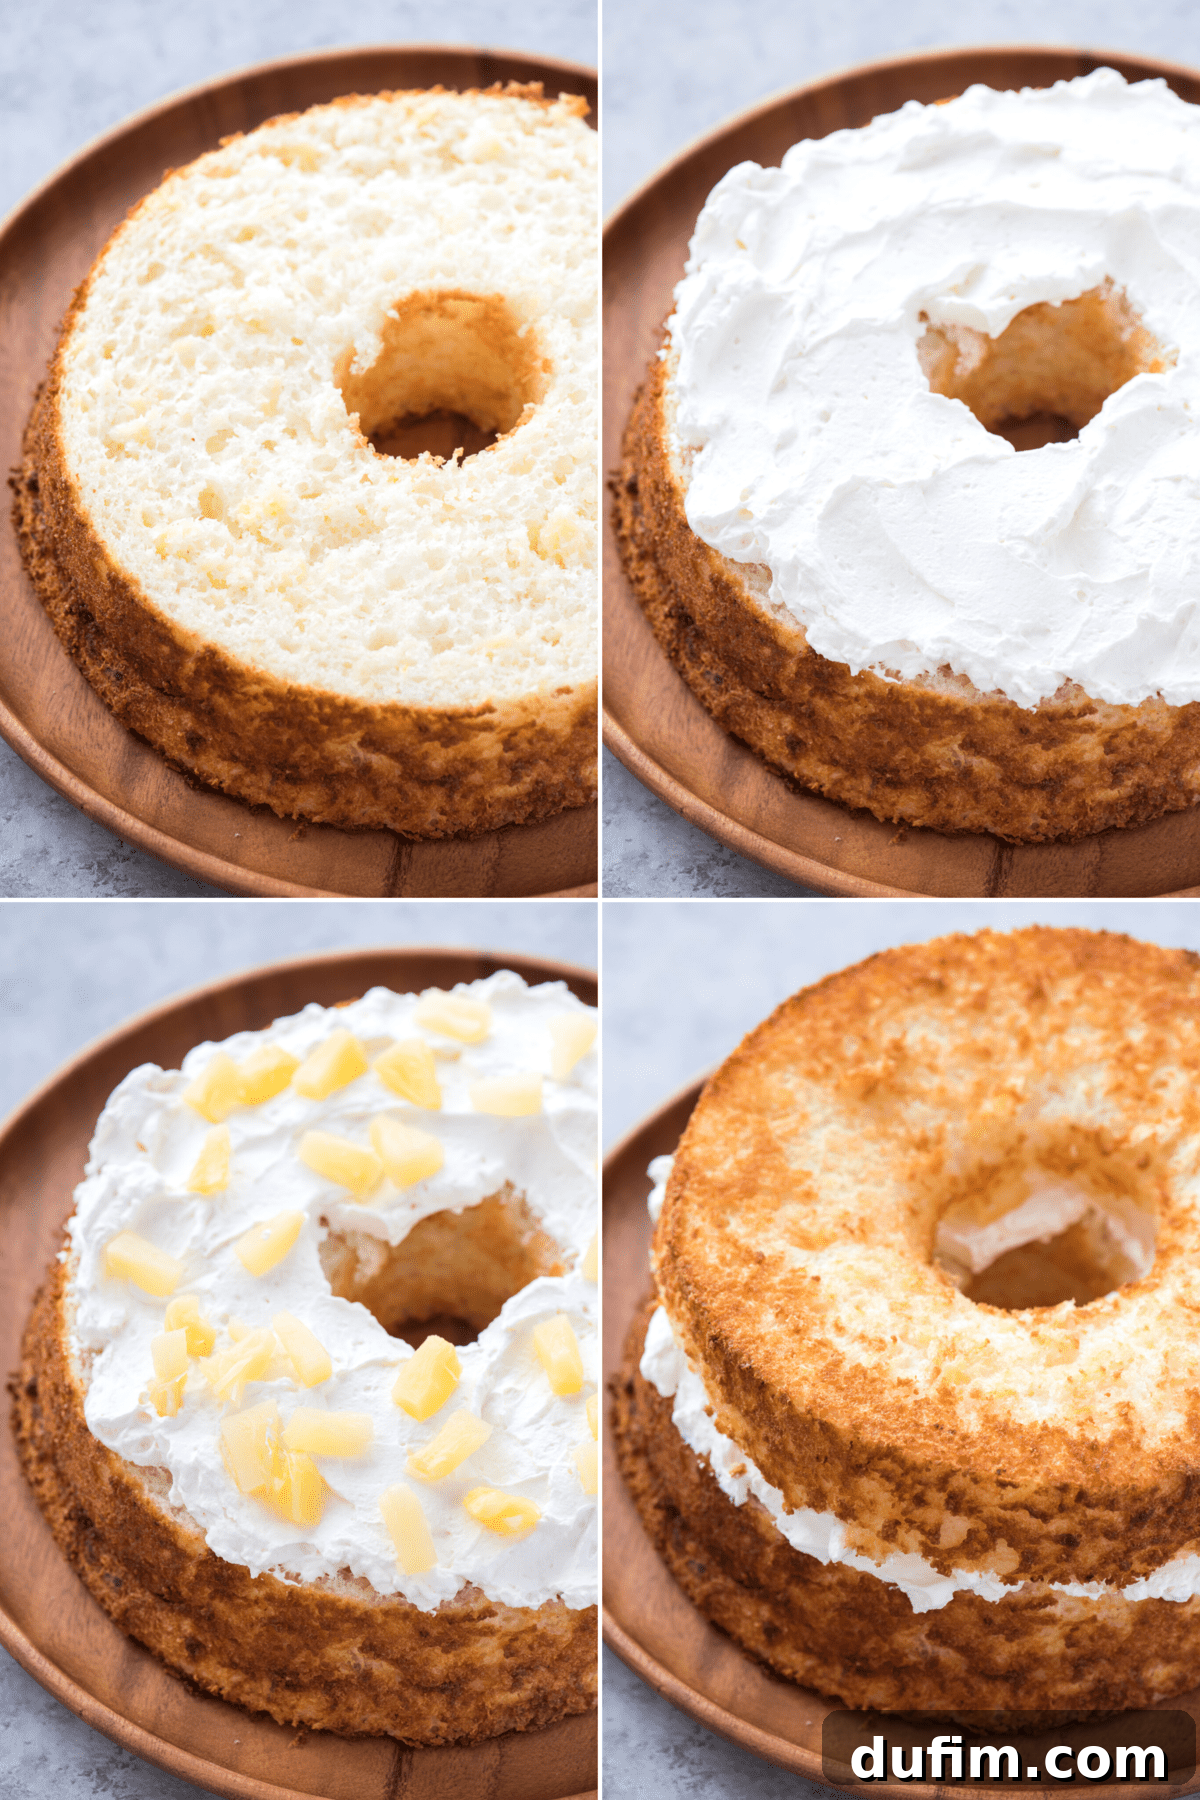
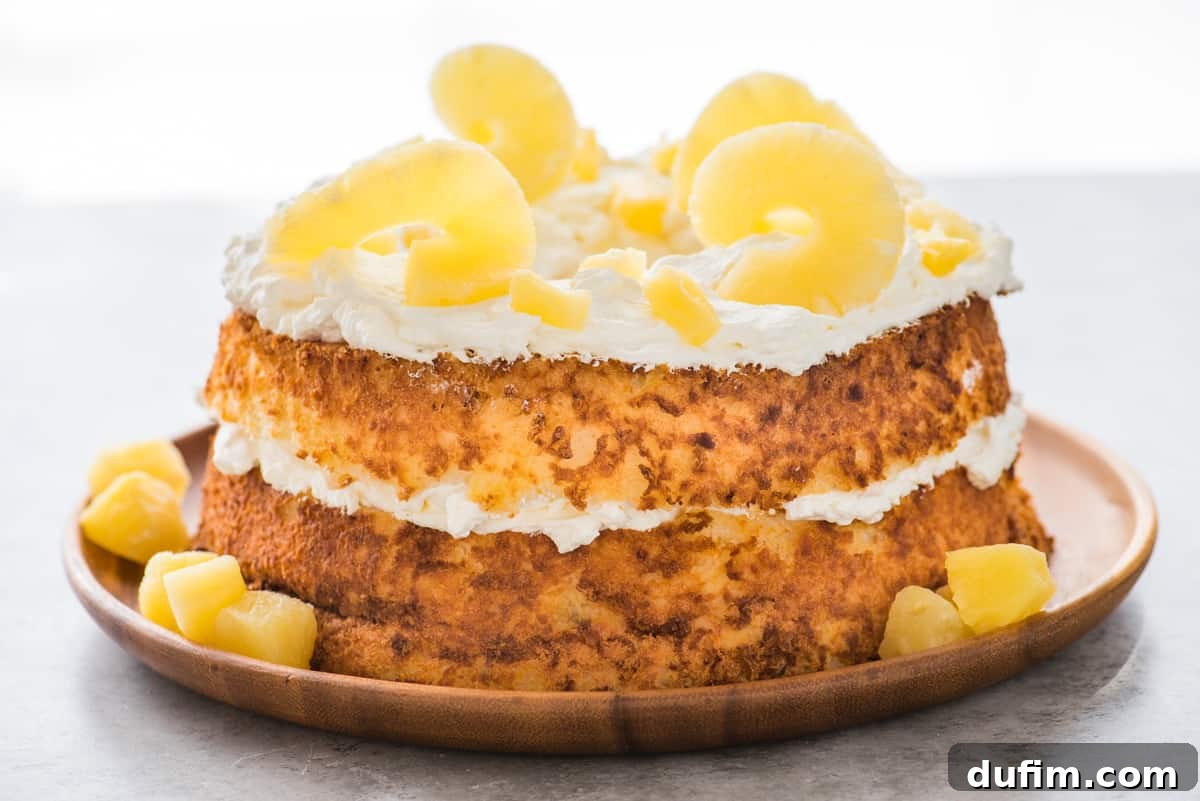
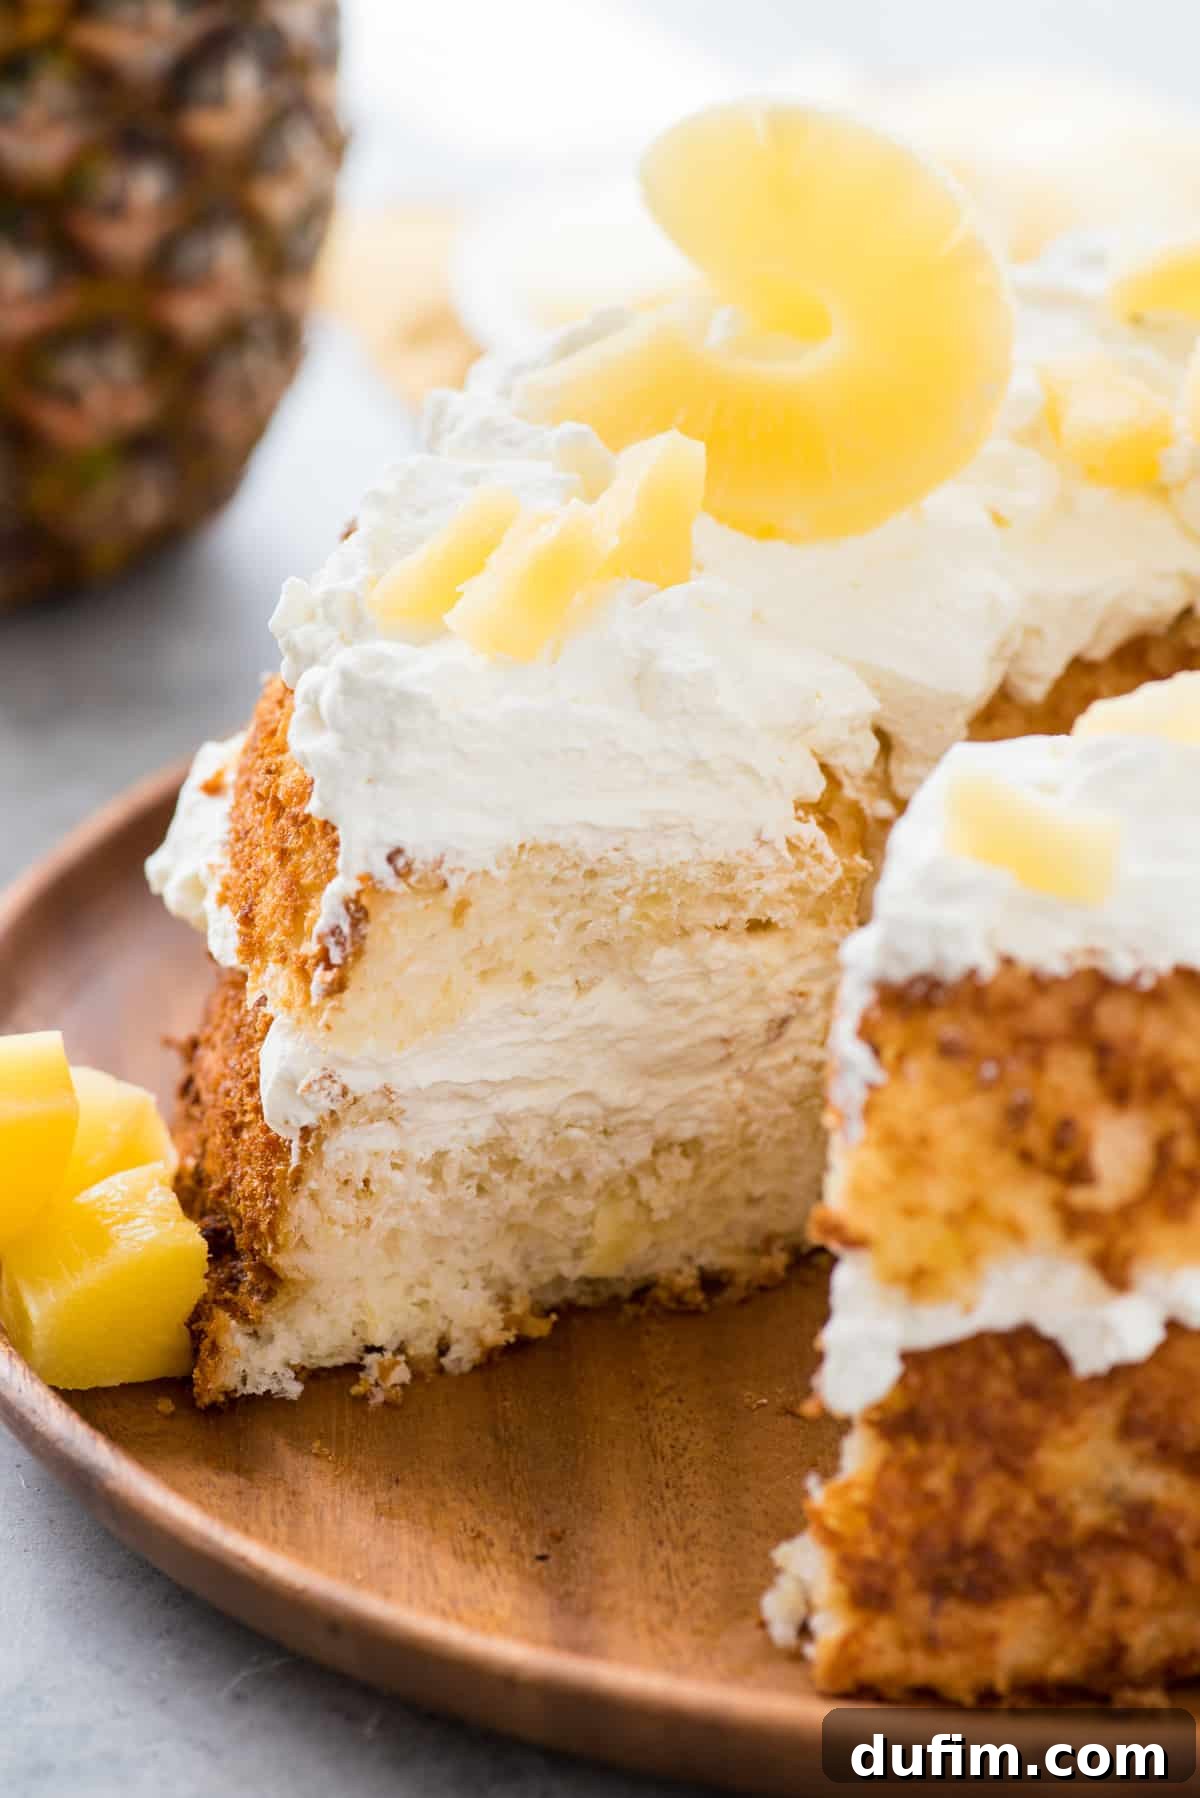
- Assemble Your Layered Masterpiece: Using a sharp serrated bread knife or a specialized cake lever, carefully slice the cooled angel food cake horizontally into two even layers. Gently lift off the top layer. Spread half of your freshly whipped cream generously over the bottom cake layer, then artfully arrange a portion of the chopped pineapple pieces over the cream. Carefully place the top cake layer back into position. Repeat the process on top, spreading the remaining whipped cream and garnishing with the rest of the chopped pineapple. Slice with a sharp serrated knife and serve immediately to enjoy this exquisite dessert!
Expert Tips for Baking Perfect Angel Food Cake
Achieving the characteristic light, airy texture of angel food cake requires a few specific techniques. These tips are essential for success, especially when using the two-ingredient method:
Tip #1 – Use The Correct Pan: The Fluted Tube Pan is Key
The type of pan you use is paramount for angel food cake. Always opt for a traditional fluted tube pan, preferably one with a removable bottom. This specialized pan allows the batter to climb high up its straight, ungreased sides during baking, creating that iconic towering structure. The removable bottom also makes it incredibly easy to release the delicate cake once cooled. Resist the temptation to use a Bundt pan, as its decorative fluting and non-stick coating will hinder the cake’s ability to rise and cling, resulting in a dense, disappointing outcome. A proper angel food cake pan is an indispensable tool for this recipe.
Tip #2 – No Cooking Spray: Keep It Ungreased!
Unlike most cakes, angel food cake pans should never be greased with cooking spray, butter, or oil. The unique batter, relying on whipped egg whites for its structure, needs to adhere to the bare sides of the pan. This adherence provides the necessary grip for the cake to climb and expand to its full, impressive height. Greasing the pan will cause the batter to slip and slide, leading to a much shorter, denser cake. Trust the process – an ungreased pan is your friend here!
Tip #3 – Invert Immediately After Baking
This is perhaps the most crucial step to prevent your beautifully risen angel food cake from collapsing. The moment your cake finishes baking, immediately invert the pan. Most tube pans have small “feet” for this purpose, but if yours doesn’t, you can cleverly rest the center tube over the neck of a sturdy glass bottle or a can of beans. This inversion allows the cake to cool upside down, using gravity to prevent the fragile structure from shrinking and losing its volume as it sets. Allow the cake to cool completely in this position, which typically takes a significant 2-3 hours. Prematurely removing it from the inverted position will result in a deflated cake. Once fully cooled, a small, thin spatula or knife can be carefully run along the edges and center core to release the cake cleanly from the pan.
Knowing When Your Angel Food Cake is Perfectly Baked
Determining the exact moment your angel food cake is done is essential for its light and fluffy texture. Beyond the visual cue of a golden-brown top, you can gently press on the surface of the cake; it should spring back slightly and feel firm, not jiggly in the center. For a more precise test, I recommend using a thin, wooden skewer, like a popsicle stick or a kabob skewer. Insert it into the center of the cake – if it comes out clean with no wet batter or crumbs clinging to it, your cake is ready to be removed from the oven and immediately inverted. An underbaked cake will be sticky and gummy, while an overbaked one can become dry.
The Importance of Inverted Cooling Time
As highlighted in our baking tips, leaving your angel food cake inverted to cool is not just a suggestion – it’s a non-negotiable step for maintaining its delicate structure and airy volume. The cake should remain upside down until it is *completely* cool to the touch. This process usually takes a minimum of 2-3 hours, but it could extend longer depending on the ambient temperature and humidity in your kitchen. Rushing this cooling period will inevitably lead to the cake sinking and losing its characteristic height and ethereal texture. Be patient, and your perfectly structured angel food cake will be your reward.
Planning Ahead: Making Angel Food Cake in Advance
Angel food cake is a fantastic dessert to prepare ahead of time, allowing you to enjoy fresh-baked goodness without last-minute stress. If you’re baking the plain cake without the whipped cream and pineapple layers, it can be stored at room temperature in an airtight container for 1-2 days. For longer storage, lightly wrap the cooled cake in plastic wrap and then place it inside an airtight container. It will keep well in the refrigerator for up to 5 days. Remember, the key is to keep it sealed to prevent it from drying out or absorbing other odors from your fridge. This makes it a great option for meal prepping or entertaining, giving you flexibility in your schedule.
Freezing Angel Food Cake for Future Indulgence
Freezing angel food cake is an excellent way to preserve its freshness and enjoy it at a later date. To freeze your cake successfully, first ensure it is completely cooled to room temperature. Next, wrap the entire cake tightly in several layers of aluminum foil, making sure there are no exposed areas. For extra protection against freezer burn, place the foil-wrapped cake inside a large freezer-safe Ziplock bag. Stored correctly, the cake can remain in the freezer for up to 3 months. When you’re ready to enjoy it, simply transfer the cake to the refrigerator and allow it to defrost overnight. Once thawed, you can then proceed with slicing the cake in half and adding your layers of fresh whipped cream and pineapple, ensuring it tastes as fresh as the day it was baked.
Elevating Your Pineapple Angel Food Cake to a Gourmet Experience
While the two-ingredient angel food cake is a marvel of simplicity, there are several ways to take this dessert from humble to utterly gourmet. Our primary upgrade, as detailed, involves transforming it into a stunning layered cake. By carefully slicing the cake in half horizontally, you create the perfect canvas for rich fillings. We layered generous amounts of homemade whipped cream, prepared with heavy cream, powdered sugar, and vanilla extract, between the fluffy cake layers. The addition of finely chopped pineapple pieces throughout these layers introduces a delightful burst of tropical tang and juicy texture with every bite.
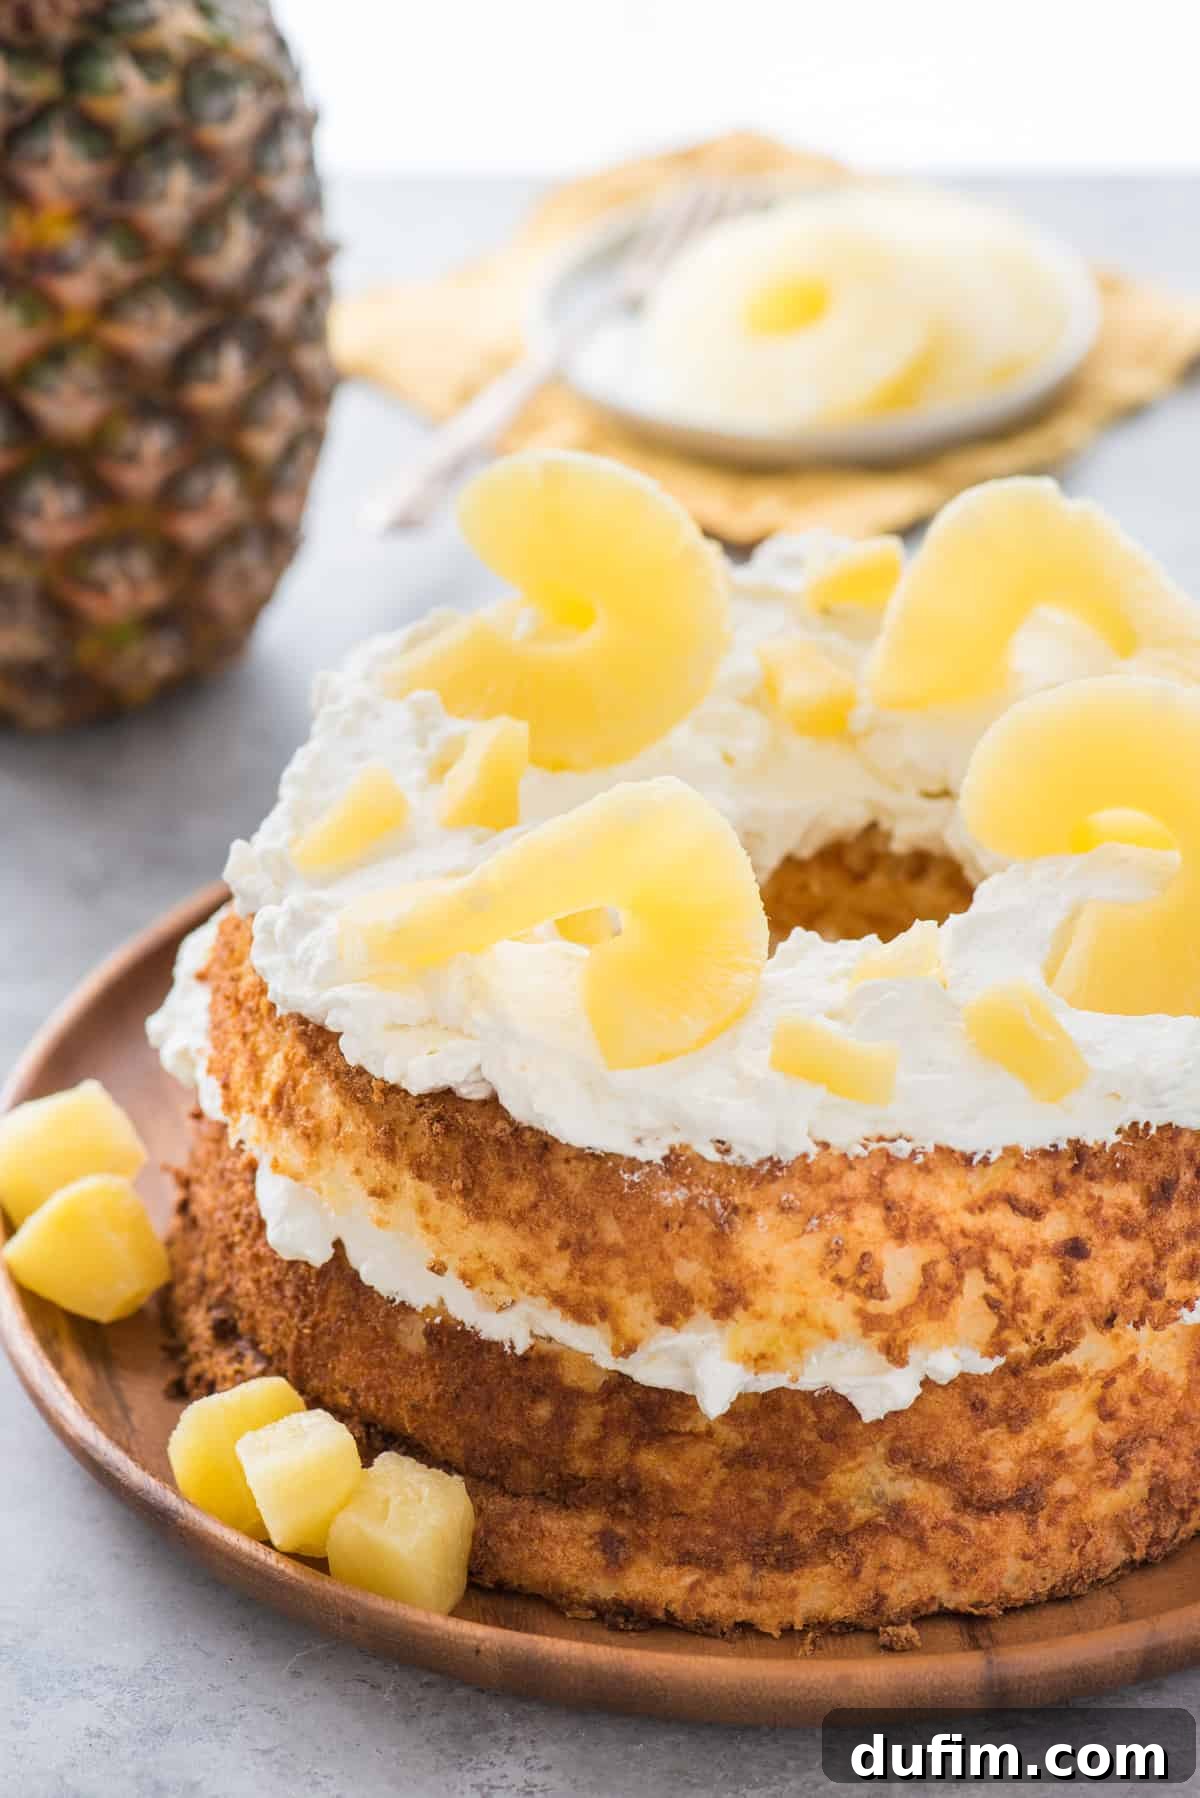
For an even more impressive presentation, don’t stop at just the layers. Once the top cake layer is back in place, repeat the garnishing. Swirl or pipe additional whipped cream decoratively on top of the cake. Then, artfully arrange more fresh pineapple pieces – perhaps even using thinly sliced pineapple rings or elegant wedges – for a visually appealing finish. A sprinkle of toasted coconut flakes, a light dusting of powdered sugar, or a few fresh mint leaves can also add a touch of sophistication and complementary flavors. These extra touches transform a simple cake into a centerpiece-worthy dessert, perfect for any special occasion or whenever you want to indulge in something truly spectacular.
More Delicious Dessert Ideas
If you’ve enjoyed making this pineapple angel food cake, you might be looking for more sweet inspirations. Here are some other delightful dessert recipes to explore, perfect for expanding your baking repertoire:
- Oreo Angel Food Cake
- Lemon Sugar Cookies
- Pina Colada Sangria
- Watermelon Cupcakes
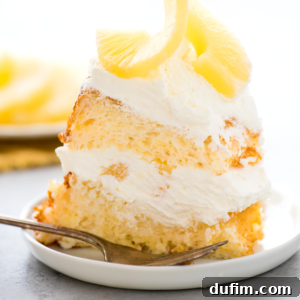
Layered Pineapple Angel Food Cake
Beth
5 minutes
40 minutes
2-3 hours
2 hours 45 minutes
16 servings
This pineapple angel food cake is incredibly easy to make with just two basic ingredients for the cake base! Elevate it further by layering with homemade whipped cream and juicy pineapple pieces for a truly show-stopping tropical dessert.
Equipment
-
Electric Mixer (stand mixer or hand mixer)
-
10-inch Angel Food Cake Pan (fluted tube pan)
-
Large Mixing Bowl
-
Sharp Serrated Bread Knife or Cake Leveler
Ingredients
For the Angel Food Cake:
- 1 box angel food cake mix (standard size, typically 16 oz)
- 1 can (20 oz) crushed pineapple in juice, undrained
For the WHIPPED CREAM:
- 2 cups (473ml) heavy whipping cream, very cold
- ½ cup (59g) powdered sugar
- 1 tsp vanilla extract
To Top and Fill the Cake:
- 1 can (20 oz) pineapple chunks or pineapple slices, drained and cut into smaller pieces
Instructions
Baking the Angel Food Cake:
-
Preheat your oven to 350°F (175°C). In a large mixing bowl, combine the box of angel food cake mix and the undrained crushed pineapple. Beat on medium speed with an electric mixer for exactly 60 seconds. The batter will become very light and fluffy, almost tripling in volume.
-
Pour the prepared batter evenly into an un-greased 10-inch tube pan. Make sure the pan is completely dry and free of any oils or sprays.
-
Bake for 40-50 minutes. The cake is done when the top is golden brown and a wooden skewer inserted into the center comes out clean. The cake should also spring back when lightly touched.
-
Immediately after removing from the oven, invert the tube pan. Allow the cake to cool completely upside down for at least 2-3 hours. This is crucial for preventing the cake from collapsing.
-
Once the cake is fully cooled, gently run a thin spatula or knife around the outer edges and the center core of the pan to release the cake. Transfer the cooled cake to a serving plate.
Preparing the Whipped Cream:
-
For the best results, place a metal mixing bowl and your electric mixer beaters in the freezer for about 15 minutes before making the whipped cream. This helps the cream whip up faster and hold its shape better.
-
Remove the chilled bowl and beaters from the freezer. Add the cold heavy whipping cream, powdered sugar, and vanilla extract to the bowl. Beat with the electric mixer on high speed for 4-5 minutes, or until stiff peaks form and the cream is thick and fluffy. Be careful not to overbeat, as it can turn into butter.
Assembling the Layered Cake:
-
Using a sharp serrated bread knife or a cake leveler, carefully slice the angel food cake horizontally into two even layers. Gently lift the top layer and set it aside.
-
Spread half of the freshly prepared whipped cream evenly over the bottom cake layer. Arrange about half of the drained, chopped pineapple pieces on top of the whipped cream.
-
Carefully place the top cake layer back onto the bottom layer. Spread the remaining whipped cream over the top of the cake, then artfully arrange the rest of the chopped pineapple pieces for garnish.
-
Cut the assembled cake with a sharp serrated bread knife and serve immediately. Store any leftovers in an airtight container in the refrigerator to maintain freshness.
Nutrition Information (Approximate)
Calories: 264 kcal |
Carbohydrates: 40 g |
Protein: 3 g |
Fat: 11 g |
Saturated Fat: 7 g |
Polyunsaturated Fat: 1 g |
Monounsaturated Fat: 3 g |
Cholesterol: 41 mg |
Sodium: 245 mg |
Potassium: 136 mg |
Fiber: 1 g |
Sugar: 31 g |
Vitamin A: 473 IU |
Vitamin C: 7 mg |
Calcium: 74 mg |
Iron: 1 mg
Nutrition Disclosure
All nutritional values are approximate and provided to the reader as a courtesy. Changing ingredients and/or quantities will alter the estimated nutritional calculations. This information is not intended to be medical or dietary advice.