

As the leaves begin to turn vibrant hues and a crisp chill fills the air, there’s nothing quite like the comforting aroma of a freshly baked dessert warming your home. This Caramel Apple Crisp recipe is poised to become your ultimate go-to treat for the entire fall season and beyond. Imagine tender, warmly spiced apples mingling with a rich, gooey caramel sauce, all crowned with an irresistible brown sugar and cinnamon oat topping that bakes to golden, crispy perfection. A final generous drizzle of caramel ties all these delightful textures and flavors together, creating a dessert that is truly impossible to resist.
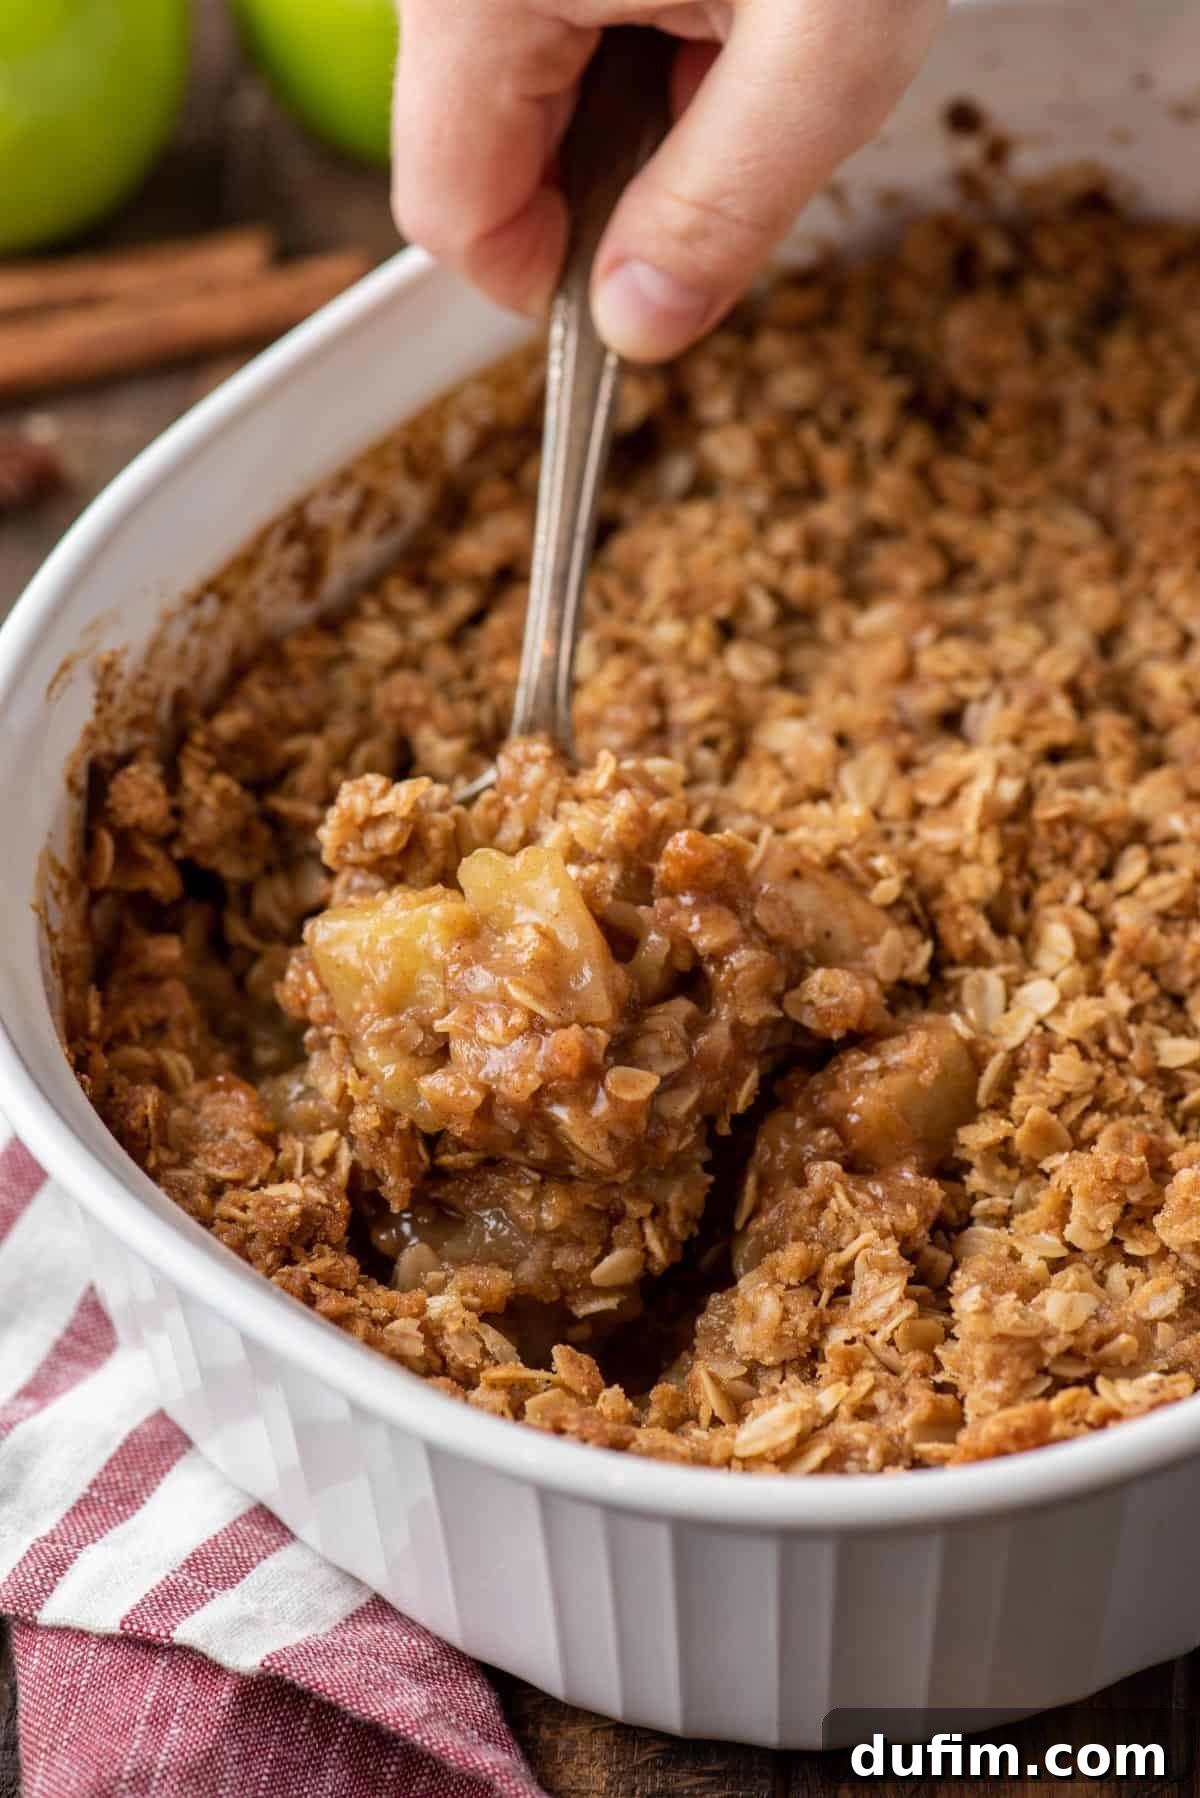
Baking the apple crisp with caramel is GENIUS! Already made 3 times this fall!
-Mandy
While a classic apple crisp holds a special place in our hearts, the addition of rich, gooey caramel truly elevates this dish to an extraordinary level. This Caramel Apple Crisp is more than just a dessert; it’s a celebration of autumn’s bounty, marking the return of shorter days, cozy sweater weather, and the joy of biting into juicy, freshly picked apples. And the best part? Despite its gourmet appeal, it’s incredibly easy to prepare, requiring minimal effort for maximum flavor payoff.
Unlike an elaborate apple pie, there’s no need to fuss with delicate pastry crusts when you’re making an apple crisp. This simplicity streamlines the baking process, making it an accessible option even for novice bakers. You simply toss together the fragrant apple filling ingredients, craft the perfectly balanced buttery, cinnamon-spiced oat topping, then combine them in a baking dish and slide it into the oven. As it bakes, your kitchen will fill with an intoxicating aroma, and the topping will transform into a glorious golden-brown, irresistibly crispy layer. It’s a challenge not to sneak a few crunchy bits off the top while you impatiently wait for your delicious caramel apple crisp to cool!
To ensure this recipe remains delightfully straightforward, we opt for a high-quality store-bought caramel sauce, both for the filling and for that luscious final drizzle. Of course, if you’re feeling ambitious and have a favorite homemade caramel recipe, feel free to use it – it will only add to the magic! Once baked and slightly cooled, all that’s left is a generous scoop of creamy vanilla ice cream melting decadently over the warm crisp, and you’re ready to indulge in pure autumnal bliss.
If you’re craving an apple-only dessert experience without the topping, our simple baked apples offer a wonderfully wholesome alternative.
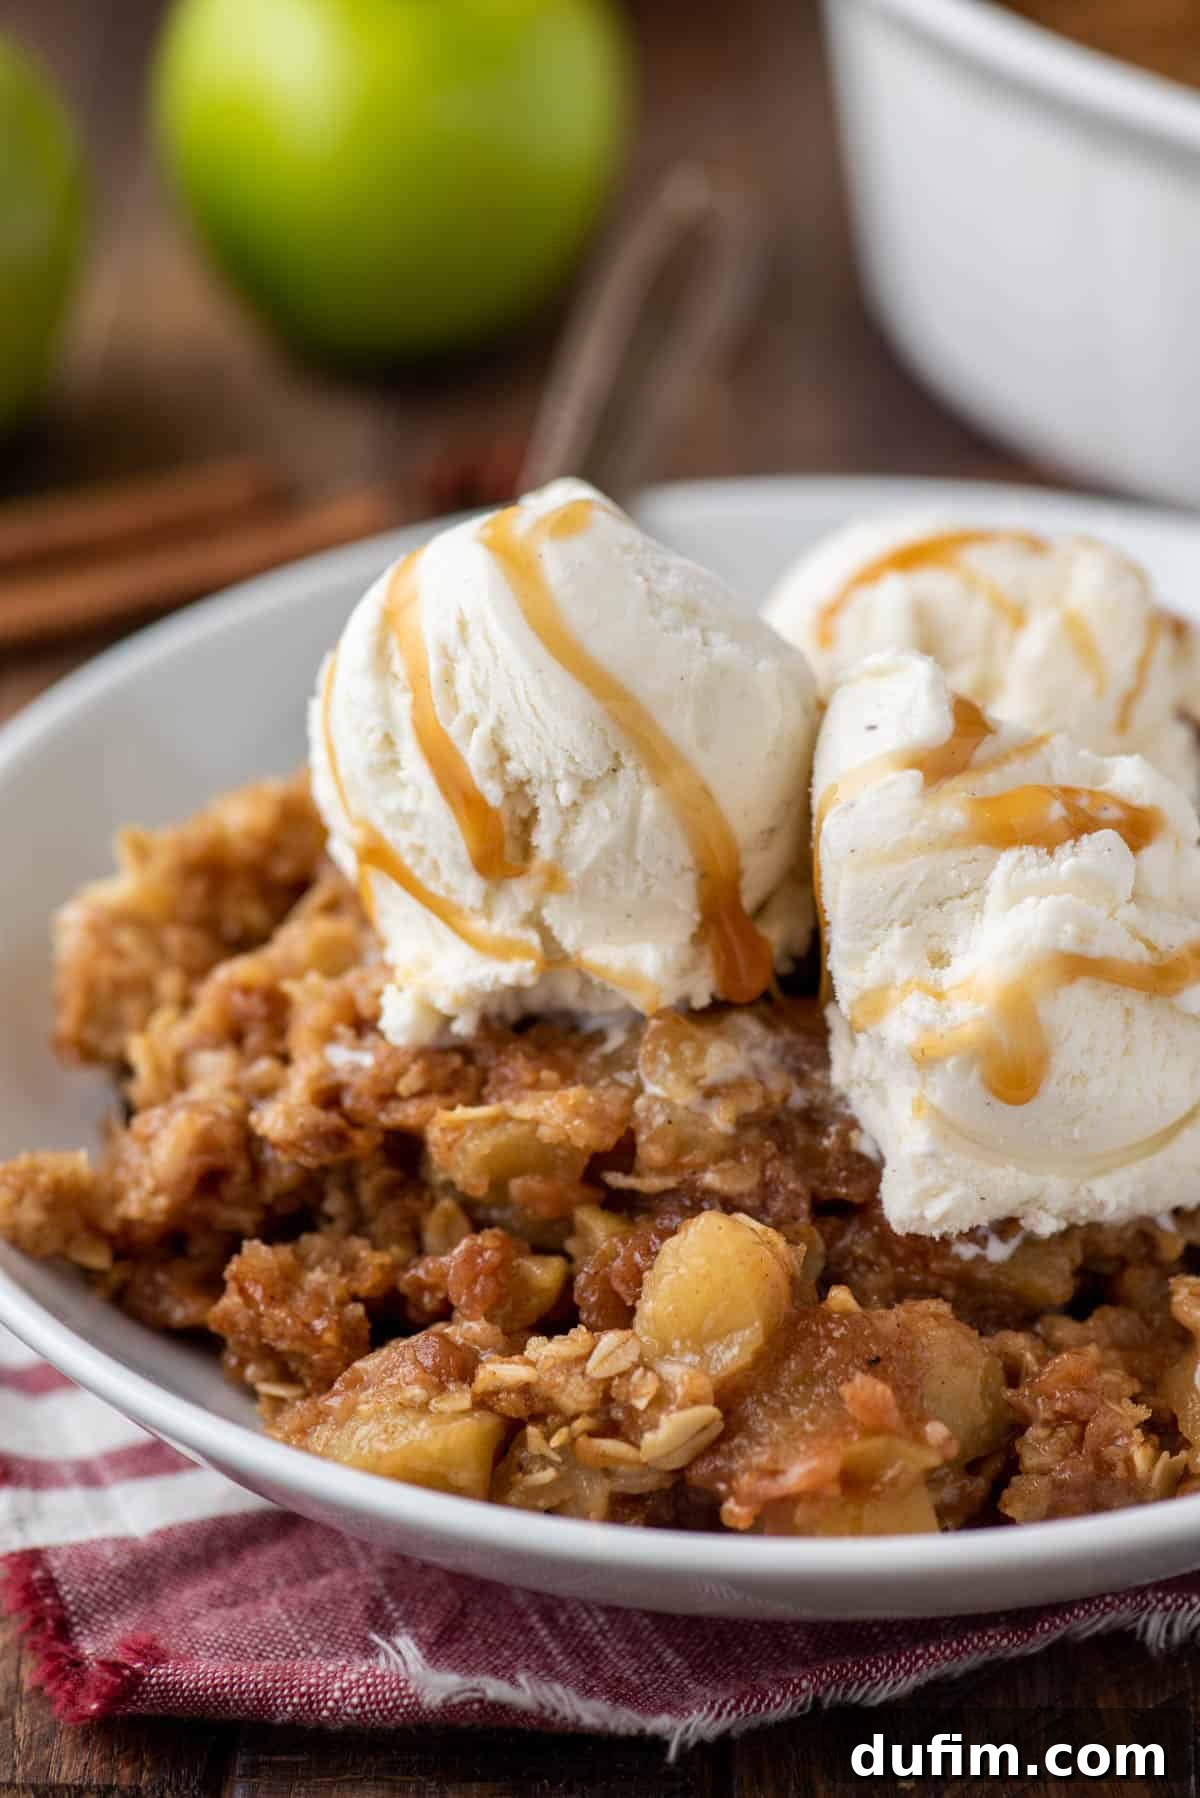
Why You’ll Love This Irresistible Caramel Apple Crisp
There are countless reasons why this Caramel Apple Crisp stands out as a true fall favorite:
- Effortlessly Delicious: With only 15 minutes of active prep time, this recipe is perfect for busy weeknights or impromptu gatherings.
- Perfect Balance of Flavors: The tartness of the apples beautifully complements the sweet, buttery caramel and warm spices, creating a harmonious taste experience.
- Sensational Textures: Enjoy the tender, soft apples, the gooey caramel, and the satisfying crunch of the oat topping in every bite.
- Cozy Fall Comfort: The warm, inviting aromas that fill your kitchen as this crisp bakes are truly the essence of autumn.
- Customizable and Versatile: Easily adapt it to your dietary needs (hello, gluten-free!) or add your favorite mix-ins like nuts.
- Crowd-Pleaser: This dessert is universally loved and always a hit at family dinners, holiday celebrations, or casual get-togethers.
Key Ingredients for the Perfect Fall Indulgence
The magic of this Caramel Apple Crisp lies in its simple yet high-quality ingredients. Scroll down to the recipe card below for precise quantities and detailed instructions.
For the Luscious Apple Filling:
- Fresh Apples: The star of the show! We highly recommend using firm, crisp apple varieties that hold their shape well during baking and offer a delightful balance of sweet and tart. Excellent choices include Granny Smith (for a tart kick), Jonagold, Honeycrisp, Braeburn, or Pink Lady. Avoid overly soft or mealy apples, as they will turn mushy.
- Caramel Sauce: This is where the “caramel” in Caramel Apple Crisp truly shines. Opt for a high-quality, thick caramel sauce. Thin, watery syrups won’t provide the same richness or gooey texture.
- Cornstarch: A crucial thickening agent that ensures your apple filling is beautifully gelled and not watery, creating that signature luscious consistency.
- Ground Cinnamon: The quintessential fall spice, adding warmth and a classic apple dessert flavor.
- Ground Nutmeg: A hint of nutmeg complements the cinnamon and apples, adding depth to the spice profile.
For the Irresistibly Crispy Topping:
- Old-Fashioned Rolled Oats: These provide the perfect texture and chewiness to the crisp topping. For a gluten-free caramel apple crisp, be sure to use certified gluten-free rolled oats, such as those from Bob’s Red Mill.
- All-Purpose Flour: Helps bind the topping ingredients together, creating that lovely crumble. If you’re aiming for a gluten-free version, a measure-for-measure all-purpose gluten-free flour substitute works wonderfully.
- Brown Sugar: Whether you choose light or dark brown sugar, its molasses notes add a depth of sweetness and a hint of caramel flavor to the topping. Dark brown sugar will lend a more pronounced, robust flavor.
- Ground Cinnamon: A second dose of cinnamon here ensures the topping is just as aromatic and flavorful as the apple filling.
- Salt: Just a pinch of salt is essential to balance the sweetness and enhance all the other flavors in the topping.
- Unsalted Butter: Cold and cut into small pieces, unsalted butter is key to achieving that perfectly crumbly and crispy topping. Keeping it cold helps prevent it from melting too quickly when mixed, leading to a flakier texture.
Is It Better to Thicken Fruit Filling With Flour or Cornstarch?
In this Caramel Apple Crisp recipe, I specifically use cornstarch for thickening the apple filling. There are several reasons for this preference: cornstarch is naturally gluten-free, which is a great benefit if you’re making a gluten-free crisp. It also produces a remarkably clear, shiny, and beautifully gelled filling, allowing the vibrant colors of the apples and caramel to show through. Furthermore, you generally need less cornstarch than flour to achieve the desired thickness. However, if cornstarch isn’t readily available or if you simply prefer using flour, you can certainly substitute it. Just keep in mind that flour can sometimes create a slightly cloudier filling and you might need to adjust the quantity slightly to achieve the desired consistency.
Crafting Your Caramel Apple Crisp: A Step-by-Step Guide
Making this delightful Caramel Apple Crisp is a straightforward and rewarding process. Once you’ve gathered all your fresh ingredients, follow these simple steps to bring your autumn dessert to life.
Prepare Your Workspace: Begin by preheating your oven to a steady 350ºF (175ºC). This ensures your oven is at the optimal temperature for even baking as soon as your crisp is ready.
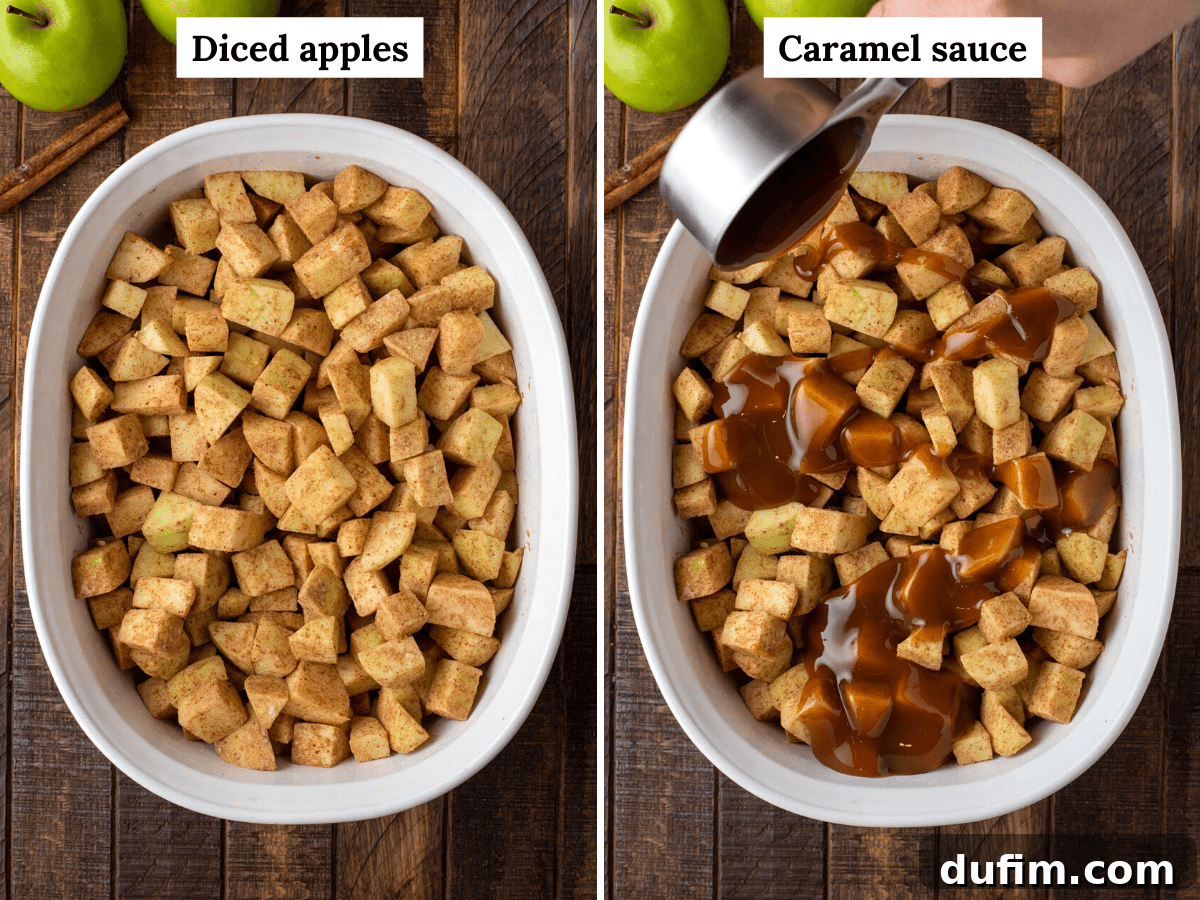
Create the Irresistible Apple Filling: In your chosen baking dish (refer to our “What Size Dish to Use” section for options), combine the peeled and chopped apples, luscious caramel sauce, cornstarch, ground cinnamon, and a hint of nutmeg. Using a spoon or spatula, gently toss all the ingredients together. Ensure that every single apple piece is thoroughly coated in the fragrant caramel and spice mixture. This even coating is key to a uniformly flavored and perfectly thickened filling.
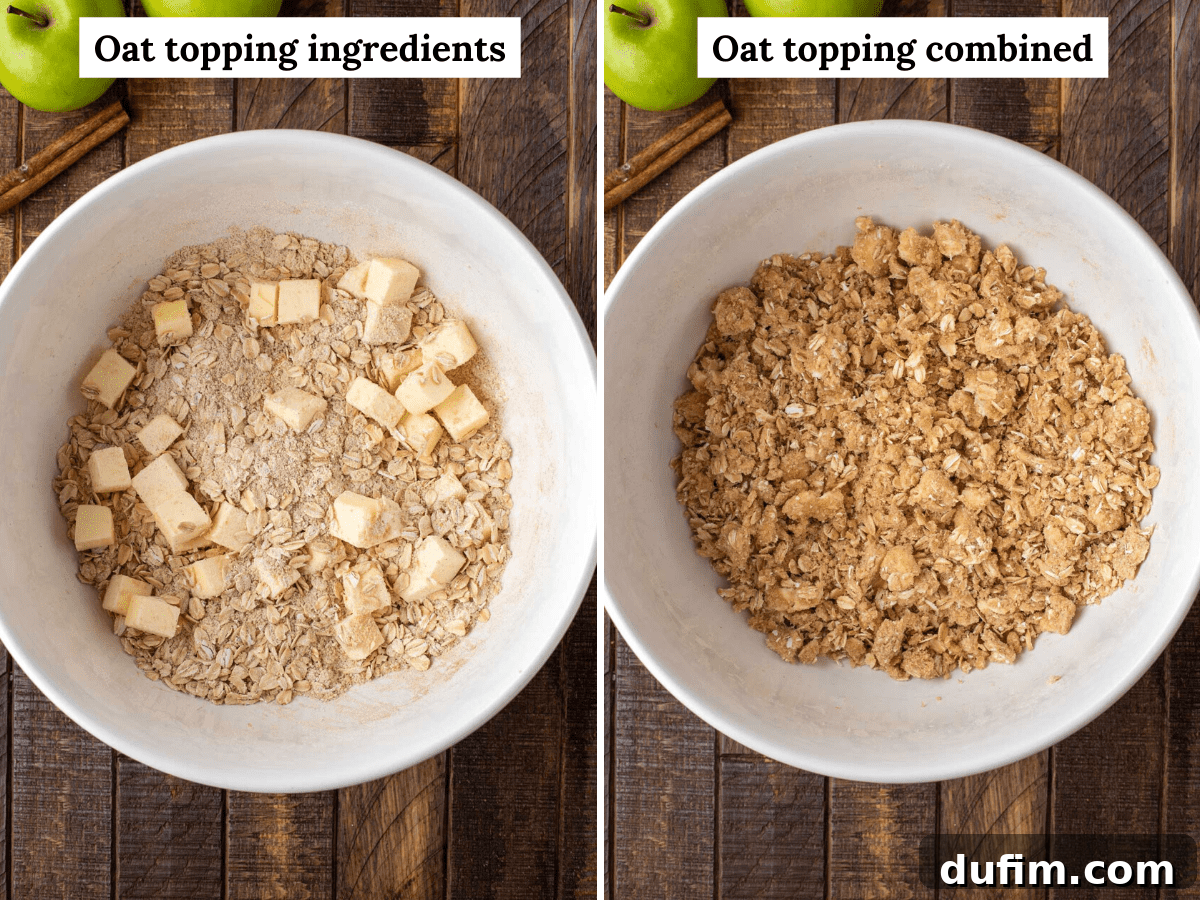
Prepare the Golden Oat Topping: In a separate mixing bowl, combine the old-fashioned rolled oats, all-purpose flour, rich brown sugar, ground cinnamon, and a pinch of salt. Next, add the cold, cubed unsalted butter. Using a pastry blender or your fingertips, work the butter into the dry ingredients. Continue mixing until the mixture resembles coarse sand with a few pea-sized bits of butter remaining. These small butter chunks are vital for creating pockets of steam during baking, resulting in an extra-crispy topping. Finally, gently squeeze handfuls of the mixture together with your hands to form larger clumps – these will bake up into delicious, varied textures.
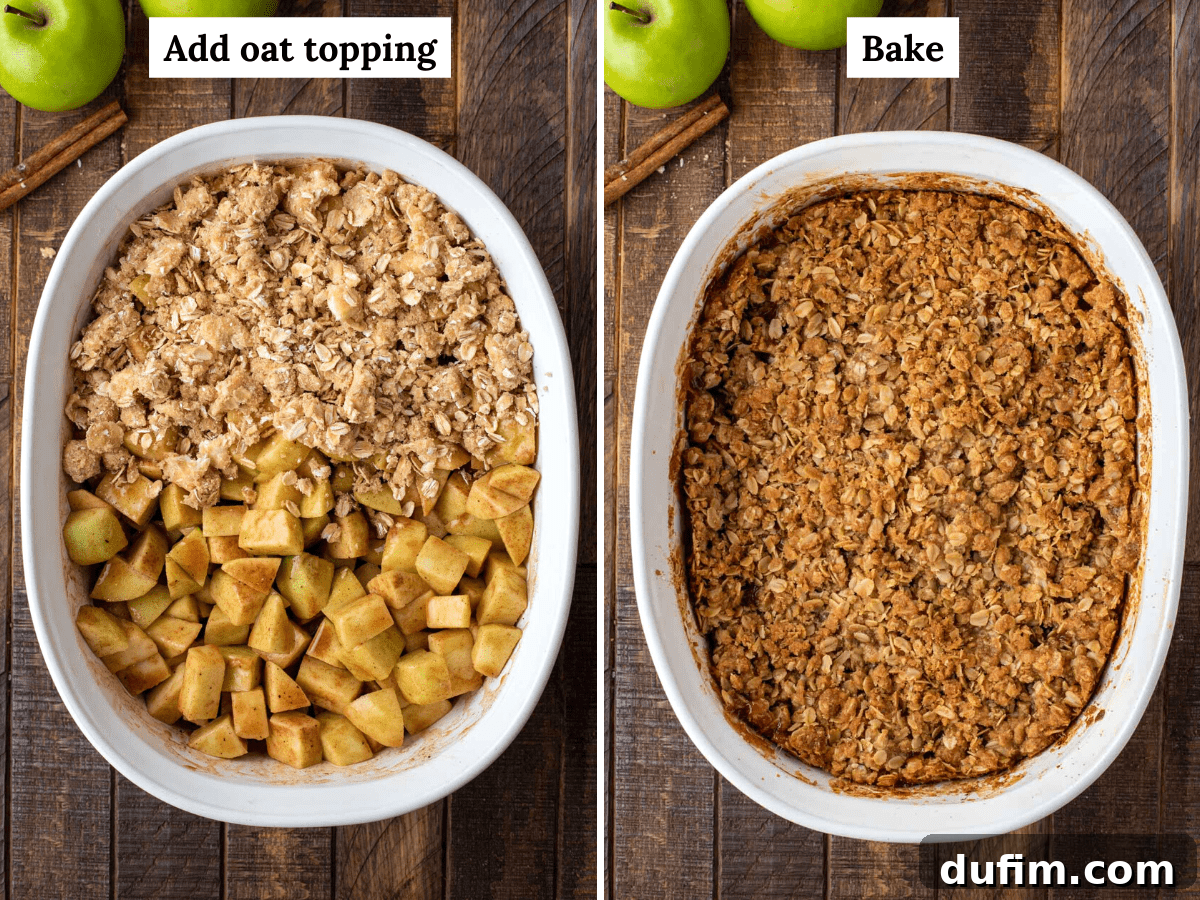
Assemble and Bake: Evenly break the prepared topping mixture into clumps and sprinkle them generously over the apple filling in your baking dish. Ensure good coverage so every spoonful of crisp has that delightful crunchy element. Place the baking dish into your preheated oven and bake for approximately 40 to 45 minutes. The crisp is ready when the topping achieves a beautiful golden-brown color and the apple filling is visibly bubbling around the edges, indicating the apples are tender and the sauce has thickened. Once baked, remove from the oven and allow it to cool for at least 10 to 15 minutes. This crucial cooling time allows the caramel apple juices to set and thicken further. Serve this warm, comforting dessert as-is, or elevate it with a scoop of vanilla ice cream and an extra drizzle of caramel sauce for an unforgettable experience.
Elevate Your Crisp: Delicious Variations and Serving Suggestions
While this Caramel Apple Crisp is perfect on its own, it’s also incredibly versatile and can be customized to your preference. Here are some ideas to make it uniquely yours:
- Nutty Additions: If you adore pecans or walnuts in your apple desserts, feel free to fold about half a cup of chopped nuts into the apple filling before baking. Alternatively, for a delightful crunch and enhanced flavor, garnish the finished crisp with toasted or candied nuts just before serving. Almonds or even hazelnuts could also be a delicious choice.
- Spice It Up: Experiment with additional warm spices! A pinch of allspice, ginger, or cardamom can add another layer of complexity to both the apple filling and the topping.
- A Touch of Citrus: A teaspoon of lemon zest mixed with the apples can brighten the flavors and add a subtle zing that cuts through the richness of the caramel.
- Boozy Bliss: For an adult twist, add a tablespoon or two of bourbon or rum to the apple filling for an extra layer of warmth and sophistication.
- Different Fruits: While apple is classic, consider combining apples with other fall fruits like pears or cranberries for a different flavor profile.
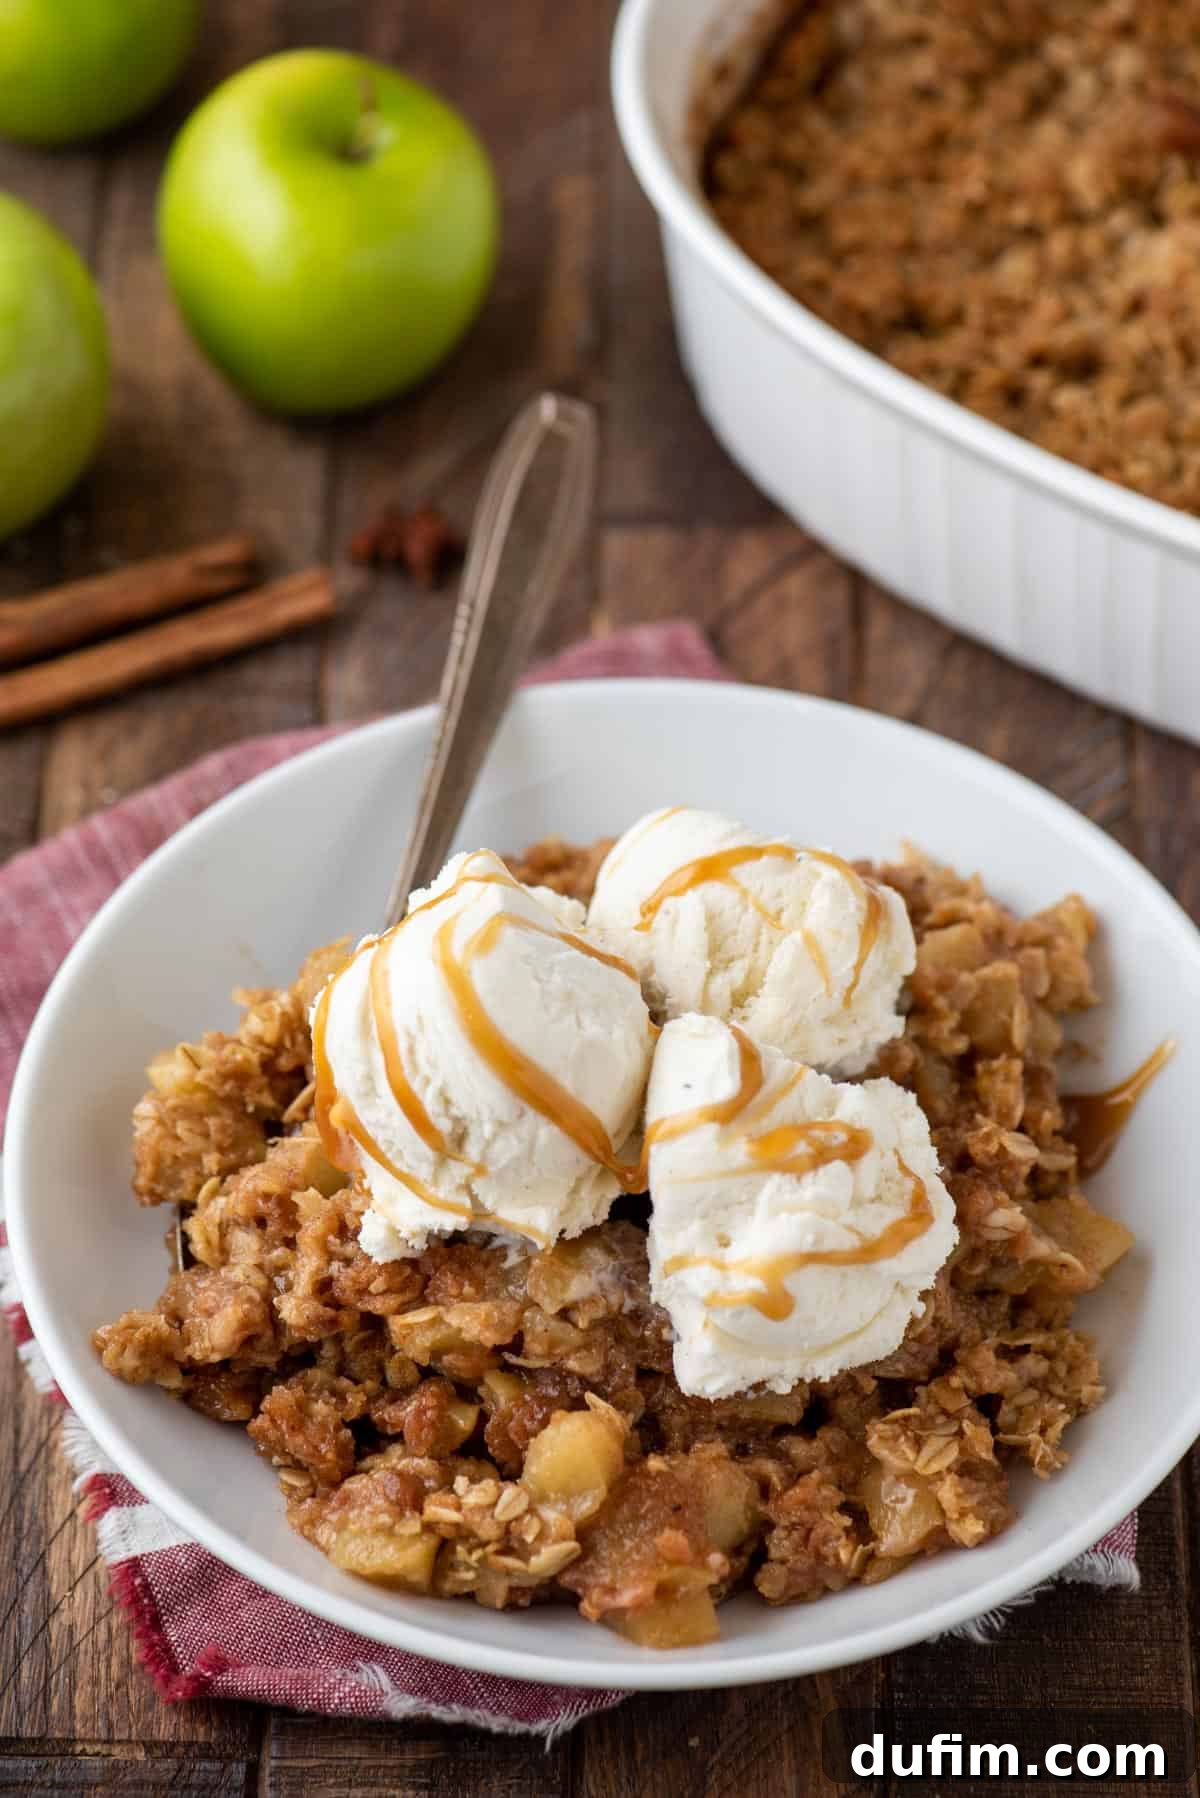
When it comes to serving, a scoop of vanilla ice cream is a time-honored tradition for a reason – the cold, creamy ice cream melting into the warm crisp is pure heaven. But don’t stop there! Consider a dollop of freshly whipped cream, a sprinkle of flaky sea salt (to enhance the caramel!), or even a side of warm crème anglaise. For a truly decadent experience, pair your crisp with a cup of hot coffee or a glass of spiced cider.
Choosing the Right Baking Dish for Your Crisp
The beauty of this Caramel Apple Crisp recipe is its flexibility when it comes to bakeware. You can successfully use any oven-safe dish that holds approximately 2 to 2.5 quarts. This capacity is key to ensuring the apples cook evenly and the topping gets perfectly crisp. Here are some common options that will work beautifully:
- 8×8 inch square pan: A classic choice, resulting in a slightly thicker crisp.
- 8 inch round pan: Also provides a good depth for the filling.
- 9×9 inch square pan: Creates a slightly thinner crisp, which may bake a little faster.
- 9 inch round pan: Similar to the 9×9, offering a bit more surface area for the topping.
- 7×11 inch rectangular pan: This size (which I used for my own crisp, baking it for 60 minutes) offers a nice balance between depth and surface area.
No matter which pan you choose, ensure it’s made from a material like glass, ceramic, or cast iron that distributes heat well and is suitable for oven temperatures.
Expert Tips for a Flawless Caramel Apple Crisp
Achieving a perfectly baked Caramel Apple Crisp is easy with a few simple techniques and considerations. These tips will help you create a dessert that consistently wows.
- Select the Best Apples: The quality of your apples directly impacts the flavor and texture of your crisp. Always use firm, flavorful apples that aren’t mealy or bland when eaten raw. If an apple doesn’t taste good fresh, it won’t magically improve when baked! Freshly picked apples from an orchard are often unparalleled in flavor and texture, making this recipe an ideal way to celebrate apple season.
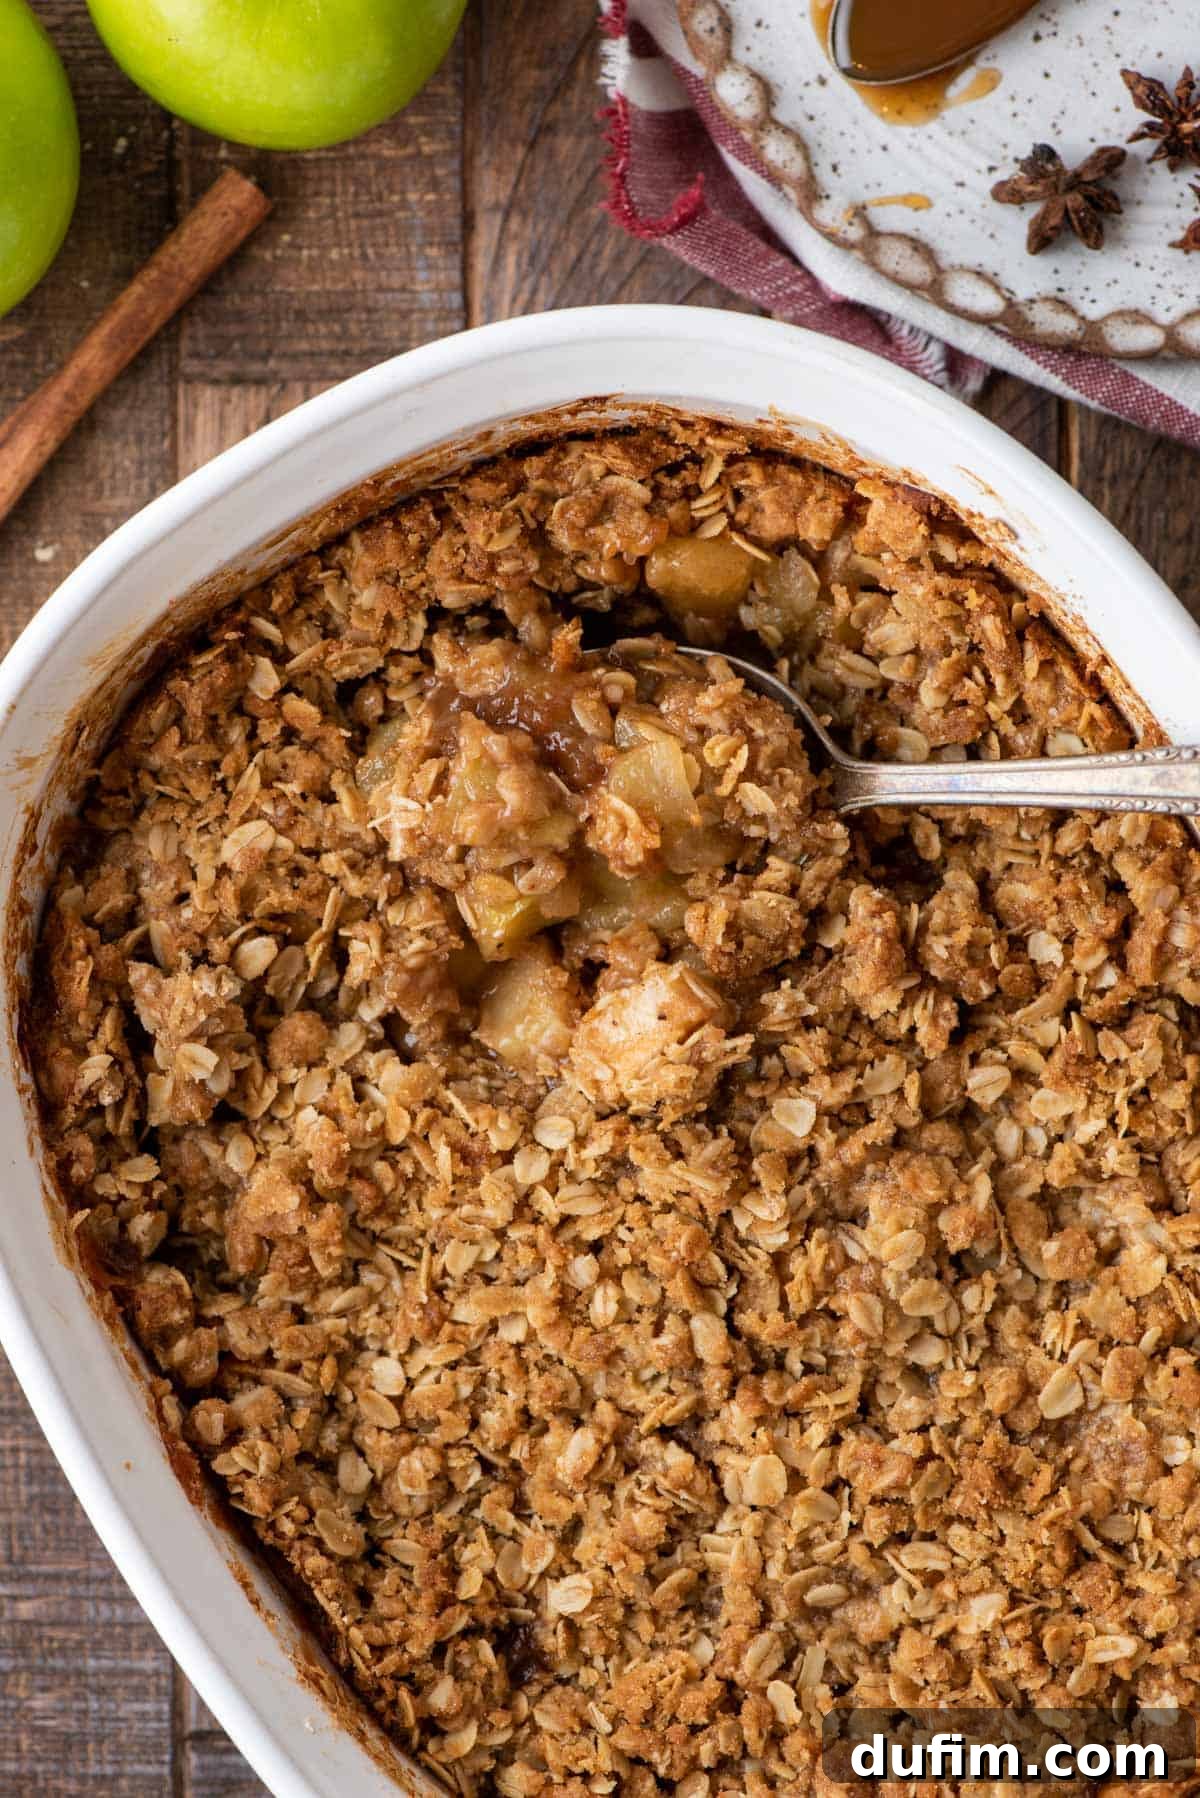
- Adjust Baking Time as Needed: Oven temperatures can vary, and the size and material of your baking dish will also influence cooking time. Don’t solely rely on the clock; instead, look for visual cues. Your crisp is done when the topping is gorgeously golden brown and, crucially, the apple filling is bubbling vigorously around the edges and through the topping. If it’s not quite there after the suggested time, continue baking in 10-minute increments. A crisp baked in a wider, shallower pan might cook faster than one in a deeper, narrower dish. As an example, my 7×11 inch oval pan took about 60 minutes to reach perfection.
- Ensure Cold Butter for the Topping: Using very cold, cubed butter for the oat topping is essential. When the cold butter melts slowly during baking, it creates steam, which results in a lighter, flakier, and much crispier crumble. If your butter is too warm, it will blend too easily, leading to a denser, less crisp topping.
- Don’t Skimp on Cooling Time: It can be tempting to dive into your crisp straight from the oven, but allowing it to cool for 10-15 minutes is vital. This resting period gives the cornstarch in the apple filling time to fully thicken and set. If you serve it too hot, the filling might be runny. Cooling allows those luscious caramel apple juices to reach their perfect, spoonable consistency.
- Get a Head Start: This Caramel Apple Crisp is perfect for making ahead! You can assemble the entire crisp – both the apple filling and the topping – and store it covered in the refrigerator for up to a day before baking. When ready to bake, simply let it sit on the counter for 20-30 minutes while your oven preheats to bring it closer to room temperature, then bake as directed. This makes entertaining a breeze!
Storing and Reheating Your Delicious Caramel Apple Crisp
While it’s rare to have leftovers of this delectable Caramel Apple Crisp, proper storage and reheating techniques ensure that every bite is as enjoyable as the first.
You can either simply cover the baking dish tightly with plastic wrap or aluminum foil, or for more compact storage, transfer any remaining crisp to an airtight container. Refrigerate promptly, and your crisp will stay fresh and delicious for up to 5 days. The flavors often meld and deepen slightly overnight!
When it comes to reheating, for the best results, I highly recommend warming the crisp in a 350ºF (175ºC) oven until it is heated through, typically about 15-25 minutes depending on the portion size. This method helps to re-crisp the topping, restoring its delightful crunch. If you’re in a hurry, the microwave will certainly work in a pinch for warming individual servings, but be aware that the topping may lose some of its crispiness and become a bit softer.
Speaking of using up apples, if you find yourself with extra apples, why not try a fun and easy foil pack apple crisp cooked right on the grill? It’s a fantastic outdoor cooking option!
Can This Caramel Apple Crisp Recipe Be Frozen?
Absolutely! This Caramel Apple Crisp freezes wonderfully, making it an excellent option for meal prep or for having a comforting dessert ready at a moment’s notice. To freeze, ensure the crisp has completely cooled after baking. Once cool, wrap it thoroughly in several layers of plastic wrap and then aluminum foil, or transfer it to a freezer-safe, airtight container. It can be stored in the freezer for up to 3 months. When you’re ready to enjoy, simply let it thaw overnight in the refrigerator, then reheat it using the oven instructions provided above to restore its warmth and texture.
Frequently Asked Questions About Caramel Apple Crisp
- What kind of caramel sauce should I use?
- For the best results, choose a high-quality, thick caramel sauce. Thin ice cream toppings might be too watery and won’t give you the rich, gooey texture you want in this crisp. Store-bought or homemade both work great!
- Can I make this Caramel Apple Crisp gluten-free?
- Yes, absolutely! To make this recipe gluten-free, ensure you use certified gluten-free rolled oats (like Bob’s Red Mill) and substitute the all-purpose flour in the topping with a measure-for-measure gluten-free all-purpose flour blend. The cornstarch in the filling is already gluten-free.
- How do I prevent a soggy apple crisp?
- Several factors contribute to a perfectly crisp topping and a non-soggy filling. Ensure your apples are firm varieties that hold up well to baking. Don’t skip the cornstarch – it’s crucial for thickening the juices. Also, make sure your butter for the topping is cold and cut into pieces, which promotes crispiness. Finally, baking until the filling is bubbling actively ensures the juices have thickened adequately.
- Can I add nuts to my apple crisp?
- Yes, nuts are a fantastic addition! You can fold about ½ cup of chopped pecans or walnuts into the apple filling before baking, or sprinkle them over the top with the oat crumble. For extra flavor, toast the nuts lightly before adding them.
Explore More Apple Delights: Reader Favorite Apple Recipes
- Caramel Apple Cheesecake Bars: A decadent fusion of creamy cheesecake, spiced apples, and luscious caramel.
- Applesauce Cake: A moist and tender cake bursting with warm apple and spice flavors.
- Caramel Apple Cookies: Soft, chewy cookies featuring chunks of apple and gooey caramel swirls.
- Apple Spice Cupcakes: Perfectly spiced cupcakes, ideal for any fall gathering.
Tap stars to rate!
Caramel Apple Crisp Recipe
Print Recipe
Equipment
-
Glass Mixing Bowl
-
Pastry Cutter
Ingredients
Apple Filling
- 7 cups (791g) peeled & chopped apples, 6-7 large or 8-10 small apples, I recommend Granny Smith, Jonagold, Honeycrisp, Braeburn, or Pink Lady. Cut the apples into 1 inch by 1/2 inch pieces.
- ½ cup (118ml) caramel sauce
- ¼ cup (28g) cornstarch
- 1 tsp cinnamon
- ½ tsp nutmeg
Topping
- 1 cup (89g) old-fashioned rolled oats
- ½ cup (60g) all-purpose flour
- ½ cup (107g) brown sugar
- ½ tsp cinnamon
- ½ tsp salt
- ½ cup (113g) unsalted butter, 1 stick, cold and cut into pieces.
Instructions
Apple Filling
-
Preheat the oven to 350ºF (175ºC). In your chosen baking dish (any dish that is 2 to 2.5 quarts, such as an 8×8 inch pan, 8 inch round pan, 9×9 inch pan, 9 inch round pan, or 7×11 inch pan will work), combine the peeled and chopped apples, caramel sauce, cornstarch, cinnamon, and nutmeg. Toss gently with a spoon or spatula to ensure all the apples are evenly coated.
Topping & Baking
-
In a separate mixing bowl, combine the old-fashioned rolled oats, all-purpose flour, brown sugar, cinnamon, salt, and the cubed cold butter. Use your fingers or a pastry cutter to cut the butter into the dry ingredients. Continue mixing until the texture is “sandy,” with a few pea-sized clumps of butter remaining. Use your hands to gently squeeze the mixture together to form larger clumps.
-
Use your fingers to break the topping into varied clumps and sprinkle them evenly over the apple filling in your baking dish, ensuring good coverage.
-
Bake for 40-45 minutes. The crisp is done when the topping is golden brown and the apple filling is visibly bubbling around the edges. If not, bake for an additional 10-20 minutes, checking periodically. The exact bake time will vary depending on your oven and the size/material of your pan (e.g., my crisp baked for 60 minutes in an oval 7×11 inch pan). Allow the crisp to cool for 10-15 minutes before serving. This cooling period is crucial for the juices to thicken to the perfect consistency.
Notes
Nutrition
Calories: 213kcal | Carbohydrates: 50g | Protein: 3g | Fat: 1g | Saturated Fat: 0.2g | Polyunsaturated Fat: 0.3g | Monounsaturated Fat: 0.2g | Sodium: 160mg | Potassium: 161mg | Fiber: 4g | Sugar: 26g | Vitamin A: 58IU | Vitamin C: 4mg | Calcium: 29mg | Iron: 1mg
Nutrition Disclosure
All nutritional values are approximate and provided to the reader as a courtesy. Changing ingredients and/or quantities will alter the estimated nutritional calculations.
Like this recipe? Rate and comment below!