
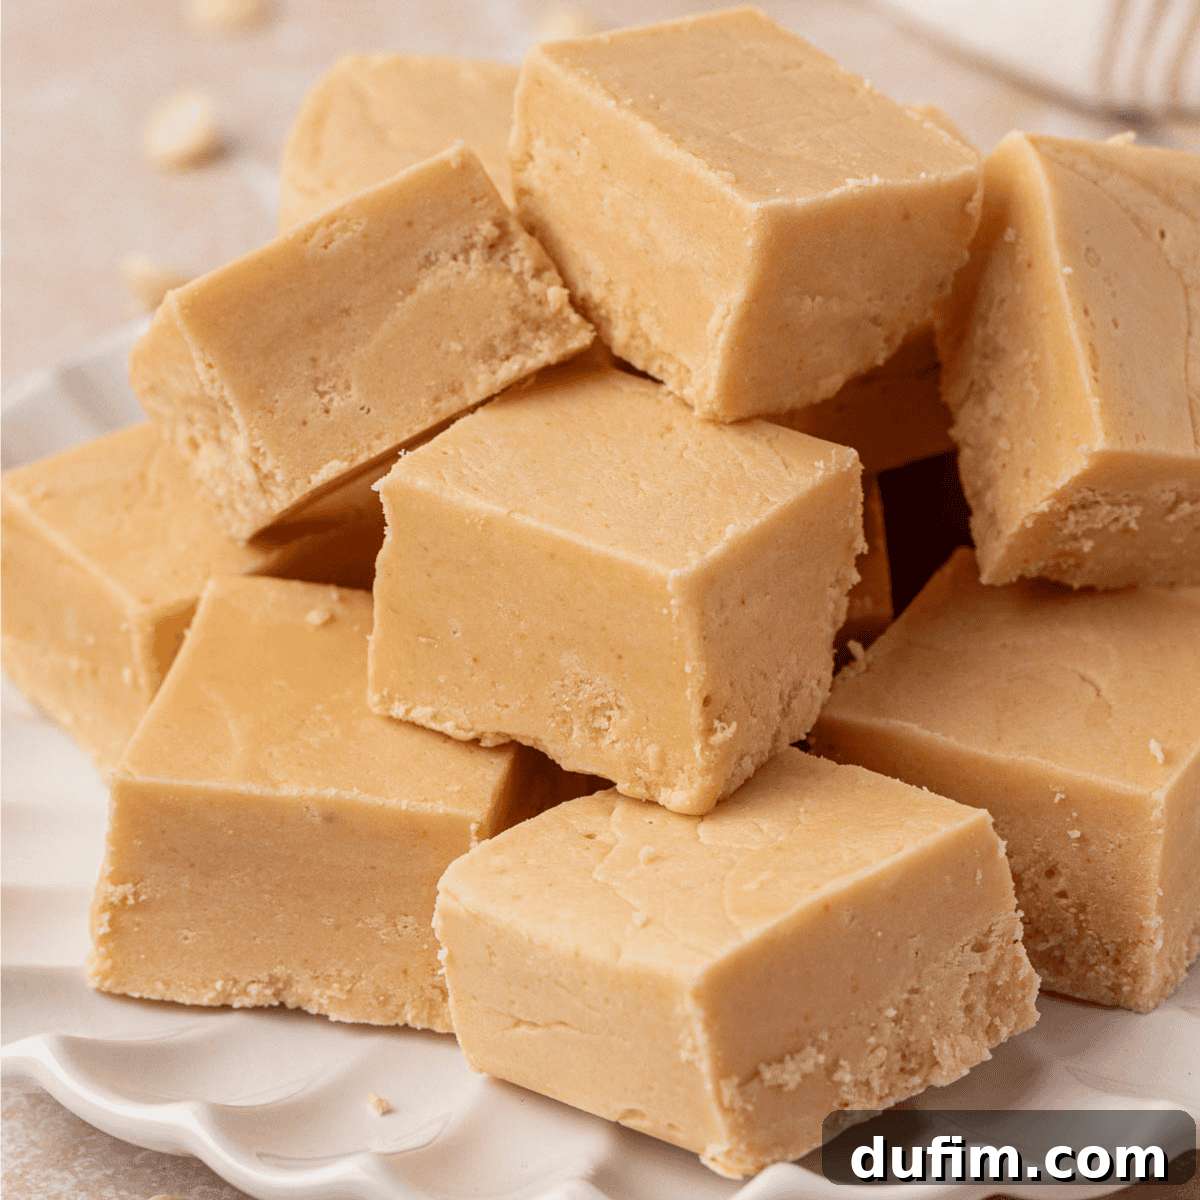
When I first polled my Instagram followers about their favorite fudge flavors, I anticipated a landslide for chocolate. To my delightful surprise, vanilla emerged as a strong contender, capturing the hearts of many with its classic simplicity. As a devout chocolate enthusiast myself, I was intrigued. Could a vanilla fudge truly rival the rich indulgence of its cocoa-laden cousin? Challenging my own biases, I decided to embark on a quest to create the ultimate vanilla fudge, utilizing my trusted stovetop fudge base. The result? A remarkably easy vanilla fudge recipe that not only sets with flawless precision but also delivers an intensely satisfying flavor experience. It’s a testament to the power of quality ingredients and a reliable method, proving that vanilla, in all its understated elegance, can indeed be a showstopper. This recipe is straightforward, consistently dependable, and undeniably worth every moment spent making it.
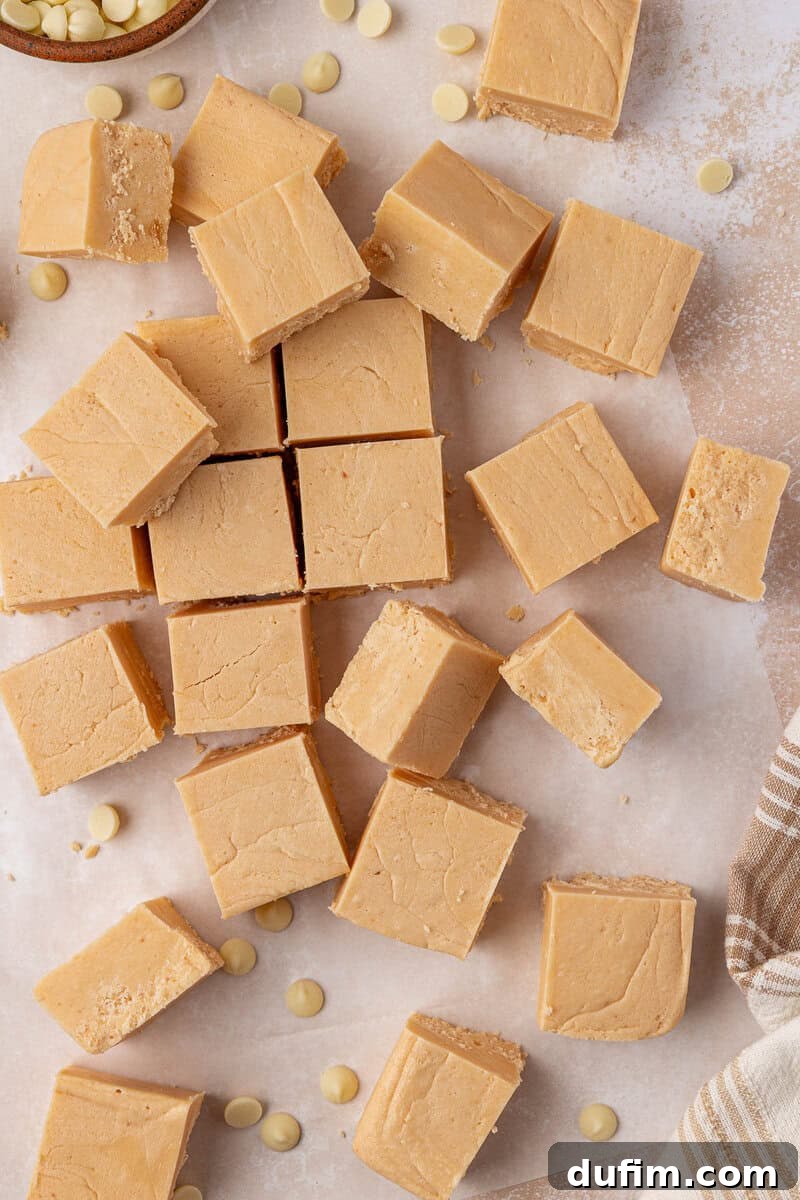
What Exactly is Vanilla Fudge?
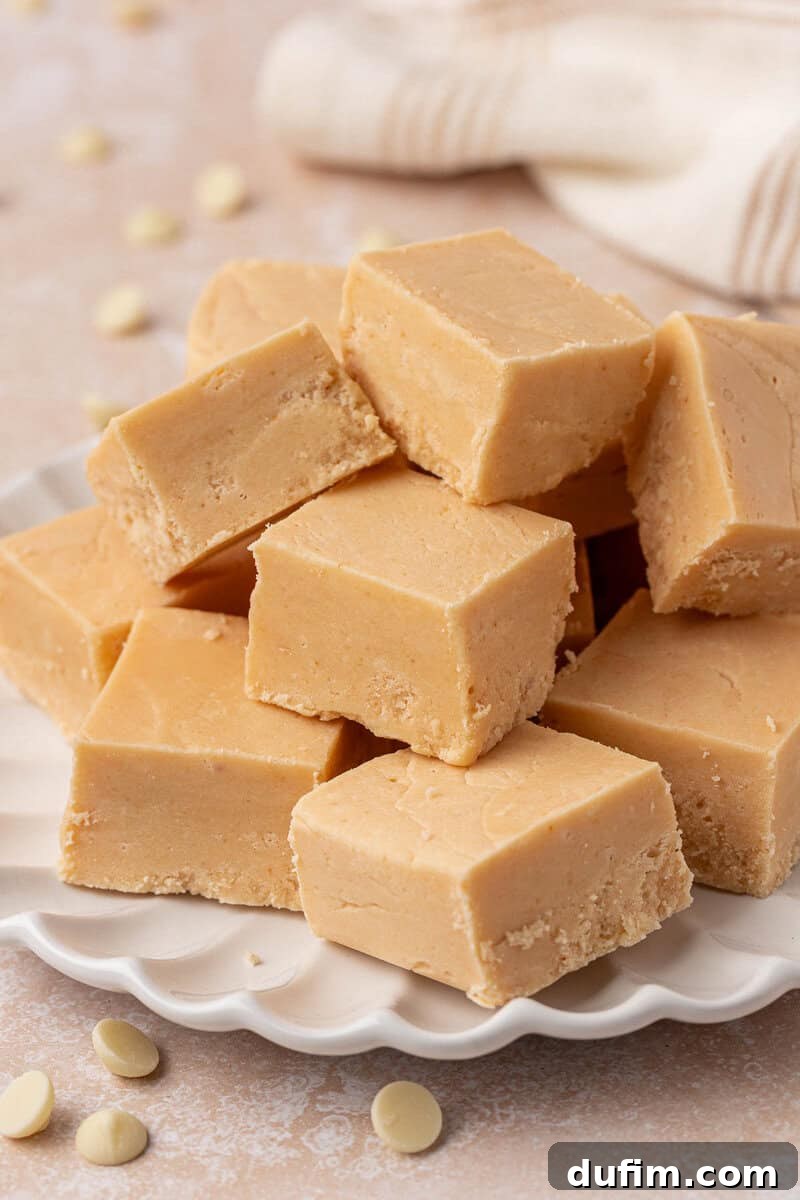
Vanilla fudge, at its core, is a luscious, creamy confection that celebrates the pure, aromatic essence of vanilla. Unlike traditional chocolate fudge, which derives its deep color and flavor from cocoa solids, vanilla fudge relies on a foundation of sugar, dairy, and often white chocolate to achieve its characteristic bright, often pristine white hue and velvety texture. It’s a delightful contrast to chocolate, offering a different kind of sweetness and a distinct, fragrant profile that makes it uniquely appealing. For those accustomed to the robust notes of cocoa, vanilla fudge presents a refreshing change, highlighting the delicate yet profound flavor of true vanilla extract. It’s not merely a “white” fudge; it’s a carefully balanced treat where the subtleties of vanilla can truly shine, unmasked by stronger flavors. My initial skepticism quickly turned to appreciation as I realized the widespread appeal of this classic flavor.
To craft this exceptional vanilla fudge, I didn’t start from scratch. Instead, I leveraged the robust framework of my proven fantasy fudge base. This recipe is a fan favorite for a reason, incorporating essential ingredients like marshmallow creme and evaporated milk, all prepared using a reliable stovetop method that guarantees consistent results. The genius of this approach lies in its simplicity: I merely substituted the chocolate chips with high-quality white chocolate chips, maintaining the precise sugar ratios that are critical for perfect fudge. This strategic swap allowed me to build upon a foundation of success, ensuring that the vanilla version would be just as dependable and delicious.
The outcome was truly surprising and exceeded all my expectations. The finished fudge boasts a rich, deep vanilla flavor that takes center stage, while the marshmallow creme works its magic, ensuring an incredibly smooth, melt-in-your-mouth texture and a brilliantly white appearance. Because its structure is rooted in a meticulously tested base, this recipe takes the guesswork out of homemade candy making. It’s an easy vanilla fudge that consistently sets to the perfect firmness, allowing for clean, effortless slices every single time. This method not only simplifies the process but also elevates the final product, making it a reliable addition to any dessert spread or gift box.
The Science Behind Perfect Vanilla Fudge: Why This Recipe Works
Achieving perfectly set fudge isn’t a matter of luck; it’s a delicate dance of precise sugar concentration, temperature control, and strategic ingredient interaction. This vanilla fudge recipe is engineered for success, built on principles that guarantee a consistently smooth, firm, and delicious outcome. The generous quantity of granulated sugar, when cooked with evaporated milk, reaches a critical concentration. As this mixture cools, the sugar molecules form a crystalline structure that gives fudge its characteristic solid, yet tender, consistency. Undercooking or incorrect sugar ratios can lead to a fudge that never truly sets, remaining stubbornly soft or even liquid.
The inclusion of marshmallow creme is a game-changer in this recipe. Beyond contributing to the fudge’s silky-smooth texture, marshmallow creme plays a crucial role in controlling sugar crystallization. It helps prevent the formation of large, gritty sugar crystals, ensuring that the fudge remains wonderfully smooth and creamy. This ingredient acts as a stabilizer, binding the components together and contributing to the fudge’s overall structural integrity. Without it, achieving that desired creamy mouthfeel would be significantly more challenging, often resulting in a crumbly or grainy product.
Finally, white chocolate chips are not merely for flavor; they are integral to the fudge’s structure and richness. As they melt into the hot sugar mixture, they contribute additional solids and fats, which further stabilize the fudge as it cools. This enhances the body and firmness of the confection, while their mild, sweet flavor complements the vanilla without overpowering it. The white chocolate also adds a luxurious richness that elevates the overall taste profile, ensuring that each bite is not just sweet, but deeply satisfying. The synergy between these carefully chosen ingredients and the precise cooking method is what makes this vanilla fudge recipe unfailingly successful, delivering a sublime texture and an exquisite vanilla forward flavor.
Essential Ingredients for Your Creamy Vanilla Fudge
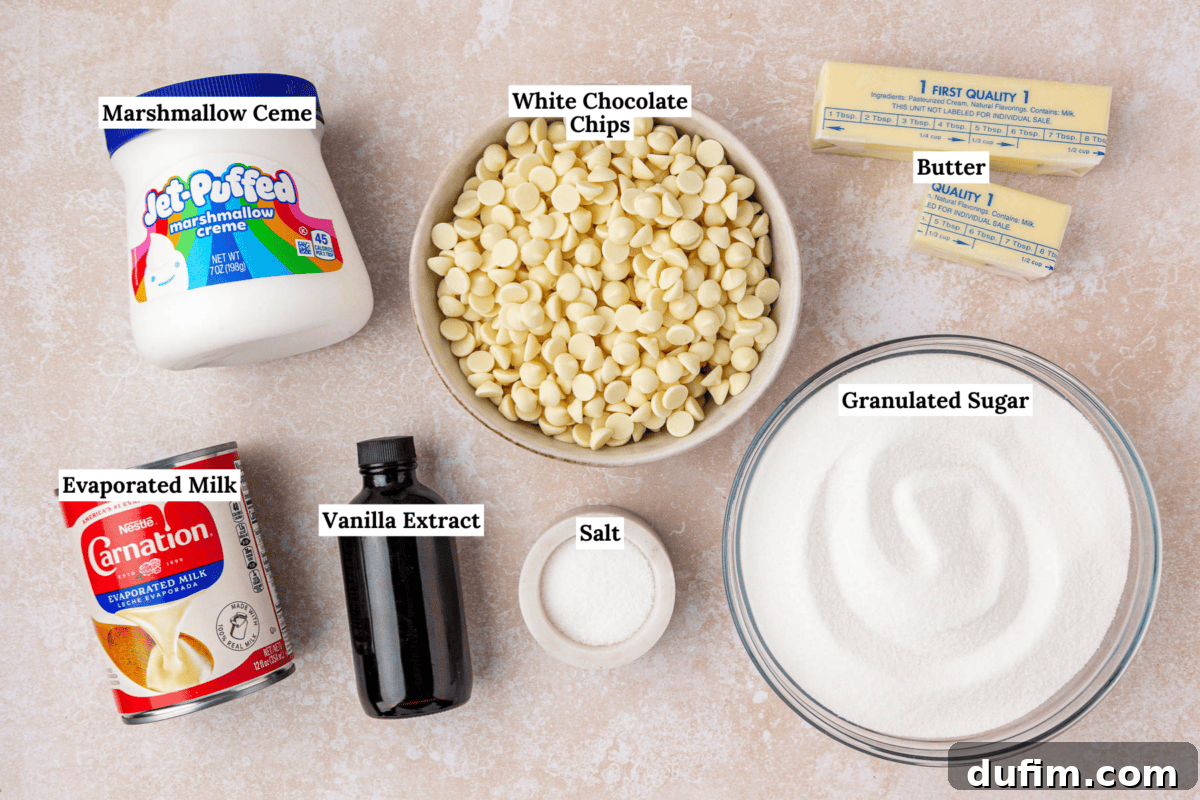
Crafting exceptional homemade vanilla fudge begins with a selection of high-quality ingredients. Each component plays a vital role in achieving the perfect flavor, texture, and set. Here’s a detailed look at what you’ll need and why each ingredient is crucial for this easy stovetop recipe:
- Granulated Sugar: This isn’t just for sweetness; it’s the structural foundation of your fudge. The full three cups are essential to reach the precise sugar concentration required for the fudge to set firmly and slice cleanly. Any reduction can compromise the final texture, leading to a soft or grainy outcome.
- Evaporated Milk: Unlike regular milk, evaporated milk has a reduced water content, making it ideal for candy making. It provides a rich, creamy base without introducing excess moisture that could hinder proper setting. Its concentrated dairy flavor also adds depth to the fudge.
- Unsalted Butter: Butter contributes significantly to the fudge’s luxurious flavor and incredibly smooth, velvety texture. It also aids in controlling sugar crystallization, helping to prevent graininess. Always use unsalted butter to have full control over the salt content in your recipe.
- White Chocolate Chips: These chips are key to both flavor and structure. They melt beautifully, adding a delicate sweetness and a subtle richness that enhances the vanilla. More importantly, the cocoa butter in white chocolate helps stabilize the fudge as it cools, contributing to its firm yet tender set. Opt for a good quality brand for the best results, as the quality of white chocolate can vary significantly.
- Marshmallow Creme: This ingredient is a true hero for achieving that smooth, non-grainy fudge texture. Marshmallow creme contains stabilizers that interfere with the formation of large sugar crystals, ensuring your fudge remains wonderfully creamy. It also adds a subtle sweetness and a light, airy quality to the confection.
- Vanilla Extract: Since vanilla is the star of this recipe, investing in a high-quality pure vanilla extract is paramount. Avoid imitation vanilla, as it won’t deliver the complex, fragrant notes that define exceptional vanilla fudge. A good extract will infuse your fudge with a warm, inviting aroma and a truly exquisite flavor.
- Salt: A small amount of salt might seem counterintuitive in a sweet recipe, but it’s crucial for balancing the flavors. It subtly enhances the sweetness of the sugar and the richness of the vanilla, preventing the fudge from tasting cloyingly sweet and adding a touch of complexity.
Mastering Homemade Vanilla Fudge: A Step-by-Step Guide
This homemade vanilla fudge recipe is designed for simplicity and success, making it a favorite among family and friends. Follow these clear steps to create a batch of perfectly creamy fudge that will impress everyone. For precise measurements and a full printable recipe, refer to the recipe card below.
Step 1: Prepare Your Pan
Before you begin cooking, it’s essential to prepare your baking pan. Line an 8×8 or 9×9 inch square pan with aluminum foil or parchment paper, ensuring there’s an overhang on the sides. This overhang will act as handles, making it incredibly easy to lift the cooled fudge out of the pan for cutting. Lightly grease the foil or parchment paper with butter or non-stick spray to prevent sticking. Set the prepared pan aside.
Step 2: Combine and Heat Core Ingredients
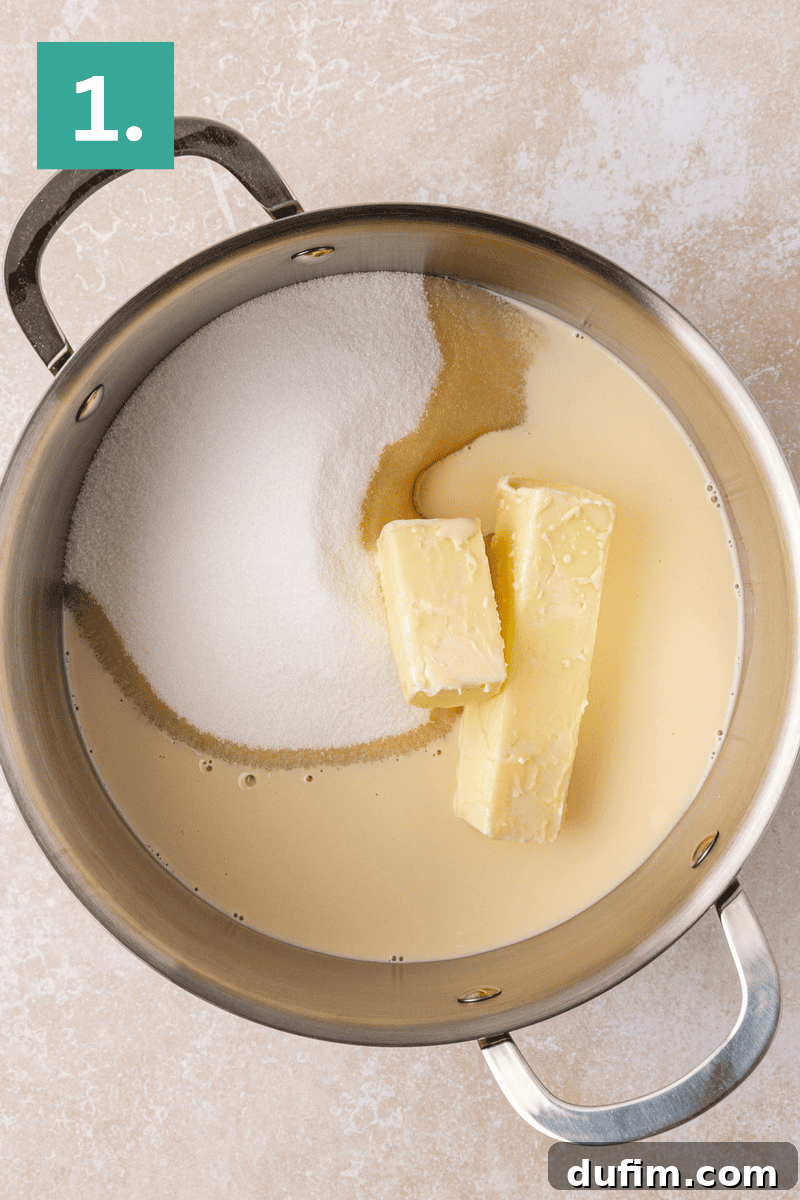
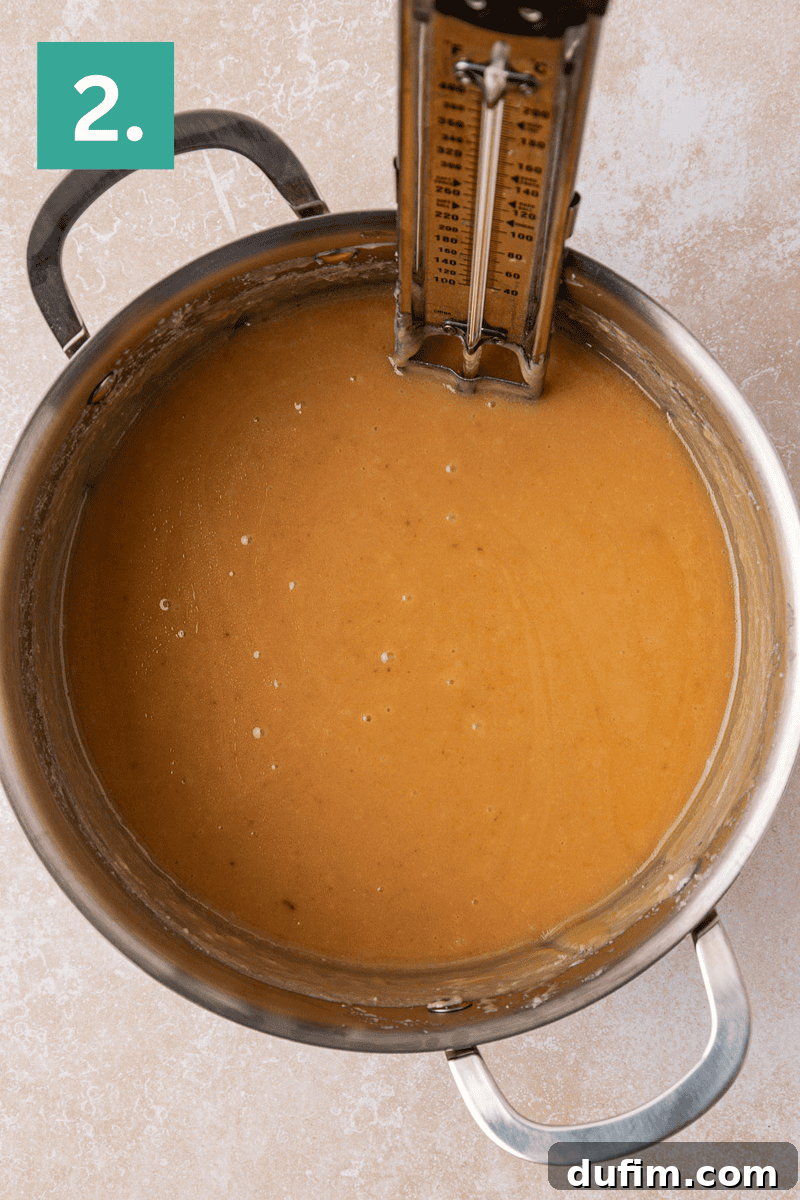
In a sturdy medium saucepan, combine the granulated sugar, unsalted butter, and evaporated milk. Place the saucepan over medium heat. Stir the mixture constantly with a wooden spoon or spatula. Continuous stirring is crucial to ensure the sugar dissolves evenly and prevents scorching at the bottom of the pan. Continue stirring until the mixture comes to a full, rolling boil. At this point, attach a candy thermometer to the side of the pan, making sure the tip doesn’t touch the bottom. If you don’t have a clip-on, use an instant-read thermometer frequently.
Step 3: Boil to Perfection
Once the mixture is at a full boil, continue to boil, stirring constantly, for 4-5 minutes. During this stage, the sugar concentration increases as moisture evaporates. Keep a close eye on your candy thermometer; you are aiming for a temperature of 234ºF (112ºC), which is the “soft ball” stage. This precise temperature is absolutely critical for the fudge to set correctly. Don’t rush this step, and avoid increasing the heat too much, as this can lead to burning or uneven cooking.
Step 4: Incorporate Remaining Flavorings
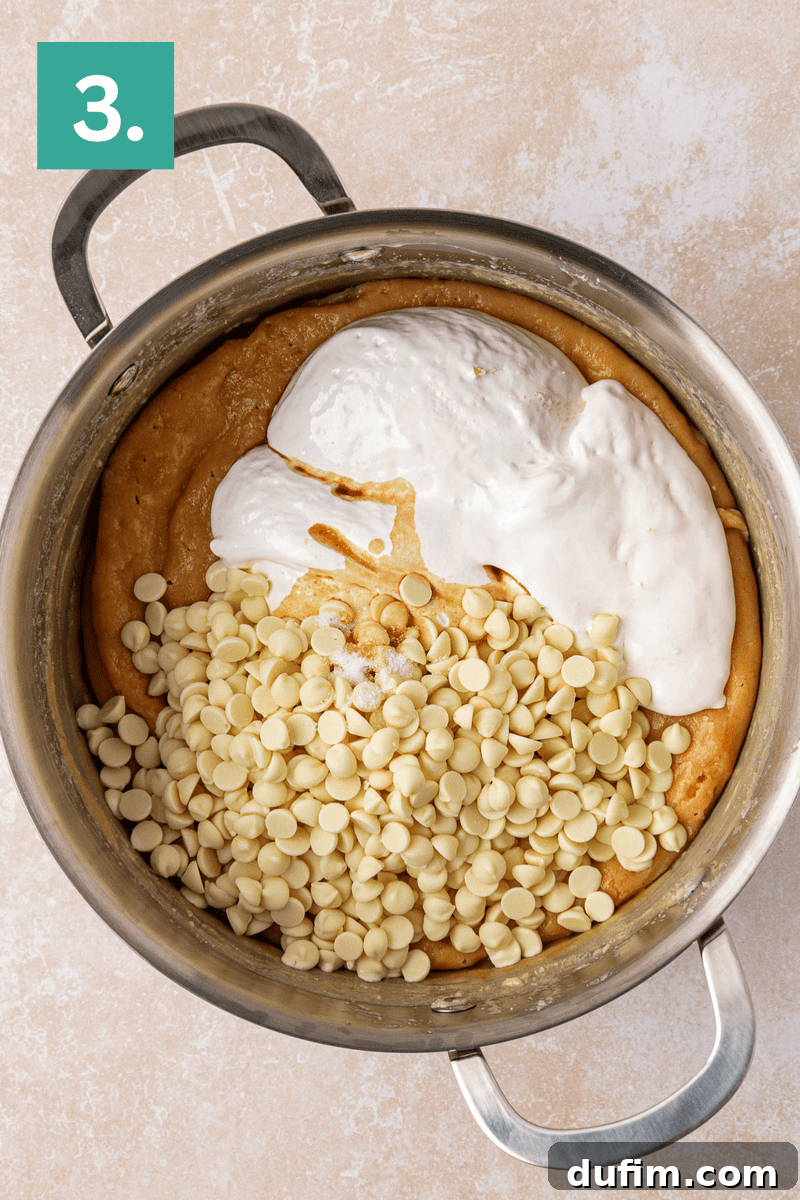
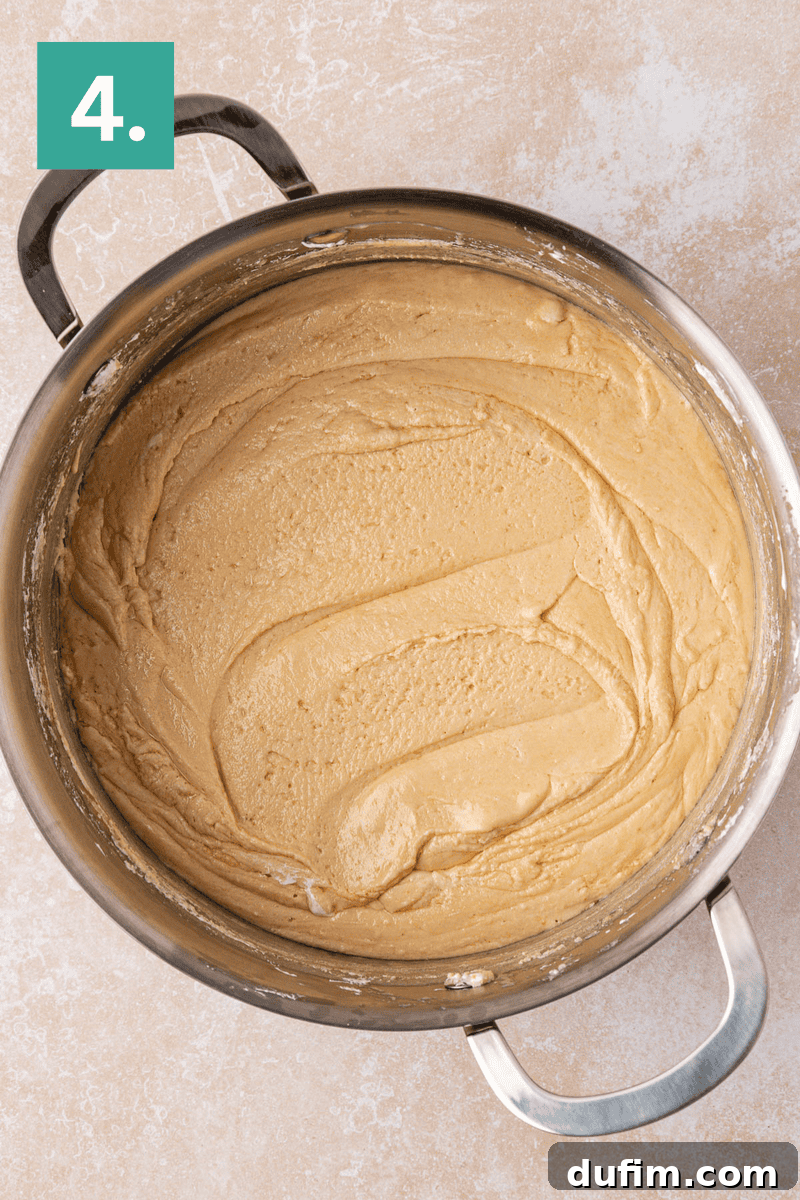
Once the mixture reaches 234ºF, immediately remove the saucepan from the heat. This is a critical moment. Quickly add the white chocolate chips, marshmallow creme, salt, and pure vanilla extract. Stir vigorously and continuously until all the ingredients are fully melted and thoroughly combined into a smooth, glossy, uniform mixture. The residual heat from the sugar mixture will melt the chocolate and marshmallow creme. Do not over-mix, but ensure everything is perfectly incorporated to avoid streaks or lumps.
Step 5: Transfer to Pan
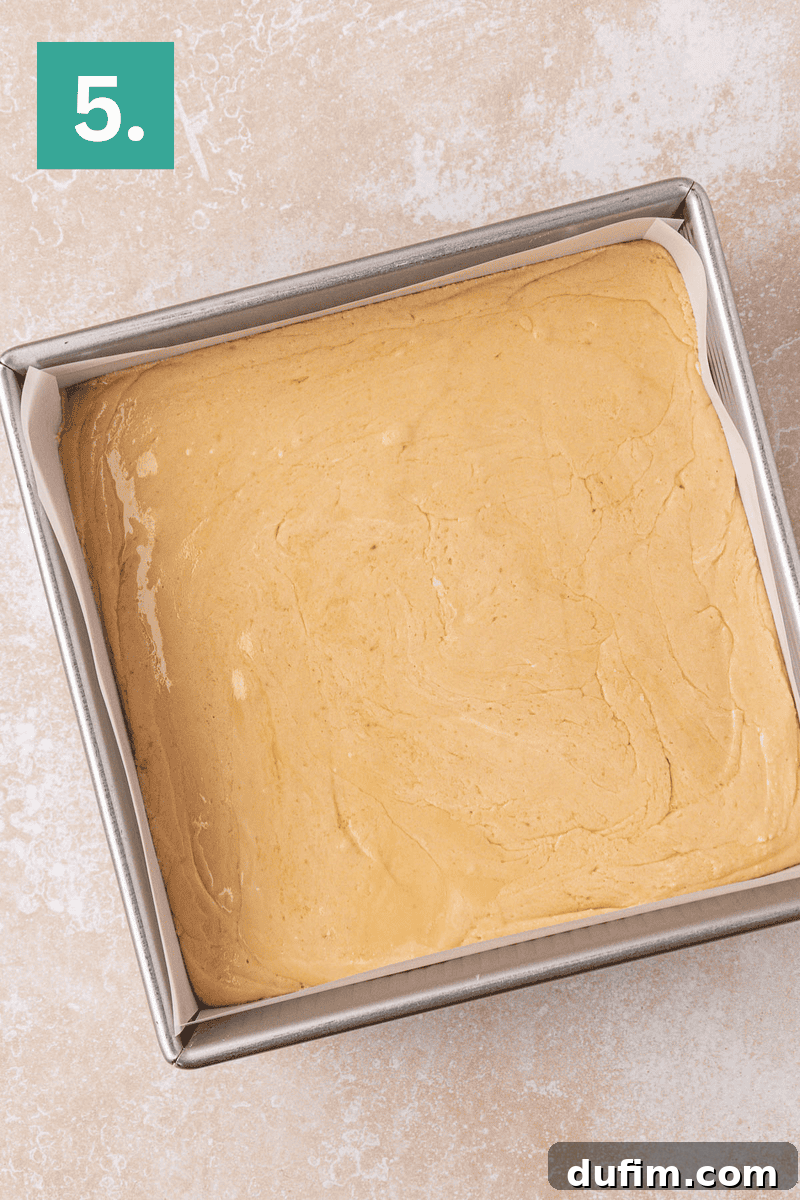
Without delay, carefully pour the hot fudge mixture into your prepared pan. Use a spatula to scrape out all the delicious fudge, ensuring an even layer across the pan. Avoid scraping the sides or bottom of the saucepan vigorously once the fudge starts to cool, as this can introduce premature crystallization and lead to a grainy texture.
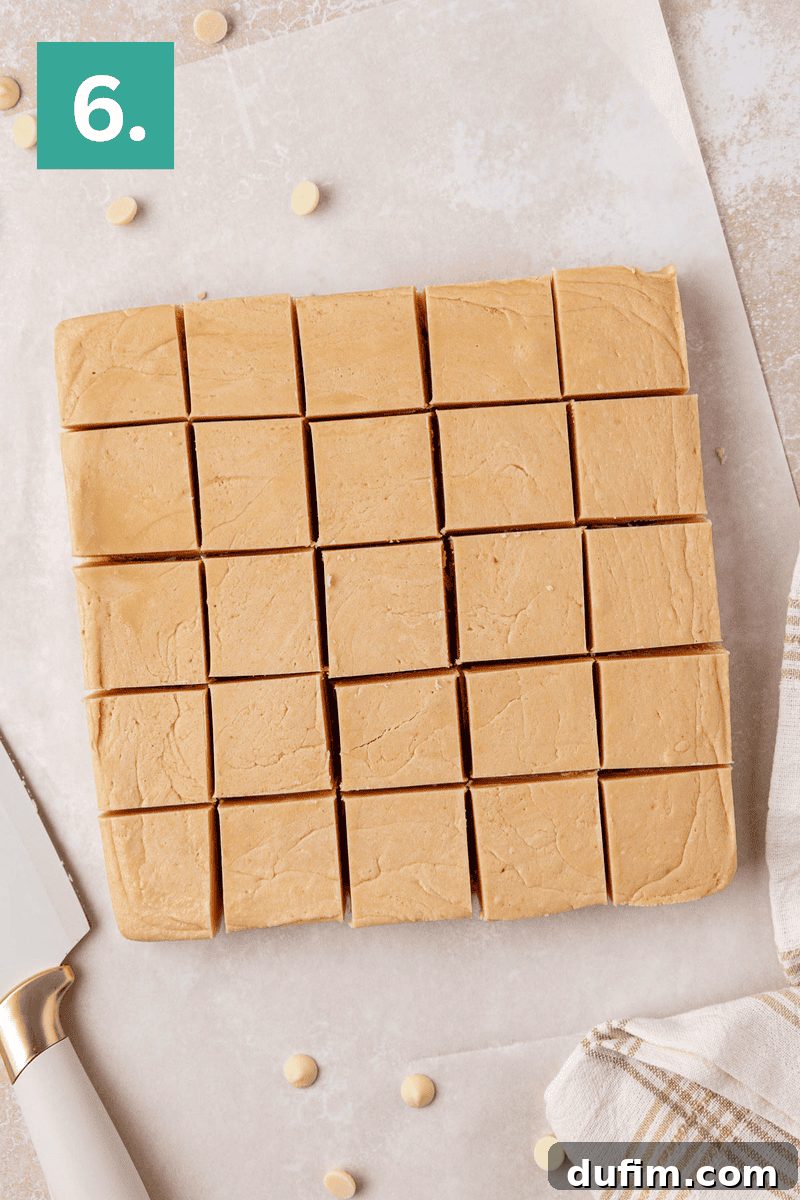
Step 6: Cool and Set
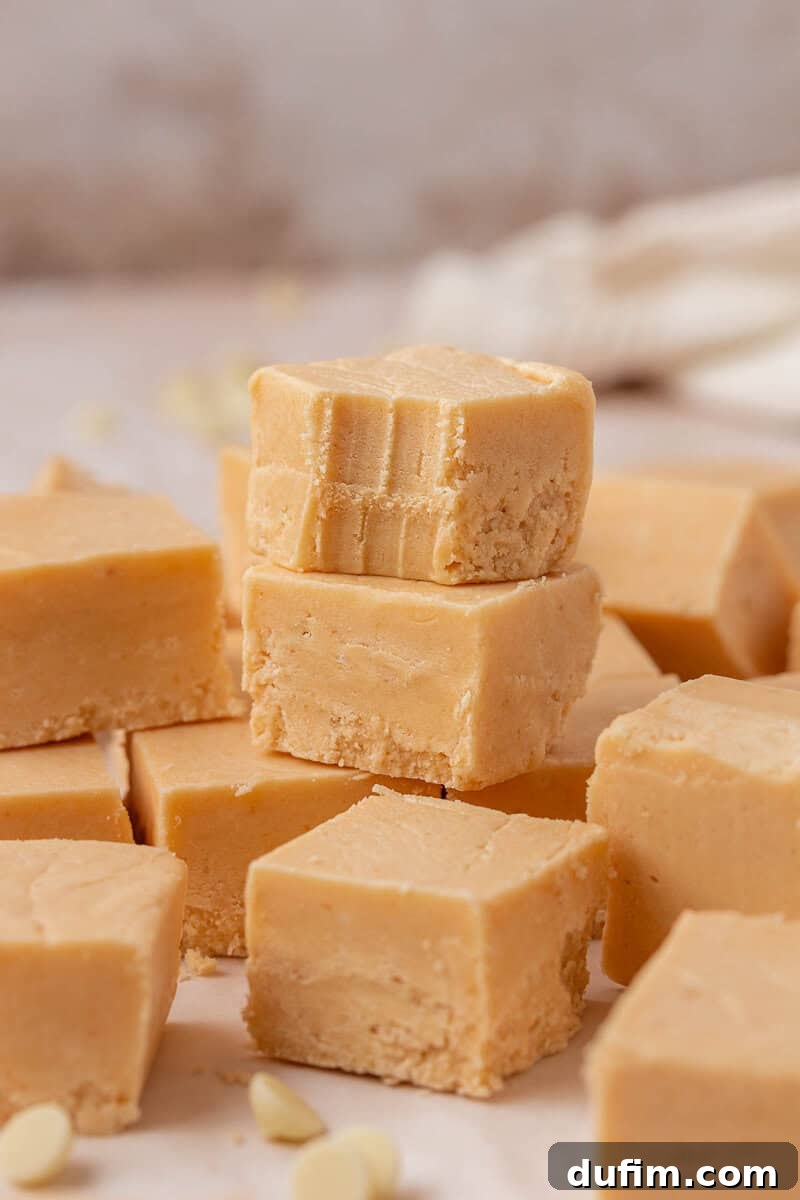
This final step requires patience but is vital for perfect results. Allow the fudge to cool completely and set undisturbed at room temperature. This process typically takes a minimum of 4-6 hours, but for the firmest, cleanest slices, I highly recommend letting it set overnight. Resist the temptation to move, touch, or cut the fudge before it’s fully firm. Once completely cooled and set, use the foil or parchment paper overhang to lift the fudge block out of the pan and transfer it to a cutting board.
Knowing When Your Fudge is Perfectly Ready to Set
Determining when fudge is ready to be removed from the heat is a critical step that dictates its final texture. It’s not simply a matter of elapsed time but a precise combination of temperature and visual cues, indicating the correct sugar concentration has been achieved. After bringing the sugar, butter, and evaporated milk mixture to a full, rolling boil, you must maintain this vigorous boil for the entire specified cooking time (4-5 minutes) to allow enough water to evaporate and the sugar concentration to properly increase. During this boiling phase, the mixture should transform, becoming noticeably thicker, acquiring a slightly glossy sheen, and displaying steady, uniform bubbles across its entire surface.
The most reliable method for confirming readiness is using a candy thermometer. You are aiming for the “soft ball stage,” which occurs at approximately 234ºF (112ºC). At this temperature, if you were to drop a small amount of the hot syrup into very cold water, it would form a soft, pliable ball that can be flattened between your fingers. This specific temperature indicates that the sugar has reached the optimal concentration to crystallize correctly upon cooling. Undercooking is, by far, one of the most common reasons fudge fails to set properly. If the mixture doesn’t reach this precise temperature, the sugar concentration will be too low, and the fudge will remain soft and gooey, no matter how long it sits or how patiently you wait for it to firm up. Trust your thermometer, and watch for those visual cues to ensure a perfectly set batch of vanilla fudge every time.
Troubleshooting Fudge: Why It Turns Soft or Crumbly
Making fudge is a form of delicious kitchen chemistry, and sometimes, even with the best intentions, things don’t go exactly as planned. Understanding why fudge can turn soft or crumbly is key to perfecting your technique and ensuring consistent success.
Why Fudge Turns Soft: Soft fudge is almost always a sign that the sugar concentration was too low. This can occur for several reasons. The most frequent culprit is undercooking; if the mixture doesn’t reach the crucial “soft ball” stage (234ºF / 112ºC) on your candy thermometer, not enough water has evaporated, leaving too much liquid relative to the sugar. Even a few degrees shy can make a significant difference. Another common cause is adding too much liquid, perhaps by mismeasuring the evaporated milk or not using concentrated evaporated milk. Lastly, altering the sugar ratio by intentionally reducing the amount of granulated sugar will invariably result in a softer, less stable fudge. Fudge relies on a precise balance, and even small deviations in liquid or sugar content can prevent it from firming up properly.
Why Fudge Turns Crumbly or Grainy: Conversely, crumbly or grainy fudge usually indicates an issue with sugar crystallization. This can happen if the sugar concentration is off balance (too high, though less common with this recipe), or more often, if the mixture cools too quickly or is disturbed during the cooling process before the crystals have properly formed. Rapid cooling encourages the formation of large, undesirable sugar crystals, leading to a gritty texture. Furthermore, improper stirring at the wrong stages, or scraping the sides of the pan too aggressively, can also introduce seed crystals that cause the entire batch to crystallize unevenly. In this recipe, the marshmallow creme is specifically added to help control crystallization, promoting small, uniform crystals that result in a smooth texture. Without adequate stabilizers or proper cooling, the fudge loses its creamy integrity and becomes crumbly. Remember, fudge making is a science; the ratios and temperatures are not just suggestions, but critical parameters for a perfect outcome.
Achieving Pristine Slices: How to Cut Fudge Cleanly
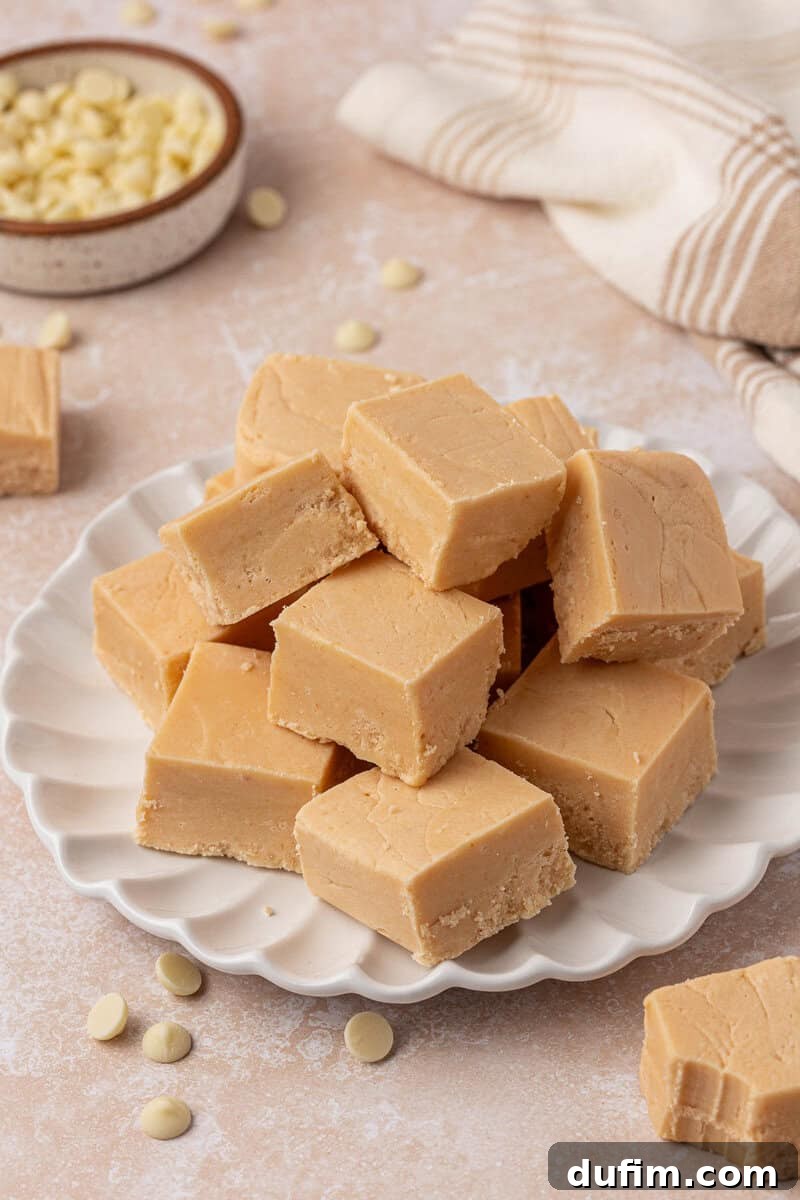
After all the effort of cooking and setting, presenting your homemade vanilla fudge with clean, sharp slices is the satisfying final touch. The secret to beautifully cut fudge lies primarily in patience and technique. First and foremost, ensure the fudge is completely cooled and fully set at room temperature before attempting to slice it. This is non-negotiable. For the absolute cleanest cuts, allowing the fudge to set for several hours, or ideally overnight, ensures its internal structure has firmed up sufficiently. Attempting to cut fudge while it’s even slightly warm will result in sticky, messy edges and potentially a crumbling texture.
Once your fudge is firm, transfer the entire block (using the parchment or foil overhang) onto a clean cutting board. For best results, use a very sharp, thin-bladed knife. A large chef’s knife or a long, thin slicing knife works wonderfully. For exceptionally clean cuts, you can warm your knife blade under hot running water, then wipe it completely dry before each slice. This slight warmth helps the blade glide through the fudge smoothly, preventing sticking and creating those coveted crisp edges. Press down firmly and evenly in a single, decisive motion rather than sawing back and forth. For uniformly sized pieces, you can lightly score the top of the fudge with the knife to mark your cutting lines before making the final cuts. Wipe the blade clean with a damp cloth after every few cuts, especially if it starts to accumulate sticky residue, to maintain that pristine finish. With these simple tips, your vanilla fudge will look as professional as it tastes.
Unleash Your Creativity: Delicious Vanilla Fudge Variations
Vanilla fudge serves as a wonderfully versatile canvas, ready to be customized and transformed to suit any occasion, season, or personal preference. While its classic, creamy form is delightful on its own, folding in additional ingredients can elevate its texture, flavor, and visual appeal. When adding mix-ins, a general rule of thumb is to incorporate about 1 cup of your chosen additions, stirring them in after the marshmallow creme and white chocolate chips have fully melted and the fudge is removed from the heat, just before pouring into the prepared pan. Here are some exciting ideas to spark your creativity:
- Nutty Indulgence: Add a delightful crunch and a hint of earthy flavor with chopped nuts. Toasted pecans, walnuts, slivered almonds, or even exotic macadamia nuts not only provide a pleasing textural contrast but also help to balance the sweetness of the fudge, adding a layer of sophisticated flavor.
- Cookies and Crunch: For a playful twist, incorporate crushed cookies or crunchy elements. Imagine the irresistible combination of crushed Oreos for a cookies and cream delight, Golden Oreos for a vanilla-on-vanilla experience, vanilla wafers, or even graham cracker pieces. For a sweet and salty sensation, try folding in crushed pretzels, creating a surprisingly addictive treat.
- Candy Confetti: Infuse your fudge with pops of color and varied textures using your favorite candies. Mini M&Ms add a fun, colorful touch, while chopped chocolate candies, peanut butter candies (like Reese’s Pieces), or buttery toffee bits provide bursts of intense flavor and chewiness. These variations are particularly fantastic for holiday trays or birthday celebrations.
- Fruity Zing: Introduce a chewy texture and a tart counterpoint to the fudge’s sweetness with dried fruits. Chopped dried cherries, cranberries, or blueberries offer a burst of fruity flavor that beautifully cuts through the richness, creating a more complex and refreshing profile.
- Festive Holiday Add-Ins: Make your vanilla fudge truly seasonal with holiday-themed mix-ins. Crushed peppermint candy canes are perfect for a refreshing winter treat, festive sprinkles add a celebratory visual, and chopped maraschino cherries (well-drained and patted dry) bring a vibrant color and a unique, sweet-tart flavor, ideal for Christmas platters and thoughtful edible gifts.
Storage and Make-Ahead Tips for Vanilla Fudge
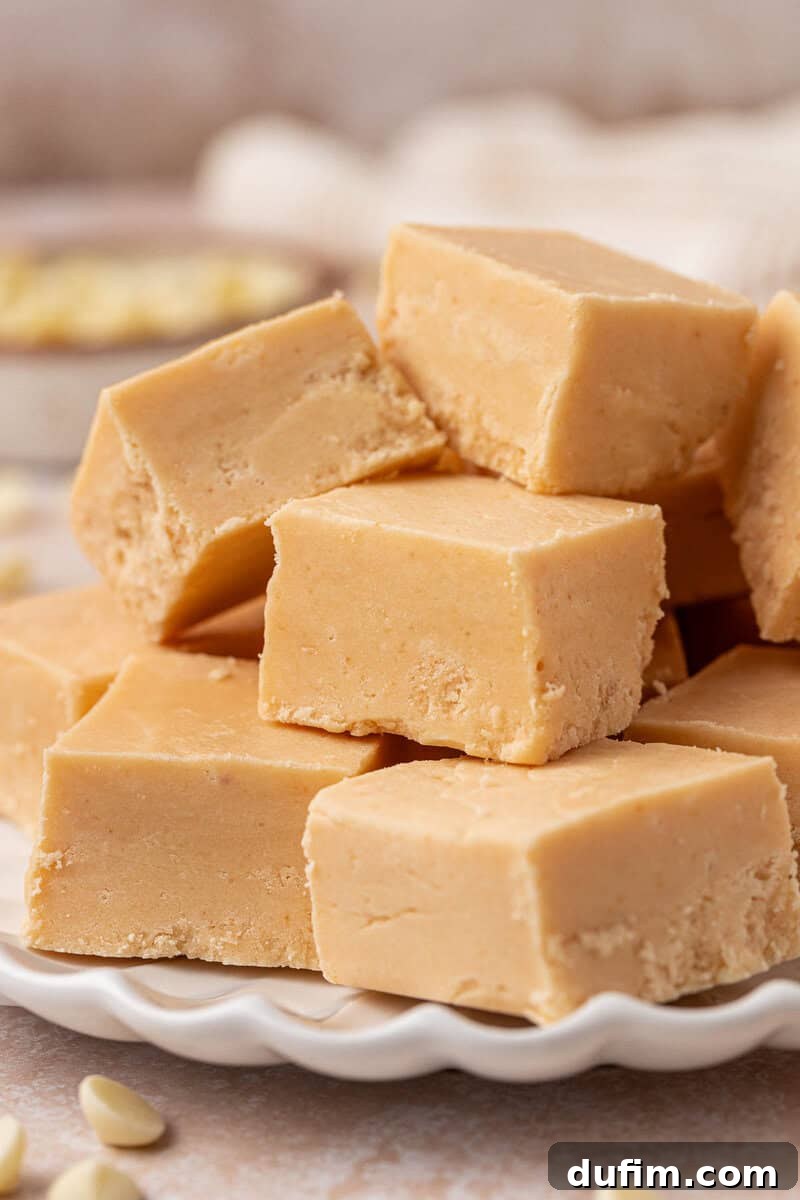
One of the many joys of homemade vanilla fudge is its excellent shelf life and adaptability for make-ahead preparations, making it a perfect candidate for holiday gifting or spontaneous sweet cravings. Proper storage ensures your fudge retains its delightful texture and flavor for days or even months.
Storing at Room Temperature: For immediate enjoyment, store your vanilla fudge in an airtight container at room temperature. It will remain fresh and delicious for up to one week. To prevent the pieces from sticking together, especially if stacked, place sheets of parchment paper between the layers. This method is ideal for maintaining the fudge’s creamy, melt-in-your-mouth texture, as refrigeration can sometimes make fudge a bit harder.
Refrigeration: If your kitchen tends to be on the warmer side, or if you prefer a slightly firmer fudge, you can certainly refrigerate it. However, for the best eating experience, allow the fudge to come back to room temperature for about 15-30 minutes before serving. This softens it slightly, bringing out its full creamy potential and flavor profile.
Make-Ahead Excellence: Vanilla fudge is an exceptional make-ahead treat. You can easily prepare a batch 1 to 2 days in advance, allowing it to fully set and firm up. Store it tightly covered at room temperature. Slice it into squares just before serving for the freshest appearance and cleanest edges. This approach is fantastic for busy periods like the holidays, as it reduces last-minute stress.
Freezing for Long-Term Storage: Yes, fudge freezes wonderfully! For extended storage, first ensure the fudge is completely cooled and set. Wrap the entire block (or individual pieces, if preferred) tightly in plastic wrap, pressing out any air bubbles to prevent freezer burn. Then, place the plastic-wrapped fudge into a freezer-safe airtight container or heavy-duty freezer bag. It will keep beautifully for up to three months. To thaw, simply transfer the frozen fudge to the refrigerator overnight or let it sit at room temperature for several hours, ensuring it remains wrapped during thawing. This prevents condensation from forming directly on the fudge surface, which could affect its texture. Once thawed, unwrap and enjoy!
If you’re a fan of crafting homemade sweets, be sure to explore my extensive collection of candy recipes for more delightful ideas. And for those planning festive feasts, don’t miss my full collection of Christmas dessert recipes, packed with festive favorites perfect for gifting and holiday gatherings.
Frequently Asked Questions About Vanilla Fudge
Your fudge is likely too soft because it did not reach a high enough temperature during the boiling stage (234ºF / 112ºC for soft ball). This means the sugar-to-liquid ratio was off, and not enough water evaporated. Fudge must achieve the correct sugar concentration to set firmly.
Graininess occurs when sugar crystallizes improperly, forming large, noticeable crystals. This can happen if the mixture is stirred too much while cooling, cools too slowly, or if seed crystals are introduced. Marshmallow creme helps significantly to prevent this by inhibiting large crystal formation, ensuring a smooth texture.
No, it is not recommended to substitute sweetened condensed milk for evaporated milk in this recipe. Sweetened condensed milk contains a high amount of added sugar, which will drastically alter the overall sugar balance of the fudge and lead to an overly sweet product with a different, often undesirable, final texture.
Yes, you can double this recipe. If doubling, use a larger 9×13 inch pan and a heavy-bottomed pot that can accommodate the increased volume. It is crucial to monitor the temperature carefully with a reliable candy thermometer, as larger batches may take slightly longer to reach the precise soft ball stage of 234ºF (112ºC).
While some experienced candy makers can rely on visual cues or the cold water test, a reliable candy thermometer is highly recommended, especially for beginners. It provides the most accurate way to ensure your fudge reaches the exact soft ball stage (234ºF / 112ºC), which is critical for proper setting and texture. Without it, success can be inconsistent.
To prevent burning, always use a heavy-bottomed saucepan which distributes heat more evenly. Keep the heat at medium, never too high, and stir the mixture constantly, especially in the initial stages, until it reaches a full boil. Once boiling, continue stirring frequently to prevent sticking and scorching at the bottom of the pan.
More Delicious Fudge Recipes to Explore
If you’ve fallen in love with making homemade fudge, there’s a whole world of flavors waiting to be discovered. Expand your repertoire with these other tried-and-true fudge recipes:
- Chocolate Peanut Butter Fudge
- Oreo Fudge
- Caramel Apple Fudge
- Rocky Road Fudge
Classic Creamy Vanilla Fudge
By: Beth
Cook Time: 6-8 hours (setting)
Yields: 24 servings
This classic stovetop vanilla fudge is incredibly creamy, smooth, and bursting with rich vanilla flavor. Made with white chocolate chips and marshmallow creme, it sets perfectly every time, making it an ideal treat for holidays, gifting, or simply satisfying your sweet tooth.
Ingredients
- 3 cups (594g) granulated sugar
- ¾ cup (170g) unsalted butter
- ⅔ cup (172g) evaporated milk
- 12 oz (340g) white chocolate chips (Nestle brand recommended)
- 7 oz marshmallow creme
- ½ tsp salt
- 1 tsp vanilla extract (pure vanilla extract for best flavor)
Instructions
- Prepare Pan: Line an 8×8 or 9×9 inch square pan with aluminum foil or parchment paper, leaving an overhang on the sides for easy removal. Lightly grease the lining. Set aside.
- Combine & Boil: In a medium-sized, heavy-bottomed saucepan over medium heat, combine the granulated sugar, unsalted butter, and evaporated milk. Stir constantly until the mixture comes to a full, rolling boil. Attach a candy thermometer to the side of the pan, ensuring it doesn’t touch the bottom.
- Cook to Temperature: Allow the mixture to continue boiling, stirring constantly, for 4-5 minutes, or until the candy thermometer precisely reaches 234ºF (112ºC – soft ball stage).
- Remove from Heat & Mix: Immediately remove the saucepan from the heat. Add the white chocolate chips, marshmallow creme, salt, and vanilla extract. Stir vigorously until all ingredients are fully melted and completely combined into a smooth, homogeneous mixture.
- Pour & Cool: Carefully pour the hot fudge mixture into your prepared pan, spreading it evenly with a spatula.
- Set & Slice: Allow the fudge to cool completely and set undisturbed at room temperature. This will take a minimum of 4-6 hours, but for optimal firmness and cleanest slices, I highly recommend letting it set overnight. Once fully firm, lift the fudge out of the pan using the overhang and cut into desired squares using a sharp knife.
Notes
To Store: Store vanilla fudge in an airtight container at room temperature for up to 1 week. Place parchment paper between layers to prevent sticking. If your kitchen is warm, you can refrigerate it, but let it come to room temperature before serving for the best texture.
To Make Ahead: Vanilla fudge is perfect for making ahead. Prepare the fudge 1 to 2 days in advance and store it tightly covered at room temperature. Slice just before serving for the cleanest edges.
To Freeze: Wrap the fully set fudge tightly in plastic wrap, then place it in a freezer-safe container or bag. Freeze for up to 3 months. Thaw at room temperature while still wrapped to prevent condensation from forming on the surface.
Nutrition Information
All nutritional values are approximate and provided to the reader as a courtesy. Changing ingredients and/or quantities will alter the estimated nutritional calculations.
Calories: 259 kcal
Carbohydrates: 41g
Protein: 1g
Fat: 11g
Saturated Fat: 7g
Polyunsaturated Fat: 0.4g
Monounsaturated Fat: 3g
Trans Fat: 0.2g
Cholesterol: 20mg
Sodium: 70mg
Potassium: 64mg
Fiber: 0.03g
Sugar: 39g
Vitamin A: 198 IU
Vitamin C: 0.2mg
Calcium: 48mg
Iron: 0.1mg