
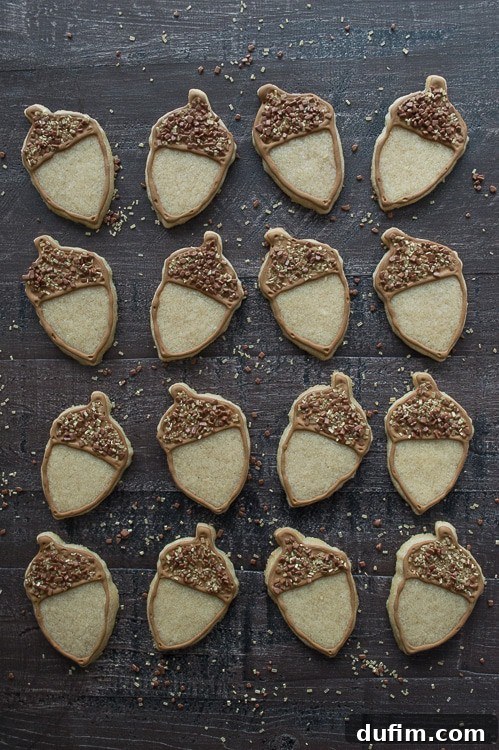
Delightful Maple Acorn Cookies with Royal Icing: A Charming Autumn Bake
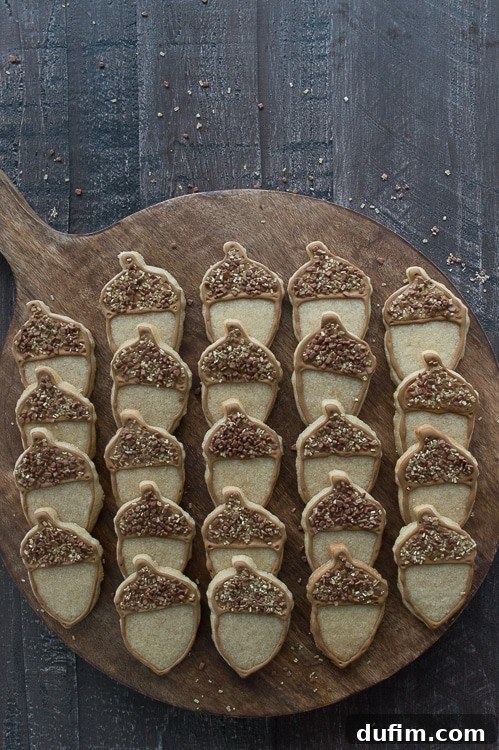
As the leaves begin to turn golden and a crisp coolness fills the air, there’s nothing quite like the warmth and aroma of homemade treats baking in the kitchen. Among the many delights of autumn, these maple-flavored sugar cookies, intricately shaped and decorated as adorable acorns, stand out as a true embodiment of the season. While they might require a little more dedication than your average quick dessert, the sheer charm and deliciousness of these Acorn Cookies make every moment spent a cherished part of the baking experience.
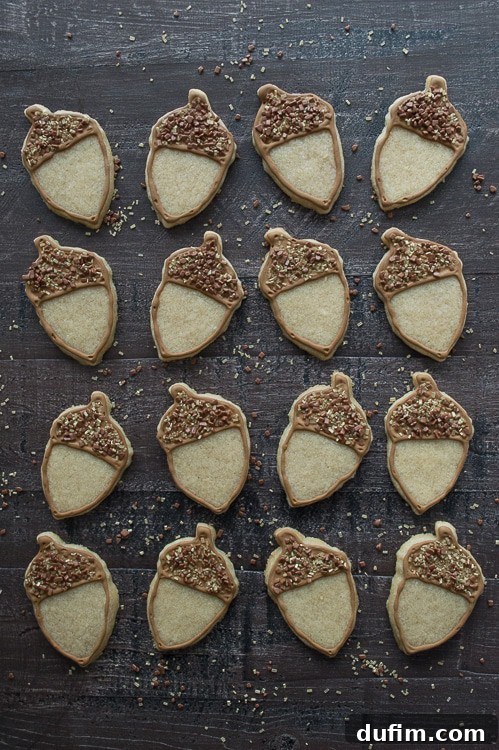
Let’s be upfront: if your goal is a five-minute dessert dash, this recipe isn’t your express lane to sweetness. Truly, it’s not! But for those who revel in the process, who find joy in creating something truly special and who appreciate the heartfelt touch of a homemade treat, then this recipe for maple acorn cookies is exactly what you’ve been searching for. It’s a project that transforms baking into an art form, promising the cutest cookies you’ve ever seen, each one baked with an abundance of love and a touch of seasonal whimsy.
The Whimsical Inspiration: Acorns, Squirrels, and Sweet Memories
Sometimes, the most enchanting baking ideas spring from unexpected places. For me, the inspiration for these adorable acorn cookies came from a very special person – my husband, Ryan. You see, Ryan has an endearing fascination with squirrels. It’s not just a passing fondness; he loves them. During the fall, our house often becomes a temporary storage unit for peanuts, all destined for his bushy-tailed friends in the backyard. His dedication to these little creatures is truly heartwarming, and it’s no surprise that when I first brought home an acorn cookie cutter, his excitement rivaled, if not surpassed, my own!
That little acorn cutter made its initial delightful debut in another beloved recipe of mine, but like many specialized tools, it eventually found its way to the back of the drawer. However, the changing seasons and Ryan’s ongoing squirrel obsession called for its grand return. There’s a particular joy in making something tailored to delight a loved one, and when that something involves squirrels, Ryan transforms into an absolute enthusiast, complete with excited squeals! Yes, I just shared that little secret, and no, I don’t regret it one bit. His pure delight makes every intricate step of creating these cookies even more rewarding.
Beyond the Cute Factor: Essential Details Before You Begin
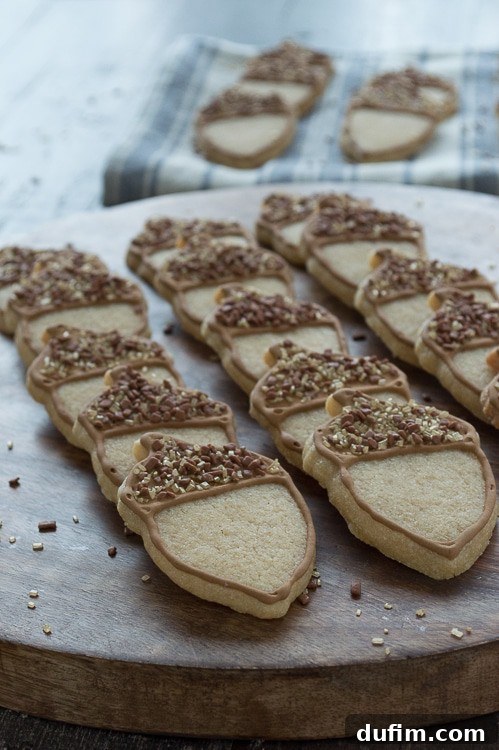
These truly are among the cutest cookies that have ever graced my kitchen countertop, and I sincerely hope you embrace the opportunity to bake and enjoy them. But before you dive into the delightful world of maple acorn cookies, let’s lay out some crucial details and tips that will ensure your baking journey is as smooth and successful as possible. Setting expectations and understanding the nuances of this recipe will transform any potential hurdles into enjoyable challenges.
1. Embrace the Time Commitment: While these cookies are undeniably adorable and deliciously rewarding, they are not a quick bake. This recipe is a commitment, a journey from dough to beautifully decorated masterpiece. However, the joy they bring, whether as a gift, a party centerpiece, or a personal indulgence, far outweighs the hours spent. Think of it as an investment in happiness, a testament to the love you pour into homemade treats.
2. The Magic of Chilling and Freezing: This recipe mandates a significant chill time for the dough – ideally overnight refrigeration. This isn’t a mere suggestion; it’s a critical step that allows the flavors to meld beautifully and, more importantly, prevents your cookies from spreading excessively in the oven. Cold dough holds its shape impeccably, giving you those perfectly defined acorn edges. Furthermore, a brief 30-minute freeze (in two 15-minute intervals during rolling and cutting) before baking is essential. This extra chill helps the cut cookies maintain their intricate shapes during the transition from counter to oven, ensuring sharp, crisp details that are vital for effective decoration.
3. Enlist Your Culinary Crew: Decorating these acorns with royal icing can be an intricate task, especially if you’re aiming for precision. My biggest learning curve was underestimating the time and meticulousness required for outlining and flooding each cookie. What I envisioned as a quick, easy process turned into a delightful, yet lengthy, artistic endeavor. This is where turning baking into a social event truly shines! Gather a few friends, family members, or even your enthusiastic kids (with supervision, of course) for a decorating party. It’s an excellent recipe for a holiday baking gathering, where the work can be divided, laughter can be shared, and everyone gets to contribute to creating these edible works of art. You can assign roles: one person outlines, another floods, and a third adds the sprinkles!
Phew! With those details laid out, the process might seem less daunting. In fact, what I once considered a complex project that might deter me from royal icing cookies for a while, now feels like a delightful challenge I’m eager to revisit. The immense satisfaction of seeing these little cuties come to life, coupled with their irresistible maple flavor, has me already planning my next batch!
Tap stars to rate!
Maple Acorn Cookies
1 hour 30 minutes
15 minutes
1 hour 45 minutes
36 cookies
Rate & Comment
Print Recipe
These adorable maple-flavored sugar cookies, shaped like charming acorns and decorated with royal icing, are a delightful project perfect for fall baking and special occasions.
Ingredients
Cookies
- 3 cups all purpose flour, plus more for rolling
- ½ tsp salt
- 2 sticks unsalted butter, 1 cup, softened
- ½ cup granulated sugar
- ½ cup light-brown sugar, packed
- 1 large egg yolk
- ¾ cup maple syrup, pure
- Vegetable oil cooking spray
Royal Icing
- 4 cups powdered sugar, sifted
- 2 tbsp meringue powder
- 5 tbsp water, plus more for thinning
- Brown food coloring (gel preferred)
- Sprinkles, such as glitter gold and milk chocolate flakes, for decoration
Instructions
Cookies: The Day Before Baking
- In a medium bowl, whisk together the sifted all-purpose flour and salt. Set aside.
- In a large mixing bowl, using an electric mixer, beat the softened unsalted butter, granulated sugar, and light-brown sugar on medium-high speed until the mixture is light and creamy, typically about 3 minutes.
- Reduce the mixer speed to medium-low, then add the large egg yolk and beat until fully incorporated.
- Next, pour in the pure maple syrup and continue to beat until well combined. The mixture may look slightly curdled, but this is normal.
- Gradually add the dry flour mixture to the wet ingredients, beating on low speed until just incorporated. Be careful not to overmix the dough.
- Divide the dough into two relatively flat discs. Wrap each disc tightly in plastic wrap and refrigerate overnight (at least 8 hours). This crucial step allows the dough to firm up, preventing spreading and enhancing flavor.
Cookies: Baking Day
- On the second day, preheat your oven to 325 degrees F (160 degrees C). Line two baking sheets with parchment paper.
- Working with one dough disc at a time, place it on a sheet of parchment paper lightly dusted with flour. Roll the dough to a uniform 1/4 inch thickness. For best results, chill the entire parchment paper with rolled dough on a flat cookie sheet in the freezer for 15 minutes. This makes cutting easier and prevents sticking.
- Remove the chilled dough from the freezer. Use your acorn cookie cutter to cut out shapes. Carefully transfer the cut cookies to one of the prepared baking sheets, spacing them about 1 inch apart. Place this baking sheet with cut cookies into the freezer for another 15 minutes. This second chill helps the cookies hold their shape perfectly during baking.
- While the first batch of cookies chills, repeat the rolling and cutting process with the second dough disc (and any scraps from the first).
- After 15 minutes of freezing, bake the cookies in the preheated oven for 14 to 16 minutes, or until the edges just begin to turn a light golden brown. Keep a close eye on them, as baking times can vary.
- Allow the baked cookies to cool on the baking sheet for 5 minutes before carefully transferring them to a wire rack to cool completely. They must be entirely cool before icing.
- Continue these steps until all the cookie dough has been used and baked.
Royal Icing Preparation and Decoration
- In a clean mixing bowl, combine the sifted powdered sugar, meringue powder, and 5 tablespoons of water. Mix on low speed with an electric mixer for about 7-10 minutes, until the icing reaches a matte appearance and firm consistency suitable for outlining. It should hold a stiff peak.
- Slowly add brown gel food coloring, a tiny bit at a time, mixing until you achieve your desired shade of acorn brown. Remember, a little goes a long way with gel colors.
- Transfer a portion of this thicker icing (your outlining consistency) into a squeeze bottle or piping bag fitted with a small round tip. Immediately cover the remaining icing in the bowl with a damp washcloth or plastic wrap directly touching the surface to prevent it from hardening.
- Begin to meticulously outline the edges of each acorn cookie, creating a distinct line between the top cap and the bottom nut portion. For steadiness, rest your arm and hand comfortably on a flat surface. Continue this process until all your cookies have their outlines. Allow the outlines to set for about 10-15 minutes, or until firm to the touch.
- Thoroughly clean your squeeze bottle or piping bag, as you will need it for flooding.
- Now, prepare your flooding icing. To the reserved icing in the bowl, gradually add water, about 1 teaspoon at a time, stirring gently by hand until the consistency is thinner and flows smoothly off the back of a spoon within a count of 5-7 seconds. It should be thin enough to spread but thick enough to stay within the outline.
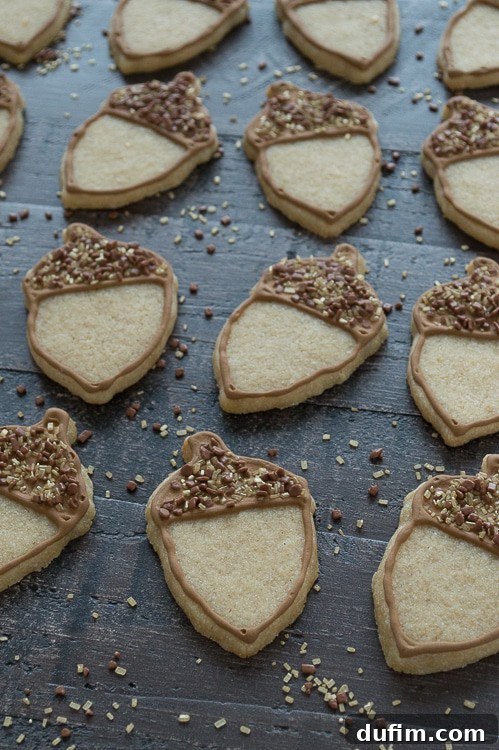
- Transfer some of this thinner flooding icing into your clean squeeze bottle or piping bag. Carefully fill the top portion (the cap) of each acorn cookie with this icing. Use a toothpick to gently spread the icing to the edges and pop any air bubbles. Avoid overfilling, as this can cause the icing to spill over your outlines. Immediately after flooding each top portion, add your desired sprinkles (glitter gold and milk chocolate flakes work beautifully) to create a textured, realistic acorn cap.
- Continue to flood and sprinkle the top portions of all the acorn cookies. Once done, allow the cookies to dry completely. This can take several hours, or even overnight, depending on humidity.
- Once the royal icing is completely dry and set, store your beautiful maple acorn cookies in an airtight container at room temperature. They will keep well for up to a week.
Notes
Maple cookie recipe adapted from Martha Stewart.
For additional guidance on mastering royal icing techniques, this resource provides excellent tips.
Nutrition
Calories: 178 kcal | Carbohydrates: 32g | Protein: 1g | Fat: 5g | Saturated Fat: 3g | Polyunsaturated Fat: 1g | Monounsaturated Fat: 1g | Trans Fat: 1g | Cholesterol: 19mg | Sodium: 38mg | Potassium: 35mg | Fiber: 1g | Sugar: 23g | Vitamin A: 164IU | Calcium: 14mg | Iron: 1mg
Nutrition Disclosure
All nutritional values are approximate and provided to the reader as a courtesy. Changing ingredients and/or quantities will alter the estimated nutritional calculations.
We hope you thoroughly enjoy baking these charming Maple Acorn Cookies. They are truly a labor of love, but the rewarding process and the delightful outcome make every step worthwhile. Perfect for sharing with friends and family, these cookies will undoubtedly add a touch of fall magic to any occasion. Don’t forget to savor the rich maple flavor and admire your beautifully decorated creations. Happy baking!