
Experience the epitome of summer desserts with our incredible Strawberry Angel Food Cake! Utilizing the concentrated flavor of freeze-dried strawberries, this homemade delight perfectly captures the essence of a “strawberries and cream” dessert, promising a uniquely light and refreshing treat.
Have you ever dreamt of baking a cloud-like angel food cake bursting with vibrant strawberry flavor? This is your ultimate guide! We’re not just sharing a recipe; we’re diving deep into the art of making a 100% homemade angel food cake, complete with innovative techniques like crafting your own cake flour substitute from pantry staples. Plus, for our health-conscious bakers, we’ll reveal how to effortlessly create a delicious gluten-free version. Get ready to impress with this truly epic dessert!
The anticipation for this recipe has been palpable! When we offered a sneak peek of this flavored angel food cake on Instagram, the response was overwhelming. It’s clear that the desire for a truly spectacular strawberry angel food cake is strong, and we’re here to deliver. This post is packed with essential insights and seven invaluable tips that will transform your baking experience, ensuring a homemade masterpiece that tastes as good as it looks.
Achieving Angel Food Cake Perfection Without Cake Flour
Many aspiring bakers often hesitate when a recipe calls for cake flour, a specialty ingredient not always found in every pantry. Cake flour is a finely milled flour characterized by a lower protein content compared to standard all-purpose flour. This unique composition is crucial for achieving the incredibly tender, delicate crumb that defines a classic angel food cake. However, purchasing a special bag of flour for a single recipe can be inconvenient and uneconomical. That’s precisely why we dedicated ourselves to perfecting an amazing homemade angel food cake that eliminates the need for store-bought cake flour entirely.
Our method ensures that you can achieve the same light and airy results using common ingredients you likely already have on hand. No more last-minute grocery runs or specialty flour purchases just for one bake. This approach empowers you to create stunning desserts with confidence and ease, proving that exceptional baking doesn’t always require specialized ingredients.
Your Secret Weapon: Homemade Cake Flour in Minutes
Here’s the game-changing secret: you can easily create your own effective cake flour substitute at home with just two simple ingredients – all-purpose flour and cornstarch! This ingenious hack allows you to mimic the low-protein, finely textured properties of commercial cake flour, which is fundamental for an impeccably soft angel food cake.
While the process is straightforward, it does require a touch of patience. The key to success lies in sifting the all-purpose flour and cornstarch together a minimum of five times. This isn’t just a suggestion; it’s a vital step. Why such thorough sifting? Each pass through the sieve serves multiple purposes: it thoroughly combines the cornstarch with the flour, evenly distributing the starch molecules that tenderize the gluten; it aerates the mixture, making it incredibly light and fluffy; and it breaks down any remaining clumps. This meticulous sifting process effectively transforms your ordinary all-purpose flour into a light, cloud-like mixture that performs just like premium cake flour, contributing directly to a supremely light and airy angel food cake texture. Well-sifted ingredients are the foundation of a truly delicate and ethereal dessert.
Gluten-Free Delight: A Strawberry Angel Food Cake for Everyone
To all our wonderful gluten-free friends, this is for you! You absolutely can enjoy this delectable strawberries and cream angel food cake. We’ve meticulously tested this recipe using both traditional all-purpose flour and a high-quality gluten-free flour blend, confirming that a fantastic gluten-free version is entirely achievable without compromising on taste or texture.
For the best results, we highly recommend King Arthur Gluten Free Measure for Measure Flour. This specific brand consistently delivers excellent performance in gluten-free baking, particularly for recipes like angel food cake where a light, airy structure is paramount. It’s designed to be a straightforward 1:1 substitute for regular flour in this recipe, meaning you can simply swap it in and follow the rest of the steps as written. This ensures that everyone, regardless of dietary preferences, can indulge in the joyous experience of a homemade, perfectly risen, and incredibly flavorful strawberry angel food cake.
Mastering Homemade Angel Food Cake: 7 Essential Tips for Flawless Results
Crafting the perfect angel food cake, especially one infused with delicate strawberry flavor, requires attention to detail. These seven expert tips are designed to guide you through each crucial step, ensuring your homemade angel food cake is light, fluffy, and absolutely unforgettable.
1. Sift, Sift, Sift! Never underestimate the power of sifting. This step is non-negotiable for achieving the signature airy texture of angel food cake. Sifting the all-purpose flour, cornstarch, and the vibrant freeze-dried strawberry powder together several times not only aerates the dry ingredients to create a lighter, fluffier cake but also serves a practical purpose: it helps to eliminate those tiny, pesky freeze-dried strawberry seeds from your dry mixture, ensuring a smooth, uniform batter and a pleasant mouthfeel in the finished cake.
2. Room Temperature Egg Whites Are Key: The temperature of your egg whites significantly impacts their ability to whip up to maximum volume. Cold egg whites are more difficult to whip and will not achieve the same stable, voluminous peaks as those at room temperature. If you find yourself short on time and forgot to set them out in advance, a quick trick is to place the egg whites in a container or Ziploc bag and submerge it in a bowl of warm (not hot) water for about 10 minutes. This gentle warming helps the proteins relax, allowing them to stretch and trap more air, leading to a much higher and more stable meringue.
3. Whip Egg Whites to Stiff Peaks with Patience: Whipping egg whites into stiff, glossy peaks is the cornerstone of angel food cake. This process can take anywhere from 10 to 15 minutes, and it’s absolutely crucial not to rush it. Stiff peaks mean that when you lift the beaters from the mixture, the peaks hold their shape firmly and do not droop or fall back into the bowl. The meringue will be voluminous, bright white, and have a beautiful sheen. Under-beaten egg whites will result in a dense, flat cake, while over-beaten whites can become dry and crumbly, leading to a tough cake. Aim for that perfect balance of firm yet pliable peaks.
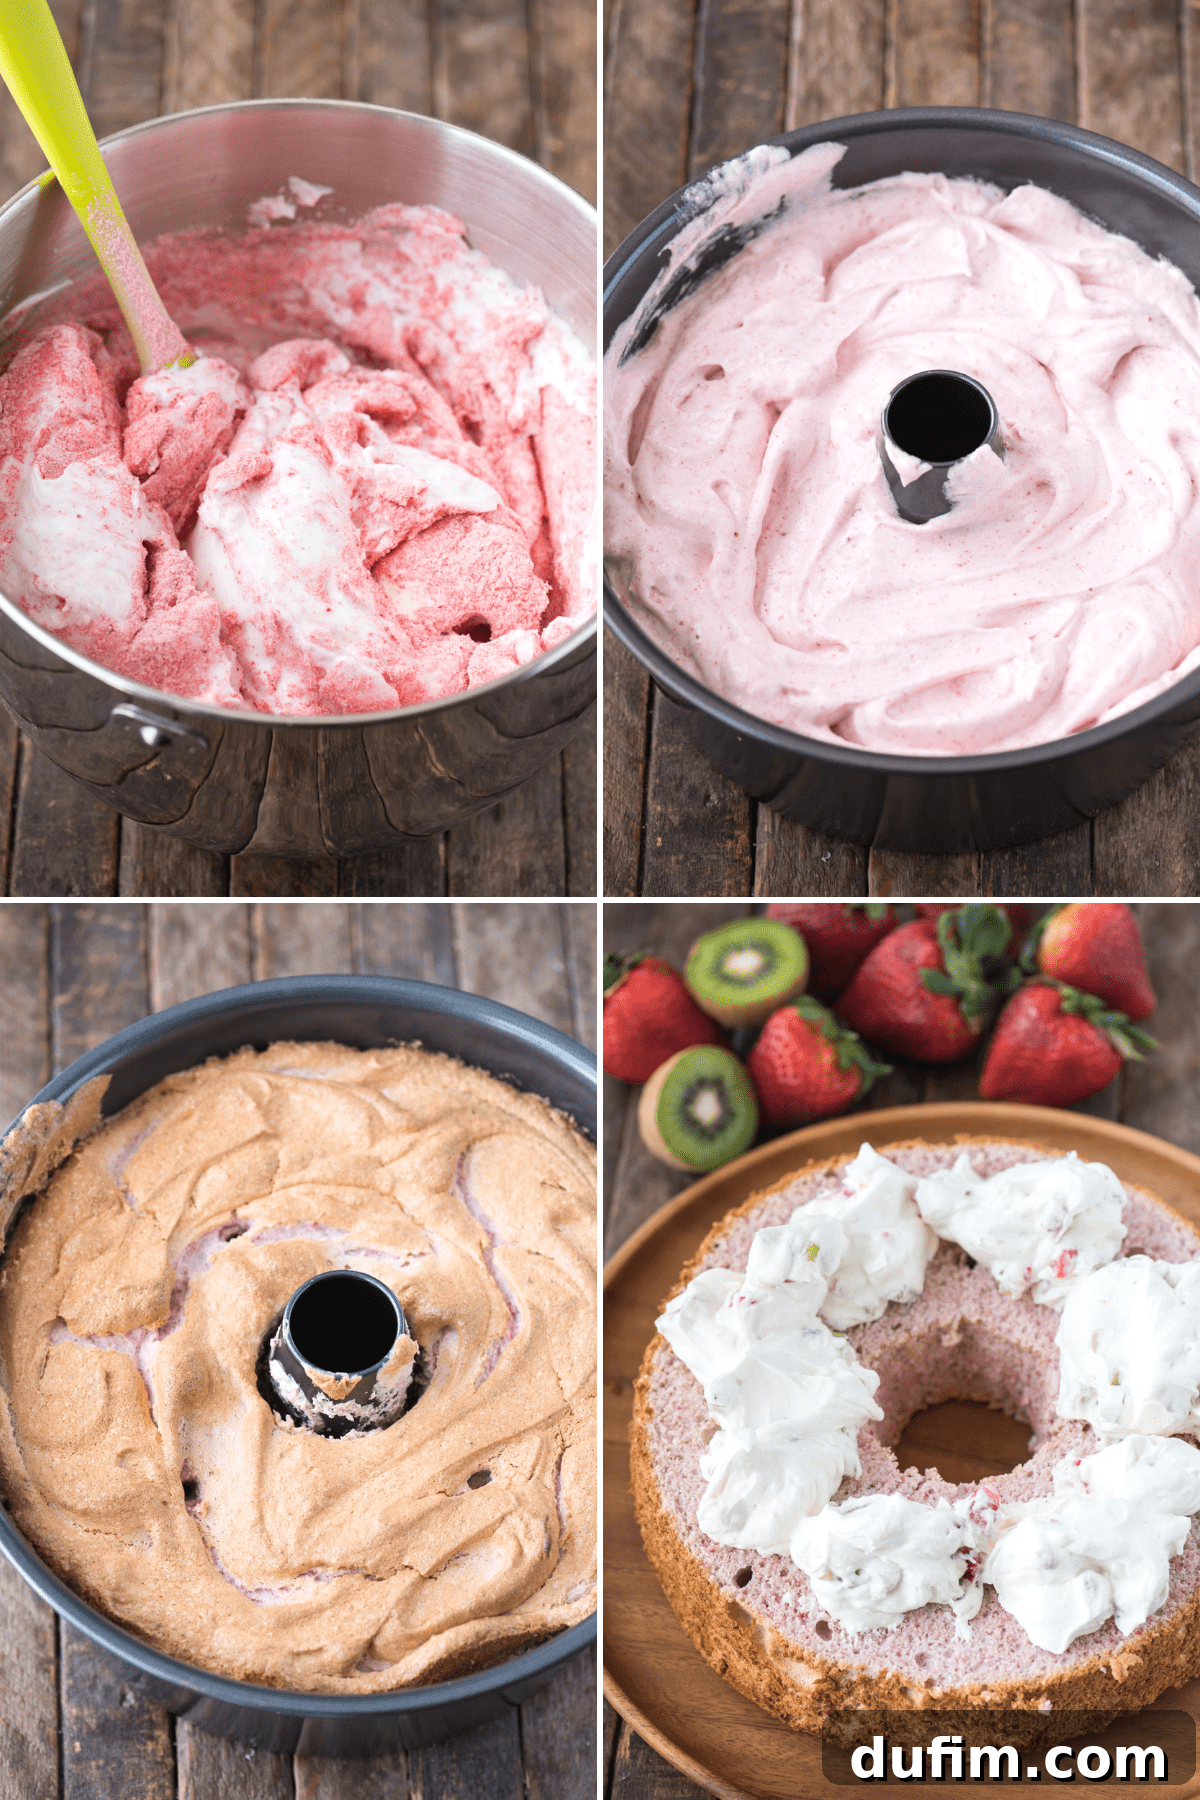
4. Fold Gently, Fold Patiently: Once your egg whites are perfectly whipped, the next critical step is incorporating the dry ingredients. Sift the flour mixture into the whipped egg whites in small batches—ideally, about 3 or 4 additions. After each addition, use a wide rubber spatula to gently FOLD the mixture together. The goal is to incorporate the dry ingredients without deflating the precious air you’ve worked so hard to create in the egg whites. Use a light hand and a folding motion, bringing batter from the bottom of the bowl up over the top. Over-mixing will knock out the air, resulting in a dense, rubbery cake. Gentleness is key to maintaining that signature lightness.
5. Never Grease Your Angel Food Cake Pan: This is a common mistake that can ruin an angel food cake. Do NOT spray the angel food cake pan with cooking spray, butter, or any form of grease. The batter needs to adhere to the sides of the pan to “climb” as it bakes. This adhesion is what allows the cake to achieve its characteristic towering height and airy structure. A greased pan will cause the batter to slide down, resulting in a short, dense cake.
6. The Right Pan Matters: Use an Angel Food Cake Pan: For truly authentic results, an actual angel food cake pan is indispensable. These pans typically have a removable bottom and often come with “feet” on the rim for inverted cooling. Unfortunately, attempting to bake an angel food cake in a Bundt pan or any other type of cake pan will not yield the same outcome. Bundt pans are designed for cakes that rely on fat for structure and typically have intricate designs, which can impede the angel food cake’s ability to rise and cling. Invest in the correct pan for the best possible angel food cake.
7. Invert Immediately After Baking: The moment your cake comes out of the oven, it must be inverted without delay. This prevents the delicate, hot cake from collapsing under its own weight as it cools. Many angel food cake pans come with small feet for this purpose; if yours doesn’t, simply invert the pan over the neck of a bottle or a sturdy can (like a can of beans or soup). Allow the cake to cool completely upside down for a minimum of 2-3 hours. This slow, inverted cooling process stabilizes the structure. Once fully cooled, use a thin, flexible spatula or knife to carefully run around the sides and center core of the pan to release the cake cleanly.
Ensuring Perfection: How to Tell When Your Strawberry Angel Food Cake is Done
Determining the perfect doneness for your strawberry angel food cake is crucial for its texture and stability. While the cake bakes, its exterior will develop a beautiful golden-pink hue. To confirm it’s fully baked, gently press the top of the cake; it should spring back resiliently. The most reliable method, however, is the classic clean test: insert a wooden skewer, such as a popsicle stick or a kabob skewer, into the center of the cake. If it comes out clean with no wet batter or crumbs attached, your delightful pink angel food cake is perfectly done and ready for the next step.
The Importance of Proper Cooling: How Long to Leave Angel Food Cake Upside Down
Once your strawberry-filled angel food cake has emerged from the oven, resist the urge to flip it right side up immediately. As detailed in our essential tips, immediately inverting the pan is paramount. You should leave the cake upside down until it is completely cool, a process that typically takes about 2 to 3 hours. This extended, inverted cooling period allows the delicate structure of the cake to set properly, preventing it from compressing or collapsing under its own weight. Rushing this step can result in a shorter, denser cake, losing the airy quality you worked so hard to achieve. Patience truly is a virtue for the perfect angel food cake.
Planning Ahead: Storage and Shelf Life of Angel Food Cake
One of the many great things about angel food cake is its adaptability for advance preparation and storage, allowing you to enjoy this delightful dessert over several days.
For short-term storage, a freshly baked and completely cooled angel food cake can be kept at room temperature. Simply place it in an airtight container to prevent it from drying out, and it will remain wonderfully fresh for 1 to 2 days. This is perfect if you’re baking a day ahead for an event.
If you need to extend its freshness, an angel food cake can be stored in the refrigerator. Lightly wrap the cake in plastic wrap, then place it inside an airtight container. When stored this way, your cake will maintain its quality for up to 5 days, making it an excellent option for longer enjoyment or meal planning.
Preserving Freshness: How to Freeze Angel Food Cake
Freezing is an excellent option for long-term storage, ensuring you always have a delicious angel food cake ready for any occasion. To freeze your cake successfully, follow these steps:
First, ensure the cake is completely cool before wrapping. Any residual warmth can lead to condensation and ice crystals, affecting the cake’s texture. Once cooled, wrap the entire cake tightly in several layers of aluminum foil. This foil barrier helps protect against freezer burn and moisture loss. Next, place the foil-wrapped cake inside a large freezer-safe ziplock bag or an airtight freezer container. This double layer of protection is key to preserving its freshness. Stored properly, your angel food cake can remain in the freezer for up to 3 months. When you’re ready to enjoy it, simply transfer the frozen cake to the refrigerator and allow it to defrost overnight. This slow thawing process helps maintain its delicate crumb and moisture.
Elevate Your Dessert: Fancy Strawberry Angel Food Cake Presentation
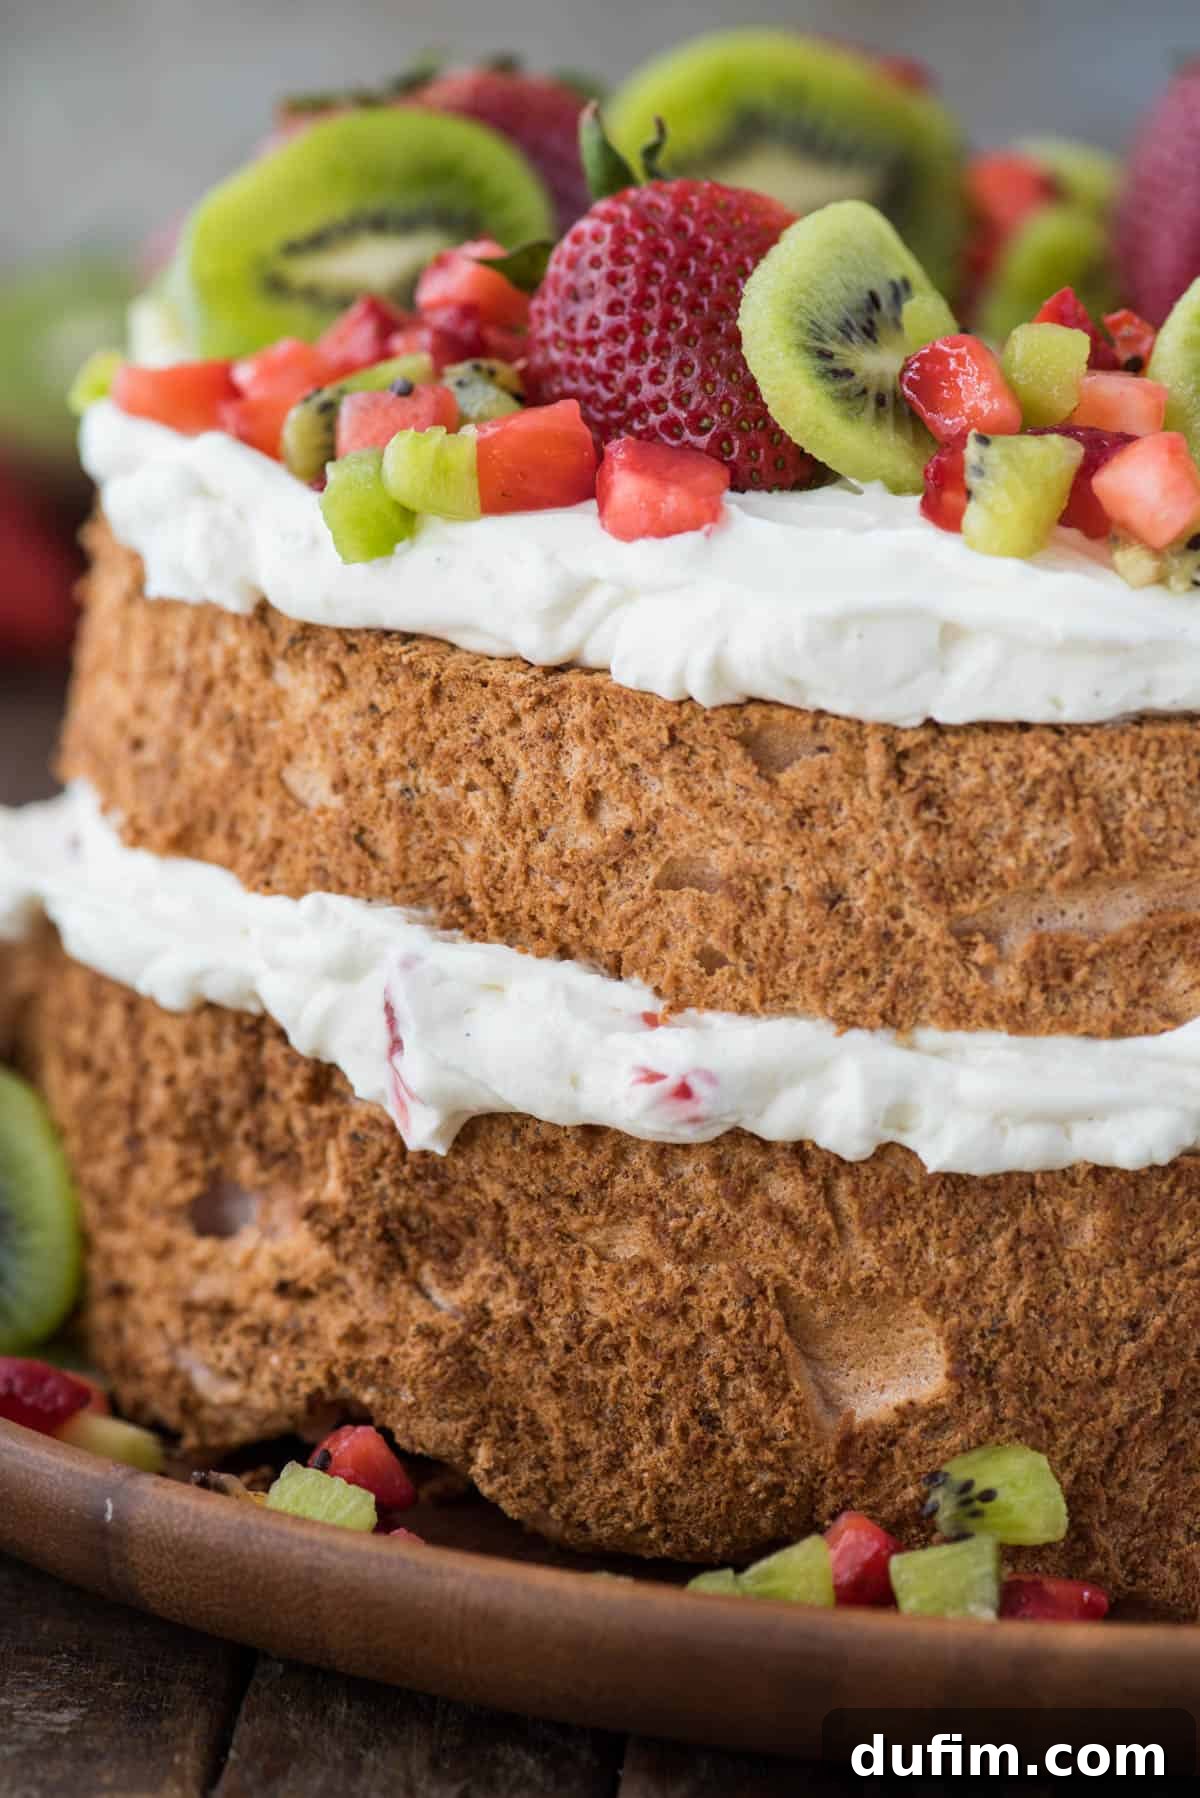
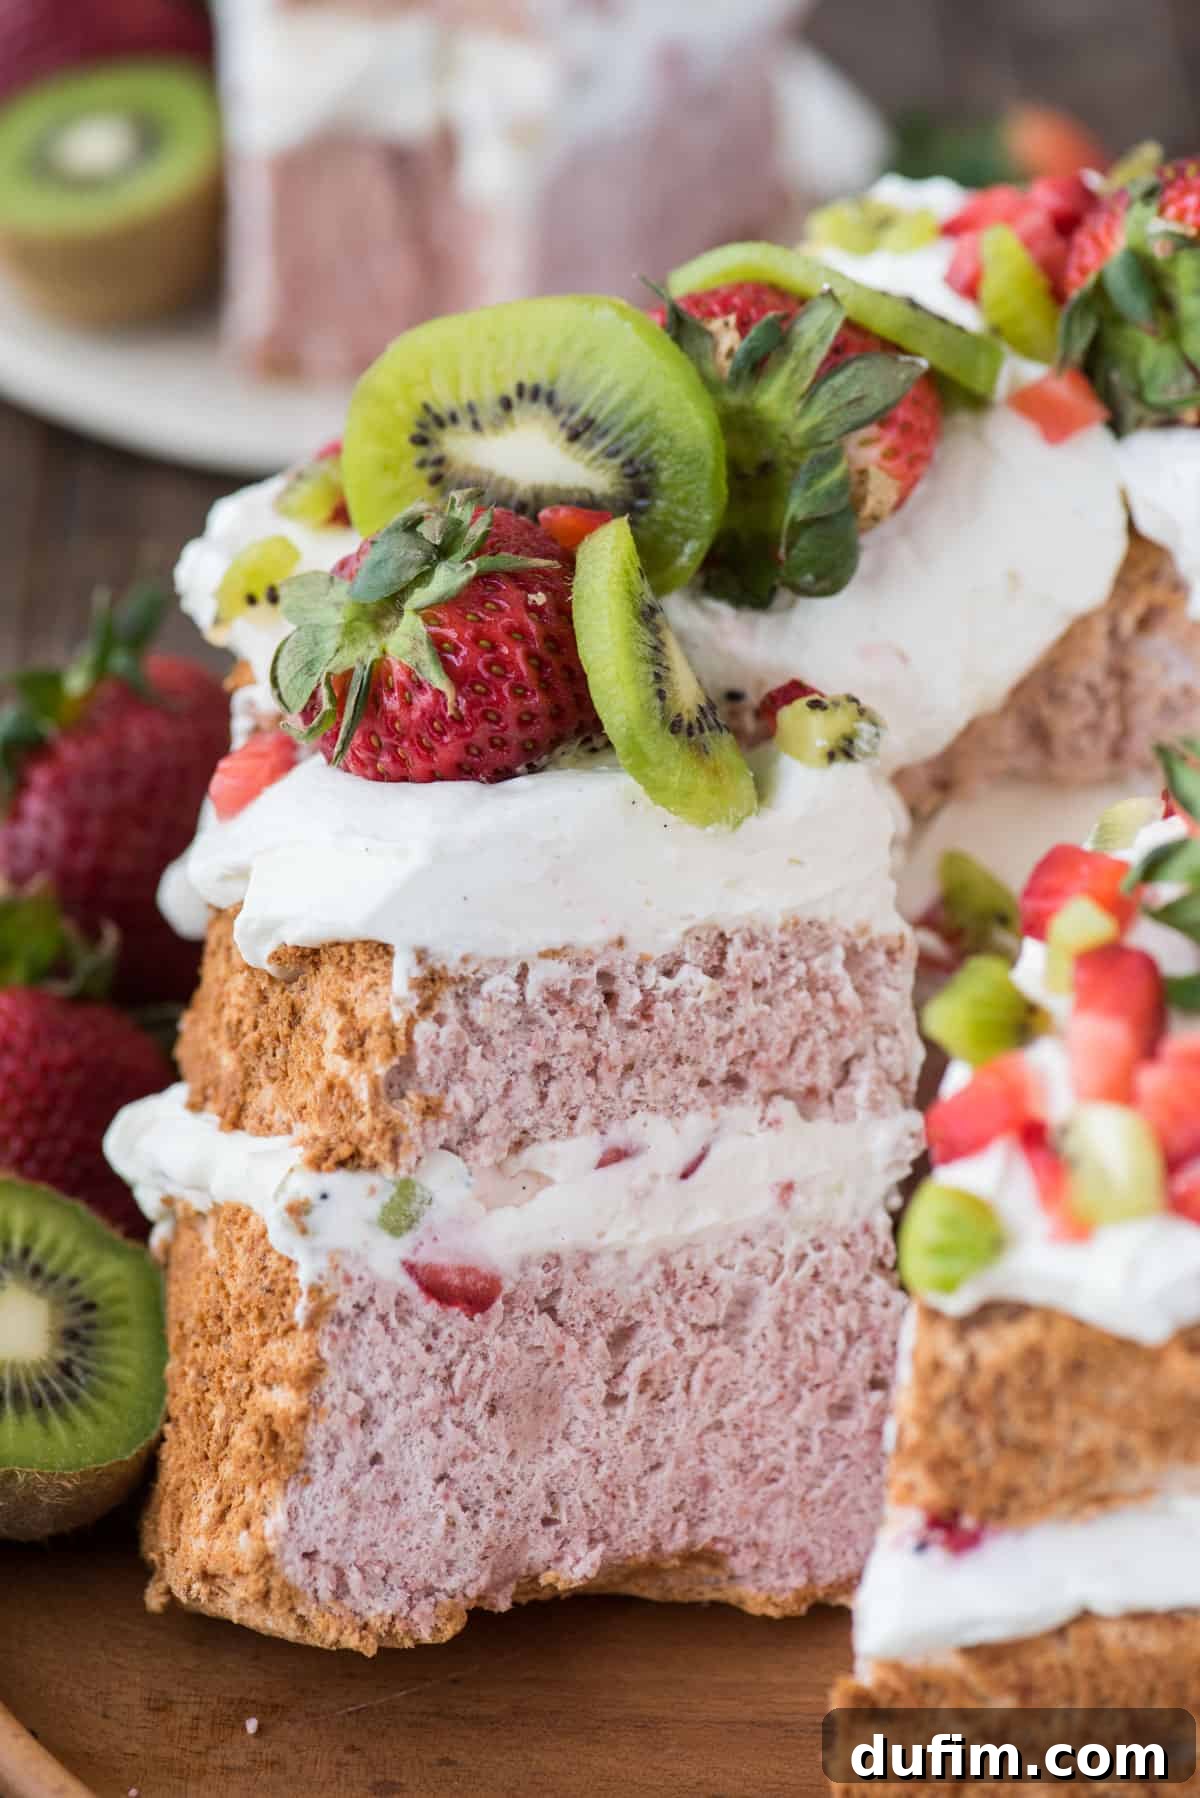
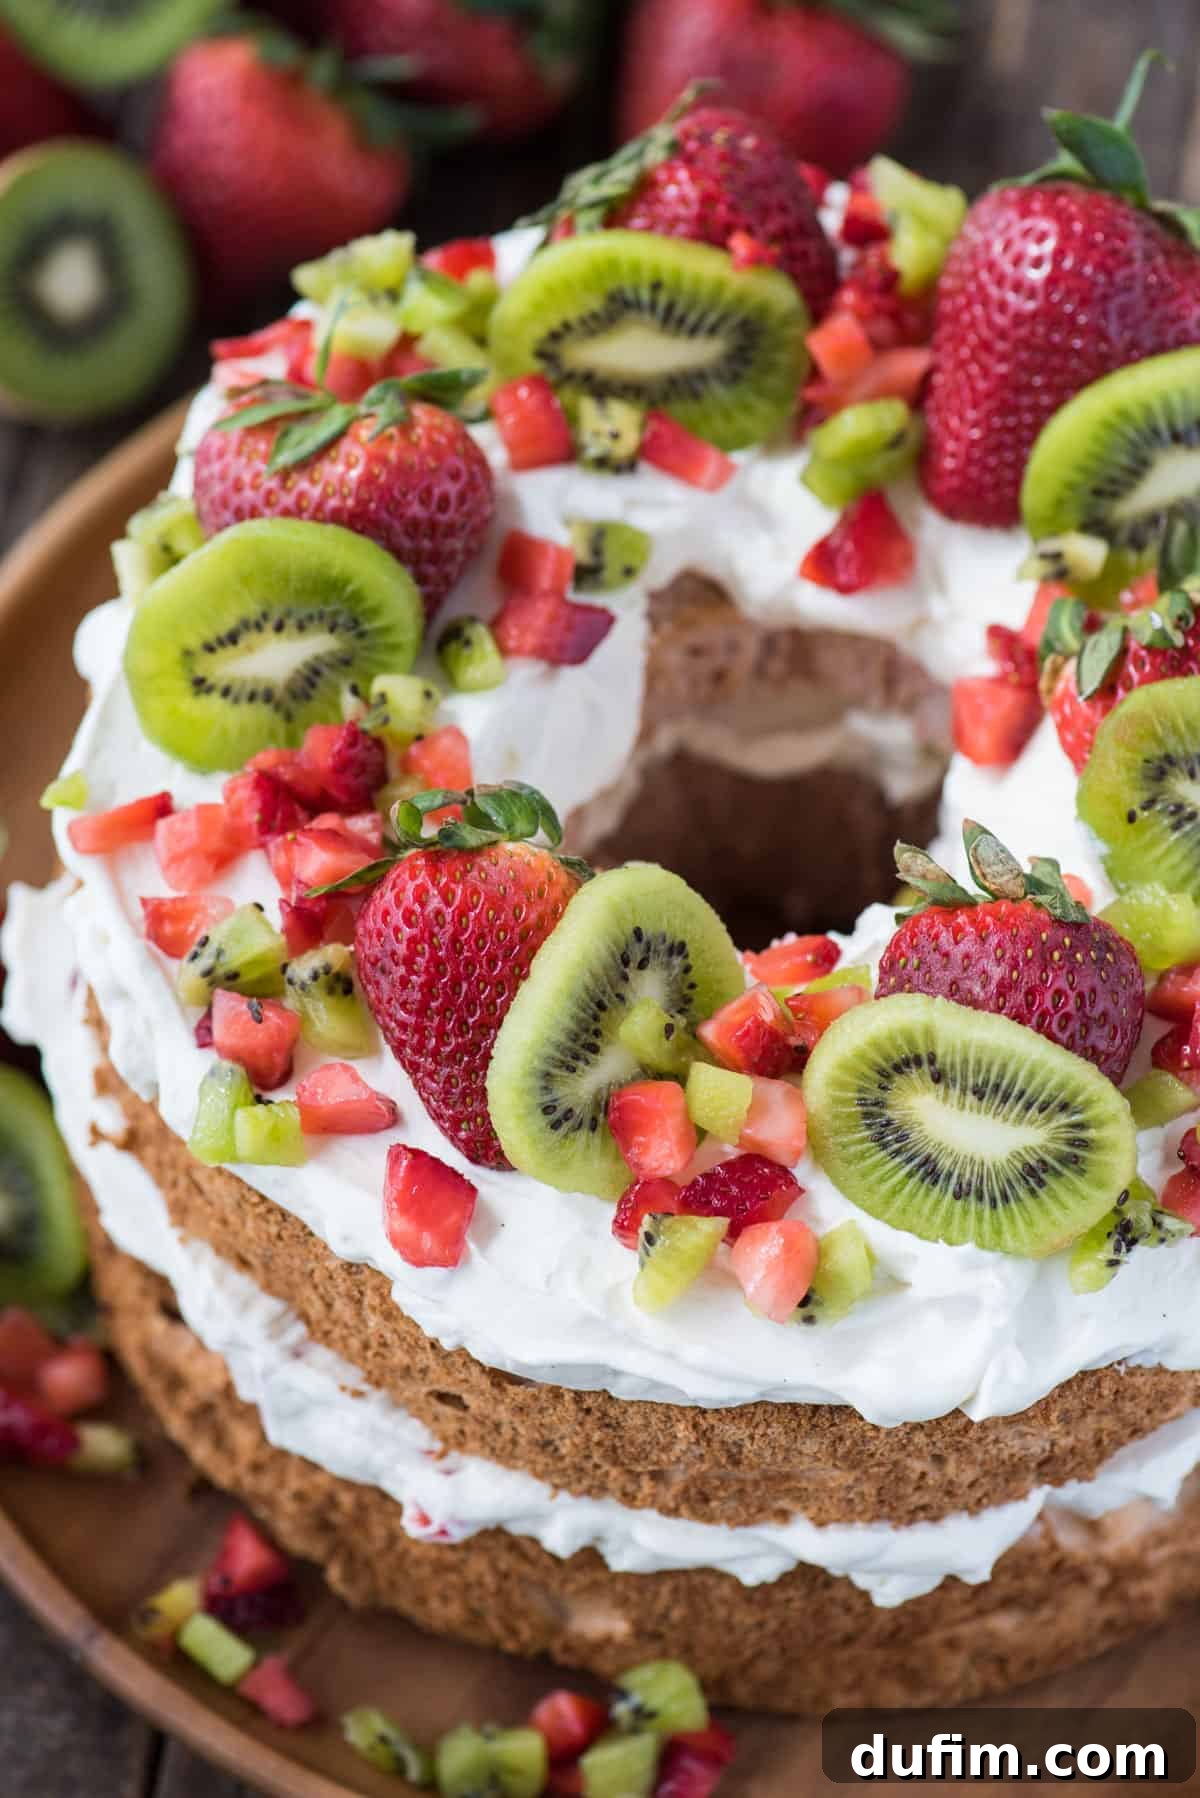
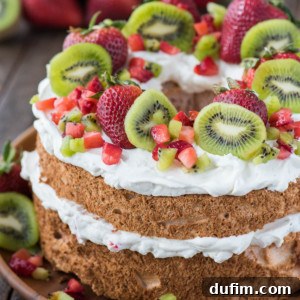
Transforming your delightful strawberry angel food cake into a truly show-stopping dessert is simpler than you might think. A few elegant touches can take it from delicious to absolutely magnificent. To create a visually stunning and even more decadent experience, consider layering your cake.
Carefully slice the cooled strawberry cake horizontally into two equal halves. Between these two luscious layers, spread a generous amount of homemade whipped cream, adding a rich, creamy contrast to the light cake. Then, scatter an abundance of freshly chopped strawberries and vibrant kiwi slices over the whipped cream. The combination of sweet strawberries and tangy kiwi not only enhances the flavor profile but also introduces beautiful colors and textures. Once the bottom layer is garnished, carefully place the top half of the cake back on. Repeat the process on the very top of the cake, adorning it with more whipped cream, fresh strawberries, and kiwi. For an extra touch, a sprinkle of fresh mint leaves or a dusting of powdered sugar can add a professional finish. Serve this beautifully layered cake with a bread knife for clean slices, and watch your guests marvel at this fancy strawberry flavored angel food cake!
Explore More Angel Food Cake Creations
If you’ve fallen in love with the lightness and versatility of angel food cake, you’re in luck! There’s a whole world of delightful variations to explore. Whether you prefer classic flavors or something more adventurous, these recipes are sure to inspire your next baking adventure.
- Homemade Classic Angel Food Cake: Master the timeless original with our detailed guide to achieving perfect height and airy texture.
- Lemon Blueberry Angel Food Cake: A bright and zesty twist, perfect for spring or summer, combining tangy lemon with sweet bursts of blueberry.
- Oreo Angel Food Cake: For chocolate lovers and cookie enthusiasts, this fun variation incorporates crushed Oreos for an irresistible indulgence.
To truly visualize the techniques, you can watch our comprehensive video on how to make our classic angel food cake. The fundamental process for preparing the batter and baking remains consistent for this delicious strawberry angel food cake, so it’s a fantastic visual aid to ensure your success.
Tap stars to rate!
Strawberry Angel Food Cake
Beth
15 minutes
45 minutes
3 hours
4 hours
16 servings
Rate
Equipment
-
Angel Food Cake Pan
-
Large Spatula
-
Glass Mixing Bowl
-
Stand Mixer (e.g., KitchenAid)
Ingredients
Strawberry Angel Food Cake
- 1 oz freeze dried strawberries
- 1 cup minus 2 Tbsp (105g) all purpose flour OR gluten free all purpose flour
- 2 Tbsp cornstarch
- 1 ½ cups (297g) granulated sugar, divided into 3/4 cup portions
- ¼ tsp salt
- 12 large egg whites, at room temperature
- 1 ½ tsp cream of tartar
- ½ tsp vanilla extract
Whipped Cream
- 2 cups (473ml) heavy whipping cream
- ½ cup (56g) powdered sugar
- 1 tsp vanilla extract
Garnishes
- Chopped strawberries and kiwi
Instructions
Instructions
-
Empty 1 oz of freeze dried strawberries into a blender or food processor. Blend until you achieve a fine strawberry powder.
-
Preheat your oven to 350º F (175°C). Measure 1 cup of all-purpose flour into a medium bowl. Remove 2 tablespoons of flour and return it to your flour container. Add 2 tablespoons of cornstarch and all of the strawberry powder to the remaining flour in the bowl. Sift this mixture five times. This meticulous sifting is essential for creating your homemade cake flour and ensuring all ingredients are thoroughly incorporated and light as a cloud.
-
To the sifted flour mixture, add ¾ cup of granulated sugar and the salt. Sift the entire dry mixture two more times. Set aside.
-
In a clean, large mixing bowl, begin to beat the room temperature egg whites on medium speed for about 2 minutes. Once foamy, add in the cream of tartar and vanilla extract. Continue to beat the mixture, increasing the speed to medium-high, for another 2-3 minutes.
-
Gradually add the remaining ¾ cup of sugar, about 1 tablespoon at a time, waiting 10-15 seconds between each addition. Continue to beat the mixture on high speed until stiff, glossy peaks form. The meringue should be white, voluminous, and airy. This entire beating process can take 10-13 minutes.
-
Carefully remove the bowl from the stand mixer. Gradually sift in the dry flour mixture (in about 3-4 batches) over the whipped egg whites. Use a rubber spatula to gently FOLD the ingredients together after each addition, taking care not to deflate the egg whites. Avoid over-mixing.
-
Gently pour the angel food cake batter into an un-greased angel food cake pan. Run a butter knife or thin skewer through the batter in a circular motion to release any large air bubbles.
-
Place the pan in the preheated oven and bake for 42-45 minutes, or until a wooden popsicle stick or kabob skewer inserted into the center of the cake comes out clean.
-
Once the cake is done baking, immediately invert the pan. You can place the center tube of your angel food cake pan over a mug or a can of beans to cool it upside down. Allow the cake to cool completely for 2-3 hours. During this cooling time, place a metal mixing bowl and beaters in the freezer to chill for the whipped cream preparation. Once fully cooled, use a small, thin spatula or knife to gently run around the sides of the pan and the center core to release the cake.
-
Carefully transfer the cooled cake onto a serving plate.
Whipped Cream
-
Ensure a metal mixing bowl and beaters have been in the freezer for at least 15 minutes to chill thoroughly.
-
Remove the chilled bowl and beaters from the freezer. Add the cold heavy whipping cream, powdered sugar, and vanilla extract. Beat with an electric mixer on high speed for 4-5 minutes, or until stiff peaks form and the cream is scoop-able and holds its shape well.
Assemble the cake
-
Using a sharp serrated knife or a cake leveler, carefully cut the angel food cake horizontally in half. Gently remove the top layer. Spread half of the freshly made whipped cream evenly over the bottom cake layer, then generously top with chopped strawberries and kiwi. Carefully place the top cake layer back on. Add the remaining whipped cream and arrange more fresh chopped strawberries and kiwi on top for a beautiful presentation. Slice with a bread knife and serve immediately.
Notes
Freeze-dried strawberries can often be found at major grocery stores or retailers like Target. Look for brands such as Simply Balanced, typically located near dried fruits and nuts.
Nutrition
Carbohydrates: 32g |
Protein: 4g |
Fat: 11g |
Saturated Fat: 7g |
Polyunsaturated Fat: 1g |
Monounsaturated Fat: 3g |
Cholesterol: 41mg |
Sodium: 89mg |
Potassium: 142mg |
Fiber: 1g |
Sugar: 24g |
Vitamin A: 437IU |
Vitamin C: 22mg |
Calcium: 23mg |
Iron: 1mg
Nutrition Disclosure
All nutritional values are approximate and provided to the reader as a courtesy. Changing ingredients and/or quantities will alter the estimated nutritional calculations.
Like this recipe? Rate and comment below!