
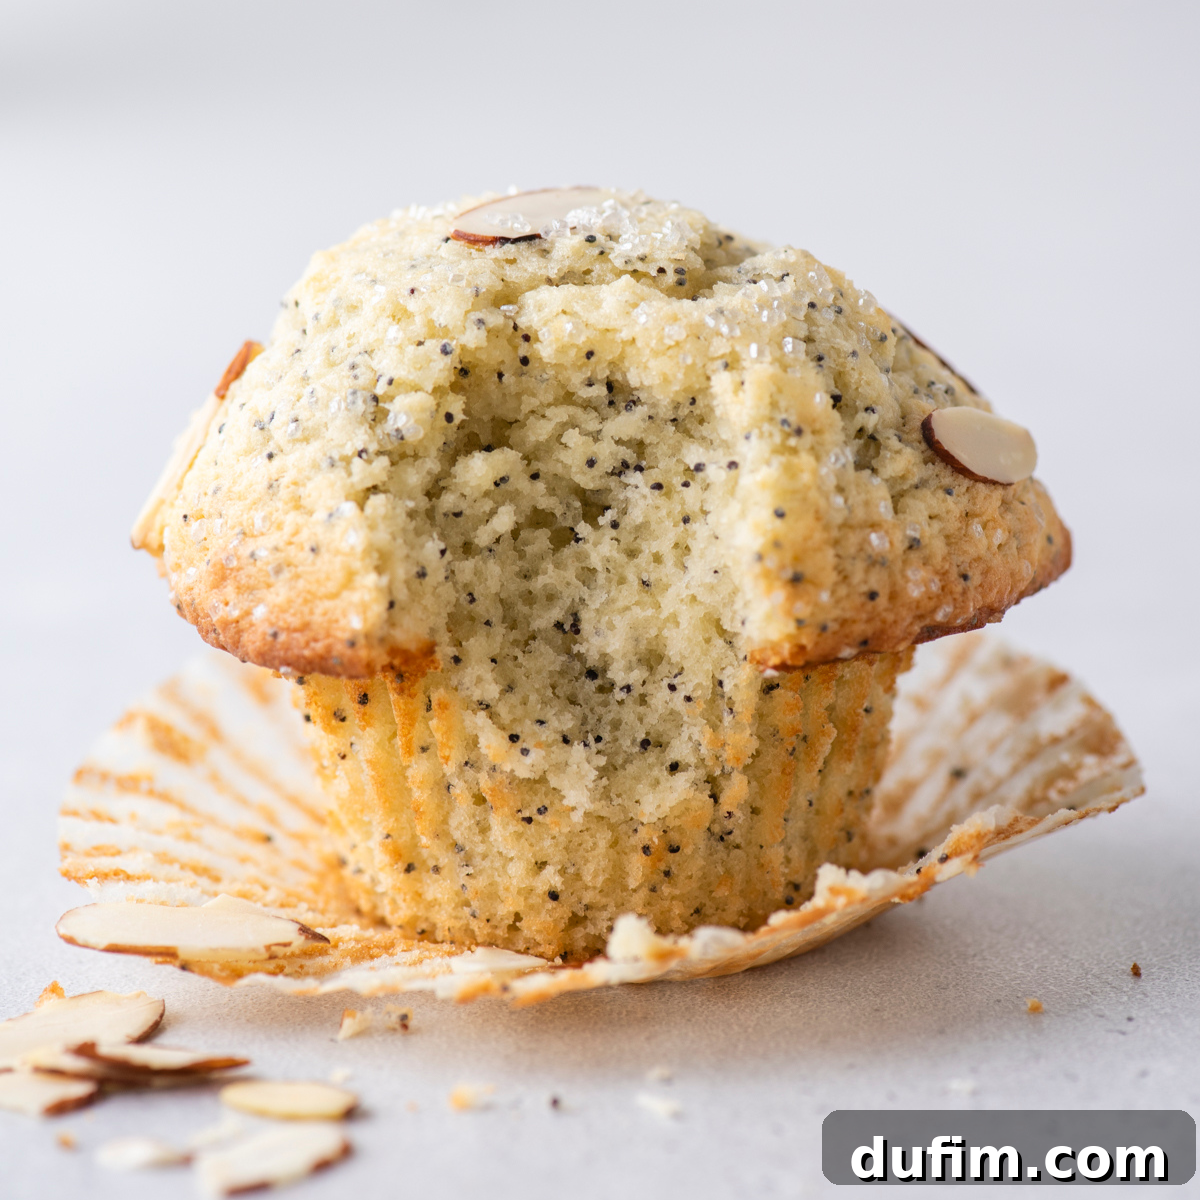
After extensive testing, sparked by popular demand, I am thrilled to share the perfected recipe for Almond Poppy Seed Muffins. What started as a good recipe transformed into an exceptional one with one crucial adjustment, yielding incredibly soft, moist muffins crowned with those coveted beautiful domes. This is the recipe I’ve poured my heart into, and it’s finally ready to become your go-to for a truly delightful treat.
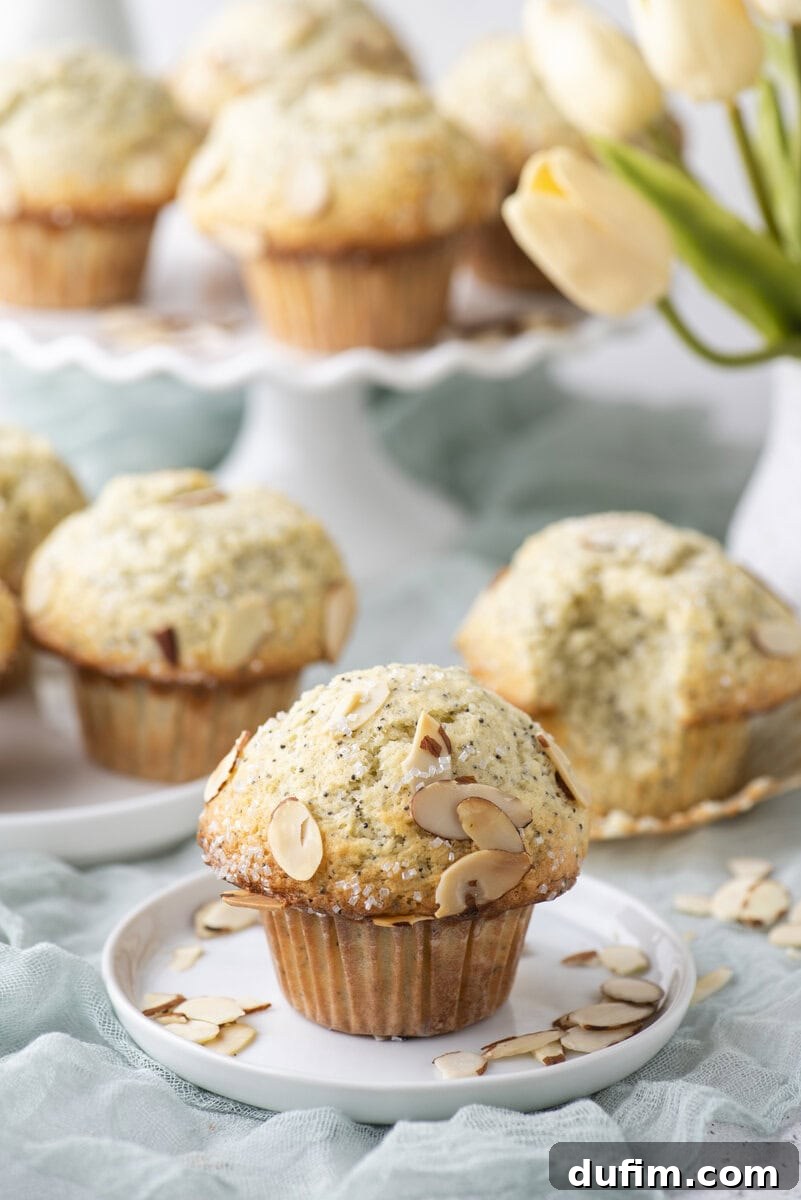
Why This Almond Poppy Seed Muffin Recipe Stands Out
My culinary journey has been dedicated to perfecting muffin recipes, aiming for that elusive trifecta: tall, soft, and tender muffins that consistently perform flawlessly in any home kitchen. If you’re familiar with my recipes, you know I don’t settle for ‘just good.’ My goal is always bakery-level excellence without the complex steps, and I’m committed to testing until that standard is met.
Just prior to this project, I was deeply immersed in perfecting a maple fudge recipe, steadfastly determined to use only authentic maple syrup. That endeavor took eight batches to finally nail, leaving me eager for a simpler, yet equally rewarding, baking victory. So, I turned to my Instagram community, asking what muffin flavor I should tackle next. The overwhelming response was clear: almond poppy seed. And so, the delightful challenge began.
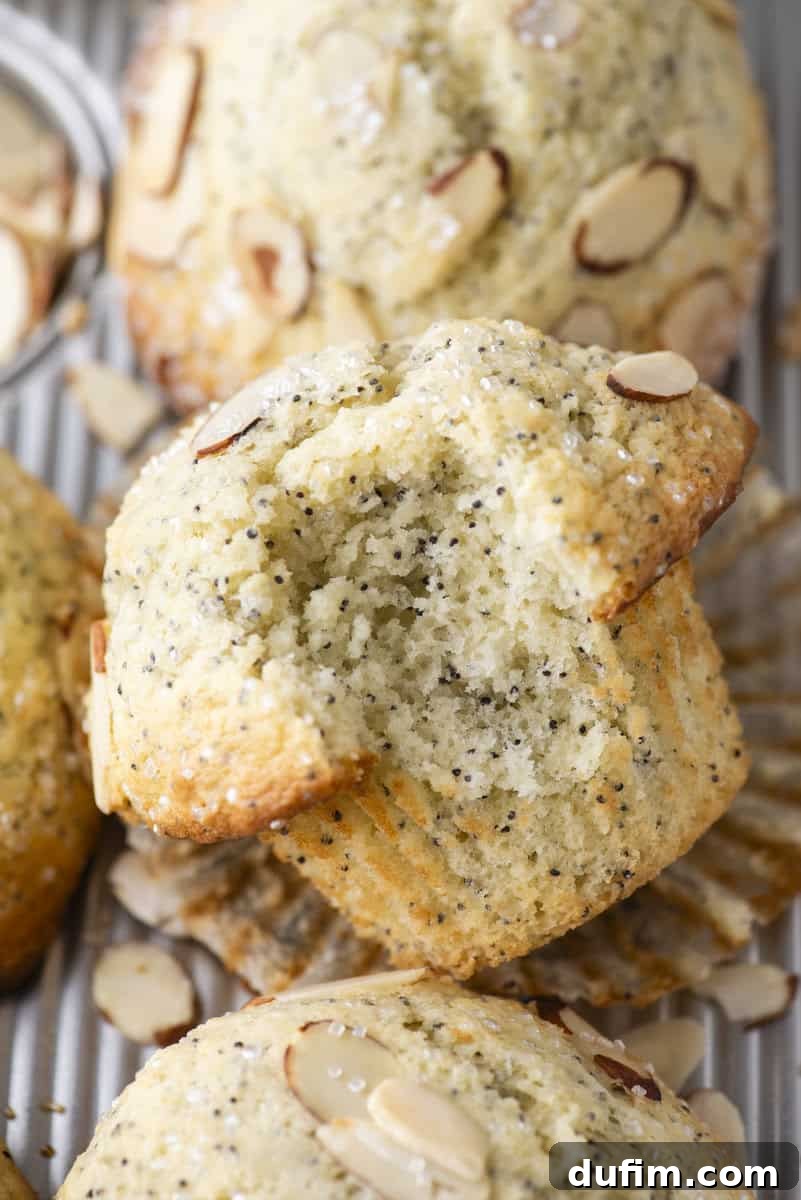
I started with my trusted master muffin base recipe, adding a generous splash of almond extract and three tablespoons of poppy seeds. The initial batch’s flavor profile was spot on, perfectly capturing that classic almond essence. However, the texture revealed a common pitfall: my base recipe is inherently designed for fruit muffins, where the fruit naturally contributes moisture. Without that, these poppy seed muffins baked up a little dry, a clear sign that a tweak was needed.
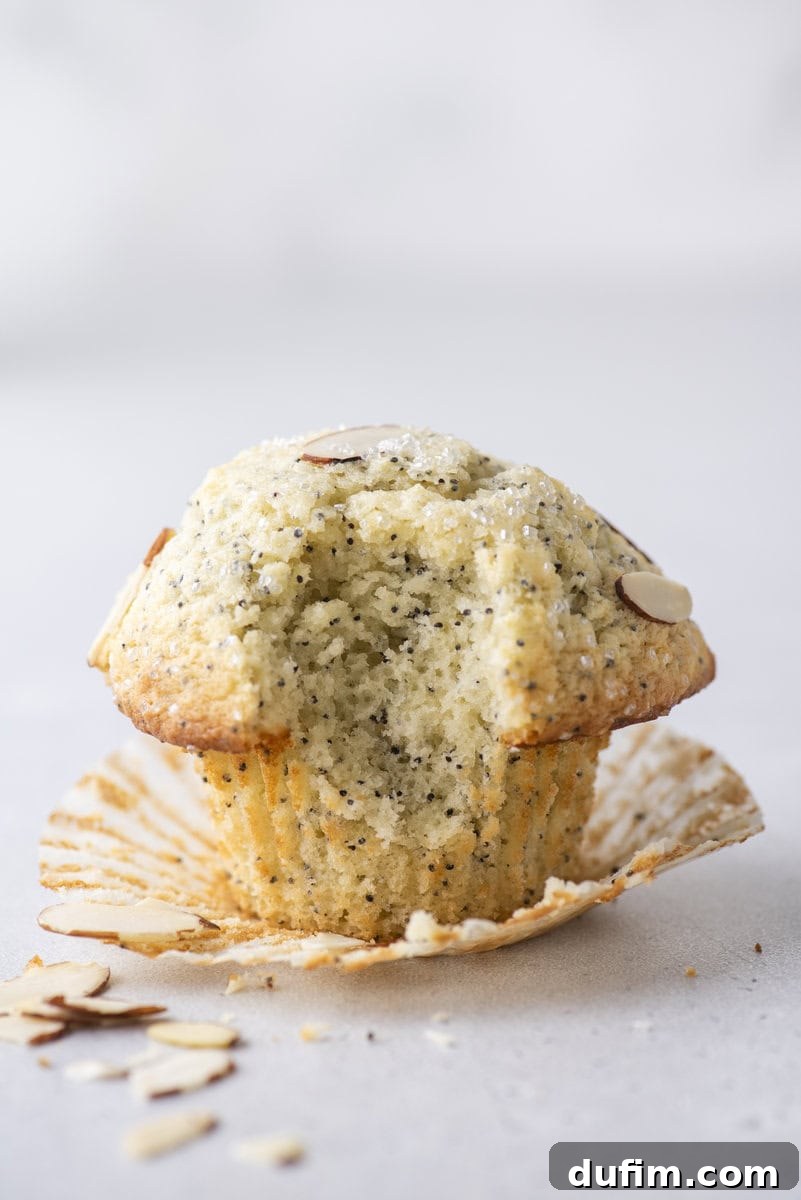
This is precisely where the real innovation and careful testing come into play. For the subsequent batch, I incorporated ½ cup of sour cream, and the transformation was nothing short of miraculous. The muffin crumb became exceptionally soft, rich, and perfectly moist. Crucially, the muffins rose beautifully, achieving those impressive, tall domes that are the hallmark of a truly exceptional bakery-style muffin.
In my experience, it’s these subtle but significant adjustments that elevate a recipe from ordinary to extraordinary. It’s not merely about combining ingredients; it’s about understanding their interplay and making informed modifications when necessary. These almond poppy seed muffins represent the culmination of that dedicated process – a final version I wholeheartedly endorse and encourage you to bake with complete confidence.
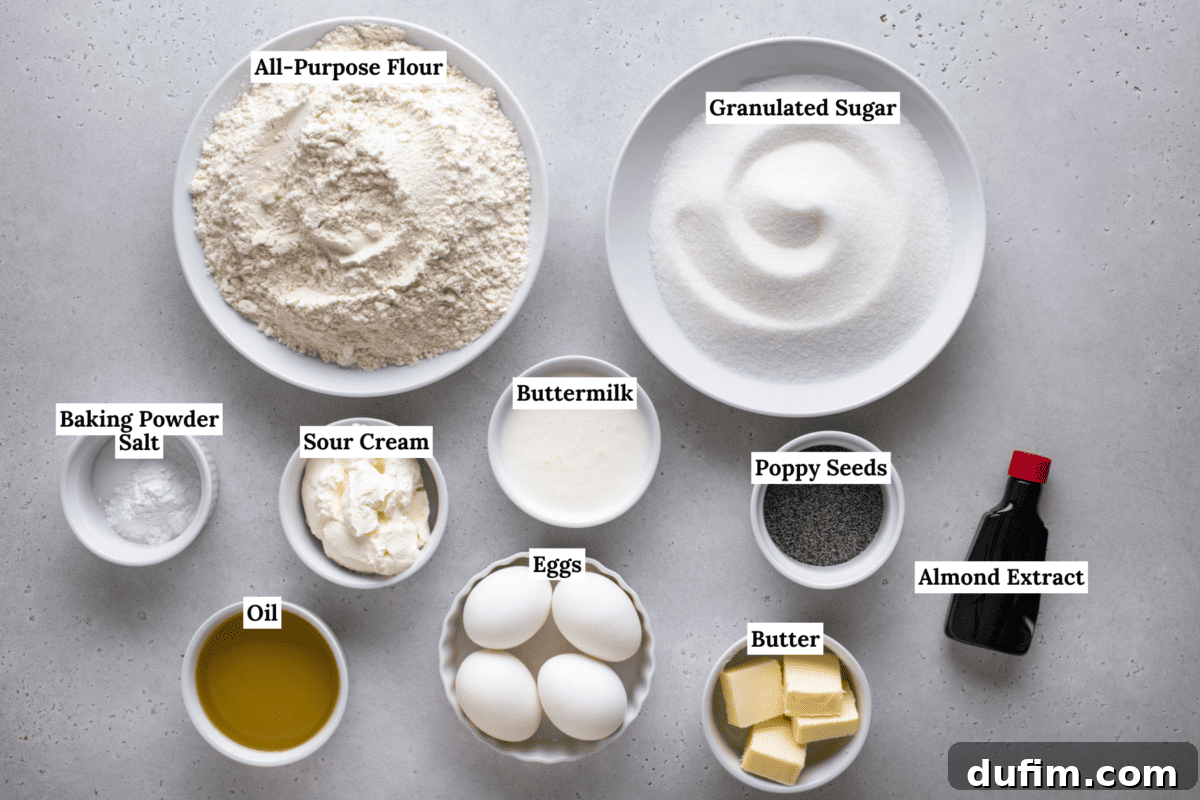
Essential Ingredients for Perfect Almond Poppy Seed Muffins
Achieving the perfect texture and flavor in these muffins relies on a few key ingredients, each playing a vital role. Here’s a closer look at what makes them so special:
- Almond extract: This is the heart of our muffin’s distinct flavor. Unlike vanilla, almond extract delivers a potent, concentrated taste. A small amount goes a long way, infusing the muffins with that unmistakably warm, sweet, and slightly nutty aroma characteristic of gourmet almond pastries. It’s essential for achieving that authentic bakery almond flavor.
- Poppy seeds: Beyond their classic visual appeal, poppy seeds contribute a delicate, earthy flavor and a subtle textural crunch that complements the soft muffin crumb beautifully. I’ve found that three tablespoons strike the ideal balance, providing enough presence without overpowering the almond notes. They also add a charming speckled look to each muffin.
- Sour cream: This is the game-changer ingredient that transformed my initial recipe. Sour cream, or a good quality full-fat yogurt, adds unparalleled moisture and richness without making the muffins dense or heavy. Its acidity also reacts with the baking powder, promoting a higher, more tender rise. It’s the secret to their incredibly moist interior and tender crumb.
- Butter and oil: By utilizing both butter and a neutral oil, we harness the best of both worlds. Butter contributes a rich, complex flavor that oil alone cannot replicate, creating a more decadent taste profile. On the other hand, neutral oil (like vegetable or canola oil) ensures an incredibly soft and moist crumb, helping the muffins stay fresh longer than if made with butter alone. This combination guarantees both flavor and an irresistible texture.
- Buttermilk: Similar to sour cream, buttermilk is a hero for tenderizing baked goods. Its mild acidity works wonders with leavening agents like baking powder, resulting in a lighter, more tender crumb and aiding in that magnificent rise. If you don’t have buttermilk, you can easily make a substitute by adding a tablespoon of lemon juice or white vinegar to regular milk and letting it sit for 5-10 minutes.
Step-by-Step Guide to Baking Almond Poppy Seed Muffins
Baking these bakery-style almond poppy seed muffins at home is surprisingly simple when you follow these clear, step-by-step instructions. Get ready to impress yourself and your loved ones with these perfectly domed delights!
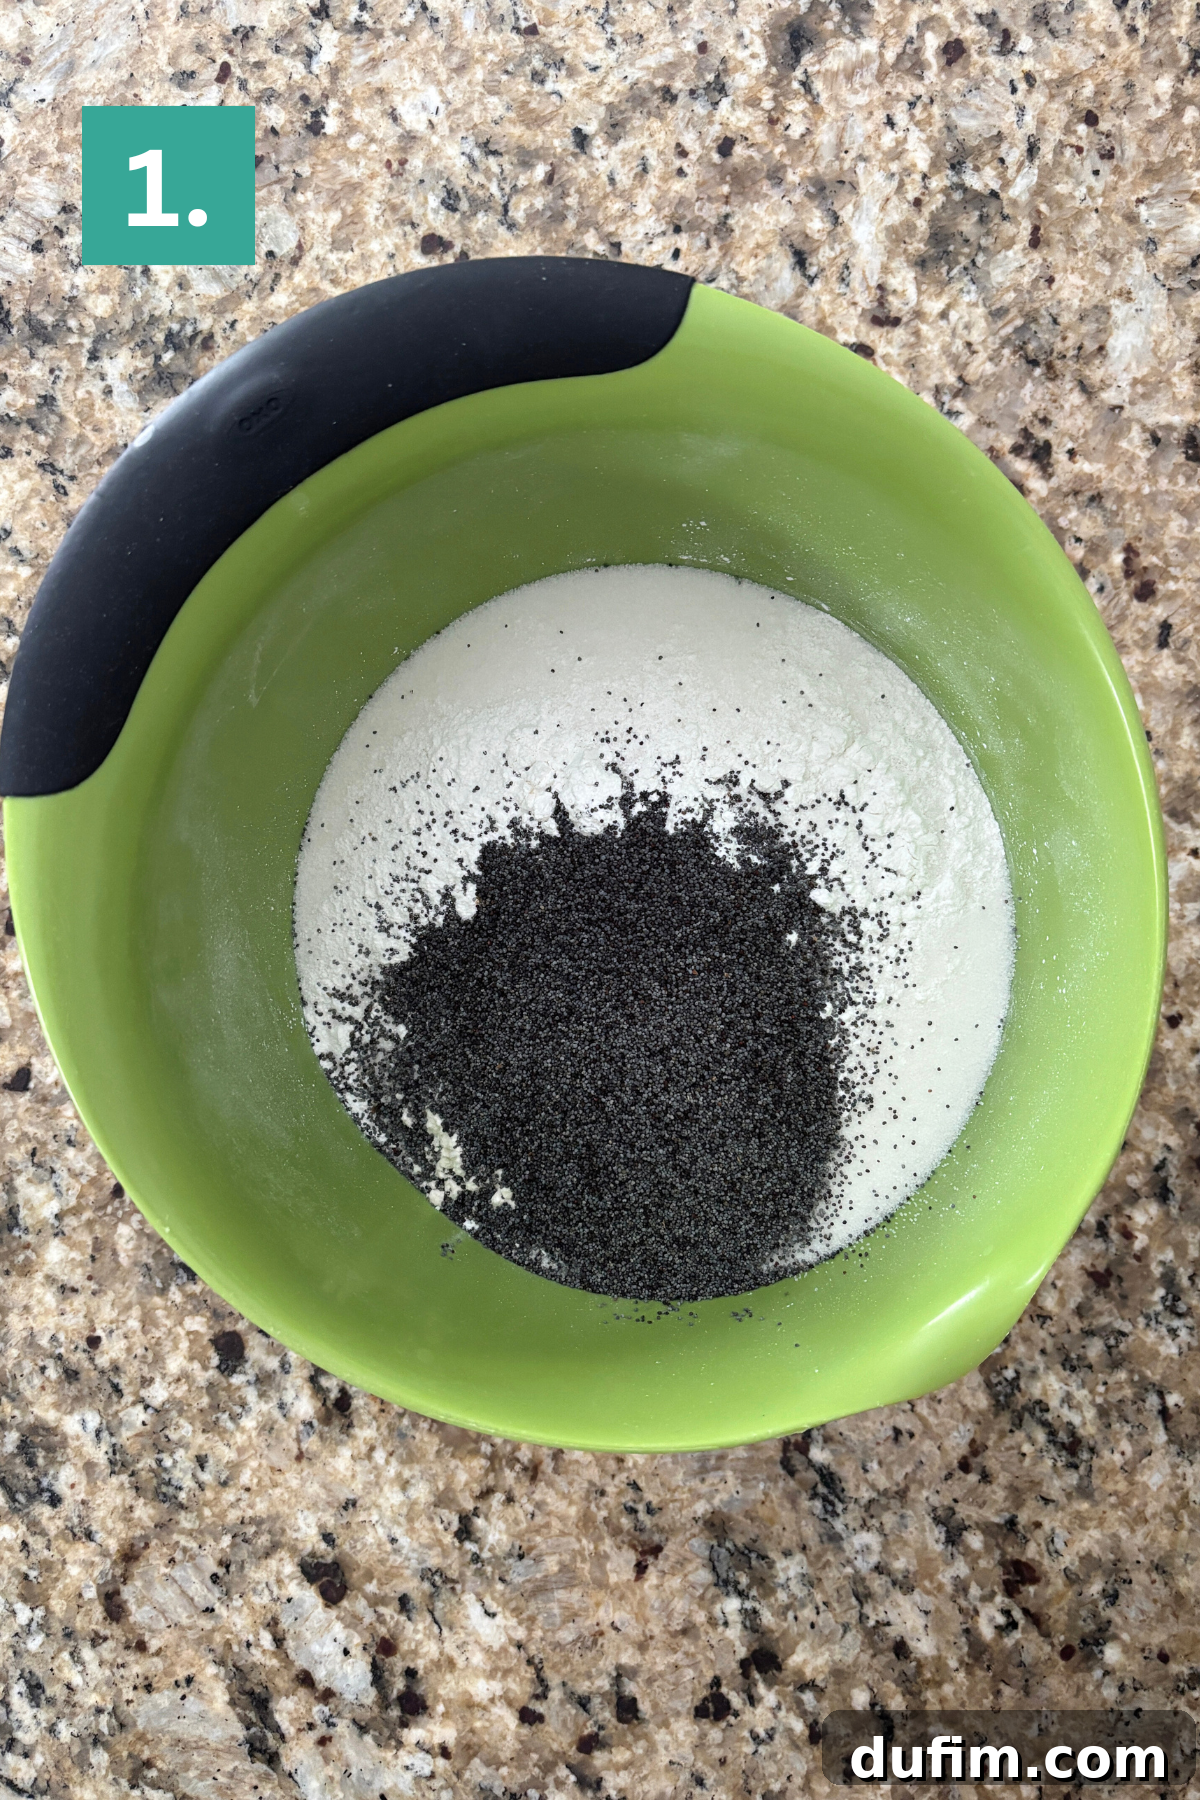
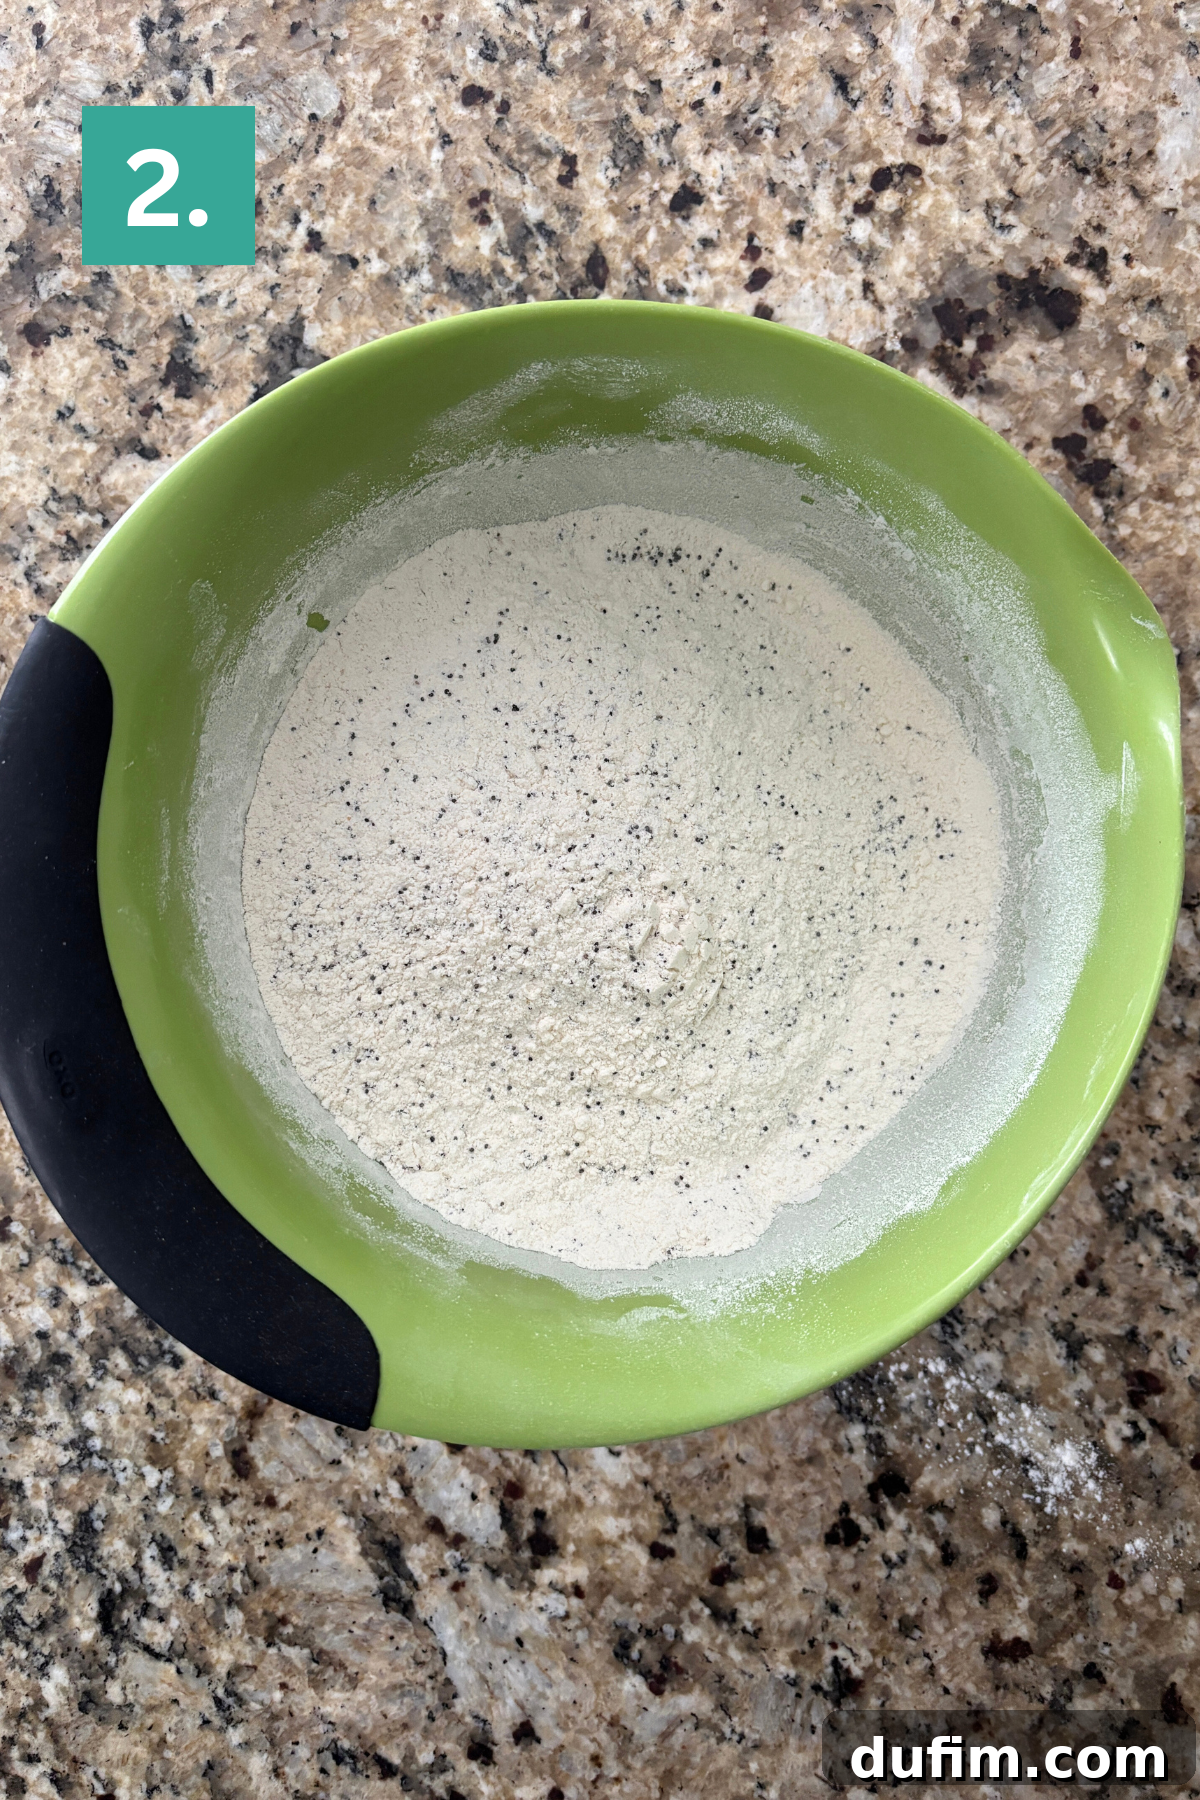
1. Combine Dry Ingredients: In a medium-sized mixing bowl, thoroughly whisk together the all-purpose flour, granulated sugar, baking powder, salt, and poppy seeds. Use a spoon or a whisk to ensure all ingredients are evenly distributed. Set this bowl aside for a moment.
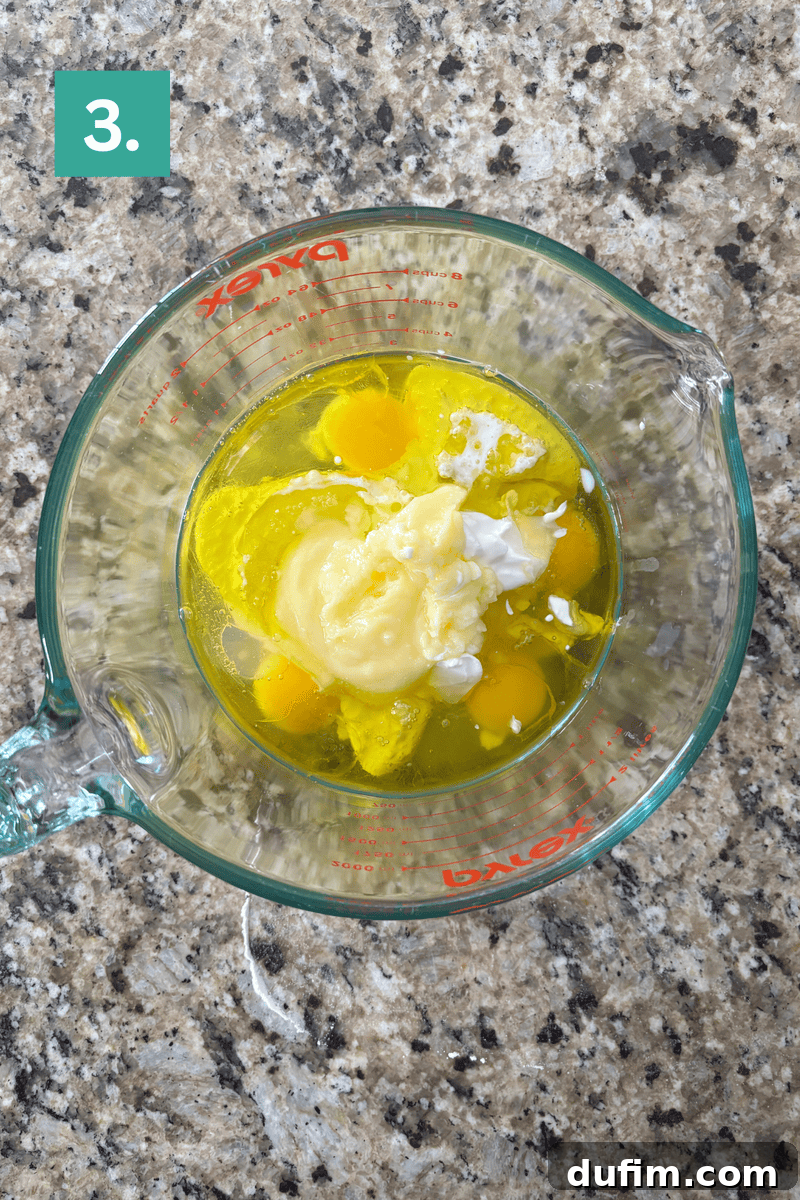
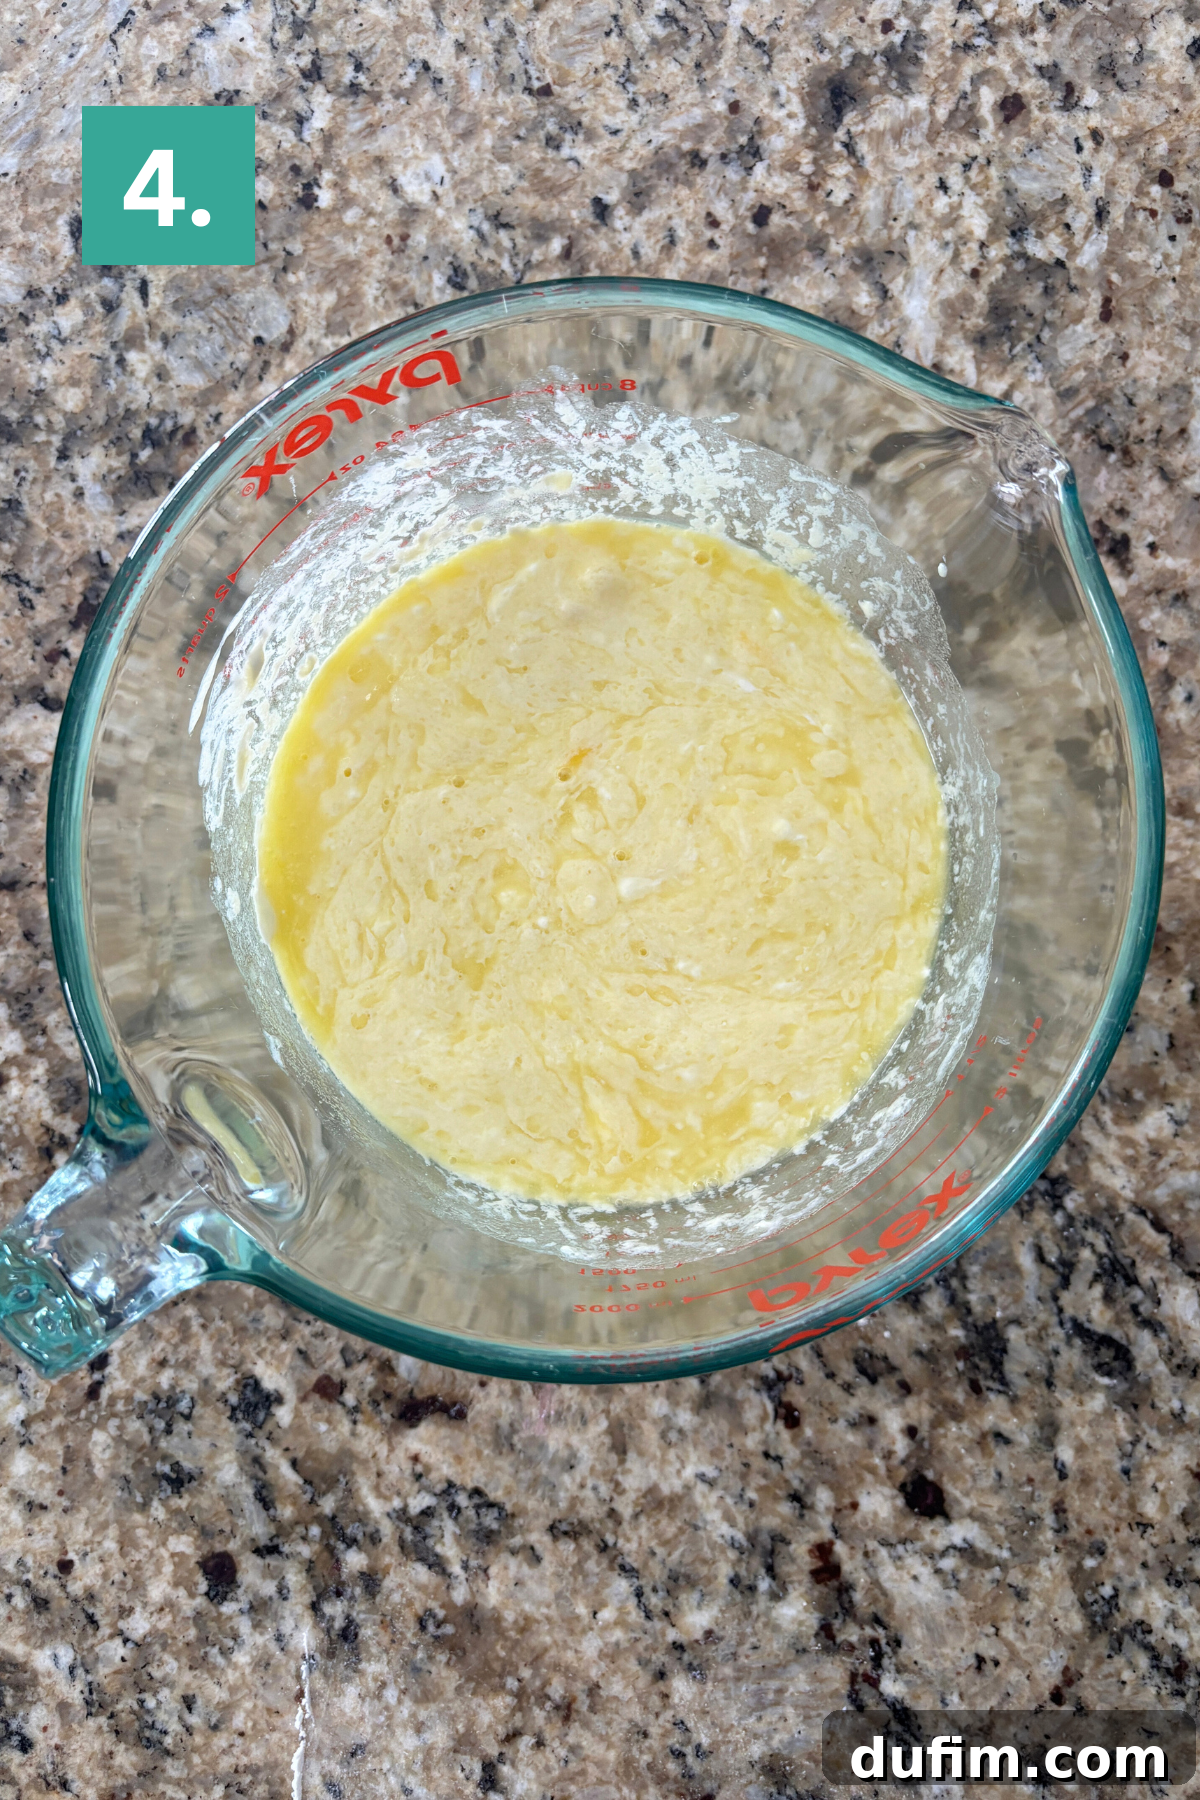
2. Combine Wet Ingredients: In a larger mixing bowl, crack the eggs, then add the buttermilk, sour cream, neutral oil, melted and cooled unsalted butter, and almond extract. Use a spatula or whisk to gently stir these ingredients together until they are fully combined and smooth. Ensure the melted butter has cooled slightly so it doesn’t scramble the eggs.
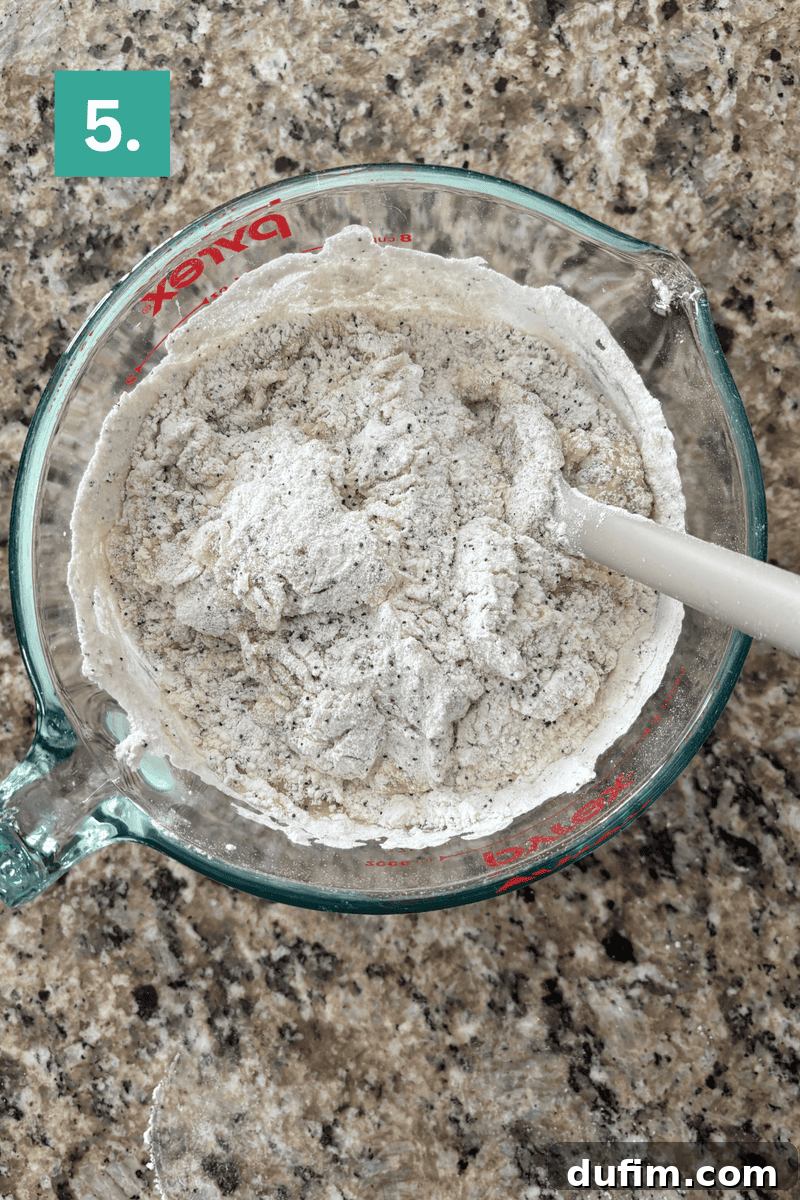
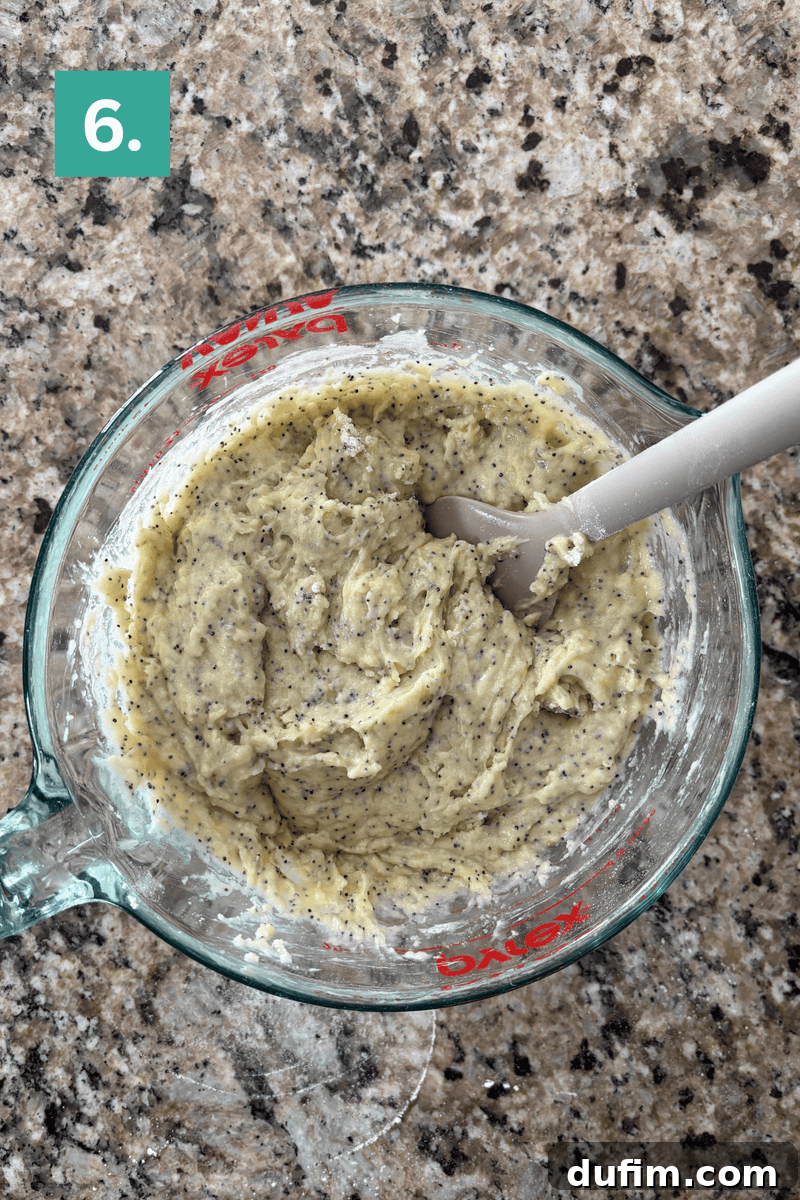
3. Gently Combine Wet and Dry: Gradually add the dry ingredients from the first bowl into the wet ingredients. Mix using a spatula, stirring just until the flour streaks disappear. It’s crucial not to overmix the batter; a few small lumps are perfectly fine and will contribute to a tender muffin texture. The resulting batter will be notably thick.
4. Rest the Batter: Cover the bowl containing the thick batter and let it rest on your kitchen counter for 15 minutes. This resting period is a secret weapon for achieving those beautiful, tall muffin tops. While the batter rests, preheat your oven to a blazing 425ºF (220ºC).
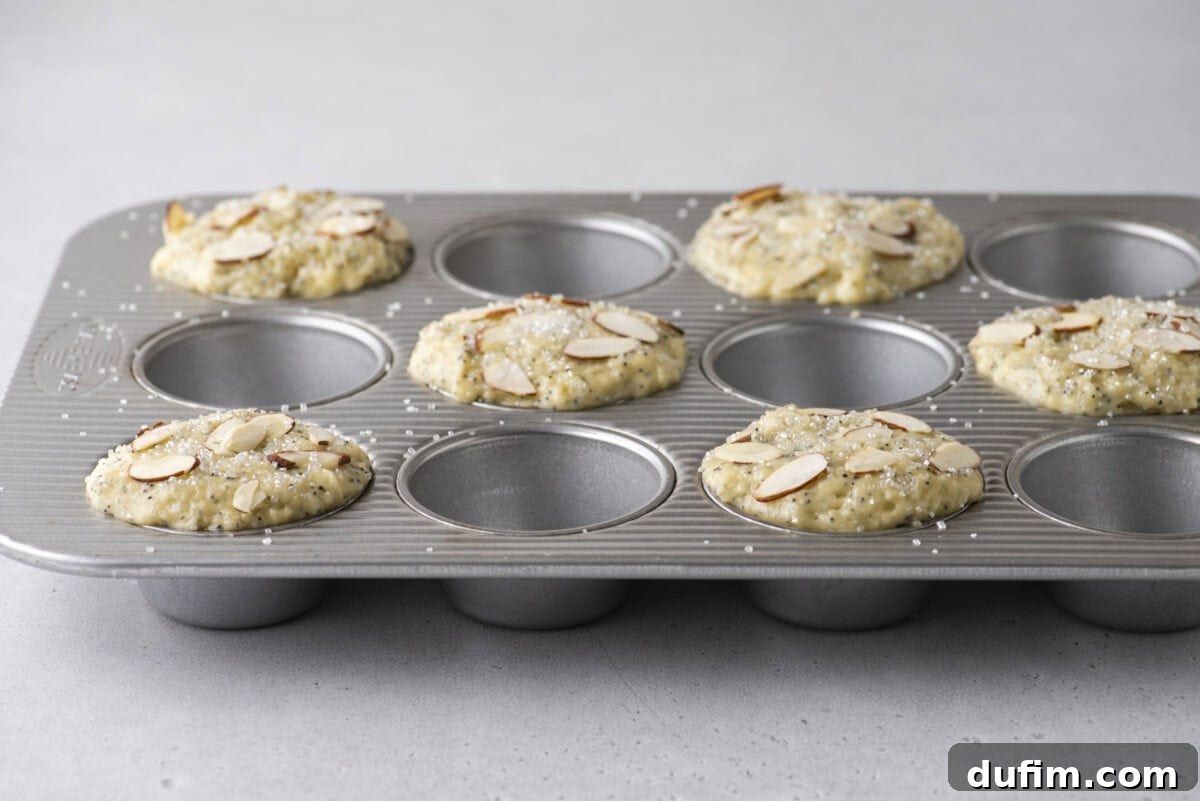
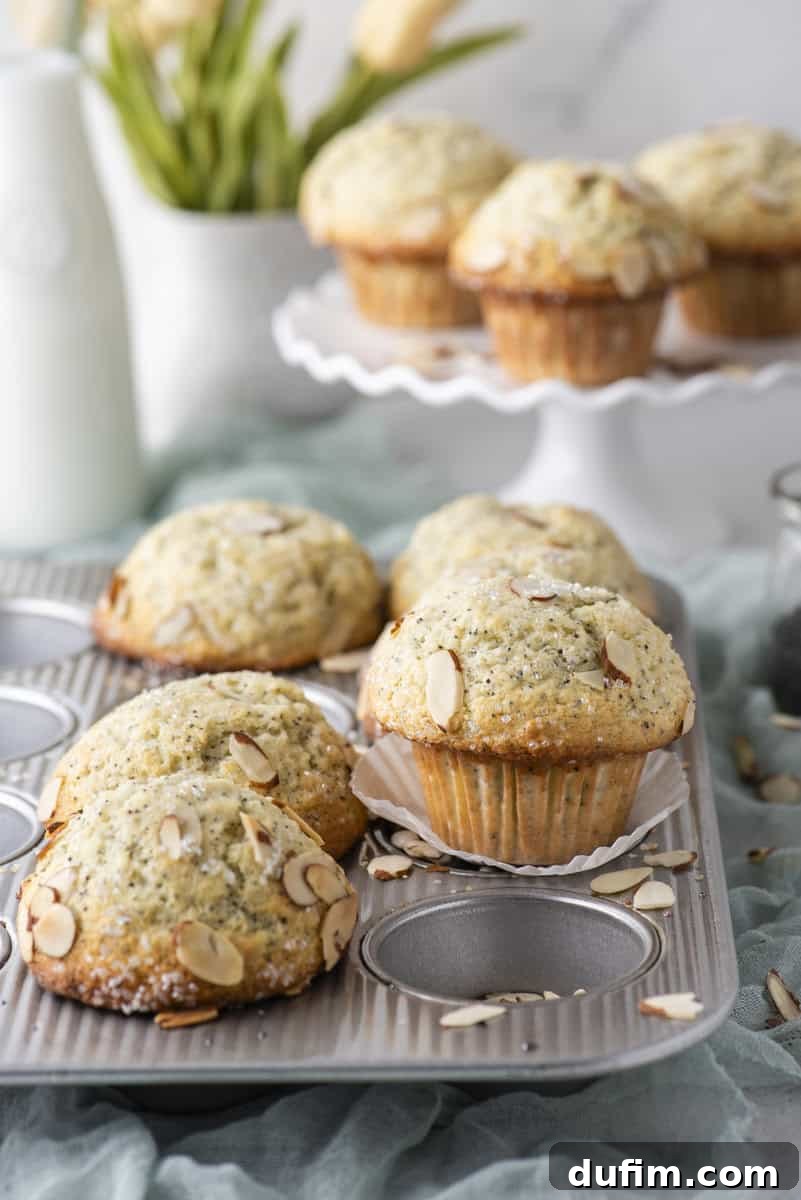
5. Fill Muffin Liners: To create impressive bakery-style muffin tops, prepare a 12-count muffin pan by lining only every other muffin well with paper liners. This means you will use 6 liners in total for the first batch. This spacing allows the muffins ample room to spread and rise without crowding each other. Fill each lined well generously with at least ½ cup of the thick batter. The batter should form a distinct dome above the liner before entering the oven. For an extra touch of elegance and crunch, gently press sliced almonds onto the top of each muffin and sprinkle with sanding sugar.
6. Bake to Perfection: Place the muffin pan into your preheated 425ºF (220ºC) oven and bake for precisely 7 minutes. This initial high heat creates a rapid rise. After 7 minutes, and without opening the oven door, reduce the oven temperature to 350ºF (175ºC) and continue baking for another 14-16 minutes, or until a wooden toothpick inserted into the center of a muffin comes out clean. Allow the muffins to cool in the pan for a few minutes before transferring them to a wire rack to cool completely. If you have remaining batter, remember to increase the oven temperature back to 425ºF (220ºC) before baking the next batch.
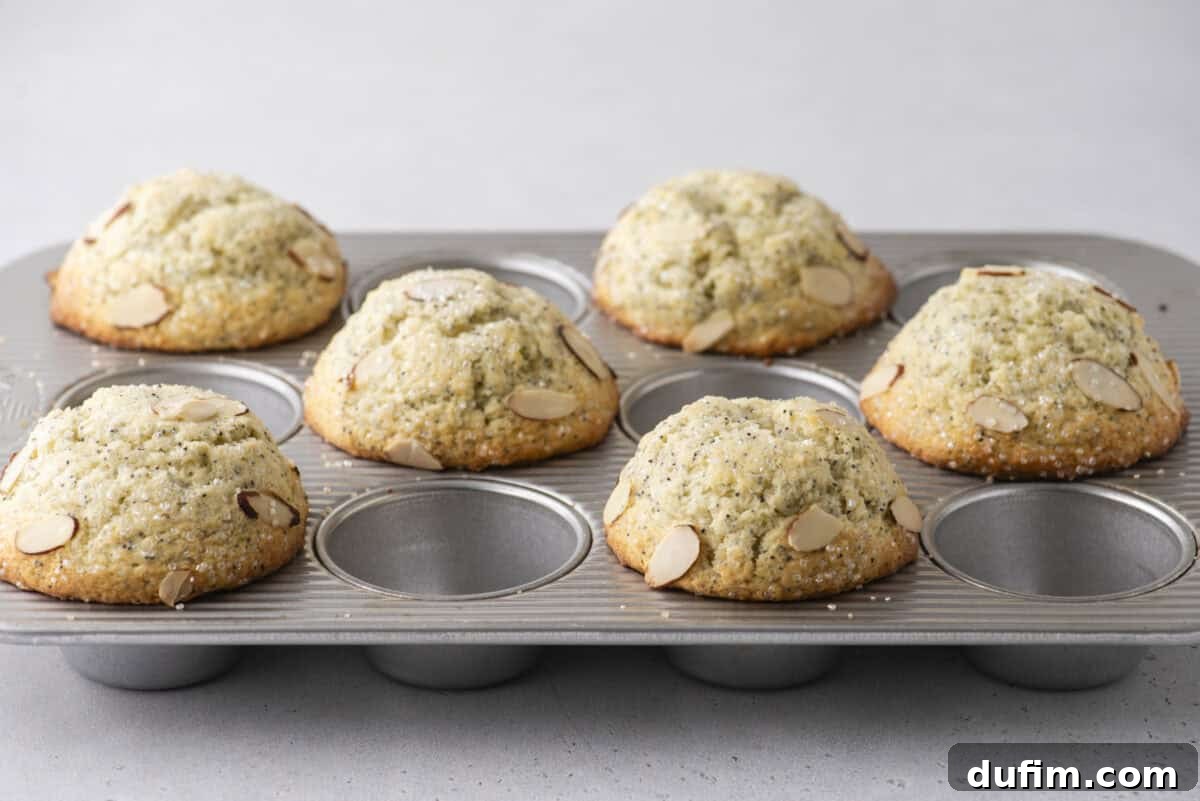
Secrets to Achieving Bakery-Style Muffin Tops
Everyone adores those generously domed, golden-brown muffin tops you find at artisanal bakeries. Achieving this professional look at home is entirely possible with a few strategic techniques that “lift” your muffins to new heights:
1. The Essential Rest Period
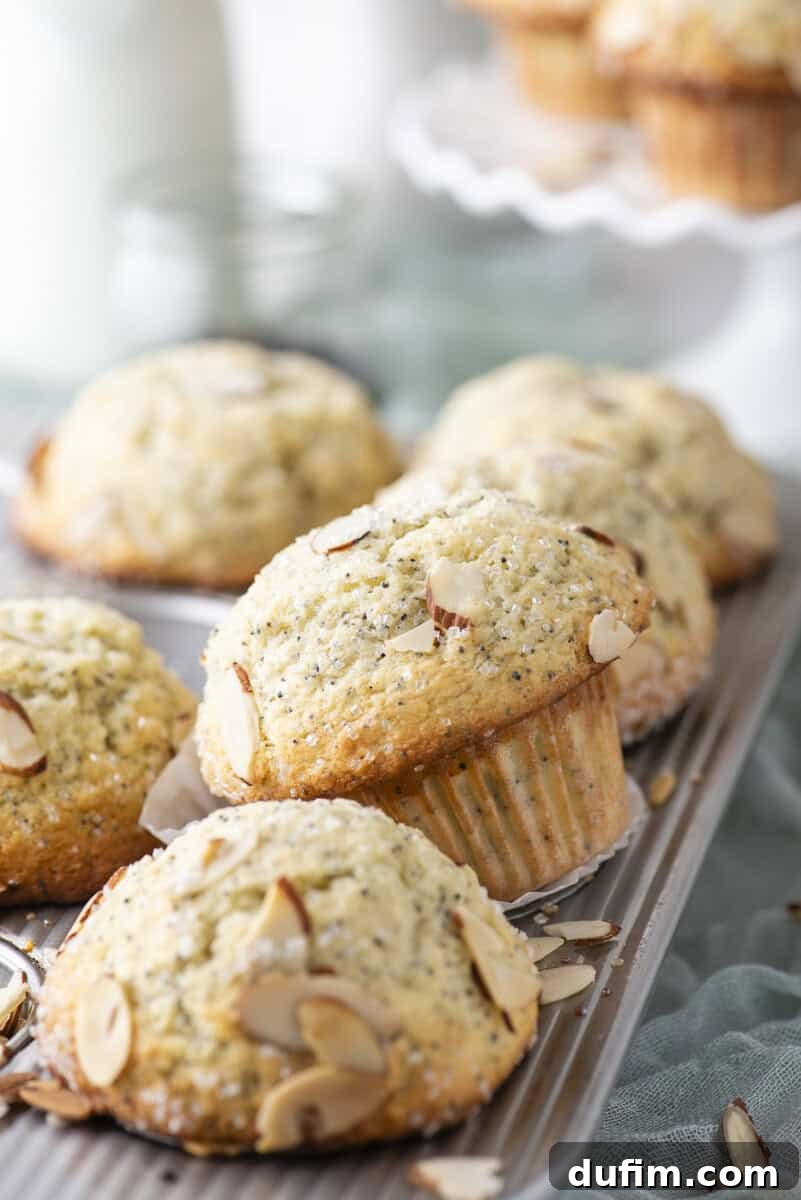
Allowing your muffin batter to rest for 15 minutes after mixing and before scooping it into the muffin pan is a game-changer. During this brief but critical period, the starch molecules within the flour begin to absorb the liquid in the batter. This absorption causes the starch to swell, leading to a thicker, more viscous batter. A thicker batter provides a more stable structure that can trap more air, resulting in a significantly higher and more impressive dome during baking. This short rest contributes immensely to both texture and rise.
2. Fill Every Other Muffin Cup for Maximum Doming
This simple trick might sound unusual, but it consistently delivers outstanding results. When preparing a 12-count muffin pan, only fill every other muffin well with batter, leaving the alternating cups empty. By providing ample space between each muffin, you allow them to spread more freely and expand upwards without encountering resistance from their neighbors. This promotes a superior dome and also encourages a more even browning on all sides, contributing to that coveted golden-brown bakery finish.
3. Don’t Be Shy: Fill Them To The Top!
Contrary to common advice for other baked goods, when aiming for sky-high muffin tops, you should fill your muffin liners right to the very top with batter. This might seem counter-intuitive and even a little risky, but it’s essential for achieving that impressive height. A fully-filled liner forces the batter to rise straight up, creating a grand, domed silhouette rather than spreading outwards too much. Embrace the fullness for truly magnificent muffins!
4. Initial High-Temperature Bake for a Perfect Rise
Starting the baking process at a high temperature (425ºF or 220ºC) and then lowering it to 350ºF (175ºC) is a classic bakery technique known as “thermal shock.” The initial burst of high heat causes the leavening agents in the batter to react rapidly, generating a sudden and powerful upward surge. This rapid expansion sets the outer surface of the muffin quickly, essentially locking in that beautiful, domed shape before the interior can fully cook. The subsequent lower temperature allows the muffins to bake through evenly without burning the exterior.
Recommended Baking Equipment for Muffins
Having the right tools can make all the difference in your baking experience, especially when striving for bakery-quality results. Here are a few recommended pieces of equipment that will help you master these almond poppy seed muffins:
- Muffin liners: While not strictly necessary if you thoroughly grease your muffin wells, good quality muffin liners ensure easy removal and a clean presentation. They also prevent your muffins from sticking, preserving their delicate shape. If you prefer not to use liners, a generous spray of non-stick cooking spray is essential.
- 4 Tbsp Scoop: A cookie scoop, specifically a 4-tablespoon (or #16) scoop, is an invaluable tool for consistent muffin size and even baking. It helps you portion out the thick batter cleanly and efficiently into each muffin liner, ensuring every muffin is uniform and perfectly sized, just like those from a professional bakery.
- Simple spatula: You’ll be pleased to know that no fancy stand mixer or even a hand mixer is required for this recipe! A sturdy, simple spatula is all you need. Its flexibility allows for gentle mixing, which is key to avoiding overmixing the batter and ensuring a tender crumb. Hand mixing also helps you feel the consistency of the batter, ensuring it’s just right.
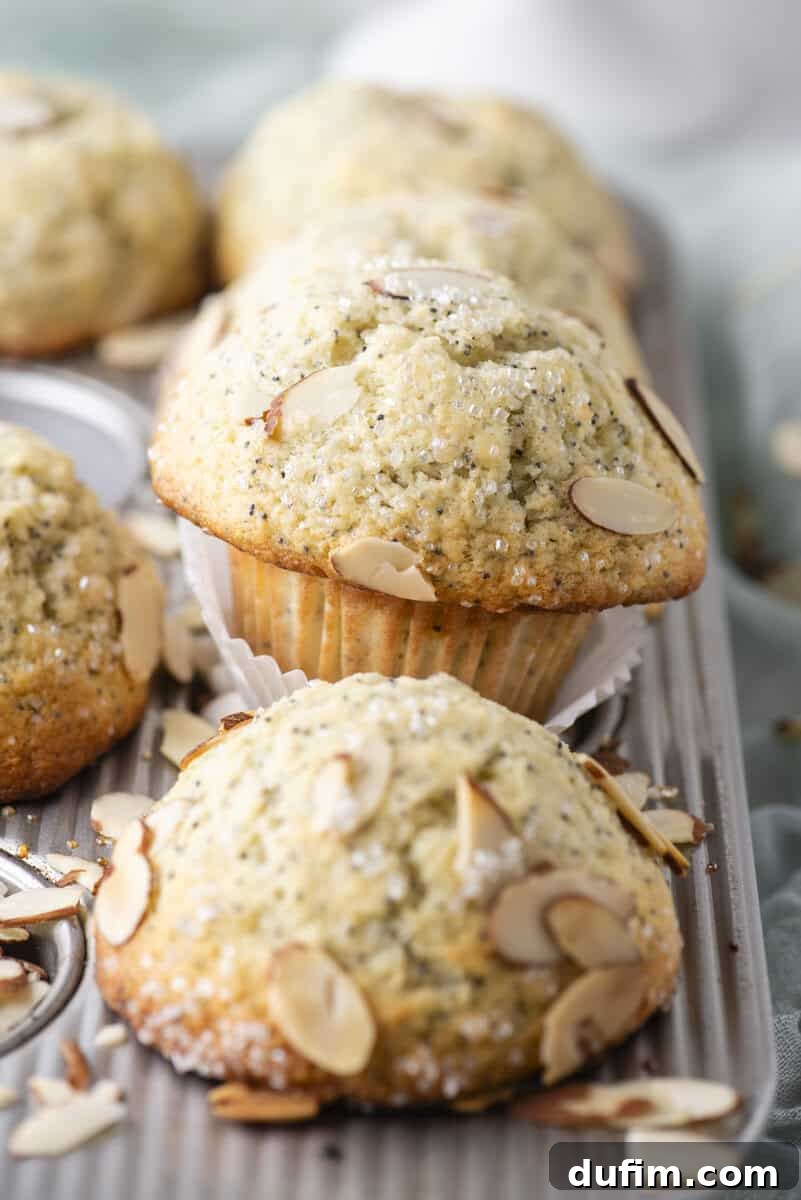
- Sanding sugar: For that final, professional bakery-style flourish, a sprinkle of coarse sanding sugar on top of your muffins before baking is a must. Unlike regular granulated sugar, sanding sugar’s larger crystals hold their shape and sparkle during baking, creating a beautiful, crunchy top layer that adds both visual appeal and a delightful texture.
Expert Tip: How to Properly Measure Flour
One of the most common baking errors that can lead to dry or dense muffins is incorrectly measuring flour. Flour can become compacted in its bag or canister, so scooping it directly with a measuring cup can result in significantly more flour than intended. For the most accurate measurement, especially with dry ingredients, using a kitchen scale to weigh it in grams is always recommended. However, if you don’t have a scale, follow this method for a more precise cup measurement:
- Aerate the flour: Before measuring, use a whisk or spoon to gently fluff up the flour in its container. Flour settles and becomes heavy and compact over time. Aerating it is like “fluffing” it up, not sifting it (unless the recipe specifically calls for sifting).
- Spoon into measuring cup: Instead of scooping directly, use a spoon to lightly sprinkle the aerated flour into your dry measuring cup. Fill it until it’s overflowing. Do not tap the cup against the counter, as this will compact the flour, defeating the purpose of aerating it.
- Level off: Use the straight edge of a butter knife or an offset spatula to level off the excess flour across the top of the measuring cup. You’ll need to repeat the aerating, spooning, and leveling process for each cup of flour required in the recipe.
Storing and Freezing Your Almond Poppy Seed Muffins
Muffin Storage Tips
The freshness of your muffins depends largely on how they’re stored. If you anticipate devouring your muffins within 24 hours of baking, you can simply leave them uncovered on your kitchen counter. These muffins are so moist that they won’t dry out within a day. In fact, storing freshly baked muffins in an airtight container immediately can trap too much moisture, potentially making them soggy and causing those beautiful crunchy, sugary tops to soften or disappear.
However, for longer storage (2-4 days), there’s a clever trick: paper towels. Line the bottom of an airtight container with a layer of paper towels. Arrange your muffins in a single layer over the paper towels. If stacking, place an additional layer of paper towels on top of the muffins before adding another layer of muffins. The paper towels will act as a sponge, absorbing any excess moisture the muffins release, helping to preserve their texture and prevent sogginess. Remember to replace the paper towels with fresh ones around day 2 or 3 if they become too damp.
How to Freeze Muffins for Long-Term Freshness
Muffins freeze beautifully, making them perfect for meal prepping or having a quick treat on hand. To freeze them, ensure they are completely cooled first. Then, individually wrap each muffin tightly in plastic wrap. Once wrapped, place the muffins in a freezer-safe ziploc bag or an airtight container, and store them in the freezer for up to 3 months. This method helps prevent freezer burn and maintains their flavor.
To thaw frozen muffins, simply remove them from the freezer and unwrap them. You can let them defrost at room temperature for about 1 hour. Alternatively, for a quicker warm-up, unwrap a muffin and microwave it in 20-second intervals until it’s heated through and soft, enjoying that fresh-baked taste once again.
Frequently Asked Questions (FAQs)
Can I substitute buttermilk?
Yes, if you don’t have buttermilk on hand, you can easily make a homemade substitute. Simply add 1 tablespoon of lemon juice or white vinegar to a liquid measuring cup, then fill the rest of the cup to the ¾ cup mark with regular milk (dairy or non-dairy). Stir it gently and let it sit for 5-10 minutes until it slightly curdles. This DIY buttermilk will work perfectly to provide the necessary acidity and moisture for tender muffins.
What if I don’t have almond extract?
While almond extract is key to the distinctive flavor of these muffins, if you don’t have it, you can substitute with pure vanilla extract. Use the same quantity (2 teaspoons). The muffins will still be delicious and moist, but they will have a classic vanilla flavor rather than the signature almond notes. Alternatively, you could add a little lemon zest for a subtle citrus twist.
Can I add fruit to these muffins?
Absolutely! This recipe provides an excellent base for adding fruit. For best results, fold in about 1 to 1.5 cups of fresh or frozen fruit (like blueberries, raspberries, or finely diced apples) during step 3, after combining the wet and dry ingredients. If using frozen fruit, do not thaw it first, as this can make the batter too watery. Gently fold it in to ensure even distribution without overmixing.
More Bakery-Style Muffin Recipes to Try
If you loved these almond poppy seed muffins, be sure to explore more of our perfected bakery-style muffin recipes:
- Homemade Chocolate Chip Muffins
- White Chocolate Raspberry Muffins
- Orange Muffins
- Chocolate Peanut Butter Muffins
Almond Poppy Seed Muffins Recipe
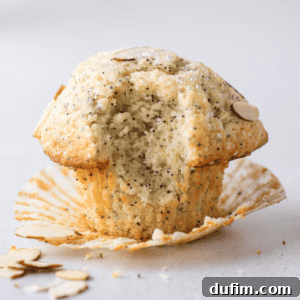
These almond poppy seed muffins are soft, moist, and full of rich almond flavor with a tender crumb and tall domed tops. Made from scratch with sour cream for added moisture, they bake up beautifully and deliver bakery-quality results in a home kitchen.
Recipe Details
- Yield: 10 muffins
- Prep Time: 15 minutes
- Cook Time: 25 minutes (7 min at 425ºF, then 14-16 min at 350ºF)
- Resting Time: 15 minutes
- Cooling Time: 15 minutes
- By: Beth
Ingredients
Muffin Batter
- 4 cups (480g) all-purpose flour
- 1 ¾ cups (347g) granulated sugar
- 4 tsp baking powder
- 1 tsp salt
- 3 Tbsp (28g) poppy seeds
- 4 large eggs
- ¾ cup (170g) buttermilk
- ½ cup (114g) sour cream, or full-fat yogurt
- ½ cup (100g) neutral oil
- 4 Tbsp (57g) unsalted butter, melted & cooled
- 2 tsp almond extract
Topping
- Sliced almonds
- Sanding sugar
Instructions
- In a large mixing bowl, thoroughly combine the flour, granulated sugar, baking powder, salt, and poppy seeds using a whisk or spoon. Set this dry mixture aside.
- In a separate, even larger mixing bowl, whisk together the eggs, buttermilk, sour cream, neutral oil, melted and cooled unsalted butter, and almond extract until well combined and smooth.
- Gradually add the dry ingredients to the wet ingredients, mixing gently with a spatula just until combined. Be careful not to overmix; a few lumps are perfectly normal and preferred for tender muffins. The batter will be quite thick!
- Cover the bowl and allow the batter to rest on the counter for 15 minutes. During this resting period, preheat your oven to 425ºF (220ºC). This rest period is crucial for developing flavor and achieving those desirable domed tops.
- Prepare a 12-cup muffin pan. For professional-looking, tall muffin tops, line only every other muffin well with paper liners (you’ll use 6 liners in a 12-cup pan). This spacing allows the muffins to spread and dome without merging. Fill each lined cup generously with at least ½ cup of the thick batter, ensuring the batter creates a small dome above the liner before baking. Gently press sliced almonds onto the top of each muffin and sprinkle with sanding sugar for a beautiful finish and added crunch.
- Bake the muffins at 425ºF (220ºC) for the initial 7 minutes. Without opening the oven door, reduce the temperature to 350ºF (175ºC) and continue baking for another 14-16 minutes, or until a wooden toothpick inserted into the center of a muffin comes out clean. This two-stage baking temperature promotes a high rise.
- Allow the baked muffins to cool in the pan for a few minutes before carefully transferring them to a wire rack to cool completely. If you have remaining batter, repeat the baking process, ensuring the oven temperature is reset to 425ºF (220ºC) before the next batch.
Notes
- Gluten-Free Option: For a delicious gluten-free version, substitute the all-purpose flour with a 1:1 gluten-free baking flour blend. I used King Arthur’s Measure for Measure Gluten-Free Flour with excellent results.
- Mini Muffins: If opting for mini muffins, bake them at 425ºF (220ºC) for the first 5 minutes, then reduce the temperature to 400ºF (200ºC) and bake for an additional 5-10 minutes, or until a toothpick comes out clean. The “every other cup” method is still recommended if you tend to overfill the mini muffin wells for best results.

Nutrition Information
All nutritional values are approximate and provided to the reader as a courtesy. Changing ingredients and/or quantities will alter the estimated nutritional calculations.
| Serving | Calories | Carbohydrates | Protein | Fat | Saturated Fat | Polyunsaturated Fat | Monounsaturated Fat | Trans Fat | Cholesterol | Sodium | Potassium | Fiber | Sugar | Vitamin A | Vitamin C | Calcium | Iron |
|---|---|---|---|---|---|---|---|---|---|---|---|---|---|---|---|---|---|
| 1 muffin | 437 kcal | 76 g | 9 g | 11 g | 5 g | 2 g | 3 g | 0.2 g | 95 mg | 456 mg | 143 mg | 2 g | 37 g | 350 IU | 0.1 mg | 186 mg | 3 mg |