
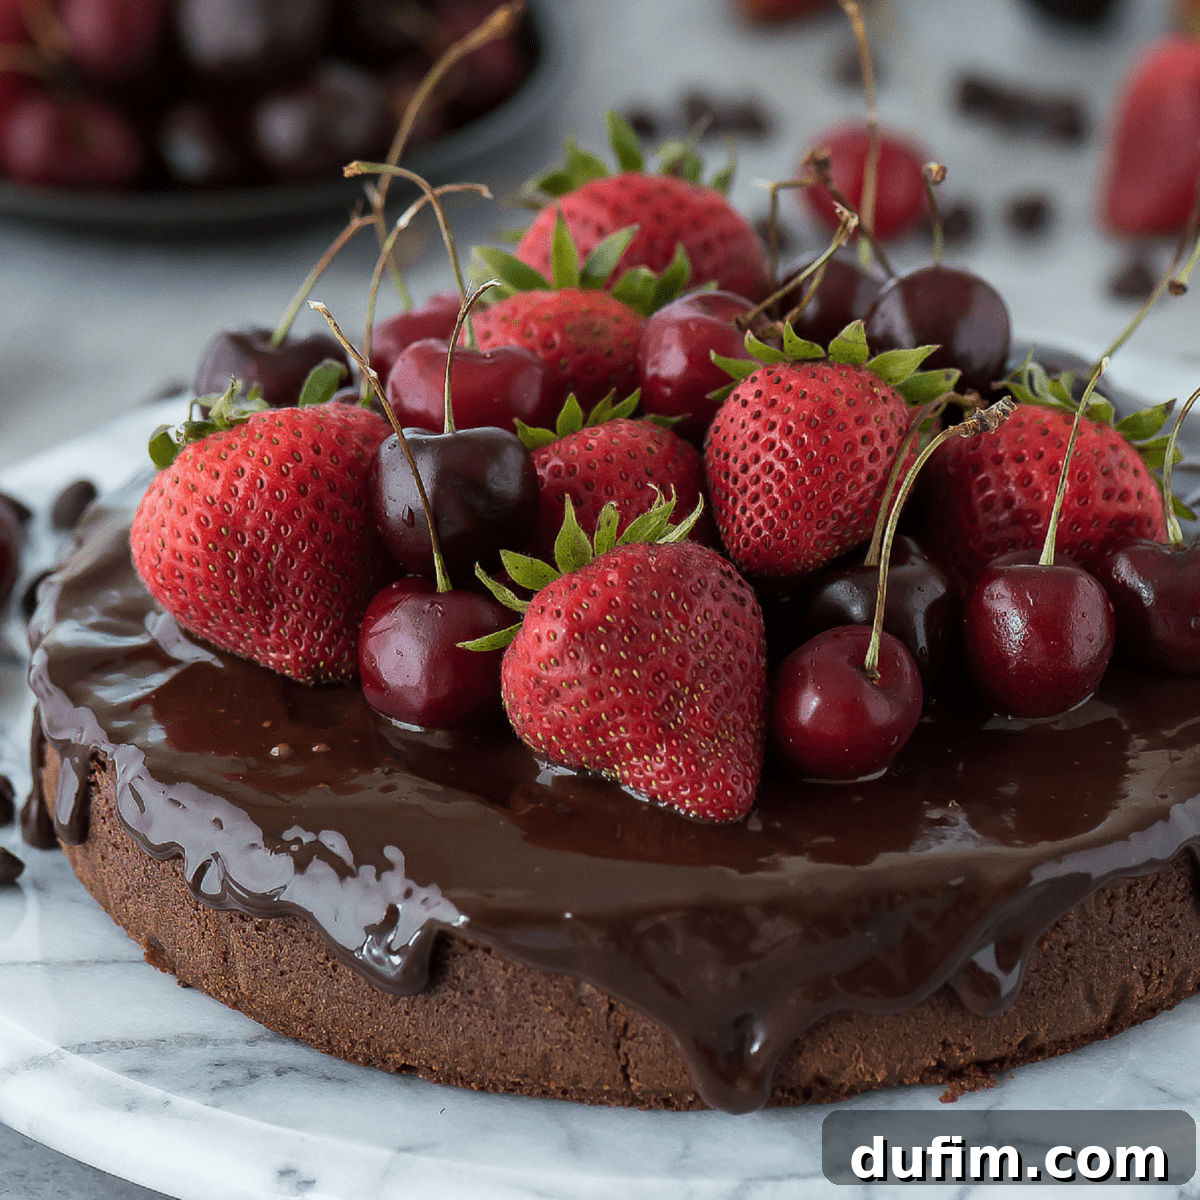
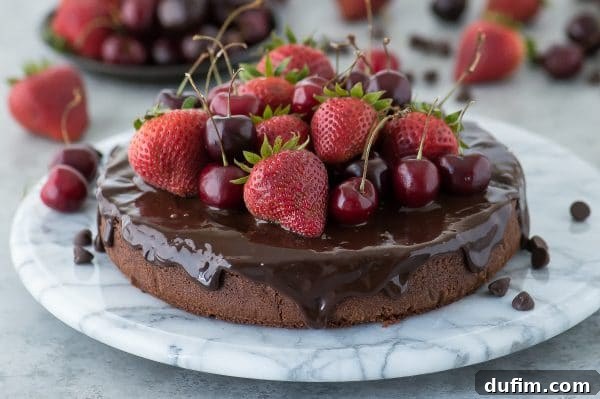
The Ultimate Classic Chocolate Mud Cake with Decadent Ganache and Fresh Berries
In the world of cakes, where light and airy sponge often reign supreme, there’s a special place in my heart for something far more substantial, something deeply rich and utterly indulgent: the classic chocolate mud cake. Over the past year, my kitchen has seen its fair share of baking adventures, from delicate multi-layered creations to frosted masterpieces. Yet, if I had to choose a single favorite, it would unequivocally be a dense, intensely chocolatey mud cake, especially when paired with a luscious chocolate ganache and perhaps a scoop of creamy vanilla bean or refreshing mint chip ice cream.
What Makes a Chocolate Mud Cake So Irresistible?
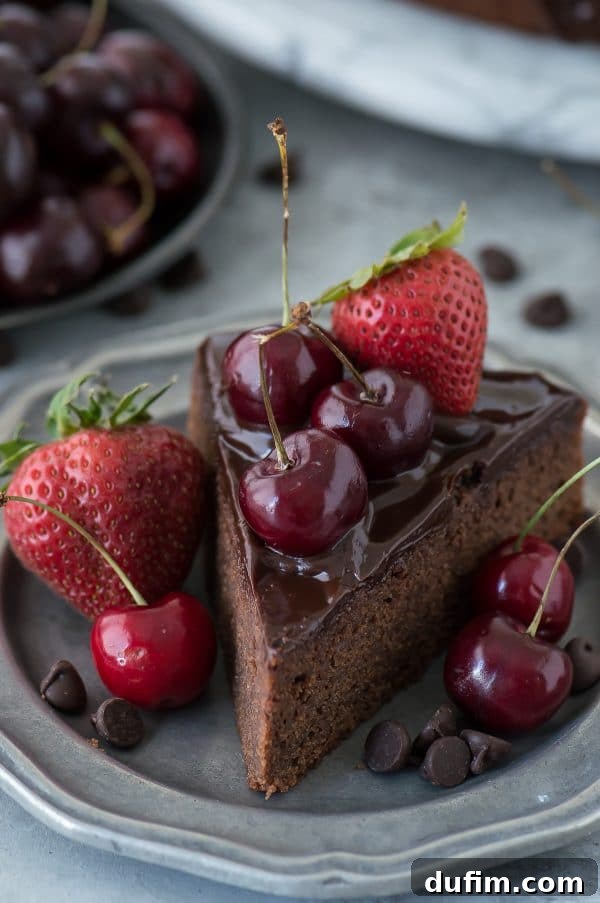
When I speak of “mud cake,” I’m certainly not referring to the charming (but inedible!) concoctions your little ones might whip up in the backyard sandbox! My kind of mud cake is a sophisticated culinary delight, characterized by its signature dense texture and profound chocolate flavor. Unlike traditional cakes that rely on aerating eggs and sugar for a fluffy crumb, a true mud cake embraces a more straightforward, yet profoundly effective, method. It begins with melting chocolate, butter, sugar, and milk into a smooth, luxurious mixture, into which flour is then incorporated.
The result is a cake that defies the conventional definition of “light and fluffy.” Instead, it delivers a deeply satisfying, almost brownie-like experience. While it’s not quite as compact as a brownie, its rich, moist, and incredibly dense crumb makes it extraordinarily delicious and incredibly rewarding to eat. It’s a cake that commands attention with every forkful, offering a comforting richness that chocolate lovers dream of.
A Versatile Dessert for Every Season: Featuring Fresh Berries
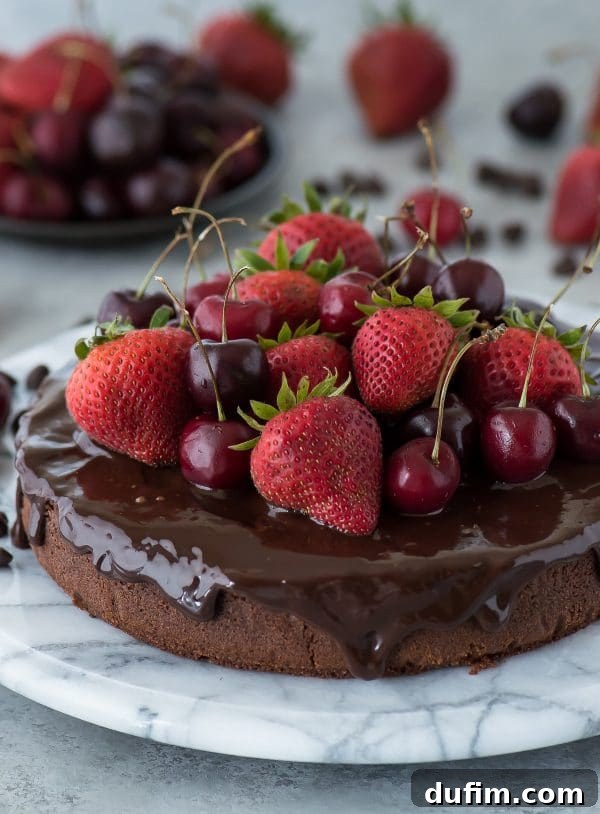
Today, we’re thrilled to share our classic chocolate mud cake recipe, complete with a luscious chocolate ganache. What makes this particular recipe stand out is its incredible versatility, making it a perfect dessert for any time of the year. Currently, we find ourselves in the peak of berry season, so I’ve chosen to crown this cake with a vibrant medley of fresh strawberries and cherries, adding a delightful tartness that perfectly balances the cake’s richness.
But imagine the possibilities! As the seasons change, so too can your decorations. For the festive spirit of Christmas, envision this deeply chocolatey cake adorned with crushed peppermint stick pieces, a sprinkle of edible glitter, or perhaps some frosted cranberries for a touch of winter magic. Come spring, a dusting of coconut flakes or delicate edible flowers could transform it into a lighter, brighter offering. And for birthdays, what could be more joyful than a cascade of colorful sprinkles, turning this elegant dessert into a celebration in itself?
My Baking Journey: From Hand Mixer to KitchenAid Professional
My baking journey has been quite an evolution, particularly when it comes to kitchen appliances. For years, my trusty companion in the kitchen was my grandmother’s hand mixer, a cherished heirloom I inherited after she passed. It was my sole mixer, a beloved tool that saw me through countless batches of cookies, cakes, and frostings. I used it faithfully until its motor finally gave out, quite dramatically, in the middle of a buttercream frosting session. At least it went out doing what it loved!
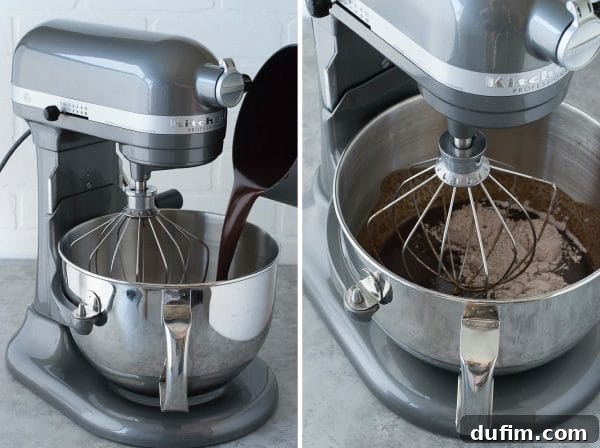
As a food blogger, relying solely on a hand mixer began to feel a bit like an oxymoron. So, you can imagine my excitement when we had the incredible opportunity to partner with KitchenAid! I am absolutely over the moon to have welcomed the Metallic Pearl Professional 600 Series 6 QT Bowl-Lift Stand Mixer into my kitchen. For someone who had only ever known the limitations of a hand mixer, this stand mixer is nothing short of a revelation. It’s like having a magical robot, or an extra pair of hands that can mix tirelessly and perfectly, allowing me to focus on the nuances of a recipe. This powerful machine has truly transformed my baking process, making even complex recipes like this mud cake feel effortless and enjoyable.
This delightful chocolate mud cake recipe was developed in partnership with KitchenAid. I extend my sincere gratitude for supporting the brands that enable me to continue sharing delicious recipes and baking adventures with you!
The Ultimate Berry Mud Cake Recipe
Get ready to bake a truly unforgettable dessert! This classic chocolate mud cake is incredibly rich, moist, and dense, making it a perfect indulgence for any occasion. Topped with a silky smooth chocolate ganache and fresh, seasonal berries, it’s a showstopper that’s surprisingly straightforward to make. Follow these steps for a decadent treat that will impress everyone.
Berry Mud Cake
By: Beth
Additional Time: 2 hours
Total Time: 2 hours
Servings: 12 servings
Classic chocolate mud cake recipe with chocolate ganache. Top with fresh berries during the summer.
Ingredients
For the Mud Cake
- 4 oz bittersweet chocolate, chopped
- 2 sticks unsalted butter, diced (1 cup)
- 1 ½ cups sugar
- 1 cup milk
- 2 large eggs
- 2 cups all purpose flour
- ¾ tsp baking powder
- ⅛ tsp salt
- 2 tbsp unsweetened cocoa powder
For the Chocolate Ganache
- ½ cup semi-sweet chocolate chips
- ⅓ cup heavy whipping cream
- Fresh strawberries and cherries to top
Instructions
Preparing the Mud Cake
- Preheat the oven to 325º F (160°C). Butter the bottom and sides of an 8-inch round cake pan or springform pan. Line the bottom with a parchment paper circle to prevent sticking.
- In a medium pot set over low heat, combine the chopped bittersweet chocolate, diced unsalted butter, and sugar. Stir occasionally with a spatula until everything is completely melted and beautifully smooth. Remove the pot from the heat and stir in the milk. Allow the mixture to cool for 10 minutes before proceeding.
- Once slightly cooled, pour the rich chocolate mixture into a large mixing bowl.
- Add the eggs to the chocolate mixture, beating on low speed until just combined. Be careful not to overmix at this stage.
- Gradually add the all-purpose flour, baking powder, salt, and unsweetened cocoa powder to the wet ingredients. Mix on low speed until the dry ingredients are just incorporated and no streaks of flour remain. Avoid overmixing to keep the cake tender.
- Pour the prepared cake batter into your buttered and parchment-lined 8-inch pan. Bake for 70-80 minutes, or until a wooden toothpick inserted into the center of the cake comes out with moist crumbs attached (not wet batter).
- Allow the baked cake to cool in the pan for 30 minutes. This helps the cake firm up before transferring. After 30 minutes, carefully invert the cake onto a wire cooling rack to cool completely. Cooling thoroughly is crucial for proper ganache application.
Crafting the Chocolate Ganache
- Place the semi-sweet chocolate chips in a medium heat-proof bowl.
- In a small pot over low heat, gently warm the heavy whipping cream until it is just about to boil. You’ll see small bubbles forming around the edges, but do not let it come to a rolling boil.
- Pour the hot heavy cream directly over the chocolate chips. Let the mixture stand undisturbed for 1-2 minutes; this allows the heat from the cream to melt the chocolate.
- After resting, use a spatula to gently stir the mixture from the center outwards until it becomes completely smooth, glossy, and emulsified.
- Allow the ganache to come to room temperature before adding it to the cake. It should be thick enough to cling to the cake but still pourable.
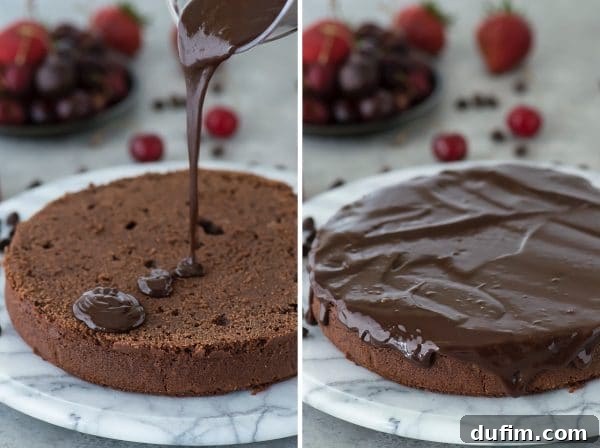
- Once the cake is completely cooled and the ganache has reached the desired consistency, spoon the ganache over the center of the cake, allowing it to gracefully drip down the sides. For a rustic look, you can spread it unevenly.
- Generously top the cake with fresh strawberries and cherries (or your chosen seasonal berries/toppings).
- Slice and serve this magnificent chocolate mud cake!
- Store any leftovers in an airtight container at room temperature for up to 3 days, or in the refrigerator for up to a week.
Pro Baking Tips for a Flawless Chocolate Mud Cake
Achieving the perfect chocolate mud cake is a delightful process, and a few expert tips can elevate your baking experience and results:
- Quality Ingredients Matter: Since chocolate is the star here, opt for high-quality bittersweet chocolate for the cake and semi-sweet chips for the ganache. Better chocolate equals better flavor.
- Don’t Overmix the Batter: After adding the dry ingredients, mix just until combined. Overmixing can develop the gluten in the flour too much, leading to a tougher, less tender cake. A dense cake is good, a tough cake is not.
- Proper Cooling is Key: Resist the urge to frost a warm cake. The cake must be completely cool before applying the ganache, otherwise, the ganache will melt and slide right off. This usually takes at least 1-2 hours, or even longer.
- Adjust Ganache Consistency: If your ganache is too thin, let it sit longer at room temperature, stirring occasionally, until it thickens. If it’s too thick, gently warm it over a double boiler for a few seconds, stirring until it reaches the desired consistency.
- Patience with Baking Time: Mud cakes take longer to bake due to their density. Don’t be alarmed by the longer baking time. The toothpick test is your best indicator for doneness.
- Pan Preparation: Properly buttering and lining your pan with parchment paper is crucial for preventing sticking and ensuring your beautiful cake releases easily.
Serving and Storage Suggestions
This classic chocolate mud cake is a standalone showstopper, but it can be made even more exquisite with thoughtful serving and storage:
- Serving Suggestions: Serve slices at room temperature to best appreciate its rich texture. It pairs wonderfully with a scoop of vanilla bean ice cream, a dollop of whipped cream, or a warm cup of coffee or espresso. For an extra touch, a sprinkle of sea salt flakes on top of the ganache can enhance the chocolate flavor.
- Storage: Store any leftover cake in an airtight container at room temperature for up to 3 days. If you need to keep it longer, it will last up to a week in the refrigerator. For longer storage, slices can be individually wrapped and frozen for up to 2-3 months. Thaw at room temperature before serving.
Nutrition Information
Calories: 455kcal
Carbohydrates: 52g
Protein: 5g
Fat: 26g
Saturated Fat: 16g
Polyunsaturated Fat: 1g
Monounsaturated Fat: 7g
Trans Fat: 1g
Cholesterol: 84mg
Sodium: 78mg
Potassium: 179mg
Fiber: 2g
Sugar: 32g
Vitamin A: 654IU
Vitamin C: 1mg
Calcium: 66mg
Iron: 2mg
All nutritional values are approximate and provided to the reader as a courtesy. Changing ingredients and/or quantities will alter the estimated nutritional calculations.
Like this recipe? We’d love to hear from you!
Rate and comment below to share your experience with this delicious chocolate mud cake!