
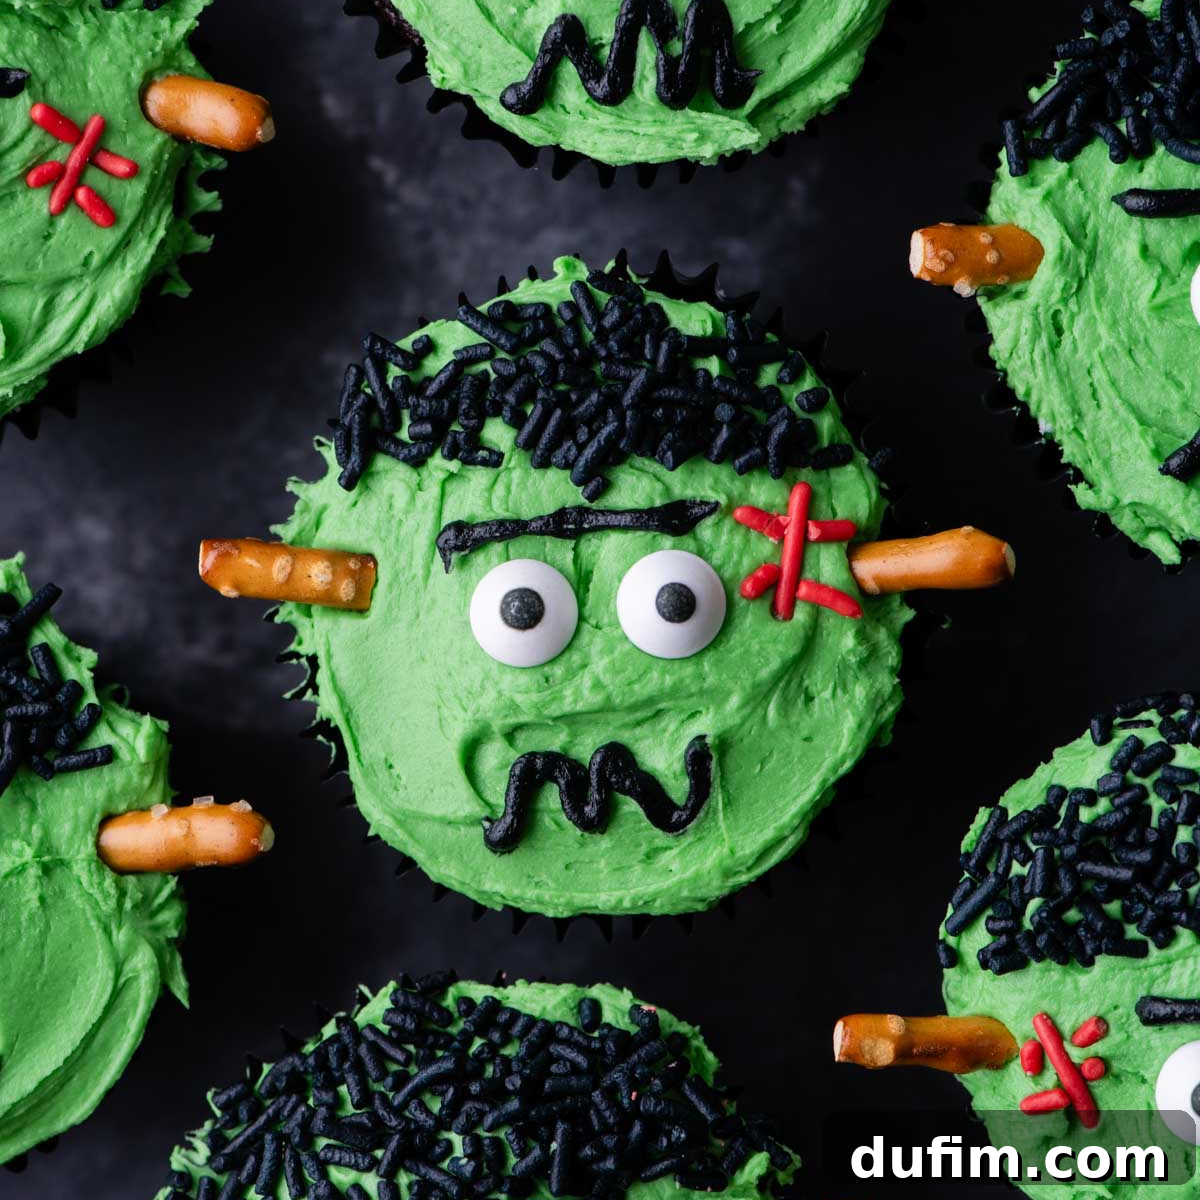
Spooktacular Frankenstein Cupcakes: The Ultimate Easy Halloween Treat
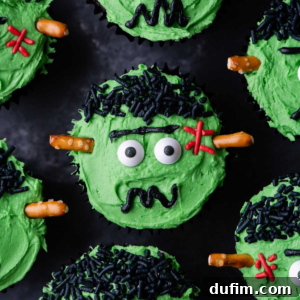
Prepare to delight everyone at your next Halloween gathering with these incredibly fun and delicious Frankenstein cupcakes! Not only are they surprisingly simple to create with our detailed, step-by-step guide, but these rich, moist chocolate cupcakes, topped with luscious homemade frosting, taste absolutely divine. They are a guaranteed crowd-pleaser that combines eerie charm with irresistible flavor, making them the perfect centerpiece for any spooky celebration.
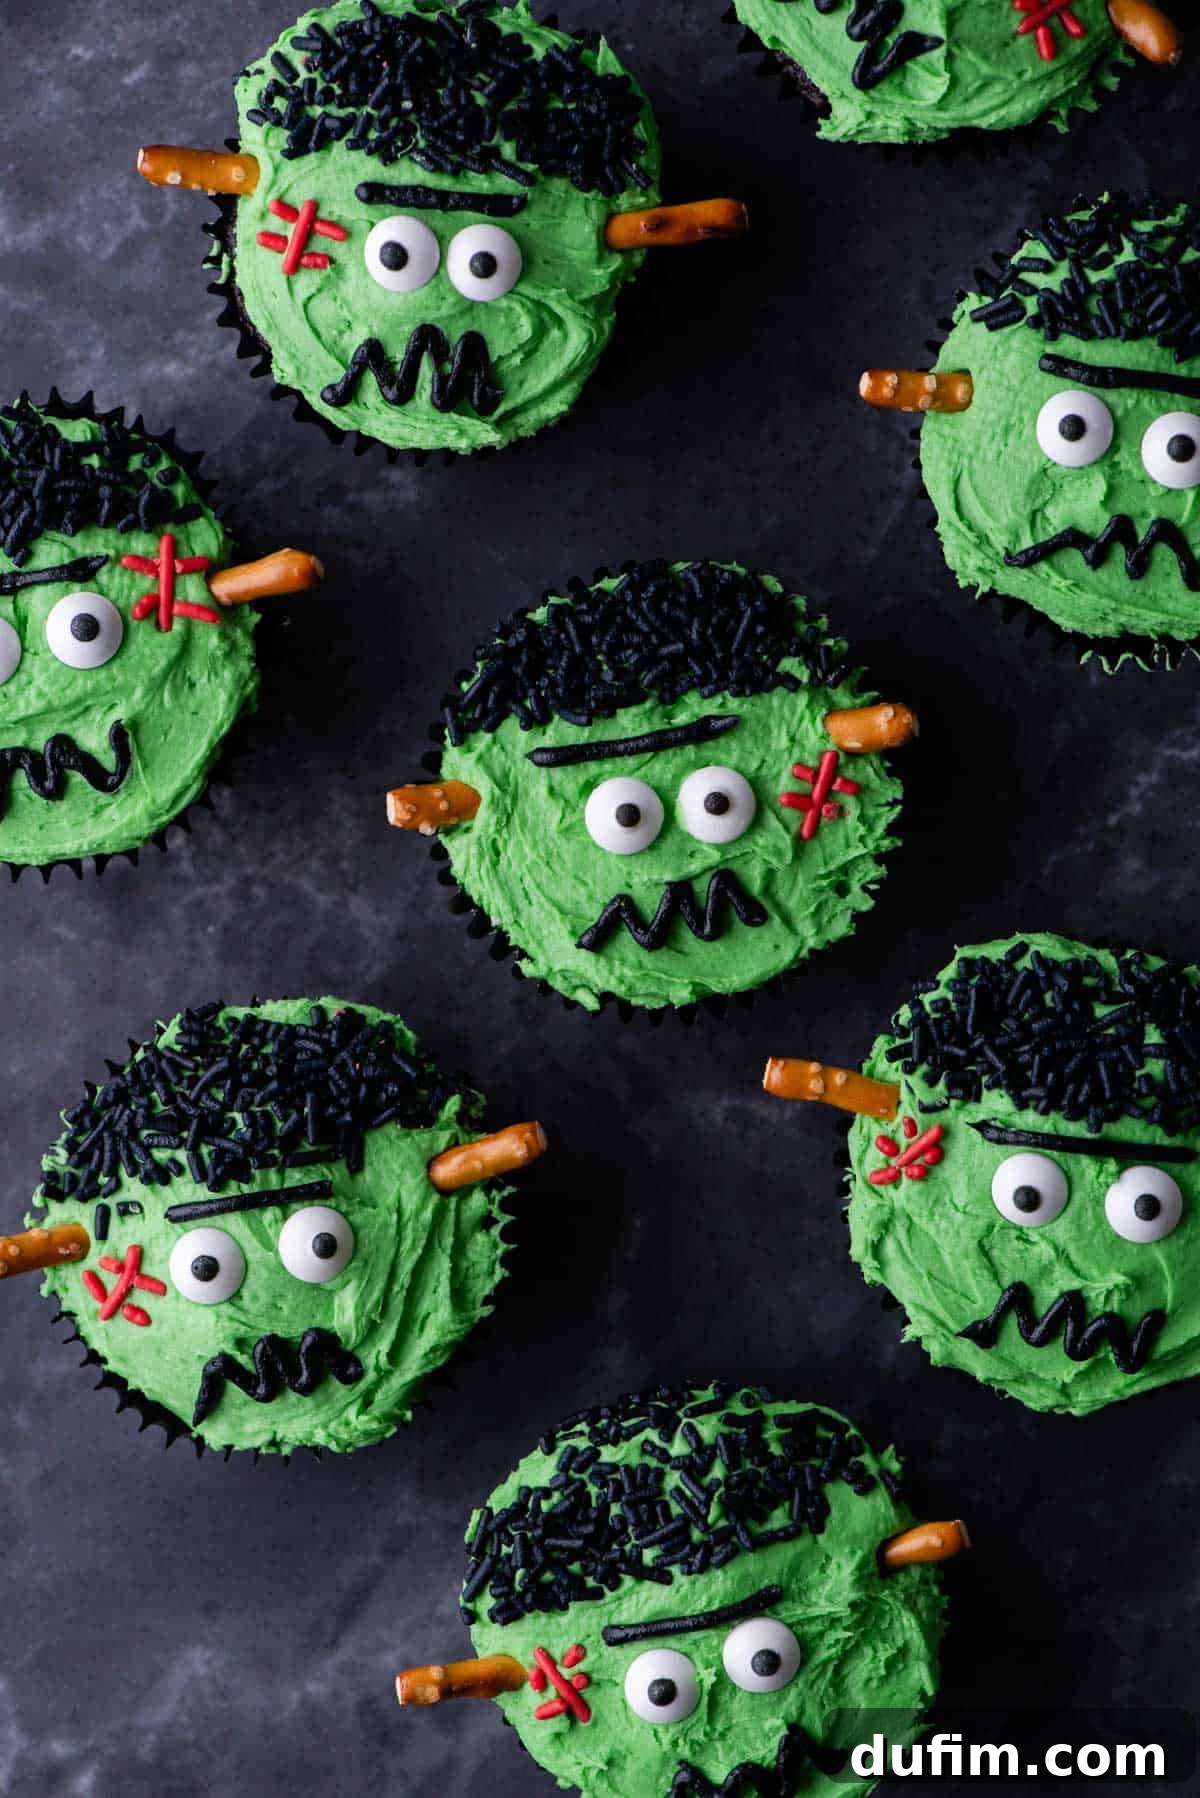
Why These Frankenstein Cupcakes Are Your Perfect Halloween Bake
Frankenstein cupcakes are the epitome of charming Halloween confectionery! Your family, friends, and party guests will be so captivated by their adorable appearance that they might even believe you’re a professional baker. Imagine their surprise when you reveal just how effortless it is to craft these perfect Frankenstein faces atop each cupcake, simply by following our easy instructions. You certainly don’t need expert baking skills to bring these cute monsters to life, making them accessible and enjoyable for bakers of all levels.
This recipe offers a fantastic blend of simplicity and spectacular results, making it ideal for busy individuals or families looking for a fun holiday project. Get ready to impress without the stress, and create memories in the kitchen that will last long after the last crumb is gone!
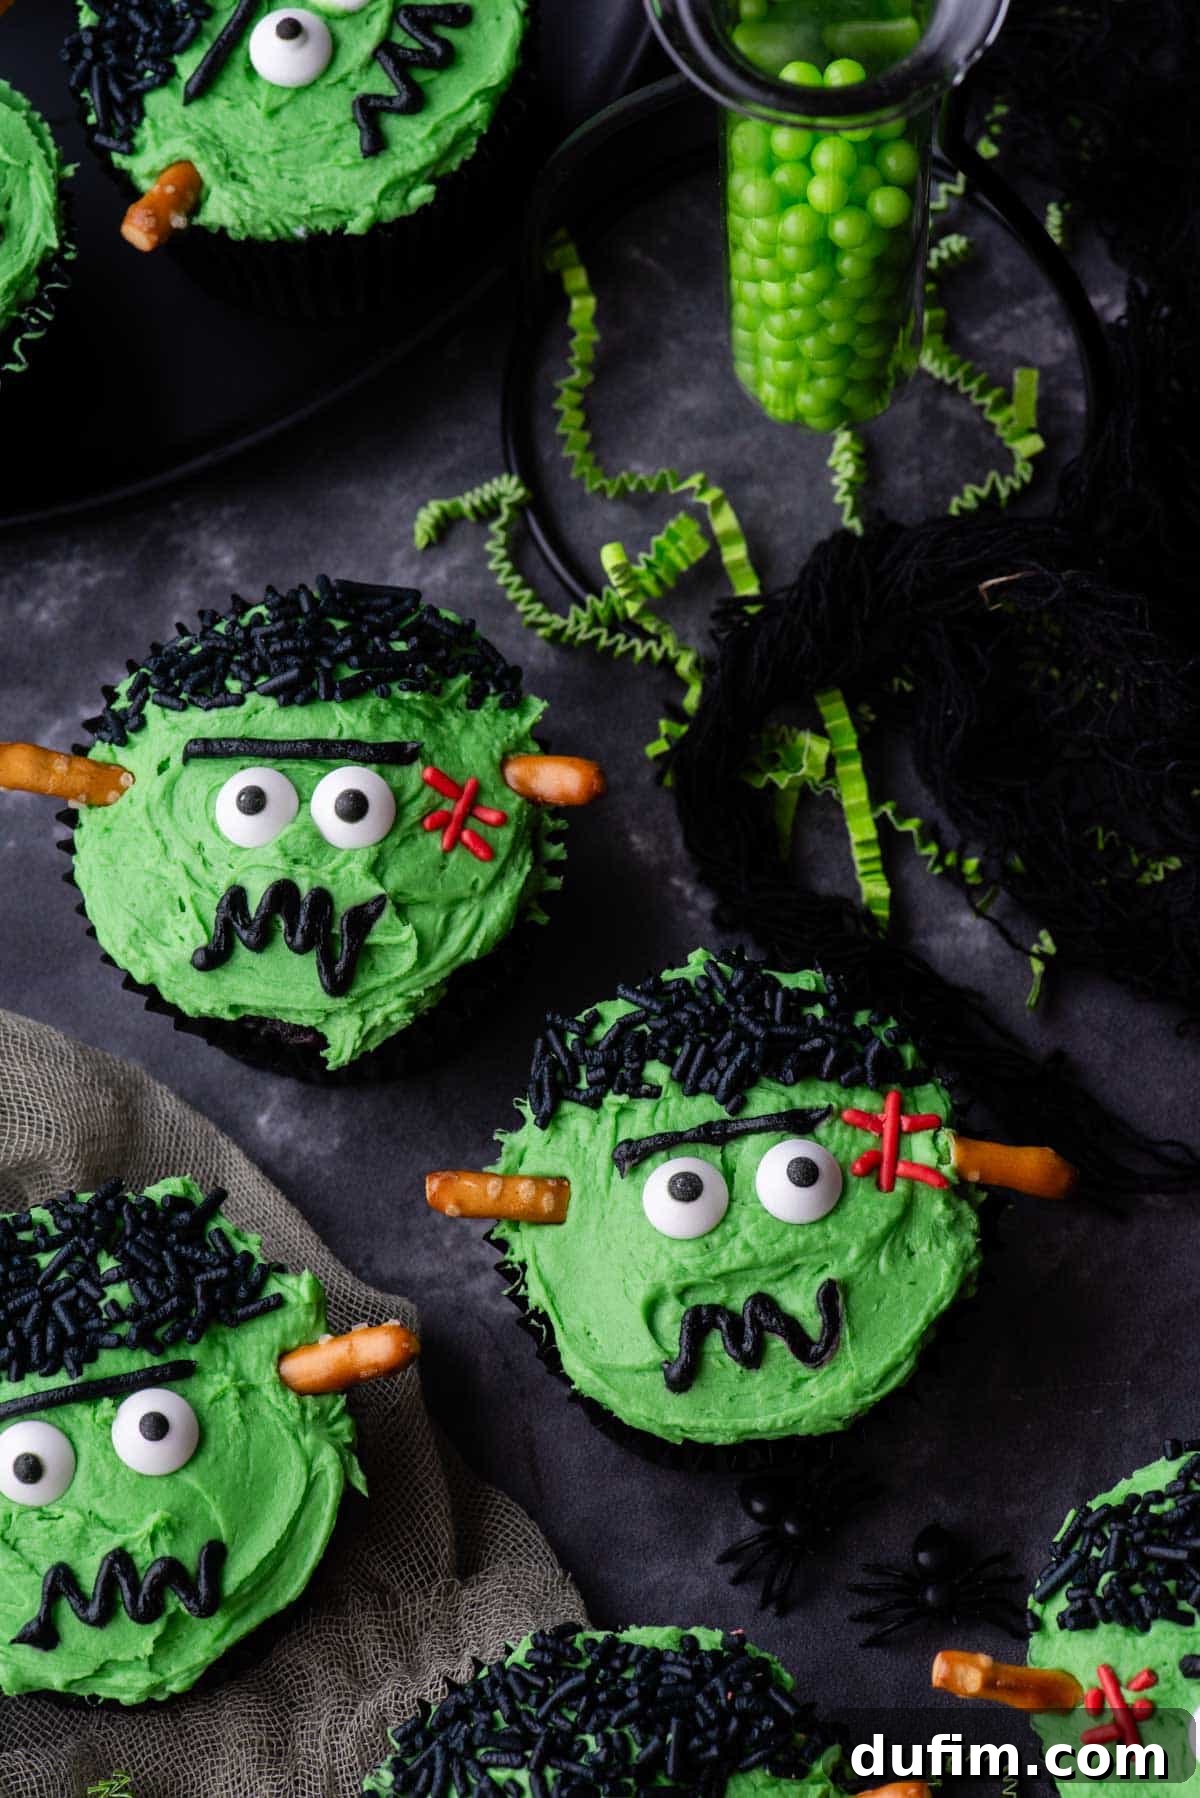
Top Reasons You’ll Love This Recipe
- Effortless Halloween Fun: Our simple, step-by-step guide ensures a stress-free baking and decorating experience, making it perfect for both seasoned bakers and beginners.
- Irresistibly Delicious: Indulge in the perfect combination of rich, moist chocolate cupcakes and a silky, homemade buttercream frosting that will delight every palate.
- Kid-Friendly Activity: This recipe is a fantastic opportunity to involve children in the kitchen. They’ll love helping to decorate these spooky yet cute treats, fostering creativity and making family bonding even sweeter.
- Party Perfect: These eye-catching cupcakes are guaranteed to be the star dessert at any Halloween party, school event, or family gathering. Their unique appearance makes them an instant conversation starter.
- Customizable Creativity: While we provide clear instructions, feel free to adapt colors and decorations to create your own unique monstrous creations, adding a personal touch to your Halloween spread.
- Show-Stopping Presentation: Impress everyone with beautifully decorated cupcakes that look professionally made, proving that delicious and visually stunning treats don’t have to be complicated.
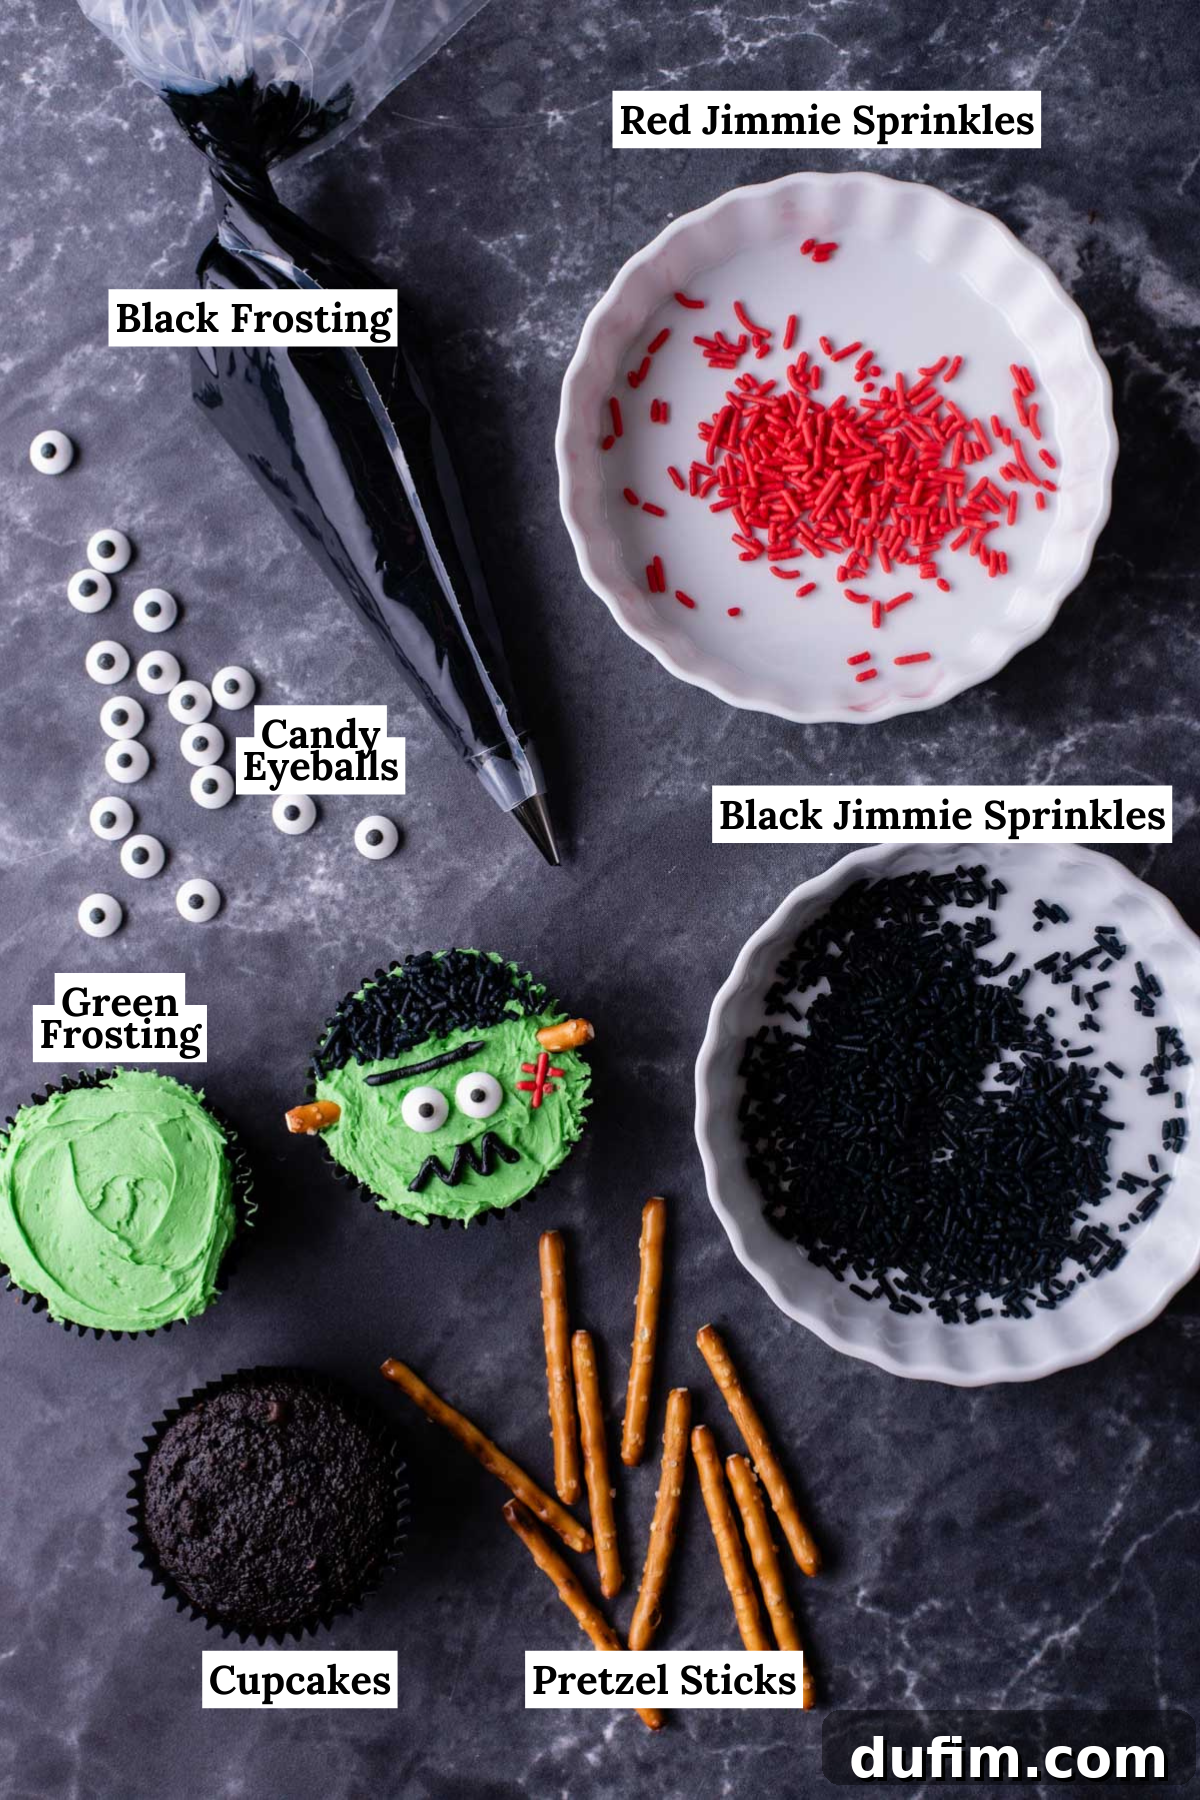
Essential Ingredients for Your Frankenstein Cupcakes
Crafting these adorable Frankenstein cupcakes involves a delightful combination of standard baking staples and a few fun, specialty decorative elements to bring the iconic monster to life. Most items you’ll likely already have in your pantry, with perhaps a quick trip to the store for the specialty Halloween decor. We’ve meticulously chosen ingredients that ensure both incredible flavor and perfect texture for your spooky treats.
For the Moist Chocolate Cupcakes
- All-Purpose Flour: This is the structural backbone of our cupcakes, providing a tender crumb and consistent texture. Measure it accurately by spooning it into your measuring cup and leveling off.
- Cocoa Powder: For that deep, intense chocolate flavor and rich color, you can use either natural unsweetened cocoa powder or Dutch-processed cocoa powder. Each type offers a slightly different flavor profile, but both work beautifully here.
- Instant Coffee Granules (Optional): Our secret ingredient! While it won’t make your cupcakes taste like coffee, a teaspoon of instant coffee granules significantly enhances and deepens the chocolate flavor, making it more robust and decadent. It truly makes the chocolate sing.
- Baking Soda & Baking Powder: These are our essential leavening agents, working in tandem to ensure your cupcakes rise beautifully and achieve that desirable light, airy, and fluffy texture.
- Salt: A crucial ingredient that balances the sweetness, brightens the chocolate flavor, and brings all the ingredients into perfect harmony. Don’t skip it!
- Unsalted Butter: Ensure your butter is at perfect room temperature. This is vital for properly creaming it with sugar, which incorporates air into the batter, leading to a lighter and more tender cupcake.
- Granulated Sugar: This fine sugar not only sweetens the cupcakes but also contributes significantly to their moistness and tender structure.
- Eggs: Providing structure, richness, and helping to bind all the ingredients together, eggs are essential. Like butter, they should be at room temperature for optimal emulsification with the other ingredients.
- Buttermilk: Adds incredible moisture and tenderness to the cupcakes. Its natural acidity also reacts with the baking soda, creating a wonderfully soft and delicate crumb. If you don’t have buttermilk, a simple homemade substitute can be made by adding 1 tablespoon of white vinegar or lemon juice to a liquid measuring cup, then filling the rest with regular milk (up to 1 cup). Let it sit for 5-10 minutes until it slightly curdles.
- Hot Tap Water: This helps to “bloom” the cocoa powder, which intensifies its chocolate flavor. It also ensures the batter is smooth and well-hydrated, preventing a dry cupcake.
For the Creamy Homemade Buttercream Frosting
- Unsalted Butter: Again, room temperature butter is absolutely key for achieving a smooth, fluffy, and pipeable buttercream frosting. It whips up much better when soft.
- Vanilla Extract: A staple for any classic, delicious frosting, providing a warm and inviting flavor that complements the chocolate cupcakes perfectly.
- Powdered Sugar: Also known as confectioners’ sugar or icing sugar, this finely ground sugar dissolves effortlessly, ensuring your frosting is wonderfully smooth and free of any gritty texture.
- Milk or Heavy Cream: Used judiciously to adjust the frosting’s consistency. A dash can transform a thick frosting into a perfectly pipeable masterpiece, ensuring it’s neither too stiff nor too runny.
The Fun Frankenstein Decorations
These are the elements that truly bring your Frankenstein cupcakes to life, turning delicious bakes into adorable monsters!
- Candy Eyeballs: The iconic feature that gives your Frankenstein monster a personality. They come in various sizes, so choose ones that fit your cupcakes best.
- Piping Bag: An essential tool for neat and professional-looking frosting application, especially for the intricate details of Frankenstein’s face.
- Wilton 4 Piping Tip: This small round tip is ideal for drawing precise eyebrows and the squiggly mouth, allowing for fine detail work.
- Green and Black Gel Food Coloring: Gel food colorings are highly concentrated and preferred over liquid dyes. They provide vibrant, rich hues without adding excess moisture, which can thin out your frosting.
- Red Jimmie Sprinkles or Red Frosting: Used to create Frankenstein’s signature stitches. Jimmie sprinkles offer a quick and easy texture, while piped red frosting allows for more artistic control.
- Black Jimmie Sprinkles: Perfect for creating Frankenstein’s recognizable, textured hair. Their elongated shape gives a great visual effect.
- Pretzel Sticks: Broken into smaller pieces, these become the classic neck bolts, adding a wonderfully fun, edible, and crunchy detail to your monster.
Step-by-Step Guide: How to Make Spooktacular Frankenstein Cupcakes
Creating these impressive cupcakes is surprisingly straightforward, blending classic baking techniques with creative Halloween decorating. We’ll start with a rich, decadent chocolate cupcake base, then top it with a delectable homemade buttercream, dyed to perfection for Frankenstein’s iconic green skin and black hair. Finally, we’ll add candy eyeballs, sprinkle on the hair, create red stitches, and attach pretzel stick neck bolts to complete our monstrous masterpieces!
Baking the Perfect Chocolate Cupcakes
- Prepare Your Workspace: Begin by preheating your oven to 350º F (175º C). Line a standard 12-cup muffin pan with paper cupcake liners. This crucial first step ensures easy removal and quick cleanup, setting you up for baking success.
- Combine Dry Ingredients: In a large mixing bowl, thoroughly whisk together the all-purpose flour, cocoa powder (either natural unsweetened or Dutch-processed), the optional instant coffee granules, baking soda, baking powder, and salt. Whisking ensures all the leavening agents and dry components are evenly distributed, which is key for a consistent rise and texture in your finished cupcakes. Set this bowl aside for later use.
- Cream Wet Ingredients: In a separate, larger mixing bowl, use an electric mixer (either a handheld mixer or a stand mixer fitted with the paddle attachment) to beat the softened unsalted butter and granulated sugar for approximately 2 minutes. Continue beating until the mixture is light in color, pale, and remarkably fluffy. This creaming process incorporates air, which contributes significantly to a lighter and more tender cupcake. Next, crack in the two large eggs and beat for an additional 30 seconds, ensuring they are fully incorporated and the mixture is smooth.
- Alternate Wet and Dry Additions: With your electric mixer set to low speed, gradually add half of the buttermilk to the creamed wet ingredients, mixing for about 20 seconds until just combined. Next, add half of your reserved dry ingredient mixture and beat until no dry streaks of flour or cocoa powder remain in the batter. Then, pour in the remaining buttermilk along with the hot tap water, mixing just until the liquids are fully incorporated. Finally, add the remaining dry ingredients and beat on low speed only until the batter is smooth and well combined. It’s crucial not to overmix at this stage, as overmixing can develop the gluten in the flour too much, resulting in tough, dense cupcakes.
- Bake to Perfection: Carefully divide the cupcake batter evenly among the prepared muffin liners, filling each cup about 1/2 full. This ensures uniform baking and prevents overflow. Bake for 17-19 minutes at 350º F (175º C), or until a wooden toothpick inserted into the center of a cupcake comes out with just a few moist crumbs attached. A clean toothpick means it’s overbaked, while wet batter means it needs more time. Once baked, promptly remove the cupcakes from the oven and allow them to cool completely on a wire rack before you even think about frosting them. Attempting to frost warm cupcakes will cause the frosting to melt and slide right off, ruining your beautiful creations!
Crafting the Creamy Buttercream Frosting
A delicious frosting is just as important as the cupcake itself. This homemade buttercream is smooth, fluffy, and holds its shape perfectly for decorating.
- Whip Butter and Vanilla: In a clean mixing bowl, combine the softened unsalted butter and vanilla extract. Using an electric mixer, beat on medium-high speed for 1-2 minutes until the mixture becomes light, pale, and noticeably fluffy. This initial whipping incorporates air, resulting in a lighter frosting texture.
- Gradually Add Sugar: Slowly begin adding the powdered sugar, one cup at a time, to the butter mixture. Mix on low speed until each addition is fully incorporated before adding the next. This gradual process prevents a “sugar cloud” from forming in your kitchen and ensures a smooth, lump-free frosting. Continue until all the powdered sugar is mixed in and the frosting is smooth and creamy.
- Add Food Coloring (If Desired): If you plan to color the entire batch of frosting a single color (before dividing it for Frankenstein’s features), now is the ideal time to add your gel food coloring. Mix thoroughly until you achieve a uniform and vibrant color throughout the frosting.
- Adjust Consistency and Sweetness: Take a small taste of the frosting and determine if you prefer it sweeter; if so, add a little more powdered sugar. More importantly, assess its consistency. If the frosting feels too thick or stiff to spread or pipe easily, add a dash of milk or heavy cream, one teaspoon at a time, mixing after each addition, until it reaches your desired smooth and pipeable consistency.
- Optional Fluffy Frosting Boost: For an exceptionally light, airy, and truly pipeable frosting, incorporate 1/4 cup of heavy whipping cream when you are adding the last portion of powdered sugar. After all ingredients are combined, whip the frosting on high speed for an additional 3-4 minutes. This extra aeration will make your buttercream incredibly light, smooth, and easy to work with for intricate decorations.
Assembling Your Frankenstein Masterpieces
Now for the most exciting part – bringing your little monsters to life! The key to successful decorating is having all your components ready and working with a steady, confident hand. Take your time, and enjoy the creative process!
- Prepare the Black Frosting: First, scoop out approximately 1/2 cup of your prepared homemade frosting into a separate small bowl. Add a few drops of black gel food coloring (gel colors are best for intense hues) and mix thoroughly until you achieve a deep, vibrant black. Alternatively, to save time, you can use pre-made black frosting from the store. Transfer this black frosting into a piping bag that has been fitted with a Wilton 4 round piping tip. This tip is excellent for drawing fine lines and details.
- Prepare the Green Frosting: Take the remaining larger portion of frosting and dye it green using green gel food coloring. Mix well until the color is consistent throughout and you have achieved a bright, monster-like green. Transfer this green frosting into another piping bag, or simply use an offset spatula if you prefer to spread the frosting rather than pipe it.
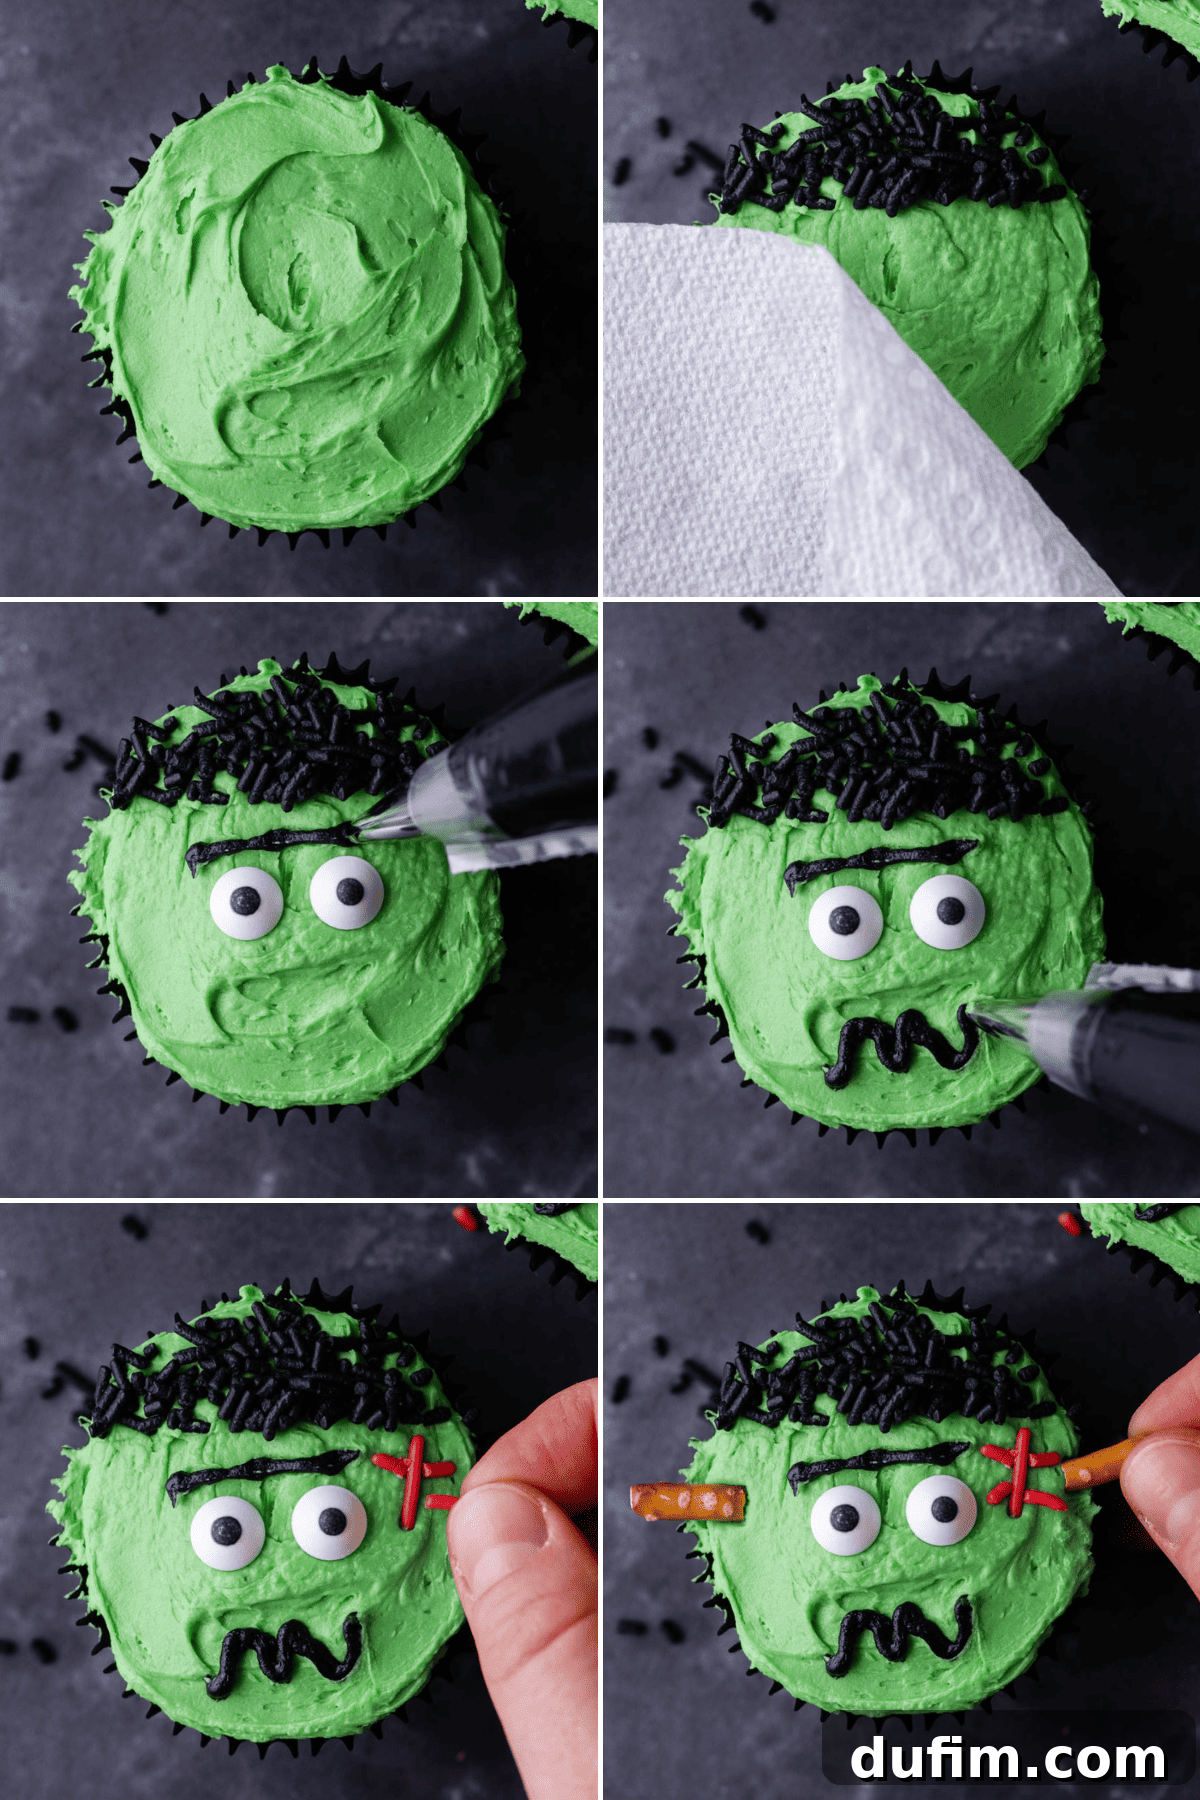
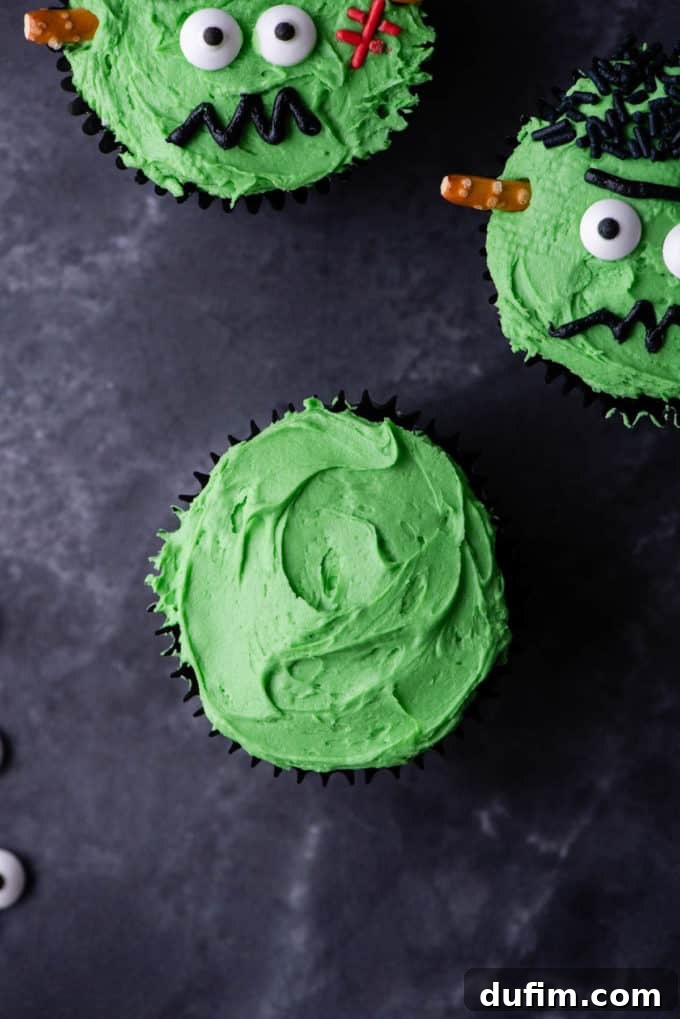
- Begin Decorating – The Hair and Face: Take a fully cooled chocolate cupcake. Using a small offset spatula or a piping bag, spread a generous layer of the green frosting evenly over the top of the cupcake. This forms the base of Frankenstein’s face. To create his distinctive black hair, gently take a piece of paper towel or parchment paper and cover the bottom two-thirds of the frosted cupcake, leaving only the top third exposed. Carefully sprinkle black jimmie sprinkles generously over the exposed top third of the cupcake. The paper towel acts as a shield, ensuring the sprinkles only adhere where you want them, forming a neat and defined hairline. Gently remove the paper towel once done.
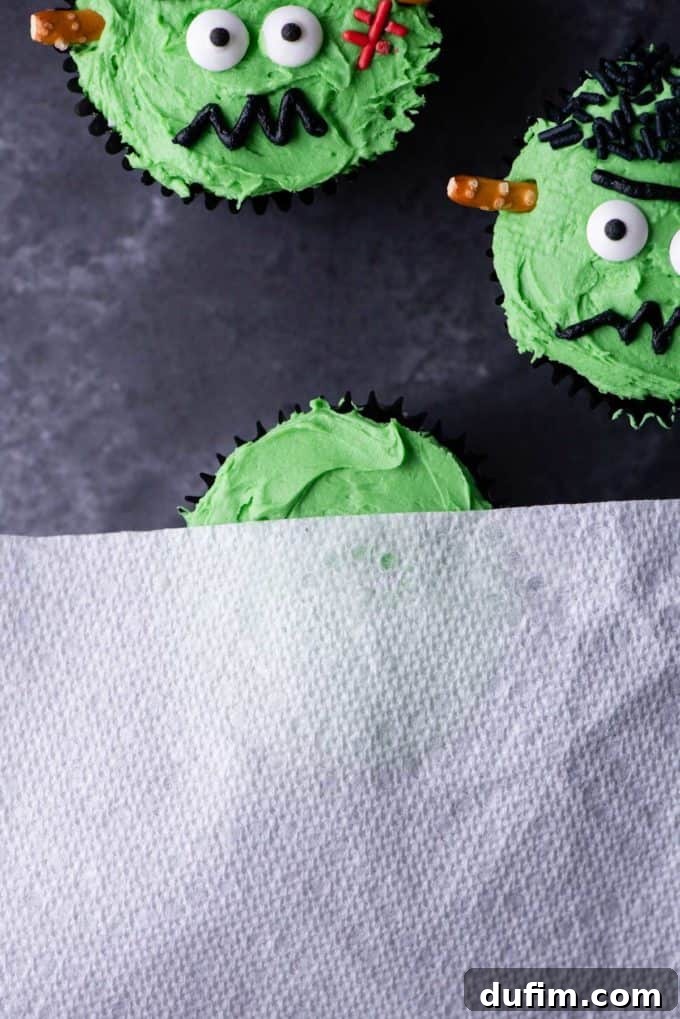
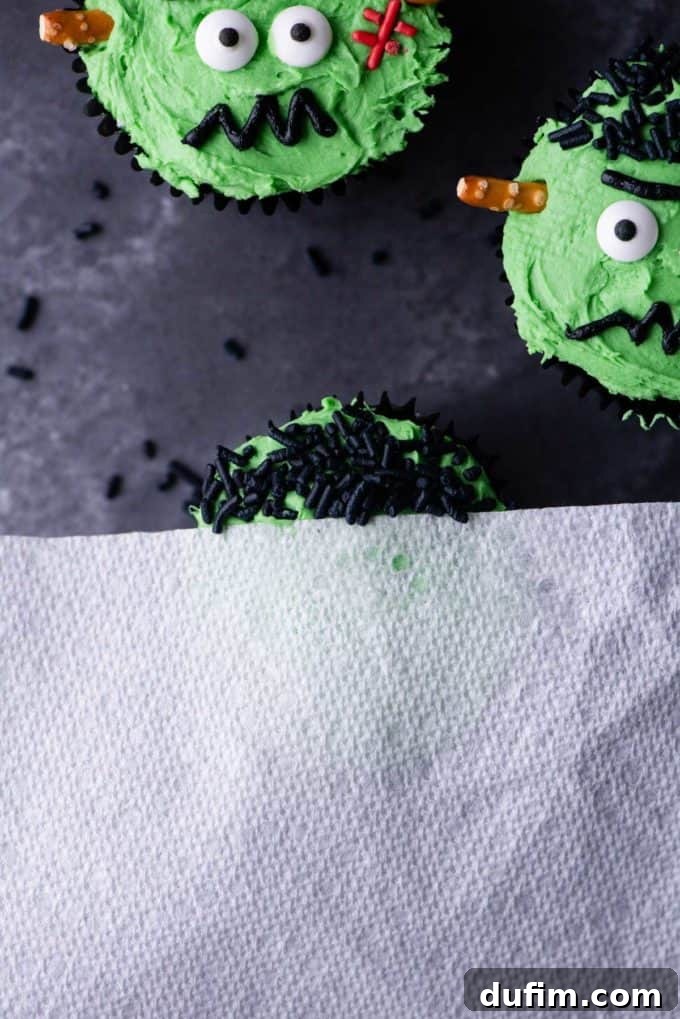
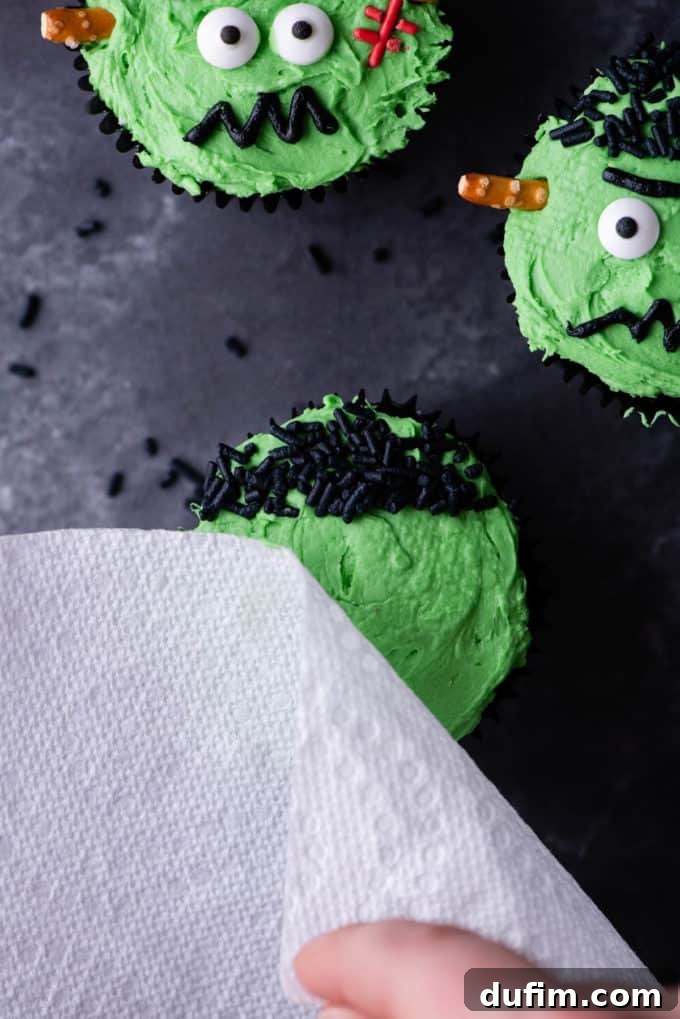
- Add Facial Features: With the hair in place, carefully add two candy eyeballs onto the green frosting, positioning them appropriately to give your Frankenstein monster his signature gaze. Using the piping bag with black frosting and the Wilton 4 tip, gently pipe a straight line just above each candy eyeball to create distinct eyebrows. Then, below the eyes, pipe a whimsical, squiggly line to form his iconic mouth. The precision here can really define the unique character and expression of each monster!
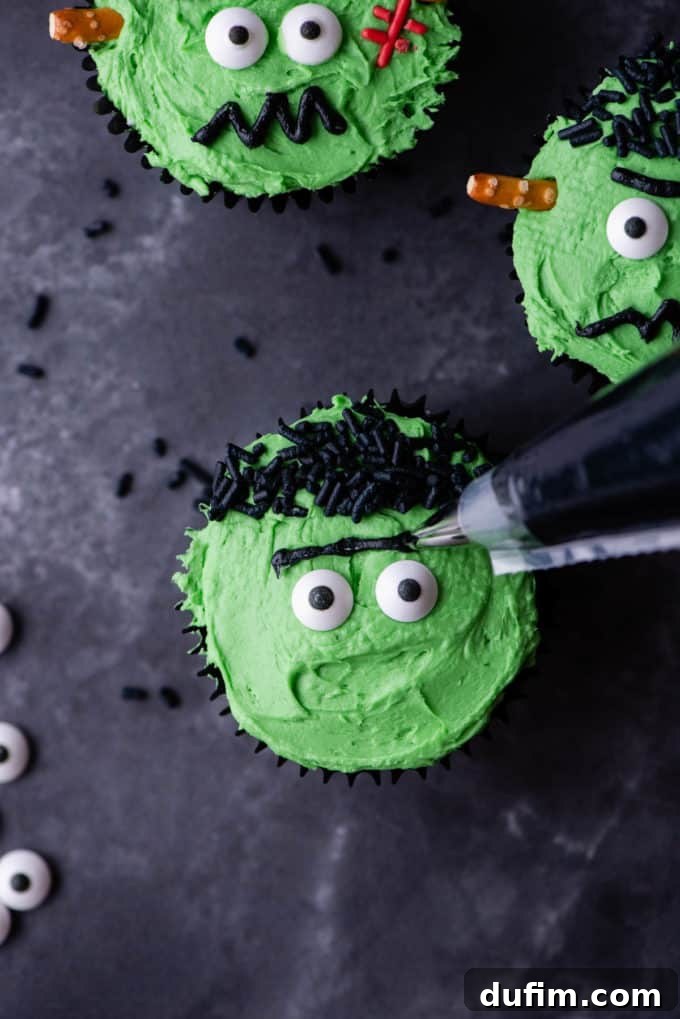
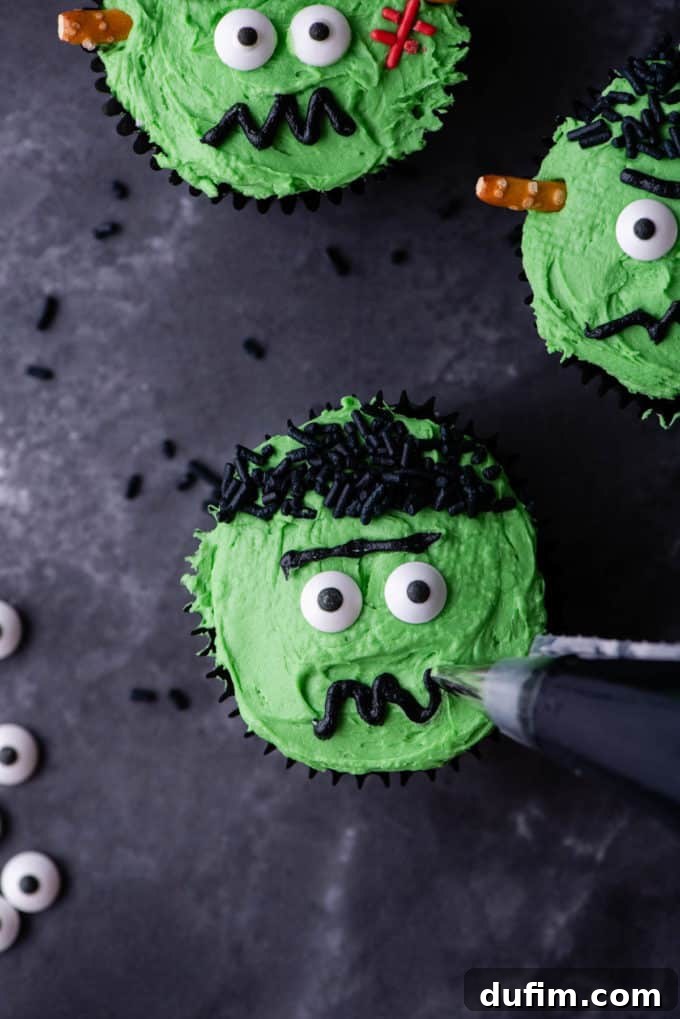
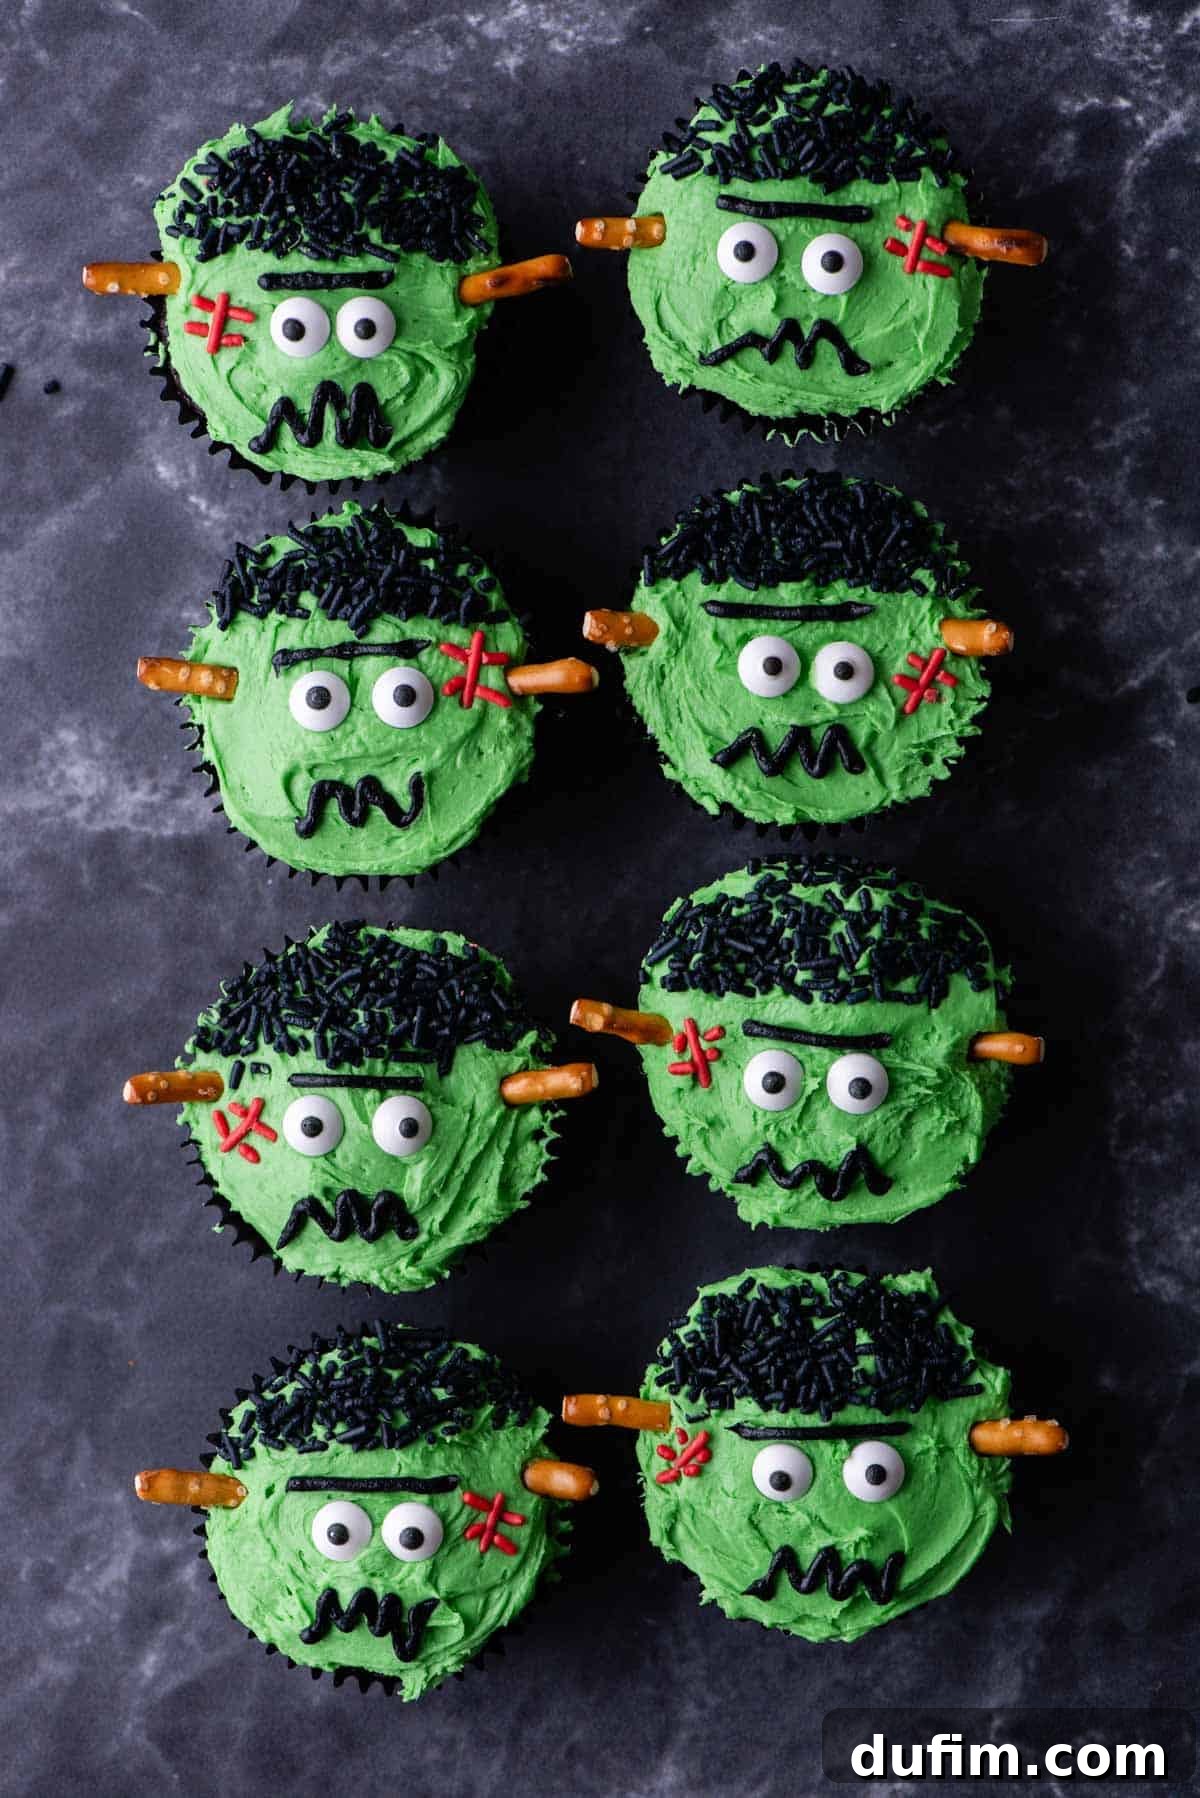
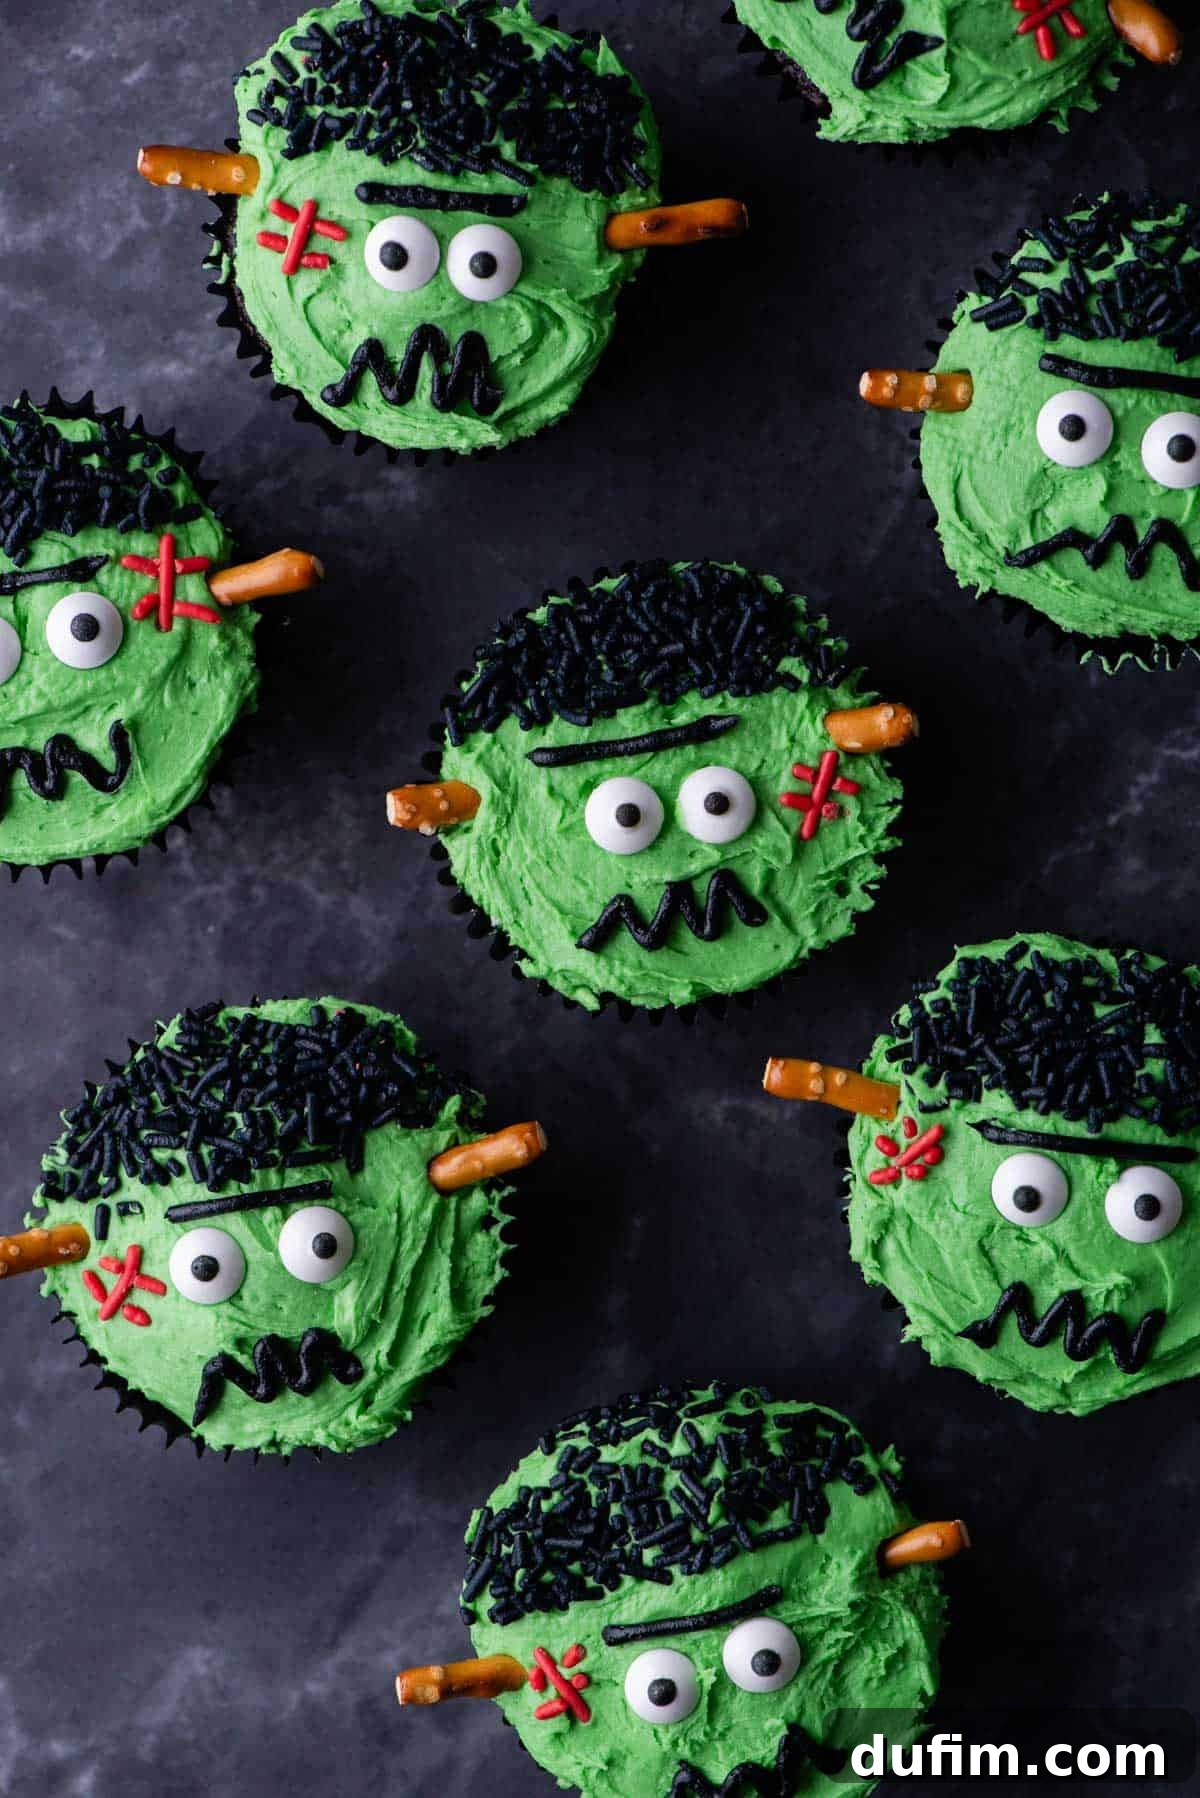
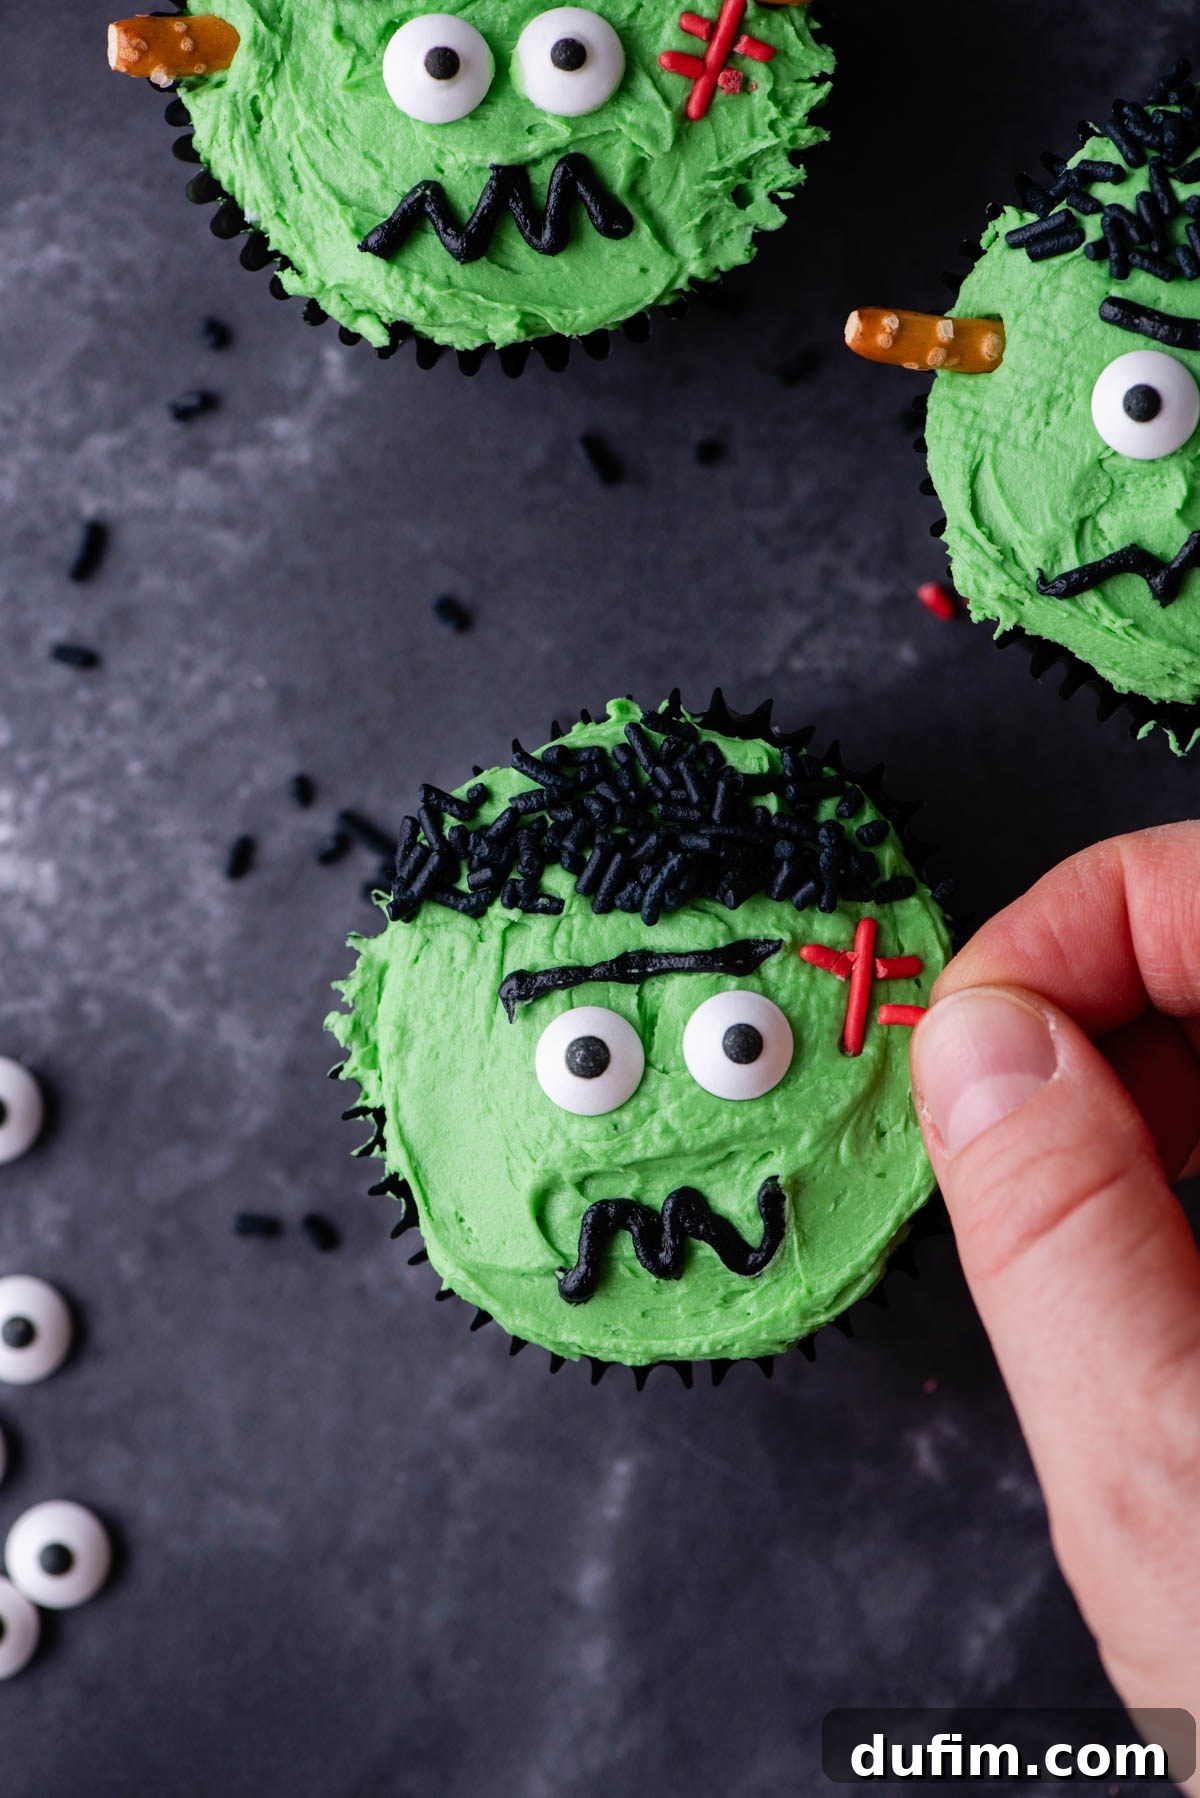
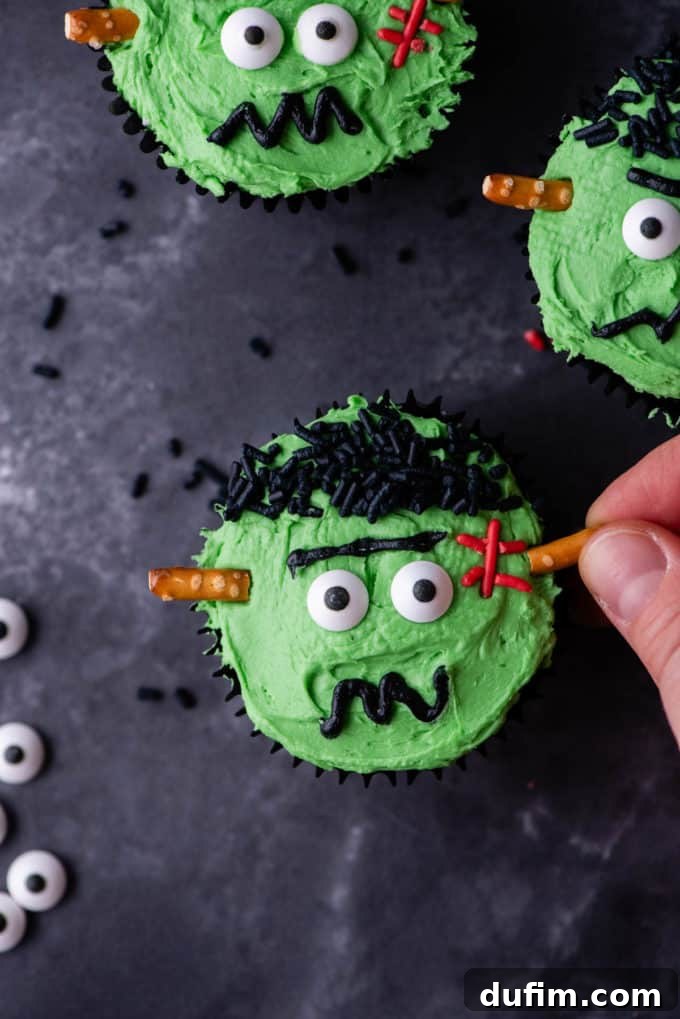
- Finishing Touches – Stitches and Bolts: For Frankenstein’s iconic stitches, gently press several red jimmie sprinkles onto the green frosting in small, short lines across the forehead or cheek. If you opted for red frosting, you can pipe tiny stitch marks instead. Finally, break your pretzel sticks into smaller, manageable pieces – usually about 1 to 1.5 inches long. Carefully insert one pretzel piece into each side of the cupcake, just below the “face,” to represent Frankenstein’s distinctive neck bolts. Repeat these exciting decorating steps for all remaining cupcakes, creating a whole army of adorable, spooky monsters ready for your Halloween celebration!
Storing & Freezing Suggestions for Your Frankie Treats
While these beautifully decorated Halloween cupcakes are truly at their best when enjoyed fresh, there are practical ways to manage them if you need to prepare them in advance or have delicious leftovers. Due to the creamy buttercream frosting and the delicate nature of the decorations, these treats are ideally consumed on the day they are made for optimal freshness, texture, and visual appeal.
If you absolutely need to store them, carefully place the decorated cupcakes in an airtight container to protect the frosting and keep them fresh. They can be safely kept at room temperature on the counter for up to 2 days. For extended storage, you can refrigerate them for up to 4-5 days. However, be aware that refrigeration can sometimes alter the texture of the cupcake, making it slightly firmer, and may cause the frosting to stiffen. For the best flavor and consistency, always allow refrigerated cupcakes to come back to room temperature for about 30 minutes to an hour before serving.
For those who love to plan ahead and minimize day-of stress, we highly recommend baking the chocolate cupcakes a day or two in advance. Once fully cooled, store the plain, unfrosted cupcakes in an airtight container at room temperature. Then, prepare the frosting and decorations closer to your event date, ideally a few hours before you plan to serve them. This approach ensures the freshest possible look and taste for your Frankenstein creations. Freezing fully decorated cupcakes is generally not recommended, as the delicate frosting and decorative elements can easily be compromised during the freezing and thawing process, potentially leading to a less appealing presentation.
Looking for More Spooktacular Halloween Cupcake Ideas?
If you’ve loved making these Frankenstein cupcakes and are eager for more festive baking inspiration, you’re in luck! Explore our extensive collection of fun and easy Halloween cupcake recipes. Each one is designed to bring a unique touch of spooky charm, delightful flavors, and creative fun to your holiday celebrations. From cute ghosts to creepy spiders, there’s a cupcake for every Halloween theme!
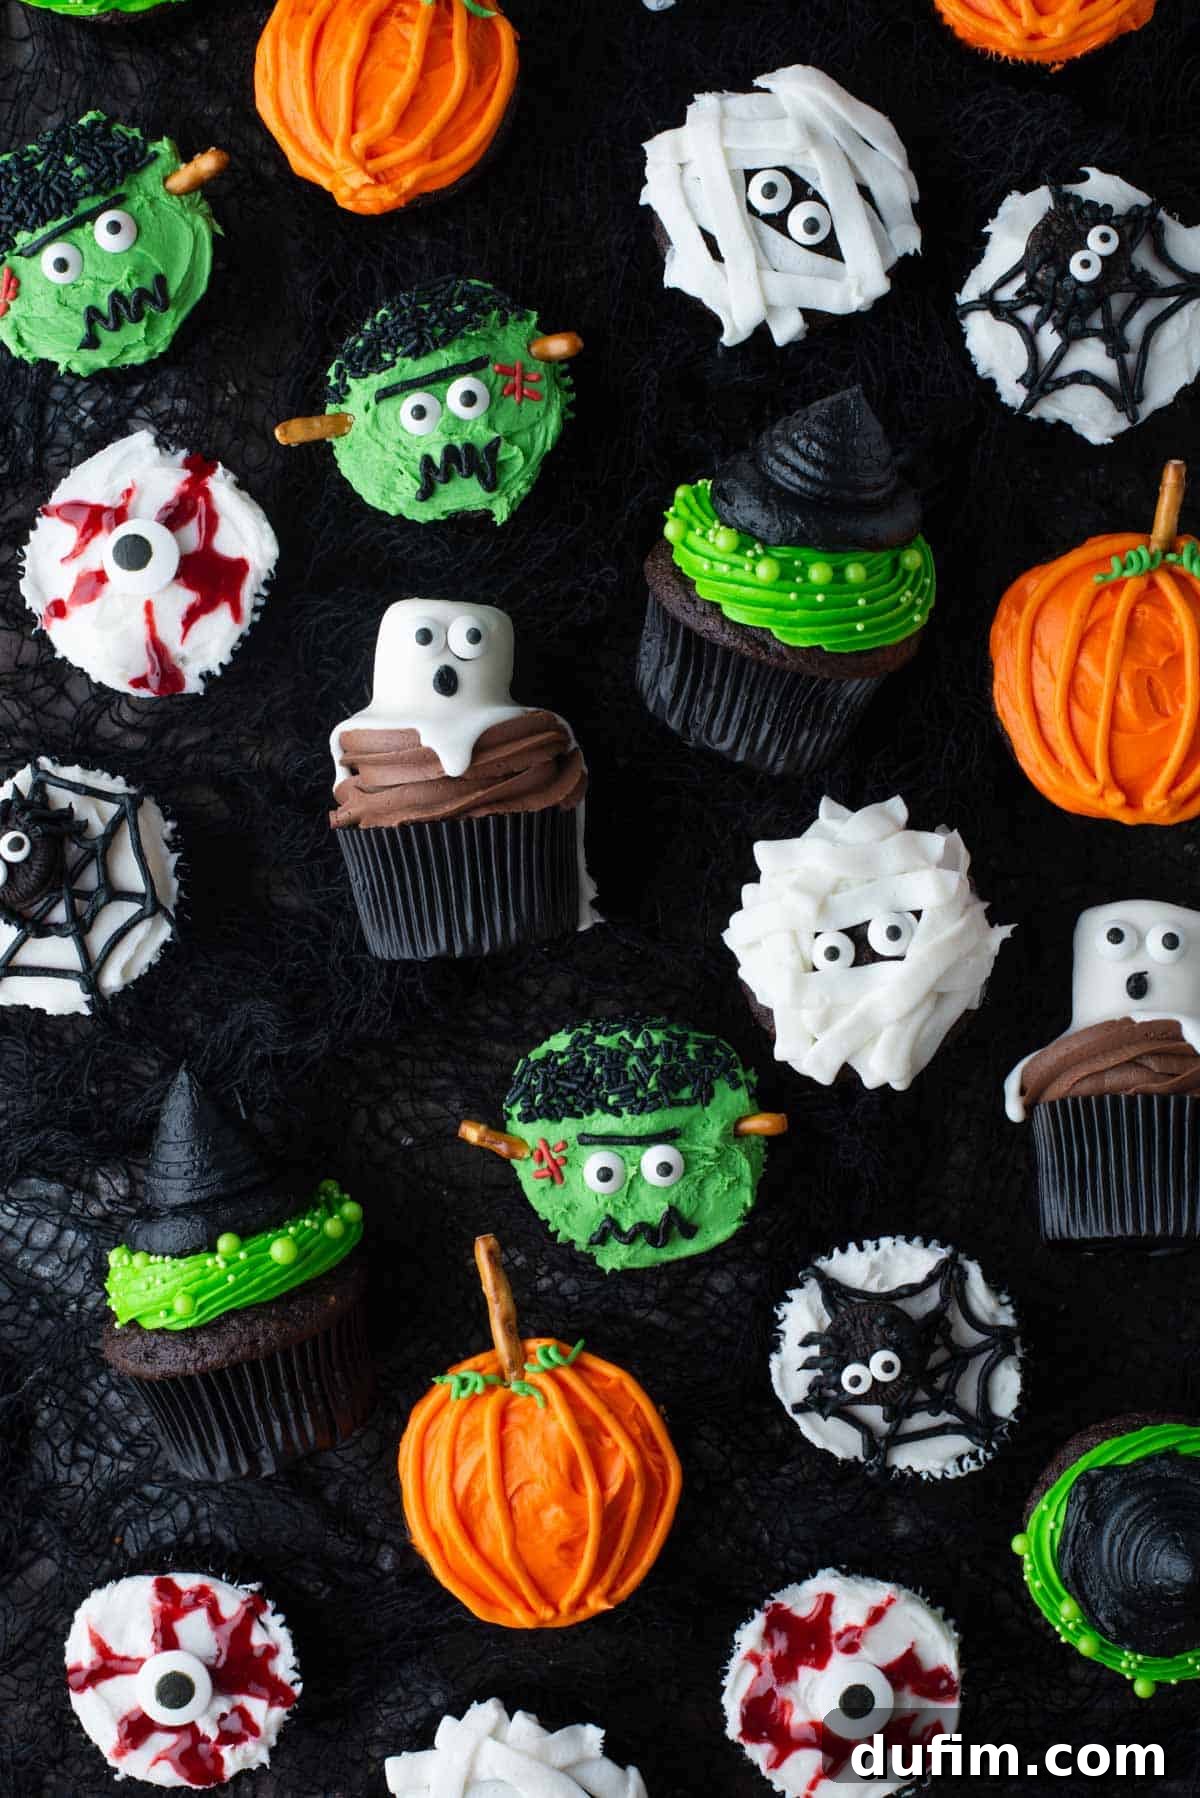
- Mummy Cupcakes: Wrap up some deliciousness with these adorable, bandaged treats.
- Witch Hat Cupcakes: Magically delicious and surprisingly easy to assemble, perfect for a coven of bakers.
- Eyeball Cupcakes: Spooky, gory, and surprisingly tasty, these will be watching you!
- Pumpkin Patch Cupcakes: A charming and flavorful fall-themed treat that brings the harvest indoors.
- Spider Web Cupcakes: Intricate-looking but incredibly simple to create, perfect for a spooky surprise.
- Ghost Cupcakes: Ethereally cute and melt-in-your-mouth good, these friendly spirits are a hit.
- Spider Cupcakes: Creepy-crawly fun for all ages, these eight-legged treats are a delightful fright.
Beyond Cupcakes: More Delightful Halloween Recipes
Extend your Halloween culinary adventures beyond just cupcakes with these other fantastic festive treats. From eerie popcorn balls to spooky brownies, we have something to make your holiday spread truly memorable and full of delightful frights!
- Ghost Popcorn Balls: A classic chewy treat given a spectral twist for Halloween.
- Nutter Butter Tombstones: Simple, peanut buttery, and perfectly spooky, these are quick to assemble.
- Candy Corn Pretzels: A perfect balance of sweet and salty, creating a quick and colorful holiday snack.
- Melted Witch Brownies: A humorous and decadently rich dessert that tells a fun Halloween story.
Frankenstein Cupcakes Recipe Card
Frankenstein Cupcakes
(Recipe rating placeholder – actual functionality removed for pure HTML output.)
By: Beth
- Prep Time: 35 minutes
- Cook Time: 19 minutes
- Cooling Time: 30 minutes
- Servings: 24 cupcakes
Get ready to create the most adorable and delicious Frankenstein cupcakes for your Halloween party! This step-by-step guide makes baking fun and easy, with moist chocolate cupcakes and creamy homemade frosting.
Equipment
- Glass Mixing Bowl
- Your Favorite Spatula
- Muffin Pan
- KitchenAid 9-Speed Mixer
Ingredients
Chocolate Cupcakes
- 2 cups (240g) all-purpose flour
- ¾ cup (63g) cocoa powder (natural unsweetened or Dutch-processed)
- 1 tsp instant coffee granules (such as Folger’s, optional)
- ½ tsp baking soda
- 1 tsp baking powder
- 1 tsp salt
- ½ cup (113g) unsalted butter (1 stick, at room temperature)
- 1 ½ cups (297g) granulated sugar
- 2 large eggs (at room temperature)
- 1 cup (236ml) buttermilk
- ½ cup (118ml) hot tap water
Frosting
- 1 ½ cups (339g) unsalted butter (3 sticks, at room temperature)
- 1 tsp vanilla extract
- 2-3 cups (227-339g) powdered sugar
- Dash of milk or heavy cream (if frosting becomes too thick)
Extras
- Candy eyeballs
- Piping bag
- Wilton 4 piping tip
- Green and black gel food coloring
- Red jimmie sprinkles or red frosting
- Black jimmie sprinkles
- Pretzel sticks
Discover more delightful baking resources.
Instructions
Chocolate Cupcakes
- Preparation: Preheat your oven to 350º F (175º C). Line a 12-cup muffin pan with paper cupcake liners.
- Combine Dry Ingredients: In a medium mixing bowl, thoroughly whisk together 2 cups (240g) all-purpose flour, ¾ cup (63g) cocoa powder, 1 tsp instant coffee granules (if using), ½ tsp baking soda, 1 tsp baking powder, and 1 tsp salt. Set this mixture aside.
- Cream Wet Ingredients: In a separate large mixing bowl, beat ½ cup (113g) unsalted butter and 1 ½ cups (297g) granulated sugar with an electric mixer for 2 minutes, until the mixture is light, pale, and fluffy. Add 2 large eggs and beat for an additional 30 seconds until fully incorporated.
- Alternate Additions: Add half of the 1 cup (236ml) buttermilk to the wet mixture and beat for about 20 seconds. Then, add half of the dry ingredients and mix until just combined. Next, pour in the remaining buttermilk along with ½ cup (118ml) hot tap water, mixing just until the liquids are incorporated. Finally, add the remaining dry ingredients and beat on low speed until the batter is smooth and well combined. Be careful not to overmix.
- Bake: Fill the prepared muffin liners approximately 1/2 full with batter. Bake for 17-19 minutes at 350º F (175º C), or until a toothpick inserted into the center of a cupcake comes out with only a few moist crumbs attached. Allow the cupcakes to cool completely on a wire rack before proceeding to frost them.
Frosting
- Mix Butter and Vanilla: In a clean mixing bowl, combine 1 ½ cups (339g) softened unsalted butter and 1 tsp vanilla extract. Beat using an electric mixer until the mixture is light and fluffy, typically for 1-2 minutes.
- Add Powdered Sugar: Gradually add 2-3 cups (227-339g) powdered sugar to the butter mixture, mixing on low speed until each addition is fully combined and the frosting is smooth.
- Coloring: If you intend to color the entire batch of frosting a single color, add your green and black gel food coloring now and mix until the desired hue is achieved.
- Adjust Consistency: Taste the frosting and add more powdered sugar if you prefer it sweeter. If the frosting becomes too thick to work with, add a dash of milk or heavy cream (starting with 1 teaspoon at a time) until it reaches a perfectly spreadable and pipeable consistency.
- Optional Fluffy Frosting: For an exceptionally light and airy frosting, add 1/4 cup of heavy whipping cream along with the last portion of powdered sugar. Whip the entire frosting mixture on high speed for an additional 3-4 minutes to incorporate extra air.
Assemble
- Prepare Black Frosting: Remove approximately ½ cup of the prepared frosting and dye it black using black gel food coloring. Transfer this black frosting into a piping bag fitted with a Wilton 4 round piping tip.
- Prepare Green Frosting: Dye the remaining larger portion of frosting green using green gel food coloring.
- Decorate Hair: Spread a generous amount of the green frosting evenly over the top of each completely cooled cupcake. To create Frankenstein’s distinctive hair, gently cover the bottom ⅔ of the frosted cupcake with a piece of paper towel or parchment paper, leaving the top third exposed. Generously sprinkle black jimmie sprinkles onto the exposed top third of the cupcake. Carefully remove the paper towel.
- Add Facial Features: Place 2 candy eyeballs onto the green frosting, positioning them appropriately. Using the piping bag with black frosting and the Wilton 4 tip, draw a straight line above each candy eyeball for eyebrows. Then, pipe a whimsical, squiggly line below the eyes to form Frankenstein’s mouth.
- Finish Details: Use red jimmie sprinkles (or pipe small lines of red frosting) to create Frankenstein’s iconic stitches across the face. Finally, break pretzel sticks into smaller pieces (about 1 to 1.5 inches long). Insert one pretzel piece into each side of the cupcake, just below the “face,” to represent Frankenstein’s neck bolts. Repeat these decorating steps for all remaining cupcakes.
Nutritional Information Disclaimer
All nutritional values provided in recipes are approximate and offered to the reader as a courtesy. Please be aware that changing ingredients, brands, and/or quantities will alter the estimated nutritional calculations. For precise nutritional information, it is recommended to conduct your own calculations based on the specific ingredients you use.
Loved creating these spooky treats? We’d love to hear your thoughts! Please feel free to share your experience and rate the recipe below!