
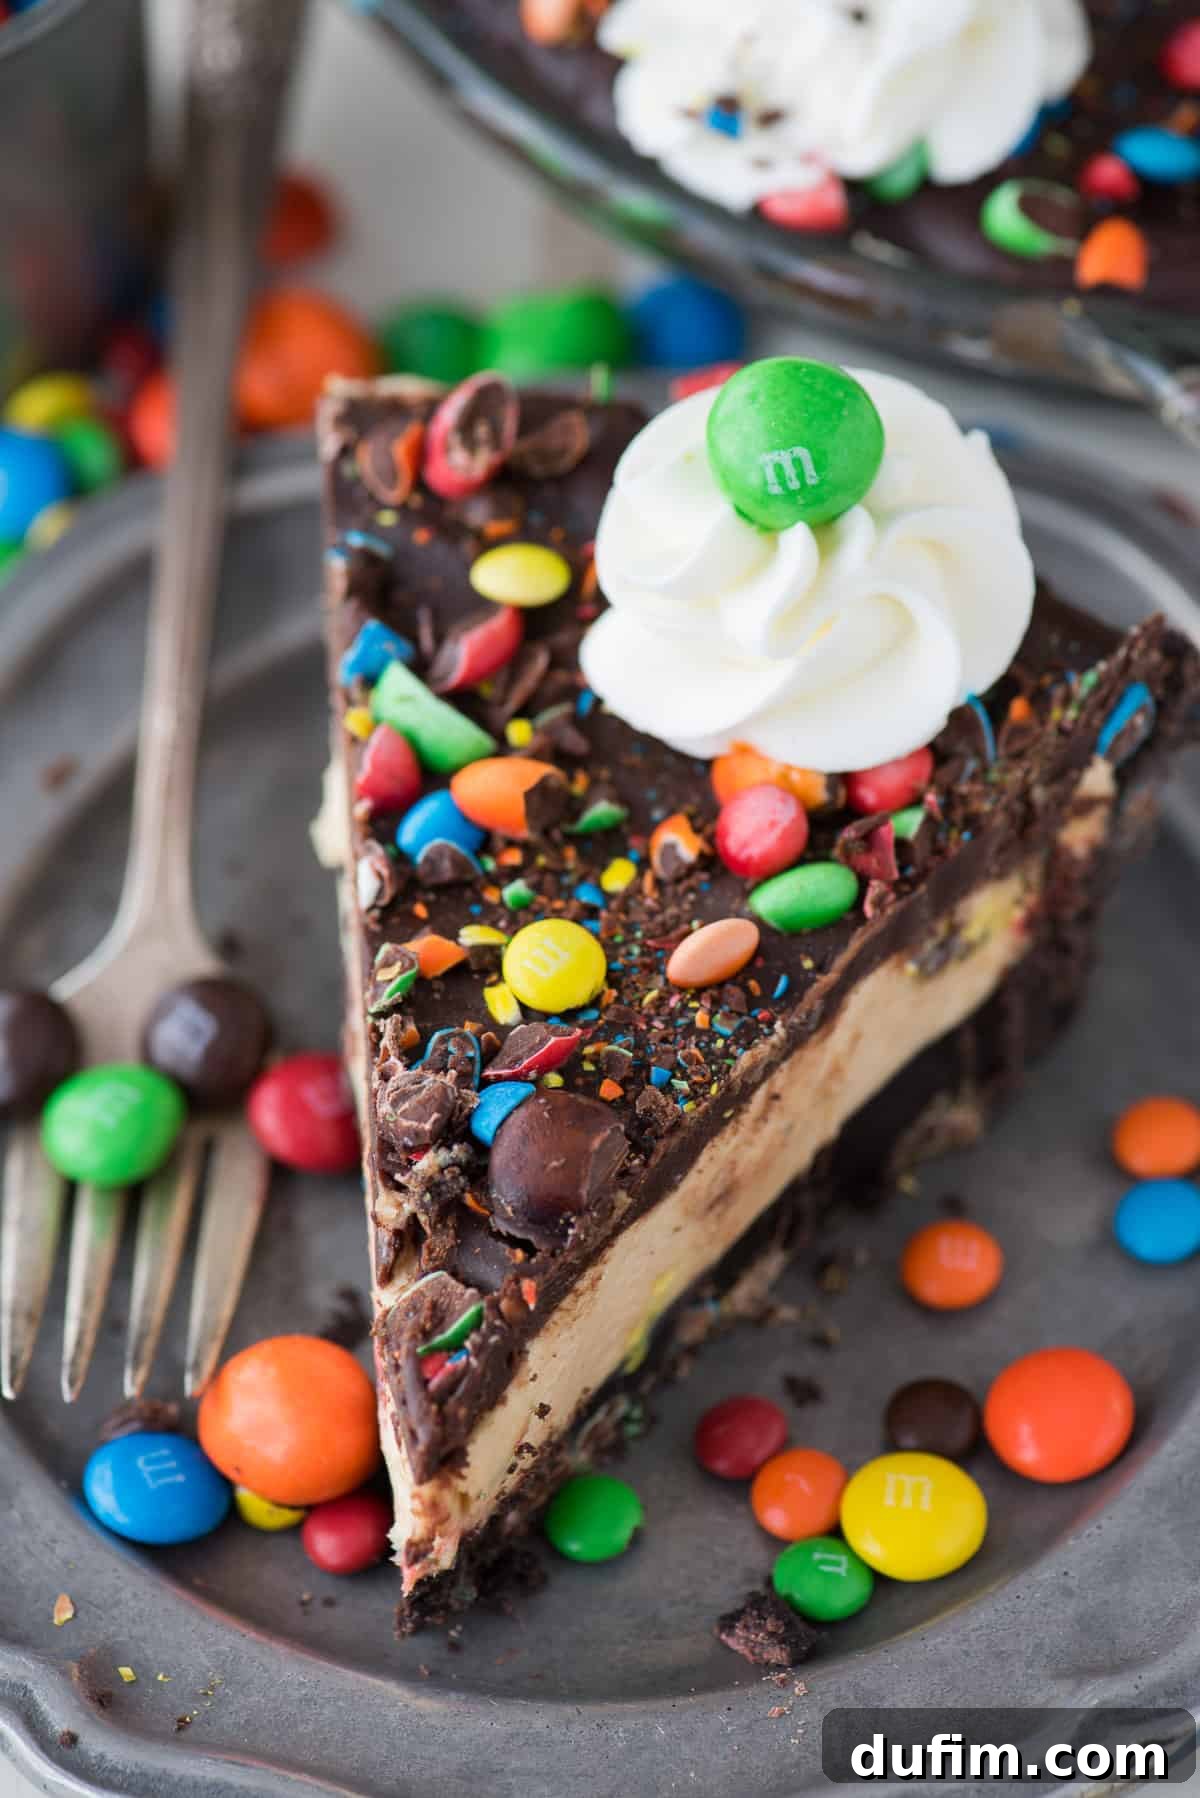
The Ultimate No-Bake M&M Pie: Easy, Delicious & Perfect for Any Occasion
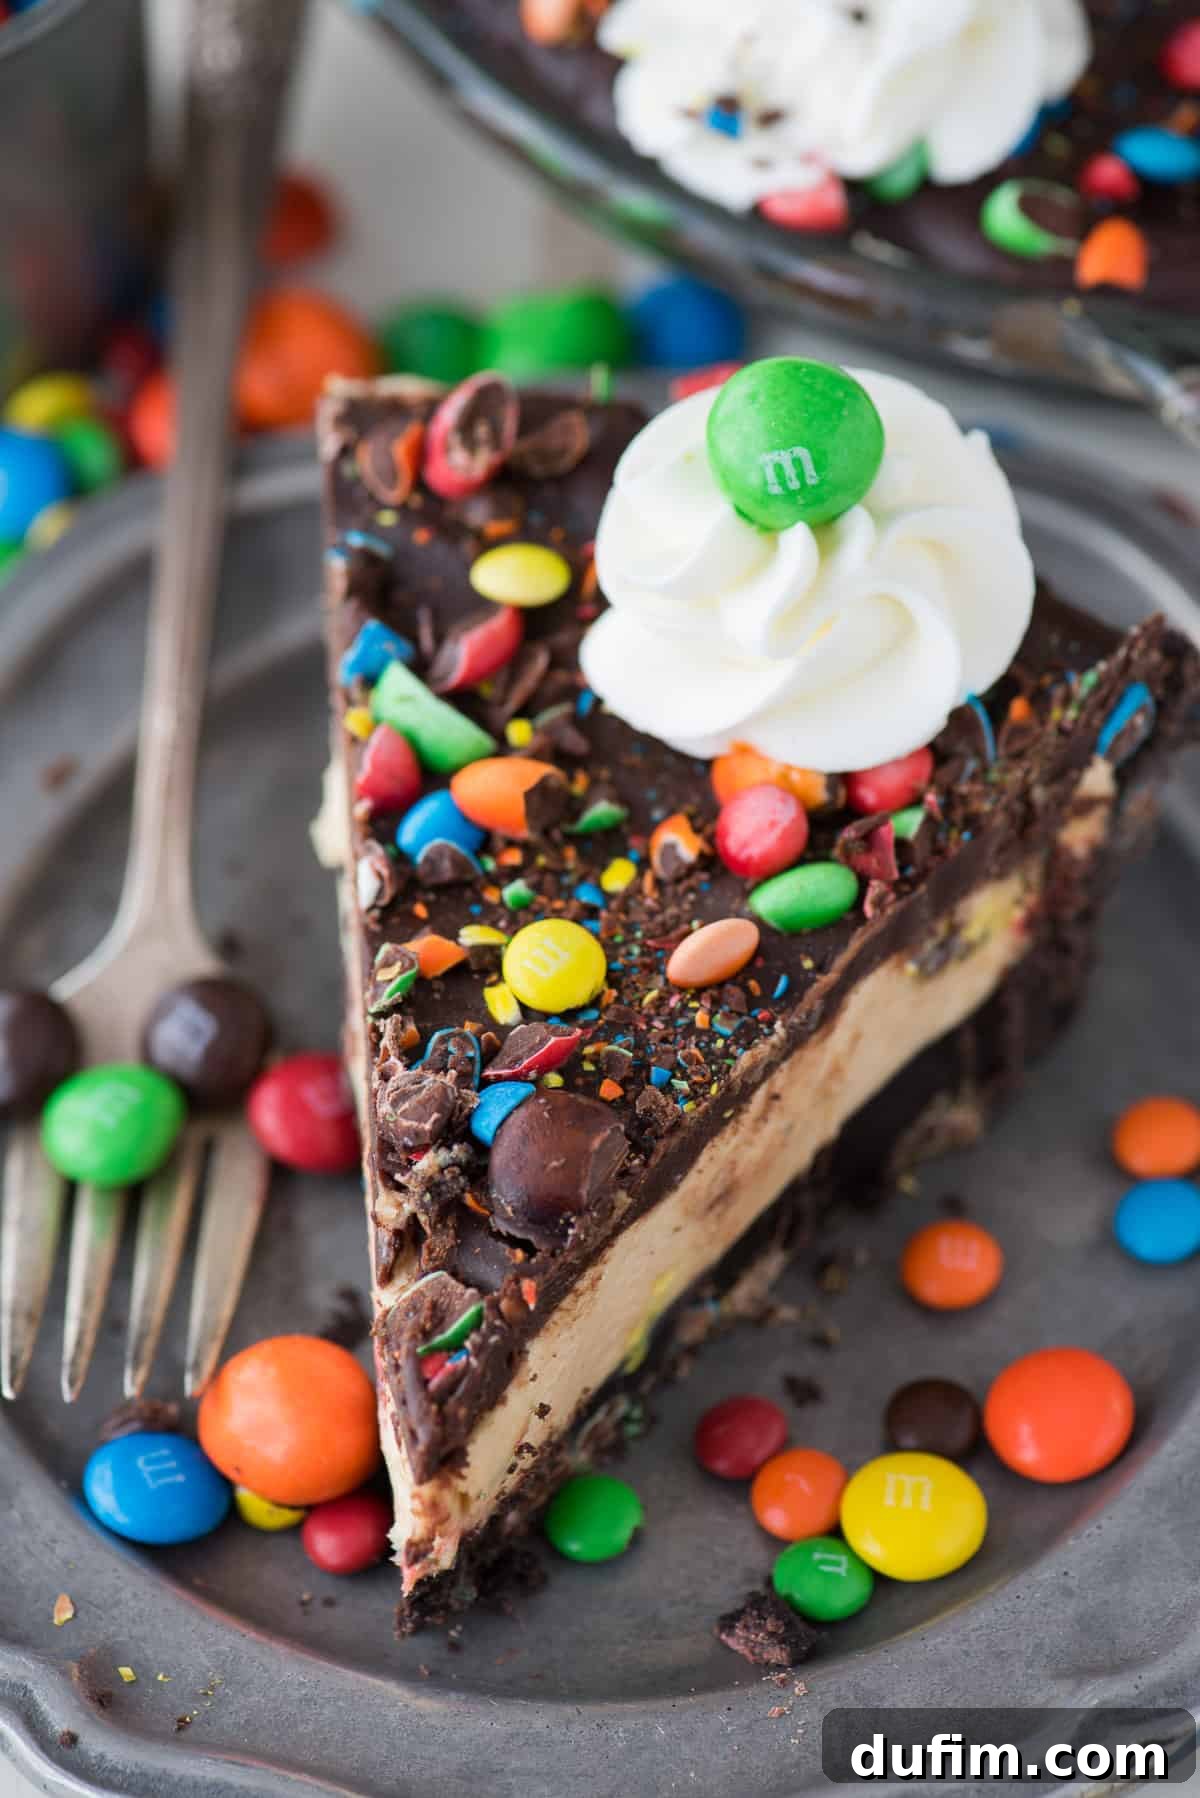
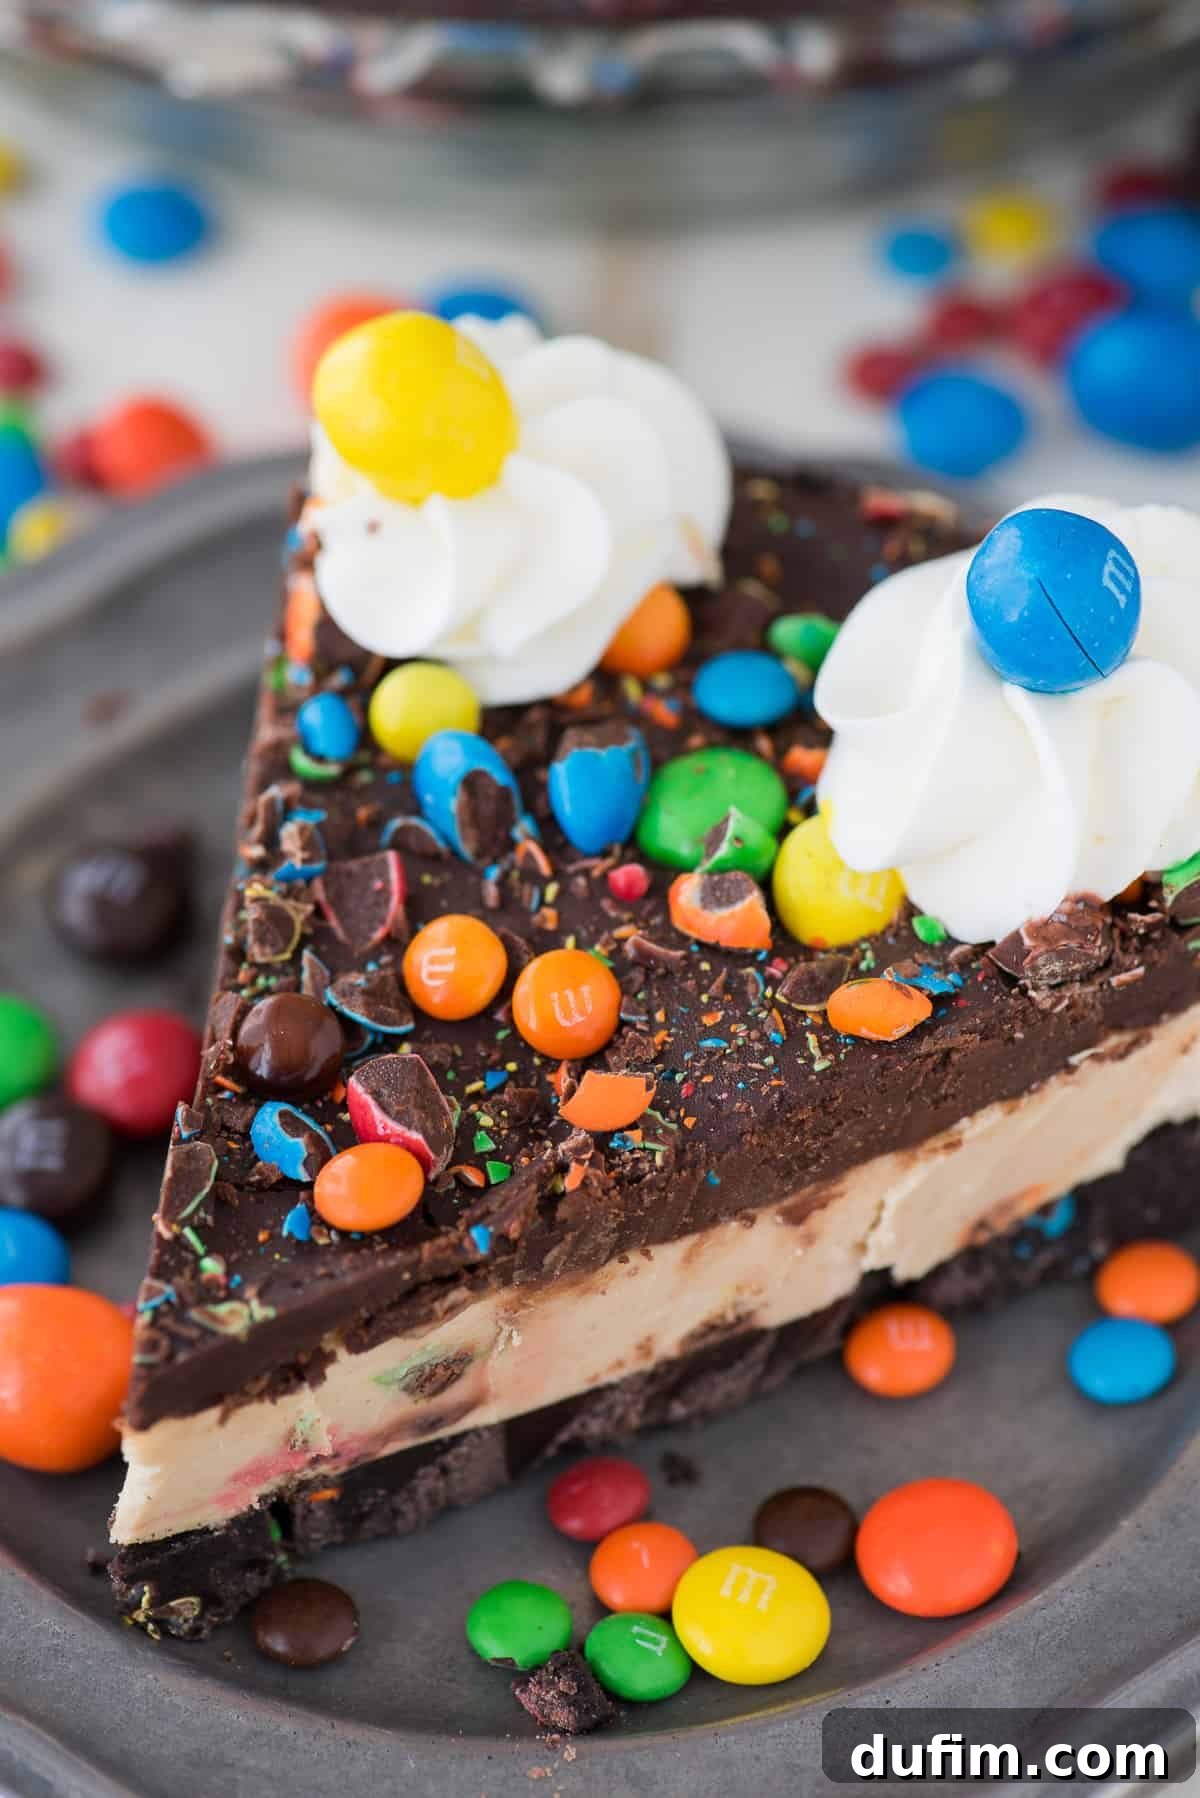
Are you searching for a show-stopping dessert that requires absolutely no oven and minimal fuss? Look no further! Our ultimate No-Bake M&M Pie is a dream come true for every dessert enthusiast. Picture this: a rich, crumbly Oreo crust, generously studded with colorful M&Ms, forming the perfect foundation for a luscious, creamy peanut butter and cream cheese filling. This delightful concoction is then crowned with a silky, decadent chocolate ganache and an explosion of vibrant M&M candies, making it an irresistible treat that’s as fun to look at as it is to eat.
We’ve heard your resounding approval for our other no-bake masterpieces, like the wildly popular No-Bake Oreo Pie and the exquisitely rich Peanut Butter Cup Chocolate Pie. So, it was only a matter of time before we introduced a dazzling M&M version, meticulously crafted to combine the very best elements of those beloved recipes. This M&M pie brings a playful twist and a burst of joyful color to your dessert table, making it the ideal choice for birthdays, festive holidays, casual potlucks, or simply a sweet reward after a long week. Get ready to impress with this effortlessly delicious creation!
Why This No-Bake M&M Pie Will Be Your New Favorite
This isn’t just another pie recipe; it’s an invitation to a delightful dessert experience that promises ease, indulgence, and universal appeal. Here’s why our No-Bake M&M Pie is destined to become a cherished addition to your recipe repertoire:
- Effortlessly Delicious: The biggest advantage of a no-bake pie is precisely that—no baking! This means less time tethered to the oven, reducing kitchen heat and effort, and freeing up more precious moments to spend enjoying your creation with loved ones. It’s perfect for novice bakers and seasoned pros alike.
- Perfect for Any Occasion: Its vibrant colors, familiar flavors, and crowd-pleasing combination of chocolate, peanut butter, and M&Ms make it a stellar choice for virtually any gathering. From intimate family dinners to grand holiday feasts, children’s birthday parties to sophisticated dinner parties, this pie always takes center stage.
- Customizable Fun: The world of M&M candies is vast and colorful! With an array of M&M varieties now readily available—from classic milk chocolate to peanut, crispy, caramel, and even seasonal editions—you have the creative freedom to personalize your pie to perfectly match any taste preference or festive theme.
- Rich and Creamy Texture: Prepare your palate for a symphony of textures. The satisfying crunch of the thick Oreo crust contrasts beautifully with the velvety smooth, light-as-air peanut butter cream cheese filling. This exquisite duo is then complemented by the silky, rich chocolate ganache, culminating in a truly delightful mouthfeel with every bite.
- Make-Ahead Mastery: Planning ahead for a party or a busy week? This pie is your secret weapon. It can be prepared entirely in advance and stored in the freezer, allowing you to focus on other preparations without any last-minute dessert stress. Simply pull it out to thaw slightly before serving, and you’re good to go!
Exploring the Colorful World of M&M’s for Your Pie
One of the most exciting aspects of crafting this M&M pie is the incredible array of M&M candies at your fingertips. The possibilities for customization are virtually endless, allowing you to tailor your pie to perfectly suit your preferences or the occasion. While we opted for mini M&M’s blended into the crust and a few peanut M&M’s for an extra crunch atop the whipped cream swirls, we wholeheartedly encourage you to experiment with your favorite varieties:
- Classic Milk Chocolate M&M’s: These are the original, universally adored chocolate candies, offering that quintessential M&M flavor that everyone loves. They are a safe and delicious bet for any part of the pie.
- Peanut M&M’s: If you’re a fan of nuts, these are a must-add. Peanut M&M’s introduce a fantastic textural crunch and a delightful nutty flavor that beautifully complements the peanut butter filling. They work wonderfully as a topping or even roughly chopped into the filling.
- Mini M&M’s: Their diminutive size makes mini M&M’s exceptionally versatile. They’re perfect for evenly distributing throughout the Oreo crust, mixing into the creamy filling, or sprinkling generously over the ganache for a consistent burst of color and chocolate in every mouthful.
- Crispy M&M’s: For those who love an additional layer of texture, crispy M&M’s offer an airy, light crispness that adds a satisfying crackle to the pie. Their unique texture provides a pleasant contrast to the otherwise smooth elements.
- Seasonal and Limited Edition M&M’s: Keep an eye out for holiday-themed or special edition M&M’s! Using varieties like mint M&M’s for a festive touch during winter, or pastel M&M’s for Easter, can add a unique and celebratory flair to your pie.
- Caramel M&M’s or Pretzel M&M’s: For a truly gourmet twist and an extra dimension of flavor complexity, consider these options. Caramel M&M’s introduce a chewy, sweet surprise, while pretzel M&M’s offer a delightful sweet and salty crunch that is simply addictive.
Don’t hesitate to mix and match different types of M&M’s to create a pie that is truly a reflection of your unique taste. The more variety, the merrier and more flavorful your no-bake M&M pie will be!
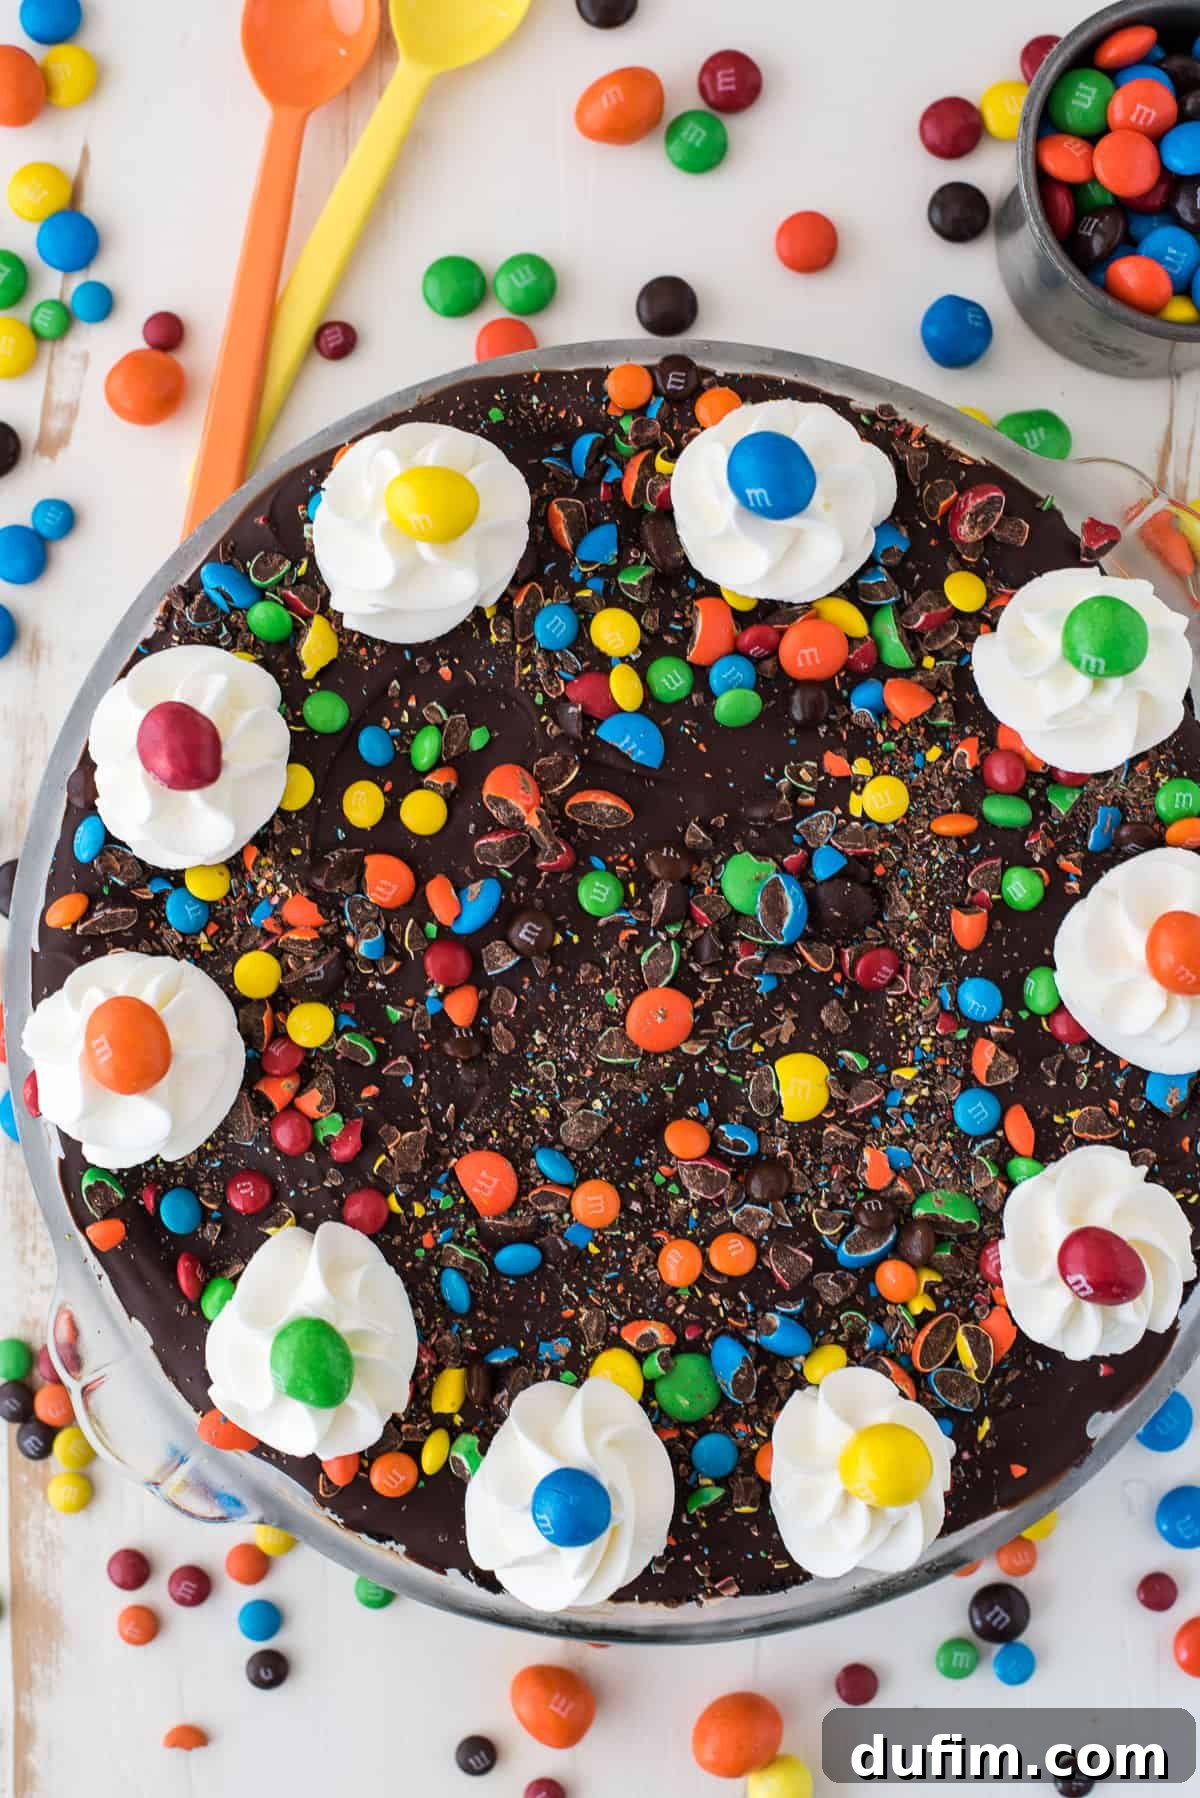
Crafting the Perfect Oreo Crust for Your M&M Pie
A truly exceptional no-bake pie begins with an outstanding crust, and our Oreo crust for this M&M pie is designed to be nothing short of spectacular. It’s robust, flavorful, and forms the perfect foundation for the creamy filling. To infuse an extra element of fun and a delightful textural surprise, we’ve decided to incorporate mini M&M’s directly into the crust mixture. While this step is entirely optional, we highly recommend it for an added burst of color and a subtle chocolatey crunch in every single bite.
You’ll notice that this recipe yields a wonderfully thick and satisfying Oreo crust, particularly if you choose to utilize an entire package of Oreos. We absolutely adore a towering crust—it adds to the pie’s impressive presentation and ensures a substantial, delicious base that holds up beautifully to the rich filling. Some might even describe it as “a mile high!” However, we understand that preferences vary. If you lean towards a more traditional, average thickness for your pie crust, a simple adjustment to the ingredient quantities will achieve your desired result. We suggest using only half the package of Oreos and, consequently, reducing the amount of melted butter to just 1/2 stick (approximately 1/4 cup or 56 grams). This slight modification will still provide a perfectly sturdy, flavorful, and incredibly delicious base, but with a more modest profile that some prefer.
When preparing the crust, ensure your Oreos are crushed into fine crumbs. A food processor works wonders for this, creating a uniform texture quickly. If you don’t have one, placing the cookies in a large Ziploc bag and crushing them with a rolling pin works just as well – and can be a fun way to release some stress! Mixing the crumbs thoroughly with the melted butter is key to achieving a cohesive crust that won’t fall apart when sliced. The addition of chopped M&Ms at this stage ensures that vibrant pops of color and extra chocolatey goodness are distributed throughout the crust, making every forkful a delightful surprise. Once pressed firmly into your pie dish, a quick chill in the refrigerator helps the crust set, ensuring it’s ready to support the decadent layers to come.
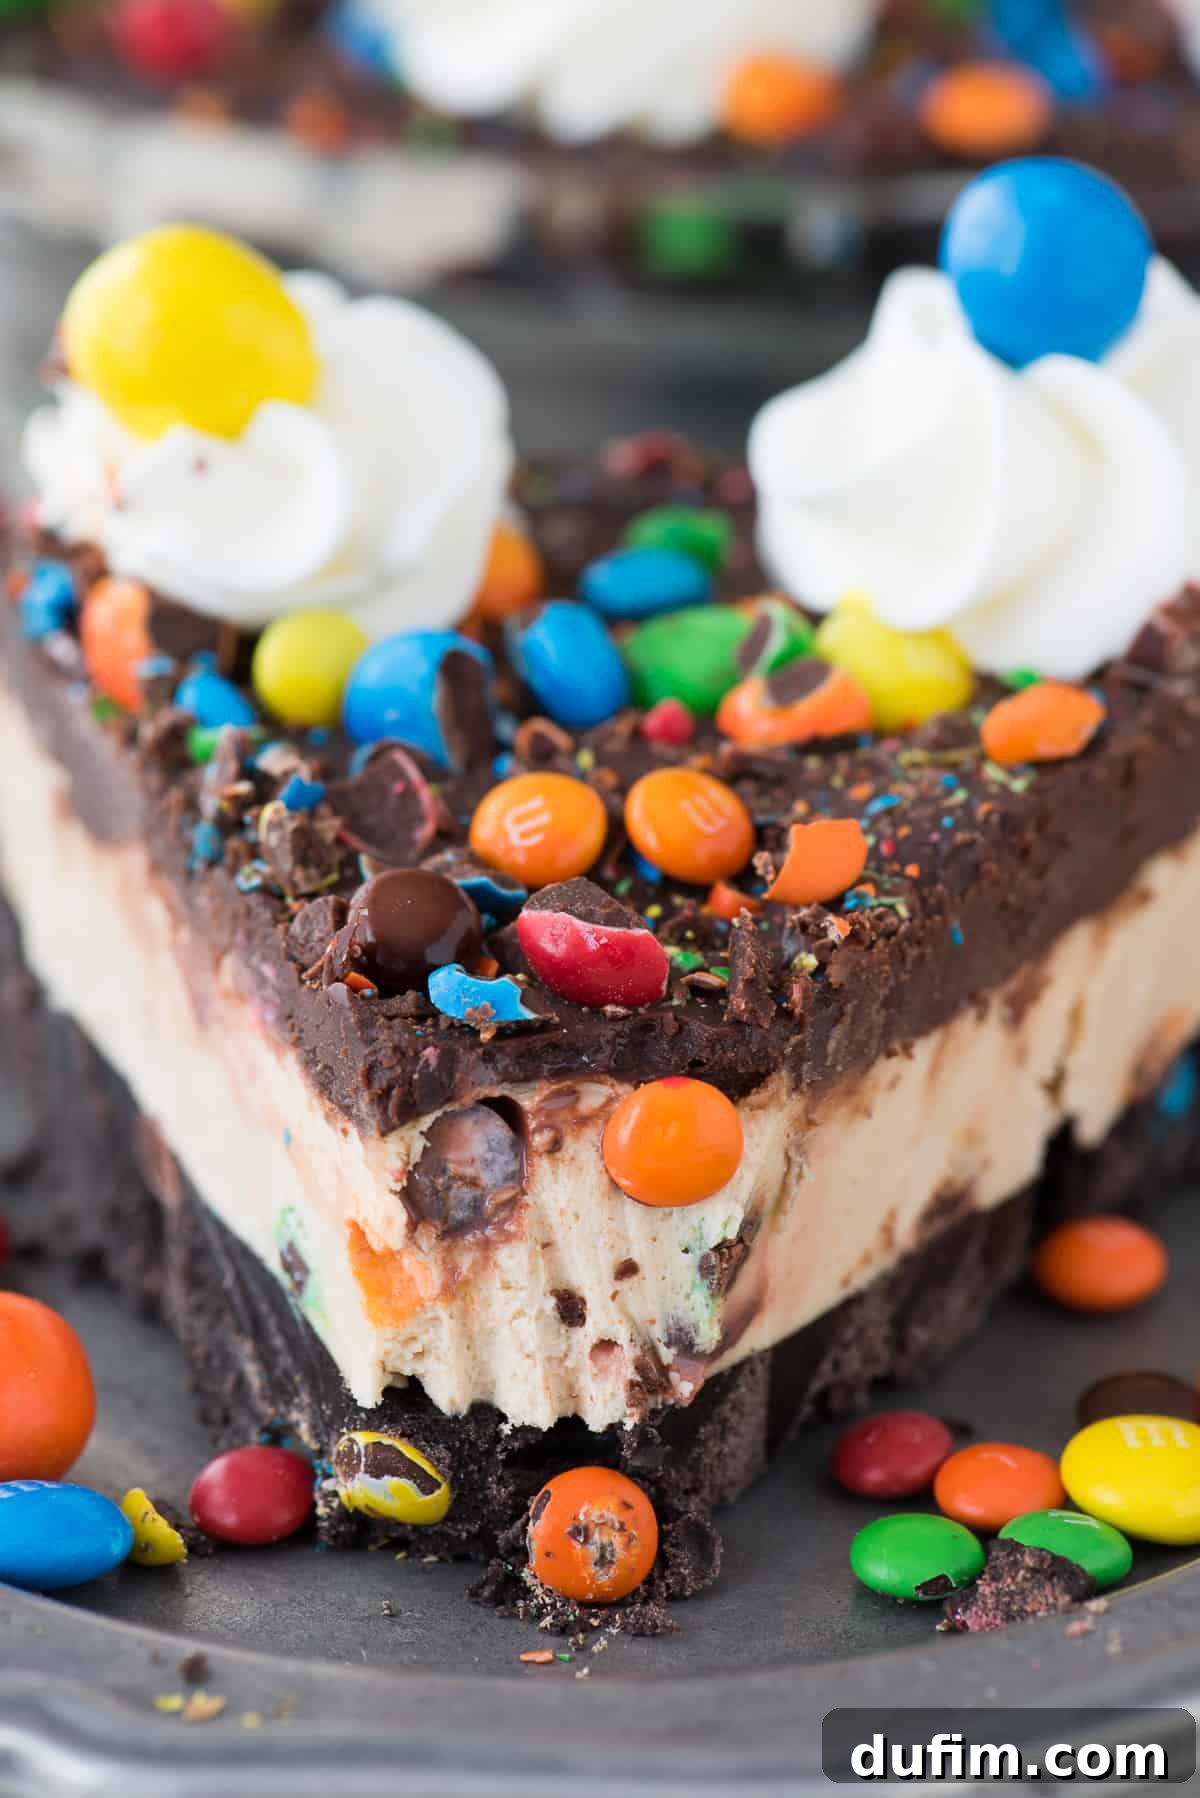
The Secret to Serving: Frozen vs. Chilled Perfection
Having had the pleasure of preparing this particular No-Bake M&M Pie—along with its highly acclaimed counterparts, the No-Bake Oreo Pie and the rich Peanut Butter Cup Chocolate Pie—on countless occasions, we’ve stumbled upon a serving revelation: we unequivocally prefer them frozen rather than merely refrigerated. While the idea of freezing a creamy pie might initially seem counterintuitive, trust us, the resulting consistency genuinely elevates the entire dessert experience to new heights.
The magic happens because even when fully “frozen,” the peanut butter cream cheese filling miraculously retains a delightful, almost velvety creaminess. It’s surprisingly pliable and easy to slice through, offering a pleasant firmness without being rock-hard. The only component that might put up a slight, friendly resistance is the robust and thick Oreo crust. But honestly, investing a tiny bit of “elbow grease” is a small, well-worth-it effort for a perfectly set, beautifully firm, and utterly delicious slice of pie that holds its shape impeccably.
For achieving the absolute best serving experience—think elegant, clean slices that impress every guest—we offer this essential pro tip: remove the pie from the freezer approximately 30 minutes before you intend to serve it. This short, strategic thawing period is crucial. It allows the crust to soften just enough to become effortlessly smooth to cut, while the filling remains wonderfully firm and creamy. This precise timing ensures you can achieve picture-perfect slices every single time, making your presentation as flawless as the taste. Once you try it this way, you’ll understand why we insist on the frozen approach!
Making Your M&M Pie Gluten-Free: A Simple Adaptation
For those navigating dietary restrictions, particularly a gluten-free diet, we bring excellent news! This delightful no-bake M&M pie is remarkably easy to adapt, ensuring that everyone can indulge in its creamy, chocolatey, and peanut buttery goodness. The primary adjustment needed is a straightforward swap: simply use gluten-free Oreos for the pie crust. The market now offers numerous brands that produce delicious gluten-free sandwich cookies, meticulously crafted to mimic the beloved taste and texture of traditional Oreos, ensuring your crust remains just as flavorful and crumbly.
The beauty of this recipe lies in the fact that virtually all the other core ingredients are naturally gluten-free. This includes the rich cream cheese, the creamy peanut butter, the light and airy Cool Whip, the decadent semi-sweet chocolate chips for the ganache, the heavy cream, and, of course, the colorful M&Ms themselves. So, with just one simple and readily available ingredient substitution, you can transform this already fantastic dessert into a safe and delicious option for individuals with gluten sensitivities. While we can easily make it gluten-free, we do have to confess that it won’t magically become calorie-free, haha! But it will certainly be worth every delicious bite, providing a guilt-free indulgence for those avoiding gluten.
More Irresistible Dessert Recipes to Satisfy Your Sweet Tooth
If you’ve fallen in love with the ease and deliciousness of this no-bake wonder, you’re in for a treat! Our kitchen is always bustling with creative dessert ideas. Here are a few more cherished recipes from our collection that we’re confident you’ll adore:
- Earthquake Cake: Prepare for a truly seismic experience with this deeply rich chocolate cake, laden with a sweet cream cheese swirl and crunchy pecans. It’s a fun, surprisingly easy cake that’s packed with flavor and dramatic cracks!
- How to Make Box Brownies Better: Transform ordinary box brownie mix into a gourmet, fudgy delight with our simple yet ingenious tips. Elevate your basic brownies to bakery-level perfection with minimal effort.
- 7 Layer Bars: A timeless classic that combines layers of graham cracker crust, chocolate chips, butterscotch chips, coconut, pecans, and condensed milk. It’s an addictive, sweet, and chewy bar that disappears fast!
- Reese’s Magic Bars: For all the peanut butter cup enthusiasts out there, these bars are pure magic. Loaded with Reese’s peanut butter cups and a blend of other delightful ingredients, they offer an irresistible combination of sweet and salty in every square.
Watch the No-Bake M&M Pie Video Tutorial
Sometimes, seeing is believing, especially when it comes to crafting the perfect dessert. If you’re a visual learner or simply prefer to follow along, we’ve got you covered! Watch our comprehensive step-by-step video tutorial, which expertly guides you through every stage of making this spectacular No-Bake M&M Pie. It’s the perfect visual aid to ensure your pie turns out beautifully and deliciously every single time!
No Bake M&M Pie
By: Beth
Prep Time: 30 minutes
Chill Time: 4 hours
Total Time: 4 hours 30 minutes
Servings: 12 servings
The ultimate no-bake M&M pie! Featuring a rich Oreo crust, a creamy peanut butter cream cheese filling, a luscious chocolate ganache, and a generous sprinkle of M&Ms. This easy dessert is perfect for any occasion.
Rate Recipe
Print Recipe
Equipment
- Glass Mixing Bowl
- KitchenAid 9-Speed Mixer (or any electric mixer)
- Spatula
- Kitchen Scale (optional, for precise measurements)
- Food Processor or Blender
- 10-inch Pie Pan
- Small Saucepan (for ganache)
Ingredients
For the Oreo Crust
- 1 package (approx. 14.3 oz / 405g) Oreos (use full package for a thick crust; half for an average crust)
- ⅓ cup chopped M&Ms (optional, for mixing into the crust)
- ½ cup (113g) unsalted butter, 1 stick, melted
For the Creamy Filling
- 16 oz (452g) cream cheese, softened to room temperature
- 1 cup (270g) creamy peanut butter (avoid natural, oily peanut butter for best consistency)
- 8 oz (226g) Cool Whip, thawed (or 2 cups homemade whipped cream)
- ¼ cup mini M&Ms (for mixing into the filling)
For the Chocolate Ganache
- 1 ½ cups (255g) semi-sweet chocolate chips (high-quality chips recommended)
- ½ cup (118ml) heavy whipping cream
For the Topping
- Additional M&Ms (mini, peanut, or classic, as desired)
- Whipped cream swirls (store-bought or homemade using heavy cream + powdered sugar)
Instructions
Part 1: Preparing the Oreo Crust
- Crush Oreos: Begin by crushing the Oreos into fine crumbs. You can achieve this using a food processor for quick, uniform crumbs, or by placing the Oreos in a large freezer bag and crushing them with a rolling pin until no large pieces remain.
- Combine Crust Ingredients: In a spacious mixing bowl, combine the finely crushed Oreos with the melted butter. If desired, stir in the ⅓ cup of chopped M&Ms for an extra burst of color and flavor in the crust. Mix thoroughly until all crumbs are evenly moistened and resemble wet sand.
- Form the Crust: Press this mixture firmly and evenly into the bottom and up the sides of a 10-inch pie pan. For a neat finish, use the bottom of a flat-bottomed glass or your fingers to compact the crust tightly.
- Chill: Place the prepared pie crust in the refrigerator for a minimum of 15-20 minutes, or until it’s firm and set, before proceeding with the filling.
Part 2: Creating the Creamy Filling
- Beat Cream Cheese and Peanut Butter: In a large mixing bowl, using an electric mixer (handheld or stand mixer), beat the softened cream cheese and creamy peanut butter together on medium speed. Continue mixing until the mixture is completely smooth, light, and well blended, scraping down the sides of the bowl as needed to ensure no lumps.
- Fold in Cool Whip and M&Ms: Gently fold in the thawed Cool Whip and the ¼ cup of mini M&Ms into the cream cheese mixture. Use a spatula and fold until just combined, being careful not to overmix, which can deflate the Cool Whip and make the filling less airy.
- Fill the Crust: Evenly spread this luscious, creamy filling over the chilled Oreo crust. Use the back of a spoon or a spatula to create a smooth, appealing top surface.
- Initial Freeze: Return the pie to the freezer for approximately 30 minutes. This crucial step allows the filling to firm up slightly, preventing the warm ganache from melting into it when applied.
Part 3: Crafting the Chocolate Ganache
- Prepare Chocolate Chips: Place the semi-sweet chocolate chips in a medium-sized, heat-proof bowl.
- Heat Heavy Cream: Pour the heavy whipping cream into a small saucepan. Heat over low to medium heat until it just begins to simmer gently around the edges. Do not bring it to a rolling boil.
- Combine: Immediately pour the hot heavy cream over the chocolate chips in the bowl. Let the mixture stand undisturbed for 1-2 minutes. This allows the heat from the cream to melt the chocolate chips thoroughly.
- Stir Until Smooth: After the resting time, use a spatula or whisk to gently stir the mixture. Start stirring from the center and gradually work your way outwards until the ganache is completely smooth, glossy, and free of any lumps.
- Cool Ganache: Allow the chocolate ganache to cool to room temperature (or slightly cooler) before pouring it over the pie. Pouring hot ganache can melt the delicate filling beneath.
Part 4: Assemble, Chill, and Serve
- Pour Ganache: Once the ganache has cooled, carefully pour it over the chilled peanut butter filling, spreading it gently and evenly to create a smooth, rich chocolate layer across the entire surface of the pie.
- Add Toppings: Before the chocolate ganache has a chance to set completely, generously sprinkle additional M&Ms (of your chosen varieties) over the top of the pie. If desired, add decorative dollops of whipped cream for an elegant finish.
- Final Freeze: Loosely cover the pie with aluminum foil or plastic wrap (ensure it doesn’t touch the topping to avoid sticking). Return the pie to the freezer for a minimum of 4 hours, or ideally, overnight, to allow all layers to set perfectly.
- Serve: Approximately 30 minutes before you plan to serve, remove the pie from the freezer and let it sit at room temperature. This brief thawing period will make slicing much easier and ensure the filling and crust are at their optimal texture. Cover and freeze or refrigerate any leftover slices.
Notes & Pro Tips for No-Bake M&M Pie Success
- Effortless Slicing: For perfectly clean and beautiful slices every time, dip your knife in hot water and wipe it clean between each cut. This technique warms the blade slightly, allowing it to glide through the frozen crust and creamy filling with ease.
- Adjusting Crust Thickness: If you prefer a less thick, more standard pie crust, simply use half a package of Oreos (approx. 7.15 oz / 200g) and reduce the melted butter to 1/4 cup (56g). The instructions remain the same for preparation.
- M&M Customization: Unleash your creativity! Don’t feel limited to just classic M&Ms. Experiment with different M&M flavors like peanut butter, crispy, caramel, or seasonal varieties to add unique twists and tailor the pie to your exact taste or holiday theme.
- Peanut Butter Choice: For the creamiest and most stable filling, we recommend using processed creamy peanut butter (like Jif or Skippy) rather than natural peanut butter, which can sometimes separate and affect the filling’s texture.
- Storage Guidelines: To maintain its freshness and delightful texture, store leftover pie tightly covered in the freezer for up to 2 weeks. Alternatively, it can be kept in the refrigerator for up to 3-4 days, though the frozen texture is often preferred for serving.
Nutrition Information
All nutritional values are approximate and provided to the reader as a courtesy for informational purposes. Please note that changing ingredients, quantities, or brands will alter the estimated nutritional calculations. This information is not intended as medical or dietary advice.
- Calories: 743 kcal
- Carbohydrates: 56g
- Protein: 12g
- Fat: 54g
- Saturated Fat: 26g
- Polyunsaturated Fat: 6g
- Monounsaturated Fat: 18g
- Trans Fat: 1g
- Cholesterol: 81mg
- Sodium: 487mg
- Potassium: 430mg
- Fiber: 4g
- Sugar: 36g
- Vitamin A: 955 IU
- Vitamin C: 1mg
- Calcium: 109mg
- Iron: 5mg
Loved this recipe? We’d be thrilled to hear from you! Please share your thoughts and rate it below!