
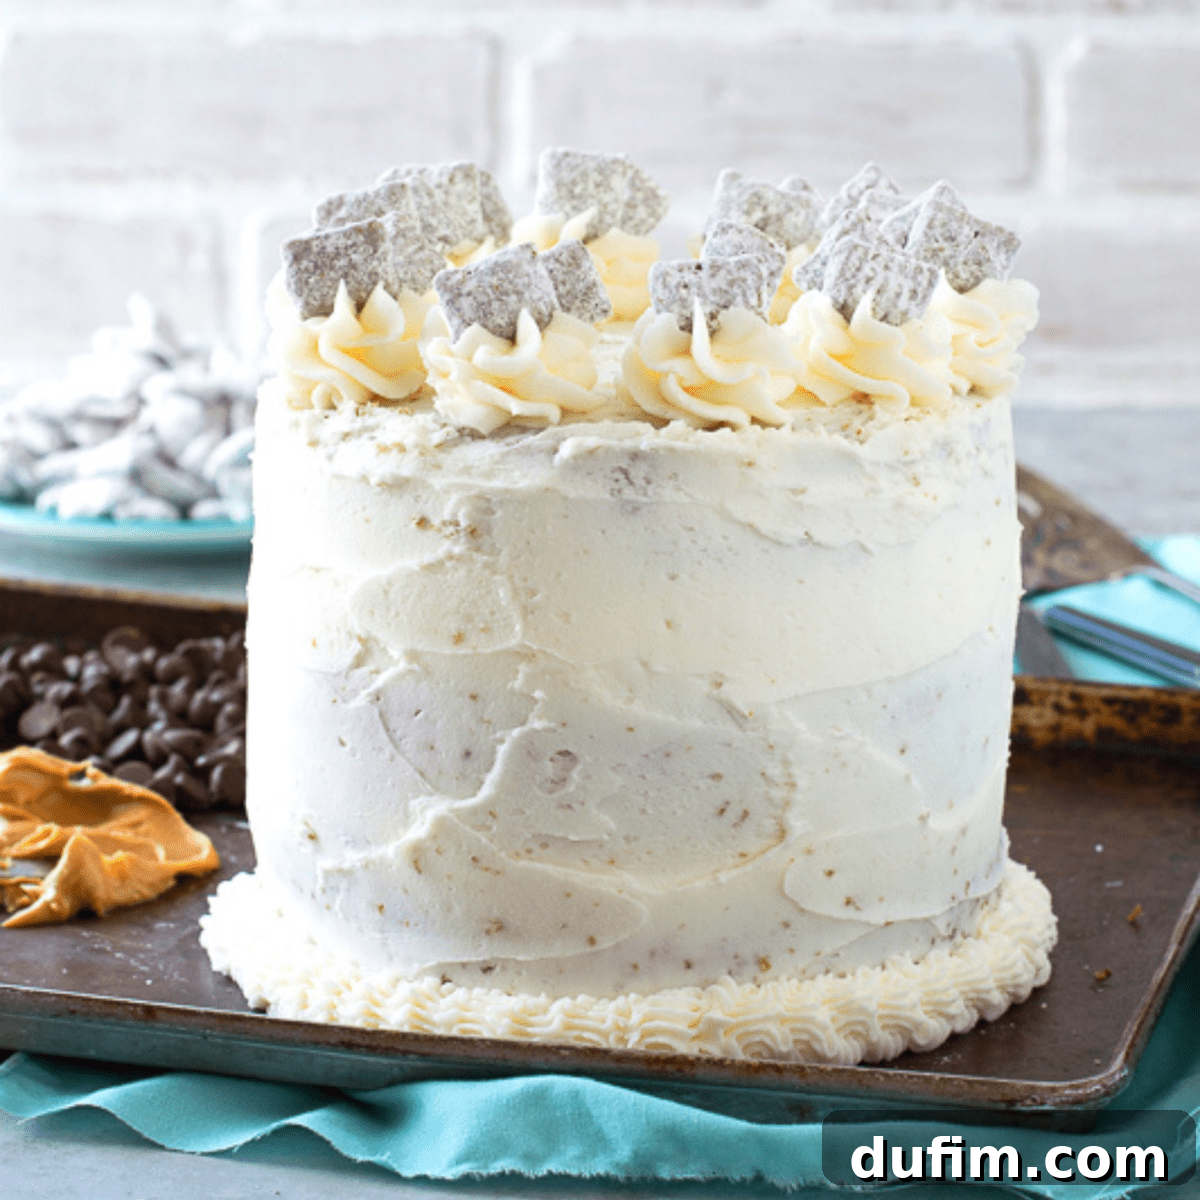
The Ultimate Puppy Chow Cake: A Decadent Chocolate Peanut Butter Dream
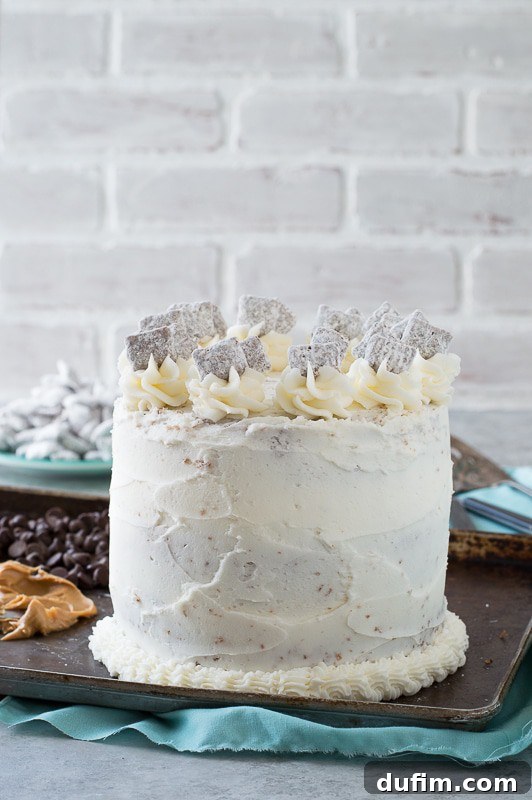
Prepare yourself for what might just be the most extraordinary cake you’ll ever encounter! This isn’t just a cake that subtly hints at the flavors of your favorite childhood snack; it’s a magnificent creation that’s absolutely overflowing with actual, crunchy puppy chow pieces. Imagine biting into layers of moist chocolate and creamy peanut butter cake, each infused with a delightful surprise of that iconic sweet-and-savory cereal mixture. It’s an adventure for your taste buds, a true celebration of all things delicious.
The Sweet Genesis of a Culinary Idea
Many people often wonder about the inspiration behind new recipes. For me, it generally boils down to two key elements: a well-loved, slightly overflowing notebook filled with scribbled ideas, and invaluable brainstorming sessions with my husband, Ryan. I tend to process ideas externally, vocalizing my thoughts and bouncing concepts off him. Often, I already have a pretty solid vision, but hearing his initial reaction helps gauge whether a recipe idea will resonate with a wider audience. It’s a fantastic sounding board that helps refine even the wildest culinary concepts.
My creative mind sometimes veers into the delightfully absurd, cooking up notions like a “Pop Tart Cake.” While I personally believe a Pop Tart Cake could be a hit, Ryan isn’t always on board with my more unconventional proposals. So, some ideas, alas, never quite make it off the drawing board. However, when I first floated the idea of a Puppy Chow Cake, we were in complete, enthusiastic agreement. The conversation went something like this, a classic debate unfolding:
Beth: “I think I’m going to make puppy chow.”
Ryan: “You mean muddy buddies…”
*A friendly but fierce debate about the proper nomenclature of this beloved snack instantly ensued.*
Beth: “OH! I should totally make a puppy chow cake!”
Ryan: “That’s an absolutely brilliant idea. But it would, of course, be a muddy buddy cake.”
Regardless of whether you call it Puppy Chow or Muddy Buddies, one thing is undeniable: transforming this beloved snack into a spectacular layered cake is pure genius. The combination of textures and flavors promises an unforgettable dessert experience that will have everyone asking for another slice.
Crafting Your Puppy Chow Masterpiece: A Five-Component Journey
While the Puppy Chow Cake might sound elaborate, involving five distinct components – the rich chocolate cake, the tender peanut butter cake, the irresistible puppy chow filling, the silky buttercream frosting, and the final assembly – the process is far from daunting. Each step is manageable, and with a little planning, you’ll find yourself creating a show-stopping dessert with ease. The secret lies in breaking it down and enjoying each part of the creative process.
Step-by-Step Approach to Baking Perfection:
Begin by focusing on the cake layers. Baking them first and allowing them to cool completely is crucial. For ultimate convenience, you can even bake these delightful layers a few days in advance. Once cooled, simply wrap them tightly in plastic wrap and store them in the refrigerator, ready for when you’re prepared to assemble. This foresight makes the entire process much more relaxed and enjoyable.
While your cakes are baking, or even on a separate day, you can tackle the puppy chow. This part is incredibly straightforward and quick to prepare, adding that signature crunch and flavor without much effort. With the cakes and puppy chow ready, you’ve conquered three out of five elements!
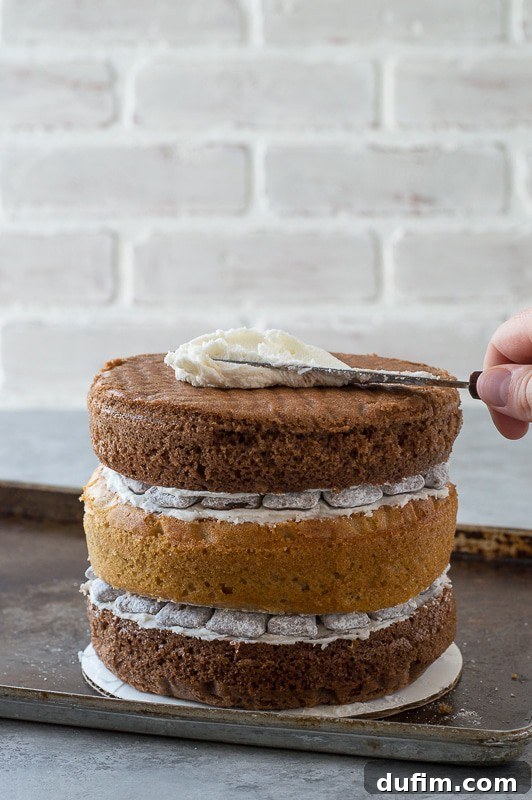
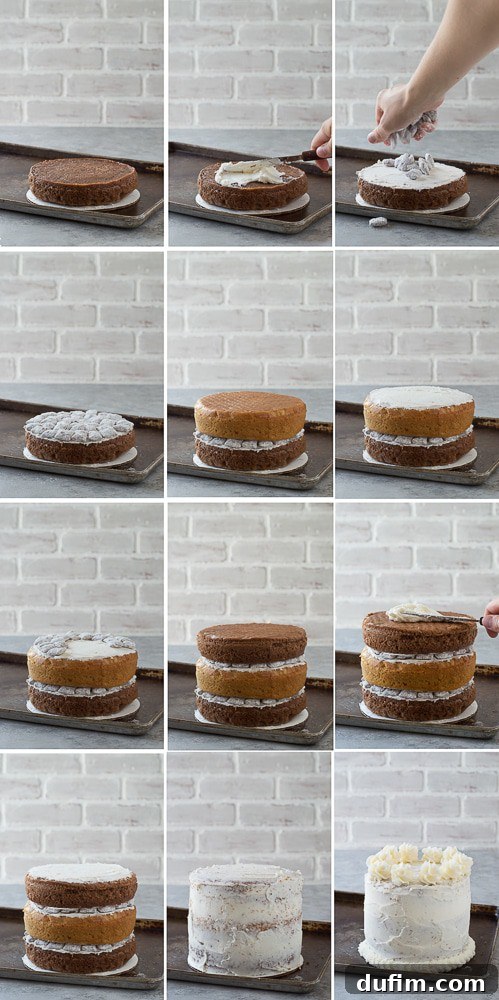
The buttercream is best prepared just before you plan to assemble the cake, ensuring it’s fresh, smooth, and perfectly spreadable. Finally, the assembly itself is a delightful culmination of your efforts. The pattern is designed for maximum flavor and texture distribution: a layer of moist cake, followed by a generous spread of creamy buttercream, then a scattering of crunchy puppy chow pieces. This sequence repeats, building a tower of deliciousness: cake, buttercream, puppy chow, cake, buttercream, puppy chow, and finally, your last cake layer, ready for a final generous coat of frosting. This structure guarantees that every single bite is a symphony of flavors and textures.
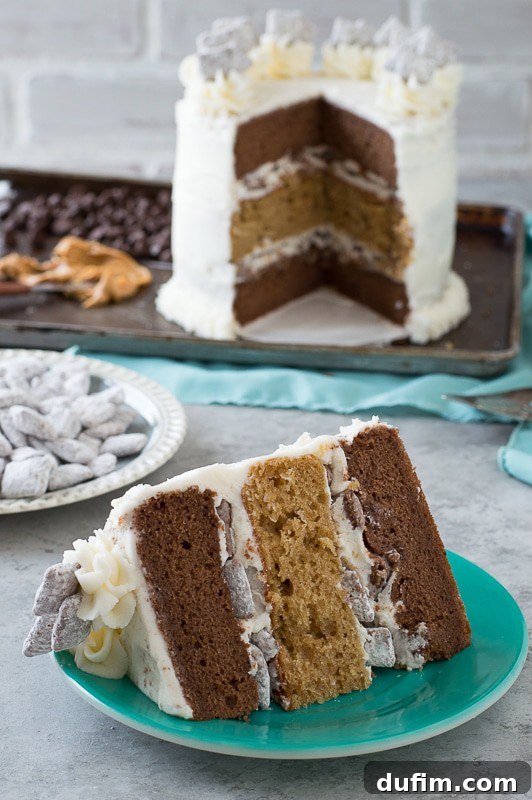
Just look at that magnificent cross-section when you slice into it! Each layer promises pure, unadulterated goodness – truly a sight to behold and an absolute treat for the palate. Mmm, perfection!
Tap stars to rate!
Puppy Chow Cake
Beth
30 minutes
25 minutes
15 minutes
1 hour 10 minutes
16 servings
Rate
This might be the best cake in the whole entire history of cakes! I mean.. it’s a puppy chow cake!!! And it’s not just a cake that tastes like puppy chow. This cake is loaded with actual puppy chow pieces!
Ingredients
Peanut Butter Cake
- ½ cup + 1 tbsp flour
- ¼ tsp baking soda
- ½ tsp baking powder
- ¼ tsp salt
- 2 ½ tbsp peanut butter
- 2 tbsp vegetable oil
- ¼ cup brown sugar
- ¼ cup buttermilk
- 1 large egg
- ¼ tsp vanilla extract
Chocolate Cake
- ½ cup cocoa powder
- 1 cup flour
- 1 tsp baking powder
- ½ tsp baking soda
- ¼ tsp salt
- 1 stick butter, room temperature (1/2 cup)
- ¾ cup sugar
- 2 large eggs
- 1 tsp vanilla extract
- ⅓ cup sour cream
- 2 tbsp melted chocolate, cooled
Puppy Chow
- 12.8 oz rice chex cereal
- 1 ½ cups semi-sweet chocolate chips
- ¾ cup peanut butter
- ½ cup butter
- 4-5 cups powdered sugar
Buttercream
- 2 sticks butter, softened (1 cup)
- 1 cup vegetable shortening
- 1 tsp vanilla extract
- 7-10 cups powdered sugar
Instructions
Peanut Butter Cake
- Preheat your oven to 350ºF (175ºC).
- Generously grease the bottom and sides of one 6-inch round cake pan or springform pan with butter. Line the bottom with a perfectly cut round piece of parchment paper. For even baking, consider placing a bake-even strip around the pan. You can easily make your own by cutting a towel or old shirt to fit, wetting it thoroughly, squeezing out excess water (but don’t dry it completely!), and securing it around the pan with a safety pin.
- In a medium bowl, whisk together the flour, baking soda, baking powder, and salt. Set aside.
- In a separate, larger bowl, combine the peanut butter, vegetable oil, and brown sugar. Beat these ingredients together with an electric mixer until well combined and fluffy. Incorporate the egg and vanilla extract, beating again until smooth.
- Gradually add the dry flour mixture to the wet ingredients, alternating with the buttermilk. Mix by hand using a spatula until all ingredients are just incorporated. Be careful not to overmix.
- Pour the batter evenly into your prepared 6-inch pan.
- Bake for 22-26 minutes, or until a toothpick inserted into the center of the cake comes out clean.
- Once baked, let the cake cool in its pan on a wire rack for 10 minutes. After 10 minutes, carefully remove the cake from the pan (if using a springform, remove the sides and bottom). Allow the cake to cool completely on the wire rack. Once fully cooled, gently peel off the parchment paper from the bottom. If necessary, use a cake leveler or a serrated knife to level the top of your cake for even layers.
- If you plan to assemble the cake later, wrap the cooled cake layer very tightly in plastic wrap and store it in the refrigerator for up to one week, or freeze for longer storage.
Chocolate Cake
- Preheat your oven to 350ºF (175ºC).
- Grease the bottom and sides of two 6-inch round cake pans or springform pans with butter, and line the bottoms with round parchment paper pieces. As with the peanut butter cake, using bake-even strips will help ensure flat, perfectly baked layers.
- In a small mixing bowl, combine the cocoa powder, flour, baking powder, baking soda, and salt. Gently mix with a spoon to ensure everything is evenly distributed.
- In a larger mixing bowl, cream together the softened butter and sugar using an electric mixer until light and fluffy. Beat in the eggs one at a time, then add the vanilla extract, mixing until just combined.
- Fold in the sour cream and cooled melted chocolate with a spatula until incorporated.
- Add half of the dry flour mixture to the wet ingredients. Instead of dumping it all at once, add spoonfuls, gently shaking it over the wet mixture. Fold the mixture by hand until no traces of flour remain. Repeat this process with the second half of the flour mixture, carefully folding and scraping the sides and bottom of the bowl to fully combine.
- Evenly divide the chocolate cake batter between the two prepared 6-inch pans, pouring about 1 & 1/3 cups into each pan.
- Bake for 25-27 minutes, or until a toothpick inserted into the center of each cake comes out clean.
- Once the cakes are baked, let them cool in their pans on a wire rack for 10 minutes. After 10 minutes, carefully remove the cakes from their pans (removing sides and bottoms if using springform pans). Allow the cakes to cool completely on a wire rack. Once fully cooled, remove the parchment paper rounds. Level the tops of your cake layers if needed for a beautiful, even stack.
- For later assembly, wrap each cooled chocolate cake layer individually and tightly in plastic wrap. Store them in the refrigerator for up to a week, or freeze for longer storage.
Puppy Chow
- Pour the entire box of rice chex cereal into a very large bowl.
- In a saucepan set over low heat, combine the semi-sweet chocolate chips, peanut butter, and butter. Stir occasionally until the mixture is completely melted and smooth.
- Pour the warm melted chocolate-peanut butter mixture over the cereal. Gently fold and stir until all the cereal pieces are thoroughly coated.
- Transfer the chocolate-coated cereal to a clean, large garbage bag (or a very large zip-top bag). Add 4 cups of powdered sugar. Twist the bag closed and shake vigorously until all the cereal is beautifully coated in the powdered sugar. If desired, you can add more powdered sugar for a thicker coating.
Buttercream
- In a large mixing bowl, combine the softened butter and vegetable shortening. Beat them together using an electric mixer until the mixture is light and fluffy. Stir in the vanilla extract. Begin gradually adding the powdered sugar, about 2-3 cups at a time, mixing by hand with a spatula to prevent a sugar cloud. Continue adding powdered sugar until the frosting reaches your desired consistency and sweetness. Finally, beat the frosting with the electric mixer one last time on medium-high speed to ensure it’s incredibly smooth and all the powdered sugar is fully incorporated.
Assembling the Cake
- Spread a tiny dab of buttercream onto a 6-inch round cardboard cake circle (or your serving plate) to help anchor the cake. Place your first chocolate cake layer on top of the cardboard. Apply a layer of buttercream on top of this first layer, spreading it as evenly as possible with an offset spatula. You can customize the amount of frosting between layers to your preference.
- Arrange a single, even layer of your prepared puppy chow pieces over the buttercream on the first chocolate layer.
- Gently place the peanut butter cake layer on top. Spread another layer of buttercream, then arrange more puppy chow pieces evenly across it.
- Carefully position the second chocolate cake layer on top of the stacked layers. Spread a final layer of buttercream over this top cake layer.
- Apply a thin “crumb coat” of buttercream over the entire cake – top and sides. This thin layer traps any loose crumbs.
- Place the entire cake in the freezer for about 20 minutes (or refrigerator for 30-40 minutes) to allow the crumb coat to firm up. This makes applying the final layer of frosting much easier and cleaner.
- Once the crumb coat is firm, begin applying the second and final layer of frosting. Start by frosting the top of the cake, then work your way down the sides, striving for the smoothest and most even finish possible.
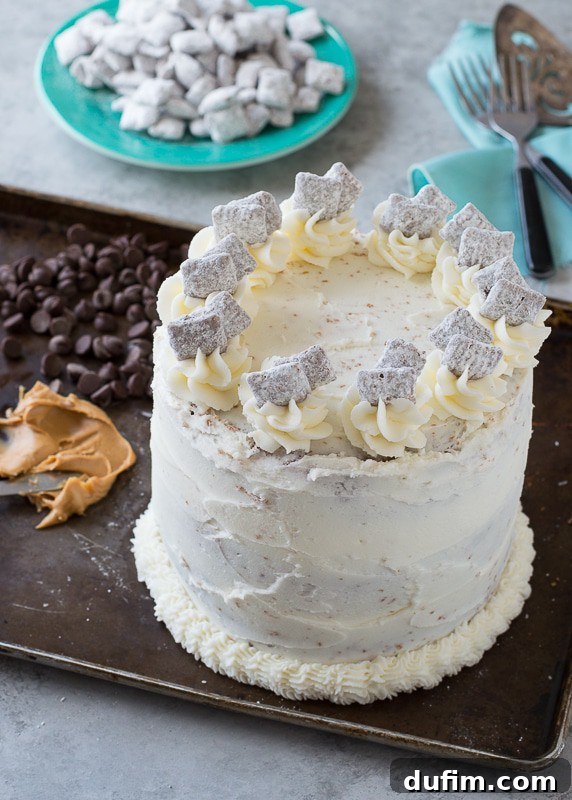
- Fill a piping bag fitted with a Wilton 2D tip (or your favorite decorative tip) with some of the remaining buttercream. Pipe a decorative border around the base of the cake and elegant swirls on top. Finish by adorning each buttercream swirl with a few extra puppy chow pieces for a festive touch.
- Serve your magnificent Puppy Chow Cake and prepare to bask in the compliments. Enjoy every glorious bite!
Notes
For a complete list of our favorite baking tools and equipment, please visit our Amazon affiliate store.
Nutrition
Calories: 1040kcal | Carbohydrates: 138g | Protein: 10g | Fat: 53g | Saturated Fat: 25g | Polyunsaturated Fat: 7g | Monounsaturated Fat: 18g | Trans Fat: 3g | Cholesterol: 100mg | Sodium: 663mg | Potassium: 325mg | Fiber: 5g | Sugar: 104g | Vitamin A: 1222IU | Vitamin C: 5mg | Calcium: 154mg | Iron: 10mg
Nutrition Disclosure
All nutritional values are approximate and provided to the reader as a courtesy. Changing ingredients and/or quantities will alter the estimated nutritional calculations.
Tips for Puppy Chow Cake Success
To ensure your Puppy Chow Cake turns out absolutely perfect, here are a few expert tips. Firstly, always use room-temperature ingredients for your cake batter and buttercream. This helps everything emulsify properly, leading to a smoother batter and a more consistent, fluffy frosting. Secondly, don’t rush the cooling process for your cake layers. Warm cakes will crumble easily and melt your frosting, leading to a messy assembly. Patience here is truly a virtue!
When making the puppy chow, ensure the chocolate-peanut butter mixture is fully melted and smooth before pouring it over the cereal. This guarantees an even coating. And don’t be shy with the powdered sugar – it’s what gives puppy chow its signature look and taste! For assembly, take your time with the crumb coat. This thin layer of frosting acts as a seal, locking in crumbs and providing a stable base for your final, flawless frosting layer. A brief chill after the crumb coat makes a world of difference for a professional finish.
Creative Variations and Serving Suggestions
While this classic Puppy Chow Cake recipe is a showstopper on its own, feel free to get creative with variations. You could experiment with different Chex cereal flavors or even mix in other crunchy elements like crushed pretzels or chocolate-covered candies into your puppy chow layers. For a richer chocolate experience, consider adding chocolate ganache drips over the frosting. To amp up the peanut butter, swirl some extra peanut butter into your buttercream or drizzle melted peanut butter over the top.
This cake is ideal for birthdays, potlucks, or any occasion that calls for an undeniably fun and delicious dessert. Serve it chilled for the best texture, and prepare for it to disappear quickly! Pair it with a cold glass of milk or a scoop of vanilla bean ice cream for an extra indulgent treat.
Share Your Sweet Success!
Did you love this recipe? We’d be thrilled to hear from you!
Rate and comment below to share your experience with this unforgettable Puppy Chow Cake!