
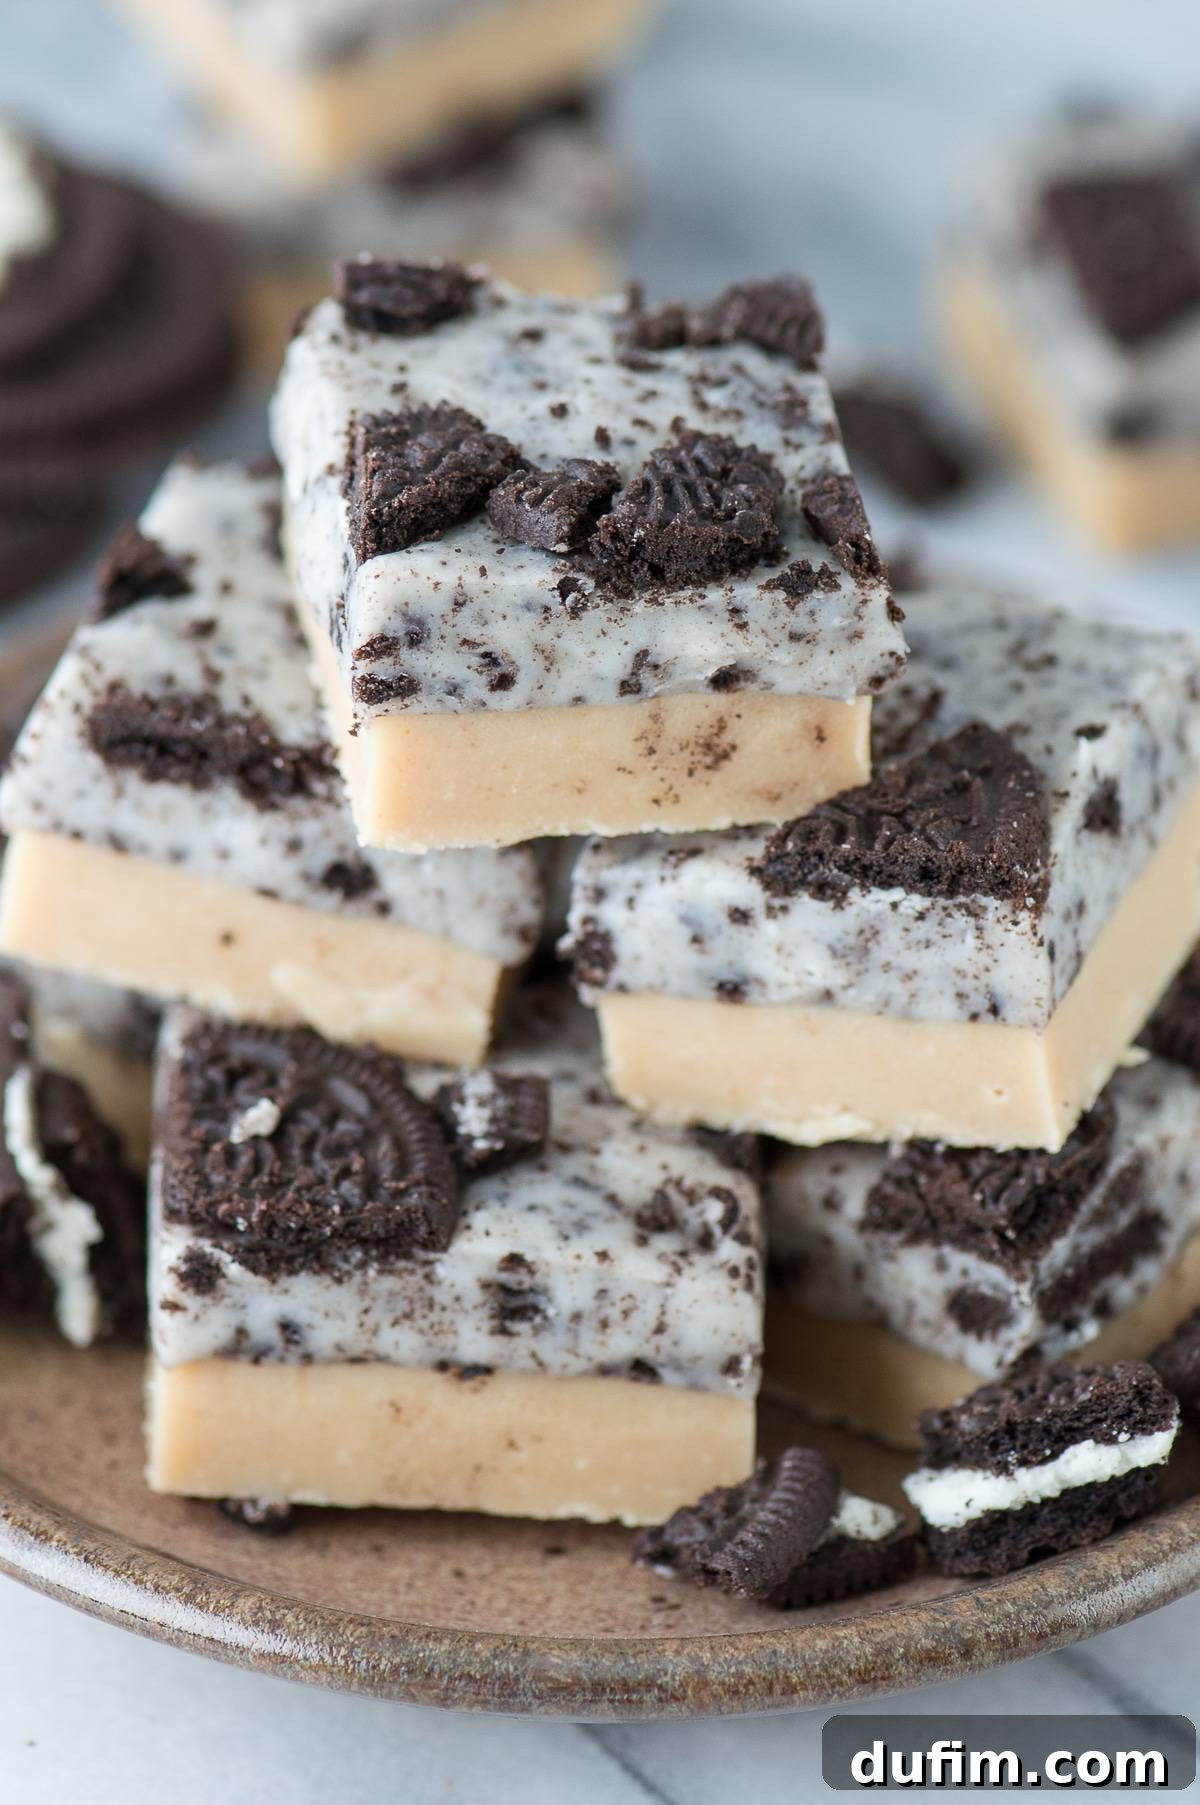
Get ready for the simplest, most delicious fudge you’ll ever make! This incredible two-layer peanut butter Oreo fudge uses only 4 ingredients and comes together with minimal effort, making it the easiest and BEST fudge recipe for any occasion.
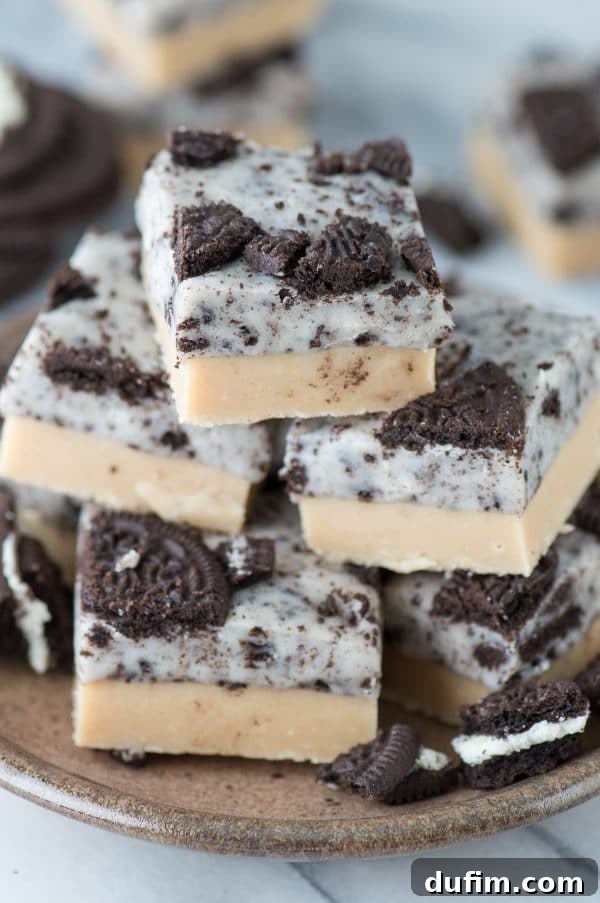
Irresistible 4-Ingredient Peanut Butter Oreo Fudge: The Easiest No-Bake Recipe!
There’s nothing quite like a homemade treat, especially when it promises rich flavor without hours of effort. Today, I’m thrilled to share a recipe that has truly become a game-changer in my kitchen: a phenomenal two-layer Peanut Butter Oreo Fudge. What makes it so remarkable? It requires just FOUR simple ingredients and absolutely no baking! Whether you’re a seasoned dessert enthusiast or a novice in the kitchen, this “miracle fudge” will have you creating impressive, delectable sweets in no time.
Finding Inspiration Beyond the Round
A few weeks ago, I found myself in a bit of a recipe rut. As a food blogger, the creative process is usually a joy, but sometimes, the well of inspiration runs dry. I realized I was deeply comfortable creating “round” things – cakes, pies, cheesecakes. While these are beloved classics, I felt a pull to explore new shapes, textures, and methods.
To break free from this creative stagnation, I reached out to my trusted circle of friends, asking for their wildest dessert ideas. Their responses were a floodgate of exciting, and sometimes daunting, suggestions! It was exactly what I needed to shake things up.
Initially, a wave of self-doubt washed over me. “If I were a truly great food blogger,” I thought, “I would instinctively know what my audience craves.” I also had to admit that my comfort zone for “round” desserts was much stronger than I had perceived. It’s easy to stay in a comfortable groove when everyone happily devours whatever you create, never complaining or asking for something different.
However, the beauty of having supportive friends is that they gently push you to grow. Many of their brilliant ideas were either slightly or significantly outside my culinary comfort zone. But instead of shying away, I made a conscious decision: my goal was to intentionally tackle some of these new recipe challenges. It’s true, I typically avoid making things I have zero experience with, primarily because new ventures often demand multiple batches and a fair bit of trial and error before perfection is achieved.
But then came this fudge recipe – and it defied all my expectations! To my utter delight, it worked flawlessly on the very first attempt. “Woohoo!” I exclaimed, realizing that if I could conquer homemade fudge on the first try, anyone could! This recipe truly is a miracle. You simply melt, you mix, and then you patiently wait while it sets. (I confess, “meander” was chosen simply because it rhymed with melt and mix – but it perfectly captures the leisurely waiting period!)
Why This 4-Ingredient Fudge is Your Next Go-To Dessert
The biggest draw, without a doubt, is the astonishingly short ingredient list. Can you believe this decadent treat calls for only four ingredients? It’s almost hard to grasp, which is why I affectionately call it “miracle fudge.” Not only is it incredibly simple, but the results are consistently rave-worthy. Everyone who has tasted this fudge has absolutely loved it, and I’m confident you will too!
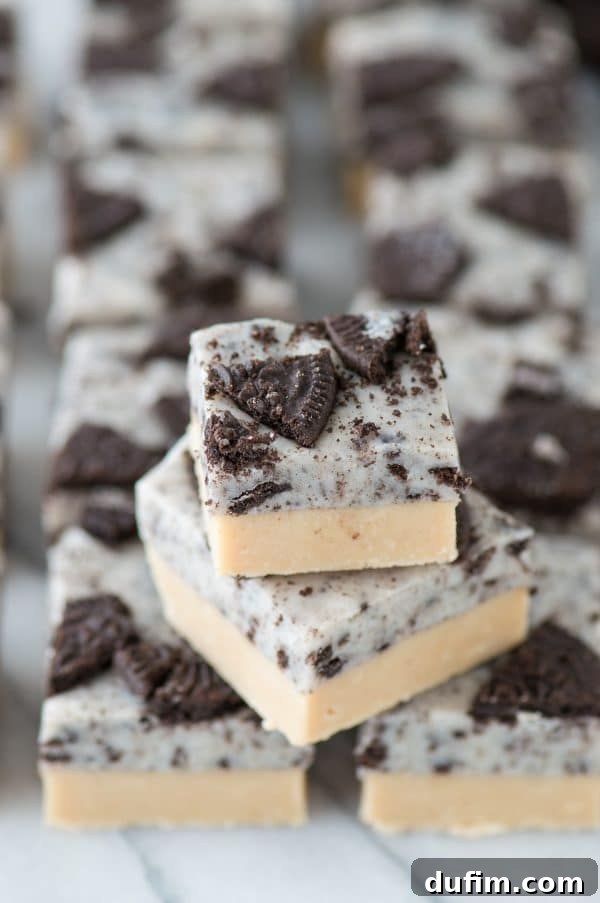
Beyond its simplicity, this Peanut Butter Oreo Fudge offers a delightful contrast of flavors and textures. The bottom layer is a smooth, creamy peanut butter fudge, rich and comforting. Layered on top is a vanilla-based fudge generously studded with crunchy, chocolatey Oreo pieces. Each bite delivers that perfect balance of sweet, salty, and satisfying crunch.
Conquering your fear of making homemade fudge has never been easier. Forget candy thermometers and complex techniques. This recipe eliminates all the guesswork, leaving you with a glorious, layered dessert that looks as impressive as it tastes.
The Essential Ingredients for Your Miracle Fudge
For this divine two-layer creation, you’ll need just four main components:
- Vanilla Candiquik or Almond Bark (16 oz package, split): This forms the base of both fudge layers, providing a smooth, stable, and easy-to-melt foundation. It’s specifically designed for quick melting and setting, which is key to our no-fail process.
- Sweetened Condensed Milk (one 14 oz can, split): This magical ingredient adds incredible creaminess, sweetness, and helps the fudge set perfectly without the need for additional sugar or elaborate cooking.
- Creamy Peanut Butter (1/3 cup): Essential for the distinct, luscious peanut butter layer. Opt for a classic, creamy variety (not natural, as the oil separation can affect the fudge texture).
- Oreos (6-8 cookies): These provide the irresistible chocolatey crunch and iconic flavor for the top layer, elevating the fudge from simple to sensational.
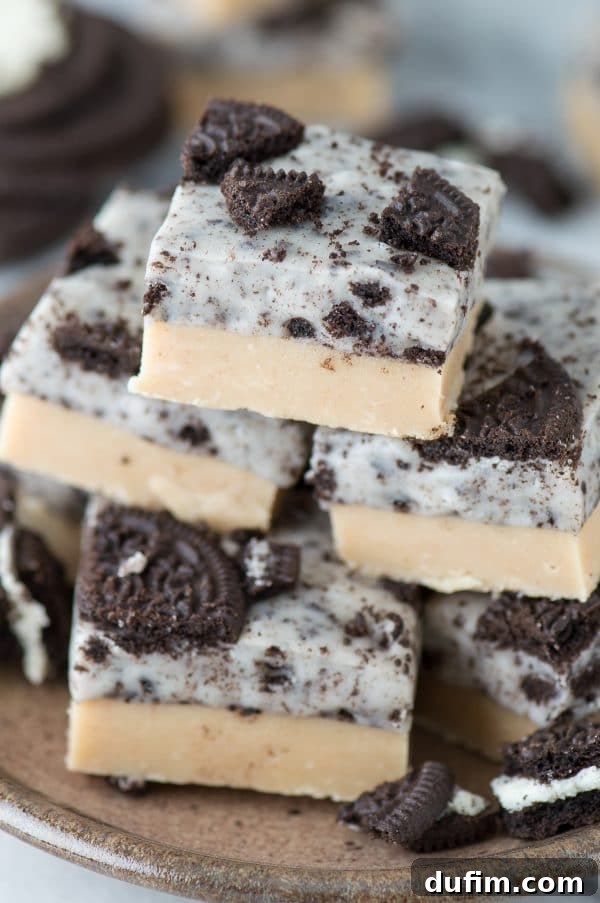
That’s it! With these minimal ingredients, you’re on your way to creating a stunning dessert that will disappear in a flash. Not only is it fantastic for satisfying a sudden sweet craving, but it also makes a wonderful homemade gift or a standout treat for parties and potlucks. Imagine the smiles when you present a dessert that took mere minutes of active prep time!
Overall Rating: 5 out of 5 stars (based on 1 rating)
Peanut Butter Oreo Fudge
This two-layer peanut butter Oreo fudge recipe is made with only 4 ingredients! It’s the easiest and BEST fudge recipe you’ll ever find!
Equipment
- 8-inch square baking dish
- Foil or parchment paper
- Medium-small pot
- My favorite spatula!
Ingredients
For the Peanut Butter Fudge Layer:
- 8 oz vanilla candiquik or almond bark (1/2 of a 16oz package)
- ⅓ cup (84g) creamy peanut butter (not all-natural, for best texture)
- 7 oz sweetened condensed milk (1/2 of a 14oz can)
For the Oreo Fudge Layer:
- 8 oz vanilla candiquik or almond bark (remaining 1/2 of a 16oz package)
- 7 oz sweetened condensed milk (remaining 1/2 of a 14oz can)
- 6-8 chopped Oreos
Instructions
- Prepare your pan: Line an 8-inch square baking dish with tinfoil or parchment paper. Ensure there’s enough excess hanging over the sides to easily lift the fudge out later.
- Make the Peanut Butter Layer: In a medium-small pot, combine 8 oz of vanilla candiquik (or almond bark) and ⅓ cup of creamy peanut butter. Heat over medium-low heat on the stove, stirring continuously until the mixture is completely melted and smooth. Be careful not to overheat.
- Incorporate Sweetened Condensed Milk: Remove the pot from the heat. Stir in 7 oz (half a can) of sweetened condensed milk until it is fully incorporated into the peanut butter mixture and creates a uniform fudge consistency.
- Pour the First Layer: Carefully pour the peanut butter fudge into your prepared baking dish. Gently tap the dish against the counter a few times to release any trapped air bubbles and ensure an even layer.
- Set the Peanut Butter Fudge: Place the dish in the refrigerator for about 15-20 minutes to allow the peanut butter fudge layer to firm up slightly. You want it cool and set enough to support the next layer without mixing.
- Make the Oreo Layer: While the first layer is setting, clean your pot or use another. Heat the remaining 8 oz of vanilla candiquik (or almond bark) over medium-low heat, stirring until it’s completely melted and smooth.
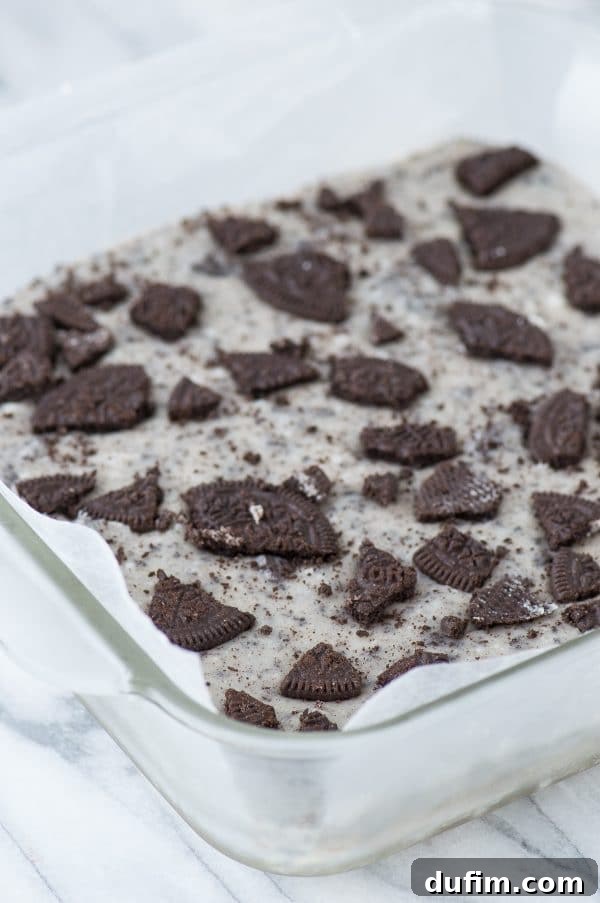
- Add Sweetened Condensed Milk & Oreos: Take the pot off the heat. Stir in the remaining 7 oz (half a can) of sweetened condensed milk and the 6-8 chopped Oreos until everything is well combined and evenly distributed throughout the fudge.
- Layer the Oreo Fudge: Pour the Oreo fudge mixture directly on top of the chilled peanut butter fudge layer. Gently tap the dish on the counter again to smooth out the top and remove any air bubbles.
- Optional Garnish: If desired, sprinkle a few additional chopped Oreos on top of the fudge for an extra visual appeal and crunch.
- Final Setting Time: Return the dish to the refrigerator and allow the fudge to set completely, ideally overnight or for at least 4-6 hours. This ensures both layers are firm and easy to cut.
- Slice and Serve: Once fully set, use the overhanging tinfoil or parchment paper to lift the fudge block out of the dish. Place it on a cutting board and cut it into desired square sizes.
- Storage: Store any leftover fudge in an airtight container in the refrigerator for up to two weeks, or freeze for longer enjoyment.
Nutrition
All nutritional values are approximate and provided to the reader as a courtesy. Changing ingredients and/or quantities will alter the estimated nutritional calculations.
Calories: 294kcal | Carbohydrates: 38g | Protein: 4g | Fat: 14g | Saturated Fat: 10g | Polyunsaturated Fat: 1g | Monounsaturated Fat: 2g | Trans Fat: 1g | Cholesterol: 8mg | Sodium: 85mg | Potassium: 137mg | Fiber: 1g | Sugar: 36g | Vitamin A: 66IU | Vitamin C: 1mg | Calcium: 74mg | Iron: 1mg
Tips for Fudge Perfection and Variations
Making this peanut butter Oreo fudge is straightforward, but a few tips can ensure absolute perfection every time:
- Don’t Rush the Melt: Low and slow is the key when melting the candiquik/almond bark. High heat can cause it to seize or burn, leading to a grainy texture.
- Use Creamy Peanut Butter: Natural peanut butter, with its separated oils, can change the texture and consistency of the fudge. Stick to classic creamy varieties for the best results.
- Chop Oreos Evenly: For a consistent crunch in every bite, chop your Oreos into roughly even pieces. You can also crush some into finer crumbs for a different texture.
- Chill Thoroughly: The setting time is crucial. Allowing the fudge to chill overnight ensures it’s perfectly firm and easy to cut into clean squares without crumbling.
- Experiment with Toppings: While chopped Oreos are fantastic, feel free to add other toppings like a drizzle of melted chocolate, sprinkles, or a sprinkle of flaky sea salt for a gourmet touch.
- Storage is Key: Store your fudge in an airtight container in the refrigerator. This keeps it fresh and maintains its firm texture.
Creative Variations to Try
Once you master the basic recipe, the possibilities for customization are endless:
- Chocolate Drizzle: Melt a bit of dark or milk chocolate and drizzle it decoratively over the top of the set fudge for an extra layer of flavor and visual appeal.
- Mini Oreos: Instead of regular chopped Oreos, use mini Oreos for a different look and a more delicate crunch.
- Peanut Butter Swirl: For the top layer, once you pour the Oreo fudge, add small dollops of melted peanut butter and swirl them gently with a knife for a marbled effect.
- Holiday Theme: Use holiday-themed Oreos or add festive sprinkles to the top layer to suit any celebration.
Ready to Make Your Own “Miracle Fudge”?
This 4-ingredient Peanut Butter Oreo Fudge isn’t just a recipe; it’s an invitation to rediscover the joy of simple, satisfying baking (or rather, no-baking!). It’s proof that you don’t need a lengthy ingredient list or complex techniques to create something truly delicious and impressive. My journey from recipe rut to this delightful discovery has been a testament to stepping outside my comfort zone, and I encourage you to do the same with this incredibly easy fudge.
So go ahead, gather your four ingredients, and whip up a batch of this irresistible fudge. It’s perfect for gifting, sharing, or simply treating yourself. You’ll be amazed at how effortlessly it comes together and how quickly it disappears!
Like this recipe? We’d love to hear from you!
Rate this recipe and leave a comment below to share your experience and tips!