
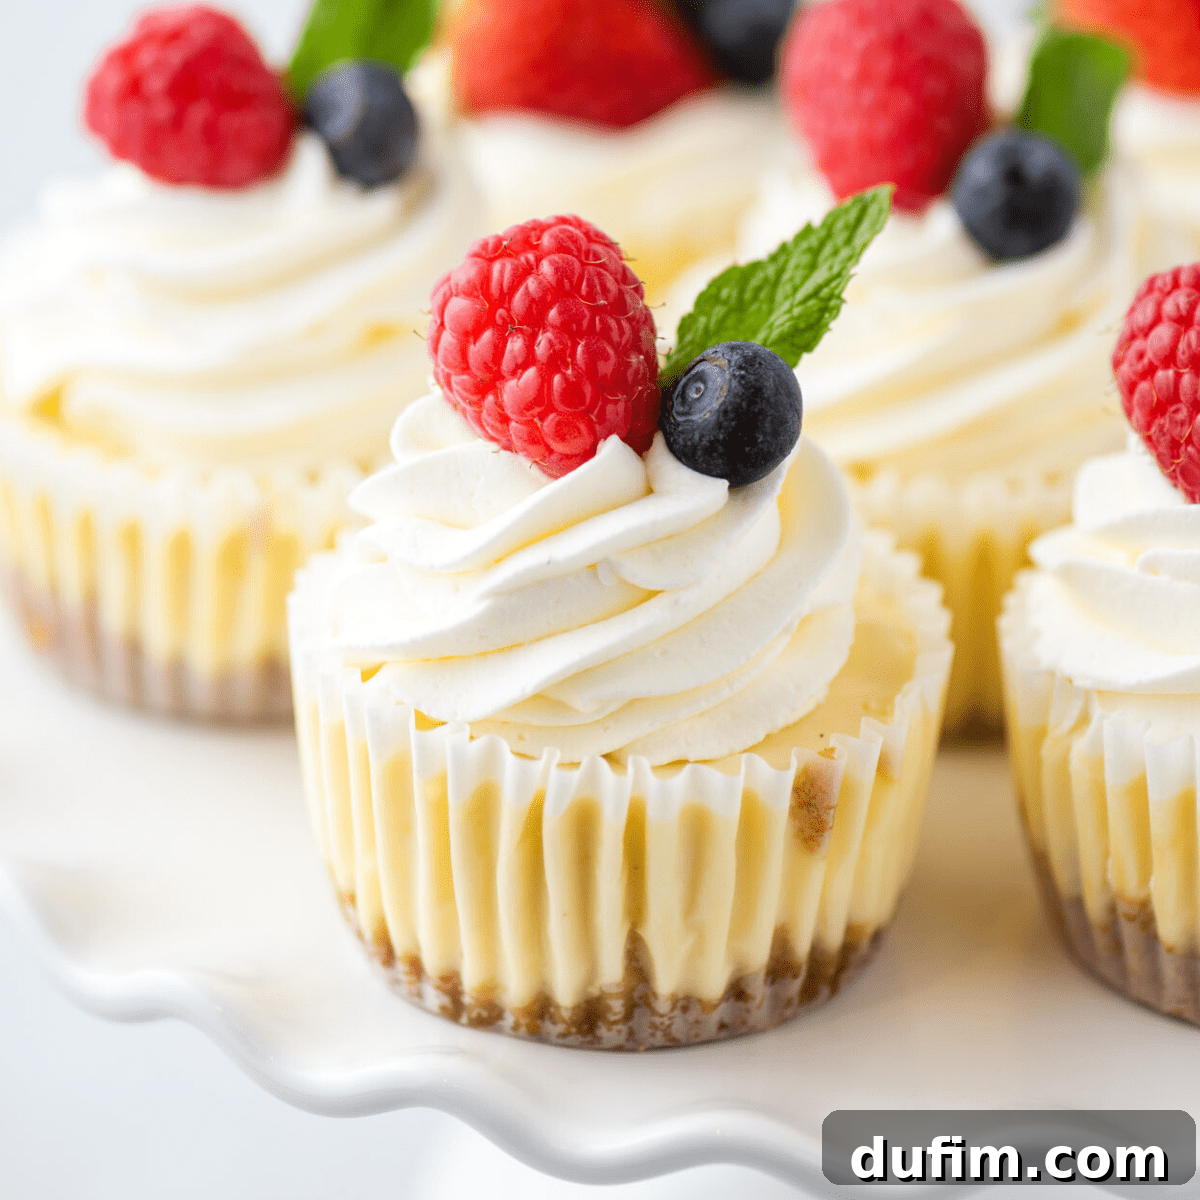
For years, I’ve perfected countless cheesecake recipes, and I can confidently say this mini version stands out as the easiest and most reliable method for achieving creamy, bakery-quality results right in your own kitchen. These delightful individual cheesecakes bake and chill in a fraction of the time compared to their full-sized counterparts, allowing you to serve perfect, stress-free desserts for any gathering. Every step of this recipe has been meticulously tested and refined to guarantee smooth, crack-free mini cheesecakes that will impress everyone. Trust this recipe for foolproof success and a dessert that consistently wows your guests.
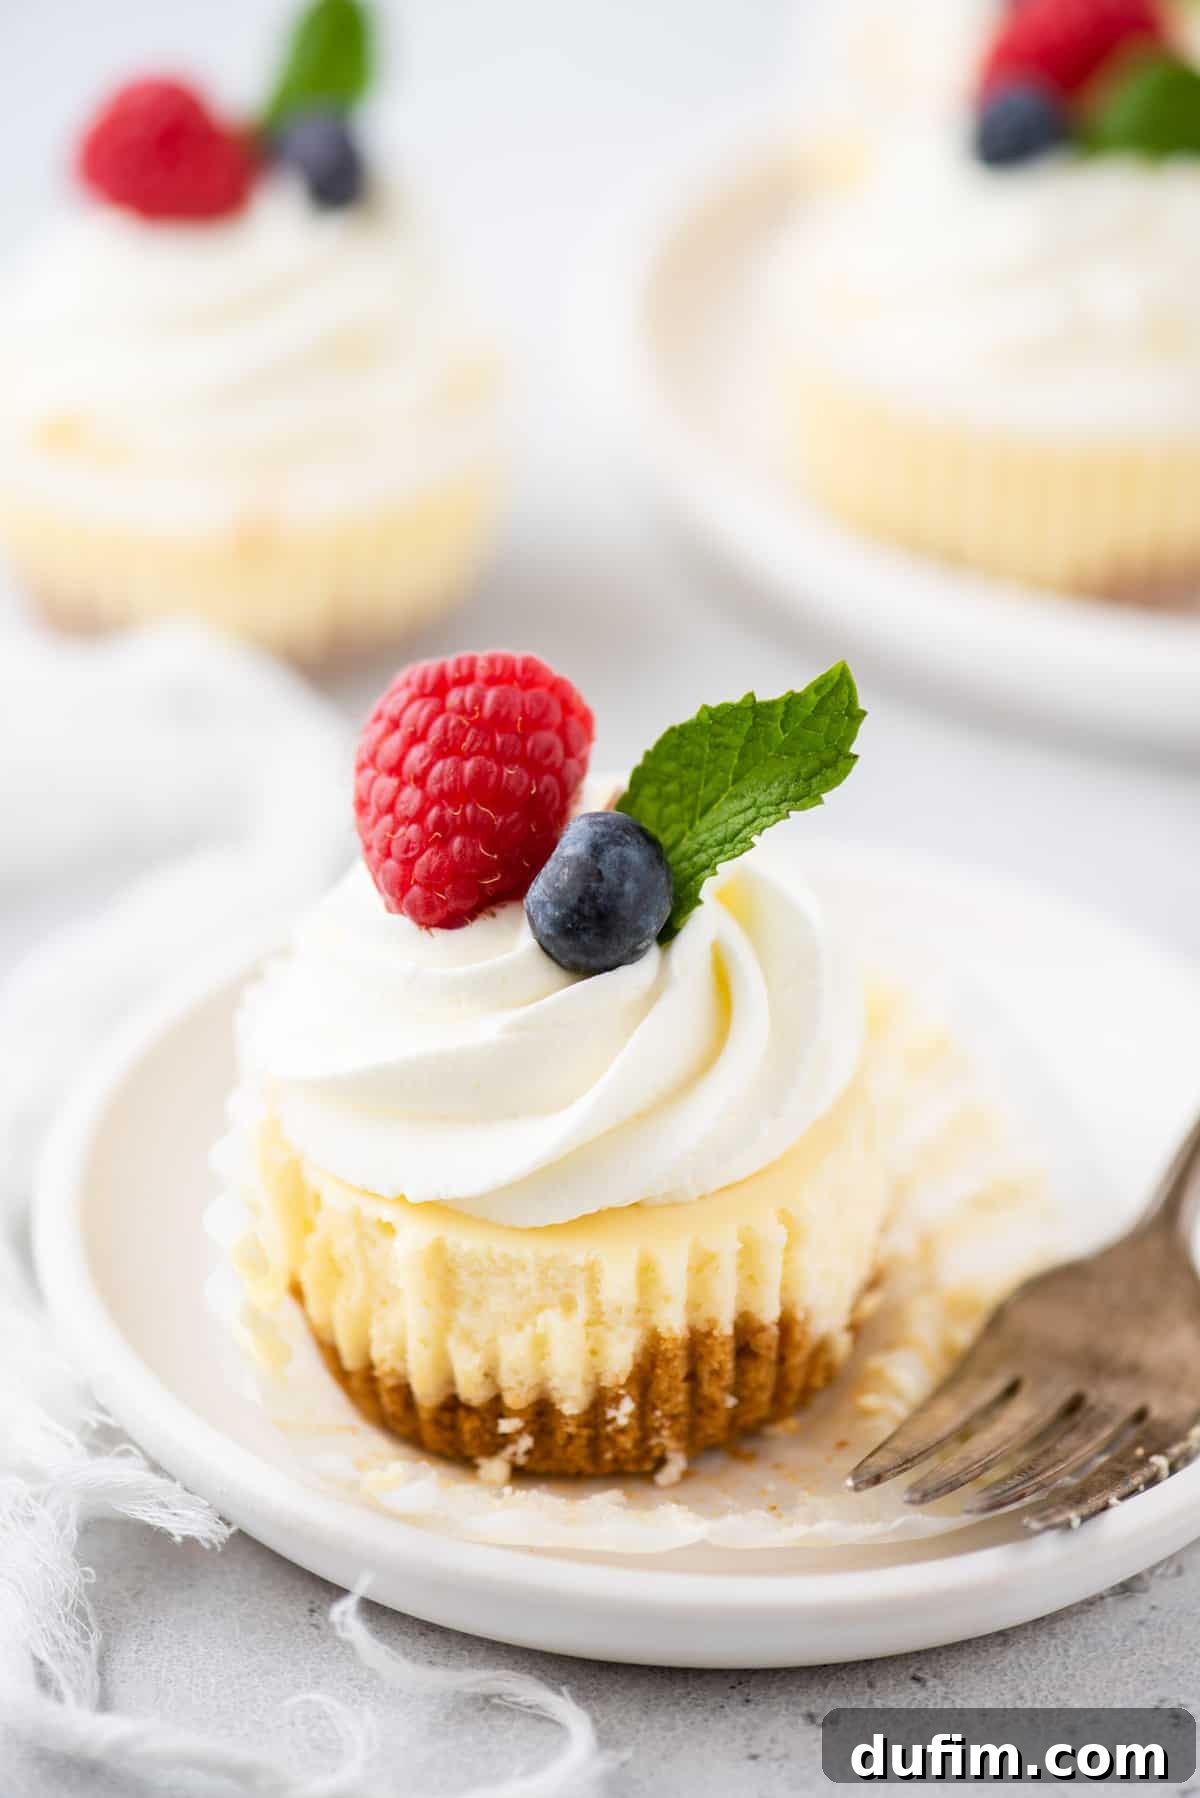
“So delicious! My daughter LOVES cheesecake and she devoured these. She even asked for them to be at her birthday party instead of cake. Thanks so much!!”
– Katy B
The Best Mini Cheesecake Recipe: Effortless Elegance for Any Event
Mini cheesecakes are more than just a dessert; they are the ultimate entry point into the wonderful world of cheesecake baking, especially for those who might find a traditional large cheesecake intimidating. These perfectly portioned treats deliver everything you adore about a classic cheesecake – that irresistible creamy texture, rich, tangy flavor, and boundless possibilities for customization with toppings – all while requiring significantly less time and effort. Because they bake much faster and chill quickly, they can be ready to serve in about a third of the time it takes to prepare a full-sized cheesecake. This efficiency means you can achieve impressive, bakery-worthy results without the common stresses of a water bath or the lengthy waiting periods associated with larger cheesecakes.
Having dedicated years to testing countless cheesecake variations, this particular recipe encapsulates all my finest professional tips and tricks into one truly foolproof method. From selecting the ideal full-fat cream cheese for ultimate richness to perfecting the delightful crust-to-filling ratio, every single step is meticulously streamlined. This ensures that even novice home bakers can achieve spectacular, flawless results on their very first attempt. I’ve also invested extensive time in testing various mixing techniques and precise bake times, guaranteeing that these mini delights emerge from the oven uniformly smooth and beautifully crack-free, eliminating any guesswork on your part!
What I find most captivating about these mini cheesecakes is their incredible versatility. Think of each little cheesecake as a delicious blank canvas, ready for your creative touch! You can adorn them with fresh seasonal fruits, decadent chocolate drizzles, rich caramel sauce, fluffy whipped cream, or a combination of your favorites, instantly transforming them to suit any theme or special occasion. Whether it’s a casual brunch, an elegant bridal shower, a festive holiday gathering, or just a treat for yourself, these cheesecakes fit right in. And because this recipe is so thoroughly tested and perfected, you can bake with complete confidence, knowing that every single batch will consistently yield a wonderfully delicious and visually appealing dessert.
Why You’ll Fall in Love with These Easy Mini Cheesecake Cups
These individual cheesecake cups aren’t just cute; they’re incredibly practical and delicious! Here are just a few reasons why they’ll become your new favorite dessert to bake:
- Effortlessly Feeds a Crowd: Mini cheesecakes are perfect for parties, potlucks, and gatherings. They’re easy to serve, no slicing required, and guests love having their own individual dessert.
- Convenient Make-Ahead & Freeze Option: Prepare them days or even months in advance! This makes entertaining so much easier, freeing up your time on the day of your event.
- Endless Customization with Toppings: From fresh berries to rich chocolate ganache, the possibilities are limitless. You can cater to different tastes by offering a topping bar.
- Faster and Easier Than a Large Cheesecake: Say goodbye to water baths and lengthy baking times. These mini versions are less prone to cracking and require less hands-on attention.
- Perfect Portion Control: Each cheesecake is a satisfying individual serving, making it easy for guests to enjoy without overindulging.
- Travel-Friendly Dessert: Easy to transport to picnics, brunches, or dinner parties without worrying about a large cake shifting or getting damaged.
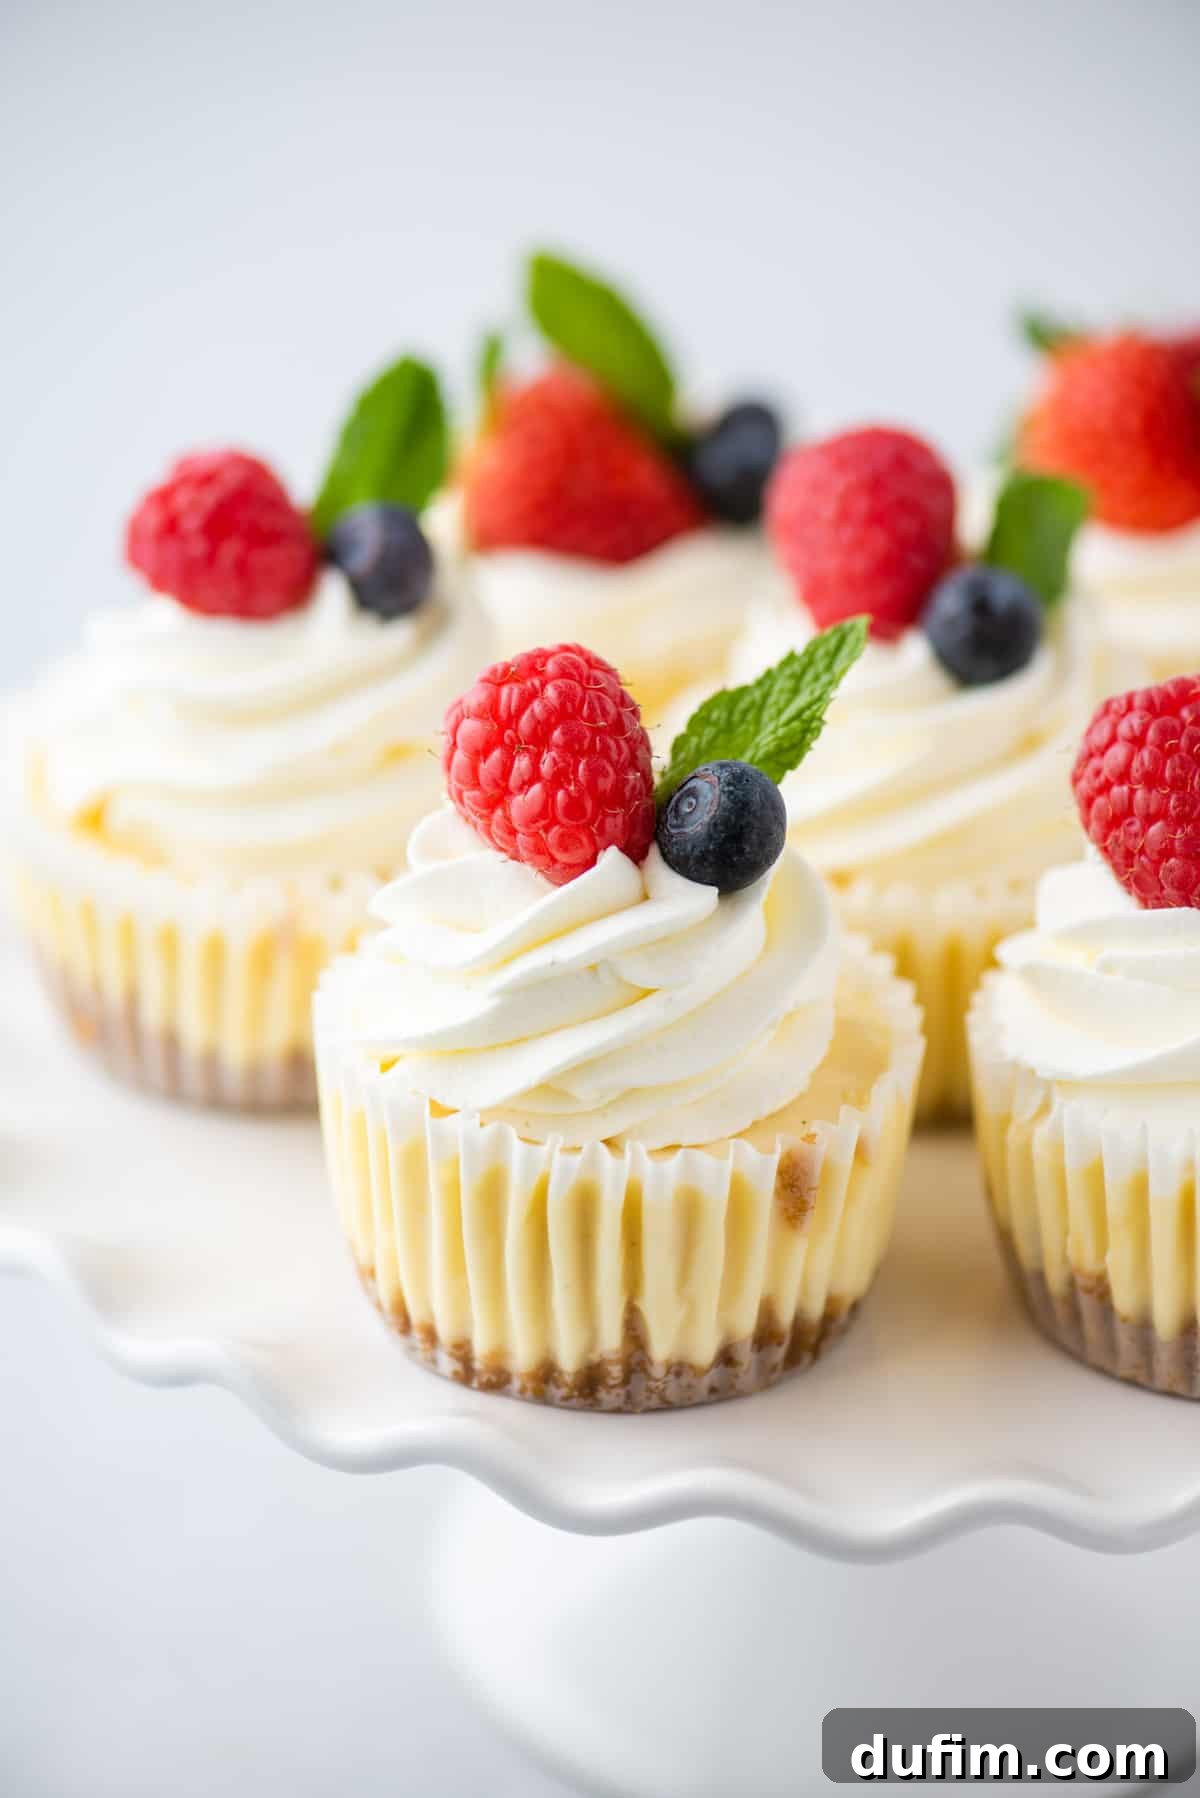
Essential Ingredients for Perfect Individual Cheesecakes
The beauty of this recipe lies in its simple, readily available ingredients that combine to create an extraordinary dessert. For precise quantities and detailed instructions, refer to the full recipe card at the end of this post.
For the Irresistible Crust
- Graham Cracker Crumbs: These form the classic, buttery base for our cheesecakes. You can easily make your own by pulsing whole graham crackers in a food processor until fine, or opt for the convenience of pre-packaged crumbs found in most grocery stores.
- Unsalted Butter: Melted unsalted butter binds the graham cracker crumbs together, creating a firm yet crumbly crust. Melting can be done quickly in the microwave or gently in a small saucepan on your stovetop. Using unsalted butter allows you to control the overall saltiness of the crust.
For the Creamy Cheesecake Filling
- Full-Fat Cream Cheese: This is the star of our show! It’s crucial to use full-fat cream cheese (in block form, not the whipped variety in tubs) and ensure it’s softened to room temperature. Room temperature cream cheese whips up smoothly, preventing lumps and ensuring a silky, uniform filling.
- Granulated Sugar: Provides the perfect balance of sweetness to complement the tangy cream cheese.
- Vanilla Extract: A touch of pure vanilla extract enhances the overall flavor profile, adding warmth and depth to the cheesecake.
- Eggs: Large eggs act as a binder and contribute to the cheesecake’s rich, custardy texture. Like the cream cheese, it’s best to let your eggs come to room temperature before mixing. This helps them incorporate more evenly into the batter, reducing the risk of over-mixing and cracks.
For the Delightful Topping
- Whipped Cream: A dollop of whipped cream adds a light, airy contrast to the rich cheesecake. You can easily make homemade whipped cream, use store-bought refrigerated whipped cream in a can, or opt for frozen whipped topping. If you’re preparing your mini cheesecakes in advance, frozen whipped topping tends to hold its structure longer in the fridge.
- Fresh Fruit: Fresh berries are a timeless and beautiful choice, adding a burst of color and natural sweetness. However, feel free to use whatever seasonal fruit looks freshest and most appealing at your local grocery store or farmer’s market! Sliced peaches, kiwi, or pomegranate arils are also fantastic options.
Can I Substitute the Graham Crackers for the Crust?
Absolutely! The crust is a fantastic opportunity to get creative. For a decadent chocolate crust, swap graham crackers for crushed Oreos (including the cream filling for extra richness) or chocolate wafers. If you’re looking for something different, try vanilla wafers for a subtle sweetness or ginger snaps for a spicy, aromatic kick, especially appealing during the fall and winter months. These mini cheesecakes can even be made without a crust, though they become a bit more challenging to eat by hand and lose some of that satisfying textural contrast. If going crustless, consider serving them in small ramekins with spoons.
Recommended Tools for Baking Flawless Mini Cheesecakes
One of the many advantages of baking mini cheesecakes is that they require minimal special equipment. Most of these tools are likely already in your kitchen, making this recipe accessible to everyone!
- Standard Size Muffin Pan: This is your primary baking vessel. A 12-cup muffin pan is perfect for creating individually portioned cheesecakes, ensuring uniform size and even baking.
- Paper Muffin / Cupcake Liners: Essential for easy removal of the cheesecakes from the pan and convenient serving. They also help maintain the shape of your cheesecakes and keep them looking neat.
- Food Processor (optional but recommended for crust): While you can crush graham crackers by hand, a food processor makes quick work of turning them into fine crumbs, ensuring a consistent crust texture.
- Mixing Bowls: You’ll need at least two – one for the crust mixture and another for the cheesecake filling.
- Hand Mixer or Stand Mixer: Crucial for achieving a smooth, lump-free cream cheese filling. A hand mixer offers flexibility, while a stand mixer allows for hands-free operation.
- Measuring Cups and Spoons: For accurate measurement of all ingredients, which is key for successful baking.
- Rubber Spatula: For scraping down the sides of the bowl and ensuring all ingredients are fully incorporated without over-mixing.
- 1/3 Cup Measuring Cup (or similar flat-bottomed tool): Perfect for pressing the crust firmly into the muffin liners, creating a solid base.
Making individual cheesecakes in a muffin pan is a brilliant way to simplify a traditional cheesecake recipe. Unlike large cheesecakes, mini cheesecakes typically don’t require a water bath, which often intimidates bakers. They also bake significantly faster, making them a much quicker dessert option without compromising on flavor or texture.
How to Make the Best Mini Cheesecakes: Step-by-Step Guide
This is the kind of effortlessly elegant dessert you’ll find yourself turning to time and again, especially when you’re hosting a crowd or simply craving a delicious treat. Follow these detailed steps to achieve perfect mini cheesecakes every time.
To Make the Crispy Graham Cracker Crust
- Prepare Your Baking Setup: Begin by preheating your oven to 350º F (175º C). Line a standard-sized 12-cup muffin pan with paper muffin liners. This ensures easy removal and a clean presentation for your mini cheesecakes.
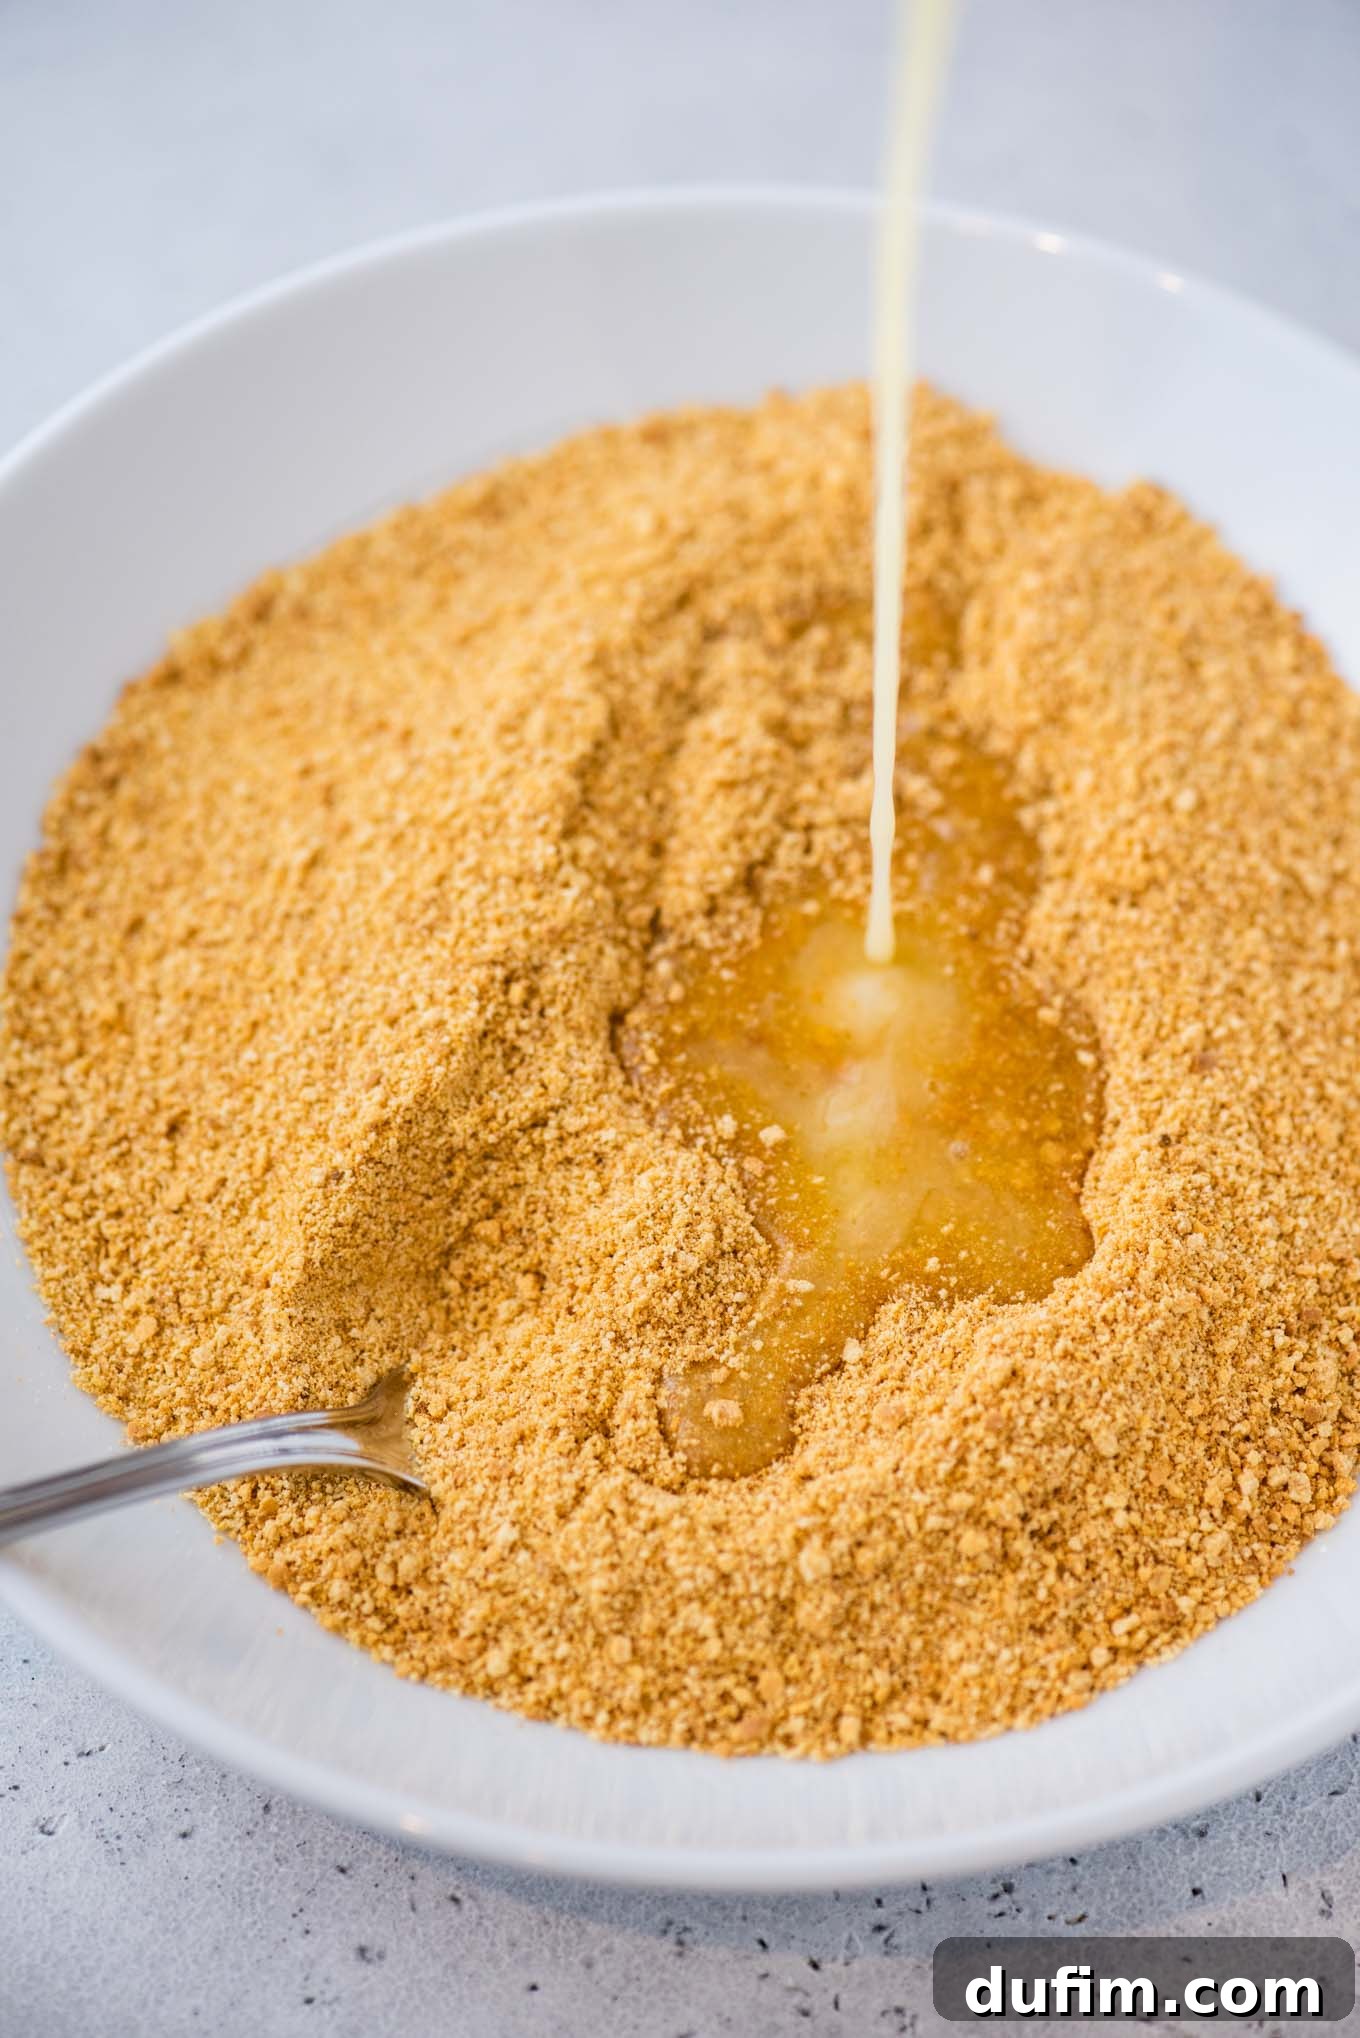
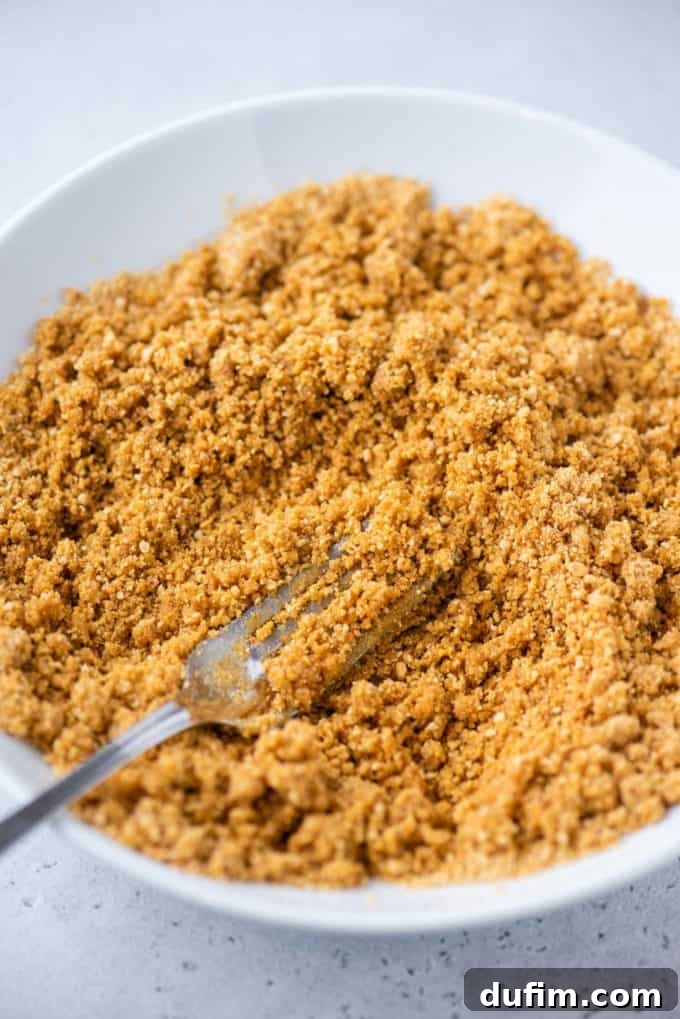
- Craft the Crust Mixture: In a medium mixing bowl, combine the finely crushed graham cracker crumbs with the melted unsalted butter. Stir these two ingredients thoroughly until the mixture is evenly moistened and resembles coarse, wet sand.
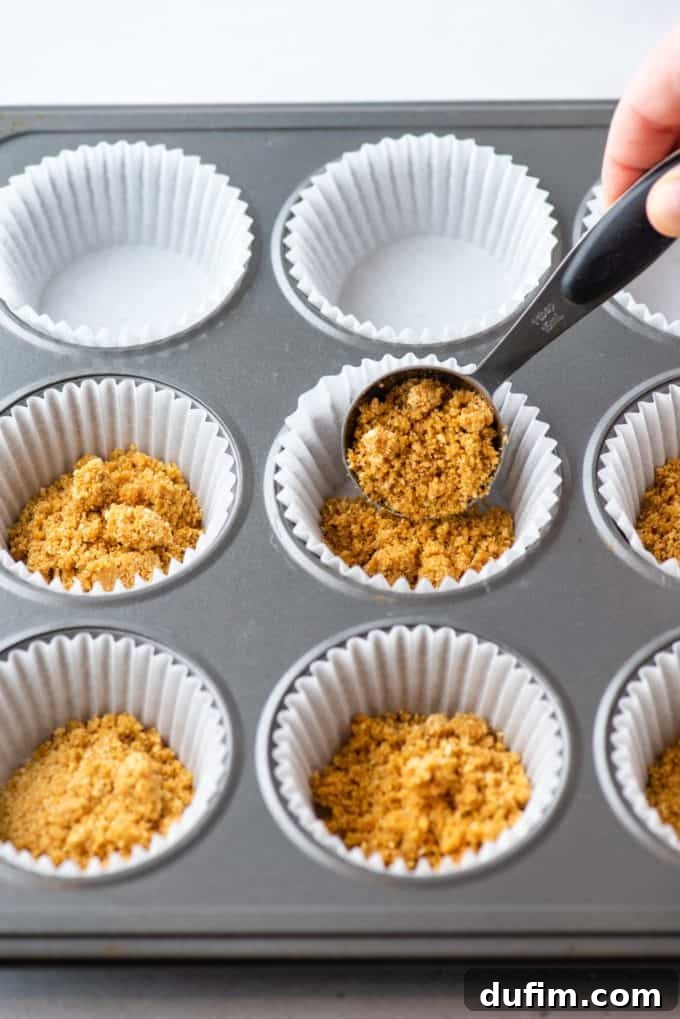
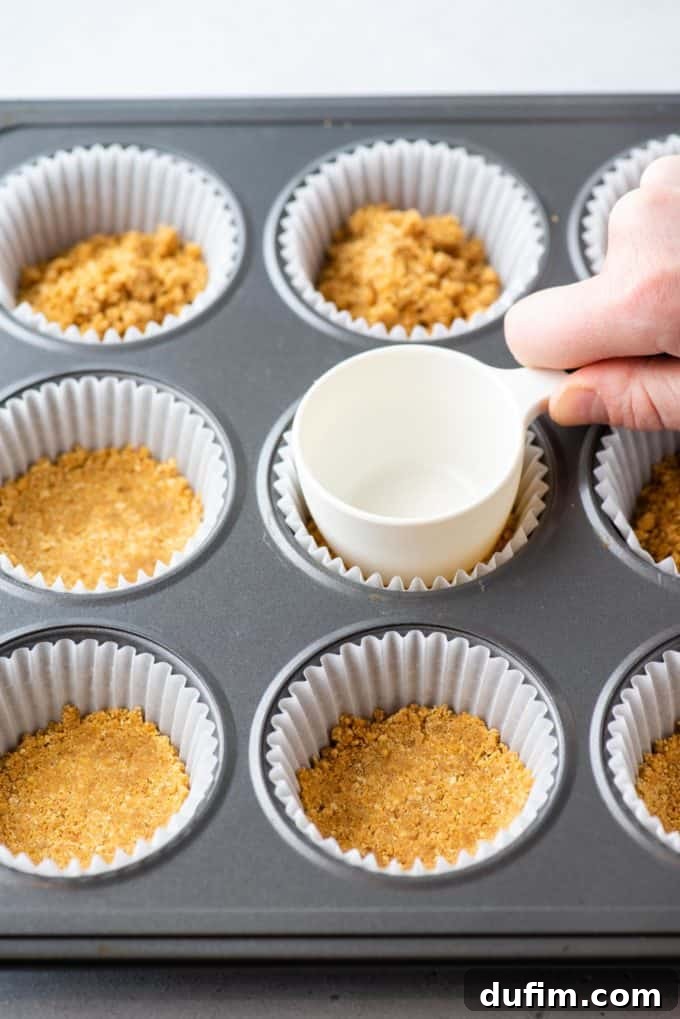
- Form and Press the Crusts: Distribute about 1 to 2 tablespoons of the graham cracker mixture evenly into the bottom of each prepared muffin cup. Using the bottom of a 1/3 cup measuring cup, a shot glass, or a similar flat-bottomed tool, press the crumbs down very firmly and evenly into the base of each liner. This creates a compact and stable crust that won’t crumble when eaten.
- Pre-Bake the Crust: Place the muffin pan in the preheated oven and bake the crusts for just 5 minutes. This quick bake helps set the crust and prevents it from becoming soggy. Once baked, remove the pan from the oven and allow the crusts to cool completely while you prepare the cheesecake filling. Cooling is important to prevent the filling from becoming greasy.
To Make the Creamy Cheesecake Filling
- Cream the Cheese and Sugar: In a large mixing bowl, using an electric hand mixer (or a stand mixer with the paddle attachment), beat the room temperature full-fat cream cheese and granulated sugar together for 1 to 2 minutes. Continue mixing until the mixture is completely smooth, light, and free of any lumps. Ensure you scrape down the sides of the bowl periodically to incorporate everything evenly.
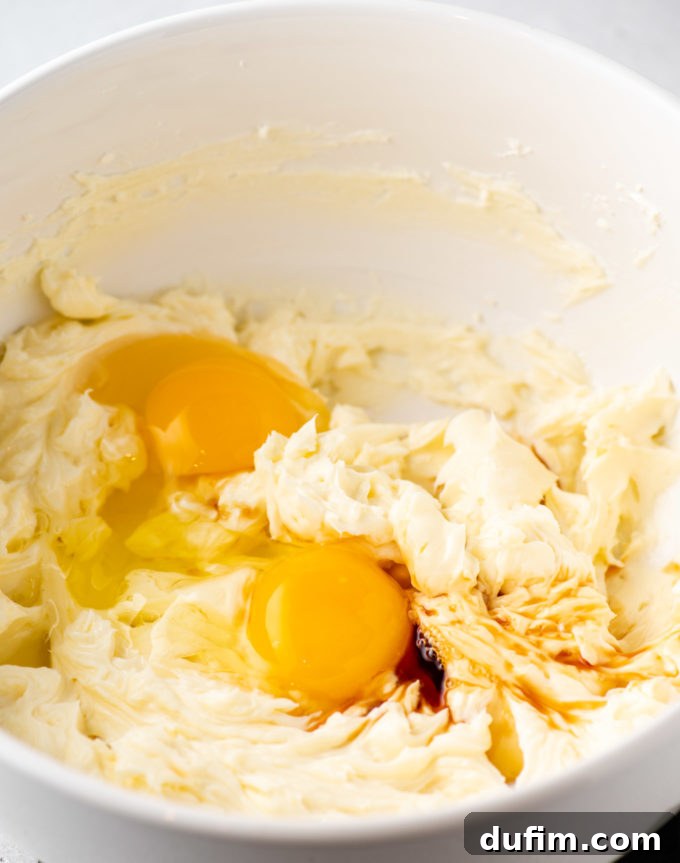
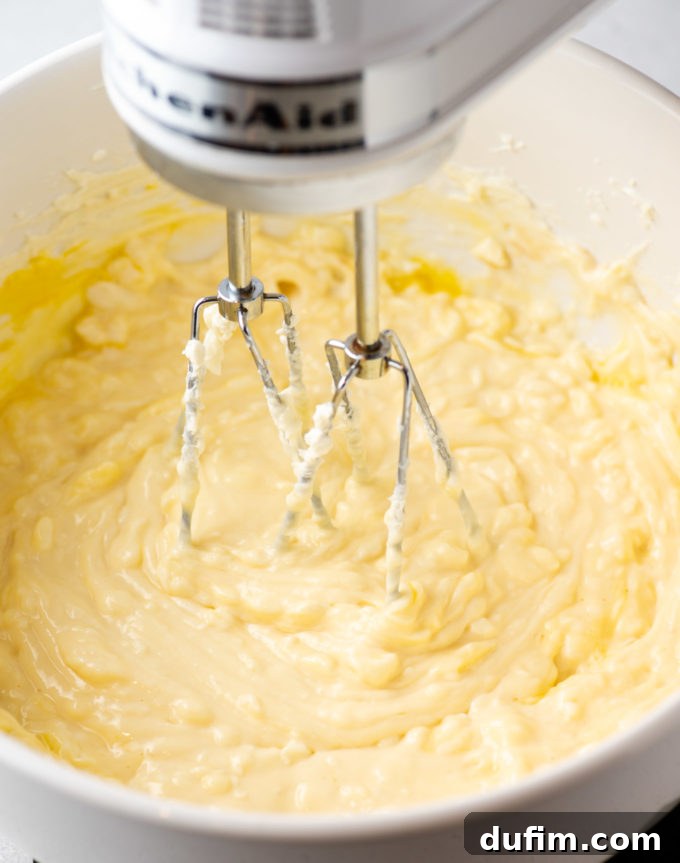
- Finish the Cheesecake Batter: Add the vanilla extract to the cream cheese mixture and beat until just combined. Next, add the room temperature eggs, one at a time, beating on low speed *just* until the yolk breaks and is incorporated. Over-beating at this stage can introduce too much air, leading to cracks and sinking. Scrape down the bowl one last time to ensure everything is perfectly blended.
- Assemble the Cheesecakes: Carefully divide the smooth cheesecake batter among the muffin cups, filling each paper liner almost to the top. Try to fill them as evenly as possible to ensure uniform baking.
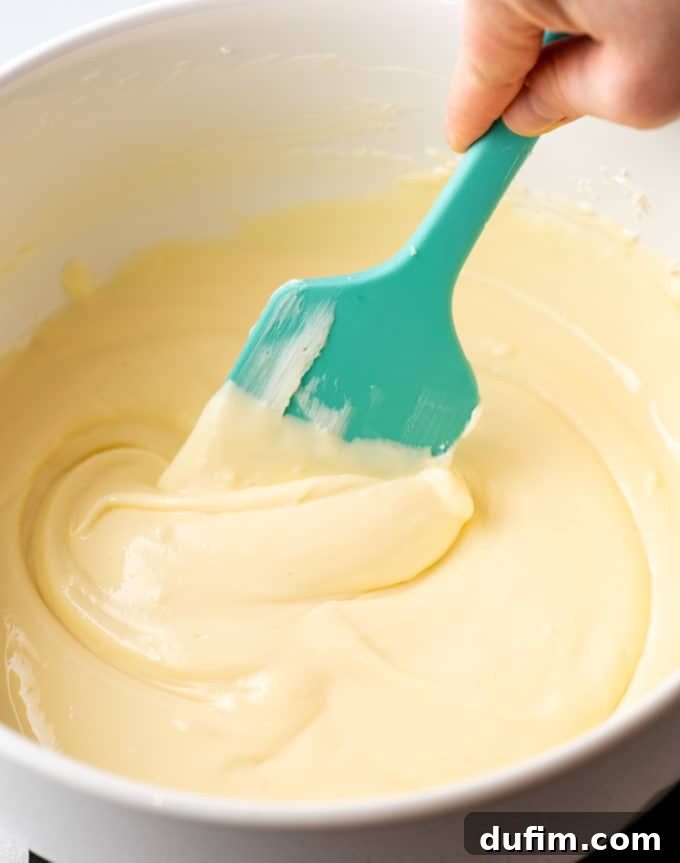
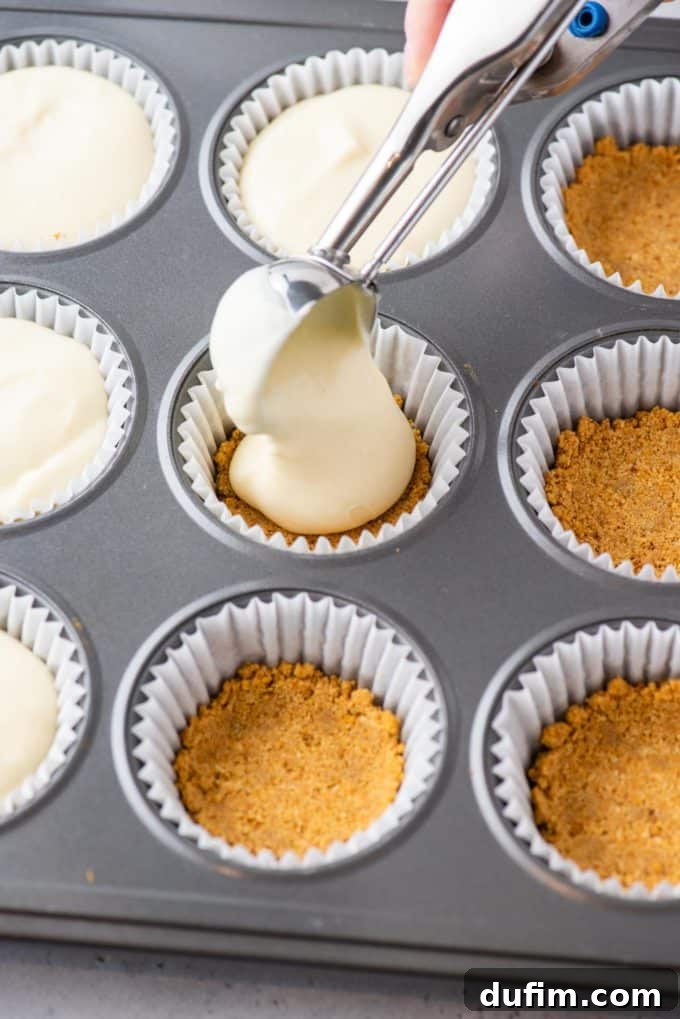
- Bake to Perfection: Return the muffin pan to the preheated oven and bake for 15 to 17 minutes. The cheesecakes are done when the edges appear set, but the centers still have a slight, gentle jiggle when the pan is lightly shaken. Avoid over-baking, as this is a common cause of dry texture and cracks.
- Cool and Chill: Once baked, remove the pan from the oven and let the mini cheesecakes cool completely to room temperature on a wire rack. This gradual cooling is crucial for preventing cracks. Once at room temperature, transfer them to the refrigerator and chill for at least 4 hours. For the best flavor and texture, chilling overnight is ideal. If chilling for an extended period or overnight, loosely cover the cheesecakes with plastic wrap to prevent them from absorbing fridge odors.
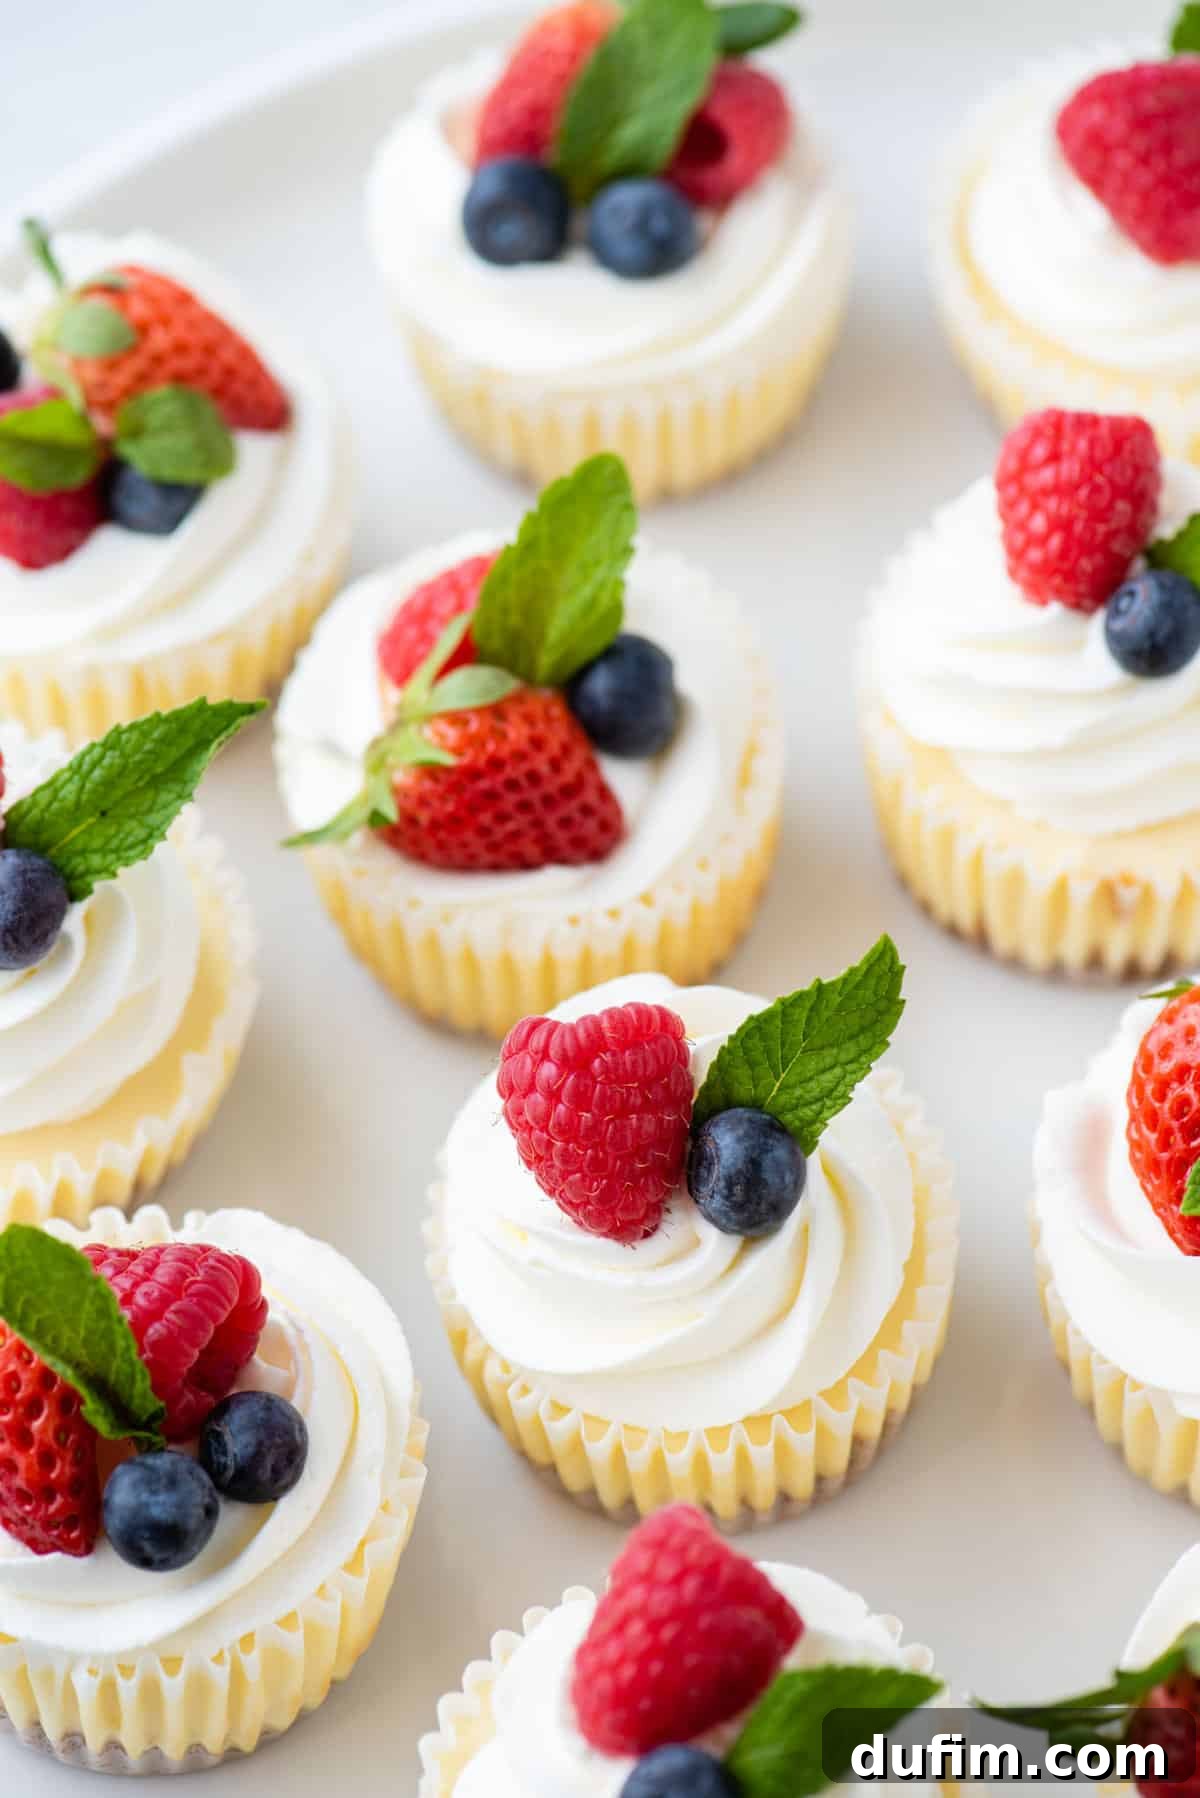
- Garnish and Serve: Just before serving, unleash your creativity! Top the perfectly chilled mini cheesecakes with a generous swirl of whipped cream, an assortment of fresh berries or other seasonal fruit, a drizzle of luscious chocolate ganache, or any of your favorite toppings. Serve immediately and watch them disappear!
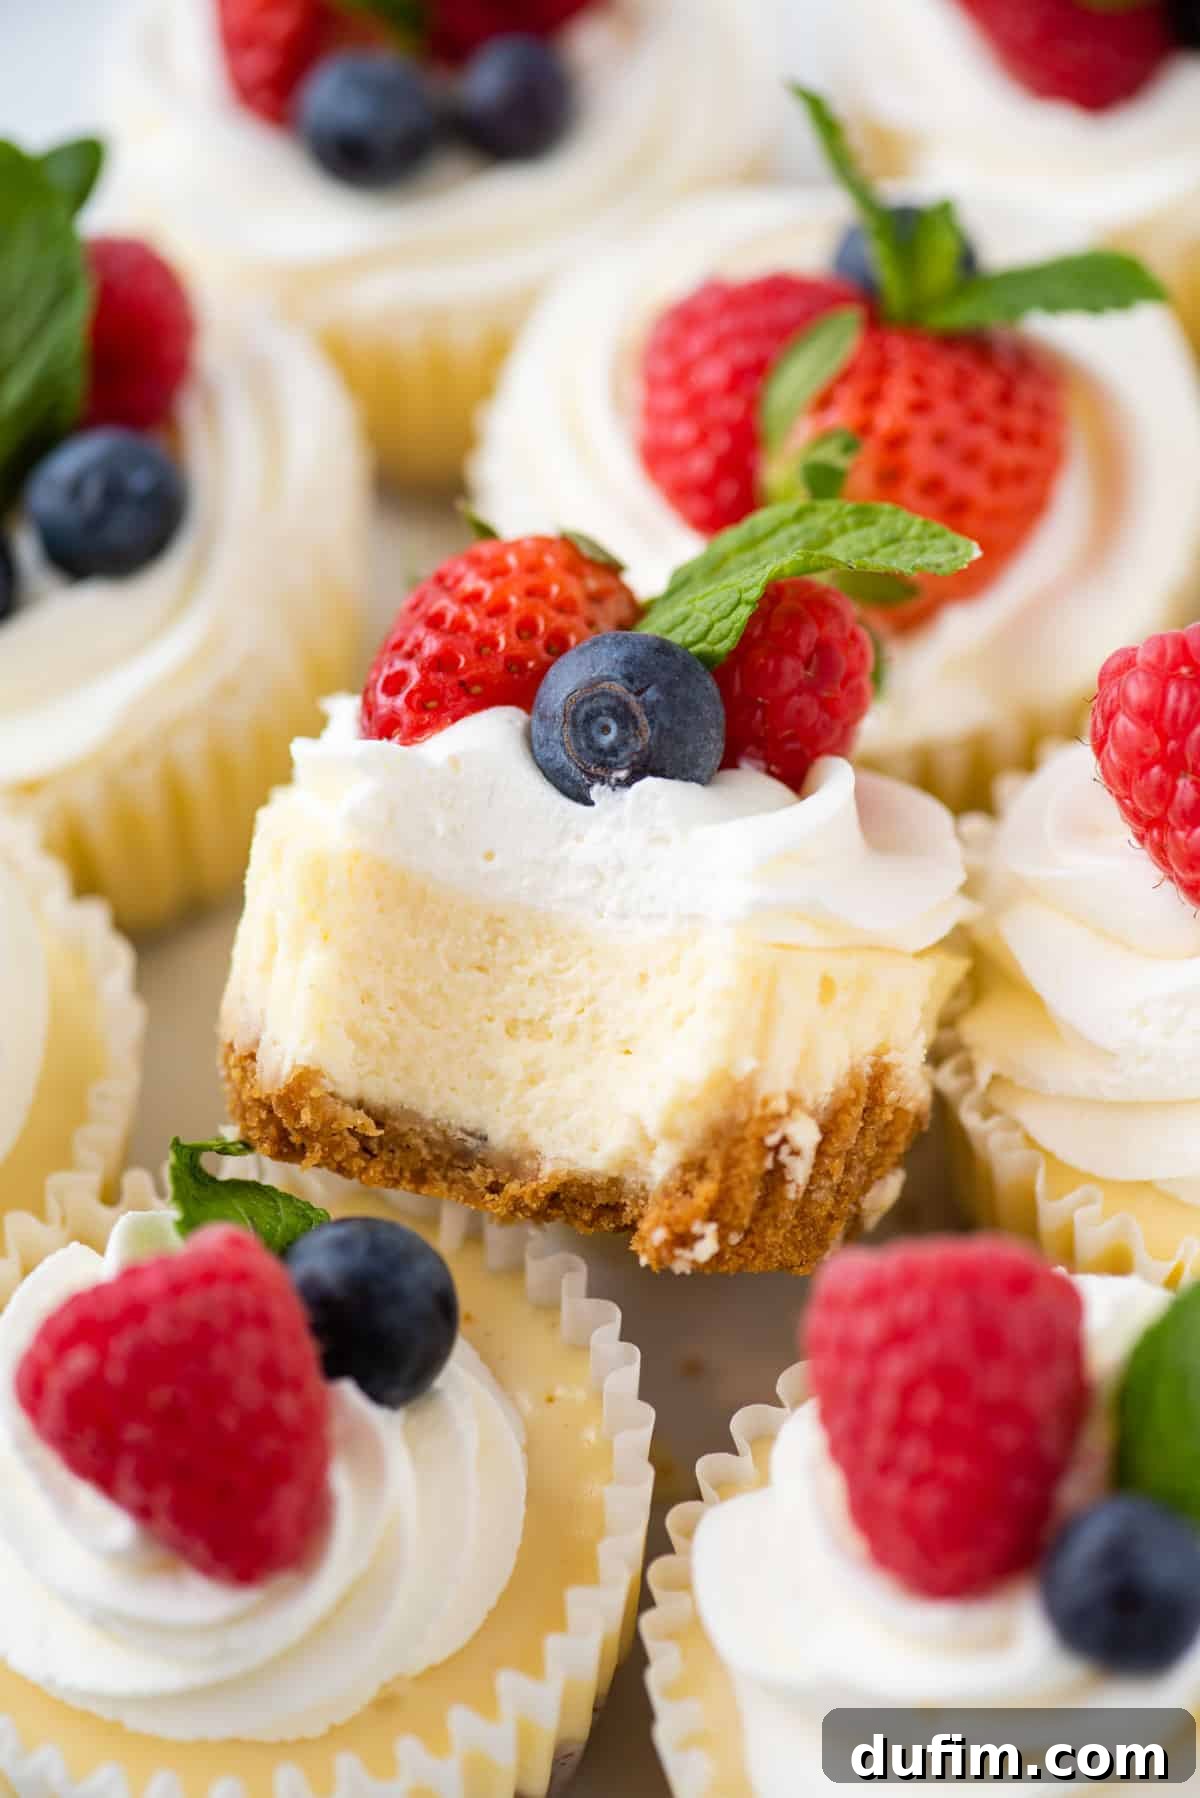
The Best Mini Cheesecake Recipe: Expert Tips for Foolproof Success
While mini cheesecakes are inherently less temperamental than their larger, traditional counterparts, a few key techniques can elevate your baking from good to absolutely perfect. These tips will help ensure your cheesecakes turn out smooth, creamy, and crack-free every single time.
- Room Temperature Ingredients are Key: This cannot be stressed enough! Ensure your cream cheese and eggs are at true room temperature. Cold ingredients don’t emulsify properly, leading to a lumpy batter and a less smooth texture.
- Do Not Over-Mix the Cheesecake Batter: This is arguably the most critical tip for avoiding cracks. Once you’ve added the eggs, beat them in just until the yolk breaks and they are barely incorporated into the mixture. Over-beating introduces too much air into the batter, which expands during baking and then collapses as the cheesecake cools, resulting in unsightly cracks or a sunken center. Use a low speed and stop as soon as the eggs are no longer visible.
- Avoid Over-Baking: Over-baking dries out the cheesecake and is a primary cause of cracks. When you gently shake the baking pan back and forth, the centers of the cheesecakes should still have a slight, delicate jiggle. If the centers move like a liquid wave, they need a few more minutes in the oven. If they are completely firm and don’t jiggle at all, they are likely over-baked.
- Allow Sufficient Cooling Time: Cheesecakes are sensitive to sudden temperature changes. After baking, let them cool gradually. Start by leaving them in the warm oven with the door slightly ajar for 15-20 minutes. Then, transfer the pan to a wire rack to cool completely to room temperature before moving them to the refrigerator. This slow cooling process helps prevent shrinking and cracking.
- Chill, Chill, Chill: Warm cheesecake is simply not appealing. Adequate chilling time (at least 4 hours, preferably overnight) is essential for the cheesecake to fully set, firm up, and develop its rich, creamy texture and robust flavor. Patience is a virtue here!
- Don’t Panic About Imperfections: Even the most seasoned bakers occasionally get a small crack or a tiny bubble. The wonderful thing about mini cheesecakes is that they are designed for toppings! A swirl of whipped cream, a few fresh berries, or a dusting of powdered sugar will beautifully disguise any minor imperfections, and no one will ever notice.
How Do You Keep Mini Cheesecakes From Sinking in the Middle? Troubleshooting Common Issues
Sinking centers can be a common frustration, but it’s an easily solvable problem once you understand the root causes. Here are the main reasons your mini cheesecakes might be sinking and how to fix them:
- Over-mixing the Batter: As mentioned in the tips, this is a prime culprit. When you overmix cheesecake batter, especially after adding the eggs, you incorporate too much air. This air expands rapidly in the hot oven, creating a puffy cheesecake. As the cheesecakes cool, this excess air escapes, and the structure collapses, causing those unsightly sunken centers.
- Sudden Temperature Changes: Cheesecake hates abrupt shifts in temperature. If you yank your hot mini cheesecakes directly from the oven into a cool kitchen, the quick drop in heat can shock the delicate custard, causing it to contract rapidly and the centers to collapse.
- Fix for Sinking Centers: The best solution is a gradual cooling process. Once the cheesecakes are baked, turn off your oven, crack the oven door open slightly, and let them sit in the diminishing heat for about 15-20 minutes. This allows them to slowly acclimate to a cooler environment. After this initial cooling period, remove them from the oven and place the muffin pan on a wire rack to cool completely to room temperature before transferring them to the refrigerator for their final chill. This method promotes even cooling and prevents drastic structural changes.
- Under-baking: While over-baking causes cracks, under-baking can also lead to sinking. If the cheesecake hasn’t set properly in the middle, it won’t be able to hold its structure as it cools. Ensure that gentle jiggle in the center is present but not a liquid wobble.
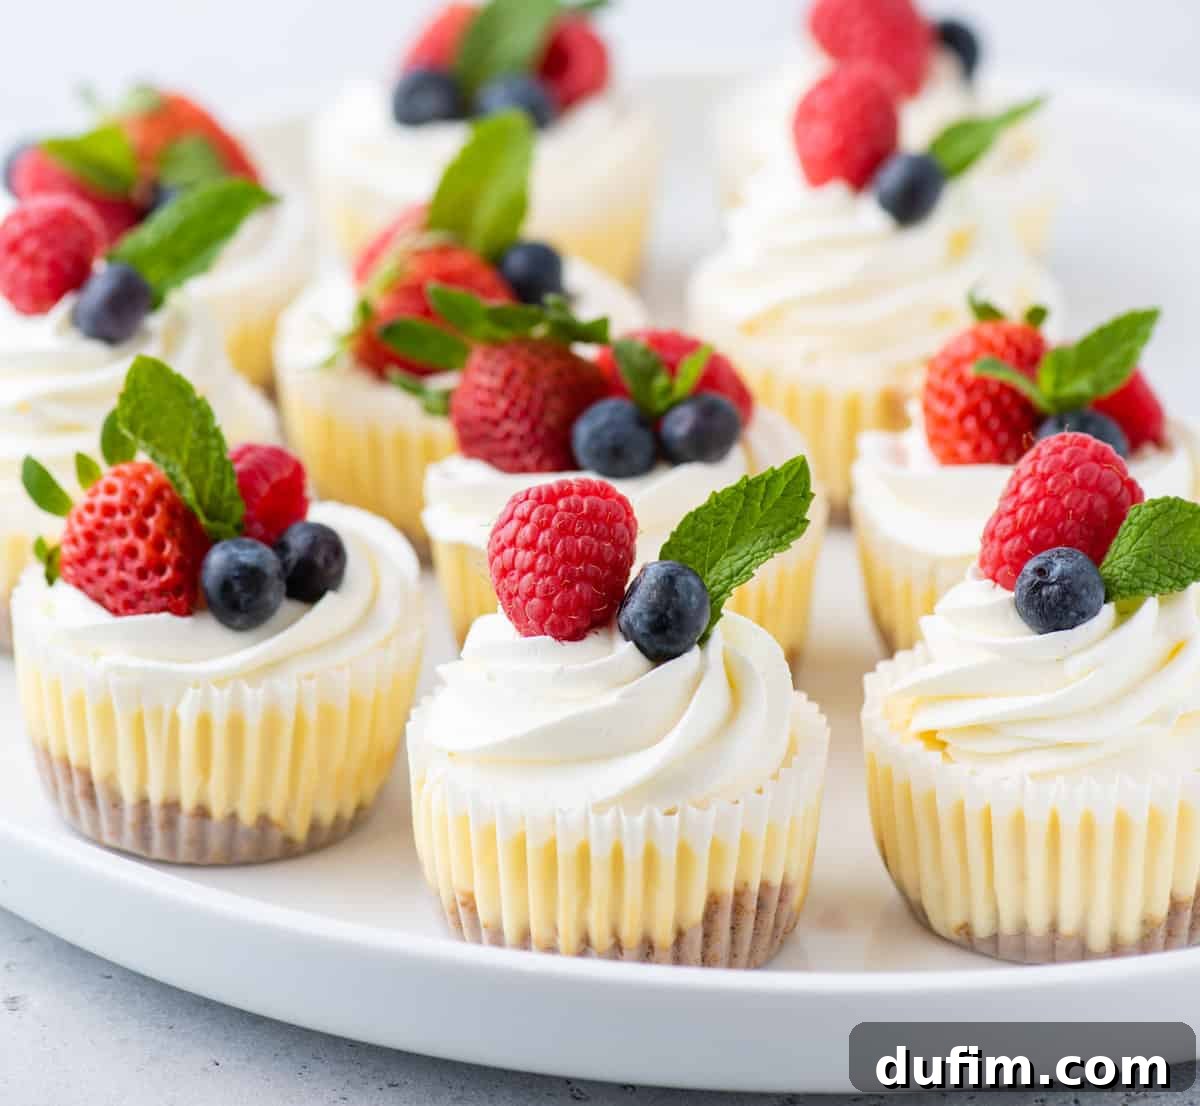
Serving the Best Mini Cheesecake Recipe: Creative Topping Ideas
These mini cheesecakes are truly a blank canvas for your creativity! While simple whipped cream and fresh berries are always a hit, don’t hesitate to experiment with these delicious topping ideas to customize them for any occasion:
- Chocolate Lover’s Dream: Sprinkle with mini chocolate chips or finely chopped dark, milk, or white chocolate. For an extra treat, fold some into the batter before baking!
- Fruit-Filled Delights: Beyond fresh berries, consider spooning a small amount of your favorite pie filling (cherry, apple, blueberry) on top. Sliced peaches or nectarines in summer, or vibrant pomegranate arils in fall/winter, add seasonal flair.
- Candy Crunch: Crush your favorite candy bars (e.g., Reese’s, Snickers, Kit Kat) and scatter them over the whipped cream.
- Caramel Indulgence: Drizzle with rich, gooey salted caramel sauce for a sweet and savory kick.
- Cookie Monster: Crush Oreos, Biscoff cookies, or shortbread biscuits for a delightful textural contrast.
- Citrus Zest: Candied citrus peels (orange, lemon, lime) offer a bright, sophisticated touch.
- Gourmet Whipped Creams: Elevate your whipped cream with unique flavors. Try my recipes for Neapolitan Whipped Cream, rich Coffee Whipped Cream, or decadent Chocolate Whipped Cream for just a few exciting options!
- Nutty Toppings: Toasted chopped pecans, walnuts, or almonds add a lovely crunch and nutty flavor.
- Sauces and Spreads: Beyond caramel, consider a raspberry coulis, lemon curd, or even a dollop of Nutella for variety.
If you’re catering to different dietary needs, you might even consider offering a keto cheesecake option alongside these for your guests.
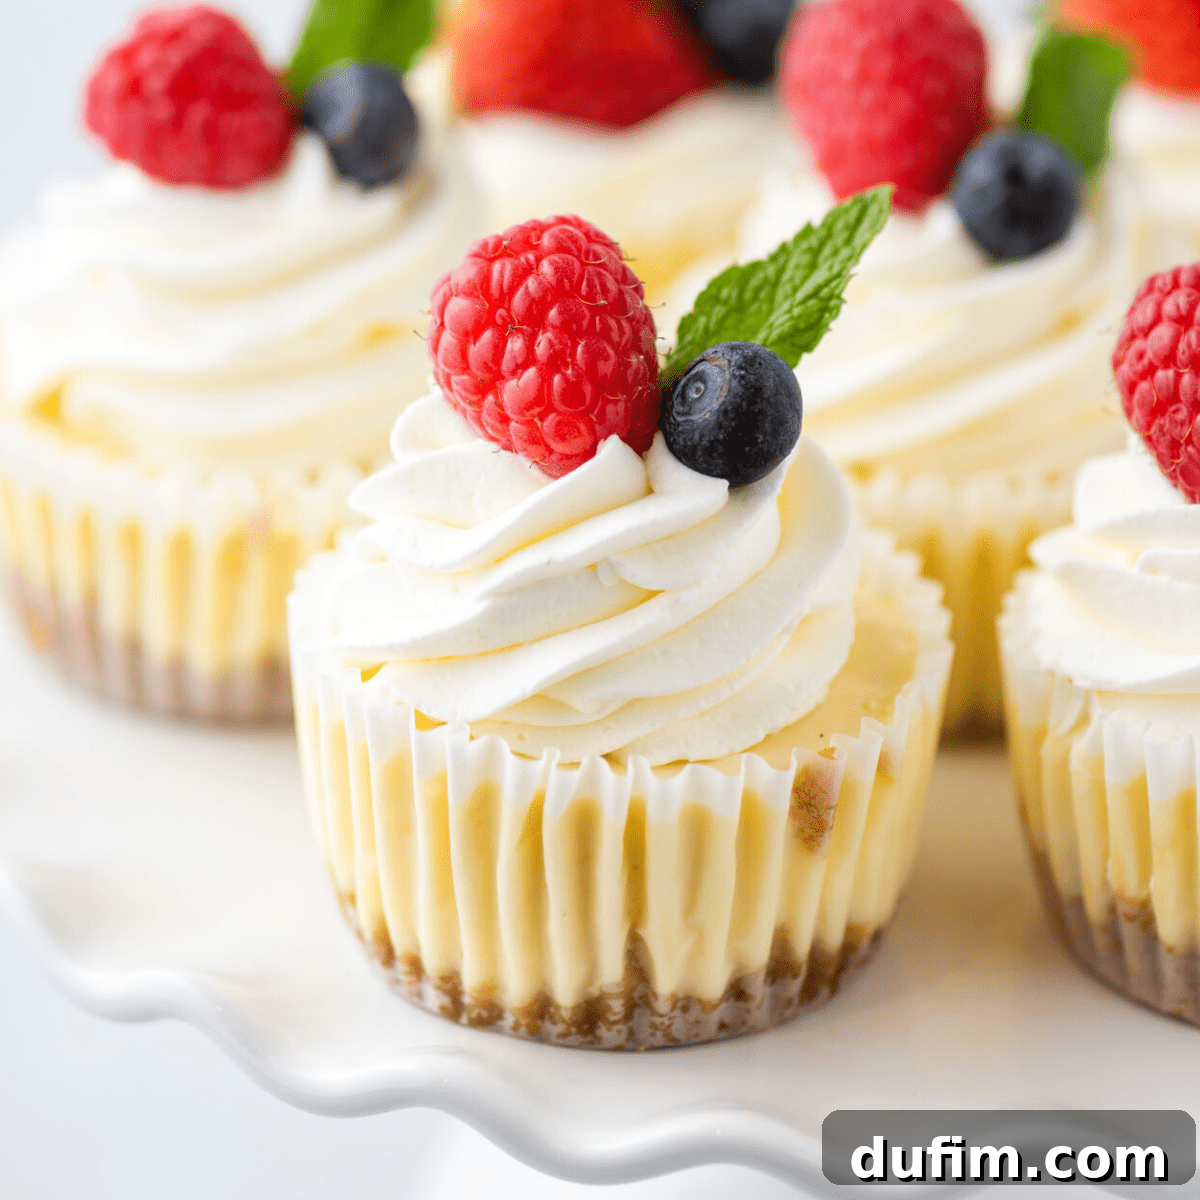
How to Store and Freeze Mini Cheesecake Cups for Lasting Freshness
One of the fantastic benefits of mini cheesecakes is how well they store, making them ideal for meal prep or enjoying throughout the week.
- Refrigeration: Once chilled, store your mini cheesecakes in an airtight container in the refrigerator for up to a week. For optimal freshness and flavor, especially if you’re preparing them for a party or special event, I recommend making them no more than 3 to 4 days in advance. Ensure they are completely cool before covering to prevent condensation.
How to Freeze Easy Mini Cheesecakes for Future Enjoyment
Mini cheesecakes freeze exceptionally well, allowing you to enjoy homemade treats whenever a craving strikes!
- Freezing Method: For best results, freeze the cheesecakes *without* any toppings. Once they are fully chilled and firm, you can individually wrap each mini cheesecake tightly in plastic wrap, then aluminum foil. Alternatively, place them in an airtight freezer-safe storage container or a heavy-duty freezer bag. If stacking layers, place a sheet of parchment paper between them to prevent sticking.
- Storage Duration: Properly wrapped and stored, mini cheesecakes will maintain their quality in the freezer for up to 3 months.
- Thawing: When you’re ready to enjoy, transfer the frozen cheesecakes to the refrigerator and let them thaw slowly for several hours or overnight. Once thawed, you can add your favorite fresh toppings and serve.
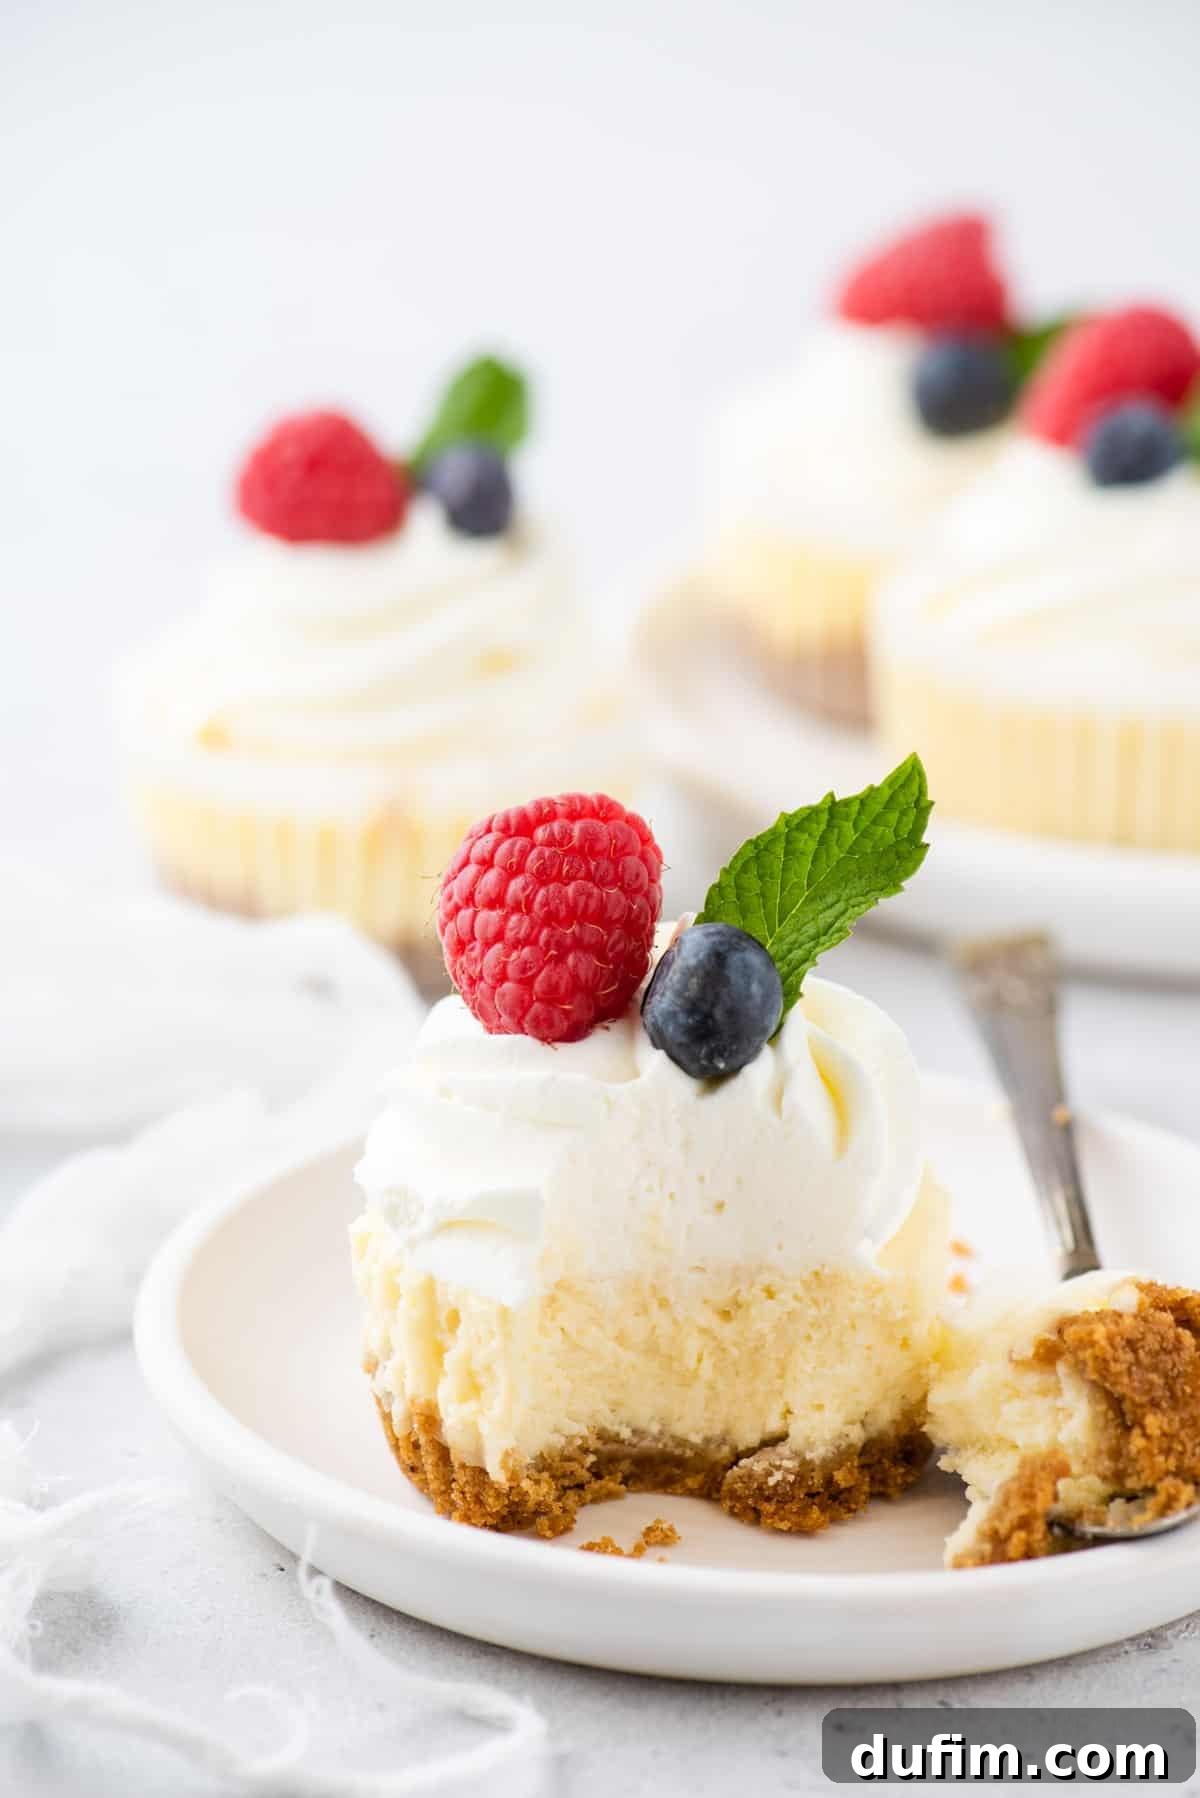
Now that you have a five-star dessert ready, why not pair it with a five-star dinner? Consider serving smoked whole chicken with crusty artisanal bread and a dollop of homemade butter for a truly memorable meal.
“First time making a cheesecake. I was in a baking competition and won first place. Very simple to follow and my cheesecake looked beautiful.”
– Luz
More Decadent Cheesecake Recipes to Satisfy Your Cravings
If you’ve fallen in love with cheesecake, explore these other fantastic recipes:
- Oreo Cheesecake: A chocolate cookie lover’s dream!
- Mini Funfetti Cheesecakes: Festive and fun for any celebration.
- Chocolate Cheesecake: Rich, intense, and utterly irresistible.
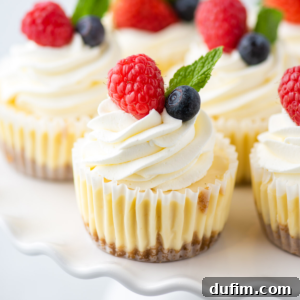
The Best Mini Cheesecake Recipe
By: Beth
Prep Time: 20 minutes
Cook Time: 22 minutes
Total Time: 42 minutes
Yields: 12 servings
Mini cheesecakes made easy! This pro-tested recipe guarantees smooth, creamy, crack-free results every time. They bake in a fraction of the time of a full cheesecake and are perfect for endless toppings, making them a foolproof, bakery-worthy dessert for parties or holidays!
Equipment
- Muffin Pan
- Glass Mixing Bowl
- Kitchen Scale
- My favorite spatula!
Ingredients
Crust
- 1 cup (113g) graham cracker crumbs
- 4 Tbsp unsalted butter, melted
Cheesecake
- 16 oz full-fat cream cheese, softened to room temperature
- ½ cup (99g) granulated sugar
- 1 tsp vanilla extract
- 2 large eggs, room temperature
Topping
- Whipped cream (homemade or store-bought)
- Fresh fruit (berries, sliced peaches, etc.)
Instructions
Crust
- Preheat oven to 350º F (175º C). Line a standard-sized muffin pan with paper muffin liners. In a mixing bowl, combine graham cracker crumbs and melted butter until it resembles coarse sand.
- Press 1-2 tablespoons of the crumb mixture into each muffin cup using the bottom of a 1/3 cup measuring cup or similar tool to create a flat, even surface.
- Bake the crust for 5 minutes. Remove the pan from the oven and allow it to cool completely while you prepare the cheesecake filling.
Cheesecake
- In a mixing bowl, beat the softened cream cheese and granulated sugar with an electric mixer for 1-2 minutes until smooth and lump-free.
- Beat in the vanilla extract until just combined. Then, add the eggs one at a time, beating on low speed only until the yolk breaks and is barely incorporated. Avoid over-mixing after adding the eggs to prevent air bubbles and cracks.
- Evenly divide the cheesecake batter among the cooled muffin cups, filling the liners almost full.
- Bake for 15-17 minutes, or until the centers of the cheesecakes are set but still have a slight, gentle jiggle when the pan is lightly shaken.
- Allow the cheesecakes to cool completely to room temperature in the muffin pan (you can leave them in the turned-off oven with the door ajar for 15-20 minutes first). Then, refrigerate them for at least 4 hours, or preferably overnight, to chill and set fully. If chilling overnight, loosely cover with plastic wrap.
- Before serving, top the mini cheesecakes with whipped cream, fresh fruit, chocolate ganache, or your desired toppings.
Notes
How to Store: Refrigerate your mini cheesecakes in an airtight container for up to a week. For maximum freshness, consume within 3-4 days of preparation, especially for parties.
How to Freeze: You can freeze mini cheesecakes for up to 3 months. Freeze without toppings. Individually wrap each cheesecake tightly in plastic wrap and then foil, or place in an airtight container with parchment paper between layers. Thaw in the refrigerator before serving and add fresh toppings.
Nutrition
All nutritional values are approximate and provided to the reader as a courtesy. Changing ingredients and/or quantities will alter the estimated nutritional calculations.
- Calories: 107 kcal
- Carbohydrates: 14g
- Protein: 1g
- Fat: 5g
- Saturated Fat: 3g
- Polyunsaturated Fat: 1g
- Monounsaturated Fat: 2g
- Trans Fat: 1g
- Cholesterol: 37mg
- Sodium: 58mg
- Potassium: 25mg
- Fiber: 1g
- Sugar: 10g
- Vitamin A: 158IU
- Calcium: 11mg
- Iron: 1mg
Like this recipe? We’d love to hear from you! Please consider rating and leaving a comment below.