
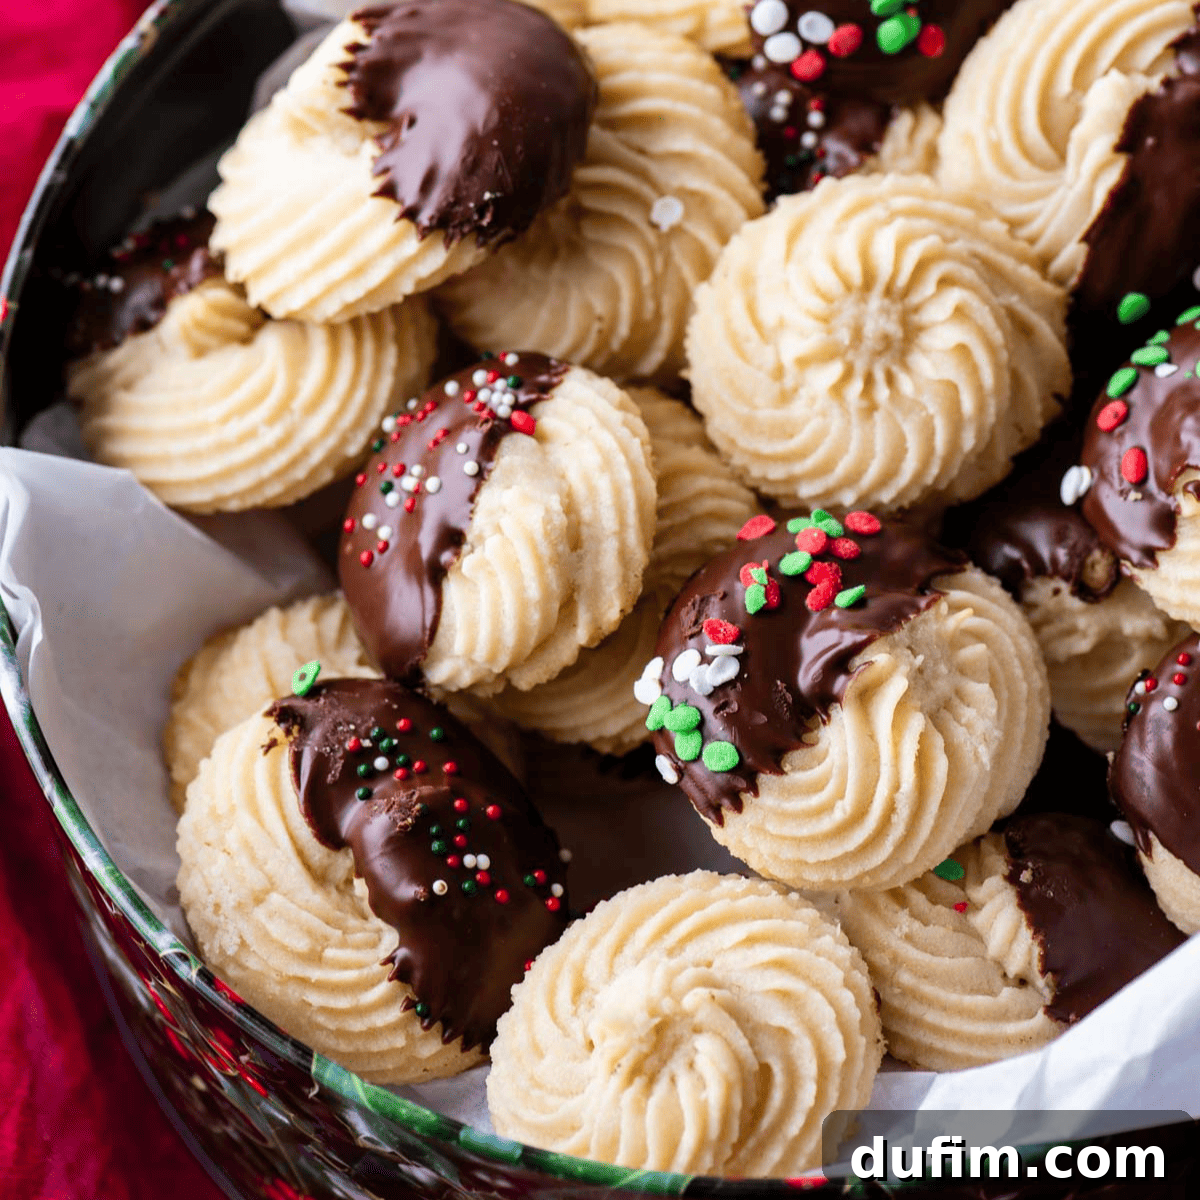
Embark on a delightful baking adventure to master the art of making ultimate melt-in-your-mouth butter cookies. After three days of dedicated recipe development and meticulous testing in my kitchen, I’m thrilled to share a foolproof method that guarantees cookies with an exquisite, rich flavor and a pristine shape that holds up beautifully through baking. If you’re yearning for tender, buttery cookies that don’t spread and deliver pure bliss with every bite, this is the recipe you’ve been searching for!
“This recipe was an absolute joy – so quick and incredibly easy to prepare! And the taste? Simply divine.”
– Casey
Unveiling the Authentic Old-Fashioned Butter Cookie Recipe
After countless hours spent meticulously testing and perfecting, I am genuinely excited to share with you what I believe to be the truly authentic old-fashioned butter cookie recipe. My culinary quest focused on a “back to basics” approach, utilizing only the purest, most essential ingredients: premium butter, fine flour, quality sugar, fragrant vanilla extract, and a pinch of salt. The result is a butter cookie that embodies perfection – simple yet profoundly flavorful.
During my extensive experimentation phase, I ventured into recipes that included whole eggs and those that specifically called for egg yolks. While eggs can add richness and structure to some cookies, I consistently found that, even with rigorous chilling, these formulations often led to cookies that spread too much during baking, losing their intended delicate shapes. This was a critical challenge, as the hallmark of a true butter cookie is its ability to hold its form. Through persistent refinement, I finally achieved the ideal balance of ingredients that ensures your butter cookies will emerge from the oven beautifully defined, with a desirable golden-brown hue and a truly delicious, tender texture that practically melts in your mouth.
The mere thought of a fresh batch of these homemade butter cookies, their sweet aroma filling the air, perfectly paired with a warm cup of coffee or a comforting mug of tea, instantly brings a sense of coziness and nostalgia. Growing up, these were an indispensable part of our Christmas cookie traditions, and it brings me immense joy to hear that my family is now giving this newly perfected recipe rave reviews. These versatile cookies are not just for holidays; they are a delightful treat for any occasion. For an impressive and diverse cookie platter that will surely captivate your guests, consider serving them alongside vintage chocolate peanut butter cookies.
What Exactly is a Butter Cookie? A Deeper Dive
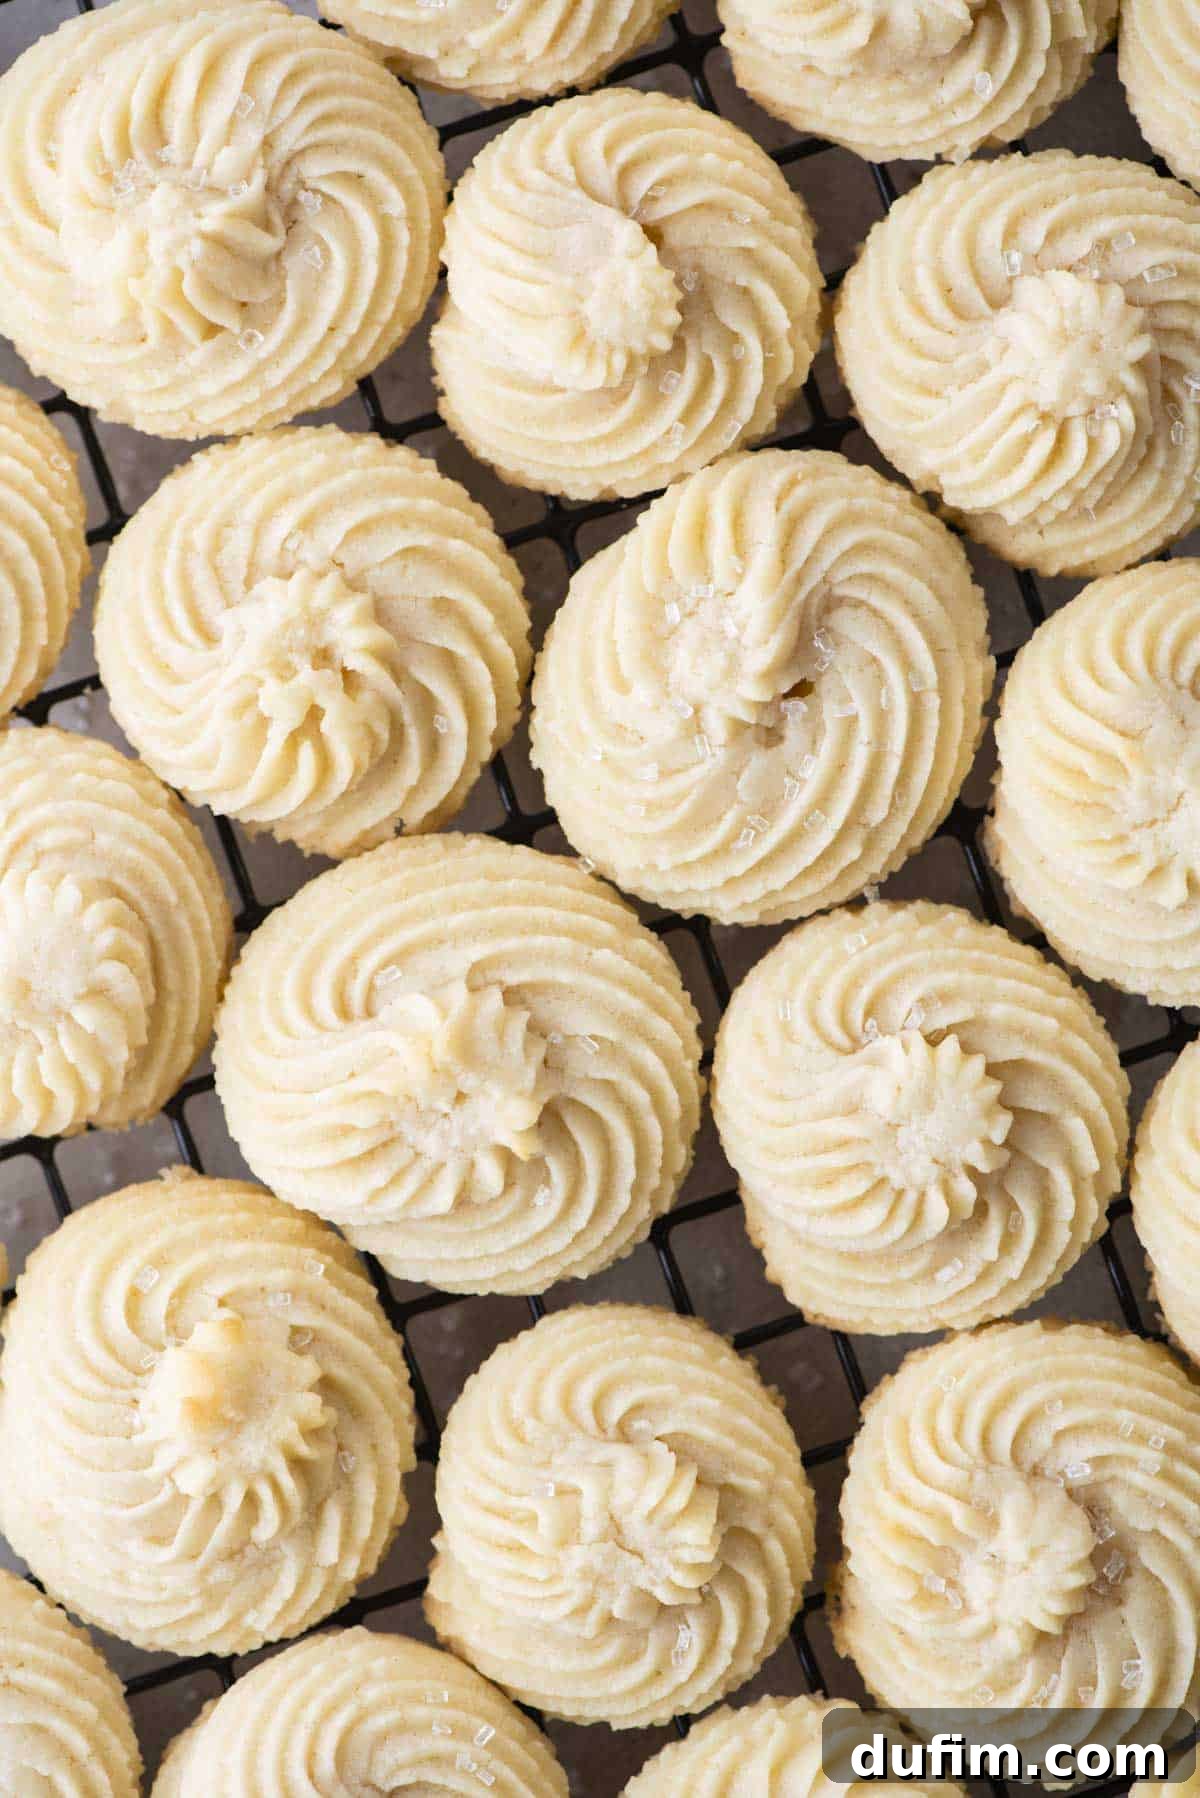
A butter cookie, at its core, is a confectionery delight known primarily for its intense buttery flavor and its elegant simplicity, typically made from a straightforward combination of sugar, high-quality butter, all-purpose flour, and often a hint of vanilla or salt. These cookies are celebrated worldwide for their crisp yet tender texture and their ability to hold intricate piped shapes, making them a favorite among bakers and consumers alike.
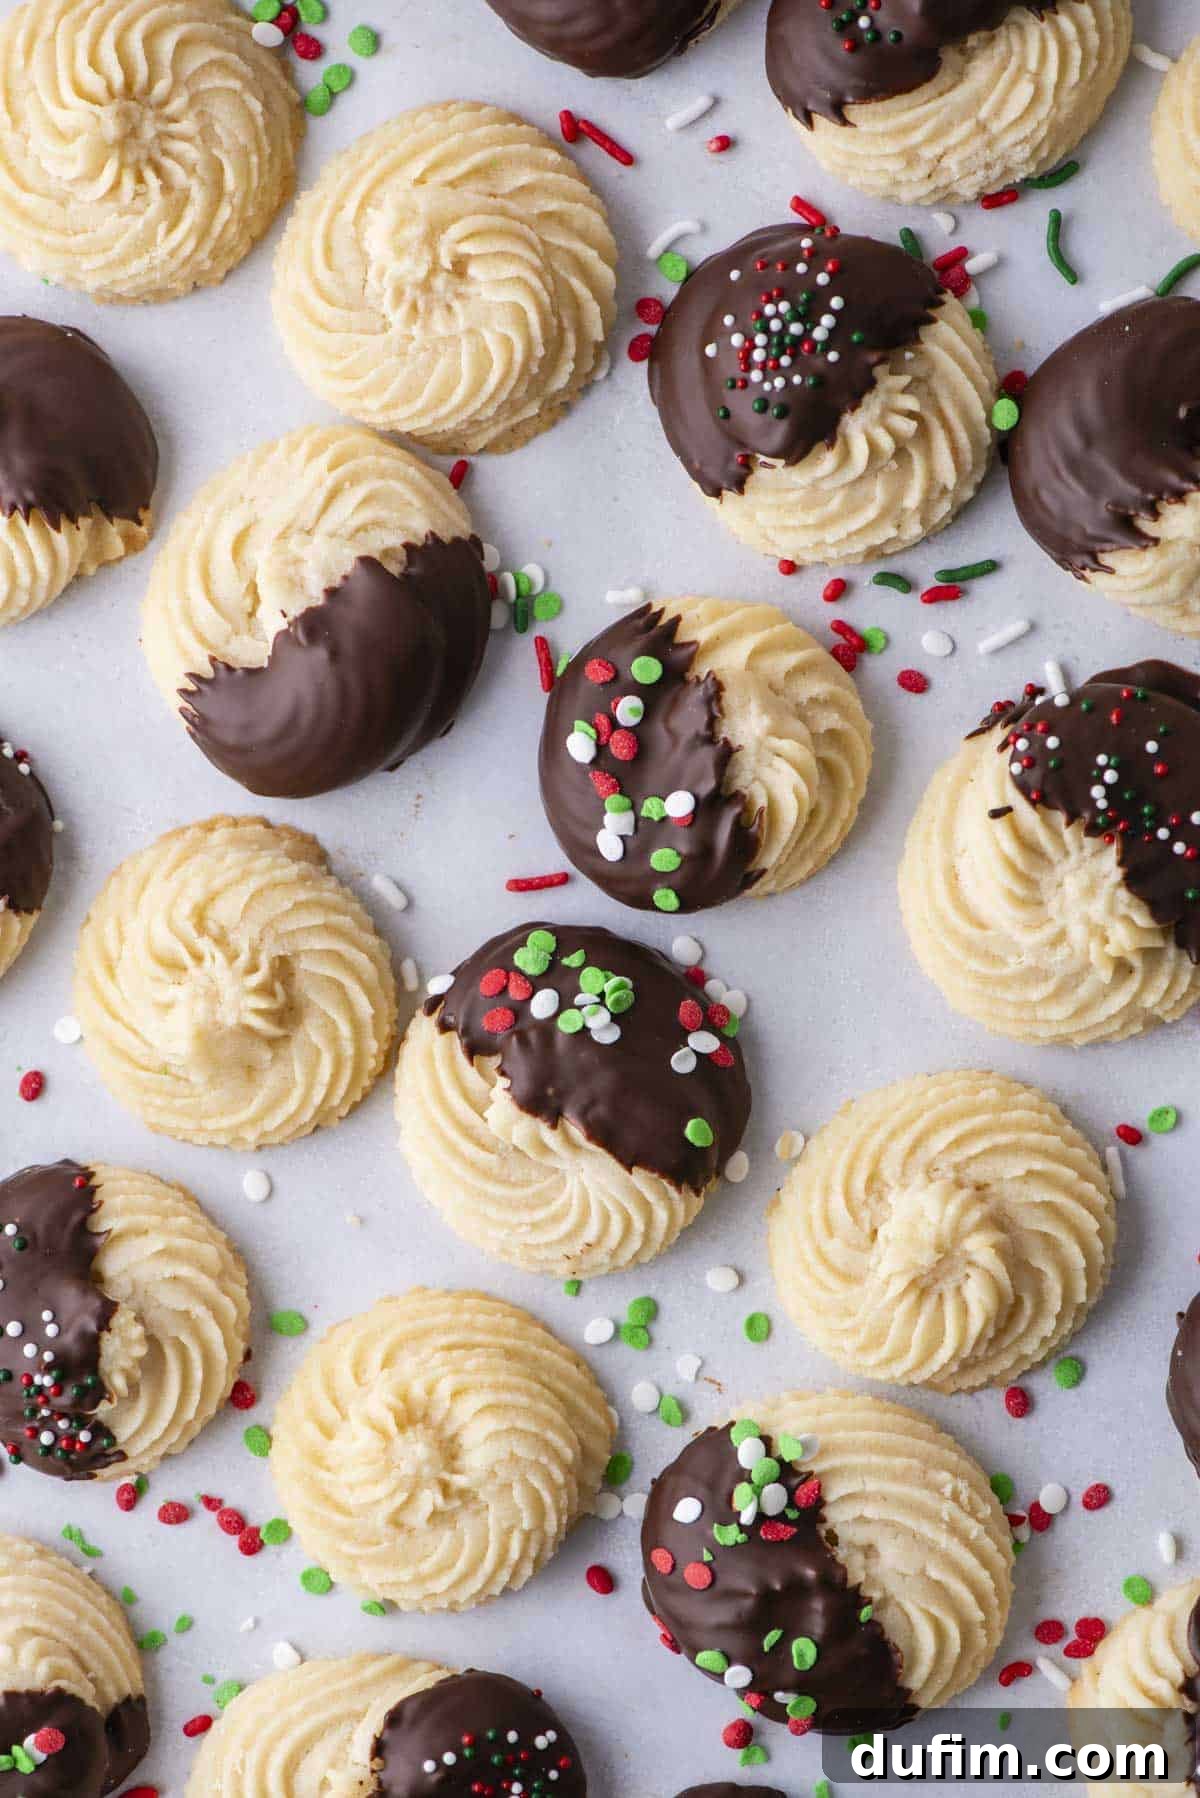
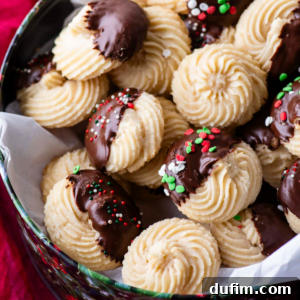
While beloved year-round, butter cookies gain particular prominence during the holiday season. Their versatility makes them an ideal canvas for festive decorations. When transformed into holiday cookies, they are frequently dipped in luscious melted chocolate, drizzled with colorful glazes, or adorned with a playful assortment of sprinkles. This makes them a staple on Christmas cookie platters, adding both visual appeal and a classic, comforting taste that is cherished by many.
The secret to their signature melt-in-your-mouth quality lies in the high butter content, which creates a rich, delicate crumb. The absence of leavening agents like baking powder or baking soda in many traditional recipes contributes to their dense yet tender structure, distinct from puffier, chewier cookie varieties. This focus on pure ingredients allows the nuanced flavors of butter and vanilla to truly shine.
Butter Cookie vs. Shortbread Cookie: Understanding the Key Differences
While butter cookies and shortbread cookies are often grouped together due to their shared butter-rich characteristics, they possess distinct identities. Understanding their differences is key to appreciating each cookie’s unique charm and choosing the right one for your preference.
The most significant distinction lies in their ingredient ratios, particularly the proportion of sugar relative to butter. Traditional shortbread, a Scottish delicacy, is renowned for its iconic 1:2:3 ratio of sugar to butter to flour. This high fat content and relatively low sugar level result in a cookie that is exceptionally “short” – meaning it has a dense, crumbly, and wonderfully tender texture that melts on the tongue, delivering an intense, pure buttery flavor. Shortbread is typically denser and less prone to intricate shaping, often pressed into molds or cut into simple fingers or rounds.
Butter cookies, conversely, generally feature a slightly higher sugar-to-butter ratio than shortbread. This increased sugar content contributes to a subtly crisper edge and a more tender, often more crumbly interior, while still maintaining that luxurious buttery taste. The higher sugar also allows for a slightly different texture that is more conducive to piping, enabling them to hold more elaborate shapes and designs without spreading excessively. While both are exquisite examples of butter-based baking, butter cookies offer a slightly lighter, often more “snappy” texture compared to the deep richness and dense crumb of shortbread. Recognizing these nuances will undoubtedly enhance your appreciation for these classic treats.
Why You’ll Adore This Perfect Danish Butter Cookies Recipe
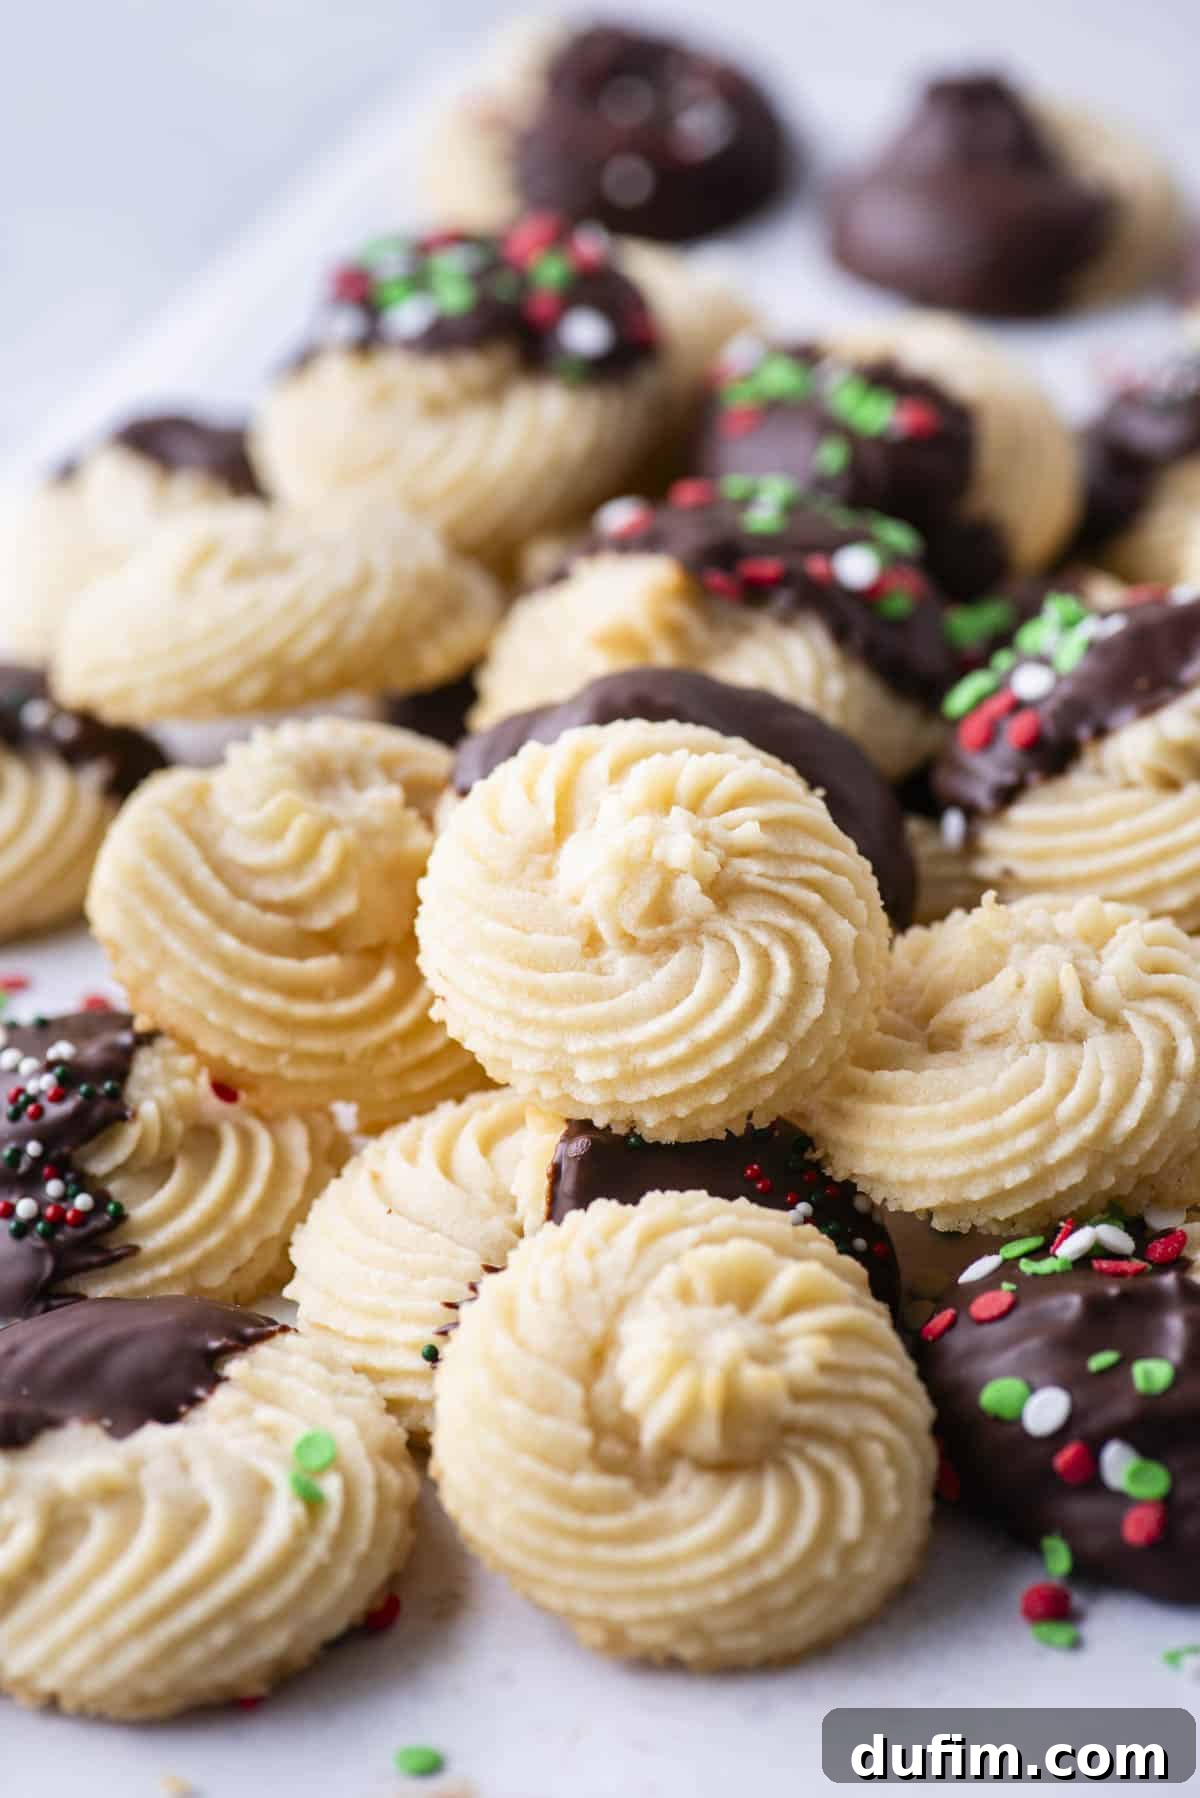
There’s an unparalleled joy that comes from a batch of homemade Danish butter cookies. They carry a unique charm, evoking feelings of nostalgia and offering a taste of pure, unadulterated comfort that store-bought versions often can’t replicate. Here are the compelling reasons why this particular recipe is destined to become your cherished go-to for years to come:
- **Flawless Shape Retention, Zero Spreading:** One of the most common frustrations in baking piped cookies is the dreaded “spread.” Say goodbye to flat, undefined cookies! This recipe has been meticulously engineered to ensure your beautifully intricate piped designs remain perfectly intact throughout the baking process, resulting in consistently aesthetic and perfectly formed cookies every single time. The secret lies in precise ingredient ratios, the strategic use of cornstarch, and a crucial chilling step that we’ll explore.
- **Crafted with Just 6 Simple, Pantry-Friendly Ingredients:** You absolutely do not need an extensive pantry stocked with exotic items to create culinary magic. This streamlined recipe calls for only six basic, readily available ingredients – high-quality unsalted butter, powdered sugar, pure vanilla extract, all-purpose flour, a touch of cornstarch, and salt. It’s a testament to the fact that extraordinary flavor and texture can truly emerge from humble, everyday beginnings.
- **Achievable in Only 8 Easy-to-Follow Steps:** Designed with bakers of all skill levels in mind – from complete beginners taking their first steps in baking to seasoned pros looking for a reliable recipe – this guide breaks down the entire process into eight clear, concise, and incredibly straightforward steps. Each instruction is detailed to ensure a smooth, enjoyable, and successful baking experience from start to finish.
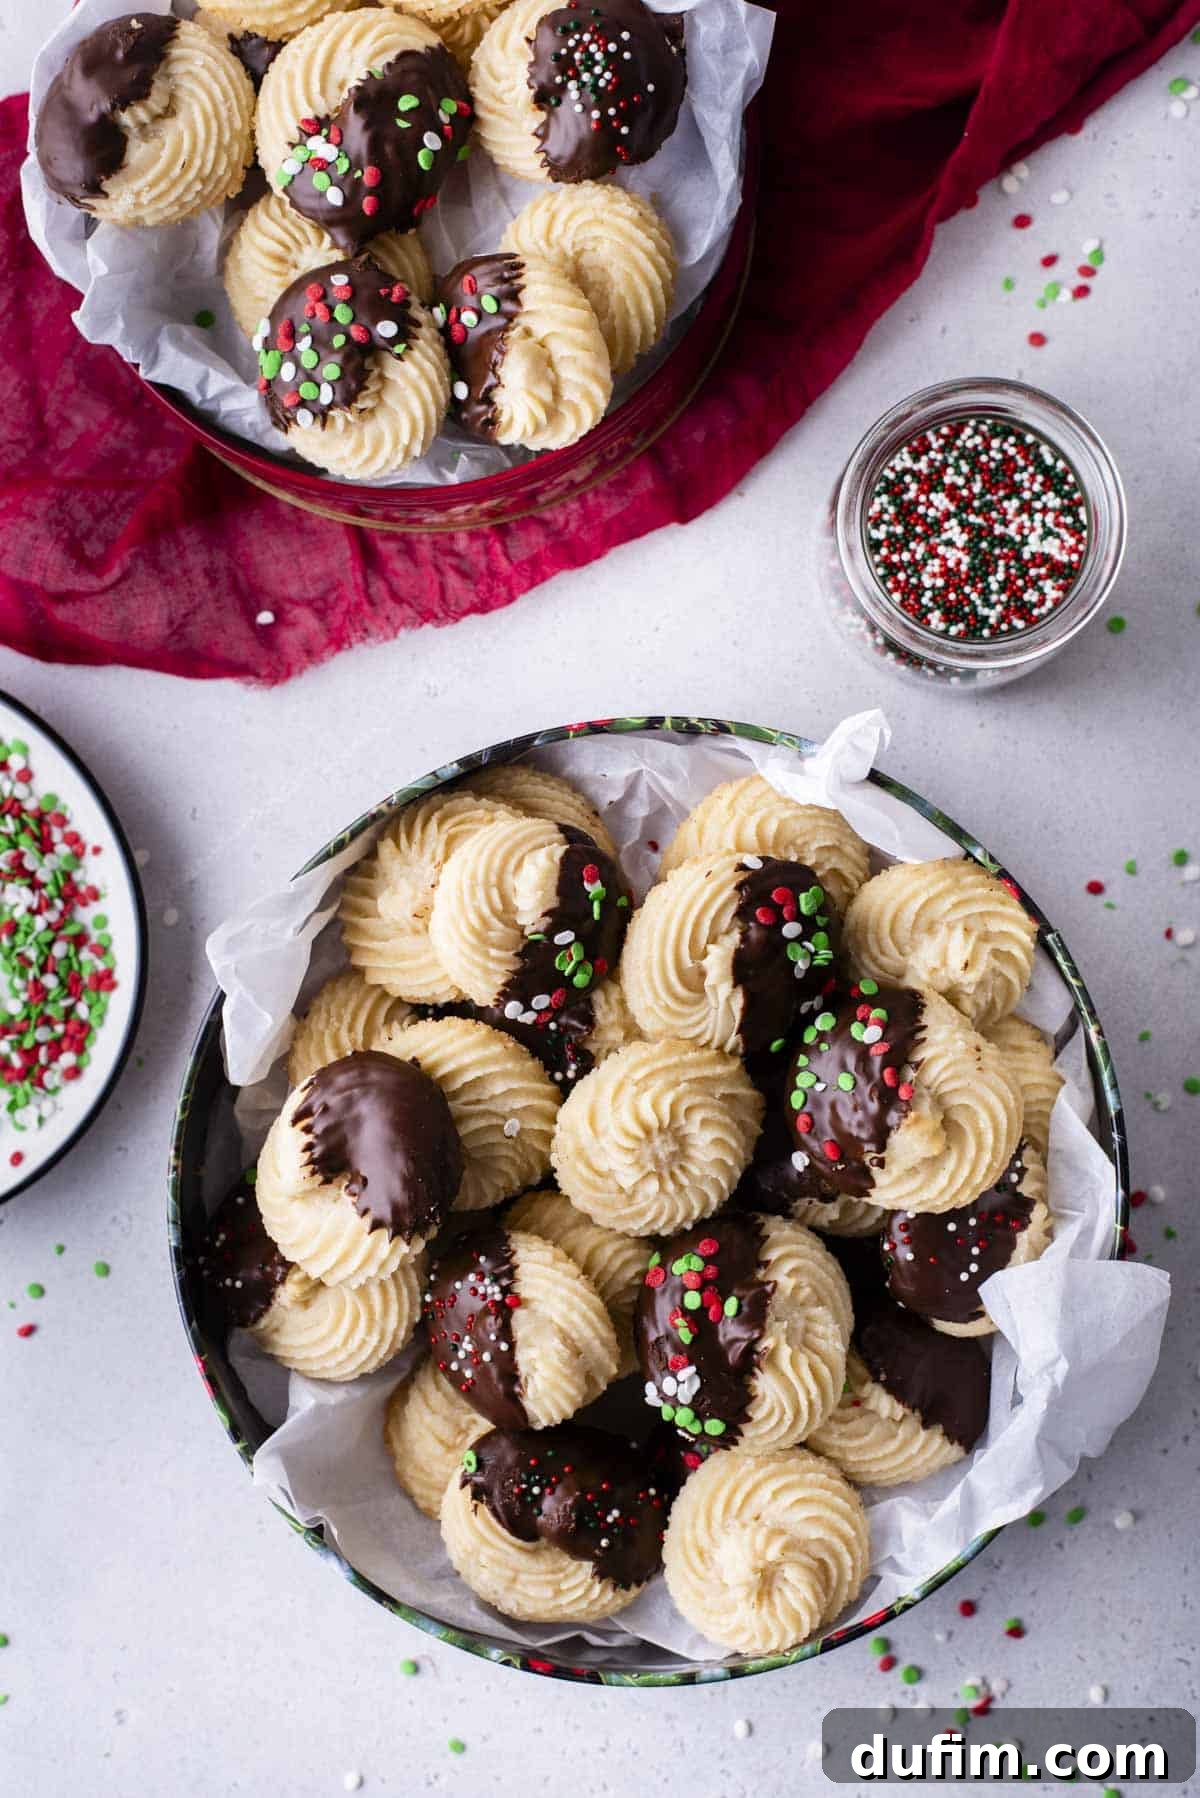
- **Effortlessly Customizable for Any Occasion or Season:** The versatility of these butter cookies is truly remarkable. Whether your goal is elegant simplicity for an afternoon tea or vibrant, festive cheer for the holidays, these cookies adapt beautifully. Keep them plain for a classic, refined treat, or easily transform them into stunning Christmas cookies by dipping them in rich melted chocolate and adorning them with colorful sprinkles. The potential for creative decoration is boundless, allowing you to personalize each batch.
- **Superior Texture and Unforgettable Flavor:** Beyond their captivating appearance, these cookies deliver an unparalleled sensory experience. They are exquisitely buttery, with a delicate crispness that gives way to a wonderfully tender interior. This perfect balance of textures, coupled with the rich butter and subtle vanilla essence, creates a truly melt-in-your-mouth sensation that is utterly unforgettable.
- **An Ideal Homemade Gift:** Their consistently beautiful presentation, coupled with their universally loved taste, makes these butter cookies an exceptional homemade gift. Package them elegantly in decorative tins or festive boxes, and you’ll have a thoughtful, impressive present perfect for friends, family, teachers, or colleagues during the holidays or any special occasion.
Essential Ingredients for Your Perfect Butter Cookies
The inherent beauty of this classic butter cookie recipe lies in its elegant simplicity. A concise list of high-quality, readily available ingredients is all you need to conjure up these truly delicious treats. Below, you’ll find a detailed breakdown of each ingredient, along with insightful tips on their specific roles and how to best utilize them. For precise measurements and comprehensive, step-by-step instructions, please refer to the complete recipe card conveniently located further down the page.
- Unsalted Butter: This is unequivocally the star ingredient of our butter cookies. It is absolutely crucial that your unsalted butter is softened to room temperature, but not melted, for optimal creaming with the sugar. Using unsalted butter grants you ultimate control over the exact salt content in your cookies, preventing unpredictable flavors that can arise from varying salt levels in different brands of salted butter.
- Powdered Sugar (Confectioners’ Sugar): Unlike its granulated counterpart, powdered sugar plays a vital role in achieving a finer, more tender crumb in your butter cookies. Its finely milled texture also helps significantly in preventing the cookies from spreading excessively during baking. Furthermore, it contributes to a wonderfully smooth and pliable dough, which is ideal for precise piping.
- Vanilla Extract: A quintessential flavoring agent, pure vanilla extract elevates and perfectly complements the rich, creamy notes of the butter. For the most authentic and robust flavor profile, I highly recommend investing in a good quality, pure vanilla extract rather than artificial alternatives.
- All-Purpose Flour: This forms the essential structural foundation of your butter cookies. Accurate measurement of the flour is paramount to achieving the desired texture – an imbalance can result in cookies that are either too dry and crumbly or too tough and dense. Please see my detailed guide below on how to measure flour correctly.
- Cornstarch: Consider this your secret weapon for ensuring your butter cookies not only hold their beautiful shape flawlessly but also achieve that coveted melt-in-your-mouth tenderness. Cornstarch works by slightly softening the flour and inhibiting excessive gluten development, which is key for a delicate cookie.
- Salt: A small but mighty ingredient, a pinch of salt is crucial for balancing the sweetness in the cookies and significantly enhancing all the other flavors. It brings out the richness of the butter and vanilla, resulting in a more complex and satisfying taste.
Optional Chocolate Dip & Decoration
To add an extra layer of elegance, flavor, and festive appeal to your butter cookies, consider a simple chocolate dip and a sprinkle of colorful decorations:
- Semi-Sweet Chocolate Chips: These are ideal for melting down into a smooth, dippable consistency. You can also experiment with dark chocolate for a richer, less sweet contrast, or milk chocolate for a milder, sweeter profile, depending on your personal preference. Chopped baking chocolate also works beautifully.
- Sprinkles: An easy and fun way to add a vibrant and festive touch! Choose sprinkles that match the season or occasion – bright primary colors for a party, pastels for spring, or classic red, green, and white for Christmas.
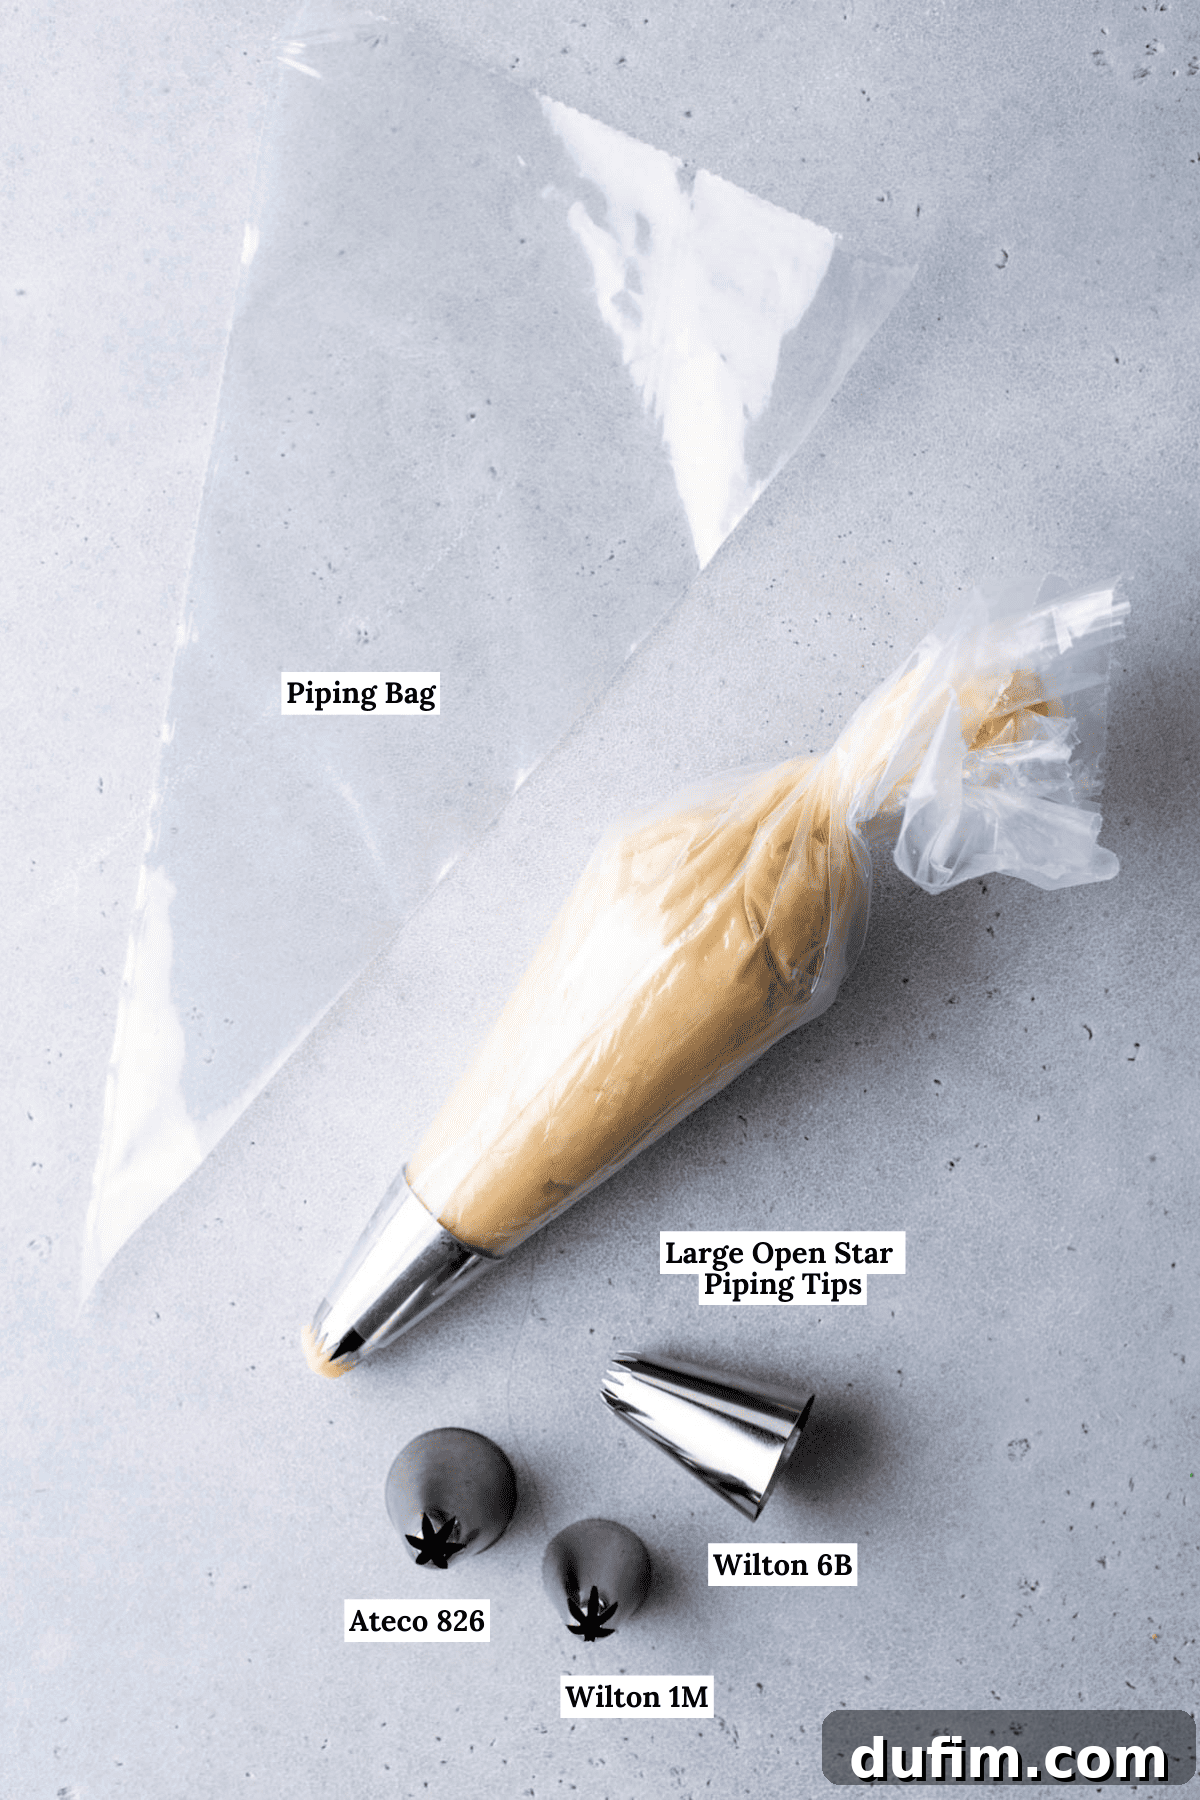
Recommended Baking Supplies for Butter Cookies
While the ingredients for butter cookies are wonderfully straightforward, equipping yourself with a few key baking tools will undoubtedly make your butter cookie crafting experience smoother, more efficient, and ultimately more successful. These items help in achieving the classic aesthetic and perfect texture.
- Piping Bags: These are absolutely essential for creating those signature beautiful, uniform piped designs that Danish butter cookies are famous for. Whether you opt for sturdy reusable silicone bags or convenient disposable ones, ensure they are of good quality to handle the thick dough.
- Large Open Star Piping Tip – Wilton 6B: This specific piping tip is highly recommended and truly ideal for achieving the classic intricate swirl pattern and elegant ridges characteristic of traditional Danish butter cookies. Its open star shape creates a substantial and visually appealing cookie.
- **Electric Mixer:** A good quality stand mixer or a powerful hand-held electric mixer will make the creaming process of butter and sugar significantly easier and more efficient. This step is crucial for incorporating air into the dough, which contributes to a light and tender crumb.
- **Baking Sheets:** Opt for light-colored, heavy-gauge baking sheets. These are superior for promoting even heat distribution and preventing the bottoms of your cookies from over-browning or burning, ensuring a uniformly baked product.
- **Parchment Paper or Silicone Baking Mats:** These are indispensable for lining your baking sheets. They serve multiple purposes: preventing the cookies from sticking, promoting more even baking, and making cleanup an absolute breeze.
- **Wire Cooling Rack:** Essential for allowing your freshly baked cookies to cool completely and evenly. Proper airflow beneath the cookies prevents them from becoming soggy and helps maintain their crispness.
Choosing the Best Butter for Your Butter Cookies
When it comes to crafting truly exceptional butter cookies, the quality and type of butter you choose are paramount, as butter is the foundational flavor of the entire recipe. While I don’t specifically endorse one brand over another, I wholeheartedly and unequivocally recommend using **unsalted butter**.
The primary reason for this recommendation is the critical element of control over the salt content within your recipe. Different brands of salted butter can contain wildly varying amounts of sodium, leading to unpredictable and inconsistent results in your baking. You might inadvertently end up with cookies that are either too salty or not salty enough. By opting for unsalted butter, you gain precise control, allowing you to measure and add the perfect amount of salt, ensuring a beautifully balanced flavor profile every single time.
Beyond the salt content, the temperature of your butter is equally vital. Ensure your unsalted butter is at **room temperature and thoroughly softened**, but under no circumstances should it be melted. Softened butter creams beautifully with powdered sugar, incorporating essential air into the mixture. This aeration is what contributes significantly to the cookie’s tender, delicate texture. If your butter is too cold, it will not cream properly, resulting in a denser, potentially tougher cookie. Conversely, if the butter is too warm or has melted, your dough will become excessively soft, making it incredibly difficult to pipe and increasing the likelihood of your cookies spreading far too much in the oven.
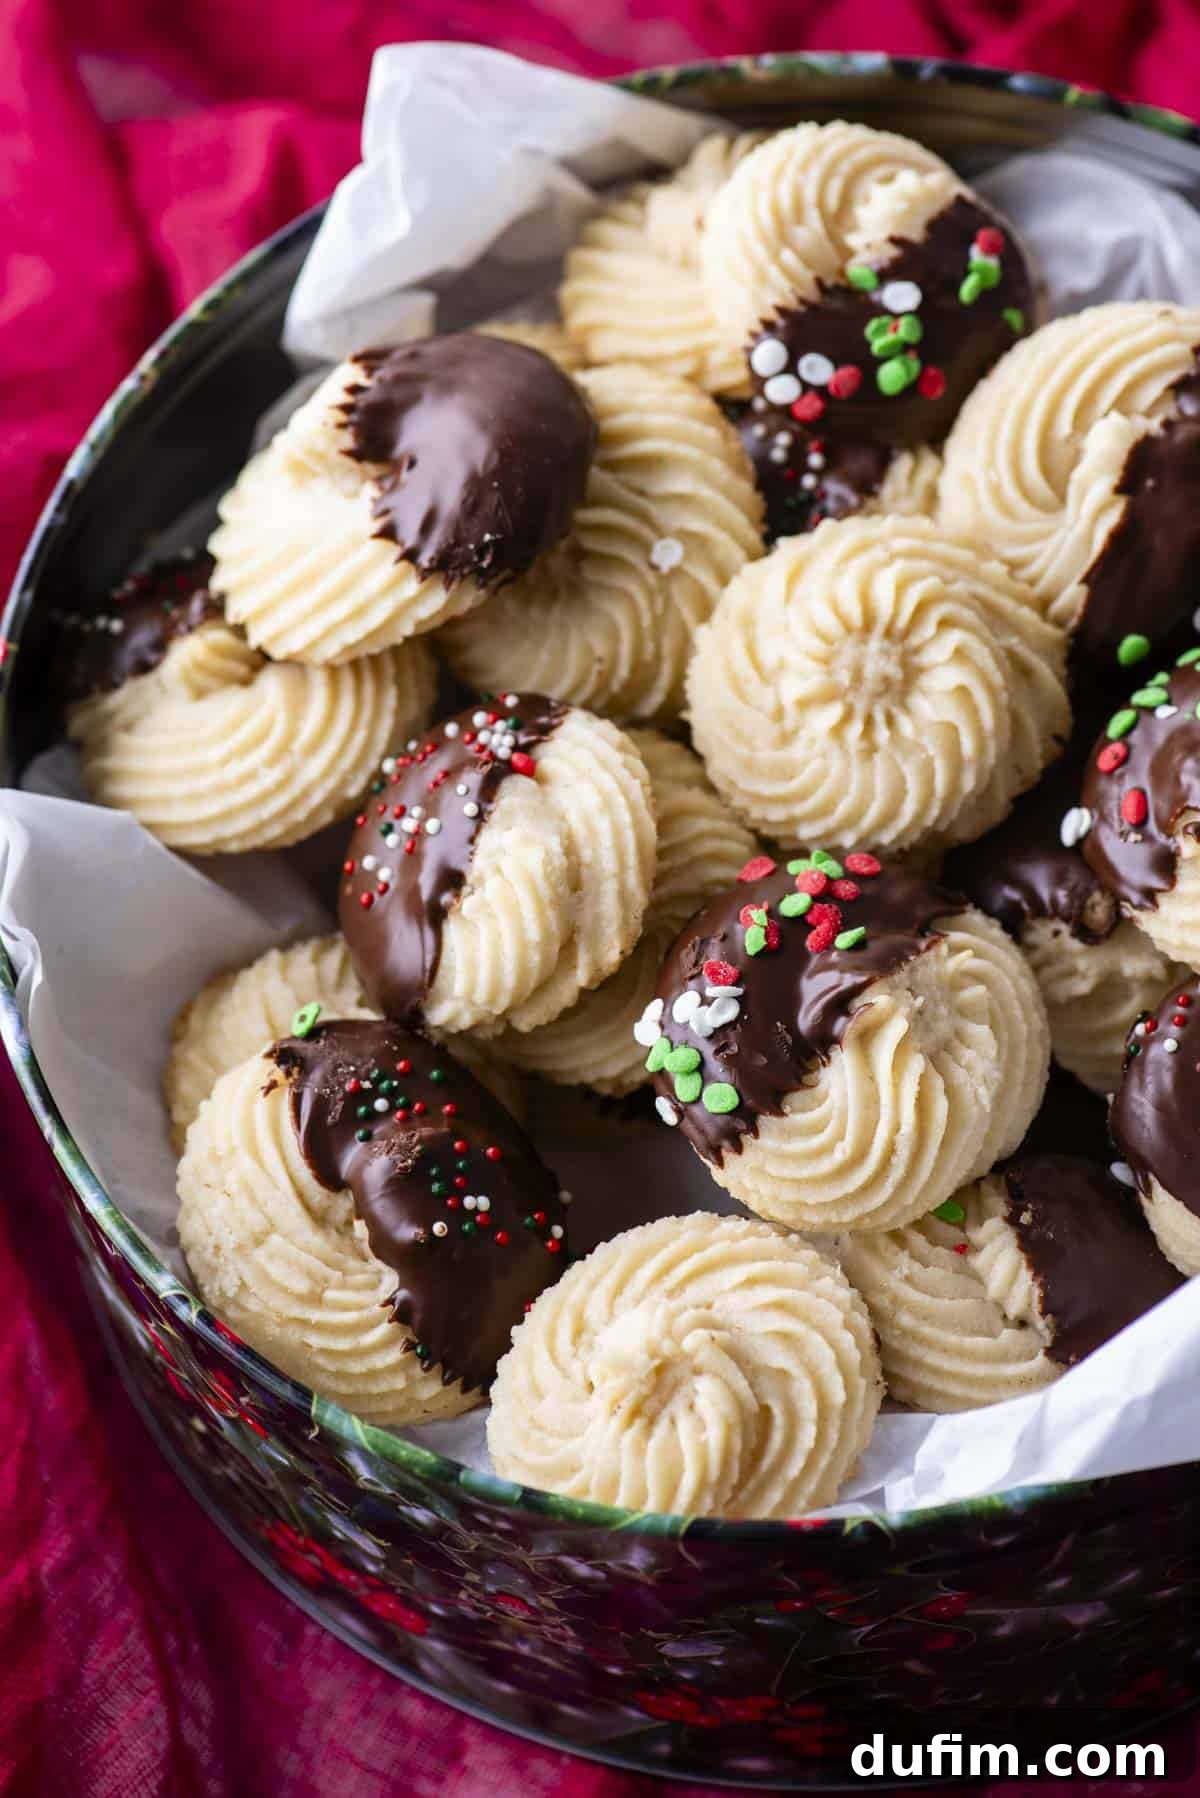
Mastering the Art: How to Make Danish Butter Cookies
During my intense three-day recipe development marathon, my primary objective was twofold: not only to create the most delicious butter cookies imaginable but also to ensure the entire baking process was as straightforward and stress-free as possible for you. These meticulously tested steps are specifically designed to consistently produce buttery, exquisitely shaped cookies that defy the common problem of spreading. By following this foolproof, step-by-step guide, you are guaranteed to achieve perfect results with every single batch. Remember, the complete recipe with all precise measurements and ingredient lists is readily available in the comprehensive recipe card below.
- Crucial First Step: Prepare for Chilling. Before you even think about preheating your oven, it is absolutely essential to prepare for the chilling phase. The piped cookie dough must be frozen for a minimum of 30 minutes before it goes into the oven. This step is non-negotiable for achieving cookies that maintain their intricate shapes and preventing them from spreading excessively.
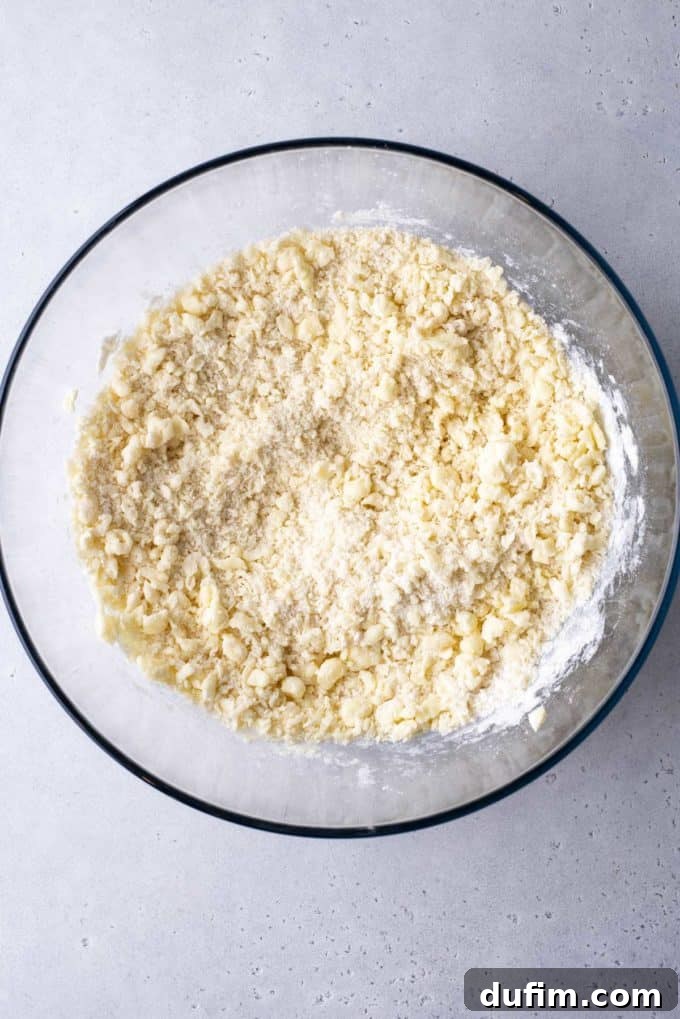
- Cream Butter and Sugar: In a large mixing bowl, combine your softened unsalted butter and the powdered sugar. Using an electric mixer (either a stand mixer with the paddle attachment or a hand-held mixer), beat these ingredients together on medium speed. This creaming process is crucial and will take several minutes until the mixture lightens significantly in color and becomes wonderfully fluffy and aerated. Ensure it’s thoroughly combined and airy for the best results.
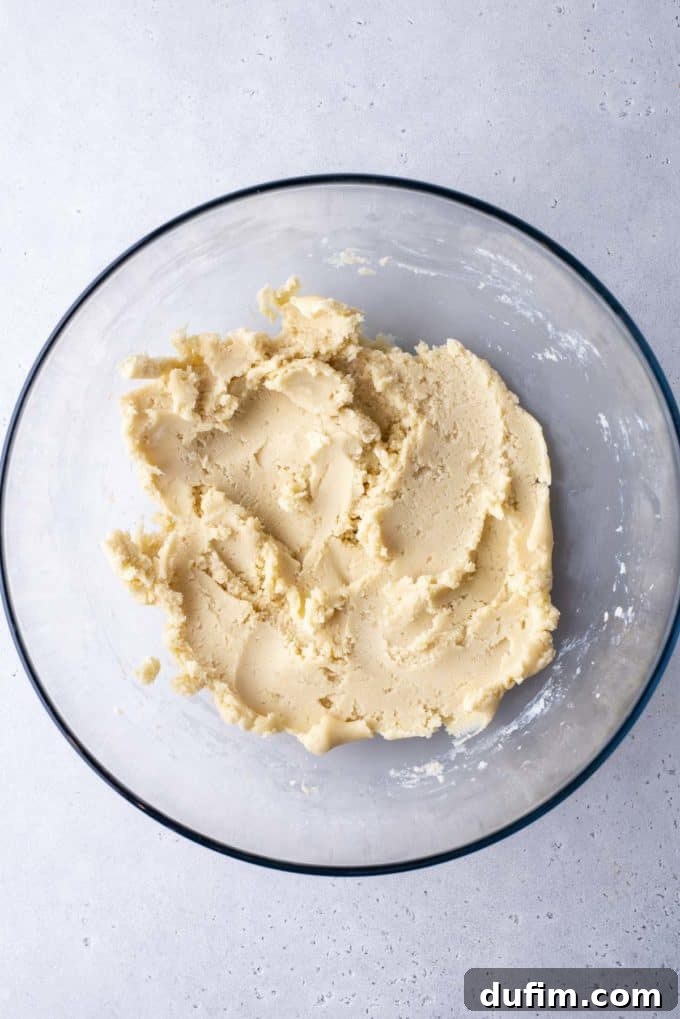
- Incorporate Remaining Ingredients: Now, add the vanilla extract, all-purpose flour, cornstarch, and salt to the creamed butter and sugar mixture. Continue mixing with your electric mixer, but reduce the speed to low. Mix only until a smooth, cohesive dough begins to form. This can take a few minutes as well, and you’ll notice the dough is quite thick and stiff. If you find the dough struggling to come together or appearing too crumbly, you can pause the mixer, use your clean hands to gently squeeze portions of the dough to help it clump, then resume mixing on low until everything is uniformly combined. The key is to avoid overmixing, as this can develop too much gluten, which will lead to tougher, chewier cookies rather than the desired tender texture.
- Prepare Your Piping Bag: Take a sturdy piping bag and fit it securely with your chosen open star-shaped piping tip (a Wilton 6B is highly recommended). Carefully fill the piping bag approximately halfway with the thick cookie dough. Avoid overfilling the bag, as this not only makes it harder to handle and control but can also cause the dough to warm up too quickly from the heat of your hands, which we want to avoid.
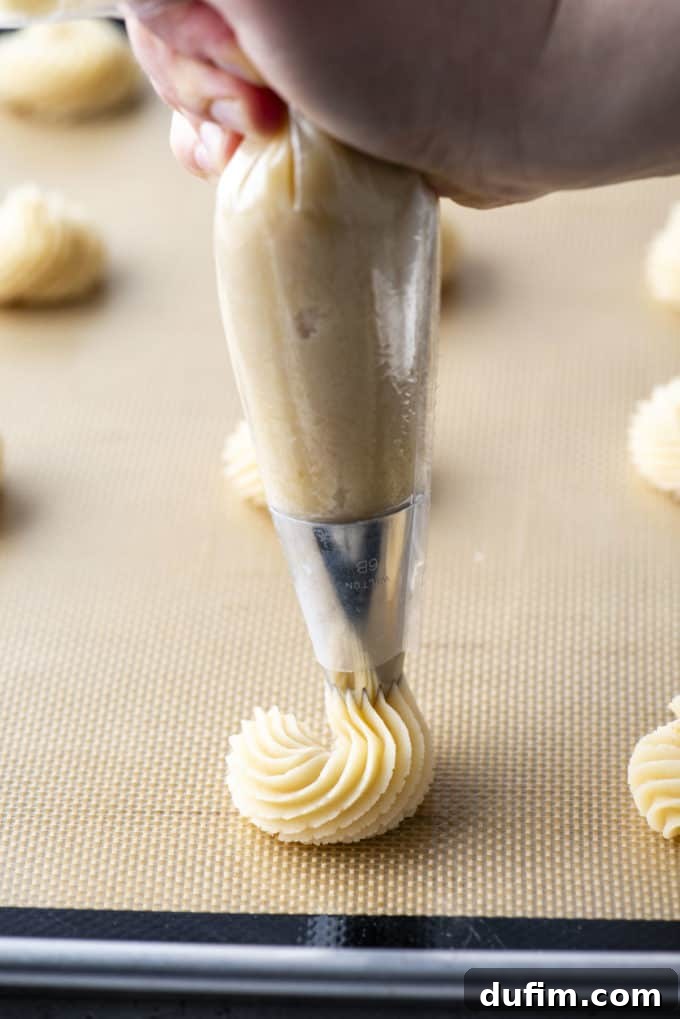
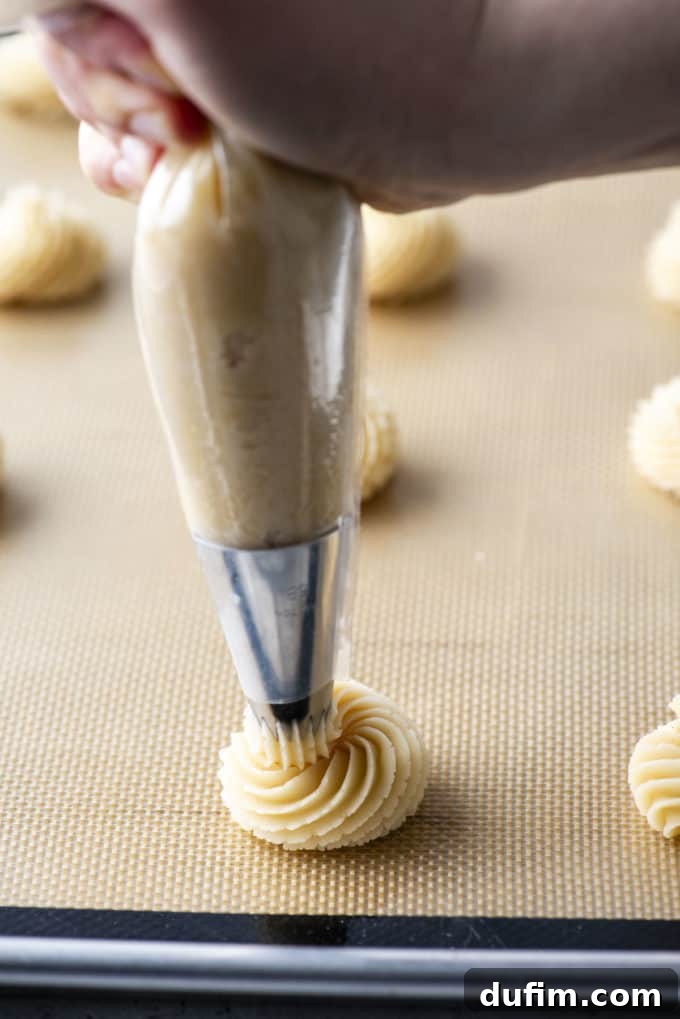
- Pipe Your Cookies with Precision: Line your baking sheet with either parchment paper or a silicone baking mat. Holding the piping bag upright and applying consistent, gentle but firm pressure, pipe small, elegant swirls. Start from the center of where you want your cookie to be, and spiral outwards, you can choose either a clockwise or counter-clockwise direction. Finish the swirl by gently lifting the bag to create a distinct, neat peak on top. Remember to leave adequate space (about 1 inch) between each piped cookie, as they will expand just slightly during baking, even with chilling.
- Freeze the Piped Dough: This step is of paramount importance and cannot be skipped for successful, shapely butter cookies. Once your baking sheets are filled with beautifully piped cookie dough, immediately transfer them to the freezer for a full 30 minutes. This firm chilling allows the butter within the dough to solidify completely, which is the key mechanism for preventing the cookies from spreading out and losing their intricate designs in the hot oven.
- Bake to Golden Perfection: While your piped cookies are chilling in the freezer, preheat your oven to 350°F (180°C). Once the oven has reached temperature, retrieve the chilled baking sheet directly from the freezer and immediately place it into the preheated oven. Bake your butter cookies for approximately 15-17 minutes, or until you observe that the edges of the cookies have turned a delicate, light golden brown. The centers should remain paler but appear set. Repeat this precise process with any remaining cookie dough and subsequent baking sheets.
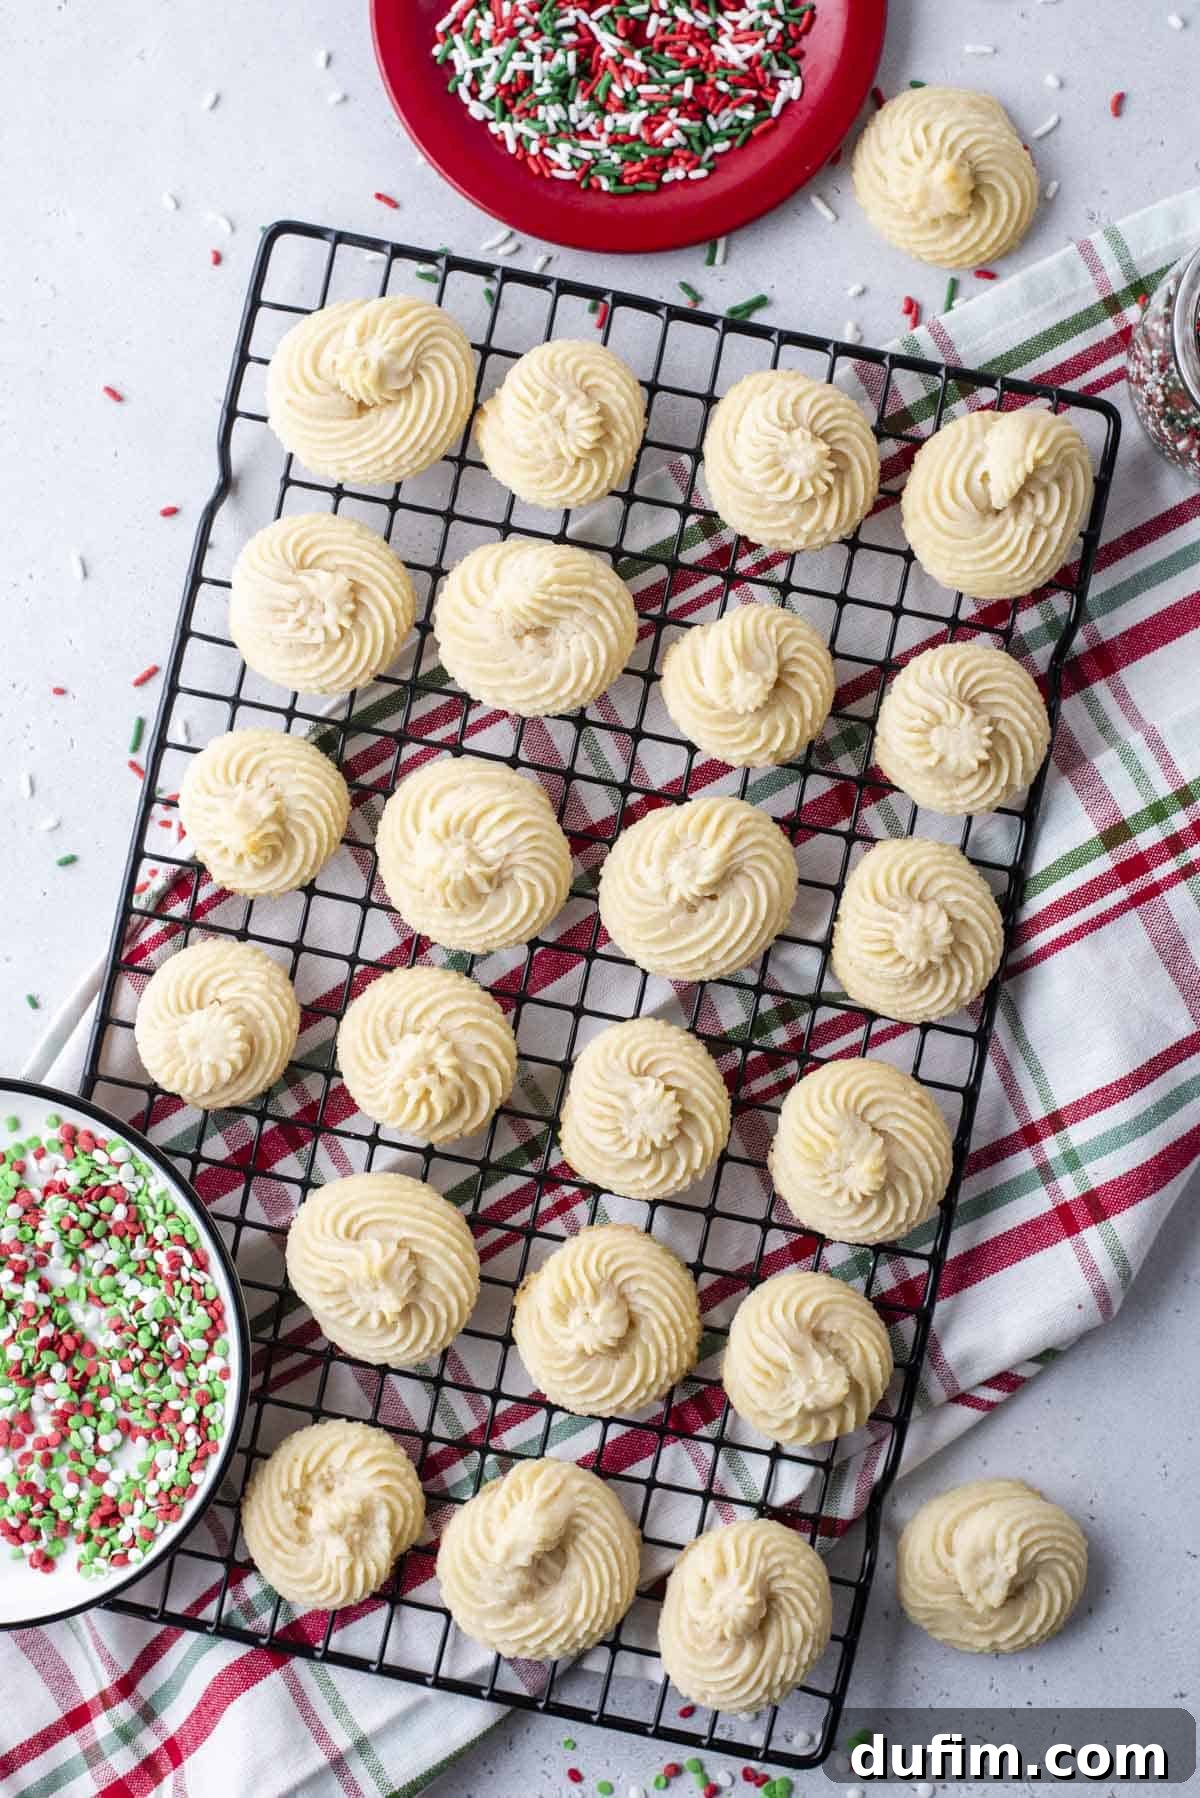
- Optional Chocolate Dip & Decorate: After your cookies have been removed from the oven and have fully cooled on a wire rack, you can add an optional, yet delightful, touch of elegance. Place your semi-sweet chocolate chips (or finely chopped chocolate) into a microwave-safe bowl. Begin by microwaving the chocolate at 50% power for 60 seconds. Remove and stir thoroughly. Then, continue microwaving in shorter intervals of 30-60 seconds at 50% power, stirring diligently between each interval, until the chocolate is completely smooth and melted. Dip one half of each cooled cookie into the melted chocolate. Immediately after dipping, if desired, add your favorite sprinkles or other decorations before the chocolate has a chance to set. Place the dipped cookies on a silicone mat or a fresh piece of parchment paper to allow the chocolate to set and harden completely.
Expert Tips & Tricks for Perfect Butter Cookies Every Time
Achieving truly exceptional homemade butter cookies that rival those from a high-end Danish bakery is not just a dream – it’s entirely within your reach with these expert tips and tricks. By paying close attention to these crucial details, you can ensure your cookies are consistently perfect, batch after delicious batch:
- **Mastering Flour Measurement is Key:** This is arguably one of the most critical steps in any baking endeavor, and especially so for butter cookies. Too much flour will inevitably result in dry, dense, and crumbly cookies, while too little flour can lead to excessive spreading and a loss of shape. Always measure your flour accurately. Please refer to the detailed guide below on “How to Properly Measure Flour” for consistent and reliable results.
- **The Absolute Importance of Chilling the Dough:** As previously highlighted in the instructions, the step of freezing the piped dough for 30 minutes before it goes into the oven is absolutely non-negotiable for this recipe. This firm chilling allows the butter within the dough to solidify completely, which acts as a structural safeguard, preventing the cookies from spreading out too much in the hot oven. Skipping this vital step will drastically alter the cookie’s texture and appearance, almost certainly leading to flat, undefined, and disappointing results.
- **Utilize a Star-Shaped Piping Tip for Authenticity:** The beautiful, signature aesthetic of classic Danish butter cookies comes directly from the technique of piping. To achieve those gorgeous, elegant ridges and perfectly formed swirls, a large open star-shaped piping tip is absolutely essential. I highly recommend using a Wilton 6B or any similar large open star tip. It ensures you create a cookie that is not only visually stunning but also has a substantial, satisfying bite with beautiful definition.
- **Avoid Overmixing the Dough:** Once you introduce the flour into your butter and sugar mixture, exercise caution and restraint. Mix only until the ingredients are just combined and a smooth dough barely forms. Overmixing is a common pitfall; it develops the gluten in the flour excessively, which can lead to tough, chewy cookies – a texture we explicitly want to avoid in a tender butter cookie. The goal is melt-in-your-mouth, not rubbery!
- **Perfect Room Temperature Butter is Non-Negotiable:** Ensure your unsalted butter is genuinely at room temperature. This means it should be soft enough to make a slight indentation with your finger without melting or becoming greasy. This ideal consistency allows the butter to cream properly with the powdered sugar, incorporating crucial air that contributes to the cookie’s light, tender, and delicate texture.
- **Ensure Even Baking Through Oven Calibration:** Every oven is unique and can have hot spots. To combat uneven baking and ensure all your cookies achieve that perfect, uniform golden edge, consider rotating your baking sheets halfway through the designated baking time. This simple action helps to even out the heat exposure and ensures consistent results across the entire batch.
A Comprehensive Guide to Properly Measuring Flour
Accurate flour measurement is an often-overlooked yet fundamental aspect of successful baking, directly impacting the final texture of your cookies. The most precise and reliable method is always to use a digital kitchen scale, weighing your flour in grams. This approach eliminates all variations caused by how loosely or tightly flour is packed into a measuring cup.
However, if a kitchen scale is not readily available, you can still achieve reasonably accurate results by following this tried-and-true method, often referred to as the “spoon and level” technique:
- **First, Aerate the Flour:** Before you even think about measuring, gently fluff the flour in its container or bag using a whisk or a spoon. Flour naturally compacts as it sits in storage, making it denser than it should be. Aerating it ensures you’re measuring a lighter, less dense quantity. This process is about “fluffing” the flour, not sifting it, unless the recipe explicitly specifies sifting.
- **Spoon the Flour into the Measuring Cup:** Once the flour is aerated, use a separate spoon to lightly scoop the fluffed flour into your dry measuring cup. Carefully pile it up until it overflows slightly. It is crucial not to use the measuring cup itself to scoop directly from the flour bag, as this action will inevitably compact the flour, leading to an over-measurement.
- **Level Off Any Excess:** After the measuring cup is gently overflowing, use the flat back of a butter knife or any straight edge (like a ruler) to carefully level off any excess flour across the top of the measuring cup. Do not tap the cup against the counter or shake it, as this will, once again, re-compact the flour and lead to an inaccurate measurement.

Storing Your Delicious Danish Butter Cookies for Optimal Freshness
Ensuring proper storage is crucial for preserving the freshness, crispness, and delightful flavor of your homemade Danish butter cookies for as long as possible. Here’s a comprehensive guide to keeping them at their very best, whether for immediate enjoyment or for future indulgence:
- **Room Temperature Storage:** Once your butter cookies have completely cooled down to room temperature, they are ready for storage. Place them in an airtight container, such as a cookie tin or a rigid plastic container with a tight-fitting lid. Stored in a cool, dry place away from direct sunlight, they will impressively retain their crispness and delicious flavor for up to one week. To prevent any delicate decorations (like chocolate or sprinkles) from sticking or smudging, it’s a good practice to place a piece of parchment paper between layers of cookies.
- **Freezing for Extended Freshness:** For those who love to bake ahead or simply want to savor their butter cookies for an extended period, freezing is an excellent option. Butter cookies freeze exceptionally well! To freeze them, first arrange the completely cooled cookies in a single layer on a baking sheet. Place the baking sheet in the freezer until the cookies are solid (this usually takes about 1-2 hours, depending on their size). Once thoroughly frozen, transfer the solid cookies to a freezer-safe bag or an airtight freezer container. Again, placing parchment paper between layers will prevent sticking. Stored correctly, your butter cookies can remain fresh in the freezer for up to three months. When you’re ready to enjoy them, simply take them out and allow them to thaw at room temperature for a few minutes; they’ll taste just as fresh as the day they were baked.
Butter Cookie Recipe: Frequently Asked Questions (FAQs)
Chewy butter cookies are typically a result of one of two common issues: over-mixing the dough or over-baking the cookies. Over-mixing, especially once the flour has been added, develops the gluten in the flour excessively, which makes the cookies tough and elastic rather than tender. Always mix only until the ingredients are just combined. Over-baking, on the other hand, dries out the cookies by evaporating too much moisture, making them hard and chewy. It’s crucial to stick closely to the specified baking time and remove them from the oven as soon as their edges turn a delicate, light golden brown.
The profound appeal of butter cookies lies in their beautiful simplicity and purity. Unlike many other cookie varieties that rely on complex flavor combinations, butter cookies allow the rich, nuanced flavor of high-quality butter to be the undisputed star of the show. This is perfectly complemented by a subtle, aromatic hint of vanilla. There are no overwhelming or competing flavors; just a perfect, harmonious balance that creates a truly comforting, satisfying, and deeply nostalgic treat. It serves as a wonderful testament to the fact that sometimes, the simplest recipes yield the most profound and cherished pleasure.
Yes, butter cookies are indeed known by a few other names, particularly depending on the region or specific cultural context. They are quite commonly referred to as Danish biscuits or butter biscuits, especially throughout parts of Europe and within Commonwealth countries. The term “Danish butter cookies” specifically evokes the iconic round, piped, or simple-shaped cookies that are famously sold in distinctive blue tins around the world, recognized for their unique shapes and rich flavor.
Absolutely! While using a piping bag helps achieve the classic, intricate Danish butter cookie shapes, you certainly have other excellent options. If you own a cookie press (also known as a spritz cookie maker), you can use it to create various decorative designs with ease. Alternatively, for a simpler approach, you can roll the prepared dough into logs, chill them thoroughly until firm, and then slice them into uniform rounds before baking. While these variations might not have the same ridged, piped texture, they will still yield incredibly delicious, buttery cookies that everyone will enjoy.
Preventing excessive cookie spread is a common challenge for many bakers, but several key factors in this recipe contribute to success. The single most important step to prevent spreading is the mandatory 30-minute freezing of the piped dough before it enters the oven. Additionally, ensure your butter is softened to room temperature but not melted, as melted butter causes immediate spread. Accurately measure your flour (refer to our guide!), as too little flour can make the dough too soft. Lastly, avoid over-creaming the butter and sugar, which can incorporate too much air, leading to collapse and spread in the oven. Baking on parchment paper or silicone mats also provides a non-stick surface that can help.
“This is an absolutely wonderful recipe – so incredibly easy to follow and fantastically delicious! I know I’ll be making these delightful cookies over and over again!”
– Joyce
Explore More Delicious Cookie Recipes from Our Collection
If you thoroughly enjoyed baking these classic butter cookies and are looking to expand your repertoire, you’ll love exploring other fantastic cookie recipes from our curated collection. Each recipe is designed to bring joy to your kitchen and deliciousness to your table:
- Homemade Peanut Butter Cookies: A timeless, chewy classic that consistently proves to be a crowd-pleaser with its rich, nutty flavor.
- Classic Jam Thumbprint Cookies: Delightful, buttery cookies featuring a tender crumb and a sweet, fruity jam-filled center.
- Irresistible Almond Joy Cookies: Indulgent and flavorful cookies, perfectly inspired by the beloved coconut, almond, and chocolate candy bar.
- Small Batch Chocolate Chip Cookies: The perfect solution when you’re craving just a few warm, gooey, classic chocolate chip cookies without making a huge batch.
- Perfect Sugar Cookies for Decorating: Another fantastic option for festive baking, these sturdy yet tender cookies are ideal for cutting out shapes and elaborate decorating.
(Original instruction “Tap stars to rate!” kept as a placeholder/legacy note if desired, but functionality is removed.)
Danish Butter Cookies Recipe
Beth
15
minutes
17
minutes
30
minutes
24
cookies
Pin Recipe
Rate Recipe
Print Recipe
Equipment
-
Piping Bag
-
Large Open Star Shaped Piping Tip
-
Silicone Baking Mat or Parchment Paper
-
Electric Mixer (Stand or Handheld)
-
Baking Sheets
-
Microwave-safe bowl (for optional chocolate dip)
-
Wire Cooling Rack
Ingredients
- 1 cup (226g) softened unsalted butter
- ⅔ cup (75g) powdered sugar
- 1 tsp pure vanilla extract
- 2 cups (240g) all-purpose flour
- 2 tsp cornstarch
- ½ tsp salt
Optional Chocolate Dip & Decorations
- ½ cup (85g) semi-sweet chocolate chips (or chopped baking chocolate)
- Sprinkles (optional, for decoration)
Instructions
-
1. Prepare for Chilling: The cookie dough must be frozen for 30 minutes before baking. Ensure you have ample freezer space ready for your piped cookies.
-
2. Cream Butter & Sugar: In a large mixing bowl, using an electric mixer, cream together the softened unsalted butter and powdered sugar until the mixture is light, fluffy, and thoroughly combined. This process typically takes about 3-5 minutes.
-
3. Combine Remaining Ingredients: Add the vanilla extract, all-purpose flour, cornstarch, and salt to the creamed butter mixture. Mix on low speed with the electric mixer until a thick, smooth, and cohesive dough forms. The dough will be very stiff. If it appears too crumbly, you may briefly knead it with your hands to help it come together before continuing to mix on low until uniform. Avoid overmixing.
-
4. Fill Piping Bag: Fit a sturdy piping bag with a large open star-shaped piping tip (such as a Wilton 6B). Gently fill the piping bag approximately halfway with the prepared cookie dough.
-
5. Pipe Cookies: Line your baking sheet with parchment paper or a silicone baking mat. Holding the piping bag upright, apply firm and consistent pressure to pipe small, elegant swirls. Start from the center and spiral outwards (either clockwise or counter-clockwise), finishing the swirl on top of itself to create a neat peak. Leave about 1-inch space between each cookie.
-
6. Freeze Dough: This step is critical. Immediately transfer the baking sheet with the piped cookies into the freezer for 30 minutes. This ensures the butter solidifies, preventing the cookies from spreading during baking.
-
7. Bake: While the cookies are chilling, preheat your oven to 350°F (180°C). Transfer the chilled baking sheet directly from the freezer to the preheated oven. Bake for 15-17 minutes, or until the edges of the cookies turn a delicate, light golden brown and the centers are set. Repeat with any additional cookie dough on a new chilled baking sheet.
-
8. Optional Chocolate Dip & Decorate: Once the cookies are completely cool on a wire rack, you can add an optional chocolate dip. Melt semi-sweet chocolate chips in a microwave-safe bowl (microwave at 50% power for 60 seconds, stir, then continue in 30-60 second intervals until smooth). Dip one half of each cooled cookie into the melted chocolate. Immediately add sprinkles if desired, before the chocolate sets. Place the dipped cookies on a silicone mat or parchment paper to allow the chocolate to harden.
Video Tutorial
Notes from the Baker
If you find piping the dough challenging or if you don’t have a piping bag, don’t worry, you still have excellent alternative options for enjoying these delicious cookies. You can easily use a spritz cookie press if you have one, which will also create lovely decorative shapes. Alternatively, for a simpler approach, you can roll the dough into a uniform log, chill it well until firm, and then slice it into even circles before baking. Regardless of the shaping method you choose, remember that the crucial step of freezing the cookies for 30 minutes before baking should not be skipped to ensure minimal spreading and optimal, tender texture.
Nutrition Information (Approximate Per Cookie)
Calories: 142kcal
|
Carbohydrates: 13g
|
Protein: 1g
|
Fat: 9g
|
Saturated Fat: 6g
|
Polyunsaturated Fat: 0.4g
|
Monounsaturated Fat: 2g
|
Trans Fat: 0.3g
|
Cholesterol: 21mg
|
Sodium: 50mg
|
Potassium: 35mg
|
Fiber: 1g
|
Sugar: 5g
|
Vitamin A: 238IU
|
Calcium: 6mg
|
Iron: 1mg
Nutrition Disclosure
All nutritional values provided are approximate estimations and are offered to the reader as a courtesy. Please note that altering ingredients and/or quantities from the original recipe will inevitably change these estimated nutritional calculations. This information is intended for general guidance only.
Enjoyed this recipe? We’d love to hear from you! Share your thoughts and rate it below!