
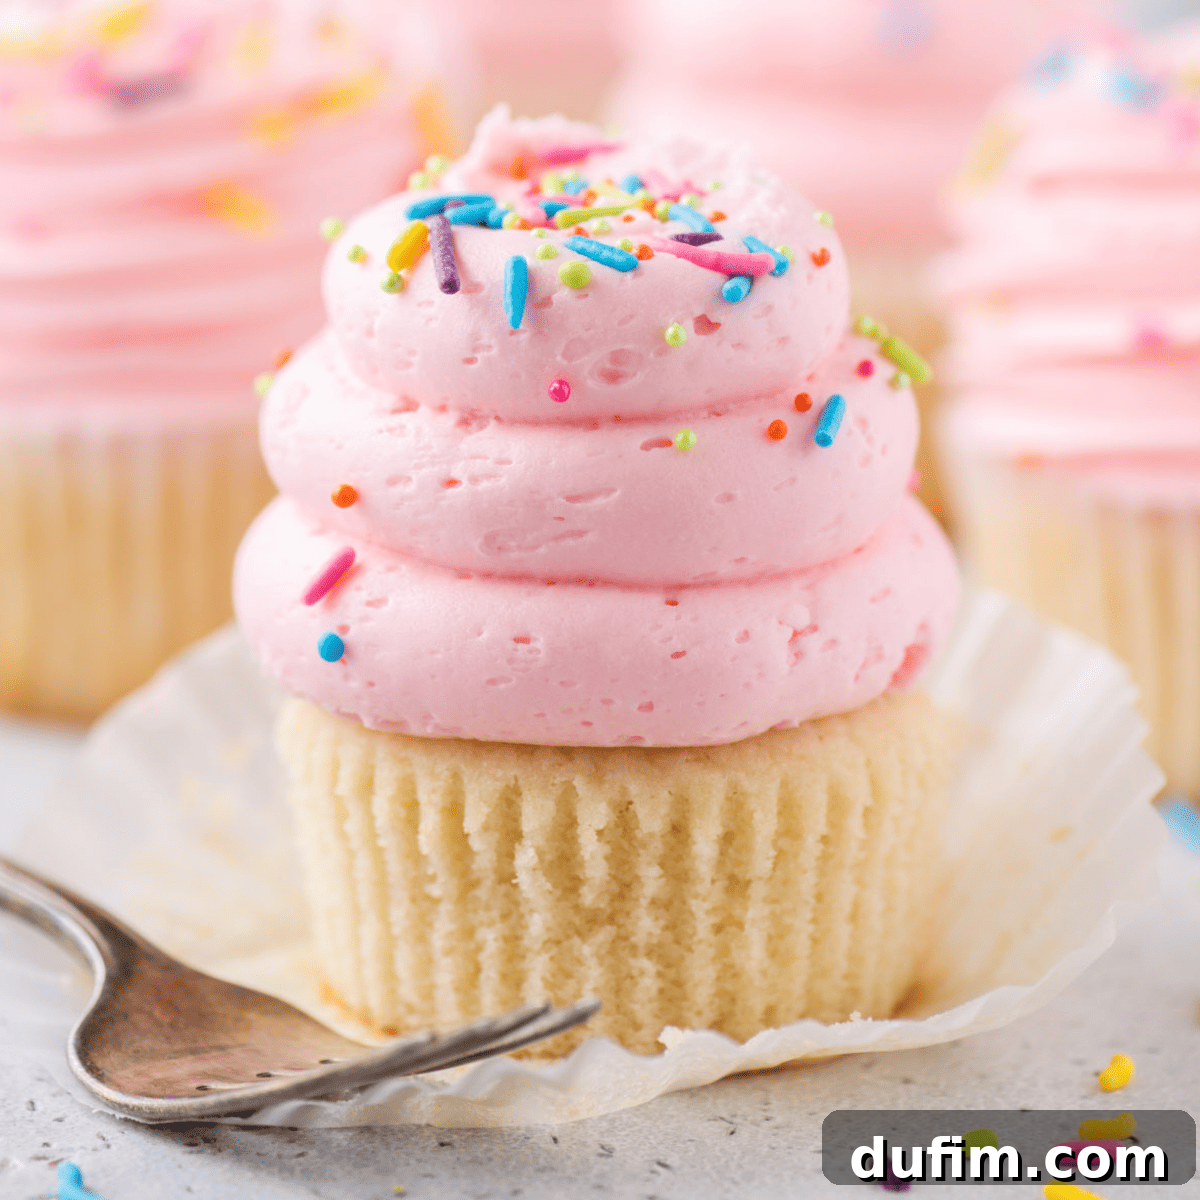
The Ultimate Guide to Moist & Fluffy Homemade Vanilla Cupcakes: Your Perfect Celebration Recipe!
Welcome to the only vanilla cupcake recipe you’ll ever need! Loved by countless families, these classic white cupcakes are our absolute favorite for any festive occasion. They are exceptionally moist, bursting with rich vanilla flavor, and surprisingly simple to prepare. Whether you opt for a smooth vanilla or a decadent chocolate frosting, these delightful treats are guaranteed to be a hit. From elegant weddings and joyful baby showers to lively birthday parties, these easy homemade vanilla cupcakes are a must-have centerpiece for every celebration!
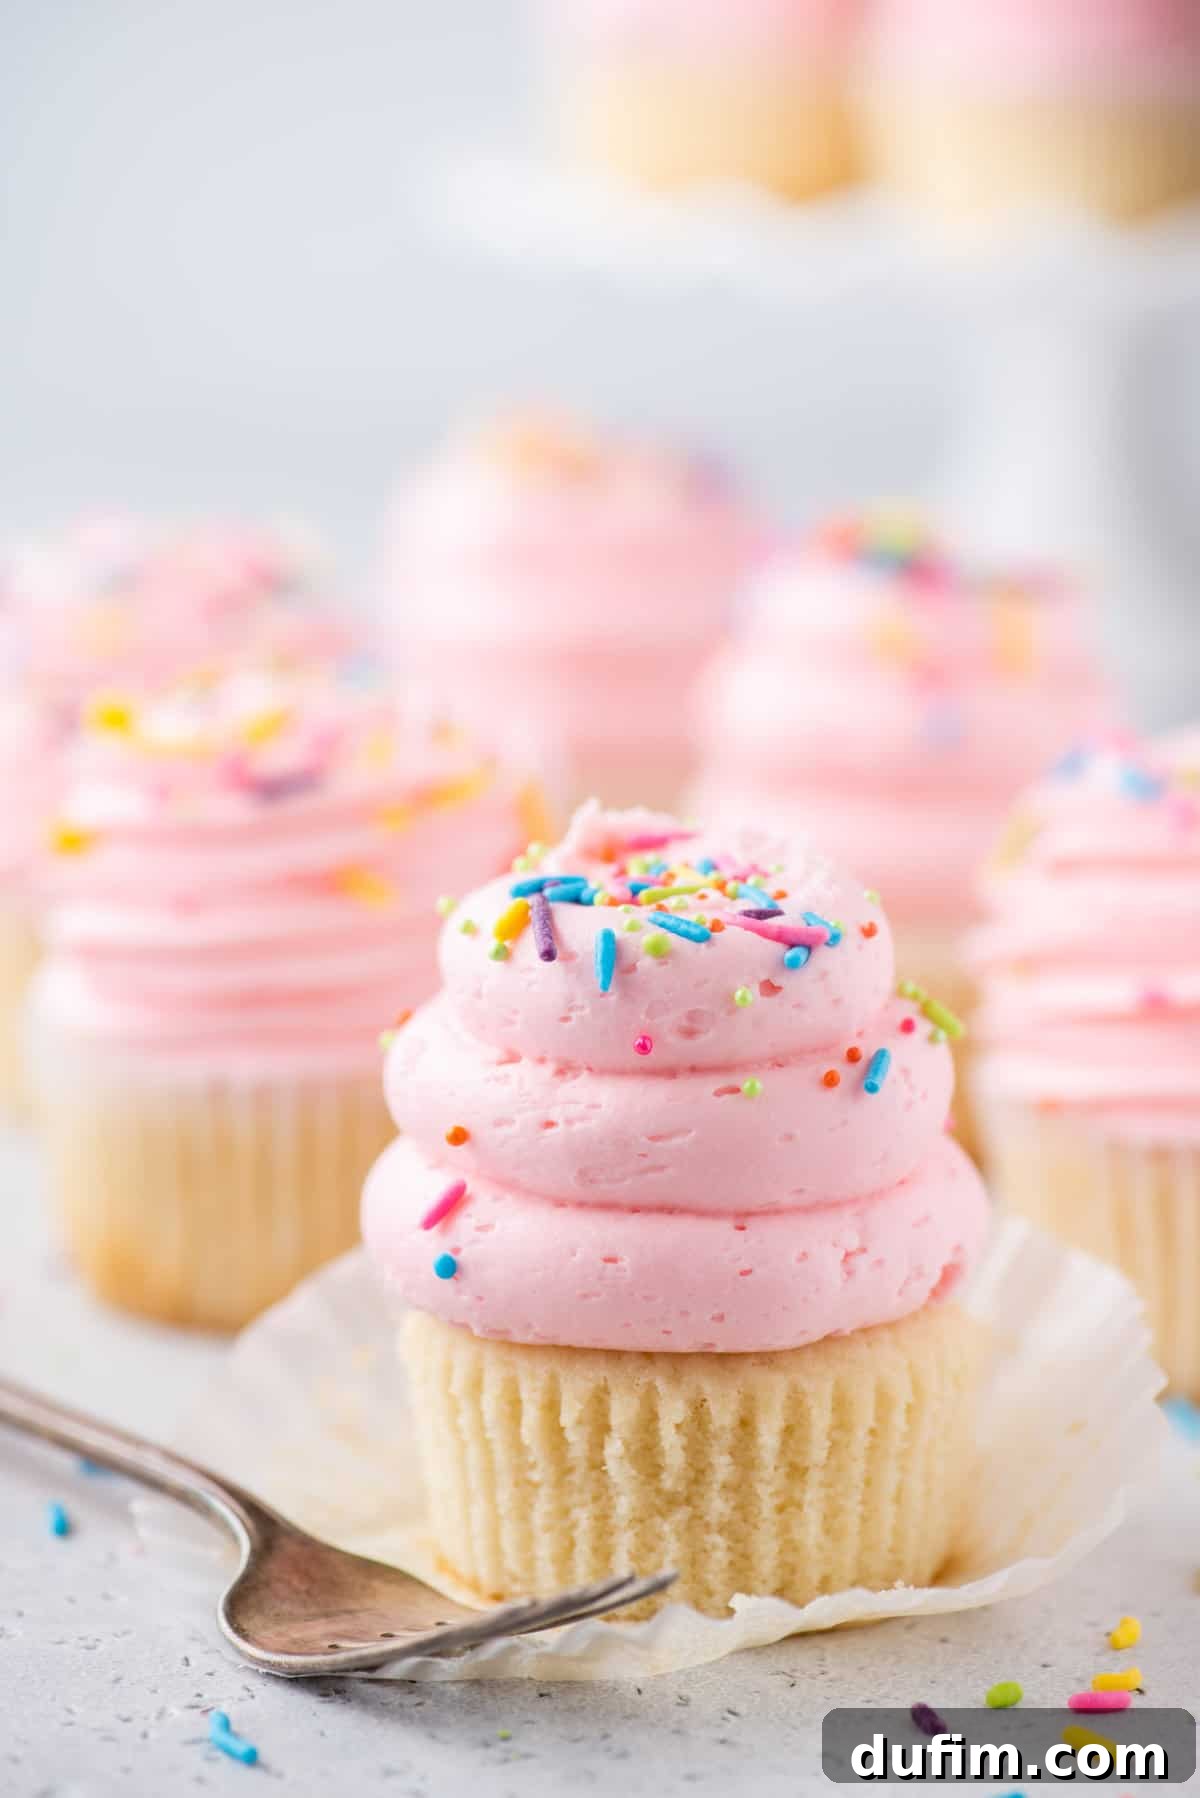
“These were delicious and very moist. Thanks for the great recipe! I have been looking for a good white cake for a long time and this is a keeper.”
— Malynn
Why Homemade Vanilla Cupcakes Are Always Best
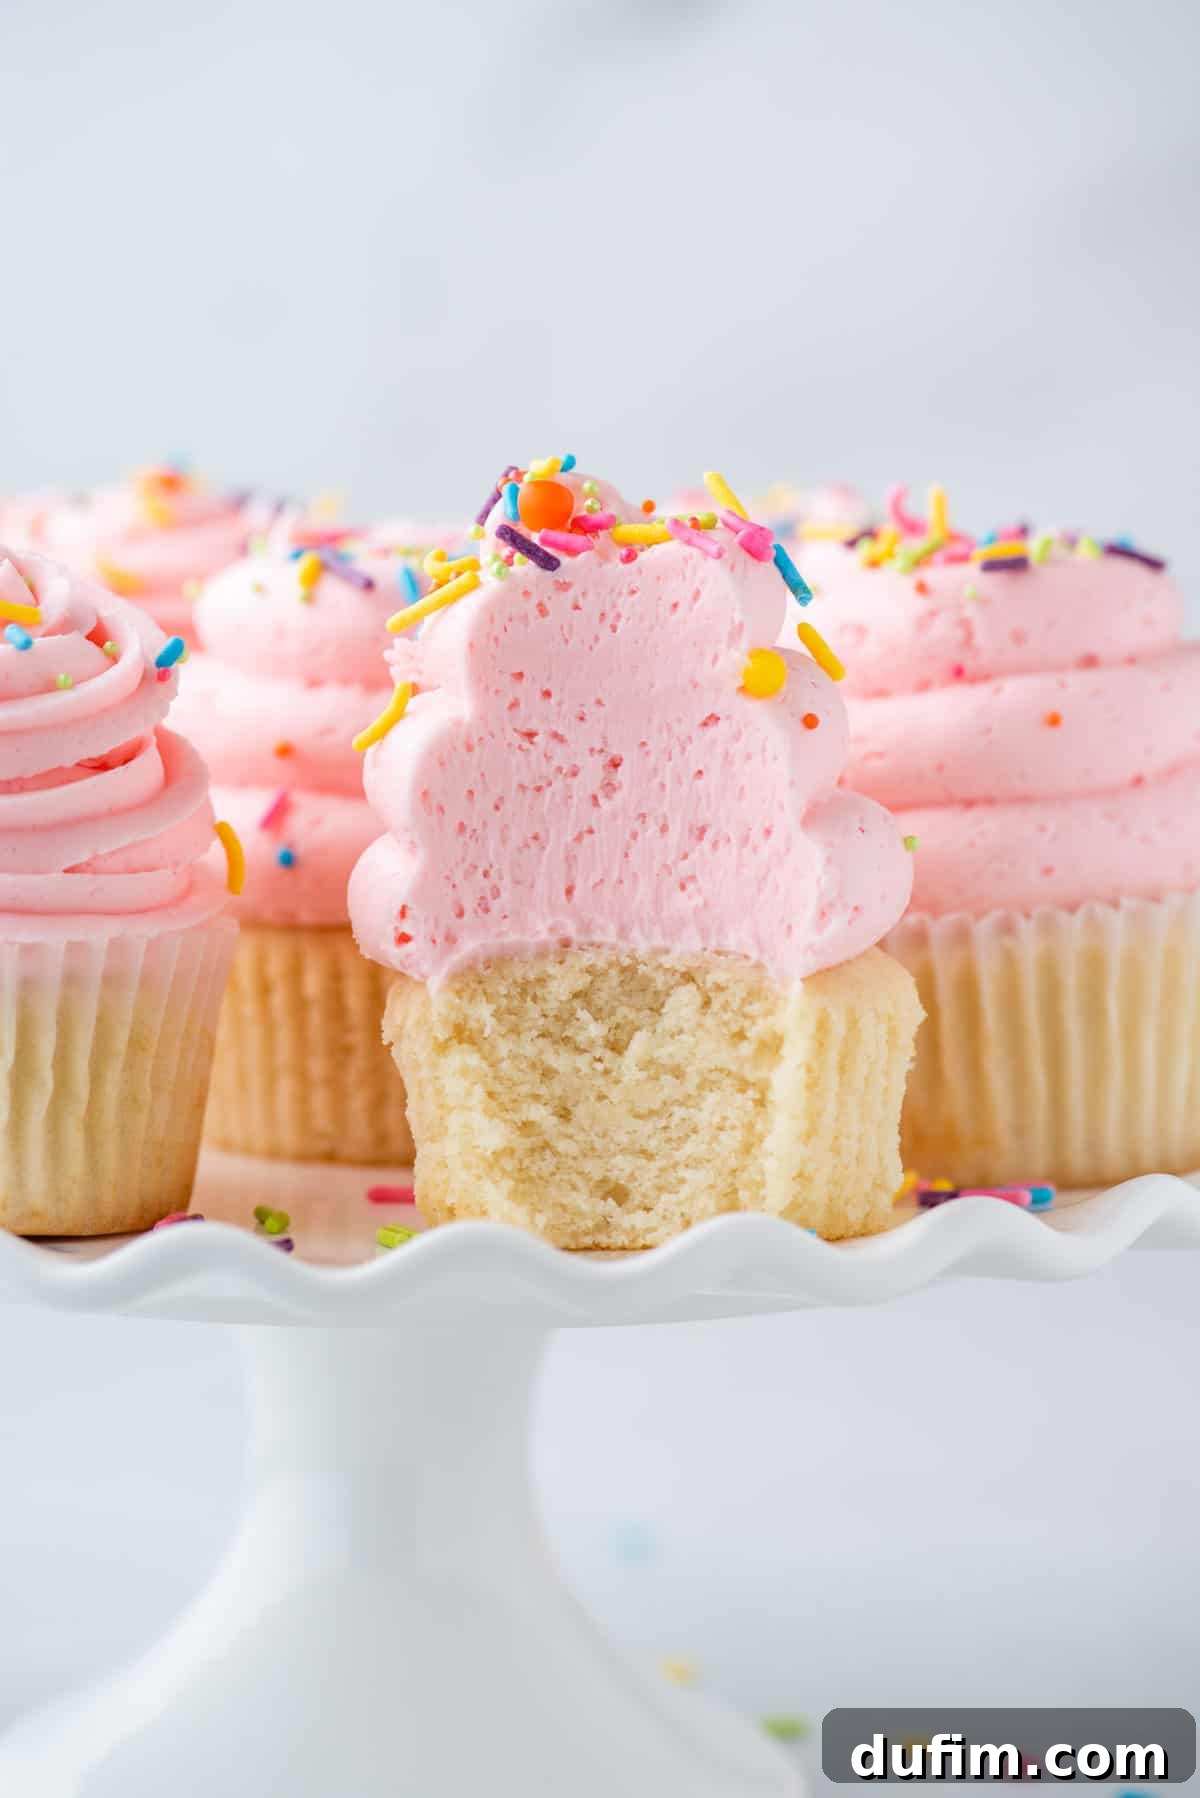
While a convenient box mix can certainly make a good cupcake (and there’s absolutely no shame in that!), there’s something truly special about homemade. Our moist white vanilla cupcakes elevate the experience entirely. They are incredibly light, wonderfully fluffy, and boast a pristine white crumb, thanks to the careful selection of ingredients like egg whites and clear vanilla extract. Beyond their visual appeal, these cupcakes offer a depth of flavor and an irresistible tenderness that simply can’t be matched by store-bought alternatives. They’re perfectly suited for any elegant event, making them ideal white wedding cupcakes for bridal showers, baby showers, or any occasion where a touch of homemade perfection is desired.
The journey of baking from scratch allows you to control every ingredient, ensuring freshness and quality that shines through in every bite. The aroma of freshly baked vanilla cupcakes filling your home is an experience in itself, creating memories and anticipation that store-bought options just can’t deliver. Plus, the joy of presenting a batch of these perfectly crafted, fluffy, and moist vanilla cupcakes to your loved ones is truly unparalleled.
What’s the Difference Between White Cupcakes and Vanilla Cupcakes?
Many bakers wonder about the distinction between white cupcakes and vanilla cupcakes. While they share a similar delightful flavor profile, the primary difference lies in their appearance and, consequently, a slight variation in ingredients. Traditionally, white cupcakes are crafted using only egg whites, which ensures the batter remains as light and white as possible. To further enhance this pristine color, bakers often opt for clear vanilla extract, which provides vanilla flavor without adding any tint.
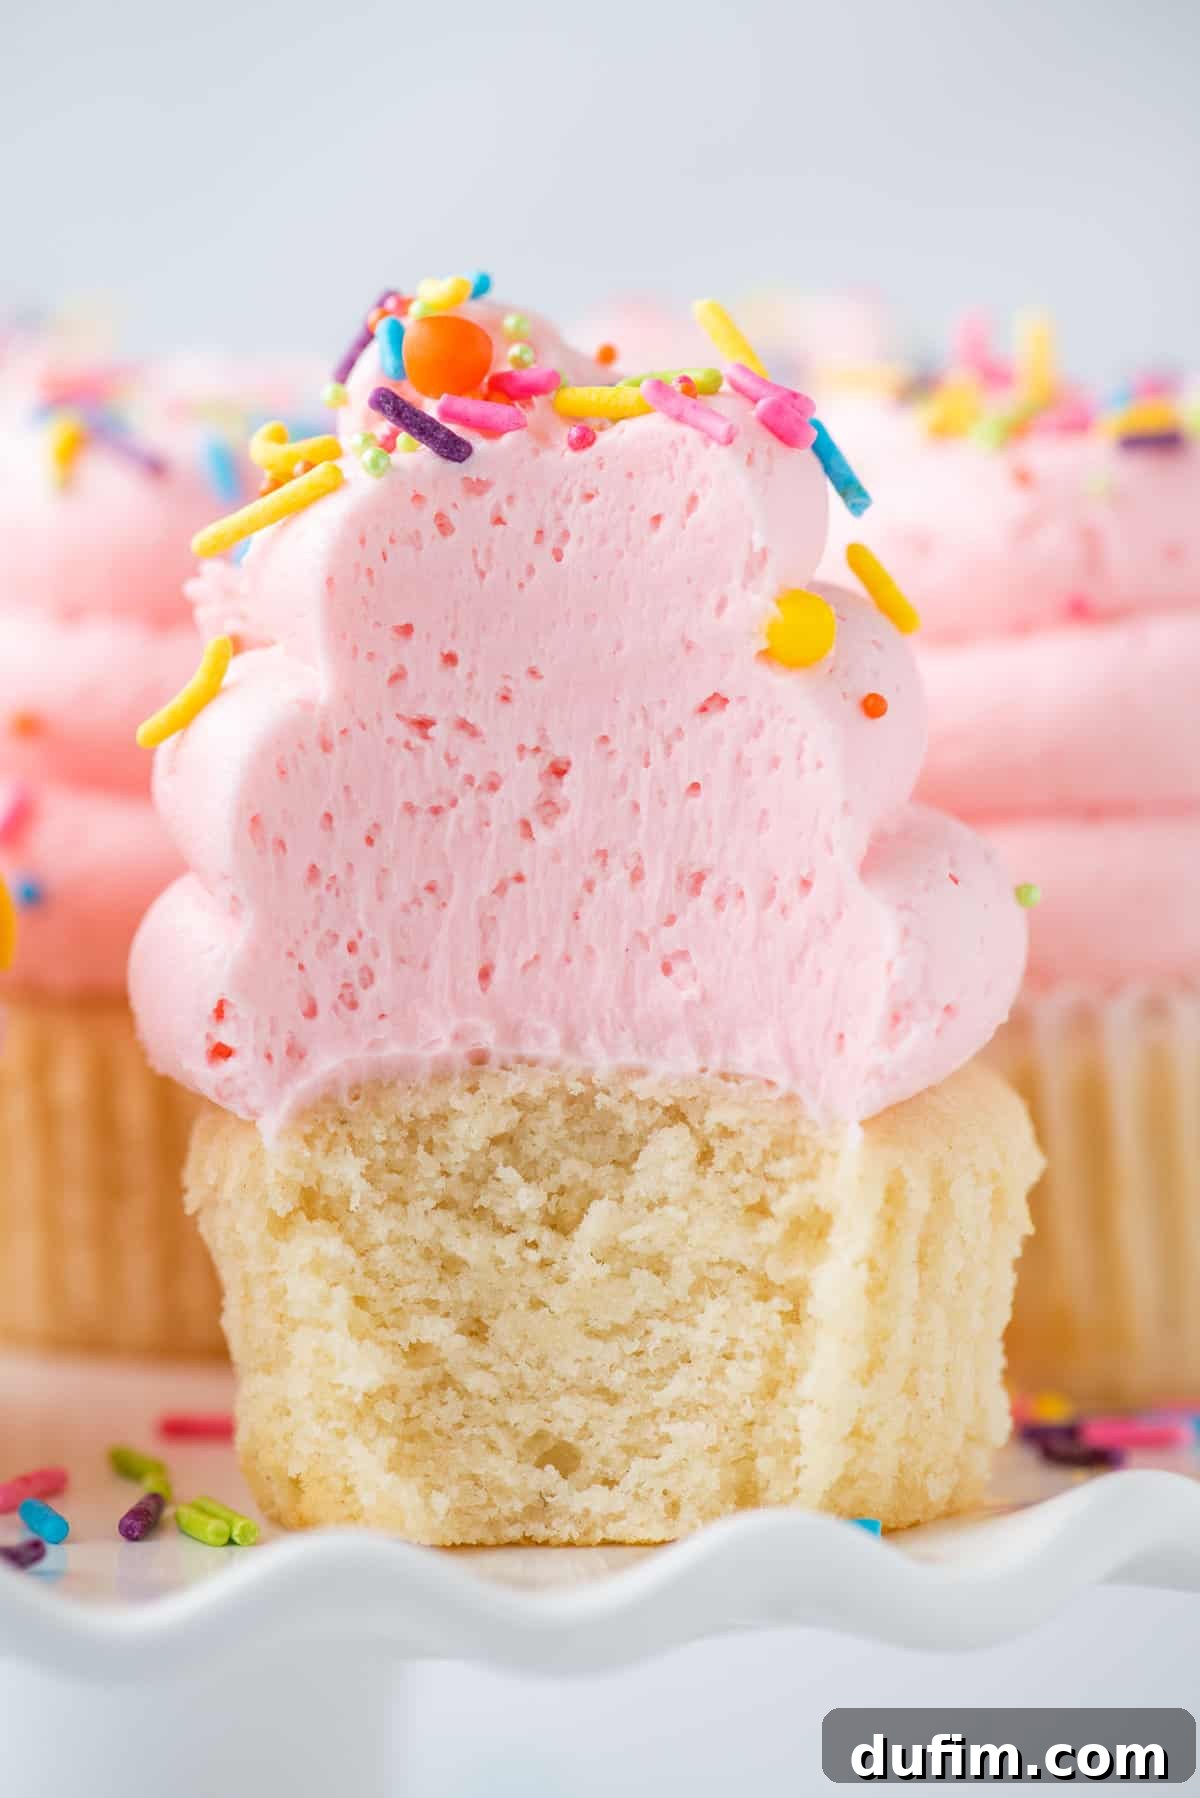
Vanilla cupcakes, on the other hand, typically incorporate whole eggs (both the white and the yolk) and regular vanilla extract. The egg yolks contribute a subtle yellow hue to the crumb, resulting in a slightly creamier color compared to true white cupcakes. However, when it comes to taste, the difference is almost imperceptible to most palates; both offer that beloved sweet, aromatic vanilla essence.
Our particular recipe strikes a perfect balance. While we use whole eggs, which technically makes them “vanilla” cupcakes in terms of color, we prioritize an incredibly moist and flavorful result. The inclusion of sour cream and milk plays a crucial role here, infusing the cupcakes with rich fat and moisture that guarantees a tender, melt-in-your-mouth texture. So, whether you call them white or vanilla, these are simply exceptional cupcakes designed for maximum enjoyment!
Vanilla Cupcakes Recipe Ingredients
Crafting the perfect moist vanilla cupcake begins with selecting the right ingredients. Each component plays a vital role in achieving that sought-after fluffy texture and rich flavor. Below, you’ll find a detailed list for both the cupcakes and two incredible frosting options. For precise quantities and step-by-step instructions, please refer to the complete recipe card further down this page.
FOR THE CUPCAKES:
- All-purpose flour: The foundation of our cupcakes. Proper measurement (using the spoon-and-level method) is crucial to avoid dry, dense results.
- Baking powder & Baking soda: Our leavening agents. Baking powder provides the primary lift, while baking soda reacts with the acidic sour cream to ensure a tender crumb and additional rise.
- Salt: A flavor enhancer that balances the sweetness and brings out the vanilla notes.
- Unsalted butter: Essential for rich flavor and tenderness. Ensure it’s at room temperature for easy creaming and a smooth batter.
- Granulated sugar: Provides sweetness, helps tenderize the cake, and contributes to a moist texture.
- Vegetable oil: Adds an extra layer of moisture and helps keep the cupcakes soft and fresh for longer.
- Eggs: Room temperature eggs incorporate better into the batter, creating a more uniform emulsion and a finer crumb structure.
- Sour cream: The secret ingredient for unparalleled moistness and a slight tangy complexity that enhances the vanilla flavor. It also helps tenderize the gluten.
- Milk: We recommend whole milk for its fat content, which adds richness and moisture. Ensure it’s also at room temperature.
- Vanilla extract: The star flavor! Use a good quality pure vanilla extract for the best taste.
FOR THE CLASSIC VANILLA BUTTERCREAM FROSTING:
- Unsalted butter: Just like for the cupcakes, room temperature butter is key for whipping into a light, airy, and creamy frosting.
- Vanilla extract: For that signature vanilla flavor in your frosting.
- Powdered sugar: Also known as confectioners’ sugar, it provides sweetness and structure to the buttercream. Sifting can help prevent lumps.
- Milk or heavy cream: Used to achieve the perfect frosting consistency. Start with a small amount and add more as needed until it’s smooth and spreadable.
- Gel food coloring (optional): For vibrant, custom-colored frosting without adding excess liquid.
FOR THE RICH CHOCOLATE BUTTERCREAM FROSTING:
- Unsalted butter: Room temperature and unsalted for the best chocolate flavor.
- Vanilla extract: Even in chocolate frosting, vanilla enhances the cocoa notes.
- Unsweetened cocoa powder: The essential ingredient for chocolate flavor. Natural cocoa powder or Dutch-processed cocoa powder will work, but steer clear of hot cocoa mix as it’s sweetened and won’t yield the same results. Sifting is highly recommended to avoid lumps.
- Powdered sugar: Sweetens and thickens the chocolate buttercream.
- Milk or heavy cream: To adjust the frosting’s consistency to your liking.
How to Make Homemade Vanilla Cupcakes: A Simple Guide
Baking delicious homemade vanilla cupcakes is a rewarding process. Follow these detailed steps to ensure perfectly moist and flavorful results every time. Remember, patience and proper technique are your best friends in the kitchen!
FOR THE CUPCAKES:
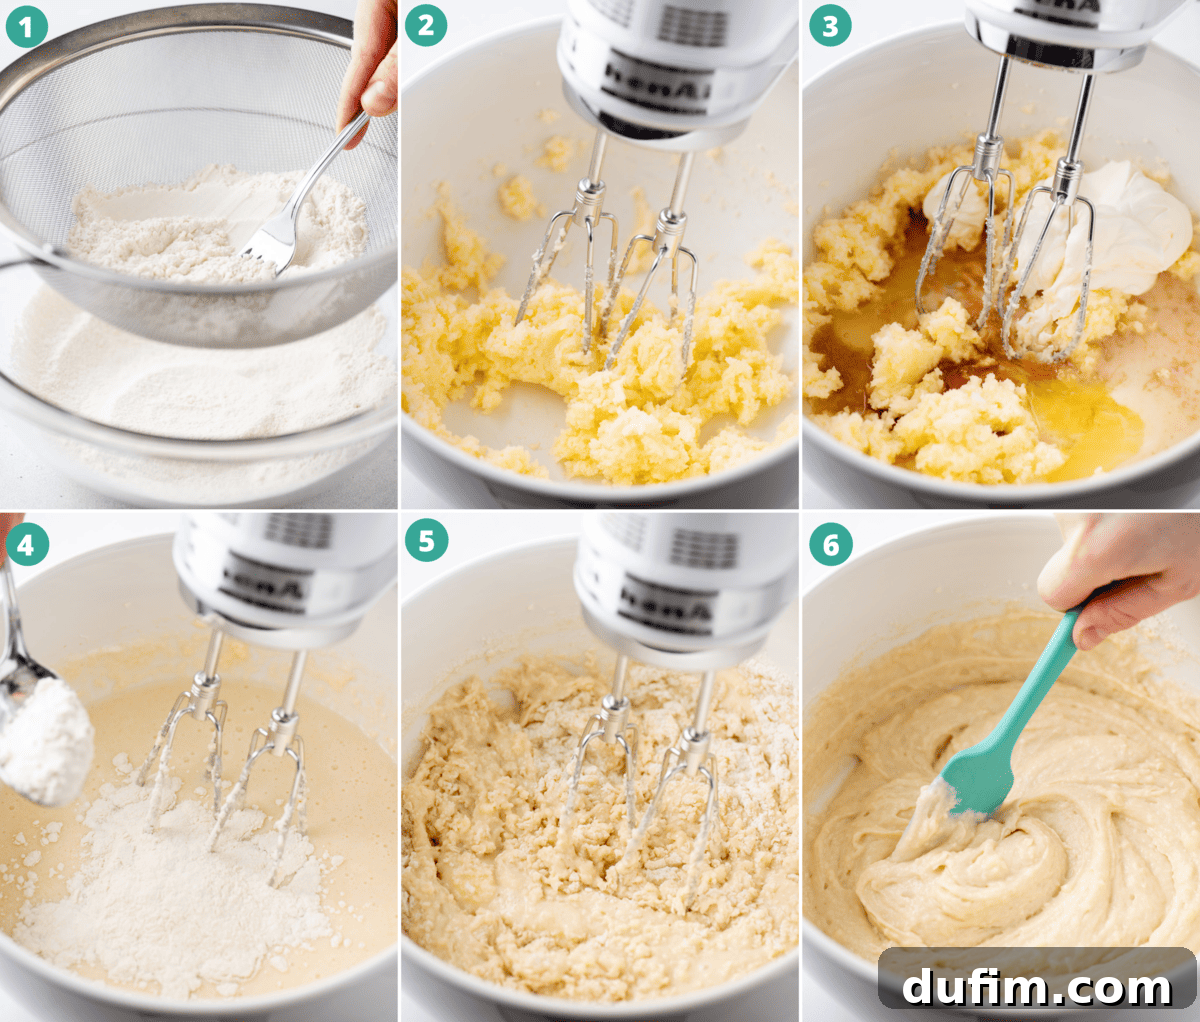
- Prepare Your Oven and Pan: Begin by preheating your oven to 350ºF (180°C). This ensures the oven is at a consistent temperature when the cupcakes go in, promoting even baking. Line a 12-cup muffin pan with paper liners and set it aside. This step not only makes for easy cleanup but also helps your cupcakes release cleanly.
- Combine Dry Ingredients: In a medium-sized bowl, whisk together the all-purpose flour, baking powder, baking soda, and salt. Whisking thoroughly ensures that the leavening agents and salt are evenly distributed throughout the flour, which is crucial for a consistent rise and flavor in your cupcakes. Set this mixture aside.
- Cream Wet Ingredients: In the bowl of a stand mixer fitted with the paddle attachment, or using a hand mixer, beat the room temperature unsalted butter, granulated sugar, and vegetable oil on medium speed for about 2 minutes. Continue until the mixture becomes light, fluffy, and pale in color. This creaming process incorporates air, which contributes to the cupcakes’ light texture.
- Add Remaining Wet Ingredients: Reduce the mixer speed to low. Add the room temperature eggs, sour cream, milk, and vanilla extract to the creamed butter mixture. Beat for another minute until everything is well combined and smooth. Scrape down the sides of the bowl as needed to ensure all ingredients are incorporated.
- Incorporate Dry Ingredients: With the mixer still on low speed, gradually add the dry ingredients (from Step 2) to the wet mixture. Mix just until the flour streaks disappear and the batter is fully combined. Be careful not to overmix, as this can develop the gluten too much, leading to tough, dry cupcakes.
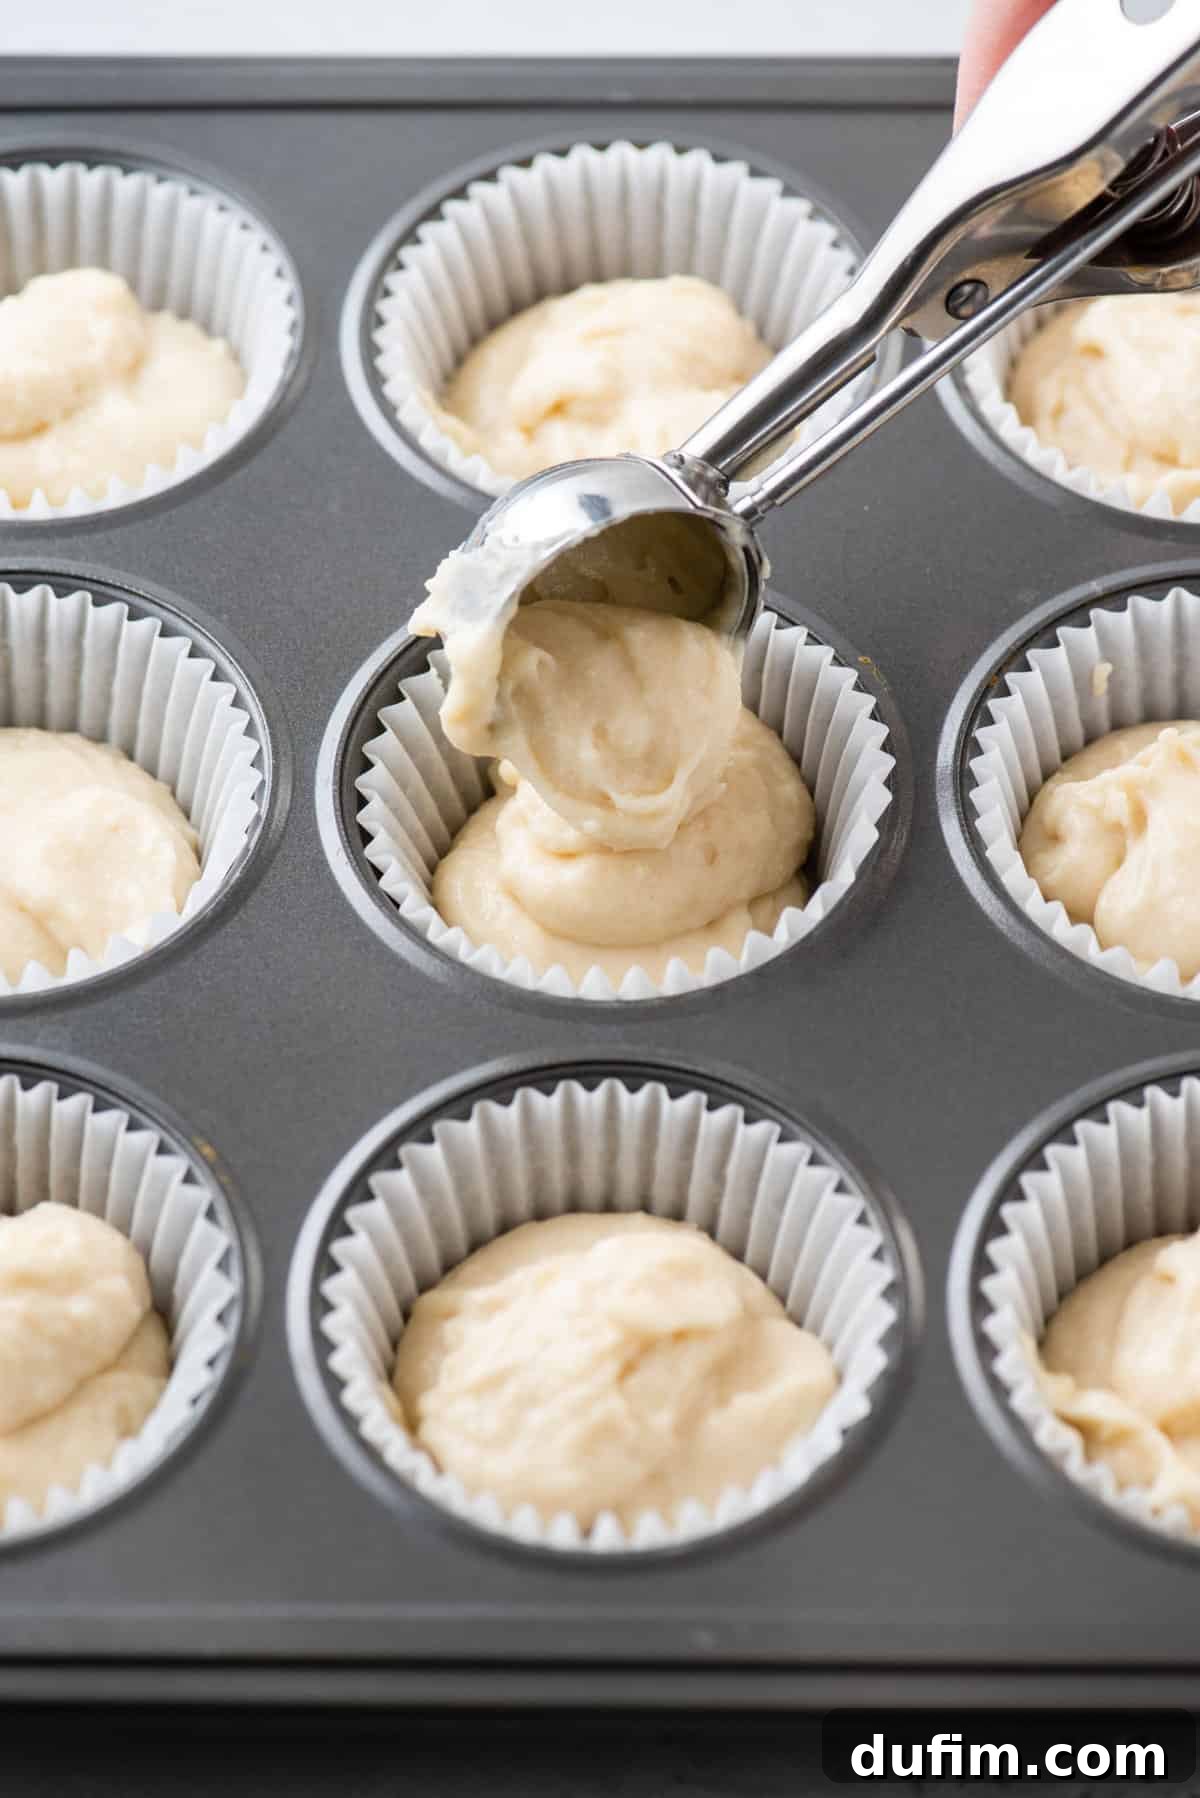
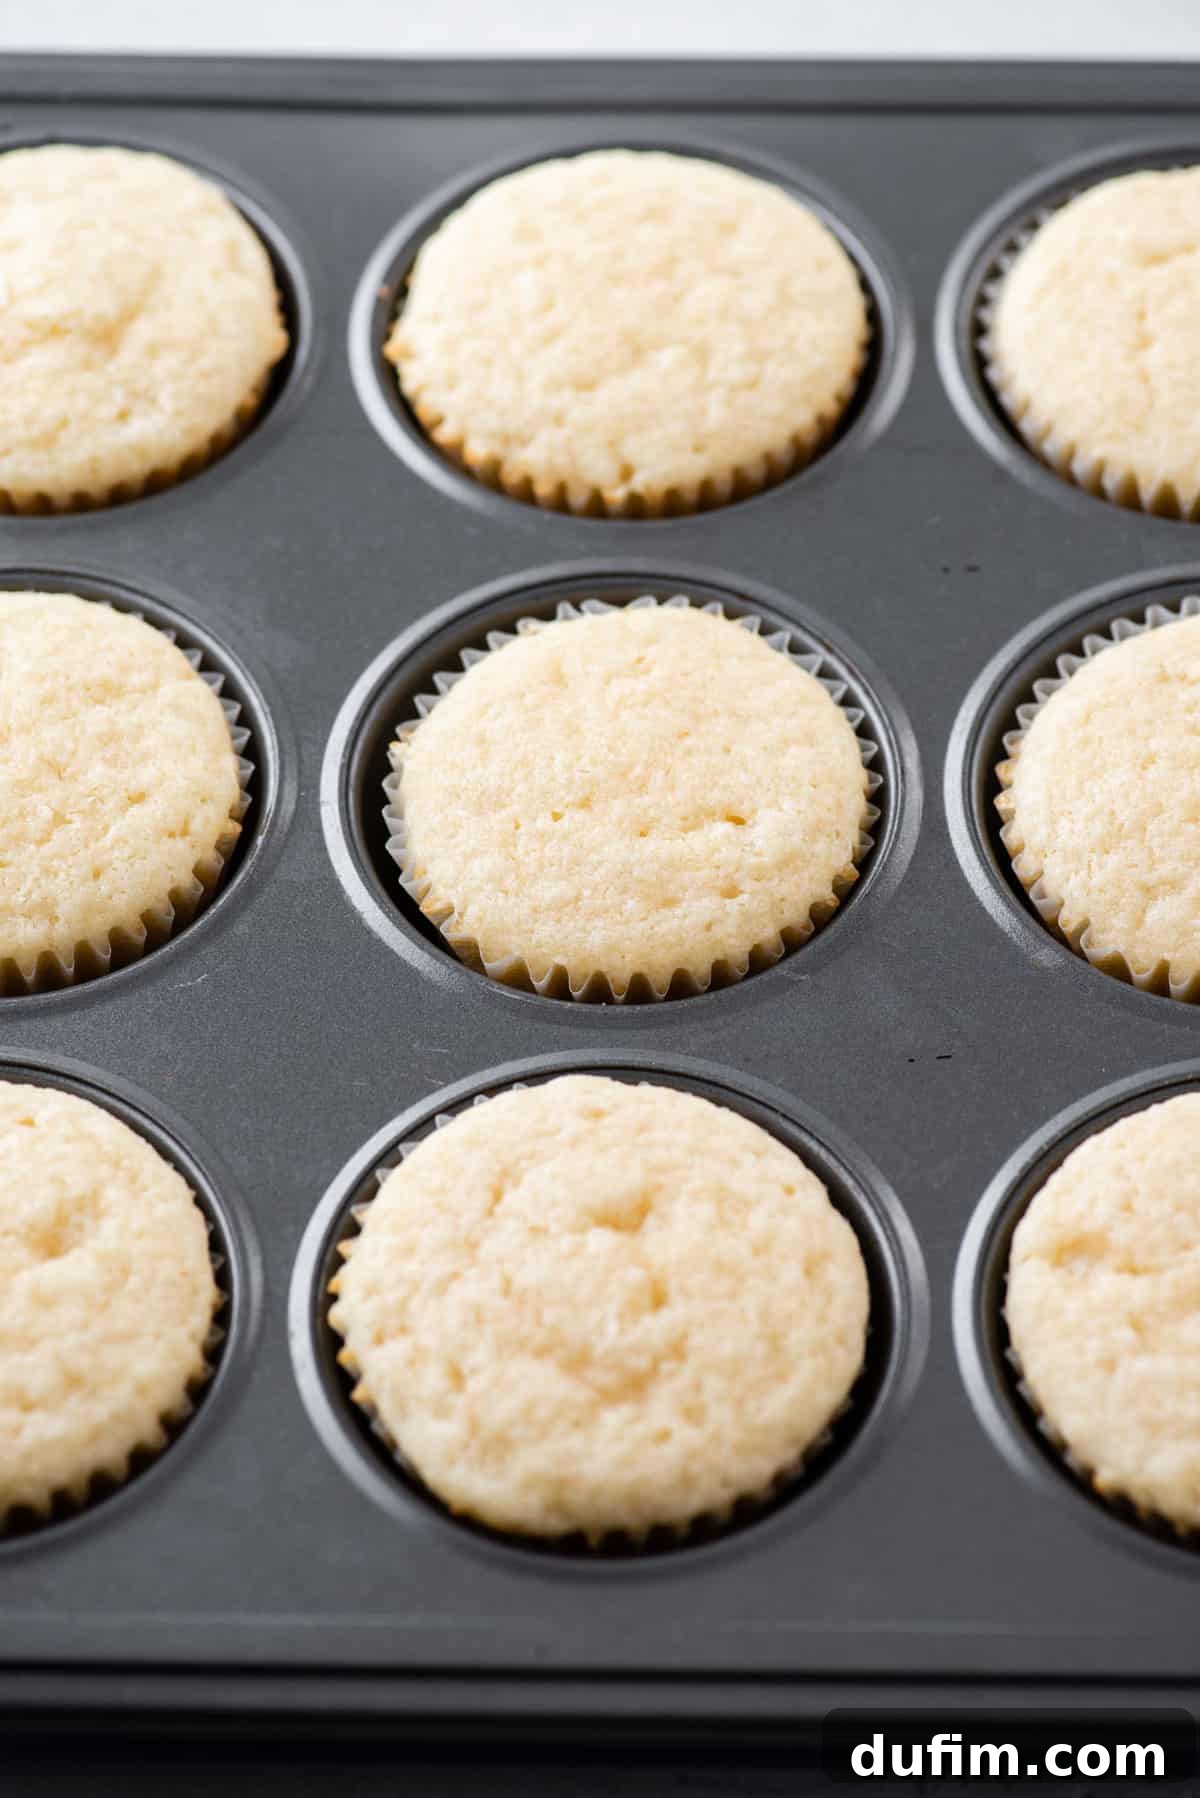
- Bake the Cupcakes: Divide the batter evenly among the prepared muffin liners, filling each about two-thirds full. This allows room for the cupcakes to rise without overflowing. Bake for 17-19 minutes, or until a toothpick inserted into the center of a cupcake comes out with a few moist crumbs attached. Avoid overbaking, which can result in dry cupcakes.
- Cool Completely: Once baked, remove the muffin pan from the oven and let the cupcakes cool in the pan for about 5 minutes. Then, transfer the cupcakes to a wire rack to cool completely before frosting. Frosting warm cupcakes will cause the frosting to melt and slide off. This cooling period is essential for the cupcakes to set properly and retain their moistness.
FOR THE FROSTING:
Each of these frosting recipes makes enough to generously frost about 24 cupcakes. If you desire a mix of both vanilla and chocolate, simply halve each frosting recipe before beginning.
- For Vanilla Frosting: In a large mixing bowl, beat the room temperature unsalted butter, vanilla extract, and a pinch of salt with an electric mixer on medium speed for 2-3 minutes, until it’s light, fluffy, and pale. Gradually add the powdered sugar, one cup at a time, mixing on low speed until fully incorporated. If the frosting is too thick, beat in 1 tablespoon of milk or heavy cream at a time until the desired consistency is reached. For extra fluffy frosting, beat in 1/4 cup of heavy whipping cream when adding the last portion of powdered sugar and whip for 3-4 minutes on medium-high speed. If desired, add gel food coloring at this stage; we used a pale pink from AmeriColor for a delicate hue.
- For Chocolate Frosting: First, sift the cocoa powder and about 3 cups of powdered sugar into a medium bowl. This crucial step removes any clumps, ensuring a super smooth, fluffy chocolate frosting. Set aside. In a separate large mixing bowl, beat the room temperature unsalted butter, vanilla extract, and salt with an electric mixer on medium speed for 2-3 minutes until light and fluffy. Gradually add the sifted cocoa and powdered sugar mixture to the butter, mixing on low speed until combined. Add 1-2 tablespoons of milk or heavy cream and beat until smooth. If the frosting is too thick, add additional milk or cream, 1 tablespoon at a time, until you reach your preferred piping consistency. Taste and adjust sweetness by adding more powdered sugar if desired.
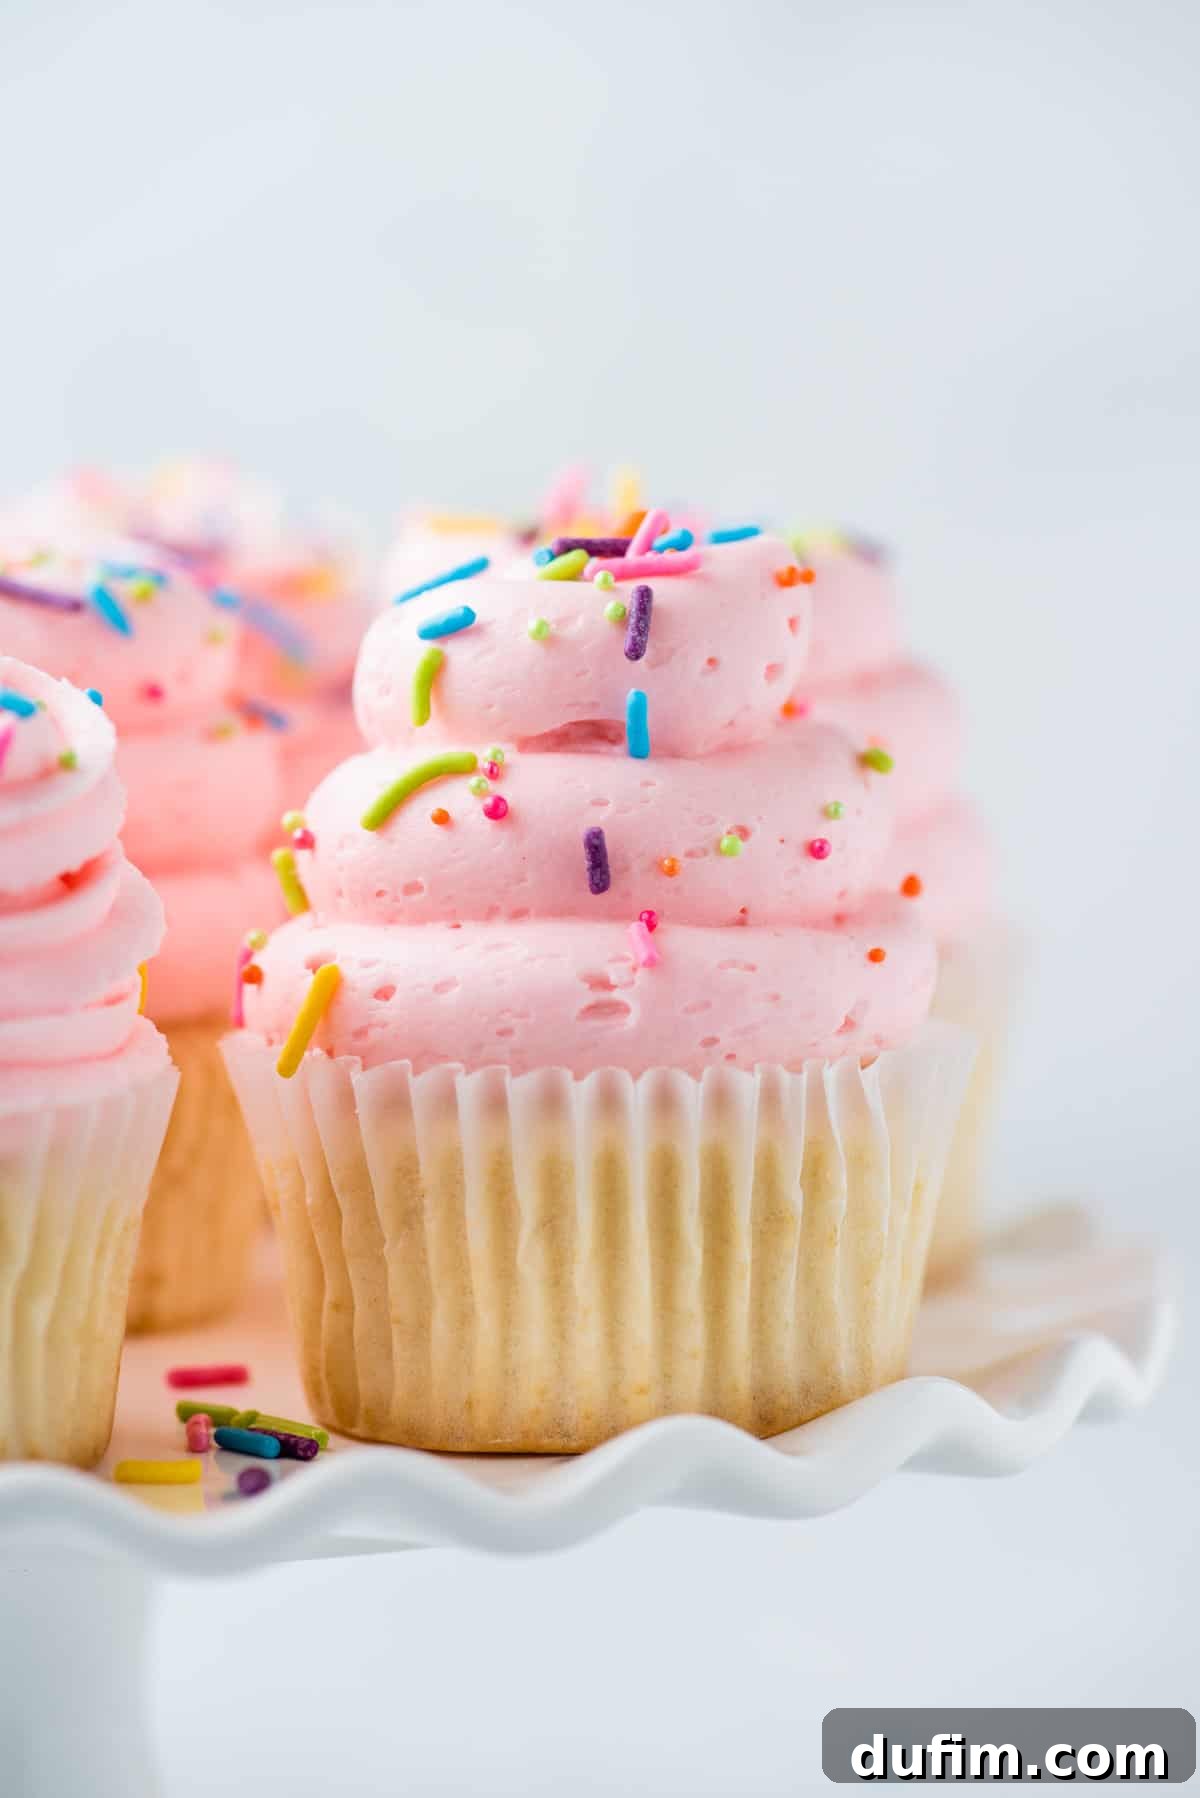
- Frost the Cupcakes: Once your cupcakes are completely cool and your frosting is ready, it’s time to decorate! Fit a piping bag with your favorite piping tip (we love the Ateco 809 and 844 for beautiful swirls). Fill the piping bag about three-quarters full with your chosen frosting. Pipe the frosting onto each cooled cupcake, starting from the center and working your way outwards in a swirling motion, then building up to create a lovely peak. Finish with colorful sprinkles if you wish for an extra touch of festivity!
Expert Tips for Baking Flawless Homemade Vanilla Cupcakes
Achieving bakery-quality vanilla cupcakes at home is easier than you think with a few simple techniques and tips:
- Measure Flour Correctly: The most common baking mistake is incorrectly measuring flour. Always use the “spoon and sweep” method: lightly spoon flour into your measuring cup until overflowing, then level off the top with a straight edge (like the back of a knife). This prevents adding too much flour, which can lead to dry, dense cupcakes.
- Don’t Overmix the Batter: Once you add the dry ingredients to the wet, mix only until just combined. Overmixing develops gluten, resulting in tough, chewy cupcakes rather than light and fluffy ones. A few small lumps of flour are better than an overmixed batter.
- Ensure Room Temperature Ingredients: For both cupcakes and frosting, make sure your butter, eggs, and dairy (milk, sour cream) are at room temperature. This allows them to emulsify properly, creating a smooth, cohesive batter and a creamy, lump-free frosting.
- Cool Cupcakes Completely: Patience is key! Frosting warm cupcakes will cause the buttercream to melt and slide off. Always allow your cupcakes to cool completely on a wire rack before you even think about piping.
- Scaling Frosting Recipes: Each frosting recipe provided is designed to generously frost 24 cupcakes. If you plan to offer both vanilla and chocolate options for a batch of 24, remember to halve each frosting recipe to get 12 vanilla-frosted and 12 chocolate-frosted cupcakes.
- Proper Storage: Store frosted cupcakes in an airtight container at room temperature for up to 2-3 days. If your frosting contains cream cheese or if your kitchen is particularly warm, refrigeration might be best. Unfrosted cupcakes can be stored on the counter, well-covered, for the same duration.
- Invest in a Good Muffin Pan: A quality, heavy-gauge muffin pan will bake your cupcakes more evenly and help prevent burnt edges.
- Don’t Overfill Cupcake Liners: Fill liners about two-thirds full to prevent them from overflowing and creating messy “muffin tops.”
Our Favorite Frosting Pairings for Homemade Vanilla Cupcakes
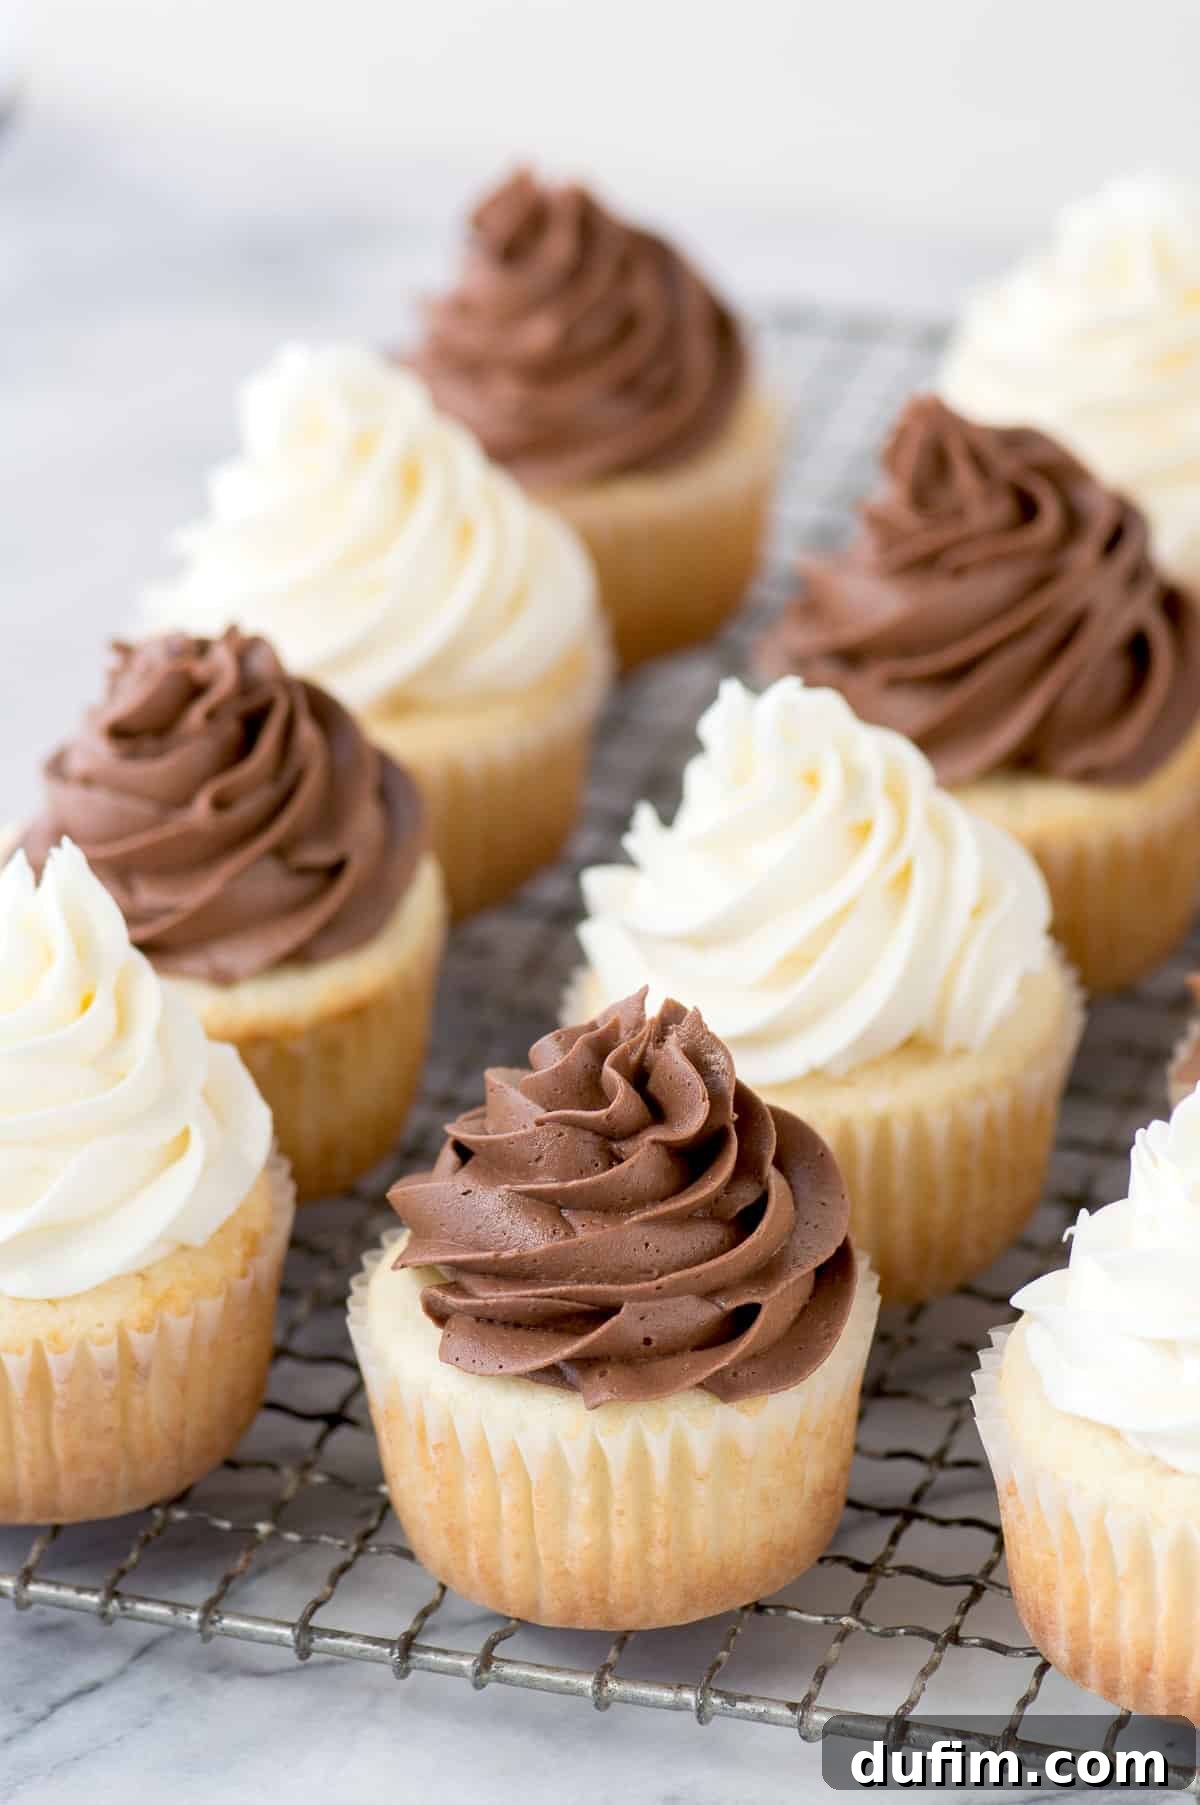
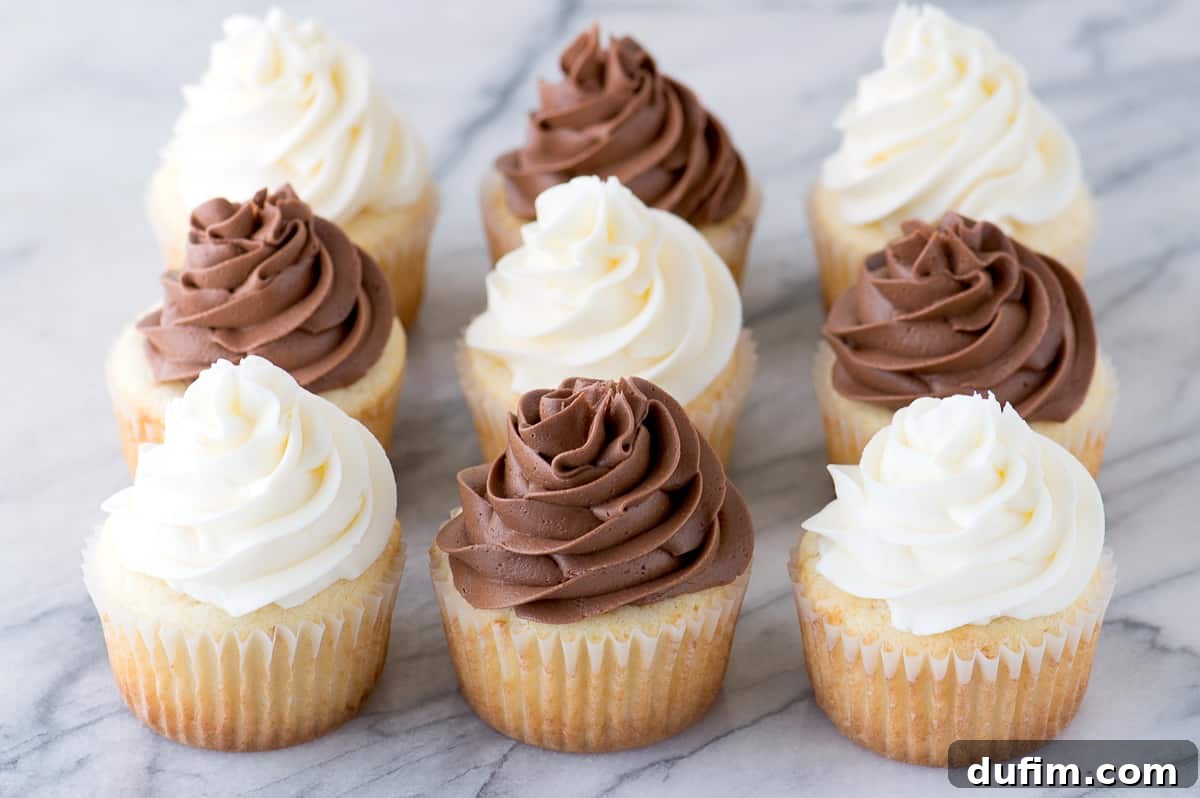
While classic vanilla buttercream is always a winner, the beauty of a simple vanilla cupcake lies in its versatility. It’s the perfect canvas for a wide array of delicious frosting flavors. Personally, I adore pairing my moist vanilla cupcakes with a rich chocolate buttercream, but we’ve included recipes for both vanilla and chocolate frosting in the recipe card because, why limit your options?
Beyond the basics, you can easily transform the vanilla buttercream into any color imaginable with just a few drops of gel food coloring. I highly recommend Wilton’s gel food colors; they’re incredibly vibrant, and a little goes a very long way! Get creative and match your frosting colors to your party theme.
Here are more delightful frosting options that pair wonderfully with our homemade vanilla cupcakes:
- Zesty Lemon Frosting: A bright and tangy complement that cuts through the sweetness of the vanilla.
- Smooth Cream Cheese Frosting: A classic, slightly tangy, and rich frosting that adds wonderful depth.
- Decadent Salted Caramel Frosting: For those who love a sweet and salty indulgence.
- Creamy Peanut Butter Frosting: A comforting and crowd-pleasing option, especially for peanut butter lovers.
- Classic Chocolate Frosting: A timeless pairing that never disappoints.
- Warm Spiced Frosting: Perfect for fall or winter, with hints of cinnamon, nutmeg, or cloves.
- Bold Espresso Frosting: Adds a sophisticated coffee kick that pairs beautifully with vanilla.
- Seasonal Pumpkin Frosting: A festive choice that brings autumnal flavors to your cupcakes.
Time Management: How Long Does It Really Take?
Planning your baking session is key to an enjoyable experience. Here’s a breakdown of the estimated time required for these delightful vanilla cupcakes:
- Preparation Time (Batter): Approximately 15 minutes. This includes gathering ingredients, measuring, and mixing the cupcake batter.
- Baking Time: Around 17-19 minutes per batch.
- Cooling Time: At least 1 hour. This is a critical step; rushing it will lead to melted frosting. Ensure cupcakes are completely cool to the touch.
- Frosting Preparation & Decoration: Roughly 15-20 minutes. This involves whipping up your chosen buttercream and then piping it onto the cooled cupcakes.
- Total Estimated Time: Expect to dedicate about 1 hour and 30 minutes to 1 hour and 45 minutes from start to finish (excluding passive cooling time).
Essential Frosting Piping Supplies for Vanilla Cupcakes
To achieve those beautiful bakery-style swirls, you’ll need a few basic piping tools:
- Piping Bags: Disposable piping bags are convenient for easy cleanup. You can find bulk piping bags that are durable and easy to use.
- Piping Tips: Larger piping tips are generally better for frosting cupcakes as they create impressive swirls with ease. My go-to tips include Wilton 1M (for classic rosettes), Wilton 2D (for beautiful ruffled swirls), Wilton 12 (for smooth, rounded tops or borders), and Wilton 199 (for star-shaped details). Ateco 809 and 844 are also excellent choices for generous, classic swirls.
How to Decorate These White Cupcakes with a Perfect Swirl
Achieving a professional-looking swirl on your cupcakes is simpler than you might think. For these white wedding cupcakes, I used a Wilton 2D piping tip, which creates a lovely ruffled effect. The Wilton 1M and Ateco 844 tips are also very similar and yield beautiful results. Here’s a step-by-step guide to piping the perfect frosting swirl:
- Prepare Your Piping Bag: Snip off the very end of your piping bag and insert your chosen piping tip so that it’s snug and secure.
- Fill the Bag: Open the piping bag wide, fold the top edges over to create a cuff, and use a spatula to fill the bag about two-thirds to three-quarters full with frosting. Don’t overfill, as it makes piping difficult. Twist the top of the bag to seal the frosting and prevent it from coming out the wrong end.
- Position the Tip: Hold the piping bag directly over the center of your cooled cupcake, applying steady, even pressure.
- Start the Base Layer: Begin piping in a swirling motion, moving outwards from the center until you reach the edge of the cupcake liner. This creates a solid base layer.
- Build the Swirl: Without lifting the tip, continue to apply pressure as you move inwards, slightly overlapping the previous layer. Gradually build up the frosting in a spiral, stacking it on top of the base layer.
- Finish the Peak: As you reach the center again, gently decrease pressure and lift the tip straight up to create a lovely peak.
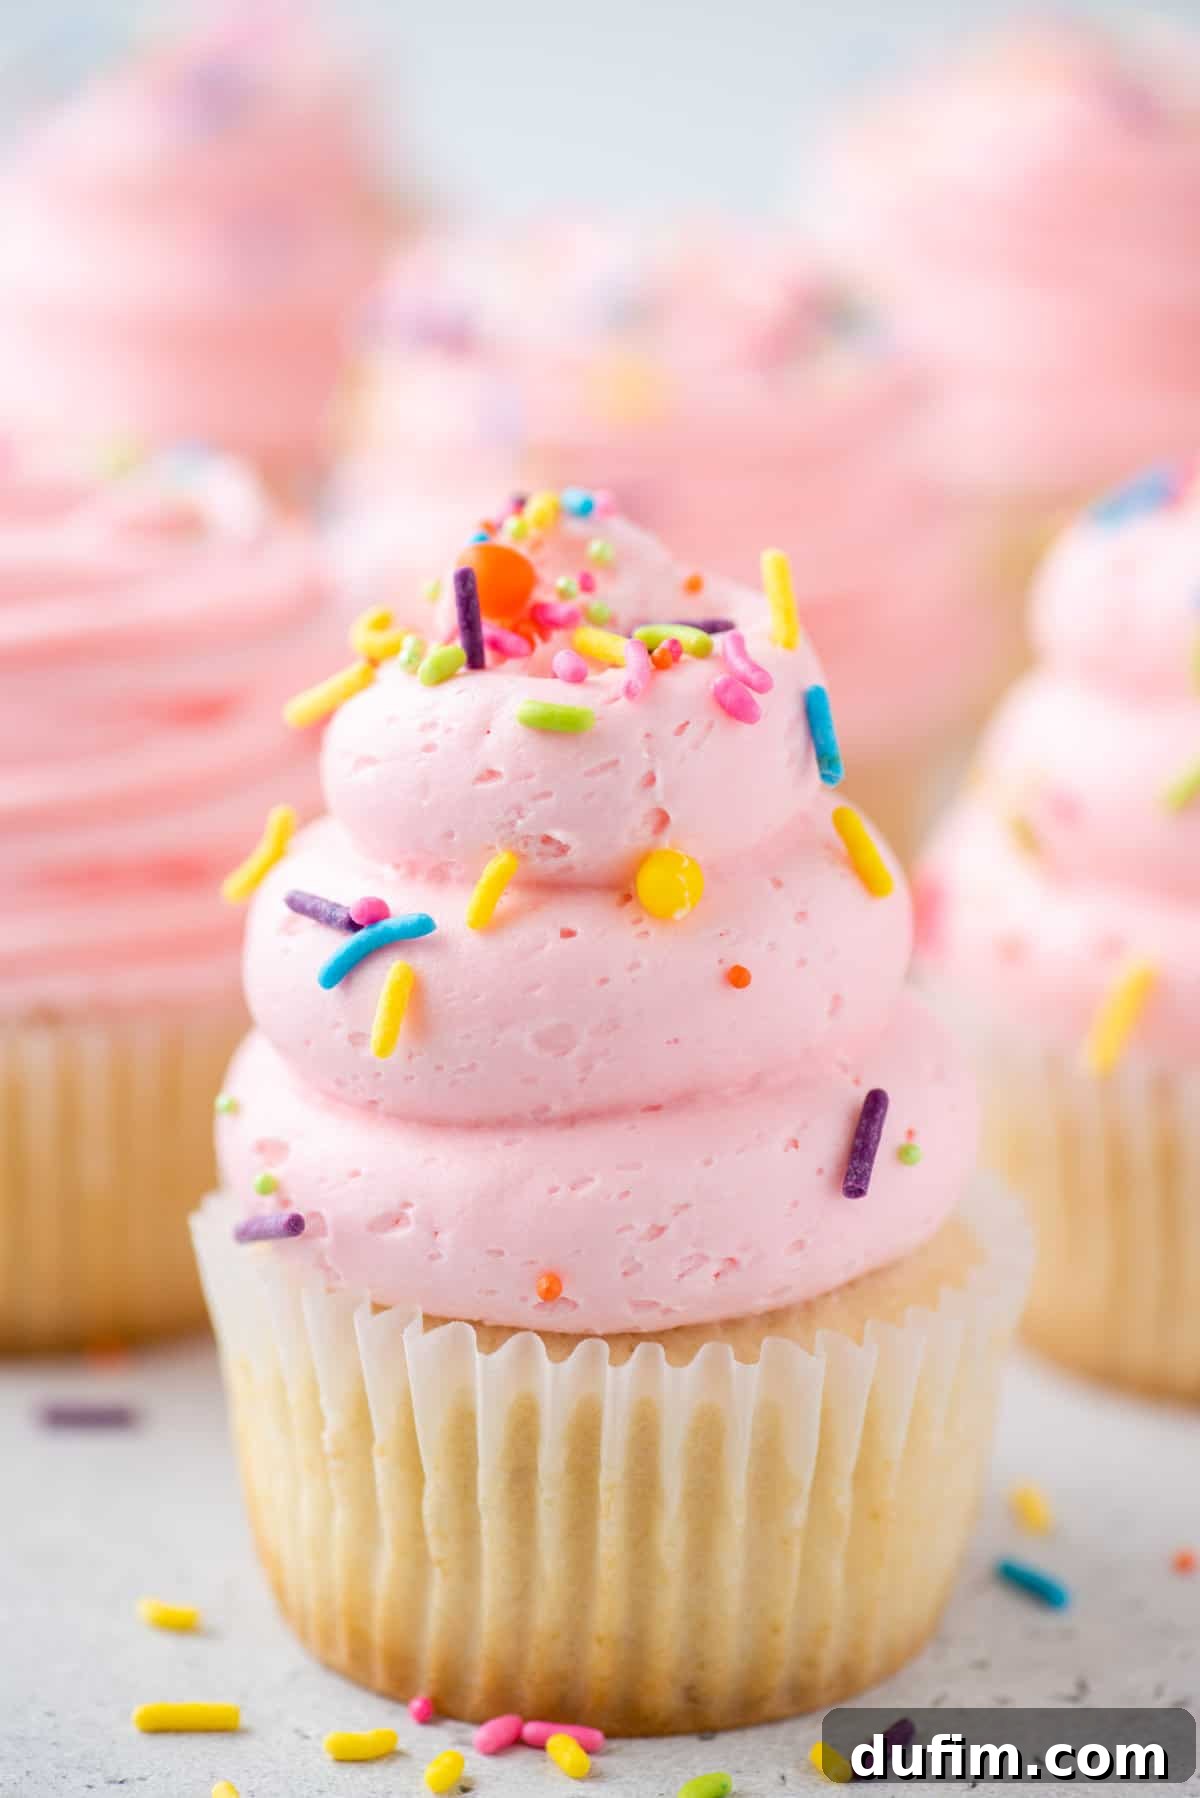
- Add Sprinkles (Optional): Immediately after piping, adorn your cupcakes with sprinkles or other decorations while the frosting is still soft, so they adhere well.
Make-Ahead Magic: Freezing Unfrosted Vanilla Cupcakes
Our moist vanilla cupcakes are perfect for making ahead, especially if you’re planning a large event or simply want to enjoy homemade treats on demand. Freezing unfrosted cupcakes is an excellent way to preserve their freshness and flavor.
- Cool Completely: The absolute first step is to ensure your baked cupcakes are completely cooled to room temperature. Any warmth will create condensation and lead to soggy cupcakes once thawed.
- Individual Wrapping: Wrap each individual cupcake tightly in plastic wrap. Make sure to cover every surface to prevent freezer burn.
- Protective Layer: Place the individually wrapped cupcakes inside a freezer-safe ziplock bag or a rigid airtight freezer storage container. This provides an additional layer of protection against odors and crushing.
- Freeze: Store in the freezer for up to 2-3 months.
To Thaw: When you’re ready to enjoy them, simply transfer the bag or container of frozen cupcakes to your kitchen counter overnight. Allow them to thaw completely at room temperature, still wrapped. Once fully thawed, unwrap them and frost as desired. They’ll taste just as fresh and moist as the day you baked them!
Moist Vanilla Cupcake Recipe Variations for Every Preference
This versatile vanilla cupcake recipe provides a fantastic base for various delicious adaptations. Don’t hesitate to get creative and tailor them to your specific tastes or dietary needs:
- Gluten-Free Option: We’ve successfully tested this recipe using gluten-free flour, and the results are wonderfully delicious! Simply follow the directions as stated, but substitute the all-purpose flour with a high-quality 1:1 gluten-free measure-for-measure flour blend. We personally love and recommend King Arthur Gluten Free Measure for Measure Flour for its consistent results.
- Funfetti Delight: To transform these into festive funfetti cupcakes, simply add 3/4 cup (130g) of colorful jimmie sprinkles to your dry ingredients mixture before combining with the wet ingredients. The sprinkles will bake into the batter, creating a cheerful, celebratory look.
- Citrus Zest Infusion: For a subtle, bright twist, add the zest of one lemon or orange to the wet ingredients when creaming. The citrus oils will infuse a delightful aroma and flavor into the cupcakes.
- Almond or Other Extracts: While vanilla is king, you can experiment with other extracts. Substitute half of the vanilla extract with almond extract for a delicate nutty flavor, or try a touch of coconut extract for a tropical vibe.
- Filled Cupcakes: After baking and cooling, use a cupcake corer or a knife to remove a small center from each cupcake. Fill the cavity with fruit curd, chocolate ganache, or caramel sauce before frosting for a delightful surprise.
More Delicious Desserts to Explore
If you’ve loved baking these vanilla cupcakes, you might enjoy exploring some of our other popular dessert recipes:
- Maraschino Cherry Chocolate Chip Cookies
- Irresistible Oreo Cheesecake
- Gooey Chocolate Turtle Cookies
- Easy & Enhanced Chocolate Cake
Frequently Asked Questions (FAQ) About Our Vanilla Cupcake Recipe
The ultimate secret to incredibly moist cupcakes lies in incorporating sources of fat and acidity beyond just butter. Our recipe achieves this through the generous use of sour cream and a touch of vegetable oil. Sour cream, with its high fat content and tangy acidity, not only adds richness and moisture but also tenderizes the gluten in the flour, resulting in an exceptionally soft and delicate crumb. The vegetable oil further enhances moisture, ensuring your cupcakes stay fresh and tender for longer periods.
Both oil and butter contribute differently to cupcakes, and the “better” choice often depends on the desired texture and flavor. Butter provides a rich, complex flavor and helps with browning and structural integrity, making cupcakes a bit sturdier. Oil, on the other hand, contributes superior moisture and results in a softer, more tender crumb that often stays moist for longer. Many professional bakers (and our recipe!) opt for a combination of both to leverage the best of each: butter for flavor and structure, and oil for ultimate moistness and tenderness. Experimentation can help you discover your personal preference, but for a truly moist cupcake, a recipe including oil is often favored.
Cupcakes sinking in the middle can be due to a few common reasons. The most frequent culprits are opening the oven door too early (which causes a sudden temperature drop), underbaking (the structure hasn’t fully set), or overmixing the batter (which creates too much air that collapses). Ensuring your oven temperature is accurate with an oven thermometer and baking until a toothpick comes out clean are crucial steps to prevent sinking.
While it might seem convenient, using cold ingredients (especially butter, eggs, and dairy) can negatively impact your cupcake’s texture. Room temperature ingredients emulsify much better, meaning they combine more thoroughly and evenly, trapping more air in the batter. This results in a lighter, fluffier cupcake with a finer crumb. Cold ingredients can lead to a lumpy batter and a denser final product. Plan ahead and take your ingredients out of the fridge at least 30-60 minutes before baking.
Classic Moist Vanilla Cupcakes
This homemade vanilla cupcake recipe is a beloved classic, delivering incredibly moist, flavorful, and easy-to-make treats perfect for any celebration. Enjoy them with vanilla or chocolate frosting!
Equipment
- My favorite spatula!
- KitchenAid 9-Speed Hand Mixer (or Stand Mixer)
- Kitchen Scale (for precise measurements)
- Muffin Pan
- Paper Cupcake Liners
- Large Mixing Bowls
- Whisk
- Piping Bag & Tips (e.g., Ateco 809 or 844)
Ingredients
For the Moist Vanilla Cupcakes
- 2 ½ cups (300g) all-purpose flour
- 2 tsp baking powder
- ½ tsp baking soda
- 1 tsp salt
- ¾ cup (170g) unsalted butter, room temperature
- 1 ¾ cups (346g) granulated sugar
- ¼ cup (59ml) vegetable oil
- 4 large eggs, room temperature
- 1 cup (227g) sour cream, room temperature
- ½ cup (118ml) whole milk, room temperature
- 1 Tbsp vanilla extract
For the Classic Vanilla Frosting (makes enough for 24 cupcakes)
- 2½ cups (565g) unsalted butter, room temperature
- 2 Tbsp vanilla extract
- ⅛ tsp salt
- 6-10 cups (681-1135g) powdered sugar (confectioners’ sugar)
- 3-6 Tbsp milk or heavy cream
- Gel food coloring, optional
For the Rich Chocolate Frosting (makes enough for 24 cupcakes)
- 1 cup (84g) natural unsweetened cocoa powder
- 4-5 cups (454-567g) powdered sugar
- 2 cups (452g) unsalted butter, room temperature
- 1 tsp vanilla extract
- ¼ tsp salt
- 3-4 Tbsp milk or heavy cream
Instructions
Cupcakes
- Preheat your oven to 350ºF (180°C). Line a muffin pan with paper liners and set aside.
- In a small bowl, whisk together the flour, baking powder, baking soda, and salt. Set aside.
- In a stand mixer or using a hand mixer, beat the room temperature butter, granulated sugar, and vegetable oil on medium speed for 2 minutes until the mixture is light and fluffy. Add the room temperature eggs, sour cream, milk, and vanilla extract, then beat for another 1 minute until well combined.
- On low speed, gradually mix in the dry ingredients (flour mixture) until just fully combined. Be careful not to overmix the batter.
- Fill the muffin liners about halfway with batter. Bake for 17-19 minutes, or until a toothpick inserted into the center of a cupcake comes out with only a few moist crumbs attached. Let the cupcakes cool in the pan for a few minutes, then transfer them to a wire rack to cool completely before frosting.
Vanilla Frosting
- In a large mixing bowl, beat the room temperature unsalted butter, vanilla extract, and salt on medium speed for 2 minutes until light and fluffy.
- Gradually add the powdered sugar, one cup at a time, mixing on low speed until combined. Add 3 tablespoons of milk or cream and beat until smooth.
- Adjust consistency as needed: If the frosting is too thick, beat in an additional 2-4 tablespoons of milk or cream, 1 tablespoon at a time, until it reaches your desired piping consistency. If you want a sweeter frosting, add more powdered sugar. For extra fluffy frosting, beat in 1/4 cup of heavy whipping cream when adding the last portion of powdered sugar and whip for 3-4 minutes on medium-high speed. Add gel food coloring, if using, and mix until evenly distributed.
Chocolate Frosting
- Sift the cocoa powder and 3 cups of powdered sugar into a medium bowl to remove any clumps. Set aside.
- In a mixer, beat the room temperature unsalted butter, vanilla extract, and salt on medium speed for 2 minutes until light and fluffy.
- Gradually add the sifted cocoa mixture and 3 tablespoons of milk or cream, mixing on low speed until smooth.
- Adjust consistency as needed: If the frosting is too thick, beat in an additional 2-4 tablespoons of milk or cream, 1 tablespoon at a time, until smooth and pipeable. Adjust sweetness by adding more powdered sugar if desired.
Assemble the Cupcakes
- Once cupcakes are completely cool, fit a piping bag with your chosen piping tip (e.g., Ateco 809 or 844). Fill the bag about 3/4 full with your prepared frosting.
- Pipe the frosting onto the cooled cupcakes in a swirling motion, building up from the center outwards and then inwards to create an attractive peak.
- Decorate with sprinkles or other embellishments if desired for a festive touch.
Video Tutorial
Watch our detailed video guide to perfect your vanilla cupcake baking and frosting techniques!
Notes
- MAKE IT FUNFETTI: For a festive touch, add 3⁄4 cup (130g) jimmie sprinkles to the dry ingredients when whisking them together.
- Each frosting recipe yields enough to generously frost 24 cupcakes. If you plan to make 12 vanilla-frosted and 12 chocolate-frosted cupcakes, remember to halve each frosting recipe accordingly.
- This recipe works beautifully with gluten-free flour! We highly recommend King Arthur Gluten Free Measure for Measure Flour for excellent results.
- For best results, ensure all dairy and eggs are at room temperature before mixing.
- Do not overmix the cupcake batter, as this can lead to tough cupcakes. Mix only until ingredients are just combined.
Nutrition Facts (Approximate Per Serving)
All nutritional values are approximate and provided to the reader as a courtesy. Changing ingredients and/or quantities will alter the estimated nutritional calculations.
- Calories: 471 kcal
- Carbohydrates: 43g
- Protein: 3g
- Fat: 33g
- Saturated Fat: 20g
- Polyunsaturated Fat: 1g
- Monounsaturated Fat: 8g
- Trans Fat: 1g
- Cholesterol: 88mg
- Sodium: 103mg
- Potassium: 53mg
- Fiber: 0.4g
- Sugar: 33g
- Vitamin A: 1012 IU
- Vitamin C: 0.1mg
- Calcium: 47mg
- Iron: 1mg
Liked this recipe? Please consider leaving a rating and comment below! Your feedback helps us improve and share more delicious recipes.