
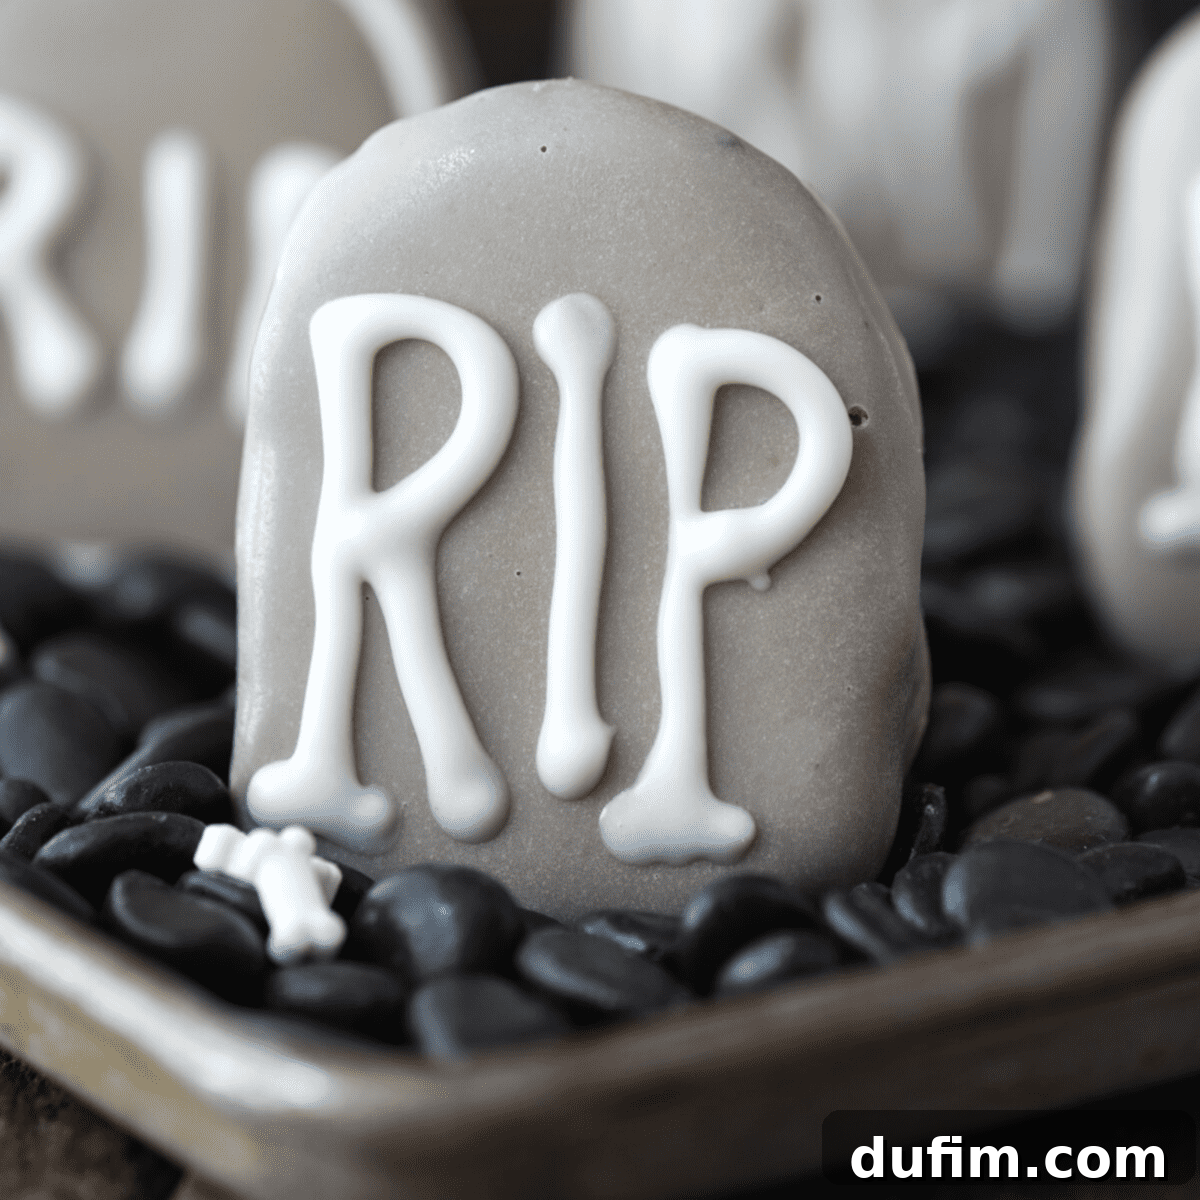
Spooky Tombstone Oreo Balls: Your Ultimate Halloween Treat Guide
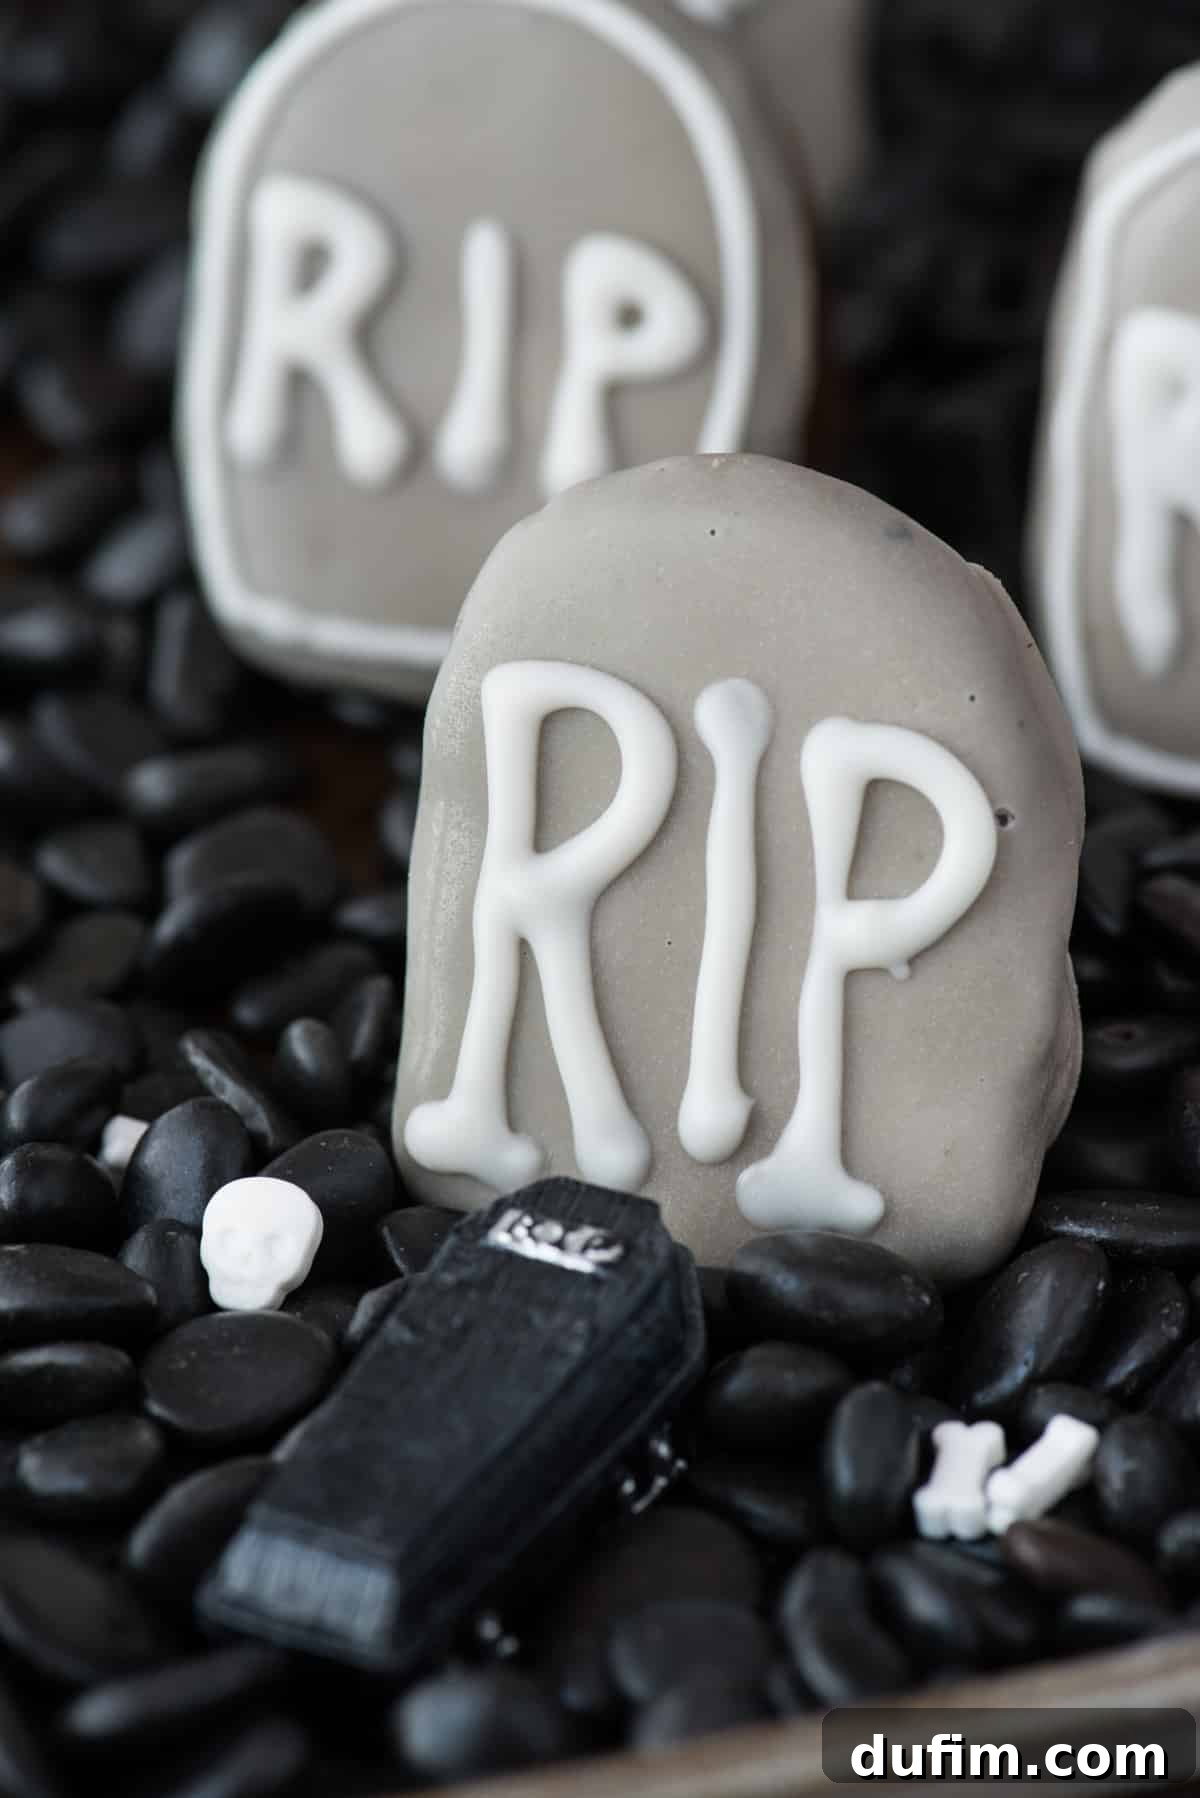
Dive into the spirit of Halloween with these incredibly fun and deliciously spooky Tombstone Oreo Balls! Requiring just 5 simple ingredients, these no-bake Halloween treats are a breeze to prepare and promise to be the star of your festive spread. Learn how to transform classic Oreo cookies into eerie graveyard delights, perfect for enchanting guests of all ages. Display them artfully in a “graveyard” setting of chocolate chips or black rocks to truly capture the hauntingly good Halloween vibe!
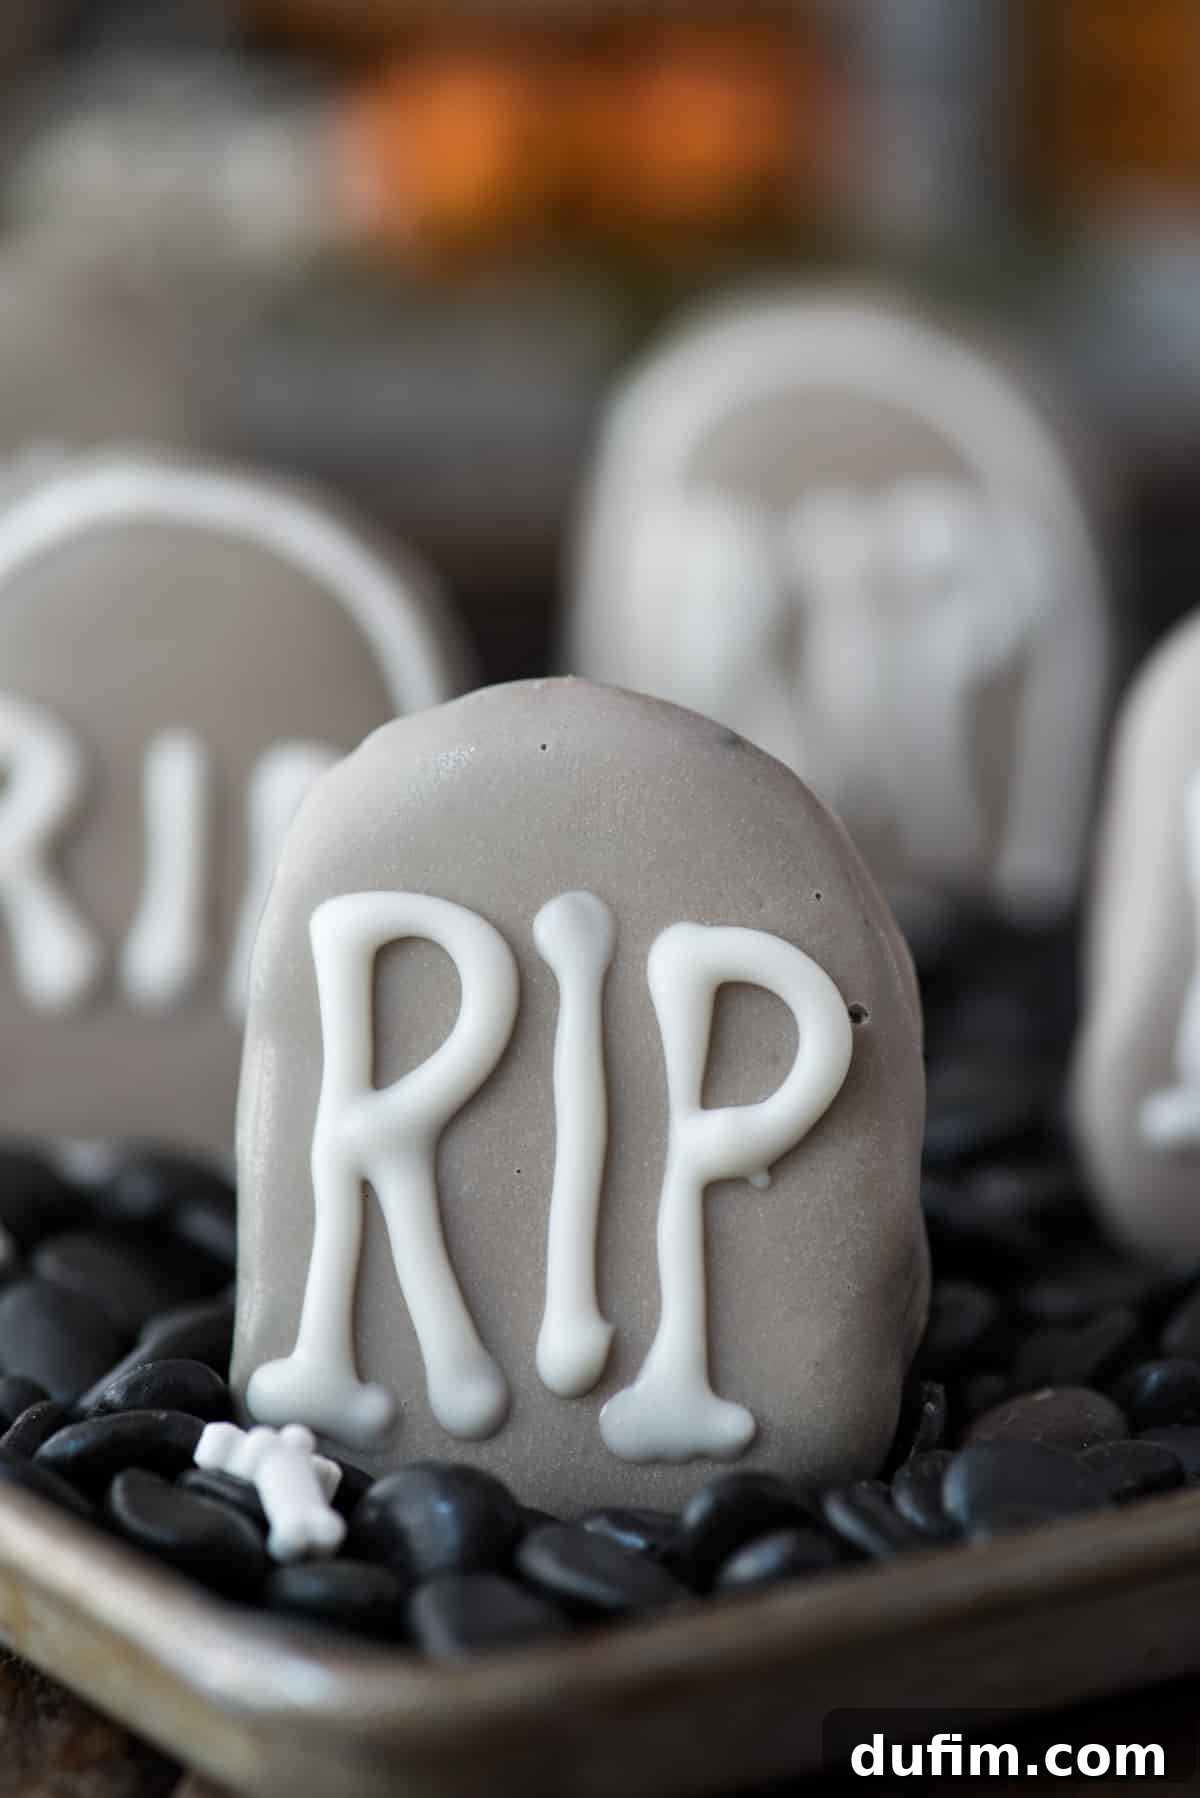
“I brought an assortment of Halloween Oreo balls to the office, and they were an absolute sensation! Everyone loved them. It’s so much fun getting creative with Oreo balls!”
– Liz
There’s an undeniable joy in creating themed treats, especially when they’re as versatile and beloved as Oreo balls. These delightful no-bake confections offer an incredible canvas for culinary creativity, making them a perfect choice for any holiday or special occasion. Beyond the spooky delights of Halloween, our collection includes an array of festive variations that are just as exciting to make and share.
For instance, imagine the crisp flavors of autumn captured in Caramel Apple Oreo Balls, a perfect treat as the leaves begin to change. When the festive season rolls around, our Christmas Present Oreo Balls and vibrant Candy Cane Oreo Balls bring a burst of holiday cheer. And for those seeking an extra special indulgence, the decadent Turtle Oreo Ball, cleverly stuffed with a Rolo, offers a delightful surprise in every bite. Each of these recipes showcases the endless possibilities when you start with the simple magic of Oreos and cream cheese.
If you’re a fan of the rich, creamy texture of Oreo truffles and enjoy a good crafting project in the kitchen, then these Tombstone Oreo Balls are the quintessential Halloween-themed weekend treat for you. They offer a unique blend of simplicity and creativity, allowing you to produce impressive results with minimal effort and maximal fun!
Why Choose Tombstone Oreo Balls for Halloween?
Halloween is all about embracing the spooky, the fun, and of course, the treats! While there are countless dessert options, Tombstone Oreo Balls stand out for several compelling reasons, making them a must-have for your frightful festivities:
- **Simple Ingredients, Maximum Flavor**: You only need 5 core ingredients, making them accessible, budget-friendly, and incredibly easy to source. Despite their simplicity, they deliver a rich, satisfying flavor that’s hard to resist.
- **No-Bake Perfection**: Skip the oven and the stress! This no-bake recipe is ideal for busy schedules and a fantastic, safe activity for involving younger helpers in the kitchen (with appropriate supervision, especially when handling melted chocolate).
- **Effortlessly Customizable**: While we’re focusing on a tombstone theme here, the foundational Oreo ball recipe is remarkably adaptable. You can easily alter colors, add different toppings, or experiment with various shapes to suit any holiday or party theme you can imagine.
- **Universal Crowd-Pleaser**: Who doesn’t love Oreos? When these beloved cookies are combined with creamy cheese and enrobed in a smooth chocolate coating, they transform into an irresistible dessert that’s guaranteed to disappear quickly at any gathering.
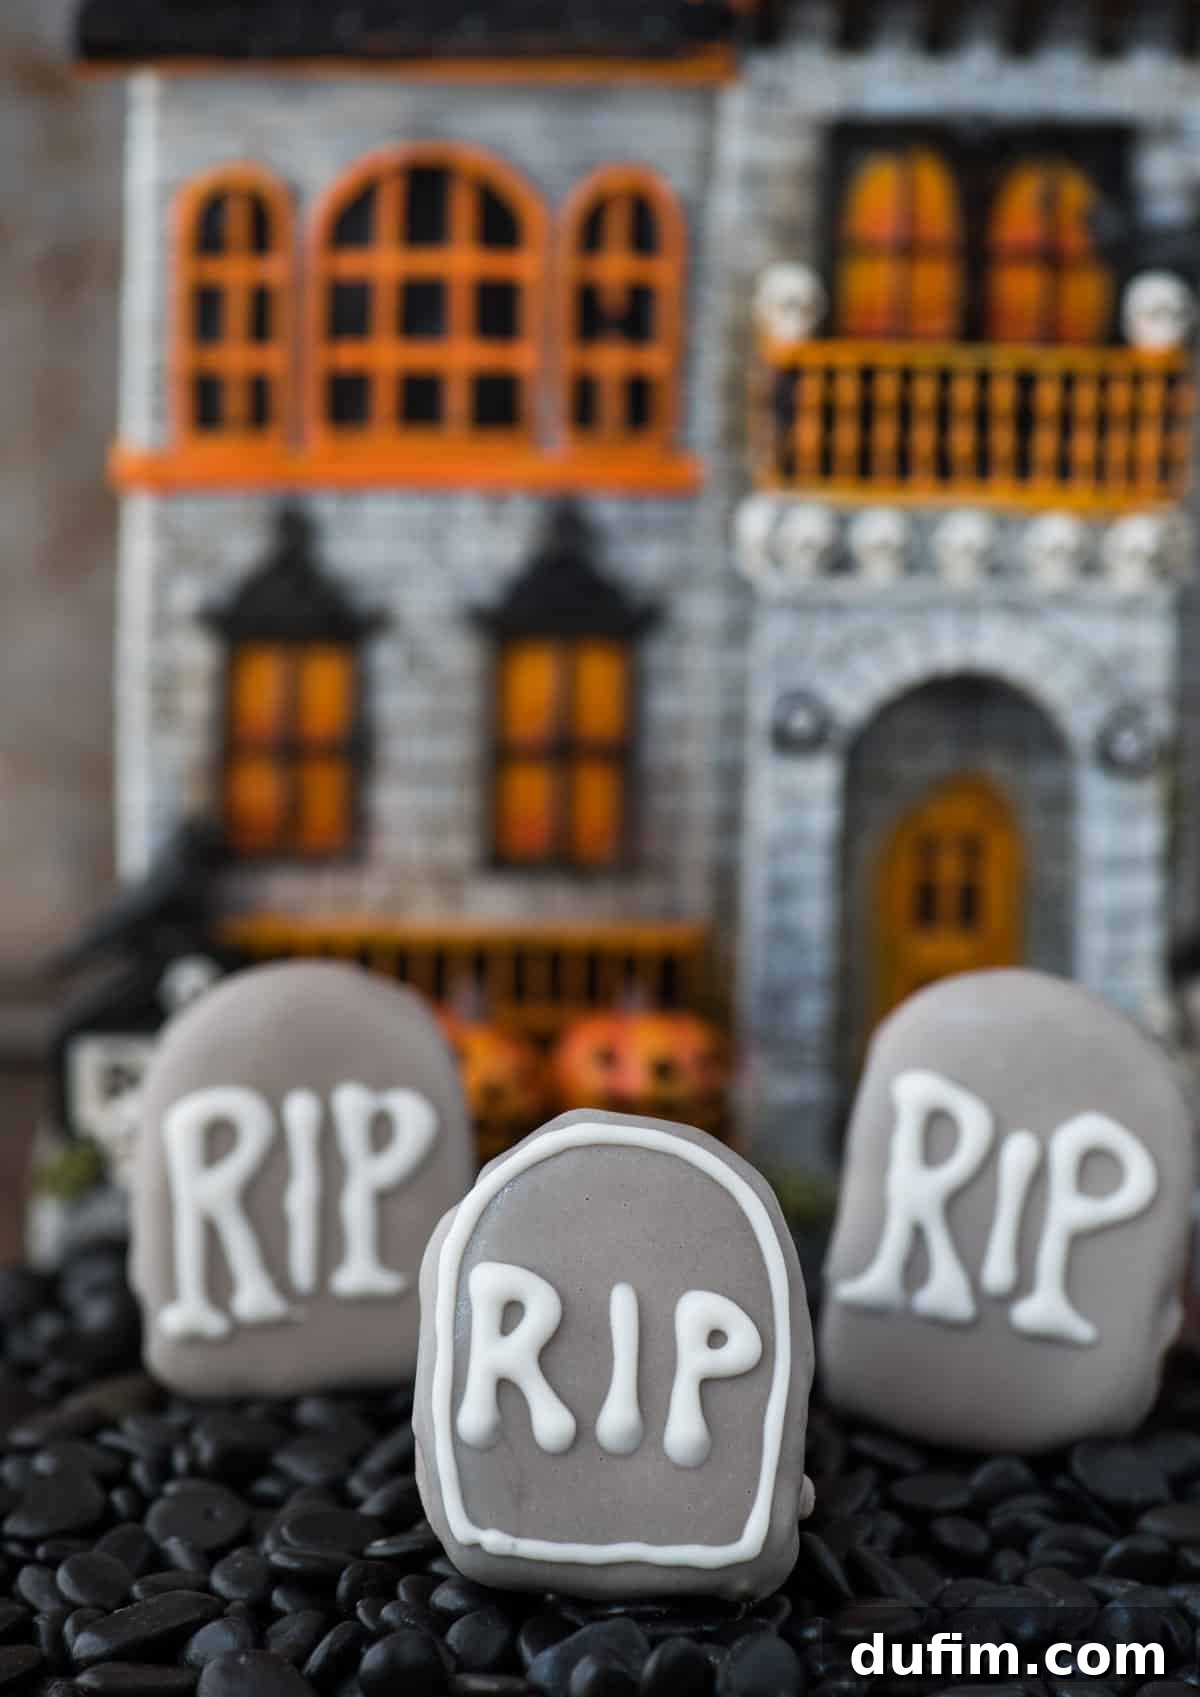
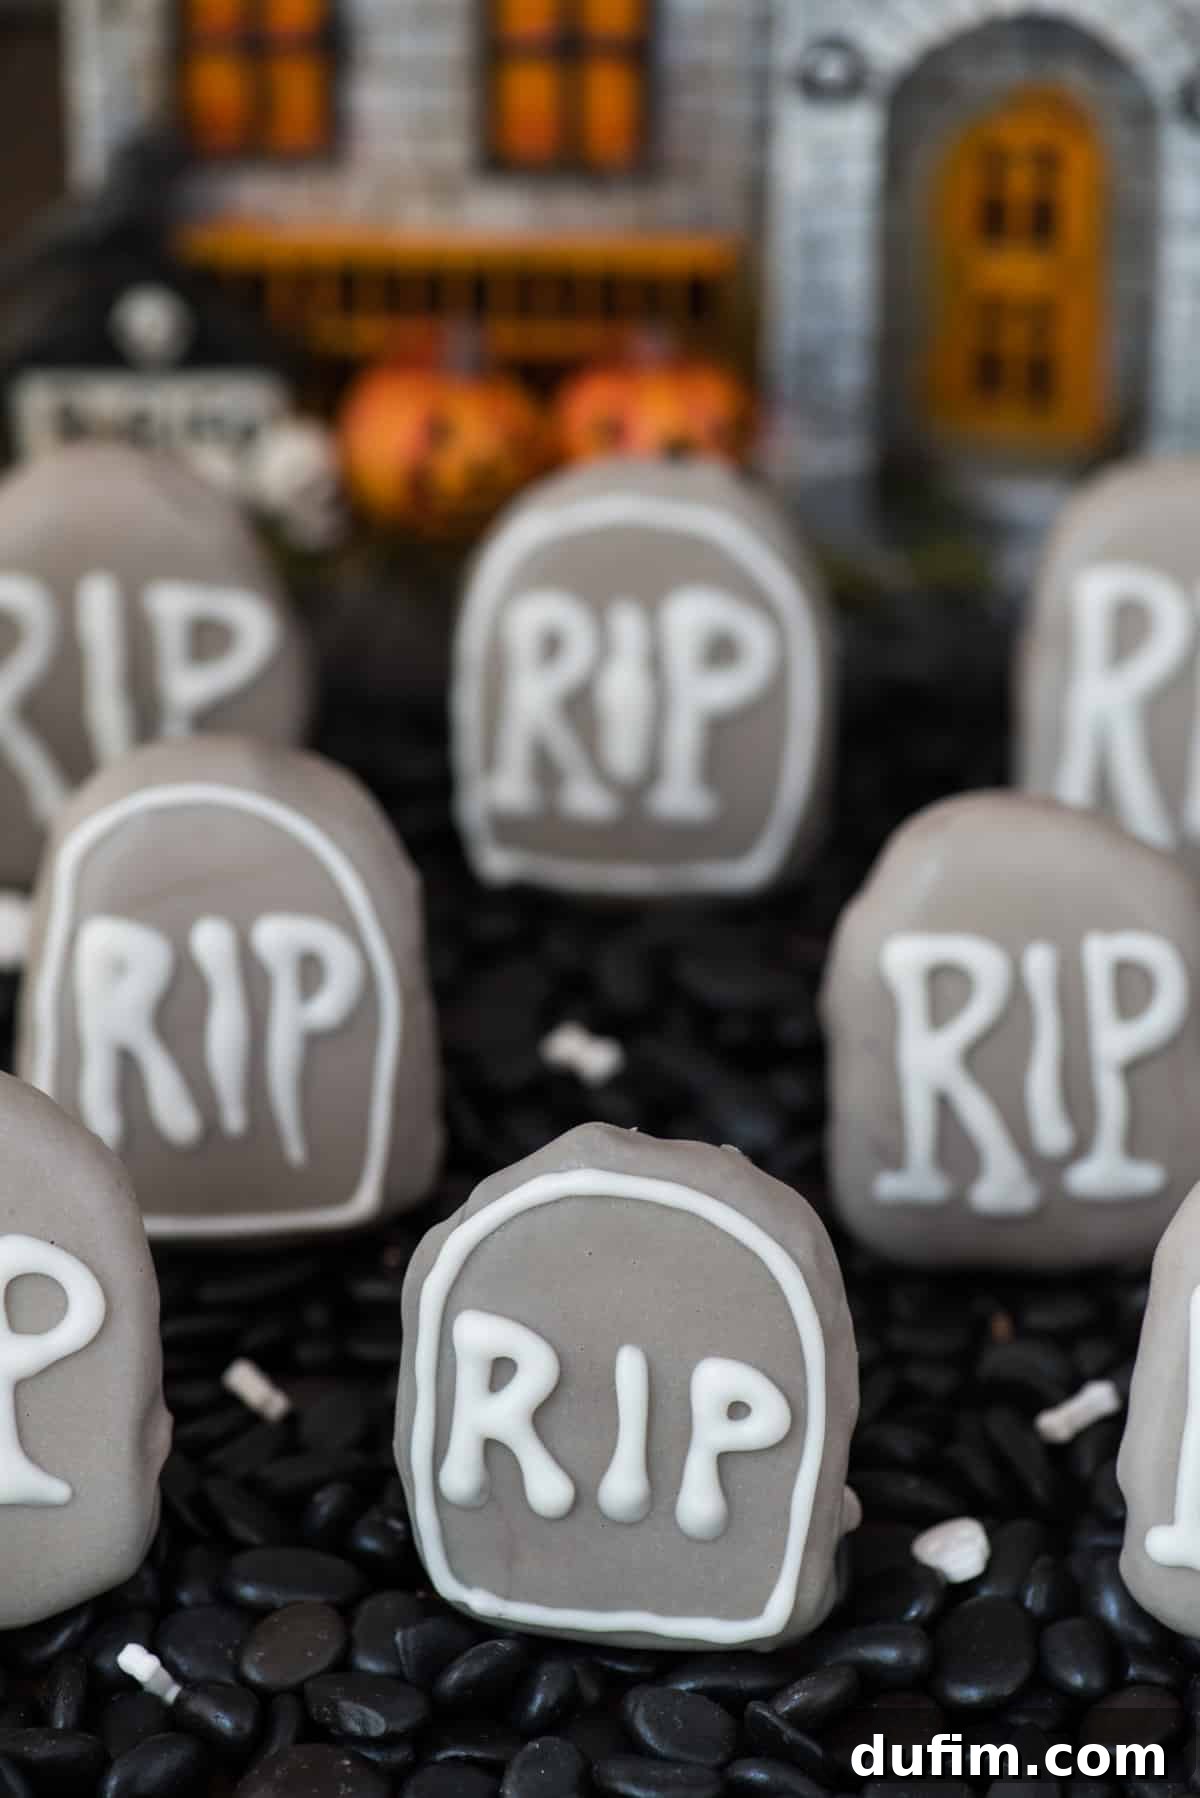
- **Visually Striking Display**: The unique tombstone shape, paired with a classic “RIP” message and a creative “graveyard” setting, turns these treats into an eye-catching centerpiece. They add a delightfully eerie touch that’s sure to impress guests on any Halloween dessert table.
Get ready to impress your friends and family with these charmingly eerie treats that are as delightful to look at as they are to eat, bringing a perfect blend of spooky fun and deliciousness to your Halloween celebrations!
Essential Tools for Crafting Perfect Tombstone Oreo Balls
Having the right tools can significantly enhance your experience and the final quality of your perfectly shaped and coated Oreo balls. While many items are standard kitchen equipment, a few specialized tools can streamline the process and elevate your results, making your Halloween treat-making even more enjoyable:
- **Silicone Baking Mat**: These non-stick mats are a genuine game-changer for any no-bake confection. Their resilient surface ensures that your shaped Oreo balls, after chilling and dipping, can be effortlessly removed without sticking, breaking, or leaving a mess. Simply place your tombstone forms on the mat for their initial chill, and then return them after they’ve been coated for the chocolate to set beautifully. Cleanup is remarkably easy too!
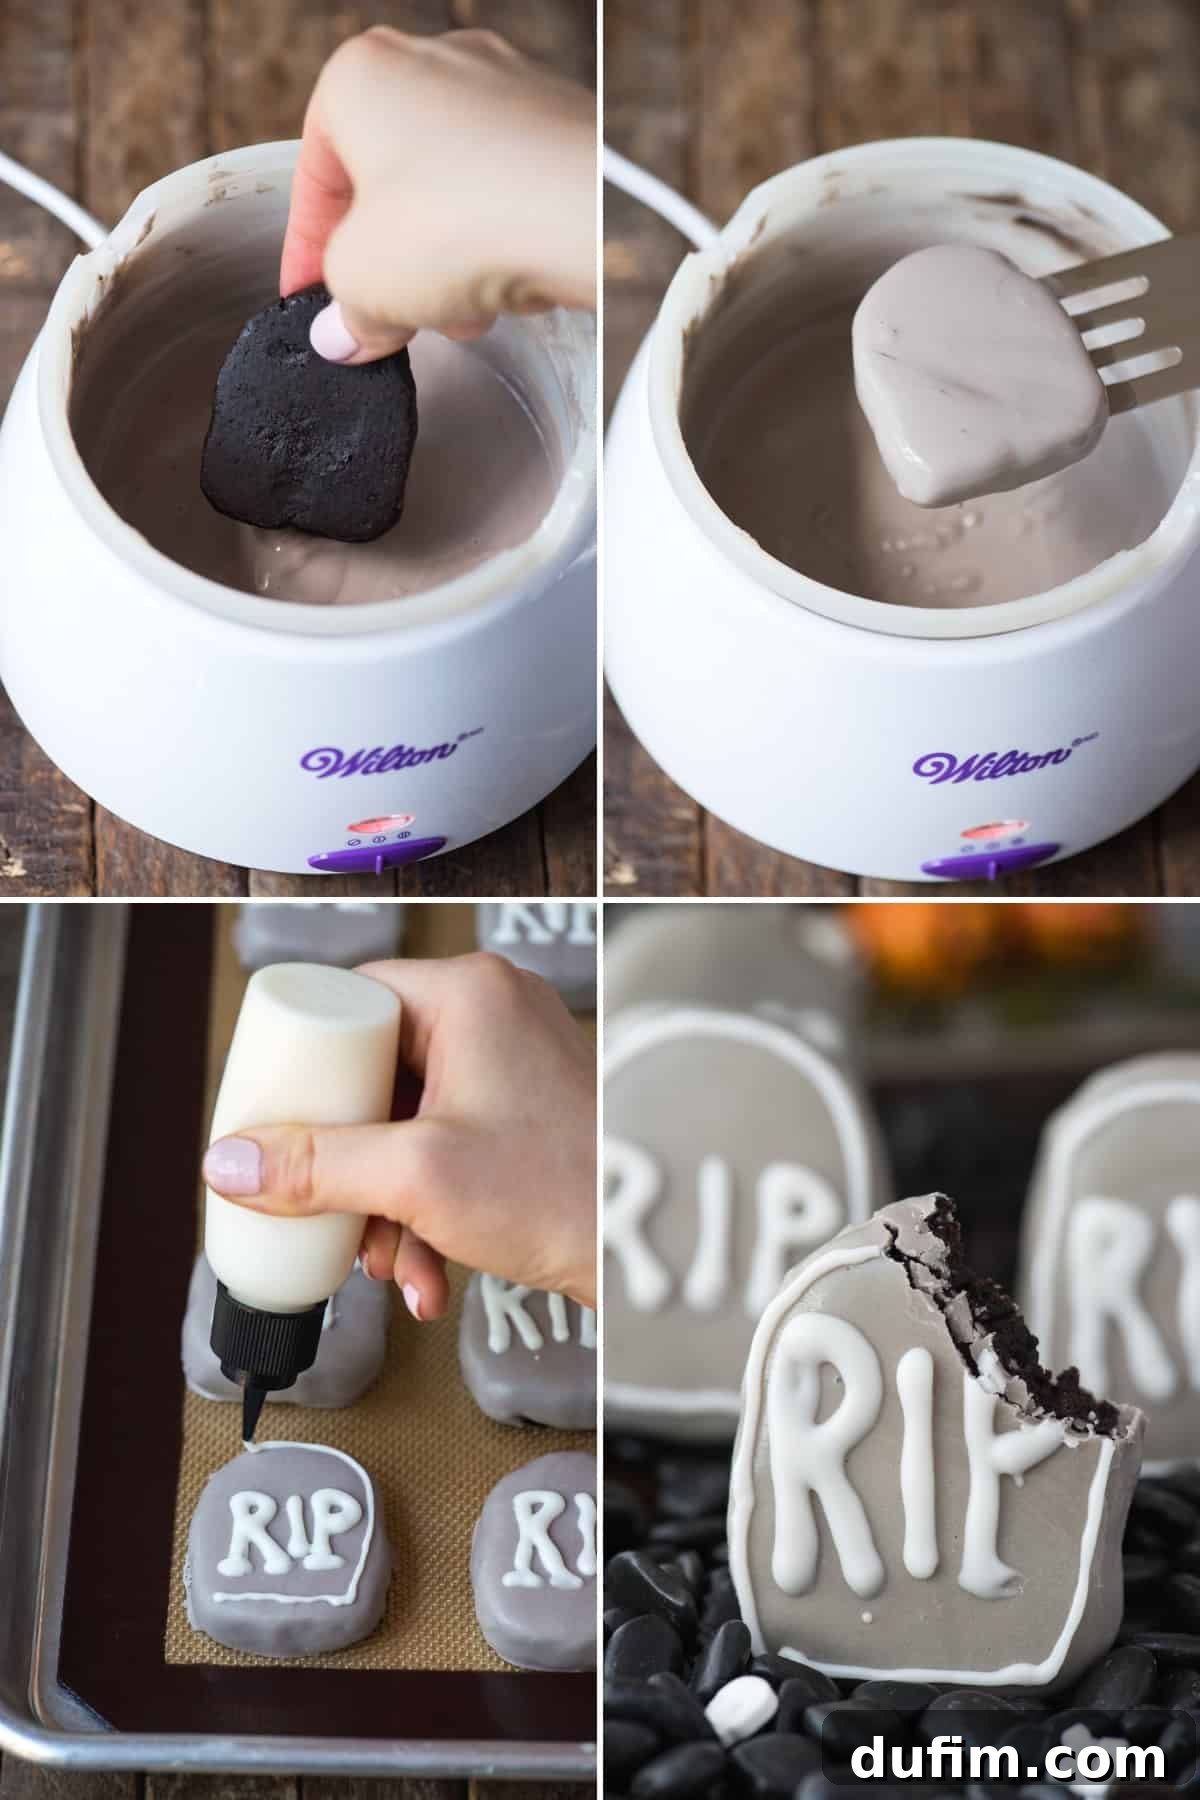
- **Melting Pot (Candy Melts Pot)**: For achieving a smooth, consistent, and perfectly tempered chocolate coating, a dedicated melting pot is an invaluable asset. Appliances like the Wilton melting pot excel at maintaining an even temperature, preventing your candy melts from seizing, hardening prematurely, or becoming lumpy. Furthermore, its portability offers immense convenience, freeing you from being tethered to the stovetop and allowing for more comfortable and efficient dipping anywhere in your kitchen.
- **High-Quality Candy Melts**: These are absolutely essential for creating a vibrant, smooth, and professional-looking coating. Brands such as Wilton are widely recognized and readily available at popular craft stores like Michaels, as well as major retailers like Walmart. For these Tombstone Oreo Balls, opt for white candy melts as your base; this allows you to easily tint them gray with food coloring. Also, keep a separate portion of white candy melts for detailed decorations. Michaels often provides a more extensive selection of colors and specialty melts, making it a great first stop.
- **Squeeze Bottles (or Piping Bags with Fine Tips)**: These specialized tools are incredibly useful, almost indispensable, for adding intricate details with precision. They are perfect for neatly piping the iconic “RIP” letters, delicate cracks, or other decorative embellishments onto your tombstones. The fine tip offers superior control, ensuring your decorations look professional and crisp. Beyond Halloween, they prove equally fantastic for decorating sugar cookies, gingerbread cookies, or other finely detailed baked goods for any occasion.
- **Food Processor or Blender**: To efficiently and quickly transform your Oreo cookies into uniformly fine crumbs, a food processor or a powerful blender is highly recommended. Consistent crumb size is key for a smooth Oreo ball mixture.
- **Mixing Bowl and Electric Mixer**: These are fundamental for thoroughly combining the crushed Oreo crumbs and softened cream cheese. An electric mixer ensures that the ingredients are perfectly integrated, resulting in a smooth, thick, and pliable dough that’s easy to shape.
While some items are optional, investing in these few specialized tools can truly enhance your culinary journey, streamline your preparation, and ultimately elevate the presentation and overall enjoyment of your homemade Tombstone Oreo Balls, ensuring they look just as fantastic as they taste.
How to Make Spooky Tombstone Oreo Balls: A Detailed Step-by-Step Guide
Creating these delightful Halloween treats is a surprisingly straightforward and fun process! Follow these detailed steps meticulously to craft your own impressive batch of spooky Tombstone Oreo Balls that are sure to be a hit:
- **Prepare Oreo Crumbs**: Begin by emptying an entire standard package of Oreo cookies (including both the dark cookie wafers and the sweet cream filling) into a food processor or a powerful blender. Pulse until the cookies are finely crushed into uniform crumbs. The goal is to achieve a fine, sand-like consistency, as this will result in the smoothest and most cohesive Oreo ball mixture. Avoid leaving any large chunks.
- **Combine with Cream Cheese**: Transfer the finely crushed Oreo crumbs into a large mixing bowl. Add the softened cream cheese. It’s crucial that the cream cheese is at room temperature; this ensures it blends seamlessly and prevents a lumpy mixture. Using an electric mixer, beat the ingredients together on medium speed until they are thoroughly combined. Continue mixing until a thick, uniform, and slightly sticky dough forms. The mixture should be firm enough to hold its shape when rolled or molded.
- **Shape the Tomstones and Chill**: Line a large baking sheet with a silicone mat or a sheet of parchment paper; this will prevent sticking. Take approximately 2-3 tablespoons of the Oreo mixture for each tombstone. Using your hands, gently form the mixture into a rectangular or slightly irregular tombstone shape. For an authentic look, make them taller than they are wide, with a subtly rounded or slightly uneven top edge. Place each shaped tombstone on the prepared baking sheet, leaving a small space between them. Once all tombstones are formed, refrigerate them for at least 20-30 minutes. This chilling period is absolutely crucial as it firms up the shapes, making them much easier to dip without falling apart or becoming too soft.
- **Prepare Gray Candy Melts**: While your tombstones are chilling in the fridge, prepare your coating. Reserve about 1/4 cup of the white candy melts; this will be used later for the “RIP” lettering. Melt the remaining white candy melts. You can do this using a specialized candy melting pot, in a microwave-safe bowl (heating in 30-second intervals and stirring vigorously between each interval to prevent burning), or over a double boiler. To achieve a smooth, pourable consistency, add about 1 tablespoon of vegetable oil to the melted candy melts and stir well. Once melted and smooth, add a tiny drop of black gel food coloring. Stir continuously until you achieve your desired gray color for the tombstones. Remember, gel food coloring is highly concentrated, so start with a very small amount and add more gradually.
- **Dip the Tombstones**: Remove the chilled Oreo tombstones from the refrigerator. Working one by one, gently submerge each tombstone completely into the gray melted candy. Use a dipping fork or a regular dinner fork to lift the tombstone out, allowing any excess chocolate to drip off by gently tapping the fork against the side of the bowl. Carefully transfer the dipped tombstone back onto the silicone-lined baking sheet. Repeat this process until all tombstones have been coated. Allow them to harden completely at room temperature, or for faster setting, place them back in the refrigerator for 10-15 minutes.
- **Add Decorative Details**: Once the gray coating on your tombstones is fully set and firm to the touch, it’s time for the intricate details. Melt the reserved white candy melts with about 1/2 tablespoon of vegetable oil to achieve a smooth piping consistency. Transfer this melted white chocolate into a squeeze bottle with a fine tip or a piping bag fitted with a very small round tip. Carefully pipe the classic “RIP” onto the front of each tombstone. You can also get creative by adding other eerie details like hairline cracks, spiderwebs, or even subtle “mossy” lines (using a touch of green food coloring in a separate portion of white melts, if desired). Allow these white chocolate details to set completely before proceeding.
- **Assemble Your Graveyard**: To create a captivating and spooky display, choose a shallow pan, a large serving dish, or a decorative tray. Fill the base with chocolate chips, crushed Oreos (for a “dirt” effect), or decorative black rocks (easily found at craft stores). Carefully arrange your finished Tombstone Oreo Balls within this “graveyard” setting. Gently move the chips, crumbs, or rocks around to help secure the tombstones upright or at slightly varying angles for a more authentic, eerie look. For an extra ghoulish touch, scatter some small candy bone sprinkles, gummy worms, or tiny candy pumpkins across the graveyard scene.
Serve your chillingly delicious graveyard immediately, or keep the assembled display refrigerated until you’re ready to unveil your Halloween masterpiece!
Crucial Tip: Avoid Dipping Frozen or Overly Cold Oreo Balls
This is a common pitfall that can lead to frustratingly cracked chocolate coatings and mar the perfect appearance of your Tombstone Oreo Balls. If your Oreo balls are frozen solid or excessively cold when dipped into warm melted chocolate, the sudden and extreme temperature difference causes the chocolate coating to contract rapidly and unevenly as it sets. This rapid contraction invariably leads to unsightly cracks forming on the surface.
The key to achieving a flawless, smooth, and uncracked coating is to ensure your Oreo balls are adequately chilled but never frozen. A brief 20-30 minute stint in the refrigerator is typically the perfect duration to firm them up sufficiently without making them too cold. This allows the chocolate to set smoothly and evenly, adhering beautifully to the Oreo ball mixture without any stress or imperfections. Always aim for a firm, but not rock-hard, consistency before dipping.
Mastering the Coating: Tips for Perfectly Dipped Oreo Balls
The chocolate coating is more than just a decorative finish; it adds a crucial layer of flavor, a satisfying snap, and seals in the deliciousness of your Oreo balls. Achieving a smooth, uncracked, and professional-looking finish is simpler than you might think with the right approach and ingredients.
Choosing Your Coating: Candy Melts vs. Almond Bark
For vibrant colors and straightforward melting, **Wilton Candy Melts** are my unequivocal choice. They are specifically formulated to melt smoothly and evenly, and they come in an impressive spectrum of colors, making them absolutely perfect for themed treats like our gray tombstones. You’ll find an excellent and often extensive selection of Wilton Candy Melts at craft stores such as Michaels, as well as in the baking aisles of larger retailers like Walmart. I’ve found that Michaels frequently boasts a more comprehensive range of colors and specialty melts, so it’s often the best starting point for unique color needs.
Alternatively, for classic chocolate-covered Oreo balls where specific vibrant colors aren’t a priority, **almond bark** (available in both chocolate and vanilla flavors) is a fantastic and reliable option. It melts beautifully, offers a smooth coating, and sets relatively quickly, providing a delicious, crisp shell that encases your treats perfectly.
Achieving the Perfect Gray for Tombstones
To create that iconic, slightly eerie gray hue for these Tombstone Oreo Balls, I start with white Wilton candy melts as the base. The magic happens when you introduce a small amount of **black gel food coloring**. Gel food coloring is superior to liquid food coloring for this application because it is highly concentrated and, crucially, will not thin out or otherwise compromise the consistency of your melted chocolate. Begin with just a tiny pin-prick of black gel and incorporate it thoroughly, stirring until the color is evenly distributed. Gradually add more, stirring completely after each addition, until you achieve your desired shade of solemn gray. Remember, a little goes a very long way, so build up the color slowly.
Thinning the Chocolate for a Silky Smooth Finish
Whether you opt for candy melts or almond bark, the melted chocolate can sometimes be a bit too thick straight out of the package, making it challenging to achieve a thin, even, and smooth coating. To obtain that coveted silky, fluid consistency, I highly recommend adding a small amount of **vegetable oil or vegetable shortening**. Approximately 1 tablespoon per bag of candy melts is a good starting point. Incorporate it gradually while the chocolate is melting, stirring continuously until the chocolate achieves a perfectly smooth and easily pourable, fluid texture. This simple addition not only helps the chocolate coat the Oreo balls seamlessly and thinly but also significantly simplifies the entire dipping process, making it much easier and considerably less messy to achieve a professional-looking finish.
Storage Solutions: How Long Do Oreo Balls Last?
One of the many wonderful attributes of Oreo balls is their excellent shelf life, provided they are stored correctly. To ensure your Tombstone Oreo Balls remain fresh, delicious, and maintain their delightful texture, proper storage is key. Simply place your finished Oreo balls in an **airtight container** once the chocolate coating has fully set. Stored in the refrigerator, they will maintain their optimal quality and taste for up to **1 week**. This makes them an ideal make-ahead treat, allowing you to prepare them in advance for parties or simply enjoy them throughout the festive Halloween season without last-minute rush.
Can Oreo Balls Be Frozen? Absolutely, for Longer Freshness!
If your goal is to extend the life of your Oreo balls even further, or if you’re planning to prepare a large batch well in advance of an event, freezing is an excellent and highly recommended option. Oreo balls freeze exceptionally well, effectively preserving their rich flavor and appealing texture for extended periods. Here’s a professional tip for freezing them effectively and preserving their quality:
Once your Tombstone Oreo Balls are completely set, arrange them in a single layer on a baking sheet lined with parchment paper and flash freeze them for about an hour. After they’re firm, you can stack them. A great method is to place 5-6 Oreo balls in a row, then wrap them tightly in a layer of plastic wrap. This individual wrapping helps protect them from freezer burn and makes it convenient to grab smaller, single-serving portions as needed. Next, place these securely wrapped bundles into an **airtight freezer-safe ziploc bag or a sturdy freezer container**. When properly frozen, your Oreo balls can be stored and enjoyed for up to **3 months**.
**Important Note on Thawing**: It’s important to be aware that when you transition Oreo balls from the extreme cold of the freezer to the warmer environment of the refrigerator (for thawing), the sudden temperature shift can sometimes cause the chocolate coating to develop small, hairline cracks. This phenomenon is purely cosmetic and does not, in any way, affect the delicious taste, quality, or safety of the treat. To minimize the likelihood of cracking, it’s best to thaw them slowly and gradually in the refrigerator overnight, rather than attempting to thaw them quickly at room temperature.
Creative Substitutions: Making Oreo Balls Without Cream Cheese
While cream cheese is undeniably the classic and most popular binder for Oreo balls, imbuing them with their characteristic tangy richness, creamy texture, and structural integrity, it’s certainly not the only option available! If you’re seeking an alternative due to dietary preferences, ingredient availability, or simply to experiment with new flavor profiles, there are a couple of excellent substitutes that can yield equally delicious results:
- **Coffee Creamer**: This is a surprisingly effective and popular substitute that many bakers swear by! You’ll need to use enough liquid coffee creamer (any flavor will work wonderfully, allowing you to infuse an additional layer of taste into your Oreo balls!) to adequately bind the crushed Oreo crumbs together. The goal is to achieve a thick, cohesive mixture that can be easily shaped. Start by adding a small amount of creamer, then gradually add more, mixing thoroughly after each addition, until the desired pliable consistency is reached.
- **Sweetened Condensed Milk**: This ingredient works beautifully to create an incredibly rich, dense, and luxuriously sweet Oreo ball. Its thick consistency acts as an excellent binder, contributing a delightful chewiness and an extra boost of sweetness. Similar to using coffee creamer, add sweetened condensed milk sparingly to your Oreo crumbs, mixing until the mixture holds together well enough to form into balls or shapes. Be mindful of its inherent sweetness, as it can make the final product quite indulgent.
Don’t hesitate to experiment with these creative alternatives to discover your personal favorite version of Oreo balls. Regardless of the binder you choose, the ultimate goal is to achieve a mixture that is firm enough to easily shape, yet remains moist, flavorful, and incredibly delicious. Each substitute offers a unique twist on the classic, inviting you to customize your treats even further.
Serving and Safety: Do Oreo Balls Need to Be Refrigerated?
For both optimal taste and crucial food safety, it is strongly recommended to keep Oreo balls refrigerated until you are absolutely ready to serve them. The cream cheese, a primary ingredient in the truffle mixture, is a perishable dairy product that benefits significantly from cold storage to prevent spoilage and maintain its freshness. Furthermore, from a culinary perspective, many people enthusiastically agree that Oreo balls deliver their best flavor and texture when served chilled, as the cool temperature enhances their rich, creamy mouthfeel and delightful sweetness.
However, if you are planning to serve them at a Halloween party or gathering, it’s helpful to understand their limits when left at room temperature. According to standard FDA guidelines, perishable foods containing ingredients like cream cheese can safely be left out at room temperature for a maximum period of up to **2 hours**. Beyond this timeframe, the risk of bacterial growth increases, which could lead to foodborne illness. Therefore, feel free to display your impressive Tombstone Oreo Balls prominently during your Halloween festivities, allowing guests to enjoy them. But remember, for the safety and continued enjoyment of any remaining treats, plan to promptly return any leftovers to the refrigerator after the 2-hour window has passed.
Beyond the Grave: Customization and Decoration Ideas
While the classic gray tombstone with “RIP” is an iconic and perfectly spooky look for Halloween, there’s absolutely no need to limit your creativity! These Tombstone Oreo Balls offer a fantastic canvas for further personalization and artistic flair. Here are some imaginative ideas to make your Halloween treats even more unique and visually striking:
- **Different Graveyard Messages**: Instead of the traditional “RIP,” consider piping other funny, spooky, or whimsical messages like “BOO!”, “EEK!”, “GONE BUT NOT FORGOTTEN,” or even personalized initials for a special touch at a party.
- **Mossy & Aged Effects**: To give your tombstones an ancient, weathered appearance, drizzle a tiny amount of green candy melts or white chocolate tinted with green gel food coloring. Apply it lightly to mimic moss or lichen growing on old stone.
- **Edible Glitter or Luster Dust**: Before the gray coating completely sets, lightly dust your tombstones with edible silver, black, or even iridescent glitter or luster dust. This adds a shimmering, ghostly, or mystical glow that catches the light beautifully.
- **Intricate Chocolate Details**: Use dark melted chocolate (or even black candy melts) in a fine-tipped squeeze bottle to draw eerie designs such as delicate spiderwebs, silhouetted bats, tiny skulls, or spooky, skeletal patterns on the tombstone surfaces.
- **Enhanced Graveyard Scenery**: Elevate your graveyard display beyond just chocolate chips or black rocks. Consider using crushed graham crackers mixed with a touch of green food coloring for a “mossy dirt” effect, arrange gummy worms peeking out from the “earth,” or scatter small candy pumpkins, plastic spiders, and miniature ghost candies to fill out your spooky scene.
- **Experiment with Oreo Flavors**: Don’t stick to just original Oreos! Explore different Oreo varieties like “Golden Oreos” for a lighter-colored, sandier tombstone base, “Peanut Butter Oreos” for an extra flavor twist, or even seasonal varieties to match your Halloween theme.
Let your imagination run wild and transform these simple, delicious treats into personalized Halloween masterpieces that reflect your unique style and spooky spirit!
More Spooktacular Halloween Treats to Try
If you’ve thoroughly enjoyed the creative process and delicious outcome of making these Tombstone Oreo Balls, you’ll be thrilled to explore more of our festive and fun Halloween recipes. We have a magical cauldron full of ideas designed to make your celebrations extra special, whether you’re hosting a party or just enjoying the spooky season at home:
- **Bubbling Witch’s Cauldron Brownies**: Conjure up some magic with these decadent and visually striking brownies, perfect for any coven gathering or haunted feast.
- **Ghost Popcorn Balls**: These light, sweet, and adorably spooky spirits are incredibly easy to make and a fantastic treat for both kids and adults.
- **Frankenstein Pretzels**: Combine the perfect balance of salty and sweet with these monstrously cute pretzels—a fun and engaging project for all ages.
- **Mini Pumpkin Pie Rice Krispie Treats**: A delightful seasonal twist on a beloved classic, offering all the comforting flavors of fall in a convenient, bite-sized treat.
Browse through these exciting recipes and get ready to conjure up even more delicious Halloween magic in your kitchen!
(Interactive rating removed for pure HTML)
Tombstone Oreo Balls Recipe
Leave a Review
Print Recipe
Equipment
-
Squeeze Bottles
-
Wilton Candy Melting Pot
-
Silicone Baking Mat
-
Food Processor or Blender
-
Electric Mixer
-
Mixing Bowl
Ingredients
- 1 package Oreos, 14.3 oz (standard package)
- 8 oz (226g) cream cheese, room temperature
- 1 bag white candy melts, Wilton brand recommended
- Black gel food coloring
- Vegetable oil – for thinning candy melts
- Optional: Chocolate chips or decorative black rocks for graveyard display
- Optional: Skeleton bone sprinkles
Instructions
-
In a blender or food processor, blend all the Oreos until you have fine, consistent crumbs. Ensure no large chunks remain.1 package Oreos
-
Transfer the Oreo crumbs to a large mixing bowl. Add the softened 8 oz (226g) cream cheese. Using an electric mixer, combine thoroughly until the mixture is thick, uniform, and sticks together well, forming a pliable dough.8 oz (226g) cream cheese
-
Line a cookie sheet with a silicone baking mat or parchment paper. Take approximately 2-3 tablespoons of the Oreo mixture for each ball and gently shape it into a tombstone-like form. Aim for rectangular shapes with slightly rounded tops. Once all tombstones are formed, place the cookie sheet in the fridge to chill for at least 20 minutes to firm up. This prevents cracking later.
-
Meanwhile, set aside a little less than 1/4 cup of the white candy melts for the “RIP” lettering later. Melt the remaining white candy melts. For optimal smoothness, add about 1 tablespoon of vegetable oil. You can melt them on the stovetop over low heat, stirring constantly, or in the microwave (at 50% power, stirring every 30 seconds until smooth). Once melted, add a small amount of black gel food coloring and stir until you achieve your desired gray color for the tombstones.1 bag white candy melts, Black gel food coloring, Vegetable oil – for thinning candy melts
-
Remove the chilled Oreo tombstones from the fridge. Dip one tombstone at a time into the gray melted chocolate, ensuring it’s fully coated. Lift it out with a fork, gently tapping the fork against the edge of the bowl to remove any excess chocolate. Use a toothpick to carefully push the tombstone off the fork and back onto the silicone-lined baking sheet. Repeat until all tombstones are dipped. Allow them to harden completely at room temperature or in the refrigerator.
-
Once the gray chocolate coating is fully set, melt the reserved white candy melts with about 1/2 tablespoon of vegetable oil. Transfer this melted white chocolate into a squeeze bottle or a piping bag with a fine tip. Carefully pipe “RIP” onto each tombstone. Feel free to add other decorative details like cracks or spooky lines as desired. Allow this white chocolate to set completely.
-
To assemble your graveyard display, fill a shallow pan, serving dish, or tray with chocolate chips, crushed Oreos, or decorative black rocks (you can find these at craft stores). Arrange the finished Tombstone Oreo Balls into this base, moving the chips/rocks around to help secure them in place. For an extra spooky touch, sprinkle some skeleton bone candies over the graveyard. If you’re not serving immediately, keep the assembled display in the fridge until ready to serve.
Nutrition
All nutritional values are approximate and provided as a courtesy. Changing ingredients and/or quantities will alter the estimated nutritional calculations.
- Calories: 235 kcal
- Carbohydrates: 27 g
- Protein: 3 g
- Fat: 13 g
- Saturated Fat: 7 g
- Polyunsaturated Fat: 1 g
- Monounsaturated Fat: 4 g
- Trans Fat: 1 g
- Cholesterol: 17 mg
- Sodium: 196 mg
- Potassium: 86 mg
- Fiber: 1 g
- Sugar: 18 g
- Vitamin A: 204 IU
- Calcium: 21 mg
- Iron: 3 mg
Enjoyed this recipe? Share your thoughts below!