
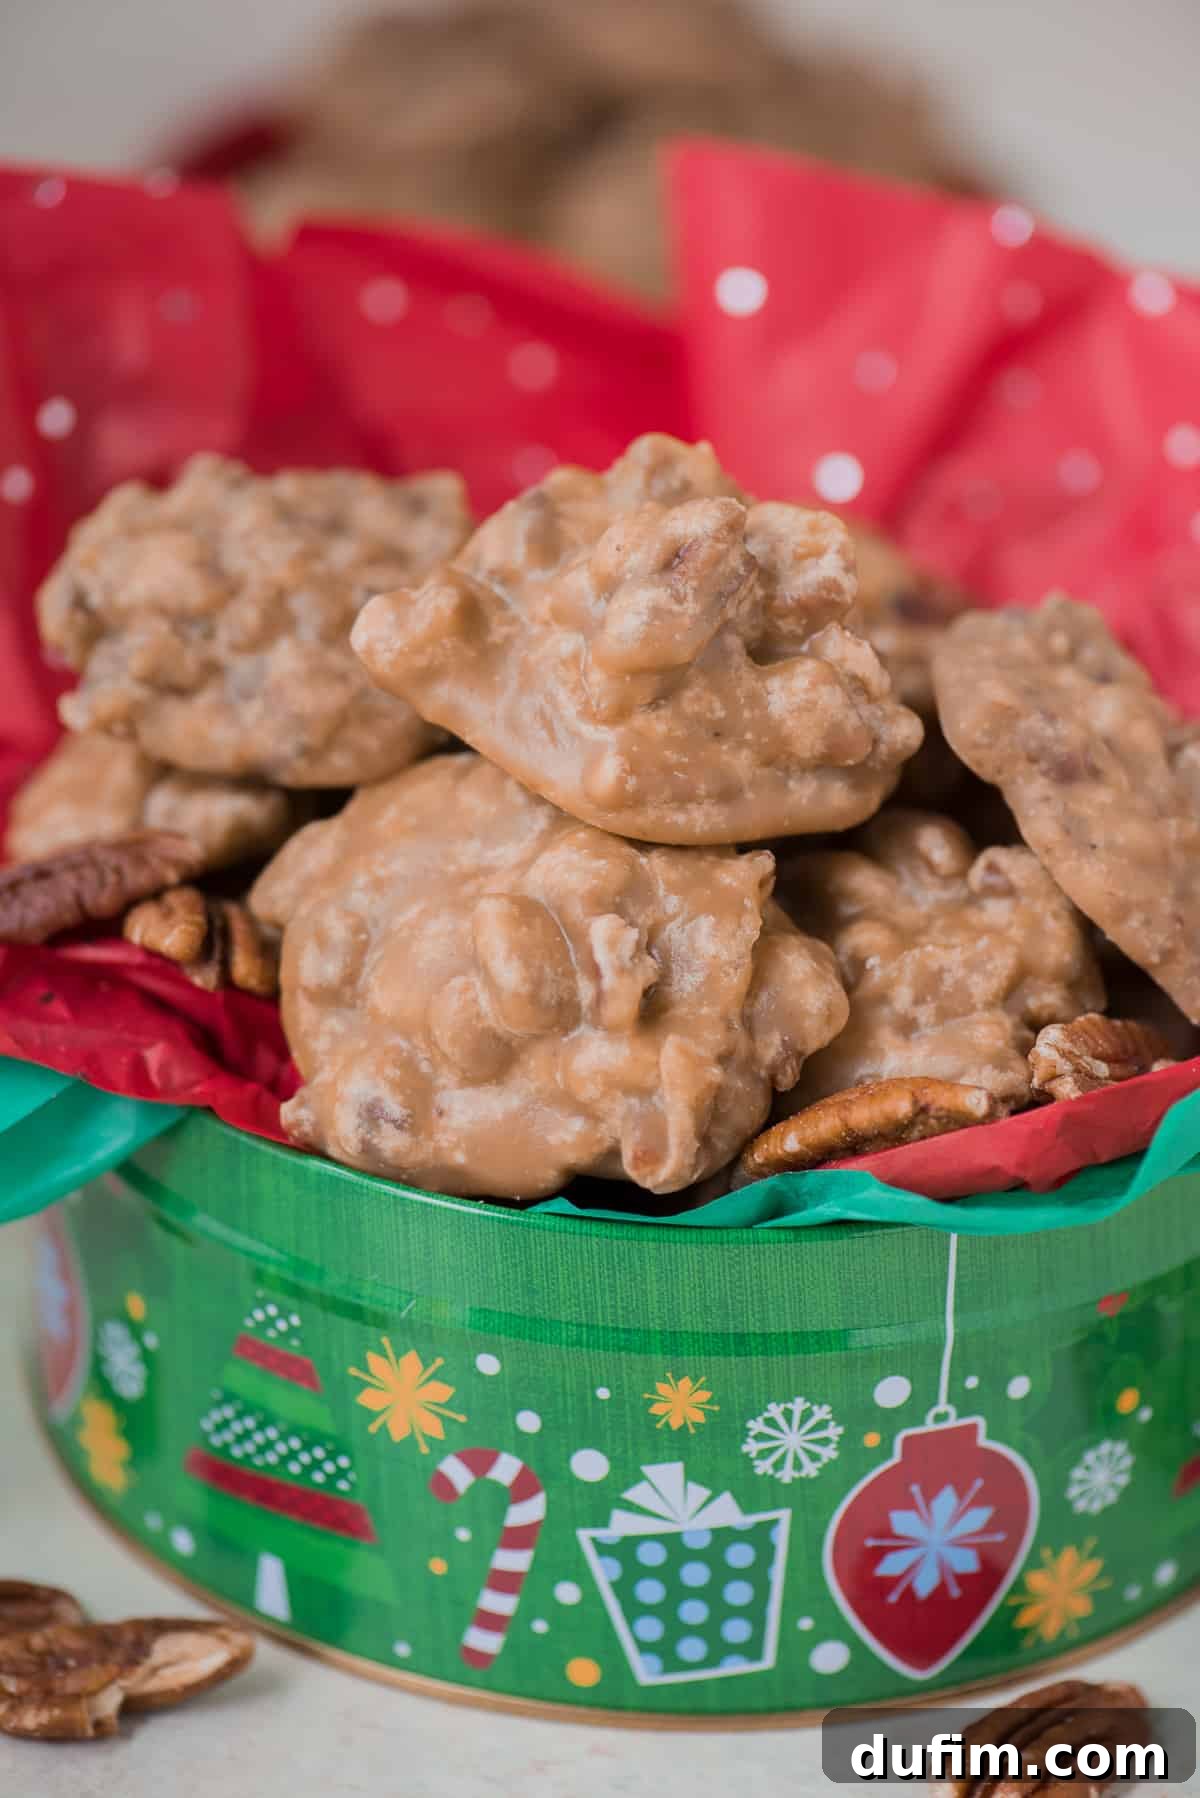
Master the Art of Southern Pecan Pralines: Your Ultimate Guide
Welcome to your ultimate guide for crafting the most exquisite Southern Pecan Pralines! I’ve dedicated countless hours to perfecting this classic confection, experiencing all the trials and errors so that you don’t have to. With my proven method, you’ll find yourself confidently creating batches of these irresistible treats with remarkable ease. I’m excited to share every valuable tip and trick I’ve gathered along the way, ensuring that you feel completely prepared as you follow my simple 5-step process to praline perfection.
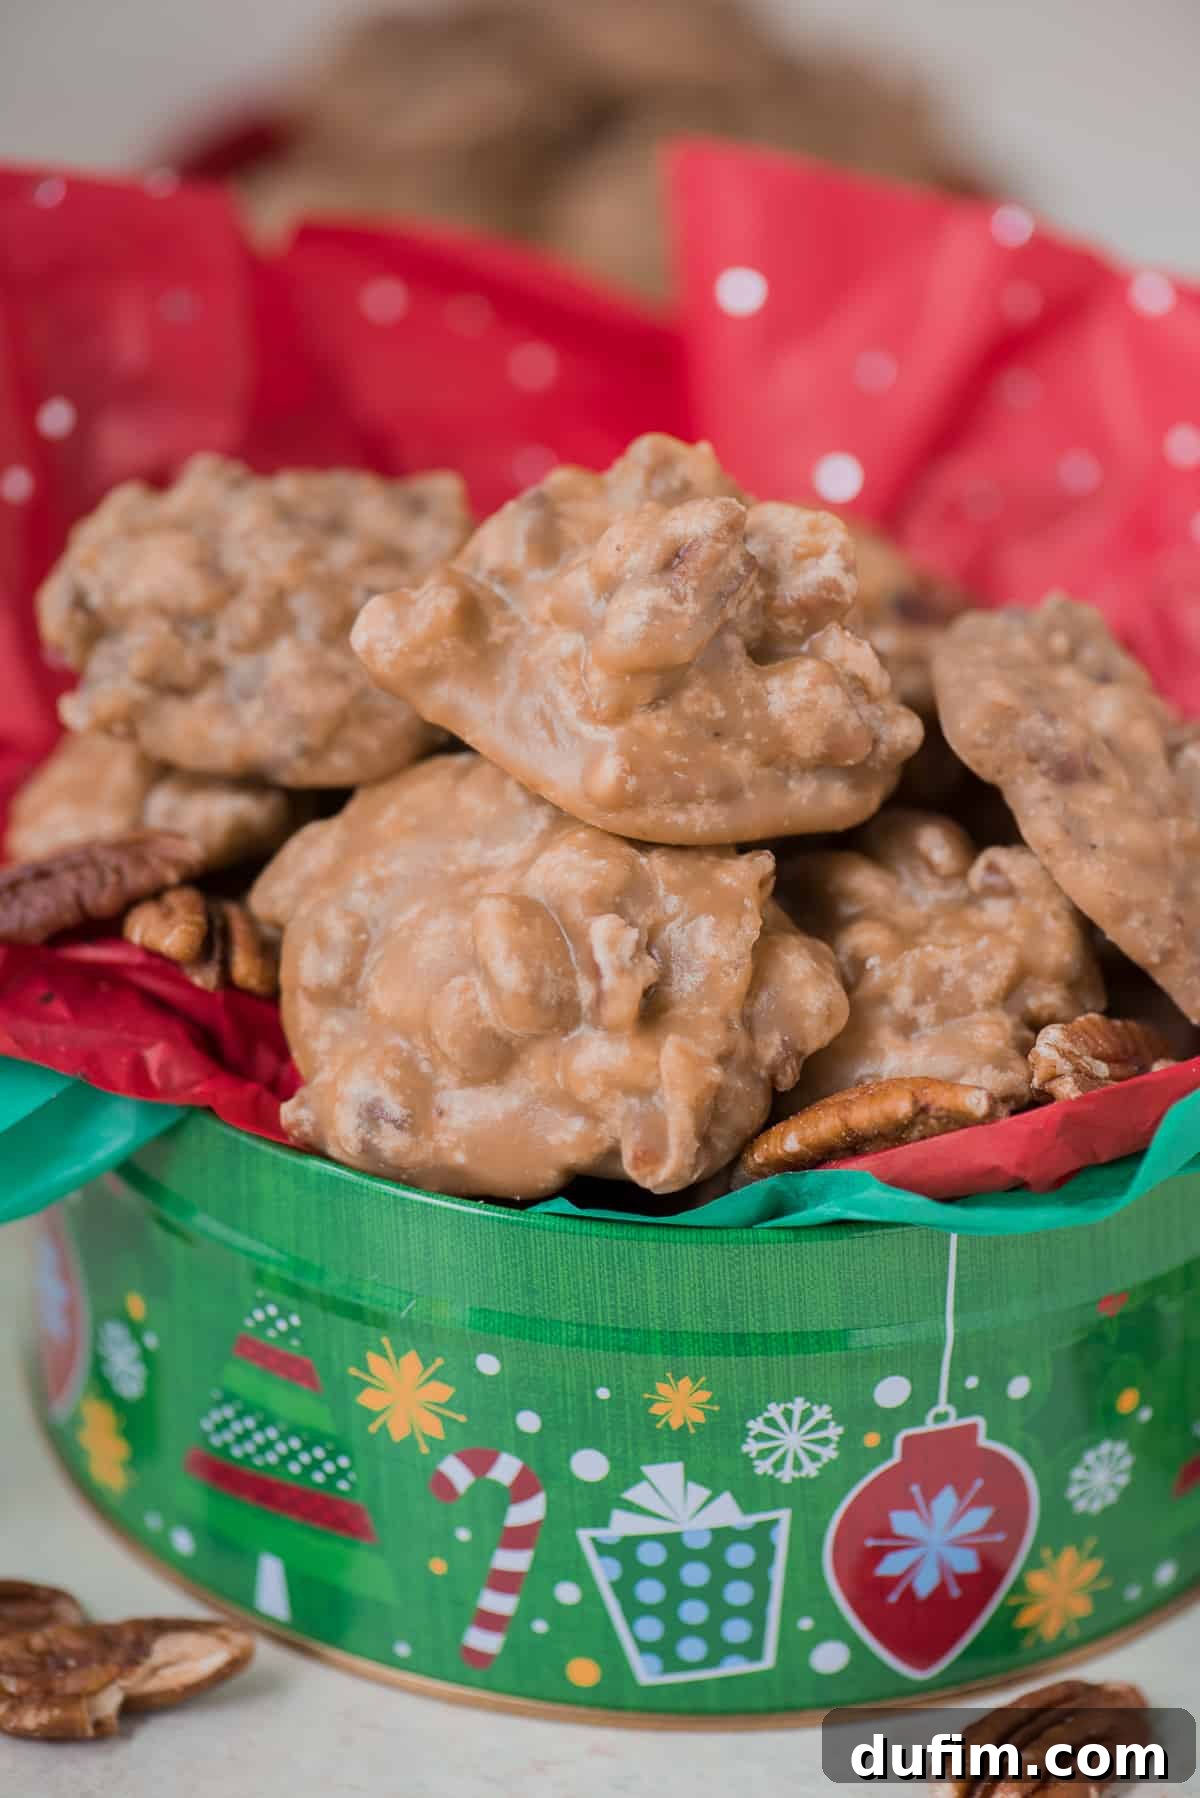
I just made these, and the texture and flavor are fantastic! They may be the best pralines I have ever had.
-Jim
What Are Authentic Southern Pecan Pralines?
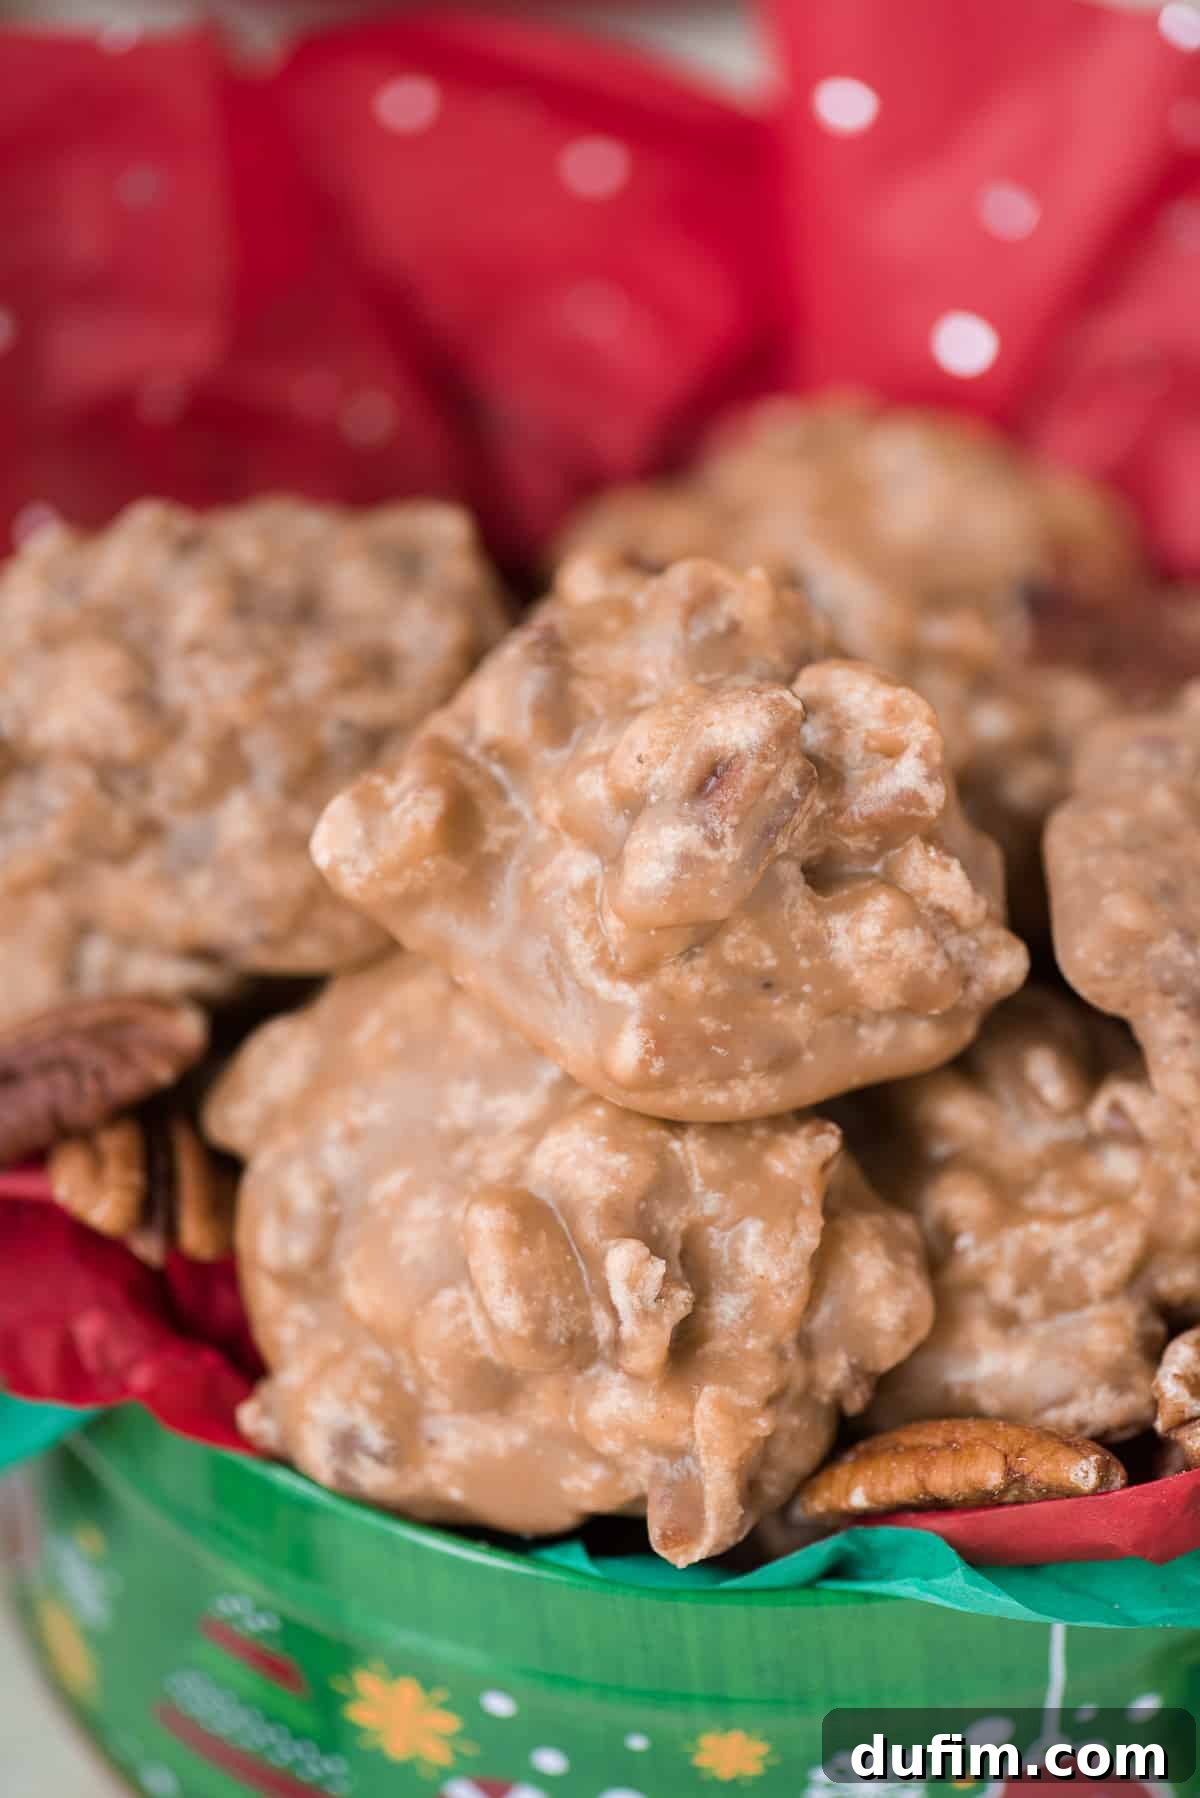
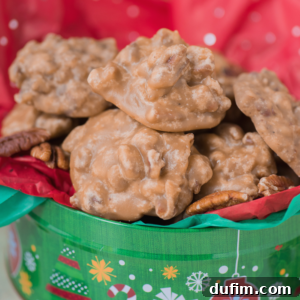
Pecan pralines are a beloved confection deeply rooted in the culinary traditions of the American South. Often referred to simply as “pralines,” these delightful candies are celebrated for their distinctive soft, creamy, and sometimes slightly crumbly texture, alongside a rich, caramelized sweetness. Each bite offers a harmonious blend of smooth candy base and the delightful crunch of fresh pecans.
Originally, the praline was a French invention, a confection of almonds coated in caramelized sugar. However, when French settlers arrived in Louisiana, they adapted the recipe to incorporate locally available ingredients, most notably pecans, and added cream to achieve a softer, creamier texture that defines the Southern praline we know and love today. This evolution transformed the praline into a uniquely American sweet, particularly iconic in New Orleans and across the Southern states.
The core ingredients for these captivating candies include brown sugar, butter, heavy cream or milk, and, of course, a generous amount of chopped pecans. The magic happens as these ingredients are cooked together to a precise temperature, then stirred until they begin to crystallize and thicken, creating that signature sweet and nutty flavor. They are typically spooned or dropped onto a prepared surface to set, forming individual, rustic-looking discs.
Pecan pralines are more than just a dessert; they are a symbol of Southern hospitality and are frequently enjoyed during holidays, family gatherings, and special occasions. Whether homemade with love or purchased from a charming candy shop, they offer a taste of history and comfort that transcends generations.
Why This Pecan Praline Recipe Stands Out
This isn’t just another praline recipe; it’s a carefully perfected method designed to give you the most satisfying results. Here’s why you’ll absolutely adore making (and eating!) these pecan pralines:
- Rich and Decadent Flavor: Pecan pralines are synonymous with indulgence, and this recipe captures that essence perfectly. Each praline boasts a deep, buttery richness that truly melts in your mouth, making it an unforgettable treat. You’ll be able to recreate the authentic, luxurious taste of traditional Southern pralines right in your own kitchen, impressing everyone who tries them.
- Irresistible Caramelized Sweetness: The masterful combination of brown sugar, butter, and pecans undergoes a magical transformation during the cooking process, developing a profound caramelized sweetness. This isn’t just a sugary treat; it’s a complex profile with notes of toffee and toasted nuts that are genuinely hard to resist. The sweet, slightly burnt sugar taste is the hallmark of a truly great praline.
- Accessible with Simple Ingredients: Despite their sophisticated flavor, these pralines are made with ingredients that are likely already in your pantry or easily found at any grocery store. Granulated sugar, brown sugar, heavy cream, milk, butter, pecans, salt, and vanilla extract are all you need. This simplicity ensures that anyone can embark on this delightful culinary adventure without needing to source exotic items.
- The Joy of Homemade Treats: There’s unparalleled satisfaction in creating something delicious from scratch, and making pralines is no exception. The process itself is a rewarding culinary experience, culminating in beautiful, handmade candies that carry a special charm. Sharing these homemade delights with friends and family adds a personal touch that store-bought versions simply can’t match, making them perfect for gifts or holiday gatherings.
- Perfect for Gifting & Entertaining: With their elegant appearance and comforting flavor, these pecan pralines are ideal for any occasion. Package them in decorative tins for thoughtful holiday gifts, serve them as a sweet ending to a dinner party, or simply enjoy them as a delightful snack. They are guaranteed to be a hit and leave a lasting impression on your guests.
Essential Ingredients for Perfect Pecan Pralines
Achieving the perfect pecan praline begins with high-quality ingredients. Each component plays a crucial role in developing the rich flavor and desirable texture. Here’s a closer look at what you’ll need and why each element is important:
- Granulated Sugar: Provides the fundamental sweetness and forms the crystalline structure of the candy.
- Brown Sugar: Adds depth of flavor with its molasses content, contributing to the characteristic caramel notes and a slightly chewier texture.
- Heavy Whipping Cream: Essential for the creamy, smooth consistency of Southern pralines. The fat content helps prevent excessive crystallization and adds richness.
- Milk: Works with the cream to create the liquid base, dissolving the sugars and contributing to the overall moisture and texture.
- Unsalted Butter (diced): Imparts a luxurious richness and buttery flavor that is critical for authentic pralines. Dicing it helps it melt evenly into the sugar mixture.
- Chopped Pecans: The star of the show! Choose fresh, high-quality pecans for the best flavor and crunch. Toasting them lightly before adding can enhance their nutty aroma.
- Salt: A small but mighty ingredient that balances the intense sweetness and enhances all the other flavors, making the pralines even more addictive.
- Vanilla Extract: Adds a warm, aromatic note that complements the caramel and pecan flavors beautifully. Use pure vanilla extract for the best results.
Recommended Tools for Praline Perfection
While the ingredients are simple, having the right tools makes the praline-making process much smoother and more successful. These items are indispensable for achieving consistent results:
- Candy Thermometer: This is by far the most critical tool for candy making, especially for pralines. It ensures you reach the exact “soft ball stage” temperature (236°F), which is vital for the correct texture. Without it, your pralines will likely be too soft (caramel-like) or too hard (crumbly).
- Silicone Baking Mat or Parchment Paper: Essential for lining your baking sheets. This prevents the sticky pralines from adhering to the surface, making them easy to remove once set. Parchment paper is a good alternative, but a silicone mat is reusable and often preferred for its non-stick properties.
- Cookie Scoop: A cookie scoop (or an ice cream scoop for larger pralines) helps create uniformly sized pralines and makes the dropping process much faster and cleaner. Speed is key when working with praline mixture!
- 4-Quart Heavy-Bottomed Pot: A medium-sized pot with a heavy bottom is crucial for even heat distribution, which prevents scorching the sugar. A 4-quart size provides enough room for the mixture to bubble without overflowing as it cooks.
- Wooden Spoon or Heat-Resistant Spatula: For constant stirring. Ensure it’s sturdy and heat-resistant, as the mixture will become very thick and hot.
Step-by-Step Guide: How to Make Irresistible Pecan Pralines
Making pecan pralines requires precision and speed, but with these detailed steps, you’ll be well on your way to success. Read through all instructions before you begin to familiarize yourself with the process.
- Prepare Your Workspace: Begin by lining two large baking sheets with either silicone baking mats or parchment paper. This preparation is crucial, as you’ll need to work quickly once the praline mixture is ready. Having two pans ensures you have enough space for all your pralines.
- Combine Ingredients and Begin Cooking: In a 4-quart (medium-sized) heavy-bottomed pot, combine the granulated sugar, brown sugar, heavy cream, milk, and diced unsalted butter. Clip a reliable candy thermometer to the side of the pot, ensuring the tip is submerged in the mixture but not touching the bottom of the pot. Cook the mixture over high heat, stirring constantly with a wooden spoon or heat-resistant spatula. Continue stirring until the mixture reaches exactly 236ºF (113°C), which is the “soft ball stage.” This constant stirring is vital to prevent burning and ensure even cooking.
- Integrate Pecans and Finish Cooking: Once the mixture hits 236ºF, carefully add the chopped pecans. The addition of cooler pecans will cause the mixture’s temperature to drop by approximately 10ºF. Continue stirring constantly over high heat until the mixture returns to 236ºF. As soon as it reaches this temperature again, quickly stir in the salt and vanilla extract. The mixture may bubble up slightly. Immediately remove the pot from the heat.
- Cool and Stir for Crystallization: This is a critical step for developing the praline’s characteristic texture. After removing the pot from heat, continue to stir the mixture constantly for precisely 3 minutes. This stirring allows the mixture to cool slightly and begin the crystallization process, transforming it from a smooth syrup into a creamy praline base. Do not stop stirring during this time.
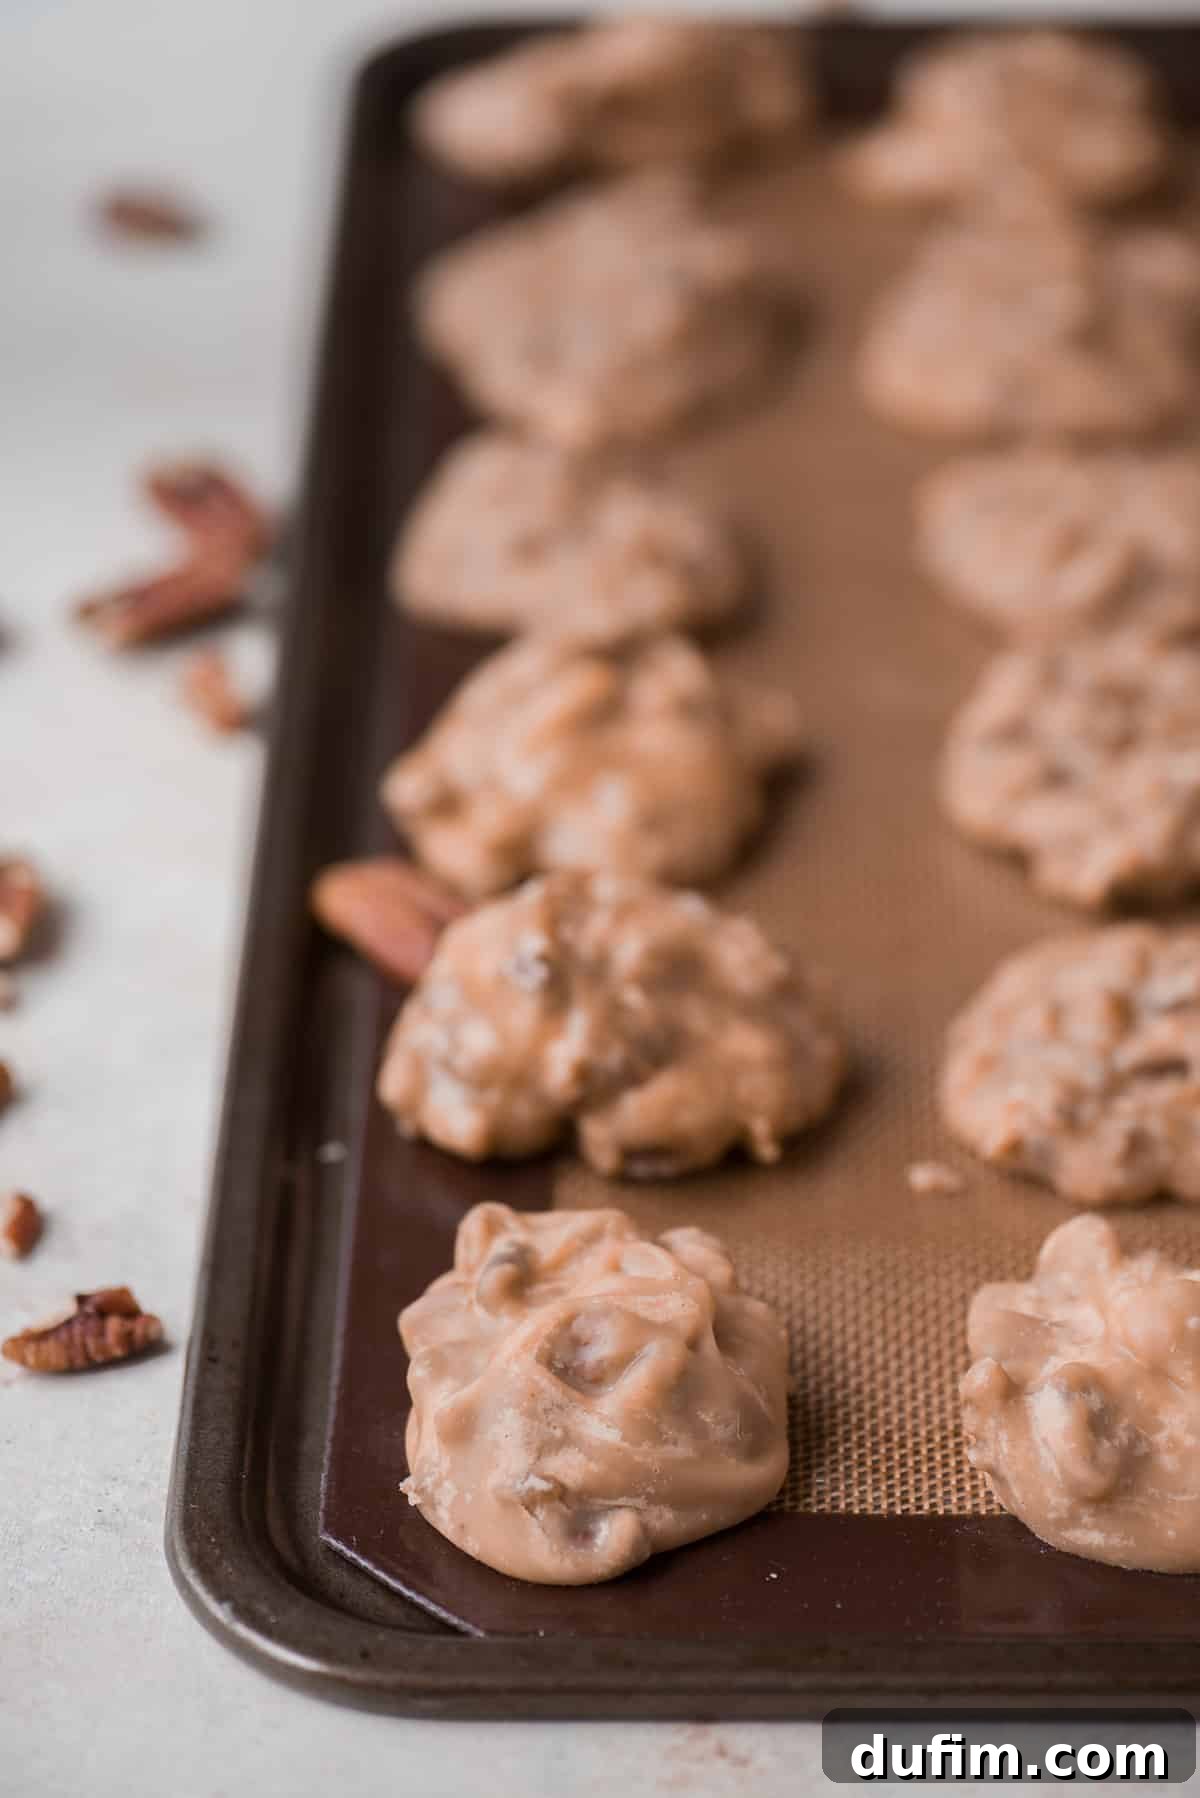
- Scoop and Set Rapidly: Immediately after the 3 minutes of stirring off the heat, begin scooping the pralines onto your prepared baking sheets using a cookie scoop. It’s highly recommended to have a helper for this step: one person stirs the mixture to prevent it from cooling too rapidly and clumping, while the other quickly scoops the pralines. Speed is absolutely essential here! If the mixture cools too much before all pralines are scooped, it will become crumbly and won’t form nicely shaped, smooth pralines.
- Allow to Crystalize and Store: Let the pralines cool completely and fully crystalize on the baking sheets. This process can take anywhere from 20 minutes to up to 2 hours, depending on various factors like ambient temperature and how long the mixture was cooked. You’ll know they are ready when they are firm to the touch and easily peel off the mat or parchment paper. Once fully set, store your delicious pecan pralines in an airtight container at room temperature on the counter to maintain their freshness and texture.
Expert Tips for Flawless Pecan Pralines
Making perfect pecan pralines can feel like an art form, but with these expert tips, you’ll master the technique and consistently achieve delicious results.
The Indispensable Candy Thermometer
Let’s be clear from the start: I do not recommend attempting to make pralines without a candy thermometer. This tool is not just helpful; it is absolutely crucial to the success of this recipe. Achieving the precise temperature of 236ºF (soft ball stage) is the difference between perfectly creamy pralines and a batch that is either too sticky (undercooked) or too crumbly (overcooked).
While a candy thermometer might not be a standard gadget in every kitchen, it’s a small investment that pays off significantly. They are relatively inexpensive and open up a world of other wonderful candy recipes, from caramel and fudge to homemade fried donuts. Ensure the thermometer is properly calibrated before use and that its tip is submerged in the candy mixture without touching the bottom of the pot for an accurate reading.
Embrace the Learning Curve: Practice Makes Perfect!
Praline making has a definite learning curve, even for experienced bakers. For this reason, I strongly recommend planning to buy enough ingredients to make this recipe at least twice. I personally went through four batches before I felt truly comfortable with the nuances of the process. The actual cooking and scooping steps are very hands-on and happen quite quickly, requiring swift action and confidence.
So, be kind to yourself! Candy making is a skill that improves with experience. Don’t get discouraged if your first batch isn’t picture-perfect. The beauty is that even “imperfect” pralines are still delicious! Just keep practicing, and soon you’ll be reaping the benefits of these buttery, sugary, perfectly crunchy, and highly addicting pecan pralines.
Common Praline Pitfalls and How to Troubleshoot
Understanding what can go wrong and how to fix it (or prevent it) is key to mastering pralines.
- Undercooked Pralines: If you remove the praline mixture from the heat before it reaches the full 236ºF, it won’t properly crystalize. The result will be pralines that are too soft, gooey, and caramel-like, lacking that distinct praline texture. While still tasty, they won’t set firmly. If this happens, you can often gently reheat the mixture and continue cooking until it reaches the correct temperature, then proceed with the stirring and scooping steps.
- Overcooked Pralines: Conversely, if the praline mixture cooks beyond 236ºF, especially if it gets into the hard ball or soft crack stage, you’ll end up with a crumbly, dry, and often sugary mixture. It won’t clump together to form smooth pralines and might taste burnt or overly hard. Unfortunately, overcooked pralines are harder to salvage, but the crumbly bits can make a fantastic topping for ice cream or yogurt!
- Gritty Pralines: If your pralines turn out gritty, it’s typically due to sugar crystallization issues. This happens when undissolved sugar crystals in the mixture trigger the entire batch to crystallize too quickly and unevenly. Refer to our FAQ section for detailed tips on preventing grittiness, including ensuring complete sugar dissolution and avoiding premature stirring.
Our goal is to help you achieve that “just right” balance – beautiful, firm, and wonderfully flavored pecan pralines every time. Always read over the instructions carefully before you begin, and get all your ingredients and tools set up. This preparation will ensure you know what you are doing and can move with confidence, helping you make the best pralines!
Choosing the Best Pecans
The quality of your pecans significantly impacts the final taste of your pralines. Opt for fresh, plump pecan halves or large pieces. Avoid anything that smells rancid or appears shriveled. For an even deeper flavor, you can lightly toast your pecans in a dry skillet over medium-low heat for 5-7 minutes, stirring frequently, before adding them to the praline mixture. This step enhances their natural nutty notes.
Storing Your Homemade Pecan Pralines
Proper storage is essential to maintain the delicious texture and flavor of your homemade pecan pralines. Here’s how to keep them fresh for as long as possible:
- Cool, Dry Place: Always store your pralines in a cool, dry place at room temperature. Heat and direct sunlight can cause them to soften, become sticky, or even melt. A pantry or countertop away from appliances is ideal.
- Airtight Container: The key to maintaining freshness and preventing them from becoming hard or absorbing moisture from the air is an airtight container. Line the container with parchment paper and place a single layer of pralines. If stacking, separate each layer with additional parchment paper to prevent them from sticking together.
- Avoid Refrigeration and Freezing: Unlike many other desserts, pralines do not fare well in the refrigerator or freezer. The moisture and fluctuating temperatures can drastically alter their delicate texture, often leading to grittiness, stickiness, or a loss of their signature creaminess. It’s best to enjoy them at room temperature.
- Shelf Life: When stored correctly, homemade pecan pralines can typically last for up to 1-2 weeks. Beyond that, they may start to lose their optimal texture and flavor, although they might still be safe to eat. Always check for any signs of spoilage, such as unusual odors or discoloration, before consuming.
Frequently Asked Questions About Pecan Pralines
What is the difference between pecans and praline pecans?
Pecans and praline pecans are related, but they are distinct in their preparation and flavor profile.
Pecans: These are simply the nuts from the hickory tree, native to North America. They are prized for their naturally sweet, buttery flavor and a tender crunch. Pecans are incredibly versatile and can be eaten raw as a snack, or used in a wide array of sweet and savory dishes, from pies and cookies to salads and savory glazes.
Praline Pecans: These are pecans that have been transformed into a confection. They are coated with a rich, sugary, and caramelized glaze, typically made from brown sugar, butter, and sometimes cream or milk. This coating gives them a distinct sweet, crunchy, and often slightly chewy outer layer, which contrasts beautifully with the natural flavor and texture of the pecan inside. Praline pecans are primarily enjoyed as a stand-alone candy or as a delectable topping for desserts like ice cream, cakes, and pies.
What’s the difference between praline and candied?
While often used interchangeably, “praline” and “candied” refer to different methods and results, particularly concerning nuts or sweet treats.
Praline: The term “praline” specifically refers to a type of sweet confection where nuts (most commonly pecans or almonds) are incorporated into or coated with a sugar-based caramel or creamy sugar mixture. American Southern pralines, as in this recipe, involve cooking sugar, butter, and cream to a specific temperature, then stirring in nuts until the mixture crystallizes and forms a soft, creamy candy around the nuts. The texture is usually creamy or slightly crumbly with a distinct caramelized flavor.
Candied: “Candied” is a broader term describing a preservation or sweetening method where food items (fruits, peels, or nuts) are cooked in a sugar syrup. The goal is often to infuse the item with sugar and then allow the sugar to crystallize on the surface, forming a hard, sweet, and often glossy coating. Candying can extend shelf life and add a sweet crunch, but the texture is typically harder and more crystalline than a praline. Candied nuts are usually individual nuts with a hard sugar shell, whereas pralines are generally formed into drops or clusters of creamy candy with nuts embedded.
Why are my pecan pralines gritty?
Gritty pralines are a common issue, almost always caused by sugar crystallization problems. Here’s how to prevent it:
- Ensure Complete Sugar Dissolution: Before the mixture comes to a boil, stir thoroughly until all the sugar crystals have completely dissolved in the liquid. Any undissolved crystals can act as “seeds” for premature crystallization.
- Wipe Down the Sides: As the mixture cooks, sugar crystals can splash onto the sides of the pot. These can also act as crystallization seeds. Use a pastry brush dipped in hot water to gently wipe down the inside edges of the pot. Do this before the mixture boils vigorously and avoid disturbing the main mixture.
- Control Temperature Precisely: Overcooking the mixture can lead to rapid crystallization and grittiness. A candy thermometer is crucial to ensure you hit the exact soft ball stage (236ºF) and no higher.
- Stir at the Right Time: While stirring is crucial during the initial cooking and after removing from heat, avoid stirring vigorously once the mixture reaches boiling and before it hits the target temperature, unless the recipe specifically instructs otherwise. Excess stirring during this phase can encourage crystallization.
- Cool Gradually: Allow the pralines to cool gradually at room temperature. Rapid cooling (like placing them in a fridge) can shock the sugar and encourage crystallization, leading to grittiness.
- Use Fresh Ingredients: Ensure your sugars are fresh and dry, as old or clumpy sugar can contain pre-existing crystals.
Can I make pecan pralines ahead of time?
Absolutely! Pecan pralines are an excellent make-ahead treat. As long as they are stored in an airtight container at room temperature in a cool, dry place, they will remain fresh and delicious for 1-2 weeks. This makes them perfect for holiday gifting or preparing for parties.
Can I substitute other nuts for pecans?
While the recipe is specifically designed for pecans, you can experiment with other nuts if you prefer. Almonds, walnuts, or even macadamia nuts could be interesting substitutes. However, the fat content and flavor profile of other nuts will slightly alter the final taste and texture of the praline, so the results may not be identical to a traditional pecan praline.
What if my pralines don’t set?
If your pralines remain sticky, soft, and don’t harden, it almost certainly means they were undercooked and didn’t reach the correct temperature (236ºF / soft ball stage). The mixture needs to reach this critical temperature for the sugar to properly concentrate and crystallize when cooled. While it’s difficult to salvage them perfectly once dropped, you can sometimes scrape them back into the pot, reheat gently, and continue cooking until the thermometer registers the correct temperature, then proceed quickly with the stirring and scooping.
More Delectable Candy Recipes to Explore
If you’ve enjoyed mastering pecan pralines, why not try your hand at other delightful homemade candies? Here are a few more recipes to satisfy your sweet tooth:
- English Toffee
- Peppermint Bark
- Candy Cane Oreo Balls
- Peanut Butter Fudge
Average Rating: 4.47 out of 5 stars from 13 ratings
Classic Southern Pecan Pralines Recipe Card
Print Recipe
Equipment
-
My favorite spatula!
-
Baking Sheet
-
Silicone Baking Mat
-
Candy Thermometer
Ingredients
- 1 cup (198g) granulated sugar
- 1 cup (213g) brown sugar, packed
- ½ cup (118ml) heavy whipping cream
- ½ cup (118ml) milk
- 4 Tbsp (57g) unsalted butter, diced (1/2 stick)
- 2 cups (228g) chopped pecans
- ½ tsp salt
- 1 tsp vanilla extract
Instructions
-
Line a large baking sheet with a silicone baking mat or parchment paper. Prepare 2 pans.
-
In a 4 quart pot with a candy thermometer clipped on the side, combine the sugar, brown sugar, heavy cream, milk and butter. Cook over high heat, stirring constantly until the mixture reaches 236º F (soft ball stage).1 cup (198g) granulated sugar, 1 cup (213g) brown sugar, 1/2 cup (118ml) heavy whipping cream, 1/2 cup (118ml) milk, 4 Tbsp (57g) unsalted butter
-
Add in the chopped pecans. The mixture will drop about 10º F – constantly stir the mixture until it reaches 236º F again. Quickly add in the salt and vanilla extract. The mixture will bubble up, remove the pot from the heat, and stir constantly for 3 minutes.2 cups (228g) chopped pecans, 1/2 tsp salt, 1 tsp vanilla extract
-
Continue to stir the mixture while using a cookie scoop to drop pralines onto the prepared baking sheets. The best way to do this is to get a buddy to stir the mixture while you scoop! You have to move FAST while scooping. Once the mixture cools too much, it will become crumbly and won’t form nice pralines.
-
Allow the pralines to fully crystalize before removing them from the baking sheet. This could take 20 minutes up to 2 hours. It depends on how long the mixture was cooked. Once set, store the pralines in an airtight container on the counter.
Video
Notes
Nutrition Information (per praline)
Nutrition Disclosure
All nutritional values are approximate and provided to the reader as a courtesy. Changing ingredients and/or quantities will alter the estimated nutritional calculations.
Like this recipe? We’d love to hear from you! Rate and comment below!