
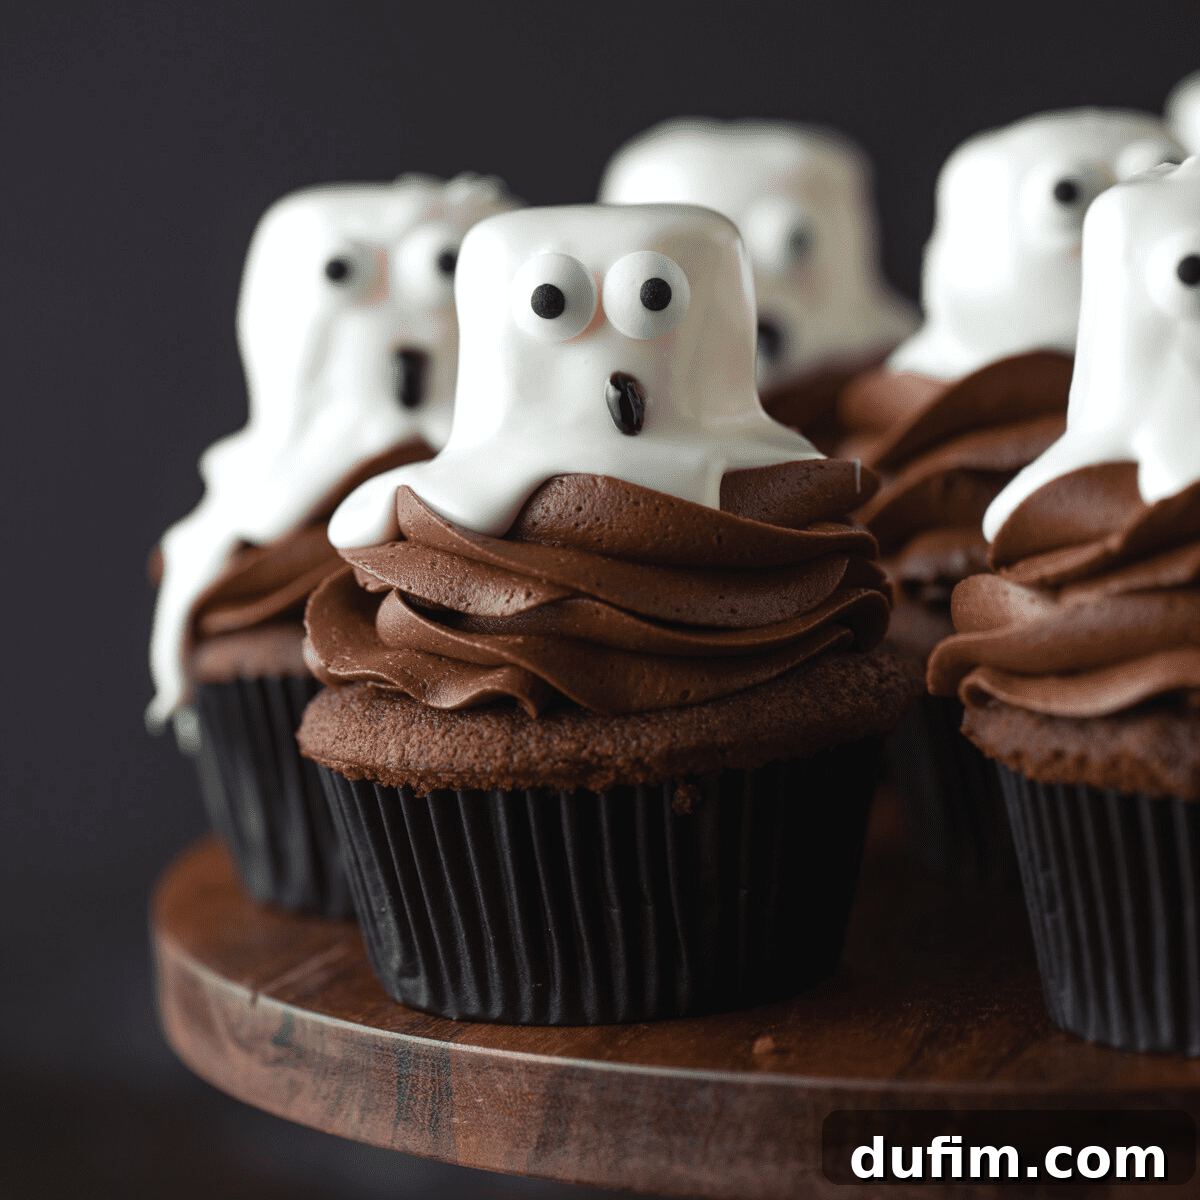
Get ready to create some hauntingly adorable treats this Halloween season! Our **Ghost Cupcakes** are the perfect spooky delight, guaranteed to bring smiles and a touch of magic to any celebration. These delightful chocolate cupcakes, crowned with whimsical marshmallow ghosts, are not just incredibly fun to make but even more exciting to eat. Whether you’re planning an elaborate Halloween bash or simply looking for a memorable baking activity with your little ghouls and goblins, this recipe is a must-try. Prepare to charm everyone with these festive and delicious Halloween cupcakes!
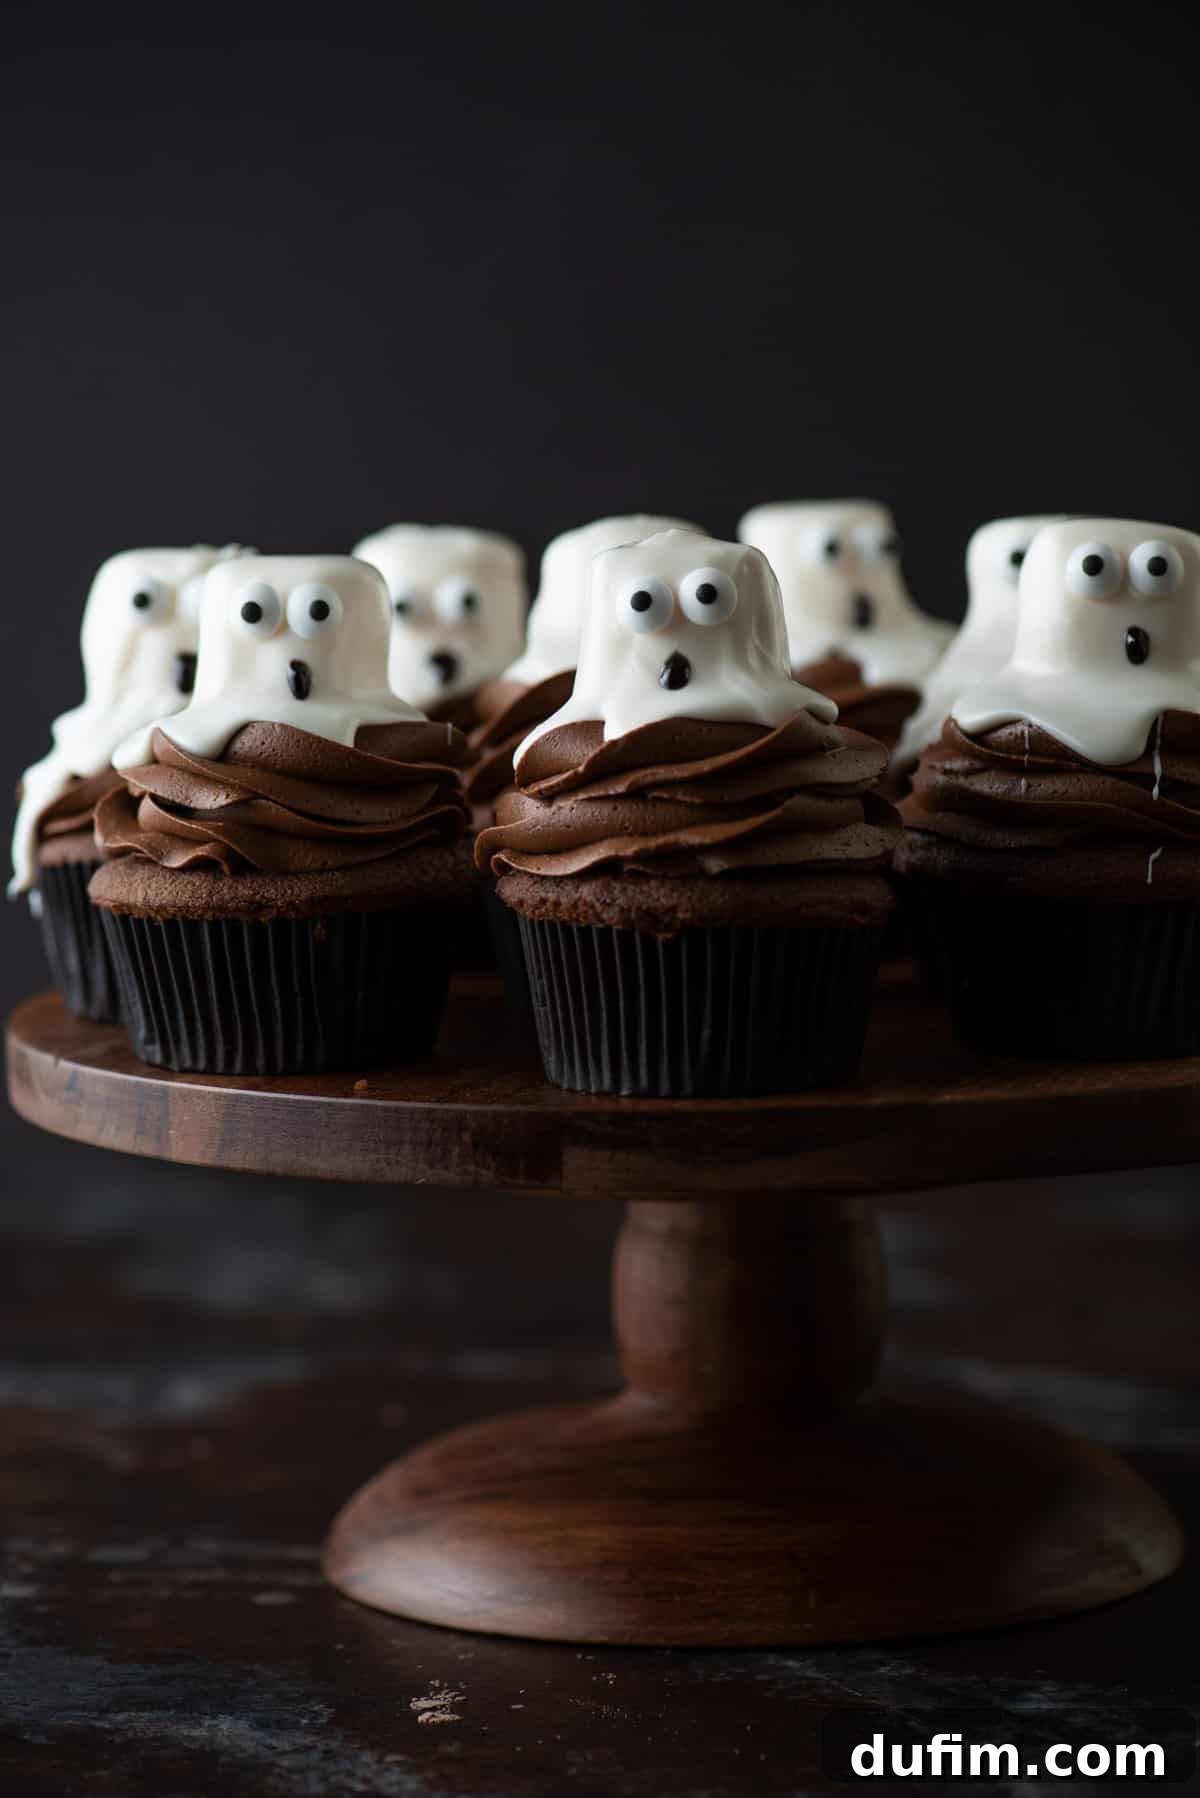
Bake the Best Ghost Cupcakes for a Memorable Halloween Celebration
For many, Halloween transcends a single day, transforming into a cherished season brimming with enchantment. It’s a time for imaginative costumes, thrilling decorations, and, perhaps most delightfully, a parade of creative and delicious treats. For me, the anticipation builds well in advance; my personal countdown to Halloween often begins as early as August! This holiday holds a special place in my heart, making early preparations for spirited celebrations and festive parties an absolute joy.
A truly spectacular Halloween party is never complete without an impressive spread of themed food, and I wholeheartedly embrace going “over the top” for this occasion! These charming Ghost Cupcakes are an absolute highlight, serving as a fantastic centerpiece for any spooky feast. Their visual appeal and delightful taste make them an instant crowd-pleaser. But why stop there? To truly elevate your Halloween dessert table and enchant your guests, consider pairing these ghostly delights with an array of other creative spooky treats:
- Transform a classic treat into something ghoulish with tombstone-shaped Oreo balls. They’re always a fan favorite and add a touch of graveyard chic to your dessert display.
- For a delightfully creepy crawly addition, whip up some spider rice krispie treats. Kids and adults alike will love their playful spookiness.
- Don’t forget to include some whimsical ghost popcorn balls, a light and airy snack perfect for balancing out richer desserts.
- And for a truly impressive and visually striking dessert, try making bubbling witch’s cauldron brownies. They’re guaranteed to be a conversation starter!
Together, these treats, alongside our star Ghost Cupcakes, will make your Halloween gathering an unforgettable culinary experience!
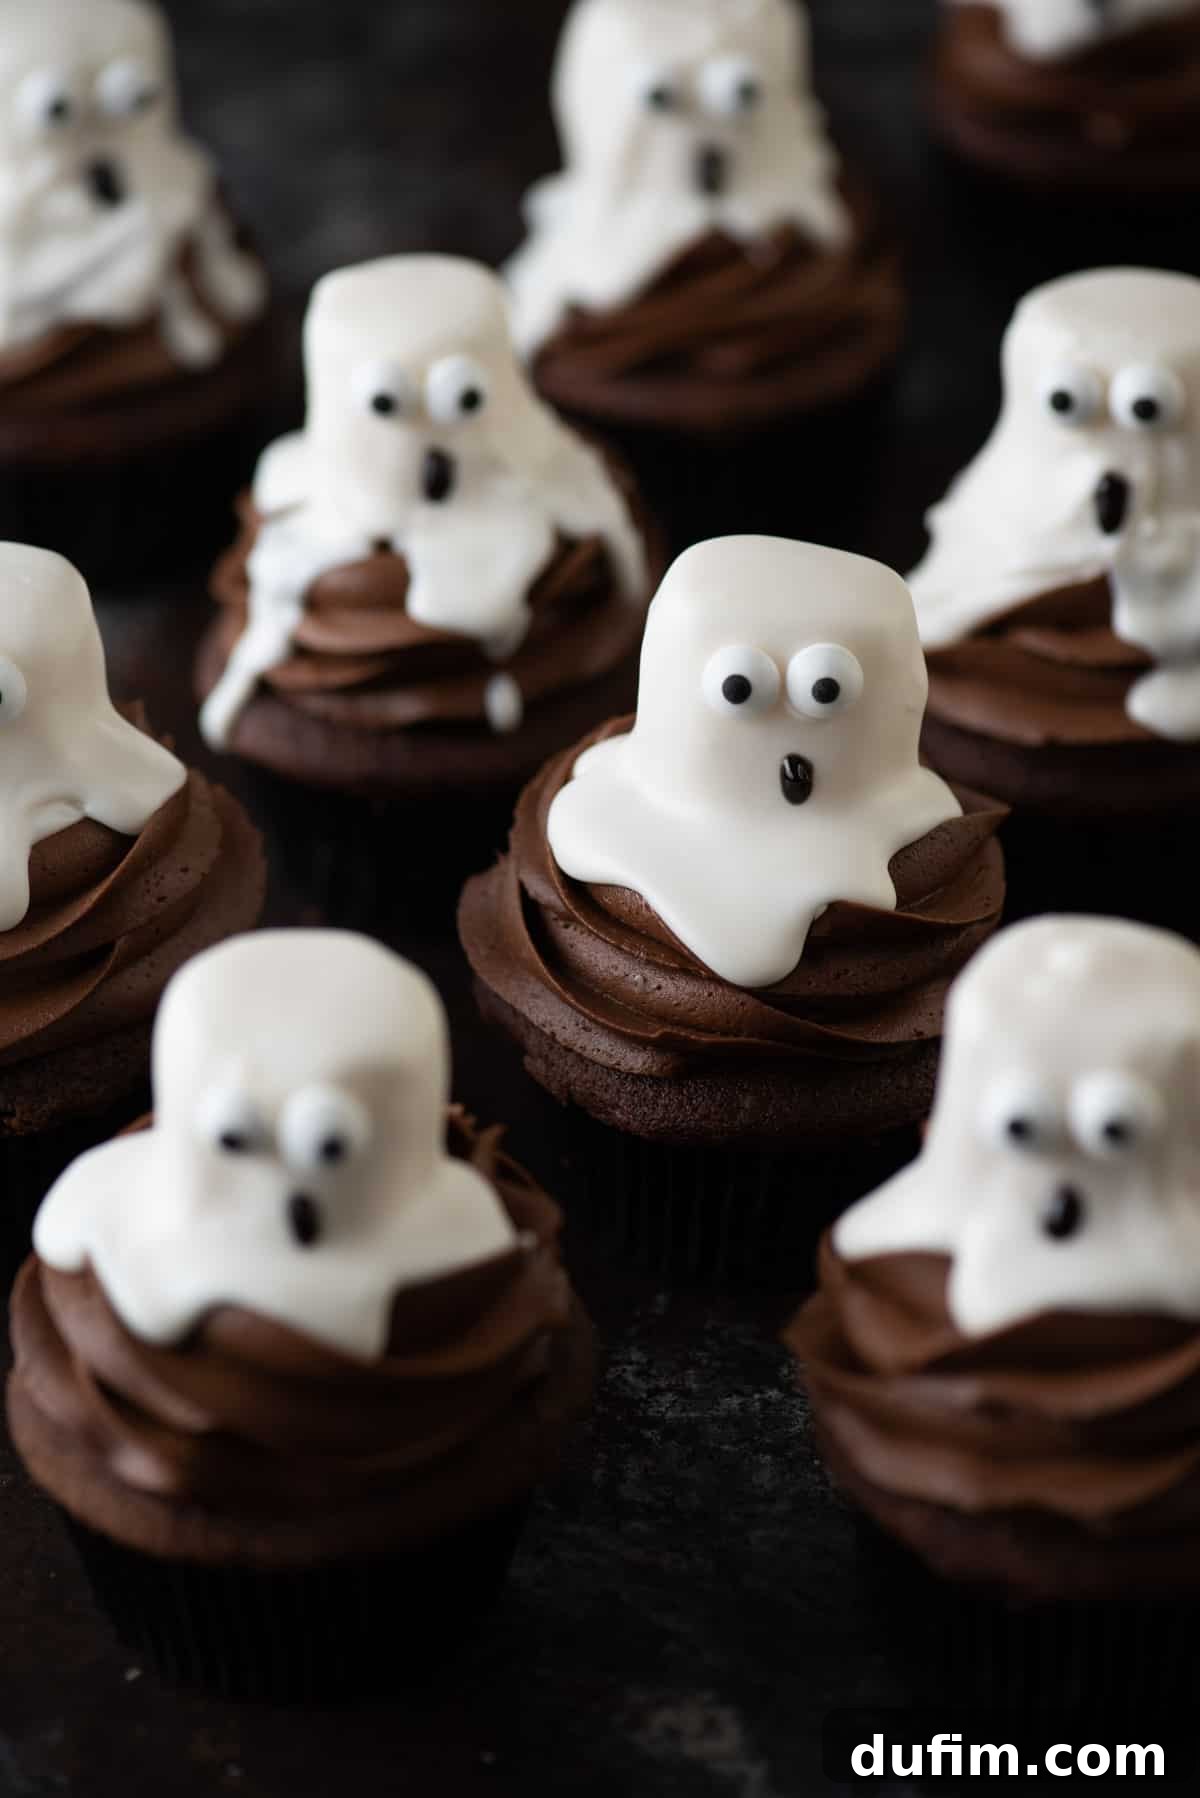
What You’ll Need: Ingredients and Supplies for Ghost Cupcakes
Crafting these adorable ghost cupcakes from scratch requires a thoughtful selection of ingredients for both the rich chocolate cupcake base and the creamy frosting, along with some playful elements for decoration. Below, you’ll find a comprehensive list designed to help you prepare for a smooth and enjoyable baking process. For specific quantities and detailed instructions, please refer to the complete recipe card available at the end of this post.
For the Decadent Chocolate Cupcakes:
- All-purpose flour: The essential structural component for our cupcakes. For those seeking gluten-free alternatives, many high-quality gluten-free all-purpose flour blends perform beautifully in this recipe; King Arthur’s brand is often a reliable choice.
- Unsweetened natural cocoa powder: This is what gives our cupcakes their deep, rich chocolate flavor and characteristic dark, spooky hue.
- Baking soda: A crucial leavening agent that reacts with acidic ingredients like buttermilk, helping the cupcakes achieve a light and airy texture as they rise.
- Baking powder: Working in conjunction with baking soda, this secondary leavening agent provides an additional lift, ensuring our cupcakes are tender and fluffy.
- Salt: A small amount of salt is vital for balancing the sweetness and intensifying the complex chocolate flavors within the cupcake batter.
- Unsalted butter: It’s paramount that your butter is at room temperature before you begin. Softened butter creams effortlessly with sugar, creating a lighter, more consistent batter that contributes to a superior cupcake texture.
- Bittersweet chocolate baking bar: For the most intense and sophisticated chocolate flavor, opt for a baking bar with a cacao percentage of approximately 70%. Melting it gently will allow it to integrate seamlessly into the batter.
- Granulated sugar: This provides essential sweetness and helps achieve a wonderfully tender crumb in your finished cupcakes.
- Eggs: Eggs serve multiple purposes: they bind the ingredients, add richness, contribute to the cupcake’s structure, and infuse moisture, creating a perfect consistency.
- Buttermilk: Known for imparting a tender crumb and a subtle tang, buttermilk is a secret weapon in many baking recipes. If you don’t have store-bought buttermilk, a simple homemade substitute works perfectly: add one tablespoon of lemon juice or white vinegar to a liquid measuring cup, then fill it to the one-cup mark with whole milk. Stir gently and allow the mixture to sit for about 5 minutes until it visibly thickens and curdles.
- Hot tap water: Adding hot water helps to “bloom” the cocoa powder, intensifying its chocolate flavor, and also contributes to the remarkably moist and tender texture of these cupcakes.
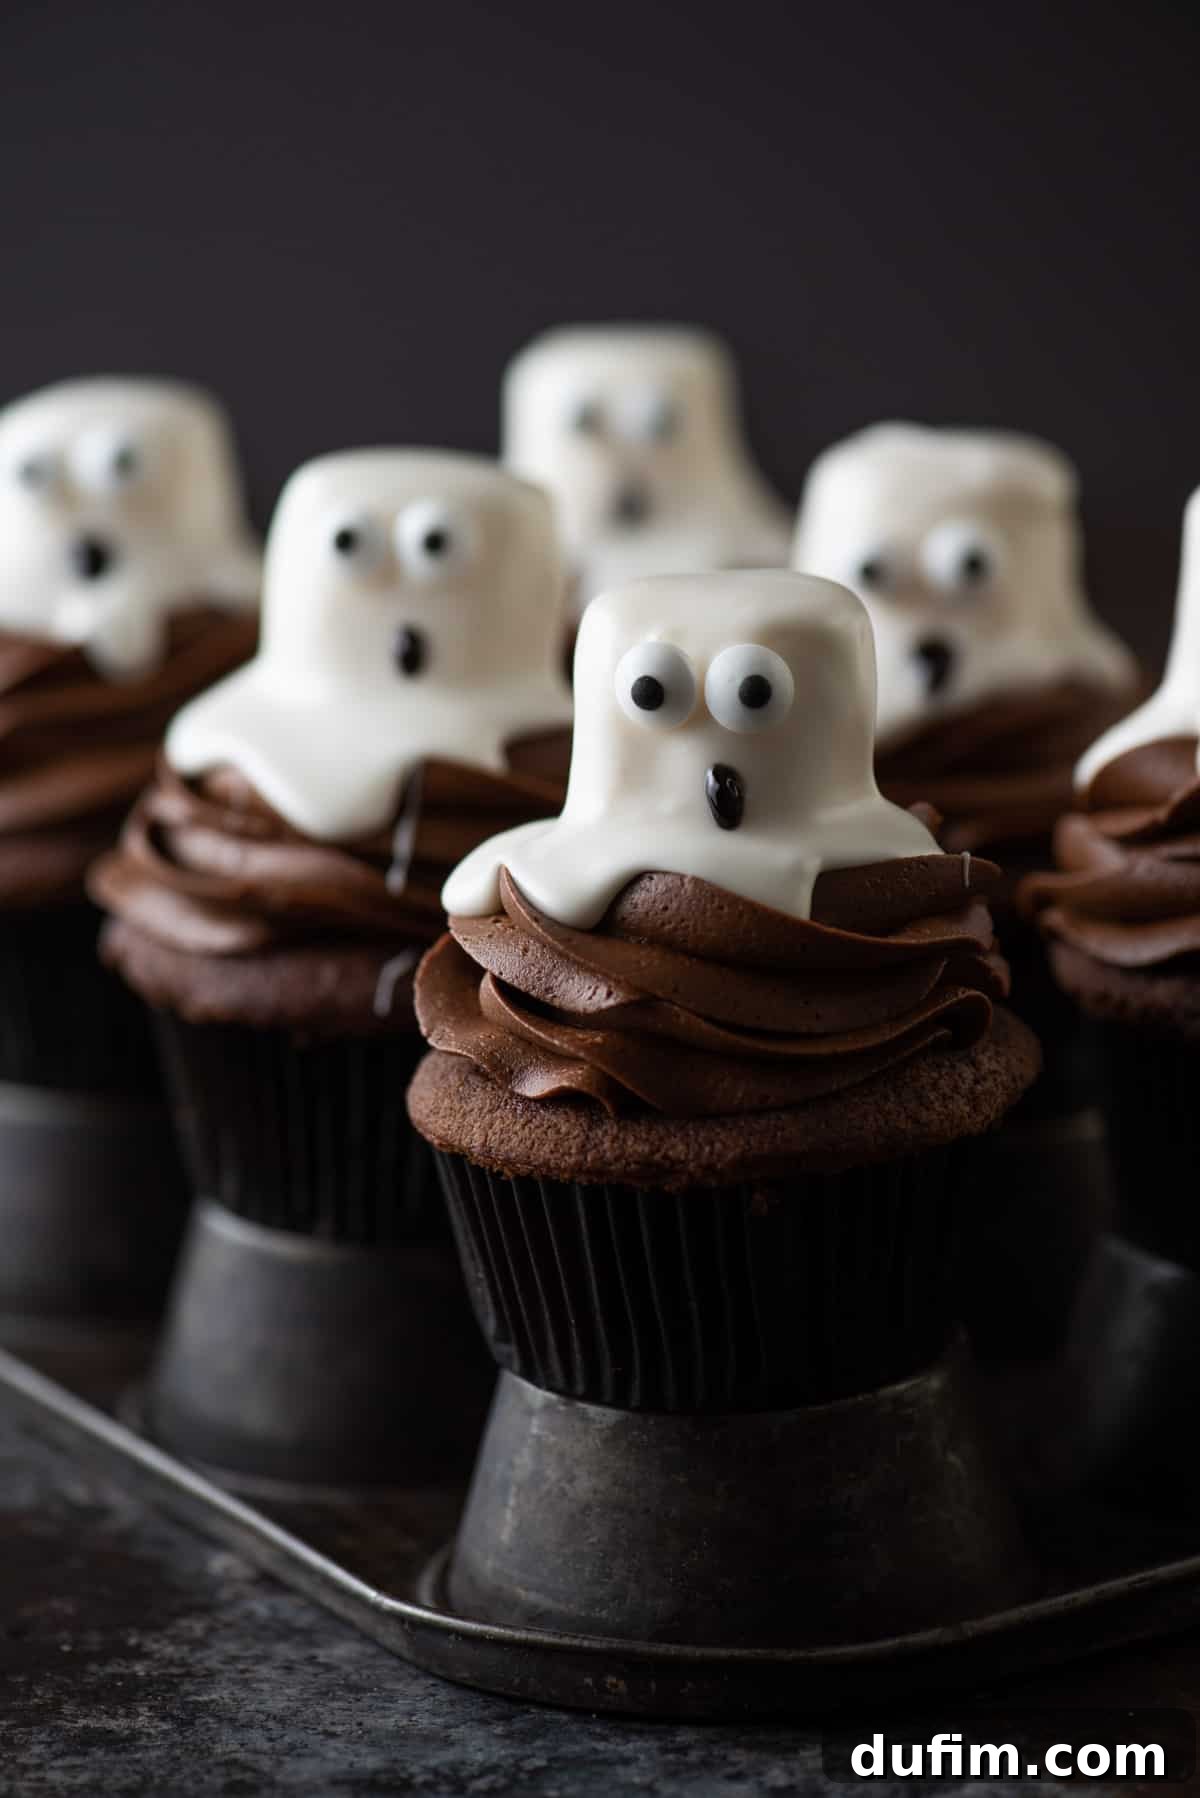
For the Velvety Chocolate Buttercream Frosting:
- Unsalted butter: As with the cupcake batter, ensure this butter is at room temperature. This is absolutely critical for whipping it into a smooth, airy, and pipeable frosting consistency.
- Unsweetened natural cocoa powder: For a deep, rich chocolate flavor in your frosting. Sifting this ingredient will help prevent any lumps and ensure a silky-smooth texture.
- Powdered sugar (confectioners’ sugar): The primary sweetener and thickener for the frosting. Sifting powdered sugar is highly recommended to achieve the smoothest, most lump-free buttercream.
- Heavy cream: Adds luxurious richness and helps achieve the ideal consistency for a luscious, pipeable frosting that holds its shape beautifully.
- Salt: A tiny pinch of salt in the frosting is essential for cutting through the sweetness and enhancing the overall chocolate taste, preventing it from being overly cloying.
- Vanilla extract: A touch of pure vanilla extract elevates and rounds out the complex flavors of the chocolate frosting.
Additional Supplies for Spooky Ghost Decoration:
- Large marshmallows: These are the magical components that will form the adorable, plump bodies of our ghosts atop each cupcake.
- One 16 oz container white frosting: Store-bought canned white frosting is surprisingly perfect for creating the flowing, ethereal drapery of your marshmallow ghosts.
- Candy eyeballs: These are the absolutely essential ingredient for giving your ghostly creations expressive, sometimes comical, and always captivating faces.
- Black writing icing: A convenient tube of store-bought black writing icing makes it incredibly easy to add small, precise details like mouths, eyebrows, or other facial features to your ghost faces.
Why We Use Canned Frosting for the Ghost Glaze
You might be curious why we recommend using store-bought canned frosting to cover the marshmallows instead of a homemade glaze. The secret lies in its unique properties when gently heated! When you warm canned frosting in the microwave for just a short period, it transforms into the perfect pourable consistency, acting as a glossy, smooth glaze. It flows beautifully over the marshmallows, creating an even, ghost-like drape that sets quickly and maintains a delicious, sweet flavor. This clever shortcut not only saves valuable time but also guarantees a consistently perfect, opaque, and professional-looking finish for your spooky specters.
How to Make Ghost Cupcakes: A Detailed Step-by-Step Guide
Ready to bring your spooky cupcake vision to life? Follow these comprehensive steps to bake and decorate your very own batch of hauntingly cute ghost cupcakes. Reading through all instructions before you begin will ensure a smooth and enjoyable baking process, leading to the best results!
Step 1: Bake the Rich Chocolate Cupcakes
- Prepare Your Oven and Muffin Pan: Start by preheating your oven to 350ºF (175ºC). Line a standard 12-cup muffin pan with paper cupcake liners. This recipe yields approximately 24 cupcakes, so be prepared to use two muffin pans or bake in two separate batches.
- Melt the Bittersweet Chocolate: Roughly chop the 3 oz bittersweet chocolate baking bar into small, uniform pieces and place them in a microwave-safe bowl. Microwave the chocolate on 50% power for 2 minutes. Stir well, then continue heating in short 15-30 second bursts at 50% power, stirring thoroughly after each interval, until the chocolate is fully melted and beautifully smooth. Set the melted chocolate aside to cool slightly to a warm but not hot temperature while you gather and prepare your other ingredients.
- Combine Dry Ingredients: In a medium-sized mixing bowl, whisk together the 2 ½ cups all-purpose flour, ⅓ cup unsweetened natural cocoa powder, ½ tsp baking soda, 1 tsp baking powder, and 1 tsp salt. Whisk diligently to ensure all dry ingredients are thoroughly combined and evenly distributed. Set this bowl aside for later.
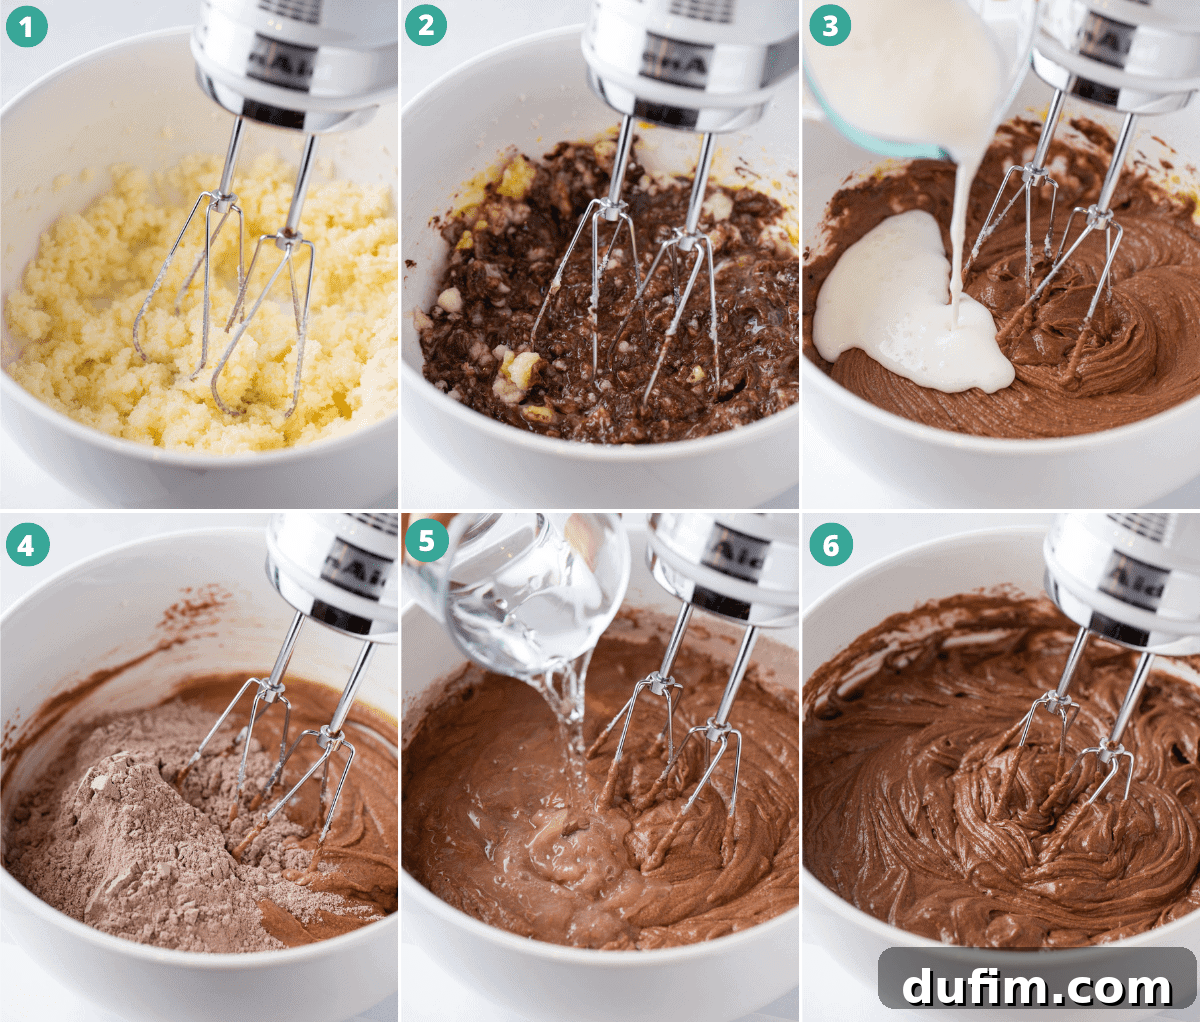
- Mix Wet Ingredients (Creaming Method): In a separate, large mixing bowl, using an electric mixer, cream together the ½ cup room-temperature unsalted butter and 1 ½ cups granulated sugar for approximately 2 minutes. Beat until the mixture is noticeably pale in color and appears light and fluffy. Next, beat in the 2 large eggs, one at a time, incorporating each egg fully before adding the next. Then, add the slightly cooled melted chocolate, beating for an additional 30 seconds until just combined.
- Complete the Batter: Pour half of the 1 cup buttermilk into the wet mixture and beat for about 20 seconds until mostly incorporated. Now, add half of the dry ingredients mixture you prepared earlier, and beat on low speed until just combined. Next, add the remaining buttermilk along with the ½ cup hot tap water, mixing just until the liquids are fully incorporated. Finally, add the remaining dry ingredients and beat on low speed until the batter is smooth and no streaks of flour are visible. Remember, it’s crucial not to overmix the batter, as this can develop gluten and lead to tough cupcakes.
- Bake the Cupcakes to Perfection: Carefully fill each prepared muffin liner halfway full with the chocolate cupcake batter. Transfer the muffin pan (or pans) to your preheated oven and bake for 17 to 19 minutes, or until a wooden toothpick inserted into the center of a cupcake comes out with only a few moist crumbs attached. Avoid overbaking, which can dry out the cupcakes.
- Cool Completely: Once baked, remove the cupcakes from the oven and allow them to cool in the muffin pan for a few minutes before carefully transferring them to a wire rack to cool down completely. This step is absolutely crucial; ensure the cupcakes are entirely cool to the touch before you attempt to frost them, as warm cupcakes will cause your frosting to melt and slide off.
Step 2: Prepare the Velvety Chocolate Buttercream Frosting
- Whip the Butter: In a large mixing bowl, place the 2 cups room-temperature unsalted butter. Using an electric mixer, beat the butter on high speed for a full 3 minutes. This extensive whipping incorporates air into the butter, making it light, pale, and exceptionally fluffy, which is the foundation of a fantastic buttercream.
- Incorporate Dry Ingredients: Sift in the 1 cup unsweetened natural cocoa powder and the first 3 cups of powdered sugar into the whipped butter. Sifting is a vital step here as it helps to break up any potential clumps in these dry ingredients, ensuring your frosting is wonderfully smooth and light – a key factor for easy and beautiful piping. Beat the frosting on low speed until all the dry ingredients are fully incorporated into the butter and the frosting appears thick.
- Add Liquids and Flavor: Now, mix in the 3 tablespoons of heavy whipping cream, 1 tsp vanilla extract, and ½ tsp salt. Continue beating until all these components are thoroughly combined and the frosting takes on a cohesive, creamy texture.
- Adjust Consistency (as needed): Gradually add the additional powdered sugar (you may need 1-2 cups more, depending on your desired sweetness and the firmness of your frosting), mixing on low speed until smooth. If, after adding all the desired sugar, the frosting still feels too thick to pipe easily, beat in an additional tablespoon of heavy cream at a time, mixing until you achieve your preferred creamy, pipeable consistency. Be cautious not to add too much liquid, as this can make the frosting too runny.
- Frost the Cooled Cupcakes: Fit a piping bag with your preferred piping tip (a Wilton 1M star tip is highly recommended for creating beautiful, classic swirls). Fill the piping bag about three-quarters full with the prepared chocolate frosting. Pipe a generous, elegant swirl of frosting onto each completely cooled chocolate cupcake, creating a sturdy and delicious base for your marshmallow ghosts.
Step 3: Assemble Your Spooky Ghost Cupcakes
- Position the Marshmallow Ghost Body: Gently place one large marshmallow upright directly on top of the chocolate frosting swirl on each cupcake. This marshmallow will serve as the primary body for your adorable ghost.
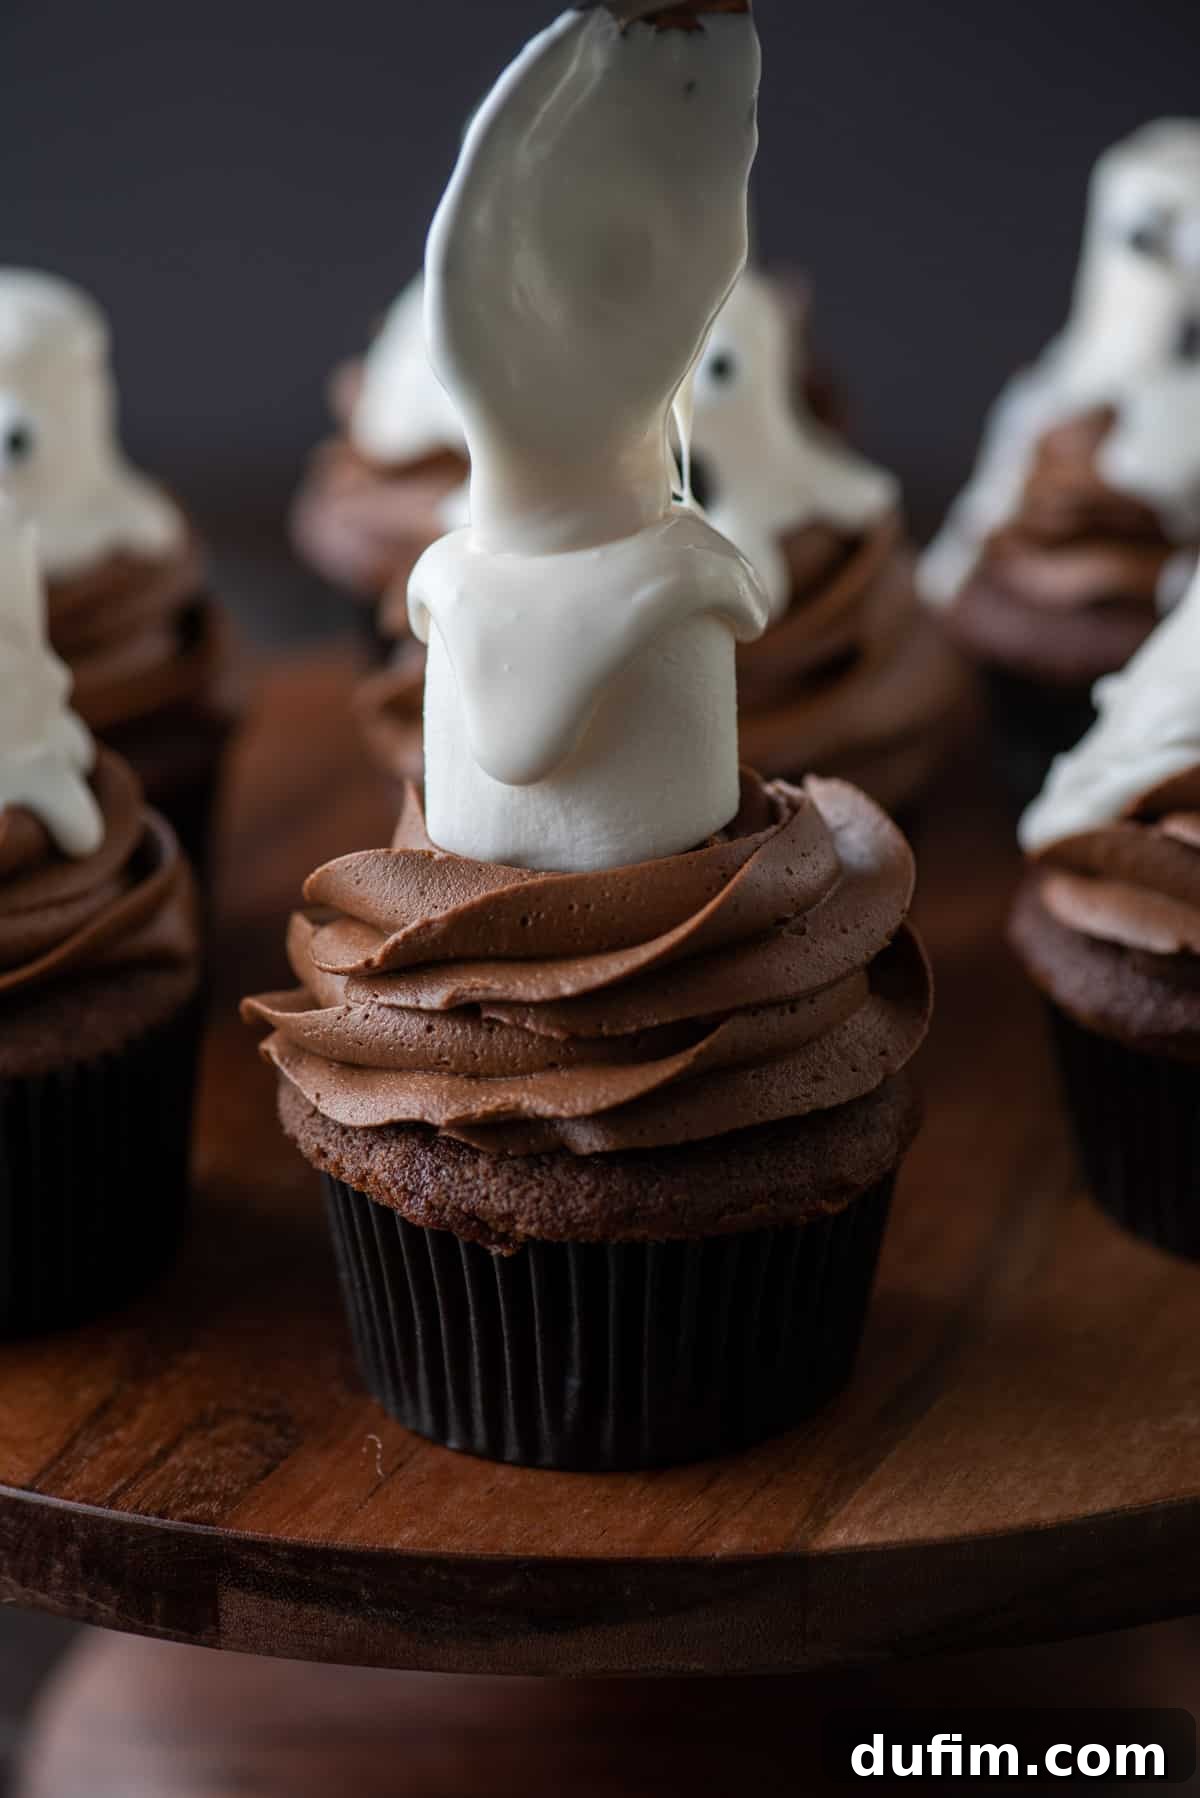
- Prepare the Ghost Glaze: Carefully transfer the entire 16 oz container of store-bought white frosting into a microwave-safe bowl. Microwave the frosting on high power for 15-30 seconds, or until the frosting becomes noticeably runny and pourable, resembling a smooth glaze. Stir it thoroughly to ensure an even consistency. It’s important not to overheat it, as it could separate or become excessively thin.
- Drape the Ghost: Using a spoon, carefully spoon the microwaved white glaze over each marshmallow. Allow the glaze to flow naturally down and completely cover the entire marshmallow, creating a beautiful, flowing, and ethereal ghost-like effect. You might need to gently rotate the cupcake or lightly guide the glaze with the back of the spoon to ensure full coverage.
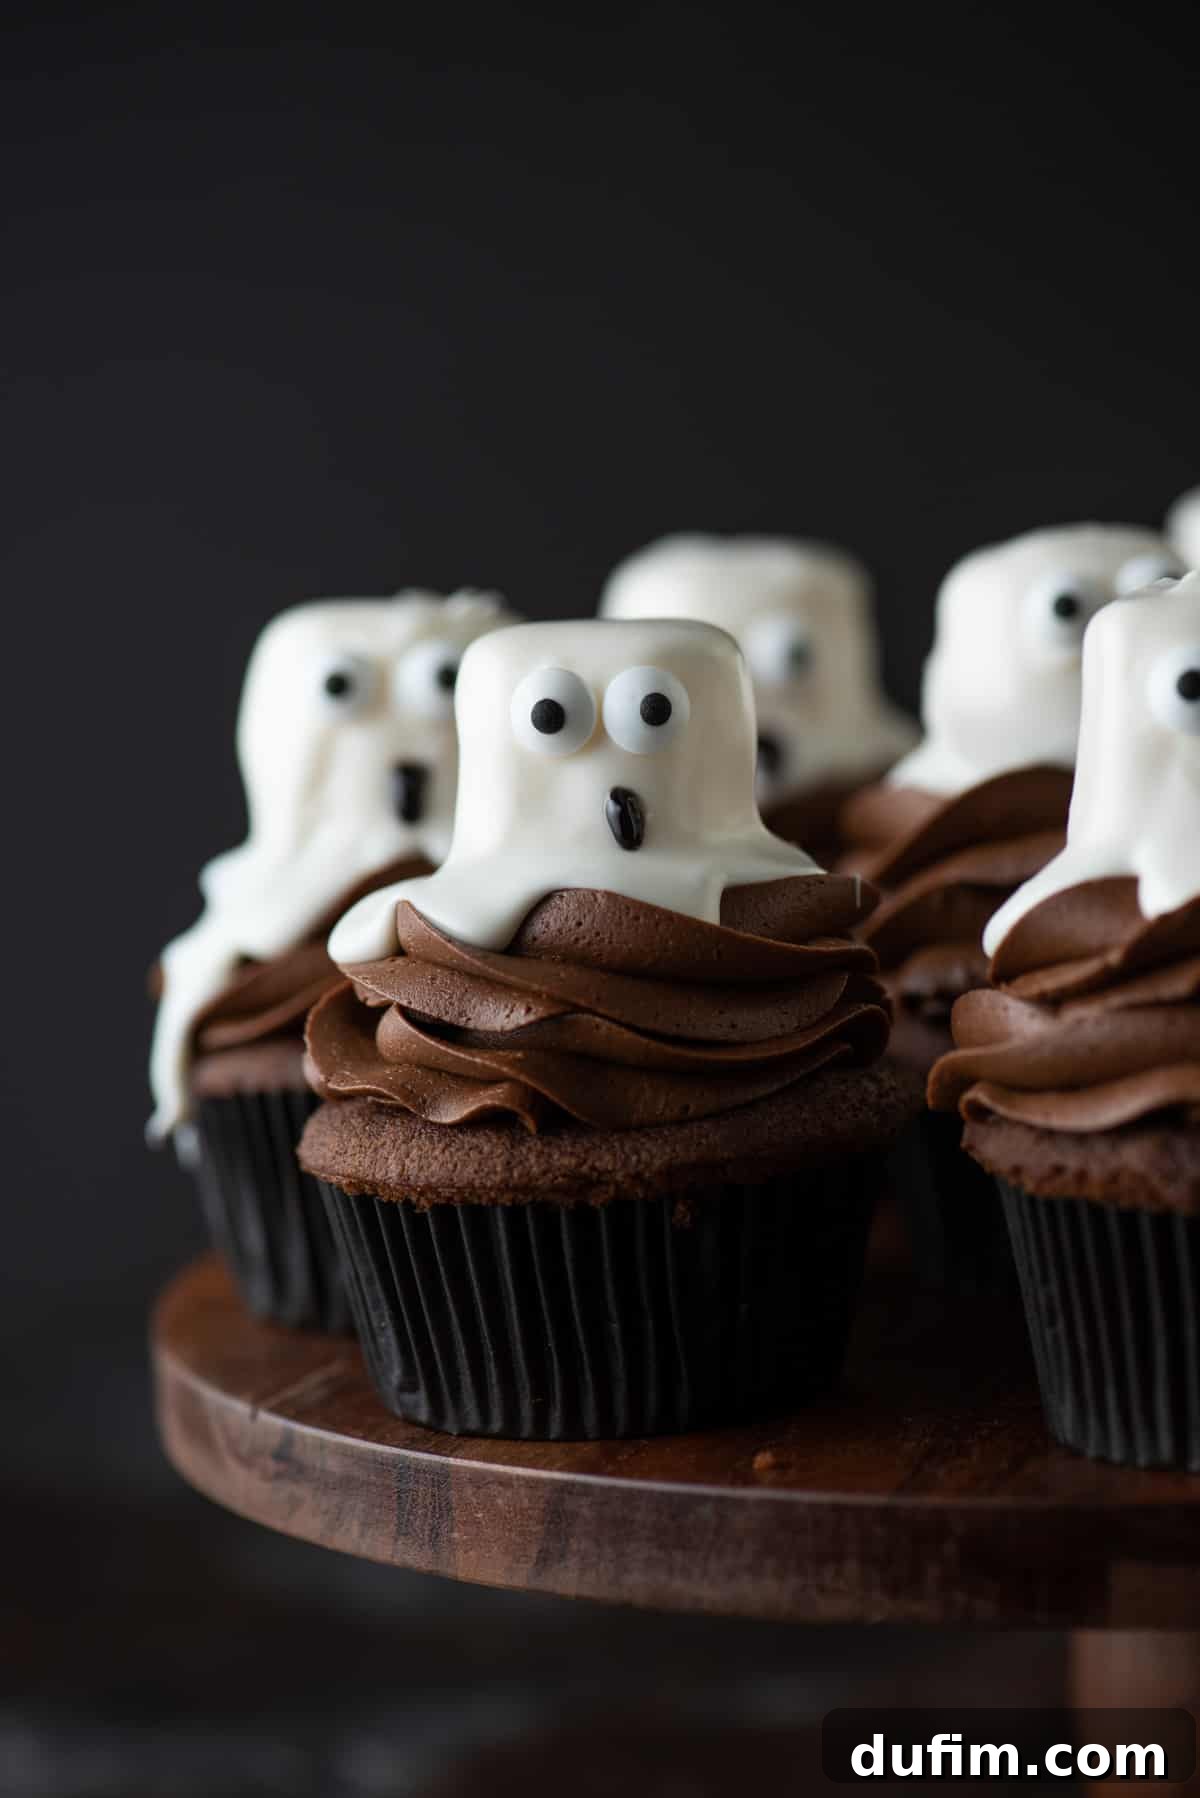
- Add the Expressive Eyes: Wait a few minutes for the white glaze to set and firm up slightly (it usually sets quite quickly). Then, gently press two candy eyeballs onto the upper portion of each marshmallow ghost, giving your specters their distinctive, expressive, and often comical gaze.
- Draw the Mouths: Finally, pick up your tube of black writing icing. Carefully and precisely draw a small, spooky, or silly mouth onto each ghost. You have complete creative freedom here – make them smiling, frowning, screaming, or any other expression that brings your unique ghost characters to life!
Expert Tips for Perfectly Spooky Ghost Cupcakes
Achieving bakery-quality ghost cupcakes that are both delicious and visually stunning is easier than you think with a few helpful insider tips. Beyond the advice already woven into the recipe instructions, here are some additional insights to ensure your Halloween treats turn out perfectly every single time:
- Measure Flour Accurately for Best Texture: This is a fundamental rule in baking! When measuring all-purpose flour, always utilize the “spoon-and-sweep” method. Gently spoon the flour into your dry measuring cup until it overflows, then level it off precisely with a straight edge, like the back of a knife. Avoid scooping flour directly from the container with your measuring cup; this compacts the flour, leading to an excess amount and potentially resulting in dry, dense, or crumbly cupcakes.
- Prevent Overflow by Not Over-filling Cupcake Liners: For cupcakes that bake into beautifully domed tops without unsightly spills, ensure you fill each muffin liner no more than halfway full. Overfilling will almost certainly cause the batter to overflow the sides during baking, creating messy cupcakes that are challenging to frost evenly and neatly.
- Sift Dry Ingredients for the Smoothest Frosting: To achieve the most luxurious, silky-smooth chocolate buttercream frosting, always take the extra step to sift both your cocoa powder and powdered sugar. This crucial process prevents any stubborn clumps from forming, which can make piping difficult, clog your piping tip, and detract from the elegant, polished appearance of your frosted cupcakes.
- Master the Canned Frosting Temperature for Perfect Ghosts: The consistency of your microwaved canned white frosting is paramount for creating those perfect, flowing ghost drapes. If the frosting is too warm and overly thin, it will run right off the marshmallows, leaving a translucent and uneven coat. Conversely, if it’s too cool, it won’t spread at all, resulting in a thick, clumpy mess. Aim for a consistency that is liquid enough to pour smoothly but still thick enough to cling to the marshmallow and create an opaque, even white coat. Achieve this ideal state by microwaving in very short bursts (10-15 seconds) and stirring frequently until it reaches the perfect pourable yet coating consistency.
- Room Temperature Ingredients are Your Best Friends: For both the cupcake batter and the frosting, ensure all cold ingredients, such as butter, eggs, and buttermilk, are brought to true room temperature before you begin mixing. This allows them to emulsify properly with other ingredients, creating a smoother, more uniform batter and a much creamier, more cohesive frosting texture.
- Avoid Overmixing the Cupcake Batter: Once you’ve added the dry ingredients to the wet, mix only until they are *just* combined and no streaks of flour remain. Overmixing is a common baking mistake that develops gluten, which can lead to tough, rubbery, and chewy cupcakes, rather than the desired light and tender ones.
- Quality Ingredients Make a Difference: While this recipe is forgiving, using high-quality ingredients, especially a good bittersweet chocolate baking bar and unsweetened cocoa powder, will significantly enhance the depth and richness of flavor in both your chocolate cupcakes and the frosting.
Storing Your Ghostly Delights
These enchanting Ghost Cupcakes are truly at their best when enjoyed fresh, ideally on the very day they are made. At this point, the chocolate frosting is at its creamiest, and the cupcakes are at their peak moistness. However, should you (miraculously!) have any leftovers, they can be stored to maintain their freshness for a few days.
- Room Temperature Storage: Store the assembled ghost cupcakes in an airtight container at room temperature. They will remain fresh, moist, and delicious for approximately 2 to 3 days. If an airtight container large enough is unavailable, you can loosely cover them on a plate with plastic wrap or aluminum foil to protect them from air exposure.
- Frosting Storage (Leftovers): Any leftover chocolate buttercream frosting can be stored securely in an airtight container in the refrigerator for up to a week. Before you plan to use it again, allow the frosting to come back to room temperature, then give it a quick whip with an electric mixer to restore its original fluffy and creamy texture.
- Freezing Cupcakes (Unfrosted for Make-Ahead): If you wish to prepare the chocolate cupcakes ahead of time, they freeze exceptionally well unfrosted. Once they have completely cooled, wrap each individual cupcake tightly in plastic wrap, then place them in a freezer-safe bag or an airtight container. They can be frozen for up to 2-3 months. When you’re ready to use them, simply thaw the unfrosted cupcakes at room temperature for a few hours before proceeding with frosting and decorating.
Explore More Spooktacular Halloween Treat Ideas
Are you looking for even more creative and delicious ways to infuse your dessert table with the spirit of Halloween? Dive into these other fantastic spooky treat recipes that are sure to be a monstrous hit with everyone at your party!
- Melted Witch Brownies: A wonderfully whimsical and slightly mischievous treat that’s as fun to look at as it is to eat.
- Frankenstein Pretzels: Incredibly easy to make and a fantastic, hands-on activity for all ages, resulting in delightfully spooky snacks.
- Nutter Butter Tombstones: Simple, delicious, and perfectly themed for a graveyard-inspired dessert display, offering a quick and satisfying bite.
- Bubbling Witch’s Cauldron Brownies: A truly impressive and interactive dessert that will wow your guests with its creative presentation and rich flavors.
Tap stars to rate!
Ghost Cupcakes
Beth
25 minutes
19 minutes
30 minutes
24 cupcakes
Rate this Recipe
Print Recipe
Equipment
- Muffin Pan
- Large Glass Mixing Bowl
- Electric Mixer (e.g., KitchenAid 9-Speed)
- Spatula
- Kitchen Scale (recommended for precise flour measurement)
- Piping Bag and Tip (Wilton 1M star tip recommended)
- Microwave-safe bowl
- Wire cooling rack
Ingredients
For the Chocolate Cupcakes
- 2 ½ cups (300g) all-purpose flour
- ⅓ cup (28g) natural unsweetened cocoa powder
- ½ tsp baking soda
- 1 tsp baking powder
- 1 tsp salt
- ½ cup (113g) unsalted butter, room temperature (1 stick)
- 1 ½ cups (297g) granulated sugar
- 3 oz bittersweet chocolate baking bar, melted
- 2 large eggs
- 1 cup (236ml) buttermilk (or homemade substitute)
- ½ cup (118ml) hot tap water
For the Chocolate Frosting
- 2 cups (452g) unsalted butter, room temperature (4 sticks)
- 1 cup (84g) natural unsweetened cocoa powder, sifted
- 4-5 cups (454-567g) powdered sugar, sifted
- 3 Tbsp heavy whipping cream (plus 1-2 Tbsp more if needed for consistency)
- 1 tsp vanilla extract
- ½ tsp salt
For Ghost Decoration
- 24 large marshmallows
- 16 oz canned white frosting, store-bought
- Candy eyeballs
- Black writing icing, store-bought
Instructions
Chocolate Cupcakes
- Preheat the oven to 350º F (175ºC). Line a muffin pan with muffin liners.
- Roughly chop the 3 oz bittersweet chocolate baking bar. Place in a microwave-safe bowl and microwave for 2 minutes on 50% power. Stir, then repeat heating in 15-30 second intervals until melted and smooth. Set aside to cool slightly.
- In a mixing bowl, combine the 2 ½ cups all-purpose flour, ⅓ cup natural unsweetened cocoa powder, ½ tsp baking soda, 1 tsp baking powder, and 1 tsp salt. Whisk well and set aside.
- In a separate large mixing bowl, beat the ½ cup room-temperature unsalted butter and 1 ½ cups granulated sugar with an electric mixer for 2 minutes, until pale and fluffy. Add in the 2 large eggs and the cooled melted chocolate, then beat again for 30 seconds until combined.
- Add half of the 1 cup buttermilk, beat for about 20 seconds. Then, add half of the dry ingredients mixture and beat until just incorporated. Next, add the remaining buttermilk plus the ½ cup hot tap water, beating just until the liquid is mixed in. Finally, add the remaining dry ingredients and beat on low speed until combined and smooth. Do not overmix.
- Fill the muffin liners ½ full. Bake for 17-19 minutes at 350º F (175ºC) or until a toothpick inserted into the center comes out with a few moist crumbs.
- Allow the cupcakes to cool completely on a wire rack before adding any frosting.
Chocolate Frosting
- In a mixing bowl, beat the 2 cups room-temperature unsalted butter on high speed for 3 minutes until light and fluffy.
- Sift in the 1 cup natural unsweetened cocoa powder and 3 cups of the powdered sugar. Beat the frosting on low speed until it’s thick and all dry ingredients are combined.
- Mix in 3 Tbsp heavy whipping cream, 1 tsp vanilla extract, and ½ tsp salt until smooth.
- Add in the additional powdered sugar (1-2 cups) as needed, mixing on low speed until you reach your desired consistency. If the frosting is too thick, beat in an additional tablespoon of heavy cream at a time until perfect.
Assemble the Ghost Cupcakes
- Fit a piping bag with a piping tip (e.g., Wilton 1M). Pipe the chocolate frosting onto each cooled cupcake in a swirl pattern.
- Place one large marshmallow on top of the frosting swirl of each cupcake.
- Transfer the 16 oz canned white frosting to a microwave-safe bowl. Microwave for 15-30 seconds, or until the icing is runny and pourable like a glaze. Stir well.
- Spoon the melted white icing over each marshmallow, letting it naturally fall and cover the entire marshmallow to create the ghost shape.
- Wait a few minutes for the white icing glaze to firm up. Then, press two candy eyeballs onto the upper part of each marshmallow ghost.
- Use the black writing icing to carefully draw a mouth on each ghost, giving them unique spooky expressions.
Video Tutorial
Watch the full Ghost Cupcakes video tutorial above for a visual guide to perfect your spooky treats!
Notes
This recipe yields approximately 24 delightful ghost cupcakes.
Crucial Tip for Canned Frosting Glaze Temperature: The temperature of your microwaved canned white frosting is vital for achieving the perfect ghost effect. If it’s too warm and thin, it will run off the marshmallows. If it’s too cool, it won’t spread evenly. Aim for a consistency that is liquid but still thick enough to coat the marshmallow opaque. Adjust microwave time in small increments (10-15 seconds) and stir between each heating session.
Nutrition Information (Per Cupcake)
Calories: 494kcal
Carbohydrates: 66g
Protein: 4g
Fat: 26g
Saturated Fat: 15g
Polyunsaturated Fat: 2g
Monounsaturated Fat: 7g
Trans Fat: 1g
Cholesterol: 70mg
Sodium: 200mg
Potassium: 141mg
Fiber: 2g
Sugar: 50g
Vitamin A: 657IU
Vitamin C: 0.01mg
Calcium: 42mg
Iron: 2mg
Nutrition Disclosure
All nutritional values provided are approximate and intended as a courtesy to the reader. Please note that altering ingredients or quantities in this recipe will consequently change the estimated nutritional calculations.
Loved baking these spooky treats?
We would be absolutely thrilled to hear about your experience! Please consider rating and leaving a comment below to share your thoughts and creations with our Ghost Cupcakes recipe. Your feedback is invaluable!