
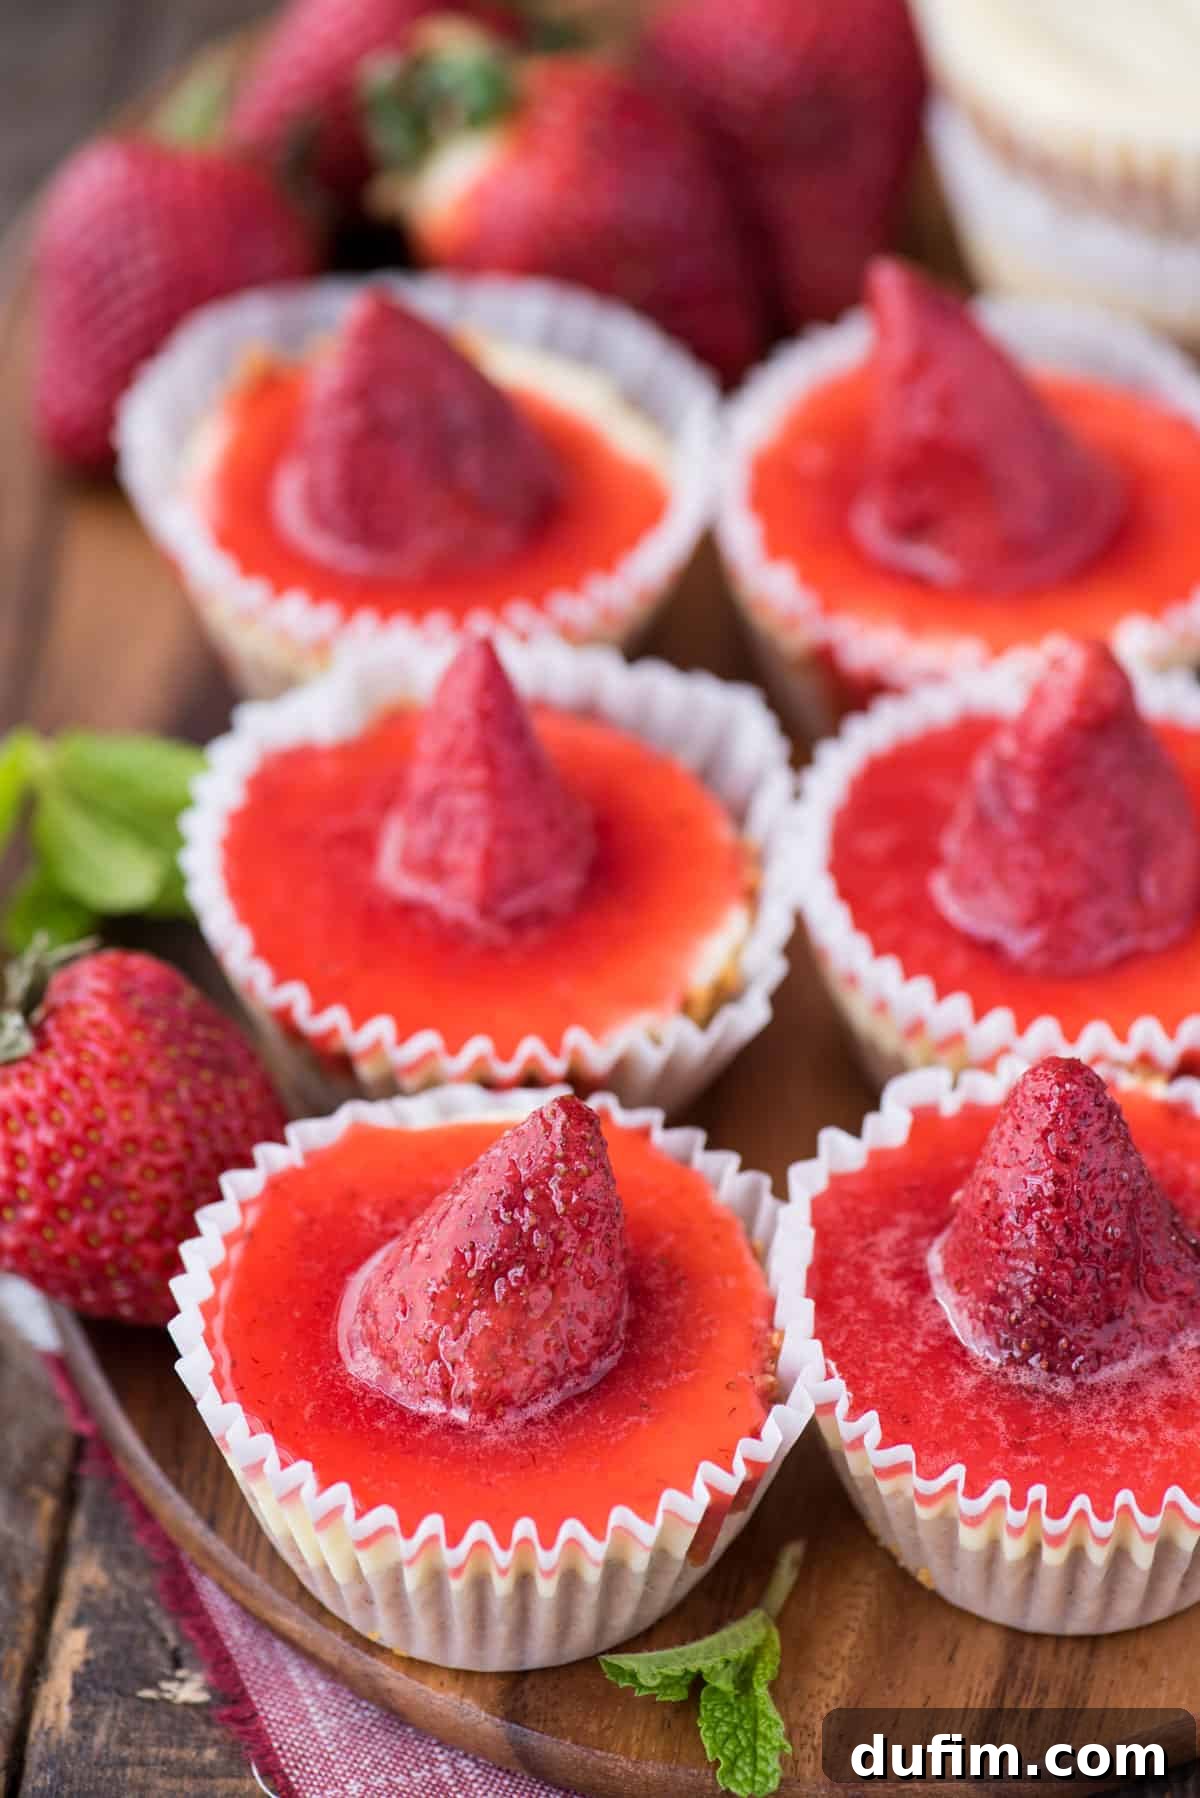
Easy Mini Strawberry Cheesecakes: Your Perfect Muffin Pan Dessert
Indulge in the irresistible charm of these **Easy Mini Strawberry Cheesecakes**, baked to perfection in a convenient muffin pan. This recipe simplifies the art of cheesecake making, offering a delightful individual dessert that’s both elegant and incredibly simple to prepare. Featuring a classic, buttery 2-ingredient graham cracker crust, a rich and velvety plain cheesecake filling, and crowned with a vibrant homemade strawberry topping, these mini treats are sure to impress without the fuss. Forget the complexities of traditional cheesecakes; our muffin pan method ensures a smooth, crack-free finish every time, making it the ideal recipe for bakers of all skill levels.
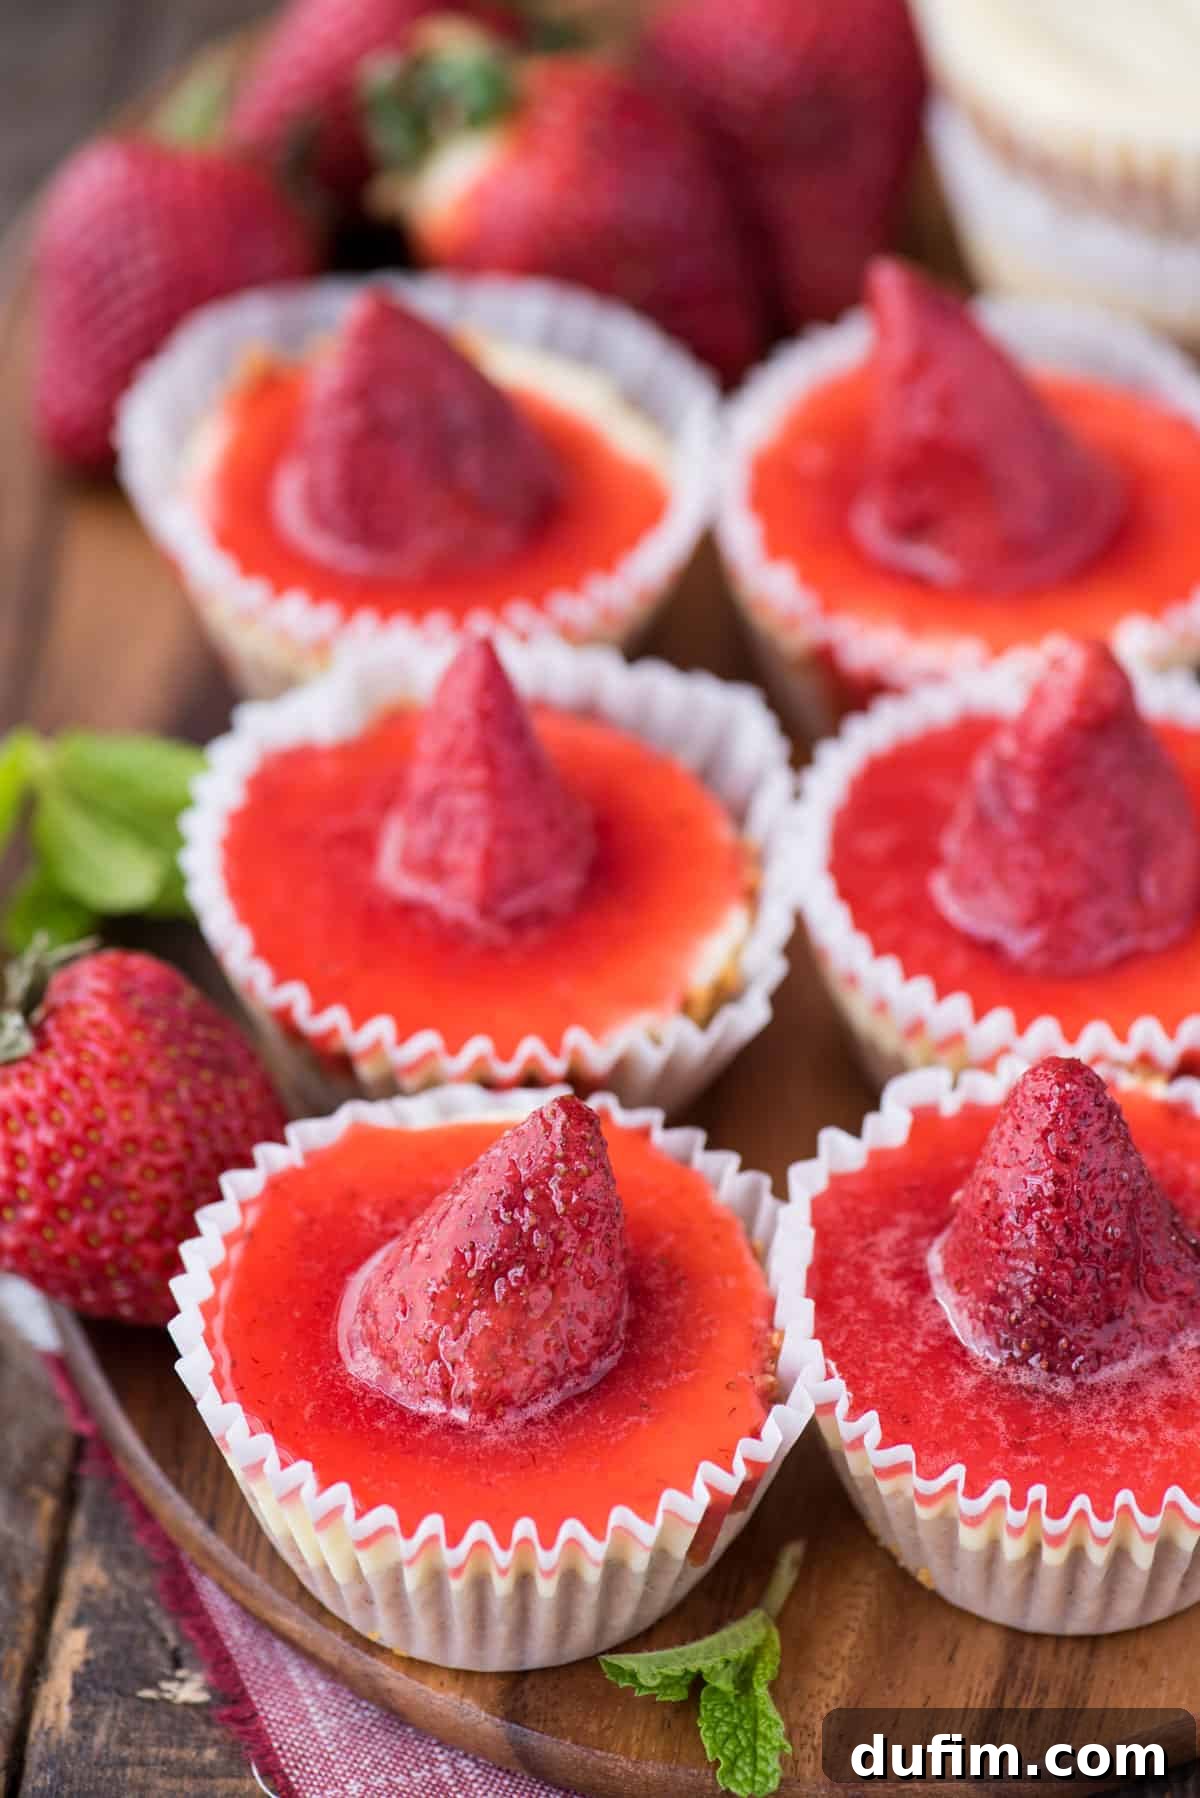
“I’ve made these delicious mini cheesecakes several times, and they are always so easy to prepare and incredibly tasty!”
-Jane
Why You’ll Love These Mini Strawberry Cheesecakes
There’s so much to adore about baking cheesecakes in miniature form, especially when they’re bursting with fresh strawberry flavor:
- Effortless Elegance: These individual cheesecakes look incredibly impressive but require minimal effort, perfect for dazzling guests or treating yourself.
- No Water Bath Required: Unlike traditional large cheesecakes, our mini version bakes beautifully without the need for a fussy water bath, saving you time and stress.
- Faster Baking Time: Mini cheesecakes bake significantly quicker than their full-sized counterparts, meaning you can enjoy your delicious dessert sooner.
- Perfect Portions: Each cheesecake is perfectly portioned, making serving a breeze and helping with portion control – if you can stop at just one!
- Versatile & Customizable: While strawberry is a classic, these mini cheesecakes serve as an excellent base for various toppings and flavors.
- Simple Ingredients: With a short list of accessible ingredients, you can whip up these delectable treats anytime.
Essential Tools for Making Mini Cheesecakes
One of the best aspects of making individual cheesecakes in a muffin pan is the minimal special equipment required. You likely already have most of these kitchen essentials on hand, making this recipe even more accessible:
- Standard Size Muffin Pan: This is the star of the show! A 12-cup muffin pan is perfect for creating perfectly sized individual cheesecakes. A non-stick pan will make removal even easier.
- Paper Muffin/Cupcake Liners: These are crucial for easy removal of your mini cheesecakes from the pan, preventing sticking and ensuring a clean presentation.
- Mixing Bowls: You’ll need at least two – one for the crust mixture and another for the creamy cheesecake batter.
- Electric Mixer: A hand mixer or stand mixer is highly recommended for thoroughly combining the cream cheese and other filling ingredients, ensuring a smooth, lump-free batter.
- Measuring Cups and Spoons: Accurate measurements are key in baking, so have your full set ready.
- Spatula or Rubber Scraper: Essential for combining ingredients, scraping down the sides of the bowl, and transferring batter.
- Small Pot: For simmering and creating the homemade strawberry sauce.
- Measuring Cup (1/3 cup or similar): Ideal for pressing down the graham cracker crust firmly into each muffin liner.
Making individual cheesecakes in a muffin pan offers several advantages over a traditional large cheesecake. It’s a wonderful way to simplify the process, eliminating the need for complex techniques like a water bath, which can be intimidating for many bakers. Plus, these mini cheesecakes bake much faster, allowing you to enjoy your dessert in less time while still achieving that signature creamy texture.
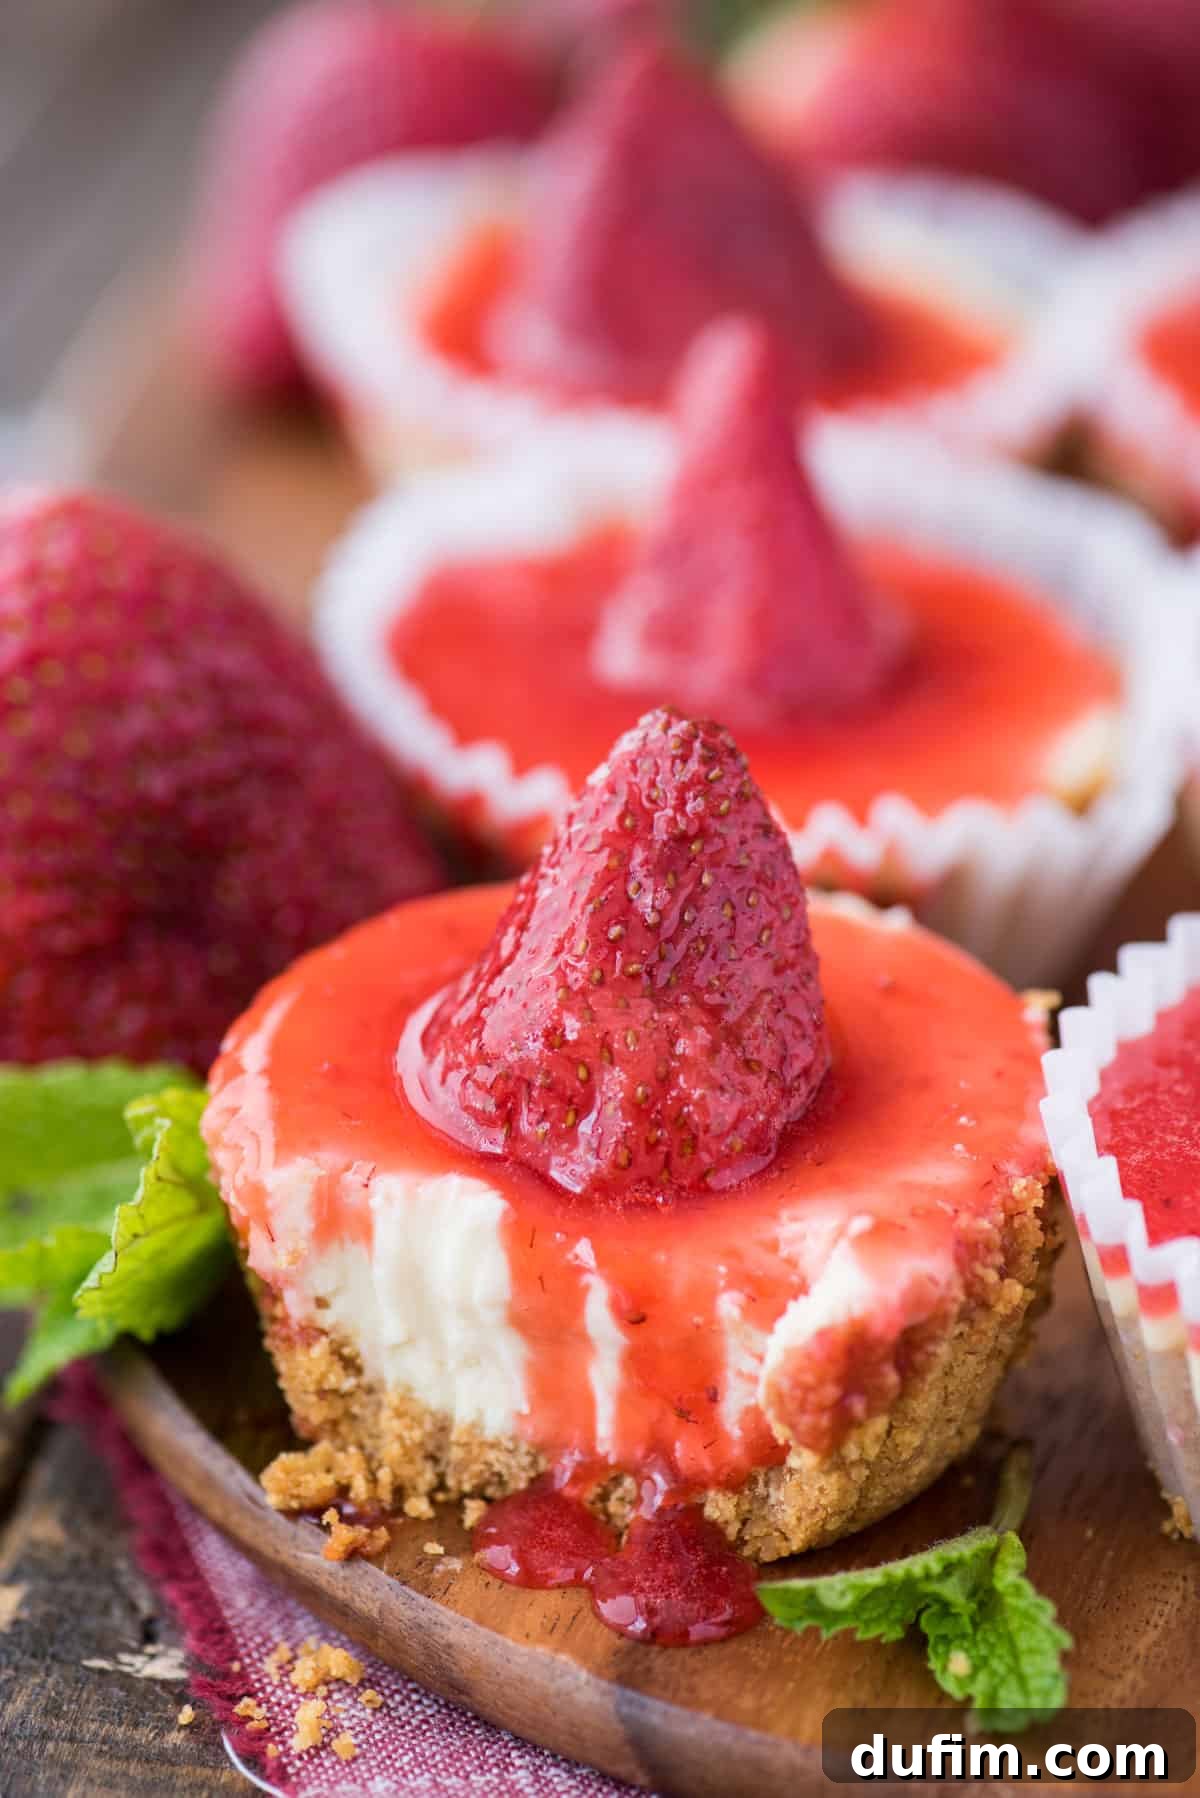
Key Ingredients for Your Mini Strawberry Cheesecakes
Our simplified mini cheesecake recipe with its luscious strawberry sauce relies on a handful of high-quality ingredients to deliver exceptional flavor and texture. For the best results, pay attention to these details:
- Cream Cheese: You’ll need two 8 oz packages (16 oz total). It’s crucial to use full-fat cream cheese, softened to room temperature. Low-fat varieties contain more water, which can affect the cheesecake’s texture, leading to a less creamy and potentially crumbly result. Room temperature cream cheese blends smoothly, preventing lumps.
- Granulated Sugar: This fine sugar plays a dual role, balancing the tangy notes of the cream cheese and contributing to the cheesecake’s overall sweetness. It also aids in achieving a smooth batter when properly incorporated.
- Vanilla Extract: A teaspoon of good quality vanilla extract is a flavor powerhouse. It doesn’t just add its own sweet, aromatic notes but also enhances the classic, rich flavor profile of the cheesecake.
- Large Eggs: Eggs are the binding agent in cheesecake, providing structure and contributing to its smooth, custardy texture. They should be the last ingredient mixed into the batter. To prevent air bubbles and potential cracking, beat them in one at a time, just until the yolk breaks and they are barely incorporated. Over-mixing the eggs is the most common culprit for a sunken or cracked cheesecake.
Graham Cracker Crust Ingredients
- Graham Cracker Crumbs: You can either crush whole graham crackers yourself for a fresher taste or use pre-made graham cracker crumbs for ultimate convenience. About 1 ½ cups are needed.
- Unsalted Butter (Melted): Just two tablespoons of melted butter bind the crumbs together, creating a sturdy and flavorful crust. Using unsalted butter allows you to control the overall saltiness of your dessert.
Homemade Strawberry Sauce Ingredients
- Fresh Strawberries: A combination of 1 cup chopped strawberries and 12 whole strawberries forms the base of this vibrant sauce. The chopped berries will break down to create the sauce’s body, while the whole berries (optional) can be used for garnish.
- Granulated Sugar: Sweetens the strawberries and helps create a syrupy consistency.
- Vanilla Extract: Complements the natural sweetness of the strawberries.
- Fresh Lemon Juice: A small squeeze of lemon brightens the flavors and helps to enhance the fruit’s natural tartness, preventing the sauce from being overly sweet.
Step-by-Step Guide to Making Mini Strawberry Cheesecakes
Creating these delightful mini cheesecakes is a straightforward process when you follow these simple steps:
- Prepare Your Muffin Pan: Begin by preheating your oven to 350°F (175°C). Line a standard 12-cup muffin pan with paper cupcake liners. This step is essential for easy removal and cleanup.
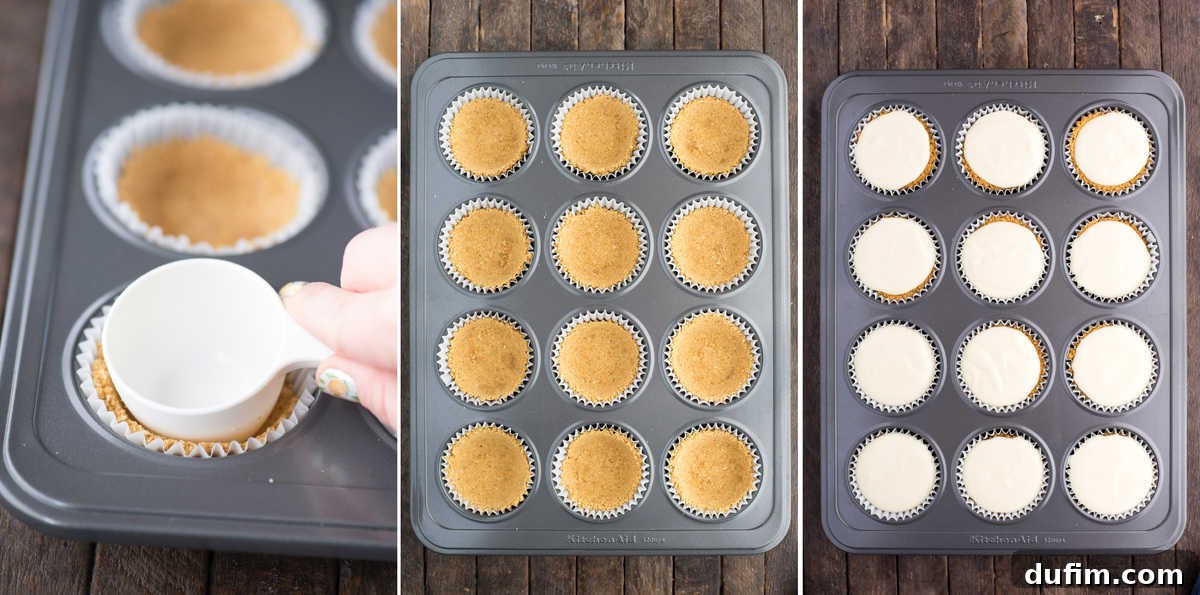
- Make the Graham Cracker Crust: In a medium mixing bowl, combine the graham cracker crumbs and melted unsalted butter. Stir with a spatula until the mixture resembles coarse, wet sand.
- Form the Crusts: Spoon about 1 to 2 tablespoons of the graham cracker mixture into the bottom of each lined muffin cup. Using the bottom of a clean measuring cup (a 1/3 cup measure works perfectly), firmly press the crumbs down to form an even, compact crust.
- Pre-bake the Crusts: Place the muffin pan in the preheated oven and bake the crusts for 5 minutes. This light pre-baking helps to set the crust, preventing it from becoming soggy once the cheesecake batter is added. Remove from the oven and allow to cool slightly while you prepare the filling.
- Prepare the Cheesecake Batter: In a large mixing bowl, using an electric mixer, beat the softened full-fat cream cheese until it’s perfectly smooth and creamy, about 1-2 minutes.
- Add Sugar and Vanilla: Gradually beat in the granulated sugar until well combined and the mixture is smooth. Then, mix in the vanilla extract.
- Incorporate the Eggs: Add the eggs one at a time, mixing only until the yolk breaks and the egg is just incorporated into the batter. Be careful not to overmix at this stage, as excessive beating can introduce too much air, leading to cracks or a sunken center during cooling.
- Fill the Muffin Cups: Divide the smooth cheesecake batter evenly among the prepared muffin liners, placing a little more than 2 tablespoons into each cup. The cups should be about two-thirds full.
- Bake the Cheesecakes: Return the muffin pan to the oven and bake for 16-18 minutes. The cheesecakes are done when the edges are set and slightly puffy, but the very center still has a slight jiggle when you gently shake the pan. This indicates a perfectly creamy cheesecake interior.
- Cool and Chill: Once baked, remove the muffin pan from the oven and let the mini cheesecakes cool completely to room temperature on a wire rack. Then, loosely cover the pan with plastic wrap and refrigerate for at least 4 hours, or preferably overnight. Chilling is crucial for the cheesecakes to set properly and develop their full flavor and firm texture.
- Prepare Strawberry Topping & Serve: While the cheesecakes chill, prepare your homemade strawberry sauce. Once both are ready, top each chilled mini cheesecake with a generous spoonful of the strawberry sauce and, if desired, a whole fresh strawberry. Serve and enjoy!
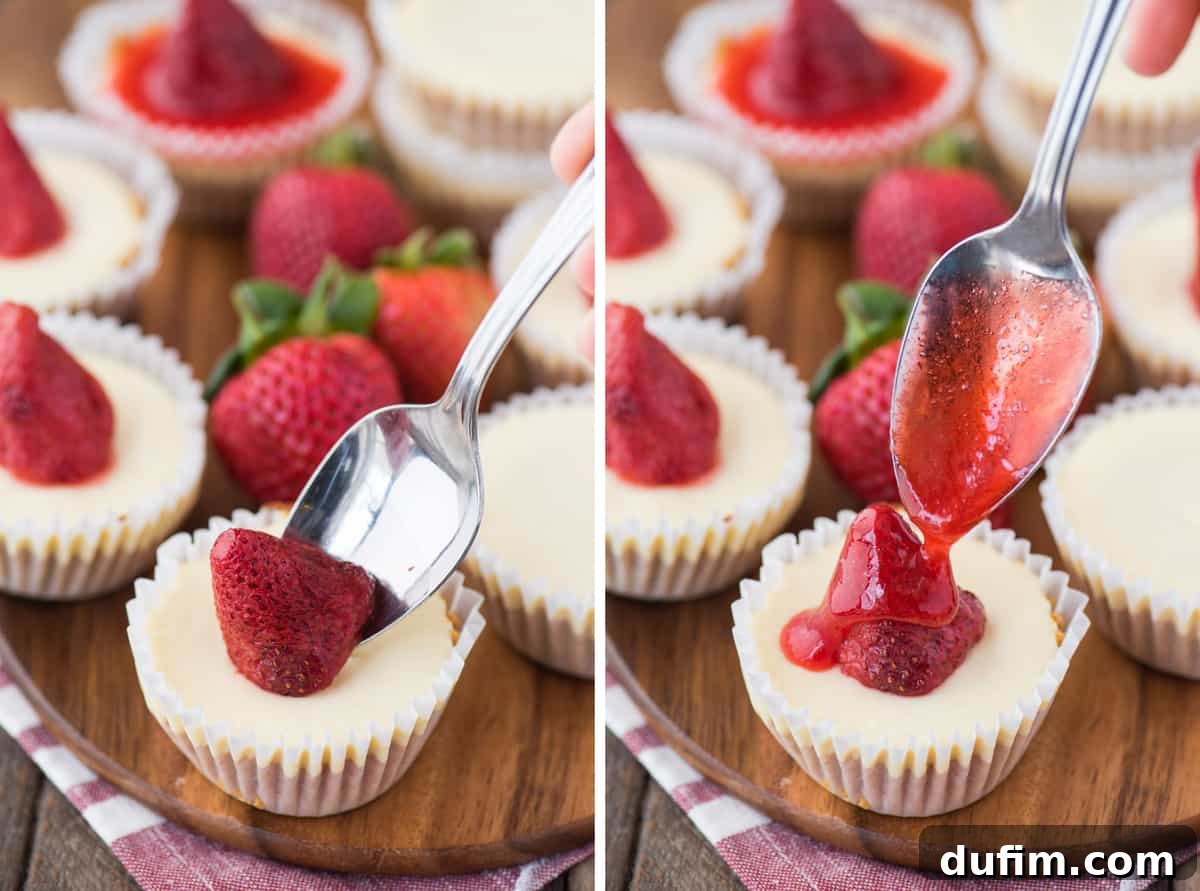
Crafting Your Homemade Strawberry Cheesecake Topping
The vibrant, sweet-tart strawberry topping truly elevates these mini cheesecakes. Making your own strawberry sauce from scratch is surprisingly easy and far superior to store-bought options. While we have a dedicated post with a video on homemade strawberry sauce, here’s a quick overview tailored for these mini cheesecakes:
In a small to medium-sized pot, combine your chopped strawberries, whole strawberries (if using for cooking), granulated sugar, vanilla extract, and a squeeze of fresh lemon juice. Heat this mixture over medium heat, stirring occasionally. The strawberries will begin to soften and release their juices, creating a bubbly, frothy mixture. Bring it to a gentle boil and let it simmer for about 7 minutes, stirring occasionally, allowing the flavors to meld and the berries to break down.
Continue to cook the sauce for another 5-7 minutes, or until it has thickened to your desired consistency. Remember, it will thicken further as it cools. Once the sauce is ready, transfer it to a container and refrigerate it. Chilling the sauce allows it to set and become even more flavorful. It can be prepared up to 2 days in advance, making your dessert assembly even quicker.
A note on whole strawberries: If you prefer to garnish your mini cheesecakes with a fresh, uncooked whole strawberry for a brighter presentation, simply omit the whole strawberries from the sauce-making process and use only the chopped ones. You can then add fresh whole strawberries to the top of each cheesecake just before serving, as seen in many of our photos.
Total Time Breakdown for Your Mini Cheesecakes
While the actual hands-on time for these mini cheesecakes is quite short, planning for the chilling period is key to their success. Here’s an estimated timeline:
- Crust Prep: Approximately 5 minutes to combine ingredients and press into liners.
- Crust Pre-bake: 5 minutes in the oven.
- Cheesecake Batter Prep: About 5 minutes to beat ingredients together.
- Baking Time: 16-18 minutes for the mini cheesecakes to bake.
- Cooling & Chilling: This is the longest, yet most passive, part. Allow at least 4 hours for refrigeration, but ideally, refrigerate them overnight. The wait is truly the hardest part, but absolutely essential for the perfect set and flavor!
Remember, the strawberry sauce can be prepared well in advance – up to 2 days – and stored in the fridge, saving you valuable time on dessert day.
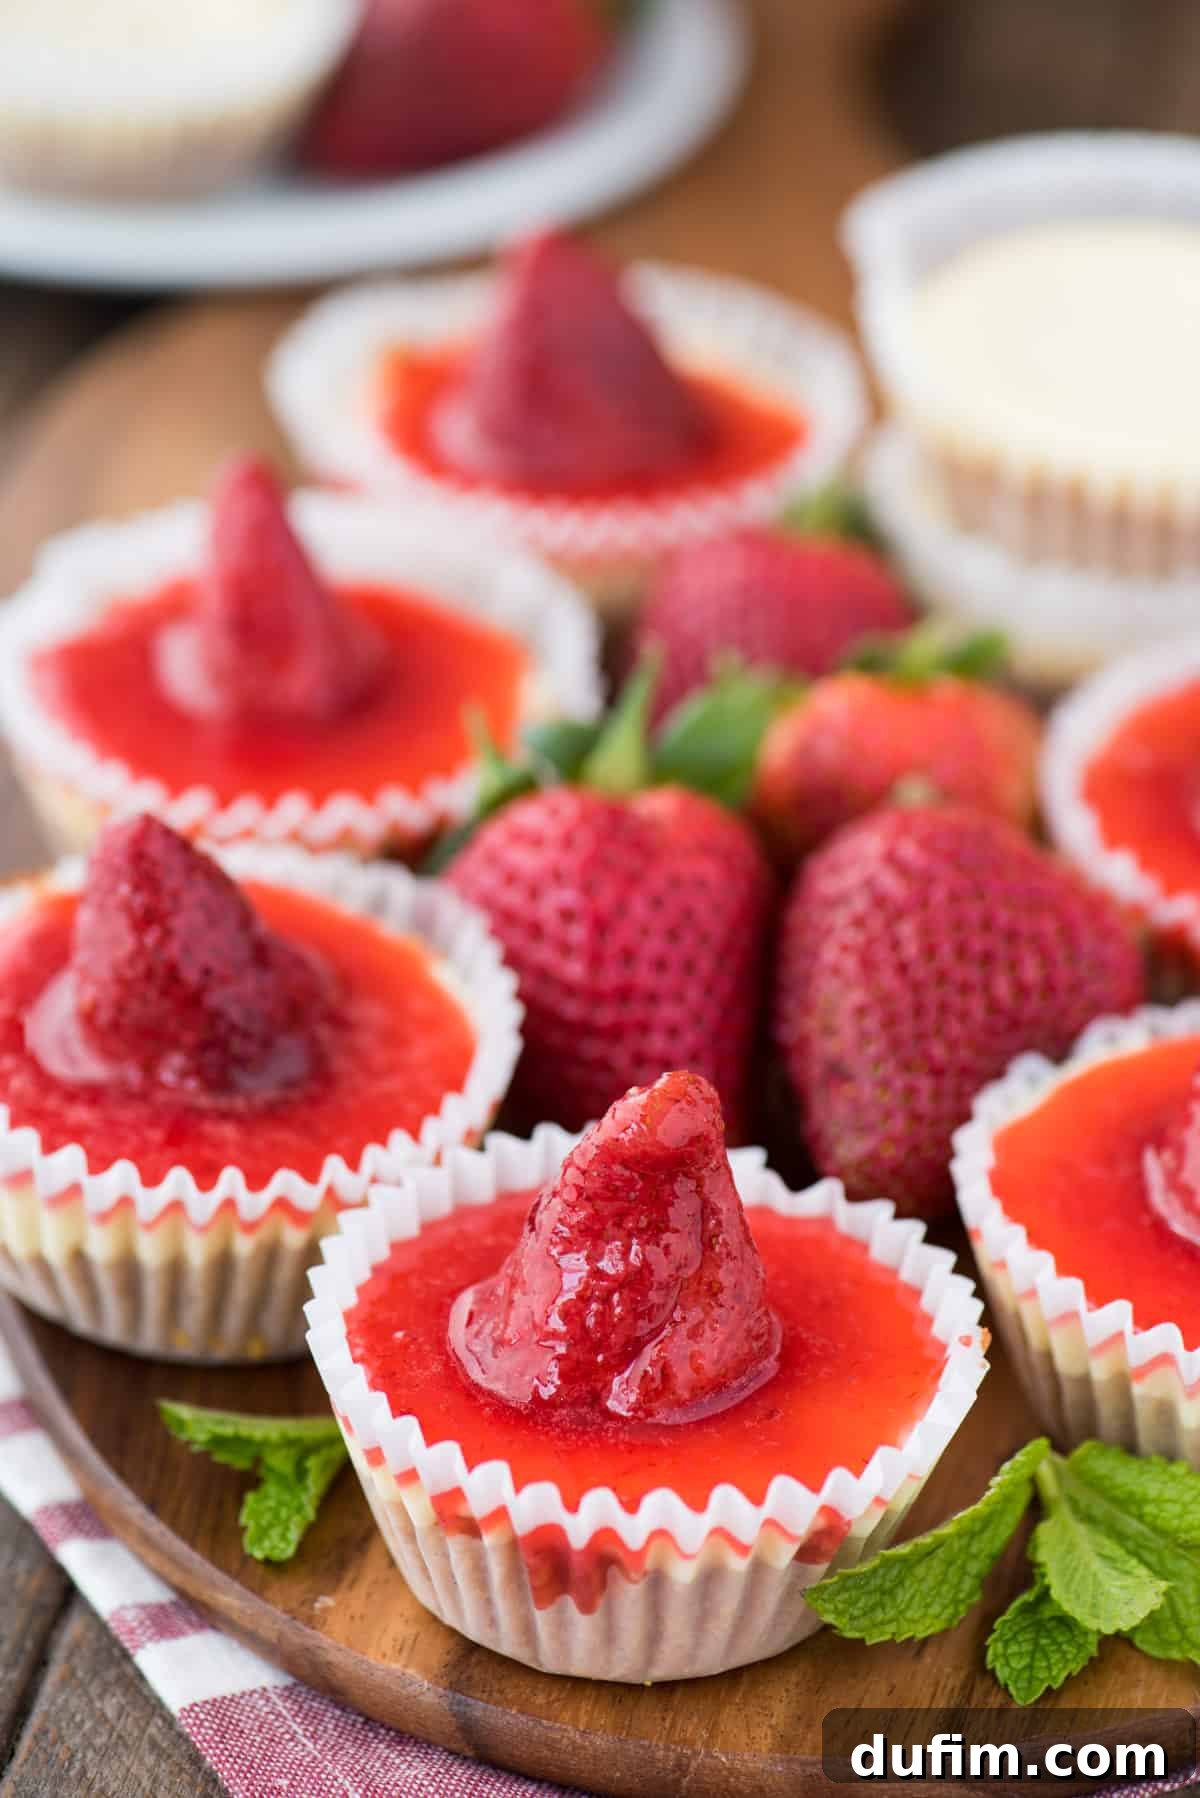
How to Know When Your Mini Cheesecakes Are Perfectly Baked
The key to a perfectly creamy cheesecake is knowing when to pull it from the oven. For mini cheesecakes, the “jiggle test” is your best friend. Gently shake the muffin pan; the centers of the cheesecakes should still have a slight, barely perceptible jiggle. The edges, however, should appear set and slightly more puffy or airy. This indicates that the outer portions are cooked, while the center is just shy of being fully set, allowing it to firm up beautifully as it cools and chills. Avoid over-baking, as this can lead to a dry texture or cracks.
Proper Cooling for Flawless Mini Cheesecakes
Cooling is a critical step that impacts the final texture and appearance of your mini cheesecakes. Once they are done baking, remove the muffin pan from the oven and place it on a wire rack on your counter. Allow the cheesecakes to cool gradually to room temperature. This slow cooling prevents drastic temperature changes that can cause cracking.
After they have reached room temperature, loosely cover the muffin pan with plastic wrap to prevent them from drying out or absorbing refrigerator odors. Then, transfer the pan to the fridge for thorough chilling. For the best results, chill them overnight. This extended refrigeration period allows the cheesecakes to fully set, firm up, and develop their deep, rich flavor profile, resulting in that signature dense yet creamy cheesecake texture everyone loves.
Troubleshooting: Why Did My Mini Cheesecakes Sink?
One of the most common issues bakers face with cheesecakes, mini or full-sized, is sinking or cracking. The primary culprit for air bubbles, which lead to sinking in the middle as the cheesecakes cool, is overbeating the eggs. Eggs provide structure, but too much air incorporated into the batter at this stage will cause the cheesecake to puff up dramatically in the oven and then deflate, resulting in a concave center.
To prevent this, follow these tips:
- Gentle Egg Incorporation: Add eggs one at a time to your cheesecake batter. Mix them in just until the yolk breaks and they are barely combined. Stop the mixer as soon as the egg is no longer visible.
- Minimize Mixing: Once all the eggs are added, beat the batter for only 30-60 seconds more, ensuring everything is incorporated without introducing excessive air.
- Room Temperature Ingredients: Ensure your cream cheese and eggs are at room temperature. This helps them combine smoothly and quickly, reducing the need for prolonged mixing.
By being mindful of how you incorporate the eggs, you can significantly reduce the chances of your beautiful mini cheesecakes sinking.
Pro Tips for Making Your Best Mini Cheesecakes
Achieving bakery-quality mini cheesecakes at home is easy with a few simple tricks:
- Room Temperature Cream Cheese: This cannot be stressed enough! Softened cream cheese whips up smoothly and incorporates evenly into the batter, preventing lumps and ensuring a silky-smooth texture. Take it out of the fridge at least an hour before you plan to bake.
- Don’t Overmix the Eggs: As discussed, eggs are delicate. Mix them in one at a time, just until the yolk breaks and is barely incorporated. Over-mixing introduces too much air, which can cause cracking or sinking.
- Pre-made Graham Cracker Crumbs: For ultimate convenience, buy a box of pre-crushed graham cracker crumbs. They’re usually found near the baking aisle or alongside pre-made pie crusts at your grocery store. This saves you the step of crushing whole crackers, though crushing your own can yield a slightly fresher flavor.
- Thorough Chilling is Non-Negotiable: Patience is a virtue in cheesecake making! The chilling period is crucial for the cheesecakes to set properly, firm up, and allow the flavors to deepen. Resist the urge to serve them warm or only lightly chilled; they truly shine after several hours or, even better, overnight in the refrigerator.
- Full-Fat Cream Cheese: Always opt for full-fat cream cheese. It provides the rich, creamy texture and superior flavor that makes cheesecake so decadent.
- Don’t Skip the Lemon Squeeze: A small amount of fresh lemon juice in the strawberry sauce brightens the flavors beautifully and prevents the sauce from being overly sweet.
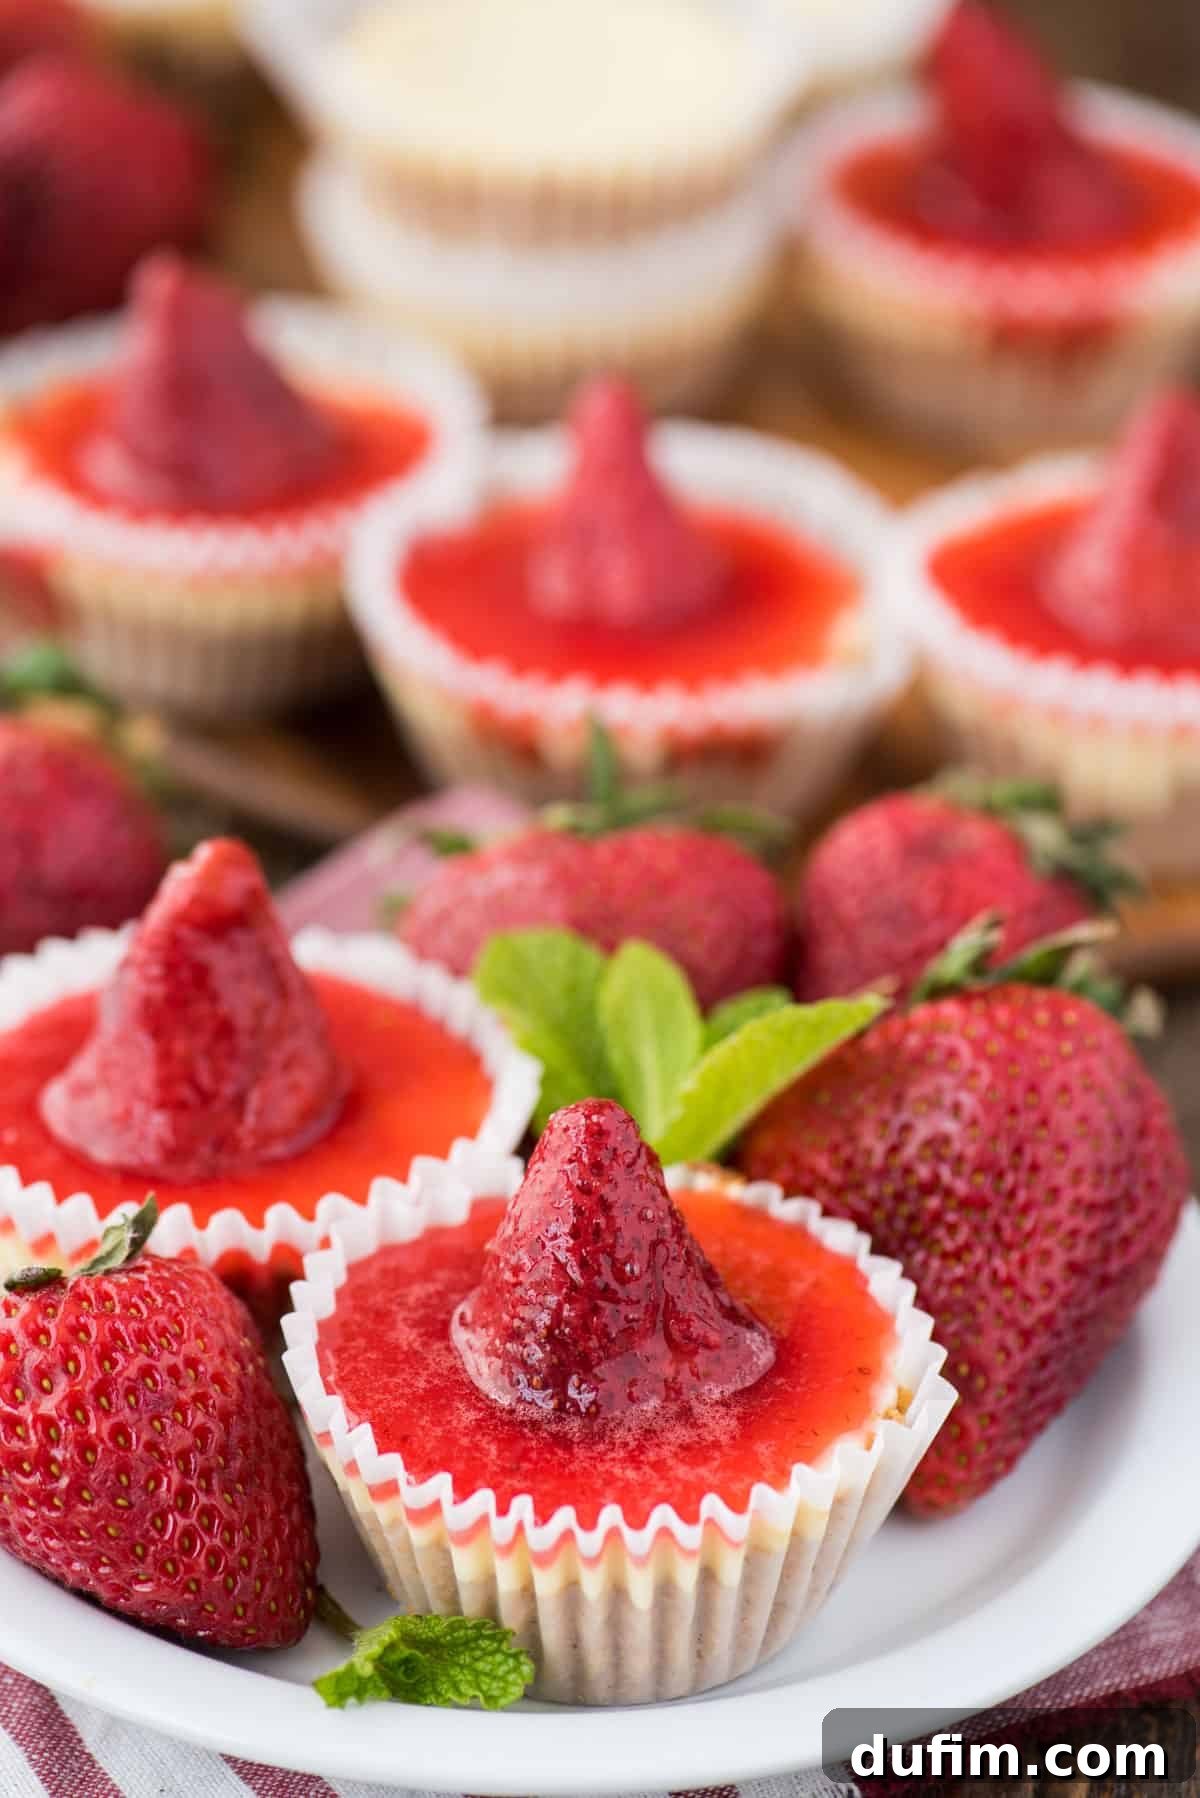
How to Freeze Mini Cheesecakes for Future Enjoyment
Mini cheesecakes are fantastic for making ahead and freezing, ensuring you always have a delightful treat on hand for unexpected guests or a quick dessert craving. Here’s how to freeze them properly:
- Cool Completely: Ensure your baked mini cheesecakes are completely cooled to room temperature, then thoroughly chilled in the refrigerator. This is critical before freezing to prevent ice crystals.
- Freeze Uncovered: Place the chilled mini cheesecakes (without any garnishes or toppings) on a baking sheet, ensuring they don’t touch each other. Place the baking sheet in the freezer until the cheesecakes are solid, usually a few hours. This step prevents them from sticking together.
- Wrap Individually: Once frozen solid, wrap each individual cheesecake tightly in aluminum foil, followed by a layer of plastic wrap. This double layer helps protect against freezer burn.
- Store in an Airtight Container: Place the individually wrapped cheesecakes into a freezer-safe ziplock bag or an airtight container. They can be frozen for up to 4 months.
- Thaw Gently: To thaw, simply transfer the desired number of frozen cheesecakes to the refrigerator overnight.
- Add Toppings Before Serving: Once thawed, add your fresh strawberry topping or any other desired garnishes just before serving for the best presentation and texture.
Variations and Serving Suggestions
While these Mini Strawberry Cheesecakes are a classic favorite, don’t hesitate to experiment! Here are a few ideas:
Flavor Variations:
- Other Fruit Toppings: Swap strawberries for blueberries, raspberries, cherries, or a mixed berry compote.
- Chocolate Drizzle: Add a drizzle of melted dark or white chocolate over the strawberry topping for an extra touch of decadence.
- Lemon Zest: Incorporate lemon zest into the cheesecake batter for a brighter, more zesty flavor profile.
- Oreo Crust: For chocolate lovers, use crushed Oreo cookies mixed with melted butter for the crust instead of graham crackers.
- Espresso Twist: A hint of espresso powder in the filling can add a sophisticated depth of flavor.
Serving Suggestions:
- Party Perfect: Arrange them on a platter for birthday parties, potlucks, or holiday gatherings. Their individual size makes them easy to serve and enjoy.
- Brunch Treat: A lighter alternative to traditional brunch desserts, pairing beautifully with coffee or mimosas.
- Romantic Dessert: Serve two on a small plate with a sprinkle of powdered sugar for a lovely shared dessert.
- Ice Cream Pairing: Serve alongside a small scoop of vanilla bean ice cream or whipped cream for an indulgent experience.
More Delightful Cheesecake Recipes to Explore
If you’ve fallen in love with these mini cheesecakes, you’ll be thrilled to discover other fantastic cheesecake recipes perfect for any occasion. From more individual treats to no-bake wonders, there’s a cheesecake for every taste:
- Mini Coffee Cheesecakes
- Mini Chocolate Cheesecakes
- Mini Oreo Cheesecakes
- No-Bake Cheesecake
- Espresso Cheesecake
Average Rating: 4.46 from 11 ratings
Tap stars to rate!
Mini Strawberry Cheesecakes
Beth
15 minutes
20 minutes
4 hours
4 hours 35 minutes
12 mini cheesecakes
Pin | Rate | Print Recipe
Equipment
-
KitchenAid 9-Speed Mixer
-
My favorite spatula!
-
Muffin Pan
Ingredients
Crust
- 1 ½ cups (170g) graham cracker crumbs
- 2 Tbsp (29g) unsalted butter, melted
Cheesecake
- 16 oz (452g) cream cheese, softened to room temperature
- ½ cup (99g) sugar
- 1 tsp vanilla extract
- 2 large eggs
Strawberry Sauce
- 1 cup (167g) chopped strawberries, equal to about half 1 lb carton
- 12 whole strawberries, tops cut off (optional, for sauce)
- ⅓ cup (66g) sugar
- 1 tsp vanilla extract
- Squeeze of fresh lemon juice
Instructions
Crust
-
Preheat the oven to 350º F (175°C).
-
Line a regular sized muffin pan with 12 paper muffin liners.
-
In a mixing bowl, combine the graham cracker crumbs and melted butter with a spatula until it resembles coarse sand.1 1/2 cups (170g) graham cracker crumbs,
2 Tbsp (29g) unsalted butter, melted -
Put 1-2 tbsp of crumbs in each muffin cup.
-
Use a 1/3 cup measuring cup (or similar flat-bottomed object) to press the crumbs down firmly into the pan.
-
Bake the crust for 5 minutes. Remove the pan from the oven and allow it to cool while prepping the cheesecake filling.
Cheesecake Filling
-
In a mixing bowl, beat the softened cream cheese with an electric mixer until smooth and creamy, about 1-2 minutes.16 oz (452g) cream cheese, softened to room temperature
-
Beat in the sugar and vanilla extract until smooth and well combined.1/2 cup (99g) sugar,
1 tsp vanilla extract -
Add the eggs one at a time, beating just until the yolk breaks and the egg is barely incorporated. Do not overmix.2 large eggs
-
Place a little more than 2 Tbsp of cheesecake batter into each muffin cup.
-
Bake for 16-18 minutes, or until the center of the cheesecake is only slightly jiggly when you gently shake the pan. The edges should appear set.
-
Allow the cheesecakes to cool completely to room temperature in the muffin pan. Then, cover loosely with plastic wrap and place them in the fridge for at least 4 hours to chill thoroughly before serving. For best results, chill overnight.
Strawberry Sauce
-
In a small-to-medium sized pot over medium heat, combine the chopped strawberries, whole strawberries (if using for cooking), sugar, vanilla extract, and a squeeze of fresh lemon juice.1 cup (167g) chopped strawberries,
12 whole strawberries,
1/3 cup (66g) sugar,
1 tsp vanilla extract,
Squeeze of fresh lemon -
Bring the mixture to a boil, stirring occasionally. It will bubble and foam as the strawberries release their juices. Allow to boil gently for 7 minutes, stirring periodically.
-
Continue to cook until the sauce thickens to your desired consistency, typically about 7 additional minutes.
-
Transfer the sauce to a clean container and store in the fridge to cool completely. Serve when ready.
-
NOTE: If you prefer to top each cheesecake with a fresh, uncooked whole strawberry, simply do not include the whole strawberries when making the sauce; only use the chopped ones. You can then add a fresh whole strawberry as garnish just before serving.
Assemble the Cheesecake
-
Once the mini cheesecakes are thoroughly chilled, remove them from the muffin pan. Top each cheesecake with a spoonful of the cooled strawberry sauce and, if desired, a fresh whole strawberry. Serve immediately.
Notes
Nutrition
Carbohydrates: 25g |
Protein: 4g |
Fat: 17g |
Saturated Fat: 9g |
Polyunsaturated Fat: 1g |
Monounsaturated Fat: 4g |
Trans Fat: 1g |
Cholesterol: 77mg |
Sodium: 203mg |
Potassium: 121mg |
Fiber: 1g |
Sugar: 19g |
Vitamin A: 612IU |
Vitamin C: 14mg |
Calcium: 54mg |
Iron: 1mg
Nutrition Disclosure
All nutritional values are approximate and provided to the reader as a courtesy. Changing ingredients and/or quantities will alter the estimated nutritional calculations.
We hope you enjoy making and sharing these delightful Mini Strawberry Cheesecakes. They are a true testament to how simple ingredients and smart baking techniques can result in an absolutely show-stopping dessert. Happy baking!