
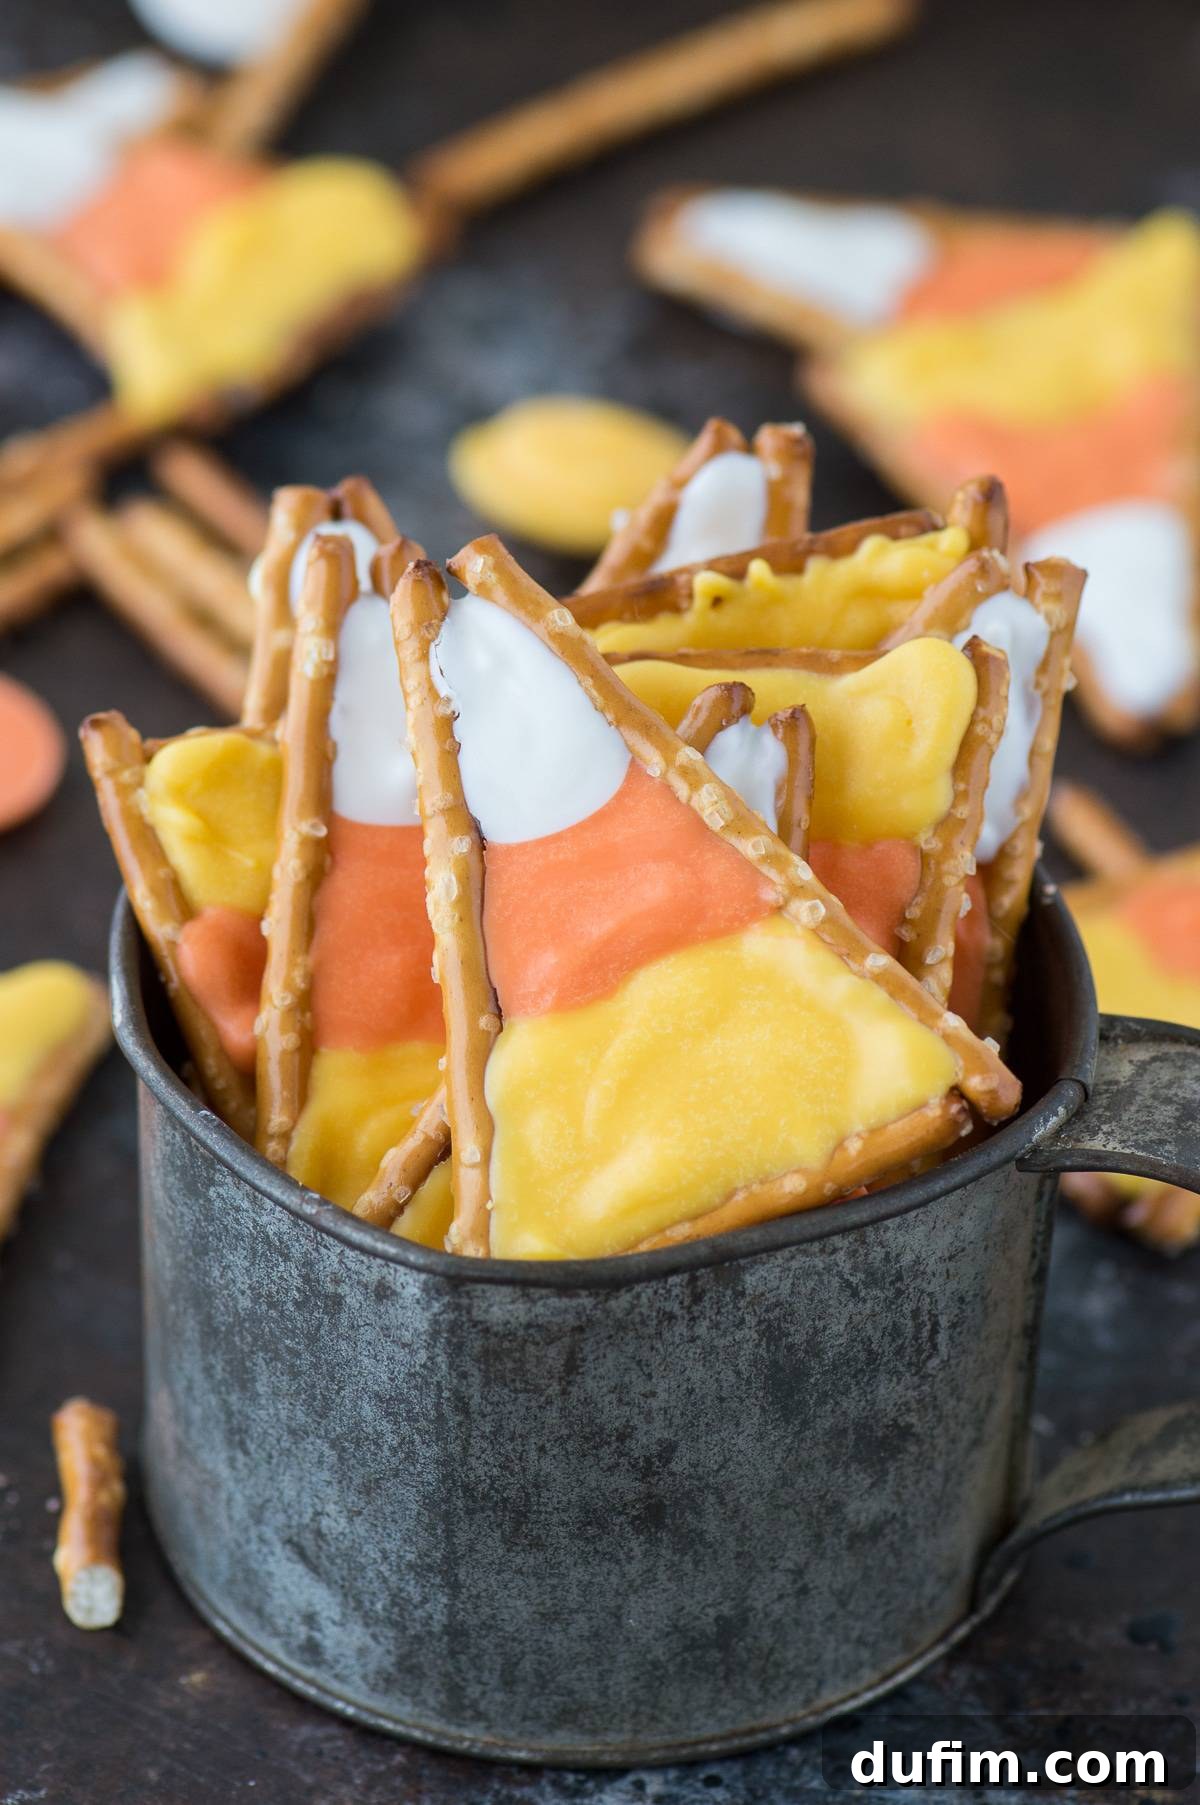
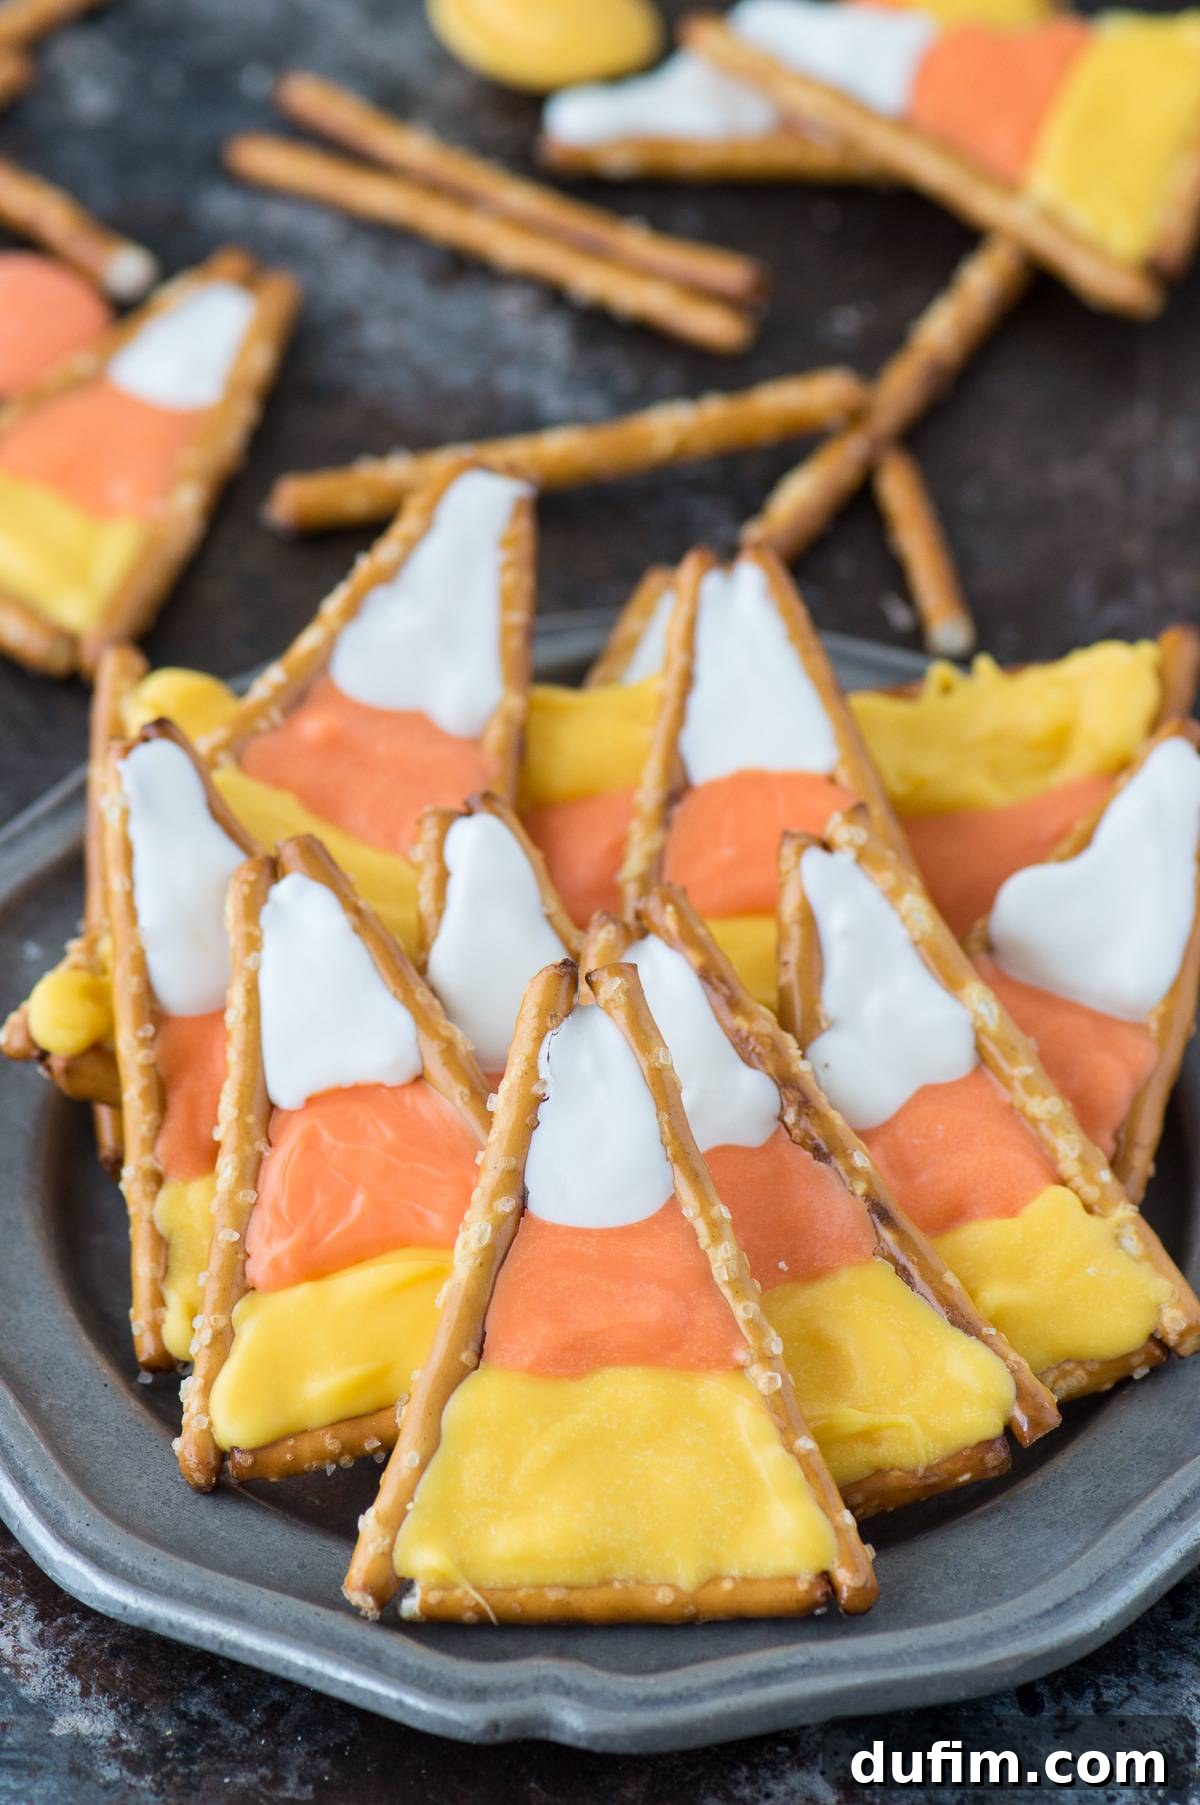
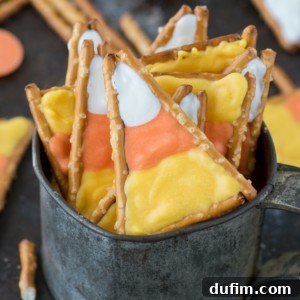
Super easy to make candy corn pretzels! This is a fun Halloween treat that kids could make using pretzels and colored candy melts.
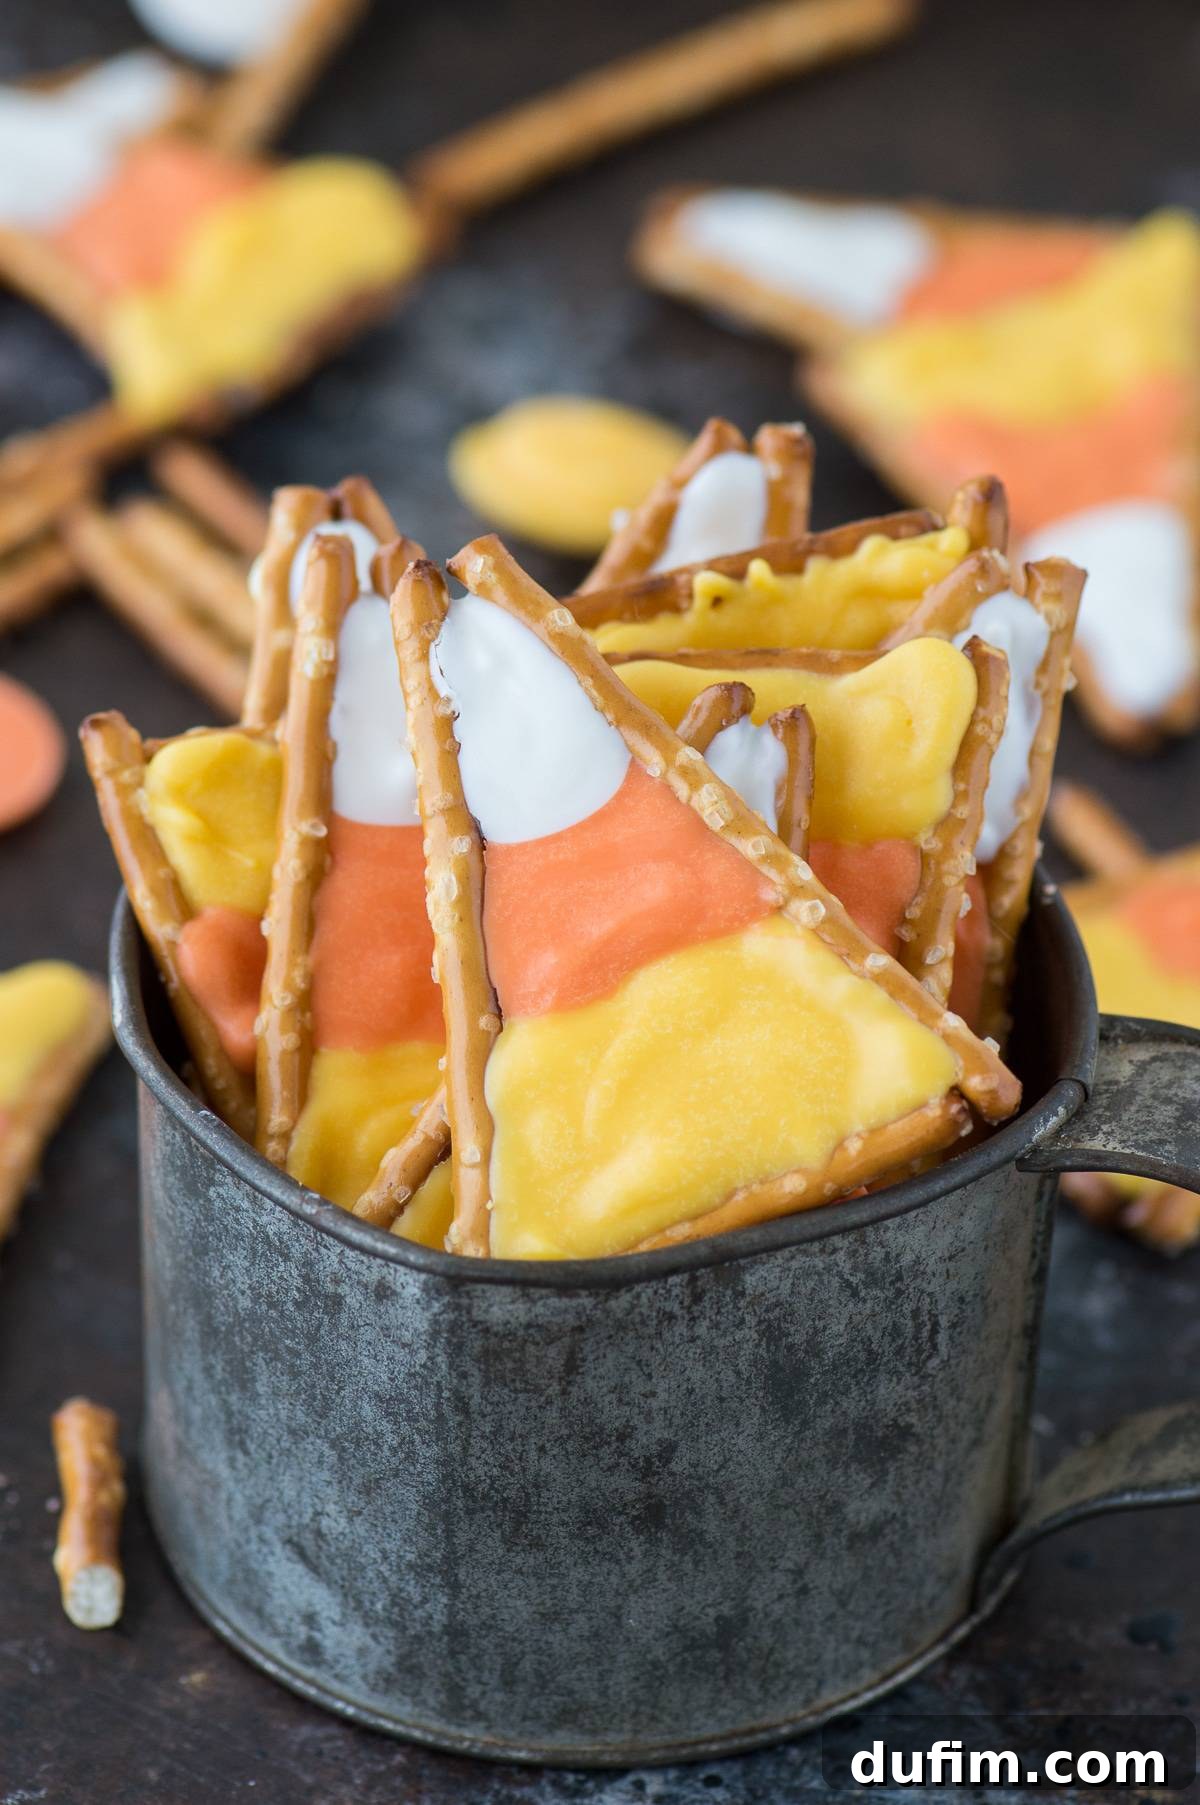
Delightful Candy Corn Pretzels: Your Ultimate Guide to an Easy Halloween Treat!
Halloween has always held a truly special place in my heart, a sentiment that has only grown stronger over the years. My affection for this holiday isn’t rooted in the promise of free candy or the traditional black and orange color scheme, but rather in the incredible variety and boundless creativity it offers. Halloween transforms into a wonderful canvas for every imagination, allowing for a diverse range of celebrations.
While some find joy in the truly spooky – elaborate haunted houses, chilling skull decorations, intricate skeletons, and eerie tombstone props – that particular style isn’t quite my preference. Instead, I gravitate towards the charming and cute side of Halloween. My ideal decorations feature playful door mats, perfectly plump and whimsical pumpkins, and the friendlier, less ghoulish renditions of characters like Frankenstein. It’s this lighter, more heartwarming aspect of Halloween that truly captures my spirit.
Bringing Childhood Memories to Life with Homemade Treats
My fondest Halloween memories often revolve around the annual elementary school party. Beyond the excitement of donning our elaborate costumes, the absolute highlight was always the activity of decorating pumpkin sugar cookies. I vividly recall this tradition happening every single year – it was such pure fun, being able to lavish as much frosting and as many sprinkles as our hearts desired onto our individual cookies. After meticulously decorating mine, I never wanted to eat it right away. I wanted to save it, to admire my creation, letting the festive spirit linger a little longer. There’s an undeniable magic in crafting cute treats that truly elevates the holiday experience, making it feel extra special and memorable.
This enduring love for adorable, festive edibles naturally leads my mind to a flurry of creative Halloween treat ideas each year. This season, we’re diving into a delightful project that is so remarkably simple, it feels less like a traditional recipe and more like a fun “how-to” guide that anyone can master: **Candy Corn Pretzels!** These charming little creations perfectly capture the iconic, tri-color look of classic candy corn, combined with the satisfying salty crunch of pretzels, all encased in sweet, vibrant candy melts. They are incredibly easy to make, require absolutely no baking, and are fantastic for involving kids in the kitchen, making them an ideal activity for family fun or a classroom party.
Why These Candy Corn Pretzels Are a Must-Make This Halloween
If you’re searching for a quick, impressive, and utterly delicious treat that embodies the playful spirit of Halloween without demanding advanced baking expertise, these Candy Corn Pretzels are undoubtedly your answer. They offer a delightful combination of ease, visual appeal, and taste, making them perfect for any Halloween gathering or a cozy night in. Here’s why they’re an absolute must-make:
- Effortlessly Simple: With just a handful of readily available ingredients and straightforward steps, anyone can master these treats. They are perfect for culinary beginners, busy parents, or even young children looking to get involved in the kitchen (with appropriate adult supervision, of course).
- A No-Bake Wonder: Forget preheating ovens, intricate frosting techniques, or complex baking schedules. This recipe entirely skips the baking process, focusing purely on the enjoyable stages of melting and decorating. This saves you valuable time and effort, making it ideal for last-minute party prep or a spontaneous crafting session.
- Visually Stunning and Instantly Festive: The classic, iconic candy corn colors – bright yellow, cheerful orange, and crisp white – create a striking visual that is instantly recognizable and perfectly festive. These treats are guaranteed to be a vibrant addition to any party platter, a delightful surprise in school lunchboxes, or charming favors in treat bags.
- Infinitely Customizable Fun: While we’re embracing the beloved candy corn theme for this recipe, the underlying concept is wonderfully adaptable. You can easily switch out the colors and pretzel arrangements to suit virtually any holiday or special occasion. Imagine red and green for Christmas, pastels for Easter, or even school colors for a graduation party!
- The Ultimate Kid-Friendly Activity: This project is a fantastic opportunity for little hands to get creative! Kids can assist with arranging the pretzels, carefully filling in the different color sections, and even adding their own personal touch with sprinkles or edible glitter before the candy sets. It’s a wonderful way to foster creativity and create lasting family memories.
So, let’s gather our minimal supplies and prepare to transform simple pretzel sticks into a batch of enchanting, edible Halloween magic!
Essential Ingredients for Your Candy Corn Pretzels
Crafting these delightful Halloween treats requires only a few key ingredients, most of which you can easily procure from your local grocery store or a specialty craft supply store. The secret to achieving a smooth, professional-looking finish and truly vibrant colors lies in using high-quality candy melts.
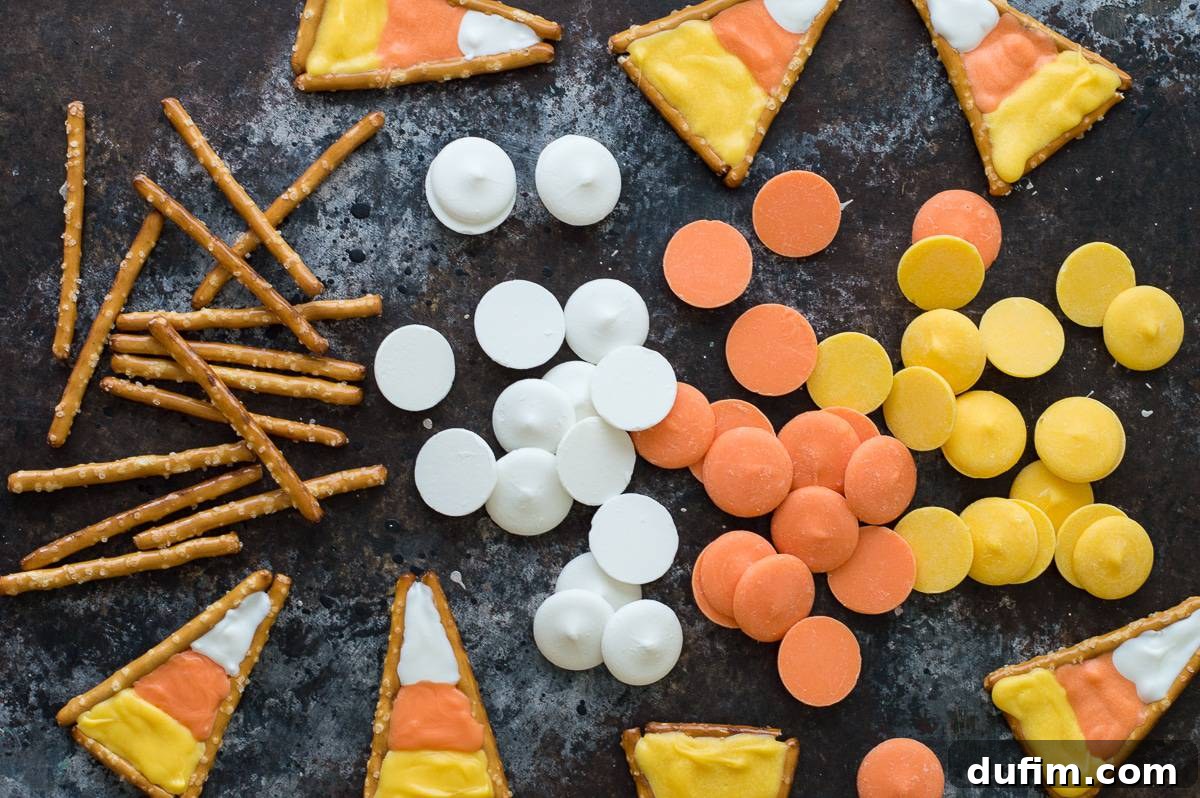
- Pretzel Sticks: You’ll need approximately one standard bag (roughly 10-12 ounces) of thin pretzel sticks. These form the fundamental structure and provide the characteristic salty crunch for our candy corn shapes.
- White Candy Melts: Plan for about 6-8 ounces. This color will be used for the smallest, topmost section of the candy corn, so you’ll generally require less of it.
- Orange Candy Melts: You’ll need about 10-12 ounces. This shade will form the vibrant middle band of our candy corn pretzels.
- Yellow Candy Melts: Also approximately 10-12 ounces. This will constitute the largest, base section of the candy corn. (Tip for Quality: Brands like Wilton candy melts are highly recommended for their excellent melting consistency and impressively vibrant, true-to-color hues, which are ideal for these decorative treats.)
- Vegetable Shortening: Keep approximately 1-2 tablespoons on hand. This is a crucial ingredient that helps thin out the melted candy melts, achieving that perfectly smooth, fluid, and pourable consistency essential for neat piping and a flawless finish.
- Squeeze Bottles or Piping Bags: These tools are indispensable for precise and controlled application of the melted candy. Small, plastic squeeze bottles offer excellent control and minimize mess, making them ideal. However, sturdy piping bags fitted with a small round tip, or even heavy-duty quart-sized Ziploc bags with a corner snipped off, can serve as effective alternatives.
- Baking Sheet(s): You’ll need at least one, and possibly two, depending on the quantity of candy corn pretzels you intend to make in a single session.
- Wax Paper or Silicone Baking Mat: Absolutely essential for lining your baking sheets. This non-stick surface prevents the candy from adhering and ensures effortless removal of your perfectly set, finished pretzels without any breakage or fuss.
Essential Equipment for a Smooth Crafting Experience
While the ingredients are relatively simple, having the right tools at your disposal can significantly enhance your crafting process, ensuring a smooth, enjoyable, and successful experience. Here’s what you’ll need:
-
Glass Mixing Bowls (3): Essential for melting and keeping each color of candy melt separate. Glass bowls are particularly good for stability and for using a double-boiler method.
-
Silicone Baking Mat or Wax Paper: Provides a crucial non-stick surface for your delicate treats.
-
Baking Sheet(s): To hold your pretzels securely while you’re decorating them and waiting for them to set.
-
Small Pots (3) or a Double Boiler Setup: Ideal for melting the candy melts gently on the stovetop, ensuring even heat distribution.
-
Spatulas or Spoons: For continuous stirring of the candy melts to prevent scorching and ensure a smooth consistency.
-
Toothpicks (Optional): Extremely useful for fine-tuning the edges, smoothing out any minor imperfections, and guiding the candy melts into tight spaces for a truly polished look.
Step-by-Step Instructions: Crafting Your Candy Corn Pretzels
Let’s embark on the delightful journey of creating these adorable Halloween treats! Follow these clear and simple steps to achieve perfect candy corn pretzels every single time.
1. Prepare Your Candy Melts with Precision
- Melt Yellow Candy: Begin by placing about half of your yellow candy melts (approximately 5-6 ounces) into a small, heatproof glass bowl. Set this bowl over a saucepan containing about an inch or two of simmering water, creating a double boiler. This method ensures gentle, even melting. Add roughly 1 tablespoon of vegetable shortening to the yellow candy melts. Stir the mixture occasionally over low heat until the candy melts are completely smooth, liquid, and entirely free of any lumps. The shortening is key here; it helps to thin the candy to an ideal, pourable consistency for decorating. Once perfectly melted, carefully transfer the yellow candy to a designated squeeze bottle.
- Melt Orange Candy: Repeat the exact melting process with the orange candy melts, using a similar amount (5-6 ounces) and a separate, clean pot/bowl and squeeze bottle. Ensure it achieves the same smooth, flowing consistency.
- Melt White Candy: Finally, melt the white candy melts. You’ll generally need less of this color (around 3-4 ounces) for the top segment. Use about half a tablespoon of shortening. Again, transfer the smoothly melted white candy to its own squeeze bottle. Always maintain very low heat throughout the melting process to prevent the candy melts from seizing, scorching, or becoming grainy.
Pro Tip for Microwave Melting: If you prefer, you can also melt candy melts in the microwave. Place them in microwave-safe bowls and heat in 30-second intervals, stirring thoroughly after each interval, until perfectly smooth. Be extremely cautious not to overheat, as this can cause the candy to seize.
2. Set Up Your Efficient Decoration Station
- Prepare Baking Sheets: Lay out one or more baking sheets on a clean, flat counter space. Generously line each baking sheet with wax paper or a silicone baking mat. This step is absolutely crucial for creating a non-stick surface, which will allow for incredibly easy and damage-free removal of your finished pretzels later on.
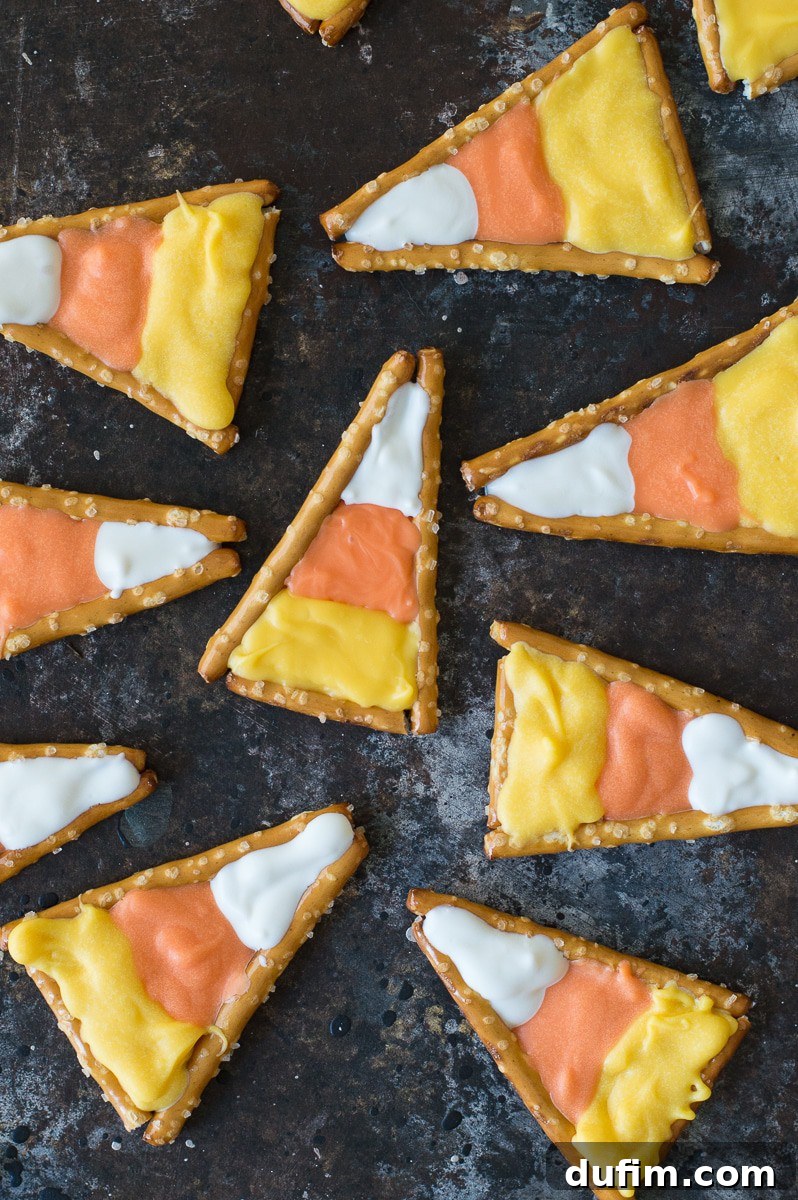
- Arrange Pretzel Outlines: Now, carefully arrange your pretzel sticks to form the distinctive candy corn outlines. For each individual candy corn shape, you will need two regular, full-length pretzel sticks for the angled sides of the triangle, and one shorter, broken pretzel piece for the horizontal base. Gently break a pretzel stick to fit neatly between the two upright sticks, effectively forming a clear triangular outline. Ensure there’s a small, consistent gap in the middle of each outline, which will soon be filled with your vibrant candy melts.
- Maximize Space: Continue this process, creating as many candy corn outlines as your baking sheet will comfortably accommodate. Remember to leave adequate space between each outline to ensure ease of filling and to prevent the colors from merging accidentally.
3. The Art of Filling Your Candy Corn Pretzels
- Start with Yellow: Using your squeeze bottles (or your chosen piping method), begin with the yellow candy melt. Carefully and steadily fill in the bottom, widest section of each pretzel outline. As you pipe, make sure the chocolate gently goes up and slightly over the sides of the pretzel sticks. This small but significant detail creates a much stronger bond, substantially helping to prevent the pretzels from detaching from the candy once it has hardened.
- Add Orange Layer: Next, smoothly transition to the orange candy melt. Pipe a distinct layer just above the yellow, creating the vibrant middle band of your candy corn. Again, allow this layer to slightly overlap both the pretzel sticks and the yellow layer below for a seamless, well-defined appearance.
- Finish with White: Finally, use the white candy melt to meticulously fill in the smallest, topmost tip of the candy corn. Take your time during this step to create a neat, perfectly pointed top, completing the iconic candy corn look.
- Refine and Smooth: If any of your piped lines aren’t perfectly straight, or if you notice any small bumps or unevenness, gently use a toothpick to smooth out the candy melts. Do this quickly before the candy begins to set to achieve a polished, professional finish.
Alternative Piping Methods: If you find yourself without squeeze bottles, there’s no need to worry! A sturdy quart-sized Ziploc bag makes an excellent alternative. Simply fill it with your melted candy, snip a tiny corner off one end, and you can pipe with surprisingly good control. Professional piping bags equipped with a small round tip also work wonderfully for precise decorating.
4. Harden and Properly Store Your Delicious Treats
- Choose Your Hardening Method: Once all your candy corn pretzels are beautifully filled, you have two convenient options for hardening them:
- Room Temperature Setting: You can simply leave them on the counter at room temperature. Depending on your kitchen’s environment, they should be completely firm and set within approximately 30-60 minutes.
- Refrigerator Acceleration: For a significantly faster setting time, carefully transfer the baking sheets to the refrigerator for about 10-15 minutes. Ensure they are fully chilled and hardened before proceeding.
- Careful Removal: Once the candy melts are completely hardened, gently peel each candy corn pretzel from the wax paper or silicone mat. Handle them with care to prevent any breakage. The non-stick surface should make this process very easy.
- Optimal Storage: To maintain their freshness, delightful crunch, and vibrant appearance, store any uneaten candy corn pretzels in an airtight container at room temperature. They will remain delicious for up to a week, making them perfect for preparing in advance or for sharing! They also make excellent, homemade gifts or charming party favors.
Expert Tips for Perfect Candy Corn Pretzels Every Time
Achieving picture-perfect candy corn pretzels is easy with these insider tips and tricks:
- Consistency is Crucial: Never skip the vegetable shortening! It’s absolutely essential for achieving candy melts that are smooth, flowing, and easy to work with. If your melts ever feel too thick, simply add a tiny bit more shortening (or a touch of coconut oil) until you reach a consistency that is pourable but not overly watery.
- Preventing Detachment (The Golden Rule): As emphasized in the instructions, always pipe the candy melts slightly up and around the sides of the pretzel sticks. This creates a robust bond between the candy and the pretzel, significantly reducing the chances of the pretzels detaching or breaking off after the candy hardens. This is arguably the most crucial tip for creating durable, handleable treats!
- Work Efficiently but Neatly: Remember that candy melts can begin to set relatively quickly, especially if your kitchen is cool. Try to work efficiently, but always prioritize neatness for the best aesthetic outcome. If your candy starts to thicken in the squeeze bottle or piping bag, you can gently rewarm the bottle in a bowl of warm (not hot) water or microwave it briefly for a few seconds.
- Correct Color Layering: Always adhere to the traditional layering sequence: start with the yellow candy melt at the bottom (the widest section), followed by the orange in the middle, and then the white at the very top (the pointed tip). This ensures your pretzels truly mimic the classic candy corn appearance.
- Embrace Creative Variations:
- Sprinkle Magic: For an extra festive touch, immediately add Halloween-themed sprinkles, edible glitter, or small nonpareils to the wet candy melts (especially the white tip) before they have a chance to harden.
- Holiday Adaptation: The beauty of this technique lies in its versatility! Easily change the candy melt colors to suit other holidays or themes. Imagine cheerful red, white, and green for Christmas; soft pastels for a delightful Easter treat; or patriotic red, white, and blue for national holidays.
- Flavor Boost: For a richer flavor profile, consider using dark chocolate melts for the bottom yellow layer, or even a combination of milk chocolate and colored candy melts for a unique twist.
More Spooktacular Halloween Treat Ideas!
Are you looking for even more fun, festive, and delicious treats to enhance your Halloween celebrations? Explore these other delightful and easy-to-make recipes that are perfect for the season:
- Melted Witch Brownies
- Halloween Sugar Cookies
- Spider Rice Krispie Treats
- Mini Pumpkin Pie Rice Krispie Treats
Candy Corn Pretzels
Beth
30
minutes
30
minutes
24
servings
Equipment
-
Glass Mixing Bowls (3)
-
Silicone Baking Mat or Wax Paper
-
Baking Sheet(s)
-
Small Pots (3) or a Double Boiler Setup
-
Squeeze Bottles or Piping Bags
-
Spatulas or Spoons
-
Toothpicks (Optional)
Ingredients
- 1 bag (10-12 oz) pretzel sticks
- 6-8 oz white candy melts
- 10-12 oz orange candy melts
- 10-12 oz yellow candy melts, Wilton brand recommended for vibrant colors
- 1-2 tbsp vegetable shortening
- Squeeze bottles or piping bags
- Baking sheet(s)
- Wax paper or a silicone baking mat
Instructions
-
In three separate small pots or heatproof bowls over low heat (or using a double boiler method), melt the yellow, orange, and white candy melts. For each color, add 0.5-1 tbsp of vegetable shortening (less for white, more for yellow/orange) to aid in thinning and smoothing the candy. Stir occasionally until completely smooth.
-
While the candy melts are melting, prepare your decoration station. Line one or more baking sheets with wax paper or a silicone baking mat. Arrange pretzel sticks to form candy corn outlines: use two full sticks for the sides of the triangle and a broken piece for the base.
-
Once melted and smooth, transfer each color of candy melt into its own squeeze bottle or piping bag with a small hole. Begin filling the pretzel outlines, starting with the yellow candy melt at the bottom (widest part), followed by orange in the middle, and finally white at the top (pointed part).
-
Crucially, ensure the candy melts slightly climb up the sides of the pretzel sticks. This small detail helps secure the pretzels firmly in place, preventing them from detaching once hardened. Use a toothpick if needed to gently guide the candy and smooth out any imperfections for clean lines.
-
Allow the filled candy corn pretzels to harden. You can leave them on the counter at room temperature or place the baking sheet in the refrigerator for 10-15 minutes to speed up the setting process.
-
Once fully hardened, carefully lift the candy corn pretzels from the wax paper. Store any uneaten treats in an airtight container at room temperature to maintain freshness.
Notes
You will typically require less white candy melts compared to the yellow and orange. It’s not necessary to melt an entire bag of each color at once, especially if you’re making a smaller batch. We recommend starting by melting about half of the orange and yellow candy melts, and a third to a half of the white, then melt more if needed.
For best results, melt candy melts gently over low heat or in a double boiler to prevent scorching. Overheated candy melts can become thick and clumpy, making them difficult to work with. If this happens, try adding a little more shortening or a teaspoon of paramount crystals to help thin it out.
Nutrition
Calories:
27
kcal
|
Carbohydrates:
4
g
|
Protein:
1
g
|
Fat:
1
g
|
Saturated Fat:
1
g
|
Polyunsaturated Fat:
1
g
|
Monounsaturated Fat:
1
g
|
Sodium:
24
mg
|
Potassium:
2
mg
|
Fiber:
1
g
|
Sugar:
3
g
|
Calcium:
1
mg
|
Iron:
1
mg
Nutrition Disclosure
All nutritional values are approximate and provided to the reader as a courtesy. Changing ingredients and/or quantities will alter the estimated nutritional calculations.