
DIY Thanksgiving Pumpkin Pie Felt Garland: A Festive & Easy Craft Tutorial
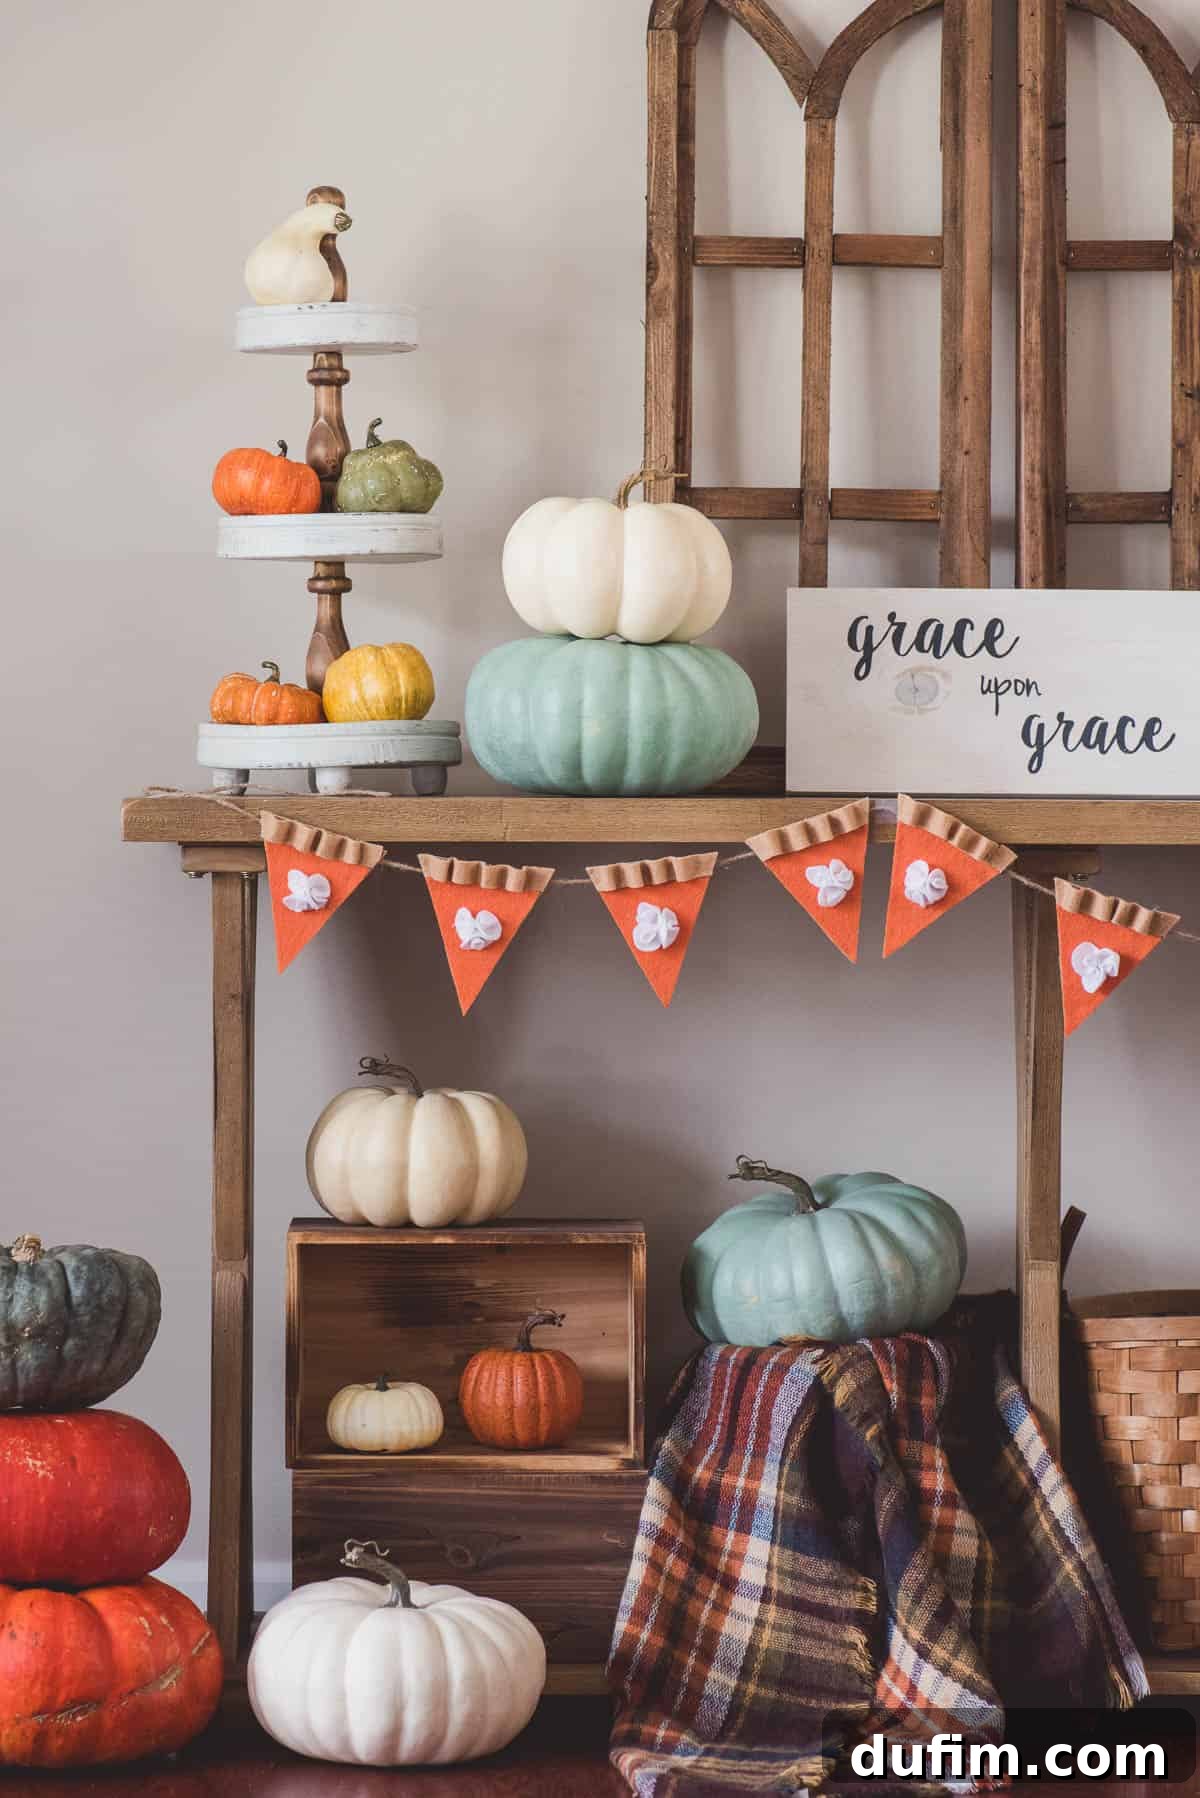
As the leaves change color and a crisp autumn breeze fills the air, our thoughts naturally turn to cozy gatherings and festive decorations. What better way to celebrate the warmth and bounty of Thanksgiving than with a charming, handmade touch? This year, ditch the store-bought decor and embark on a delightful crafting journey to create your very own Pumpkin Pie Felt Garland Banner. It’s a surprisingly simple project that promises to add a unique, heartwarming accent to your holiday home.
Whether draped over a mantelpiece, strung across a doorway, or adorning a festive buffet table, this garland captures the essence of Thanksgiving dessert in an adorable, lasting form. Our comprehensive step-by-step tutorial is packed with photos and clear instructions, ensuring that even novice crafters can achieve a beautiful result. Get ready to transform sheets of felt into a mouth-watering display that will be the talk of your Thanksgiving celebration!
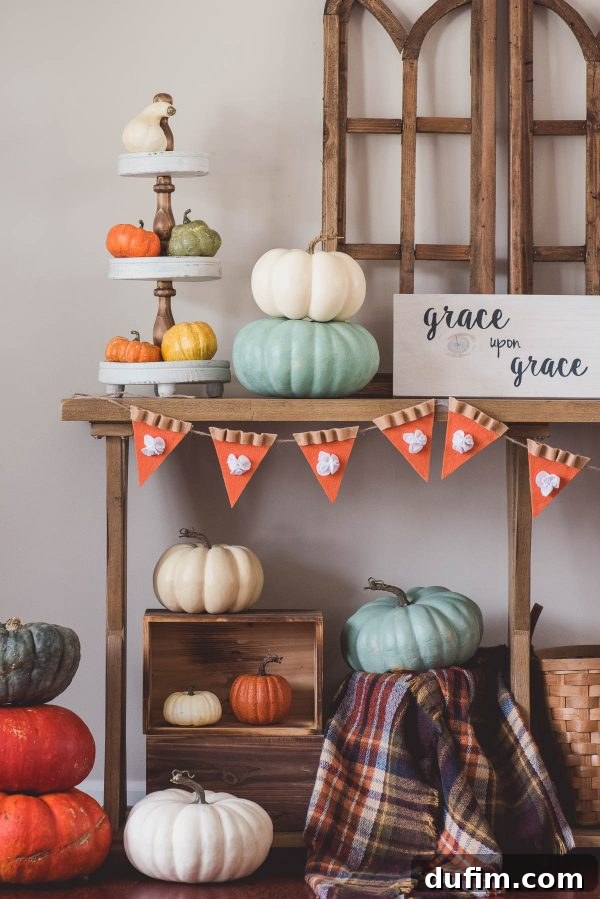
Bring the Warmth of Thanksgiving to Your Home with a Handmade Garland
The joy of crafting often comes from sharing inspiration within a vibrant community. I absolutely adore connecting with my followers on Instagram, and it’s always a thrill to showcase my latest DIY adventures. Recently, I shared a glimpse of this adorable pumpkin pie garland I had whipped up, and my inbox was instantly flooded with enthusiastic requests for a tutorial! The overwhelming desire for a guide prompted me to jump right into action, eager to help you bring this sweet decoration into your own homes.
Documenting a craft project step-by-step, especially with photography, presents its own unique set of challenges. It’s quite different from capturing a delicious meal! There’s an intricate dance between crafting, adjusting lighting, and ensuring every crucial detail is perfectly visible in each shot. While it presented its own hurdles, I poured my efforts into making this tutorial as clear and visually rich as possible, hoping to ease your creative process. Rest assured, you’re in good hands – creating this garland is far less stressful than trying to photograph melting ice cream in the summer!
Everything You Need to Create Your Own Pumpkin Pie Garland
Before diving into the fun of cutting and gluing, it’s essential to gather all your materials. Having everything neatly organized will make the crafting process much smoother and more enjoyable. This project uses readily available craft supplies, making it an accessible and affordable option for adding a handmade touch to your Thanksgiving decorations.
Essential Supplies for Your Felt Garland Project
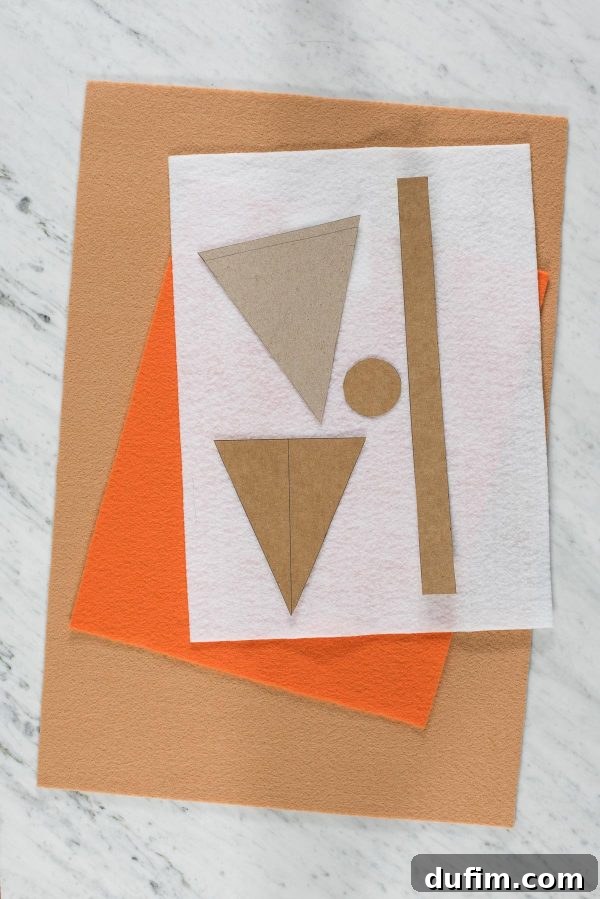
- Printable Templates: Your absolute starting point! These PDF templates are designed for easy printing and provide the exact shapes for your pie crusts, filling, and whipped cream. Printing them out is the first exciting step in bringing your garland to life!
- 1 Large Tan Felt Sheet: This will form the delicious, flaky crust of your pumpkin pies. Look for a sturdy, medium-thickness felt that holds its shape well.
- 1 Large Orange Felt Sheet: The vibrant heart of your pies! Choose a rich pumpkin orange to capture that classic holiday feel.
- 1 Small White Felt Sheet: For the irresistible dollops of whipped cream. A crisp white will provide a lovely contrast to the orange filling.
- Craft Scissors: A good pair of sharp craft scissors will make cutting felt a breeze, ensuring clean, precise edges for all your pie components.
- Pen for Tracing: A fine-tipped pen or a fabric marker is perfect for accurately transferring your template shapes onto the felt without creating thick, visible lines.
- Glue Gun and Glue Sticks: Your best friend for quick and secure assembly. A hot glue gun provides an instant bond, crucial for felt crafts. Ensure you have plenty of glue sticks on hand!
- Twine: This will be the string that holds your beautiful pies together. I used a natural jute twine, measuring mine at approximately 79 inches (around 200 cm) to perfectly fit across my fireplace mantel. Adjust the length to suit your desired hanging location.
When it comes to sourcing your felt, I’ve found that craft stores like Michaels often carry larger, higher-quality felt sheets. These larger sheets tend to be thicker and more durable, which results in a more professional and lasting finish for your garland. Each large sheet typically costs around $2, making this an incredibly budget-friendly project. You’ll specifically need one large tan sheet for the crusts and one large orange sheet for the pumpkin filling. The small white felt sheet will provide more than enough material for the whipped cream accents.
A pro tip for working with templates: I highly recommend printing the PDF templates, carefully cutting them out, and then tracing those paper templates onto a thicker material like cardboard. An old cereal box or any thin piece of cardstock works perfectly. By doing this, you create sturdy, reusable templates that are much easier to trace around repeatedly, preventing wear and tear on your paper originals and ensuring consistent pie shapes.
Step-by-Step Guide: Crafting Your Felt Pumpkin Pie Garland
Now that you have all your supplies ready and your sturdy templates prepared, let’s embark on the delightful journey of assembling your Thanksgiving Pumpkin Pie Felt Garland. Take your time with each step, and remember, crafting is all about enjoying the process!
Step 1: Preparing Your Templates and Workspace
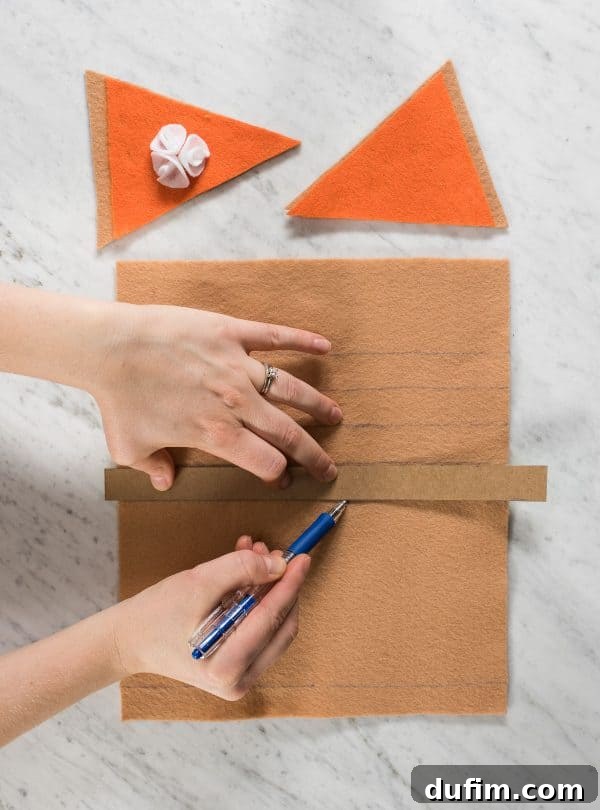
Begin by carefully cutting out all the shapes from your printed PDF templates. As suggested, transfer these paper templates onto a piece of thin cardboard (like from a cereal box). Cut out the cardboard templates with precision. These sturdier templates will be your guides for tracing onto the felt. Lay out your felt sheets on a clean, flat surface, ensuring you have enough space to work comfortably. Having a dedicated area for cutting and gluing will help keep your project organized and efficient.
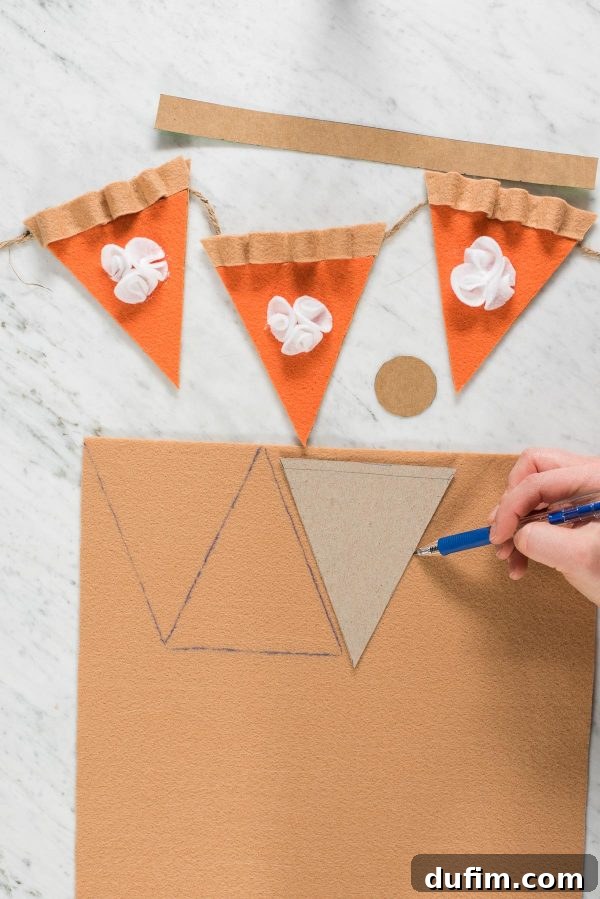
Step 2: Cutting the Felt Crusts
Take your “crust” cardboard template and place it onto your large tan felt sheet. Using your pen, carefully trace around the template. Think about how many pumpkin pies you want on your garland – my garland features 10 delicious pies, so I traced and cut 10 crusts. Maximize your felt usage by placing templates close together but leaving enough room for clean cuts. Once traced, meticulously cut out each tan felt crust shape. Precision here will contribute to the overall neatness of your finished pies.
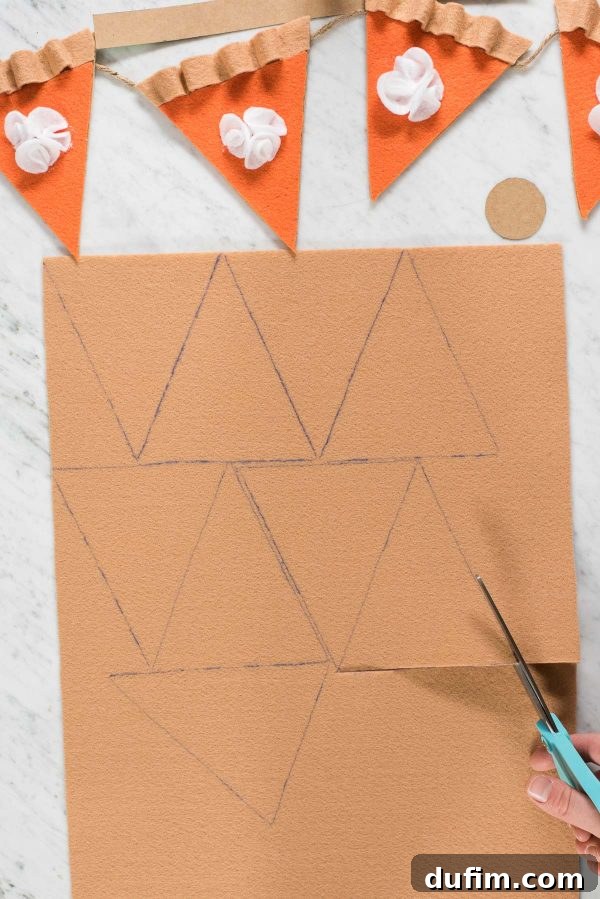
Step 3: Crafting the Vibrant Pumpkin Filling
Next, grab your “pumpkin pie” (the filling) template. Position it on your large orange felt sheet and trace the required number of pie filling shapes, matching the number of crusts you’ve prepared. The vibrant orange felt will immediately bring the essence of autumn and Thanksgiving to your craft. Once all the orange shapes are traced, carefully cut them out. These will form the delicious body of your felt pumpkin pies.
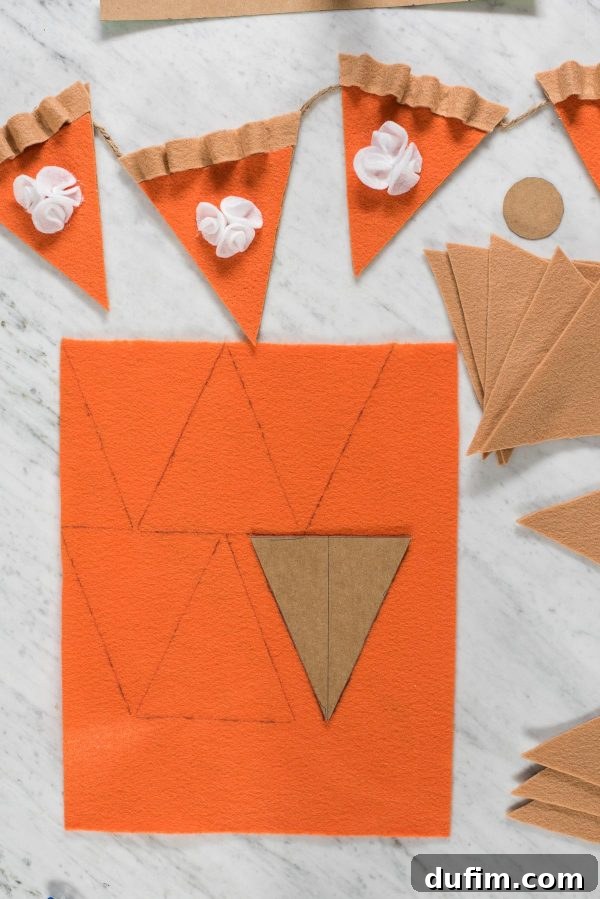
Step 4: Whimsical Whipped Cream Details
Now for the sweet topping! Take your “whipped cream” circle template and trace it onto your small white felt sheet. This is where you need to pay close attention to quantity: each pumpkin pie will require three white felt circles to create that lovely, dimensional whipped cream effect. So, if you’re making 10 pies, you’ll need to trace and cut out 30 white circles. Take your time to cut these circles cleanly, as they will add a delicate finish to each pie slice.
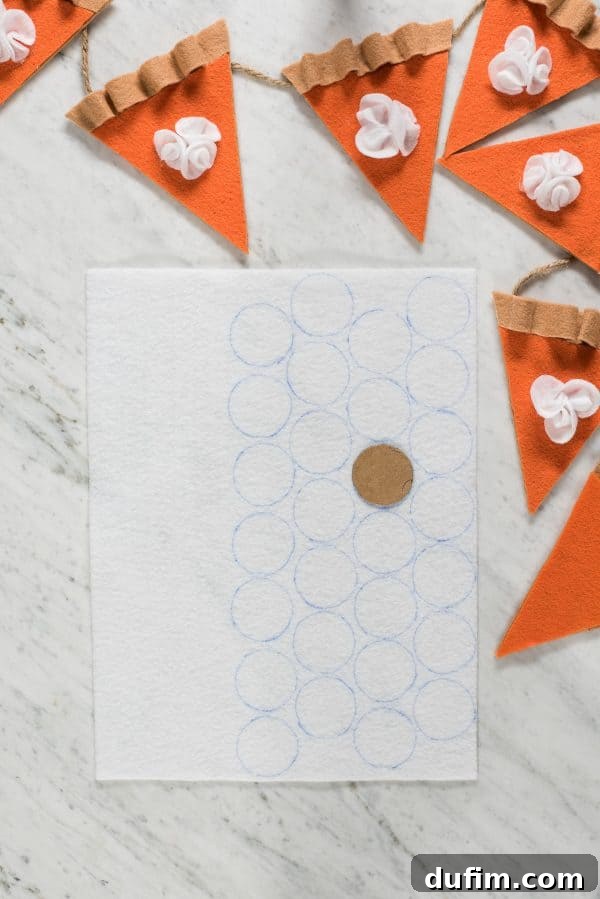
Step 5: Designing the Top Crust
Finally, locate your “top crust” template. This unique piece will create the charming wavy edge that gives your felt pies their authentic look. Trace this template onto any remaining tan felt. Again, ensure you have one top crust piece for each pie you plan to assemble. Once all your top crusts are traced, carefully cut them out. With all your felt pieces now neatly cut and organized, it’s time to give your hands and fingers a well-deserved short break from the scissors! You’ve completed the initial cutting phase, and the fun of assembly is next.
Step 6: Assembling Each Delicious Pumpkin Pie
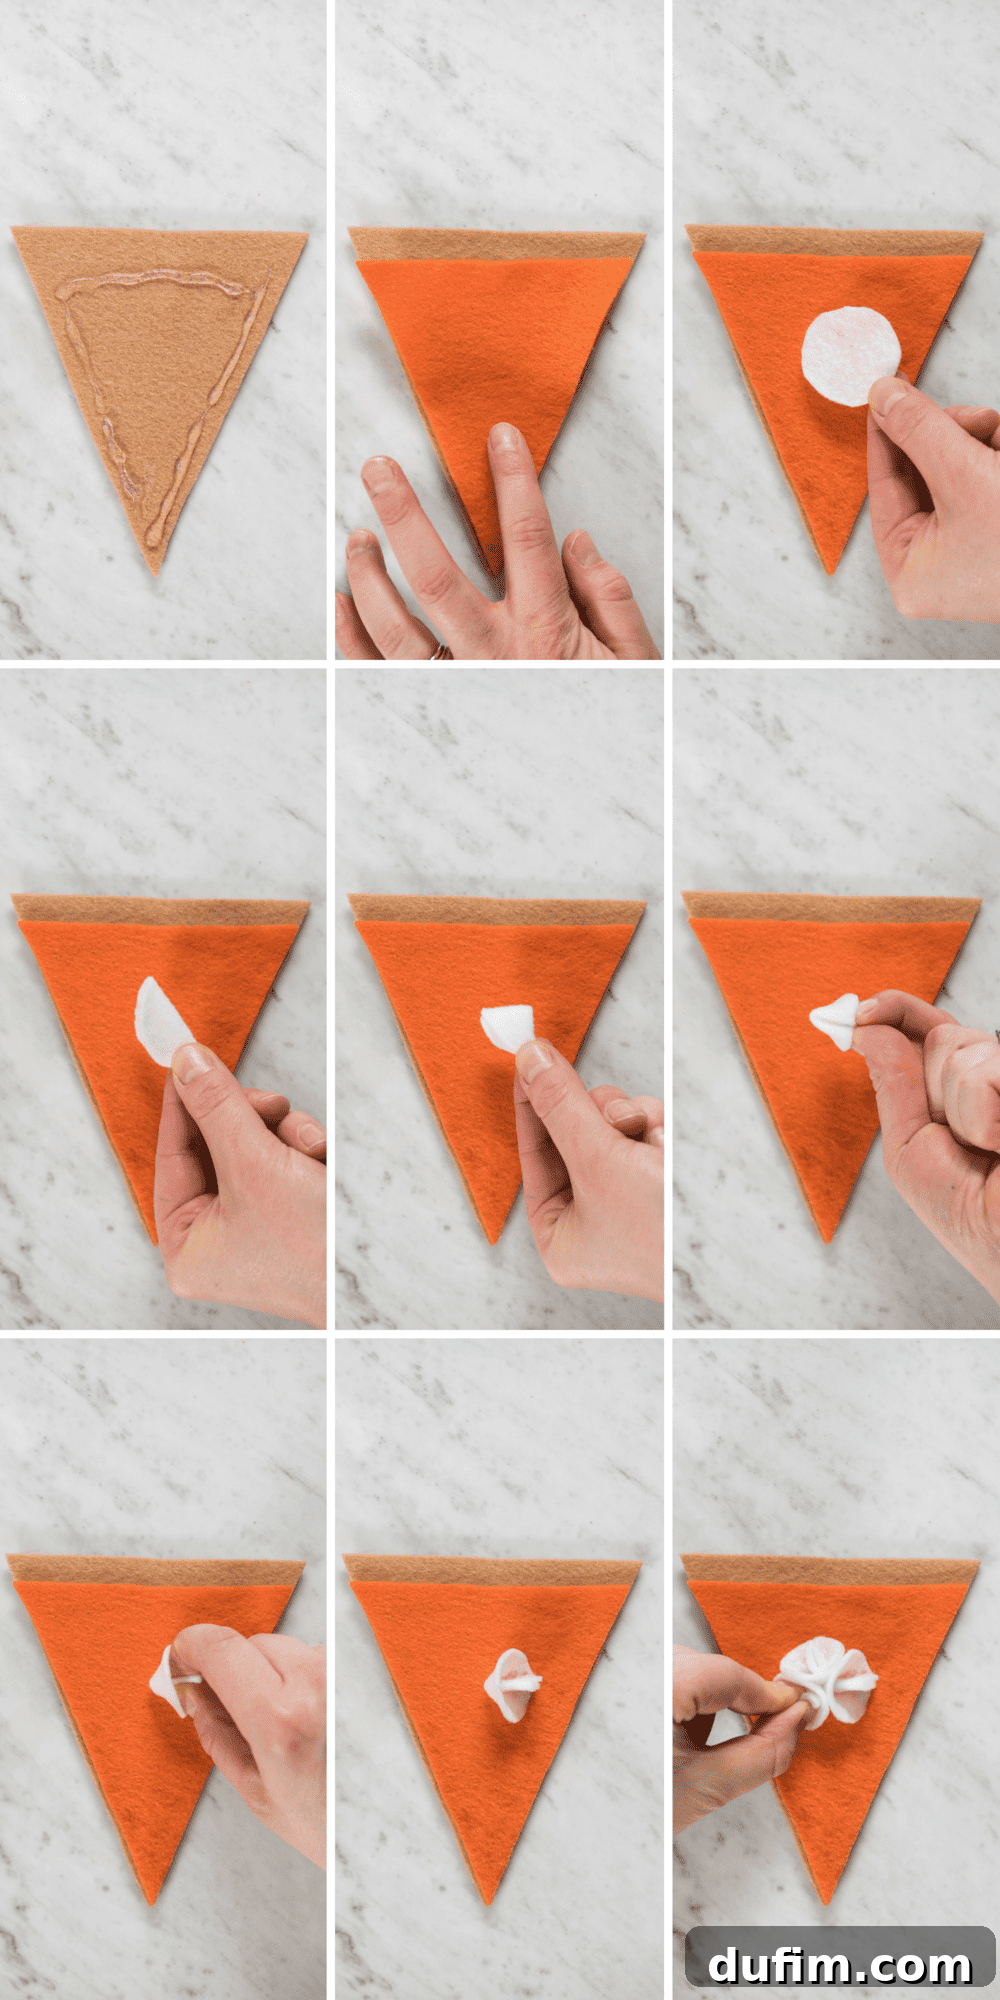
With all your felt pieces ready, it’s time to bring each pumpkin pie to life! Start by taking one tan felt crust piece. Apply a line of hot glue along the straight edge of the orange pumpkin filling piece, then carefully press it onto the tan crust. You’ll notice that the tan crust extends slightly beyond the curved edge of the orange filling – this is intentional, as it creates the base where your top crust will eventually be attached. Ensure the orange filling is centered neatly on the crust.
Next, let’s create that delightful whipped cream dollop. Take one of your white felt circles, fold it in half, and then fold it in half again. This quarter-fold will give it volume and shape. Pinch the innermost folded corner and apply a small dot of hot glue to the folded side. Press this onto the orange pie filling. Repeat this process with two more white circles, overlapping them slightly to create a full, fluffy whipped cream effect. This layering adds wonderful dimension to your pies, making them even more irresistible.
Step 7: Adding the Signature Wavy Top Crust
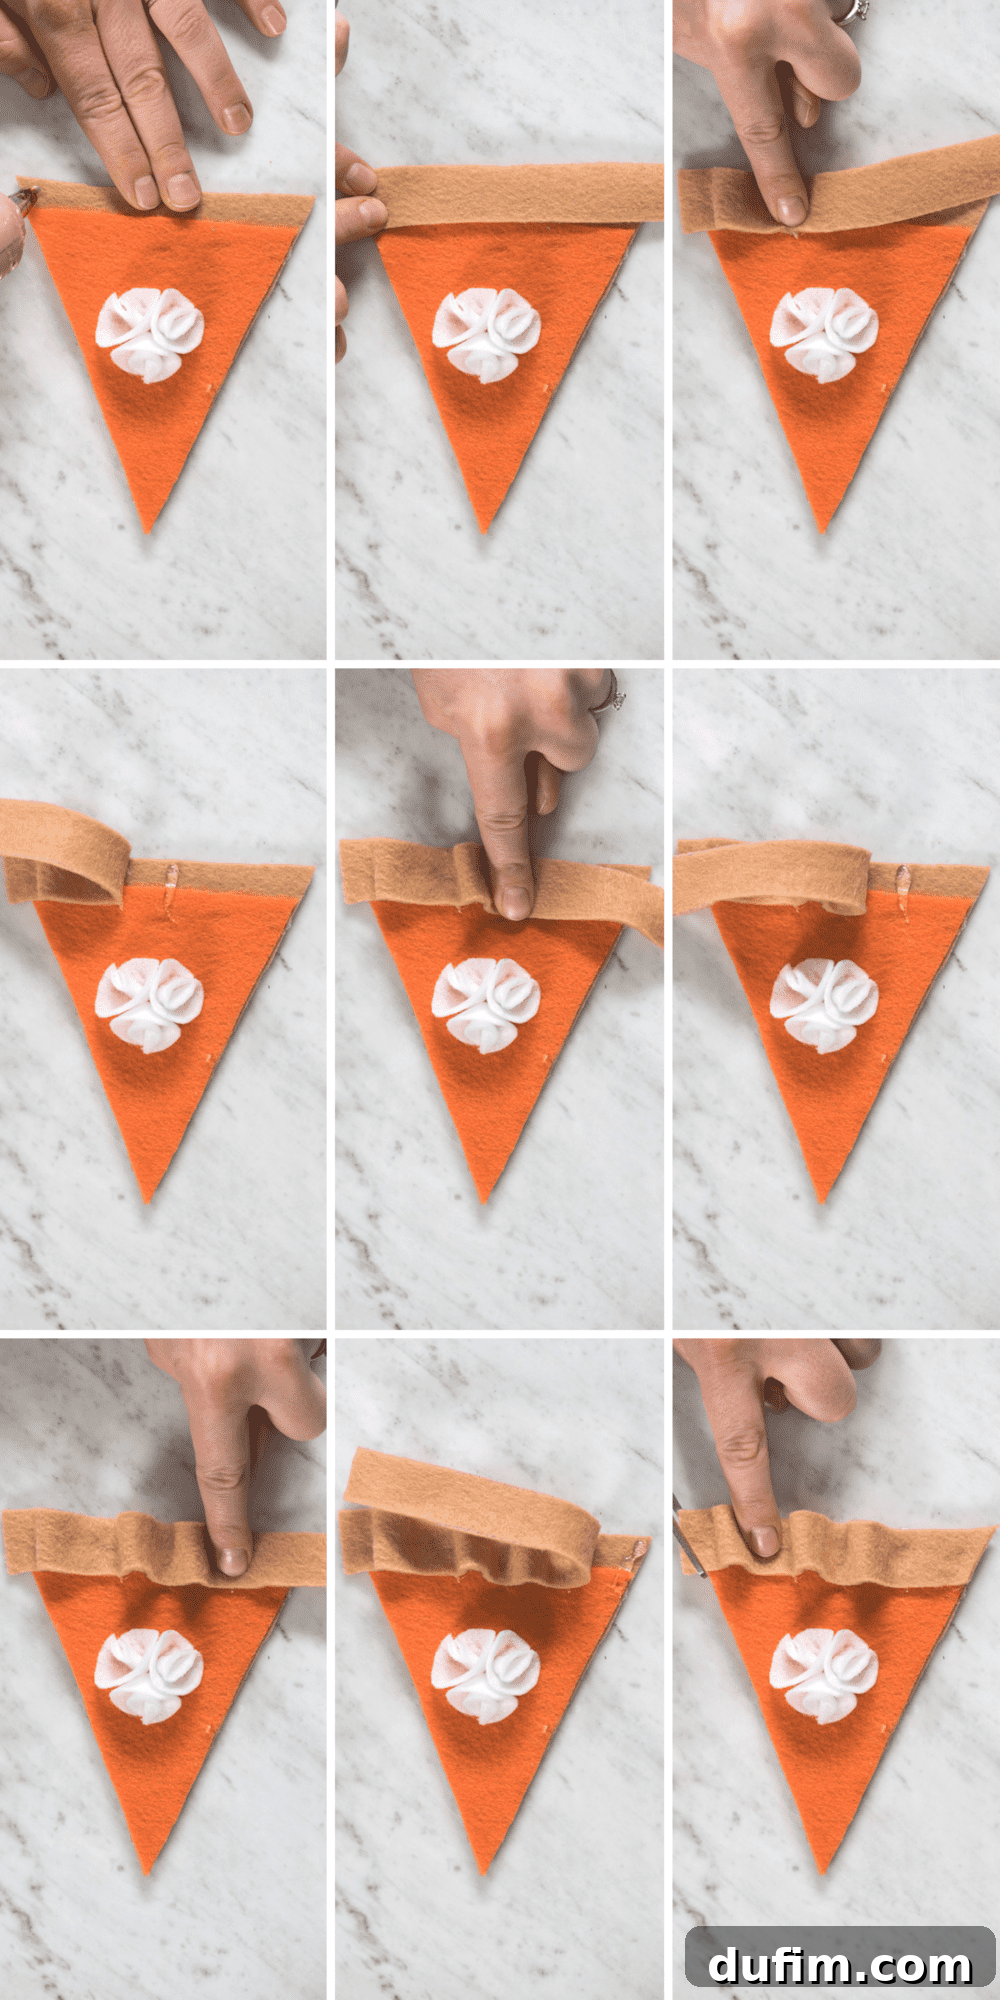
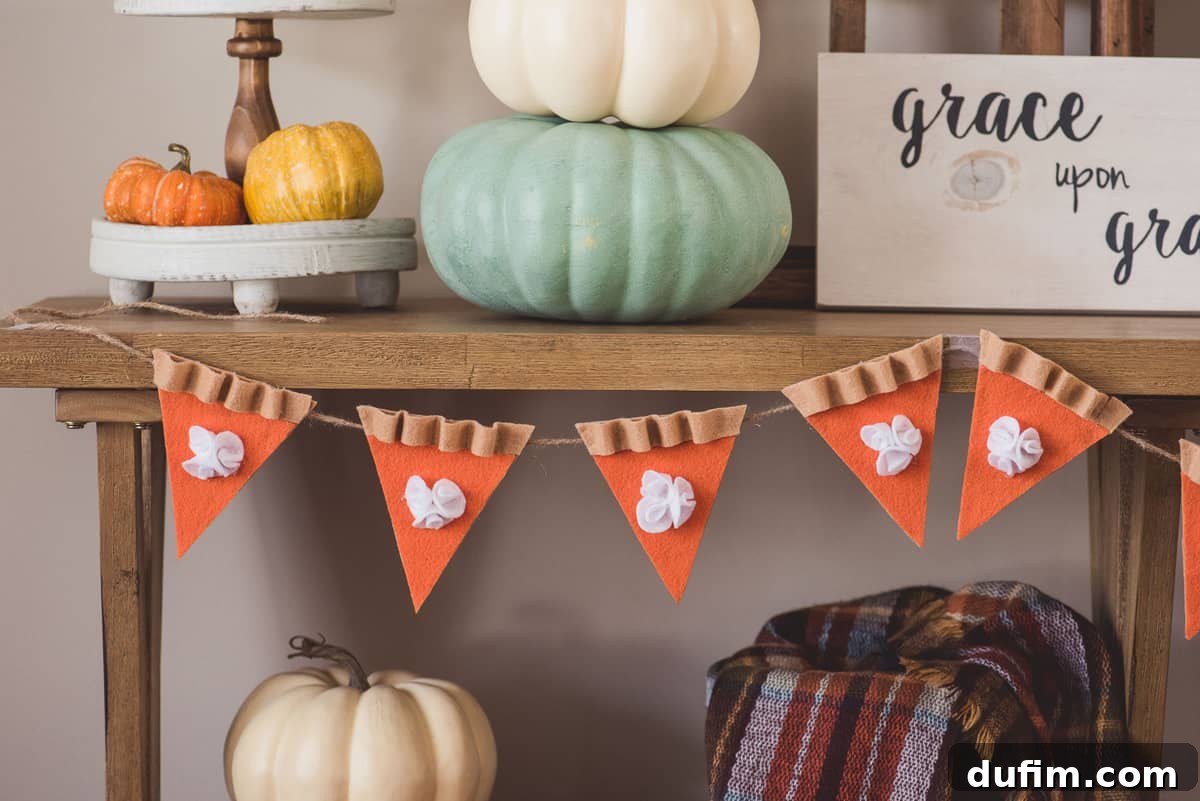
Now for the charming wavy top crust! Take one of your tan top crust pieces. Align one end with the top edge of your assembled pie, allowing a little excess to hang over the side – this will be trimmed later. Apply a small bead of hot glue along one edge of the top crust and press it down onto the tan crust section of your pie. To create the characteristic wavy pattern, gently make a slight “bump” or curve with the felt, then apply another small dot of glue to secure it. Continue this technique, creating a series of gentle waves. I found that about four wavy bumps per pie give a lovely, natural look. Once the entire top crust is glued down and secure, take your scissors and carefully trim off any excess felt from both ends at an angle, mimicking a freshly baked pie crust. This step truly gives your felt pies their distinctive character and makes them look wonderfully authentic.
Step 8: Stringing Your Garland Together
The final stage of assembly is stringing your individual pumpkin pies onto the twine to form the complete garland. First, determine the desired length for your twine. As mentioned, I measured my twine to be 79 inches (approximately 200 cm) to fit perfectly across my fireplace mantel. Consider where you plan to hang your garland and measure accordingly. Once you have your twine, find its center point. This is where you’ll want to glue your very first pumpkin pie, ensuring a balanced display.
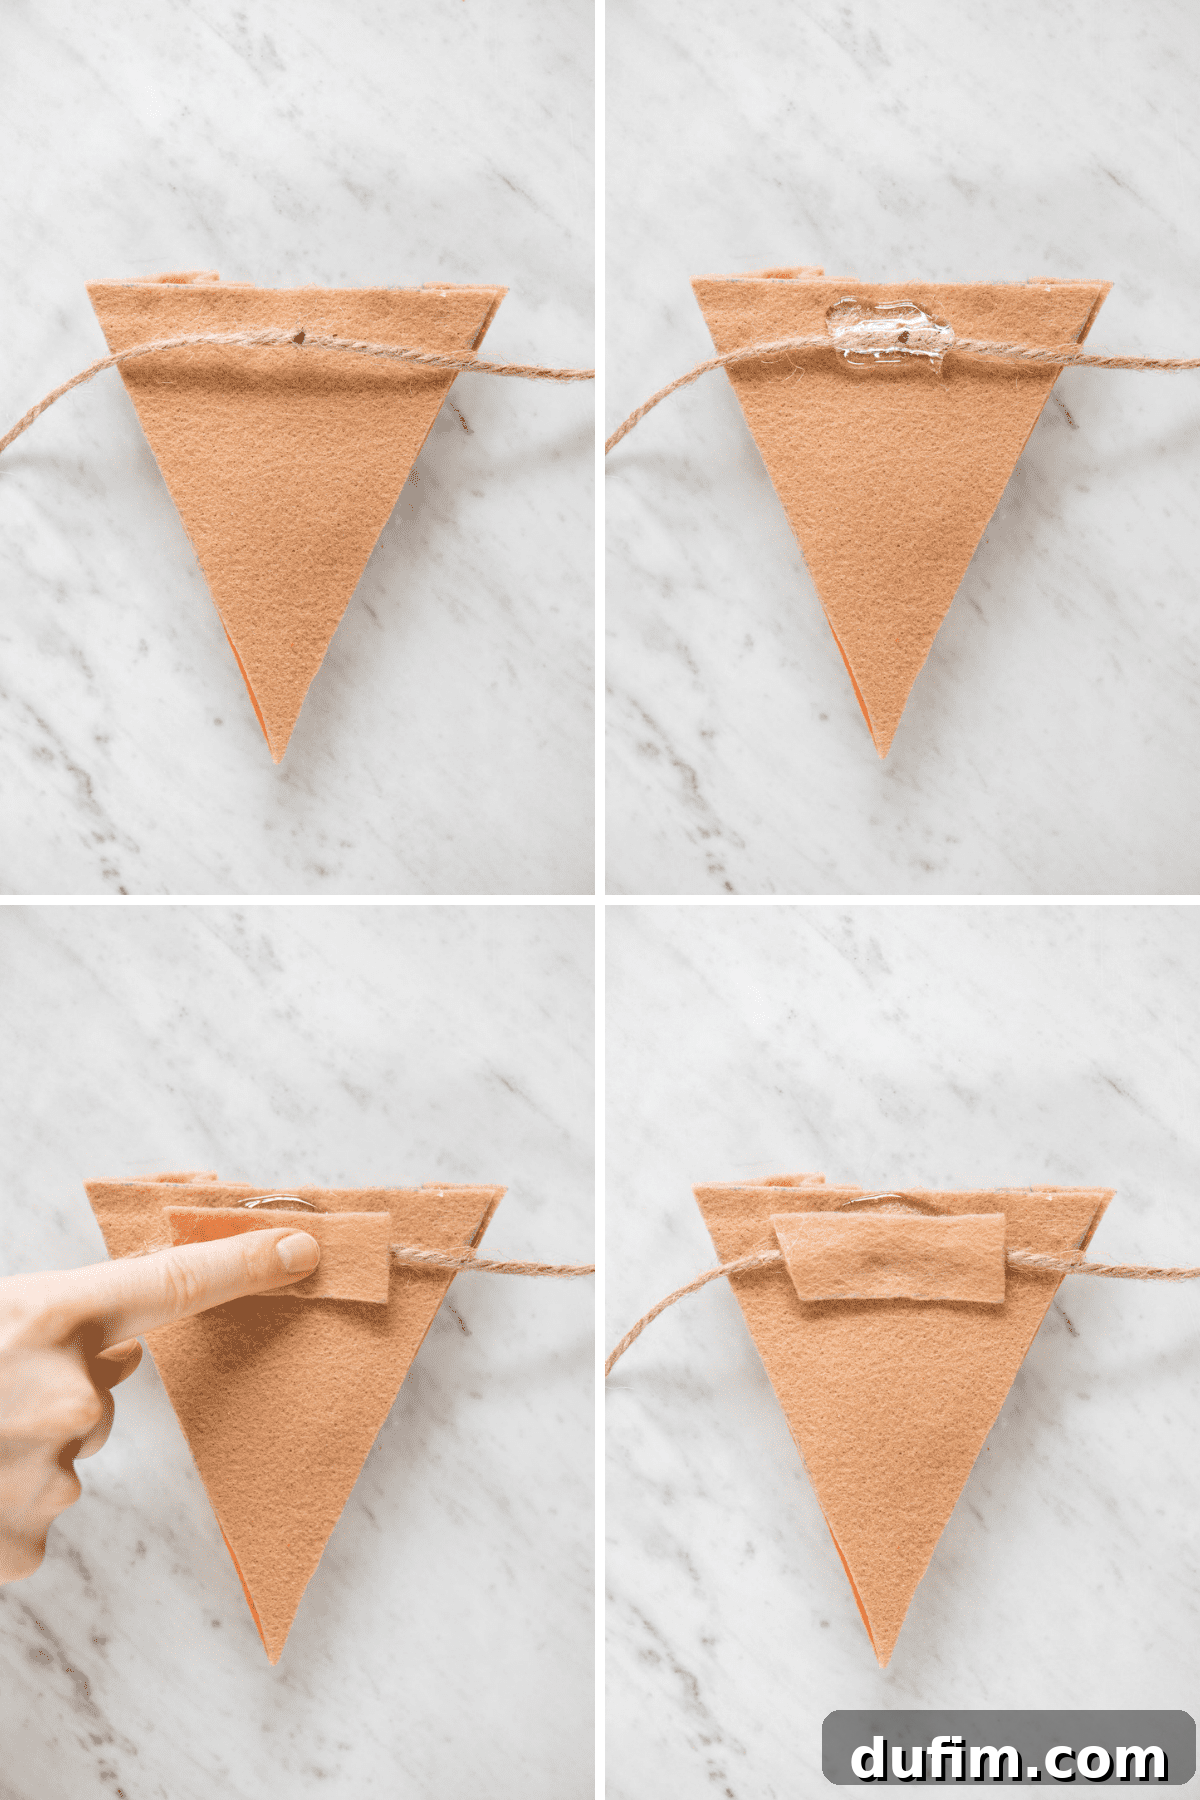
To attach each pie securely, flip the pie over to its back side. Apply a generous squeeze of hot glue across the top, where the twine will rest. Quickly place a section of your twine onto the glue. To further reinforce the attachment and give it a clean finish, take a small scrap piece of tan felt and press it firmly over the twine and glue, creating a strong bond. Repeat this process for all your pumpkin pies, spacing them as close or as far apart as you prefer. Experiment with different spacing to see what looks best for your aesthetic. Once all your pies are attached and the glue has thoroughly dried, your beautiful felt pumpkin pie garland is ready to adorn your home!
Displaying Your Handmade Thanksgiving Masterpiece
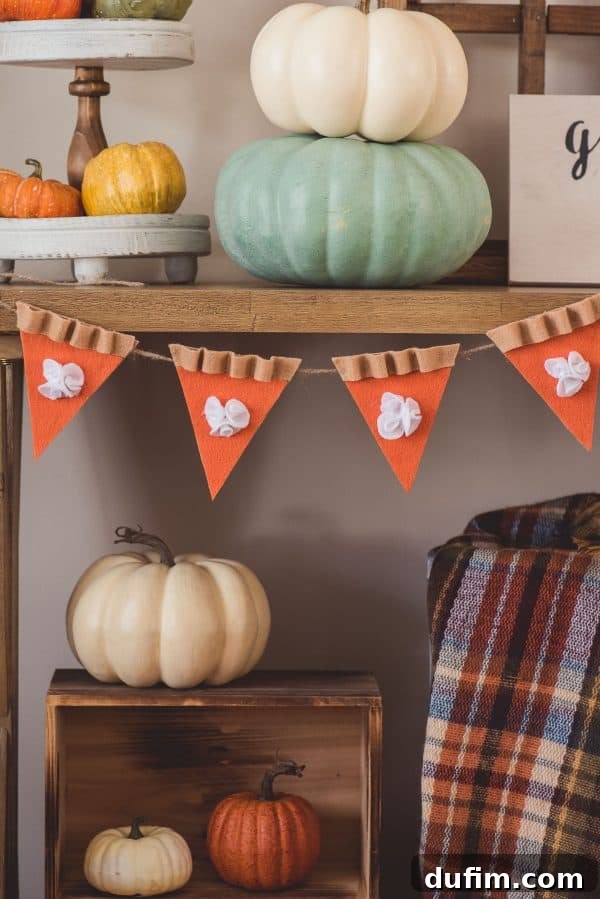
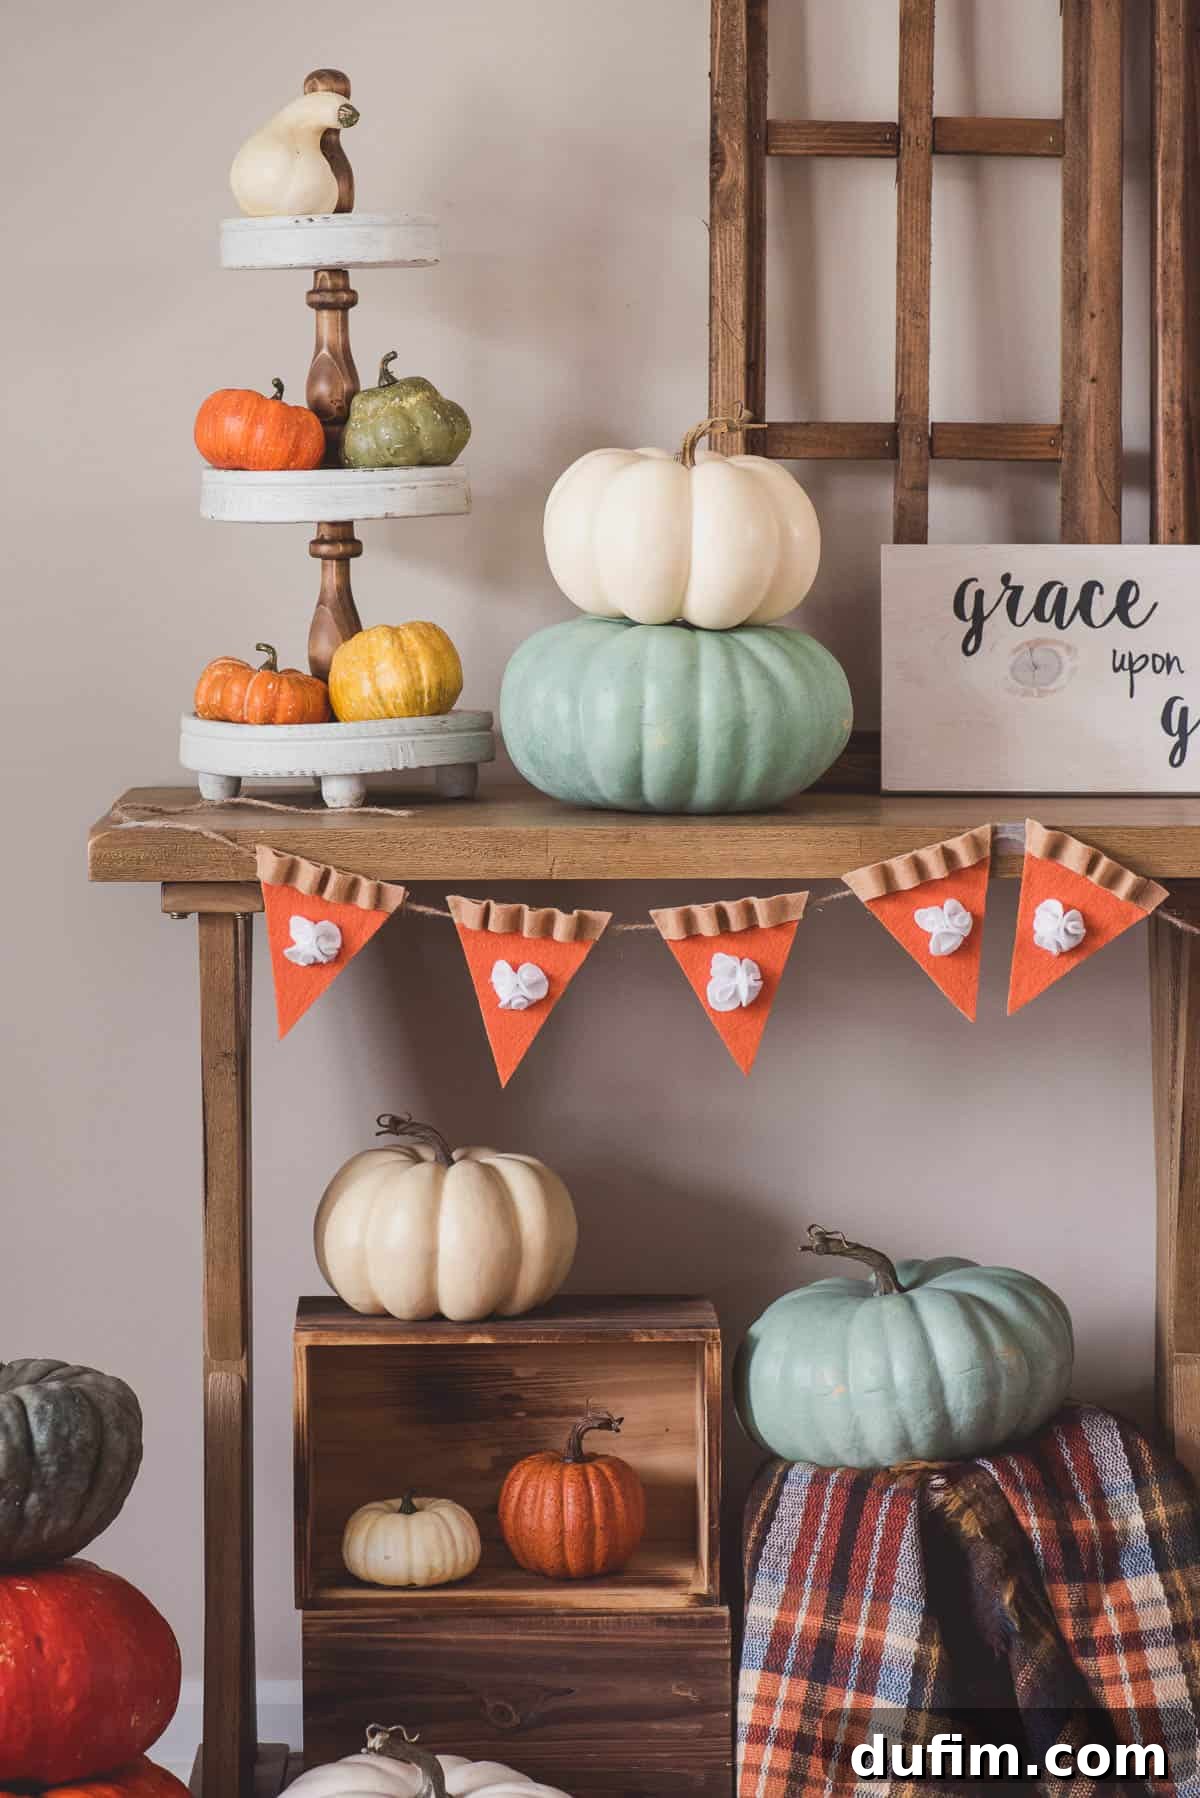
Once the glue has fully set and your garland is dry, it’s time for the exciting part: displaying your handmade Thanksgiving masterpiece! Drape it elegantly across your fireplace mantel, hang it along a banister, suspend it above a festive entryway, or use it to adorn a shelf or a window. The soft, textured felt combined with the warm, inviting colors of pumpkin pie will instantly infuse your space with the cozy spirit of the harvest season. Your guests will undoubtedly admire the personal touch and effort you’ve put into crafting such a charming and unique decoration. This garland isn’t just a decoration; it’s a testament to the joy of creation and the warmth of the holidays.
Tips for a Perfect Felt Garland and Festive Decor
To ensure your felt pumpkin pie garland remains a beloved part of your Thanksgiving decor for years to come, here are a few extra tips:
Storage: When the holiday season concludes, gently fold or roll your garland and store it in a dust-free container or bag. This will protect the felt from creasing and keep it clean for next year’s festivities.
Safety with Hot Glue: Always exercise caution when using a hot glue gun. Ensure children are supervised if they are helping with this part of the project. A silicone mat can also be helpful to protect your work surface from errant drips.
Customization: Feel free to get creative with your garland! You could add small cinnamon stick embellishments to the center of the whipped cream, sprinkle glitter for a touch of sparkle, or even use different shades of orange and tan felt for a varied look. Consider adding small felt leaves or berries between the pies for an even more autumnal feel. You could even create smaller versions to use as individual ornaments or gift tags!
Placement: While mantels are classic, think about other spots where this garland could shine. Drape it over a doorway, along a dining room hutch, or even across a window frame to welcome guests. Its charming appeal is versatile and can enhance almost any area of your home.
Share Your Creations!
I would absolutely love to see your beautiful handmade pumpkin pie garlands! Once you’ve completed your project and proudly displayed it in your home, please share photos with me on Instagram. Tag me @[YourInstagramHandle] (or a relevant hashtag like #DIYPumpkinPieGarland #ThanksgivingCrafts) so I can admire your creativity and share your festive spirit with our crafting community. It’s always inspiring to see how everyone puts their unique spin on these tutorials!
Crafting this felt pumpkin pie garland is more than just making a decoration; it’s about investing time in creating something beautiful, celebrating the spirit of gratitude, and adding a personal, homemade touch to your holiday season. May your Thanksgiving be filled with warmth, joy, and delicious pies – both real and felt!