
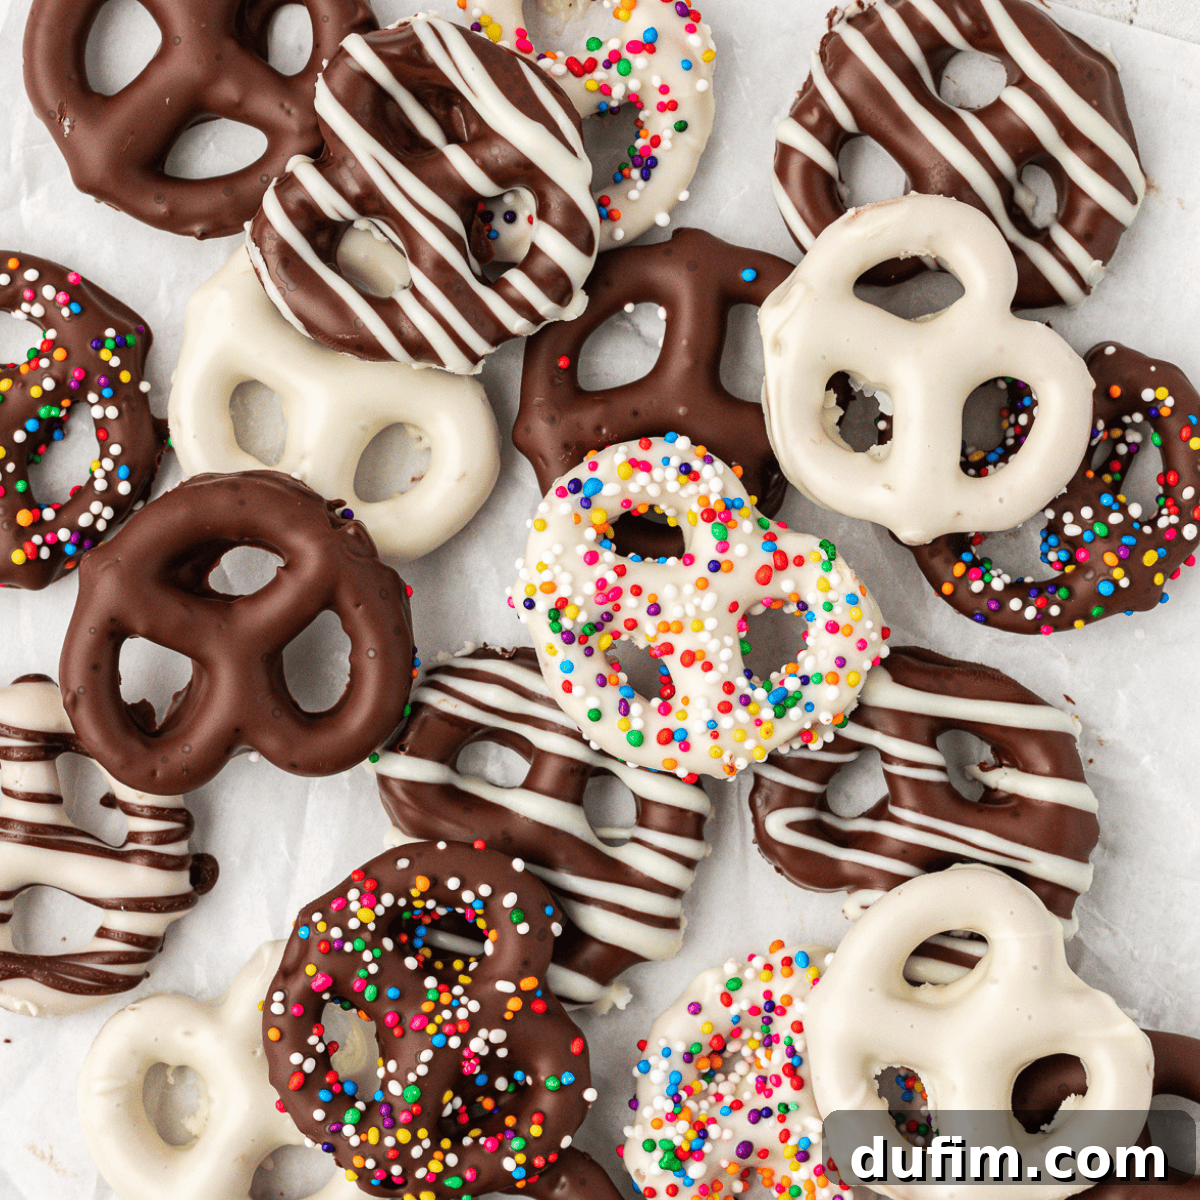
The Ultimate Guide to Perfect Homemade Chocolate Covered Pretzels
Welcome to the definitive guide for crafting the most exquisite chocolate covered pretzels right in your own kitchen! Forget the guesswork and common frustrations; I’ve spent countless hours meticulously testing eight distinct types of chocolate. My detailed notes cover everything from melting times, taste profiles, and visual appeal to dipping consistency, drying duration, and cost-effectiveness.
This comprehensive research means you can now create flawlessly coated, delicious chocolate pretzels with absolute confidence. I’ve navigated all the trial and error, so you don’t have to experience any of the typical challenges. Get ready to impress with your perfect homemade treats!
Why This Chocolate Covered Pretzel Recipe is a Must-Try
Chocolate covered pretzels appear deceptively simple, yet many home bakers encounter challenges when attempting them from scratch. Achieving the ideal chocolate temperature during melting is crucial; mishandling this step can lead to undesirable textures and an unappealing appearance, such as dullness or streaking.
Furthermore, mastering the art of applying a smooth, even layer of chocolate to each pretzel requires a bit of technique. But don’t fret! This guide walks you through every step, armed with my proven tips and tricks to ensure your success. Say goodbye to lumpy, uneven coatings and hello to professional-looking results!
When melting chocolate, common issues like “chocolate bloom” – where the chocolate develops a grayish-white film – or clumping and thickening can easily arise. Chocolate bloom is often a result of improper storage or fluctuating temperatures, affecting the chocolate’s crystalline structure. These problems can be frustrating and deter you from future attempts.
My extensive kitchen experiments weren’t just about tasting (though that was certainly a perk!). I’ve spent hours dipping pretzels, deliberately encountering every potential issue you might face, and crucially, discovering how to prevent them. This guide distills all that experience, offering you the simplest, most foolproof path to creating exquisite homemade chocolate covered pretzels.
Here are compelling reasons why this recipe will become your new favorite:
- A perfectly balanced sweet and salty indulgence.
- Requires only about 20 minutes of active preparation time.
- Calls for just a few easily accessible ingredients.
- An enjoyable and interactive treat to make with family and friends.
- Makes for a thoughtful and delicious gift for any occasion!
Essential Ingredients for Your Perfect Chocolate Covered Pretzels
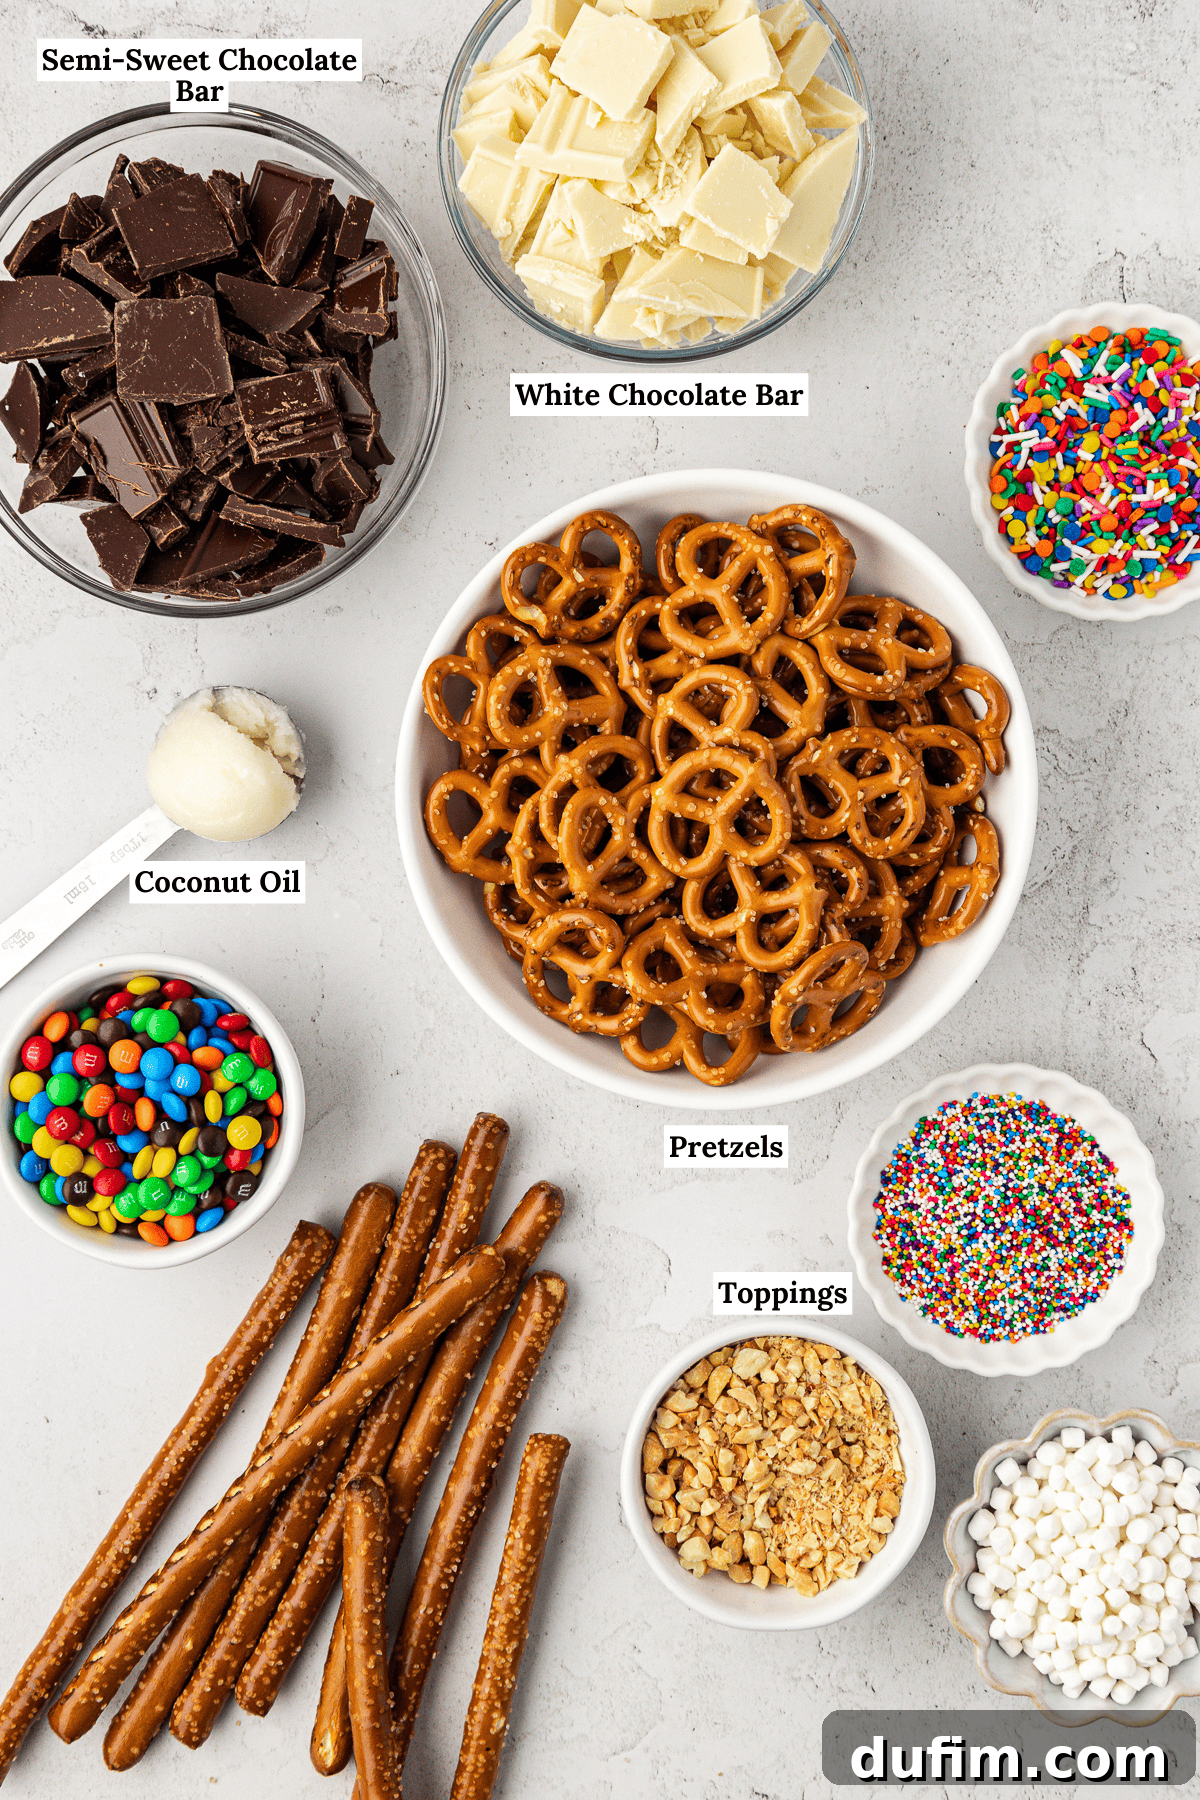
The delightful crunch of pretzels paired with rich, smooth chocolate creates an irresistible sweet and salty sensation. You’ll be surprised how few ingredients you need to achieve such a gourmet treat! While a full recipe card with precise measurements and instructions follows, here’s a detailed look at what you’ll need and some crucial considerations:
- Pretzels: The foundation of our treat! Whether you prefer classic pretzel twists for a traditional look, longer pretzel rods for easy dipping and decorating, or even mini pretzels for bite-sized delights, the choice is yours. Ensure they are fresh and unbroken for the best results.
- 8 oz (227g) Semi-Sweet Chocolate: This can be in the form of high-quality baking bars or chocolate chips. The type of chocolate significantly impacts melting, consistency, and final taste. Refer to my detailed chocolate breakdown below for specific recommendations. For best results, avoid candy melts unless specified, as their flavor and texture can be inferior.
- 8 oz (227g) White Chocolate: Similar to semi-sweet, opt for baking bars or good quality chips. True white chocolate contains cocoa butter, milk solids, and sugar, lacking cocoa solids. Many “white baking chips” are actually compound coatings; while they melt easily, true white chocolate often yields a superior flavor and texture. Again, my chocolate testing section offers specific insights.
- Coconut Oil or another Neutral Oil: A crucial ingredient for achieving that coveted smooth, glossy finish and a softer bite. Use about ½ teaspoon for each type of chocolate you melt. Neutral oils like refined coconut oil (which has no coconut flavor), vegetable oil, or canola oil work best. This helps thin the chocolate slightly, making it easier to dip and preventing a hard, brittle coating when set.
- Optional Dipping Tools: While not strictly necessary, tools like a chocolate dipping fork set can make the process much cleaner and more efficient, especially when working with smaller pretzels or intricate designs.
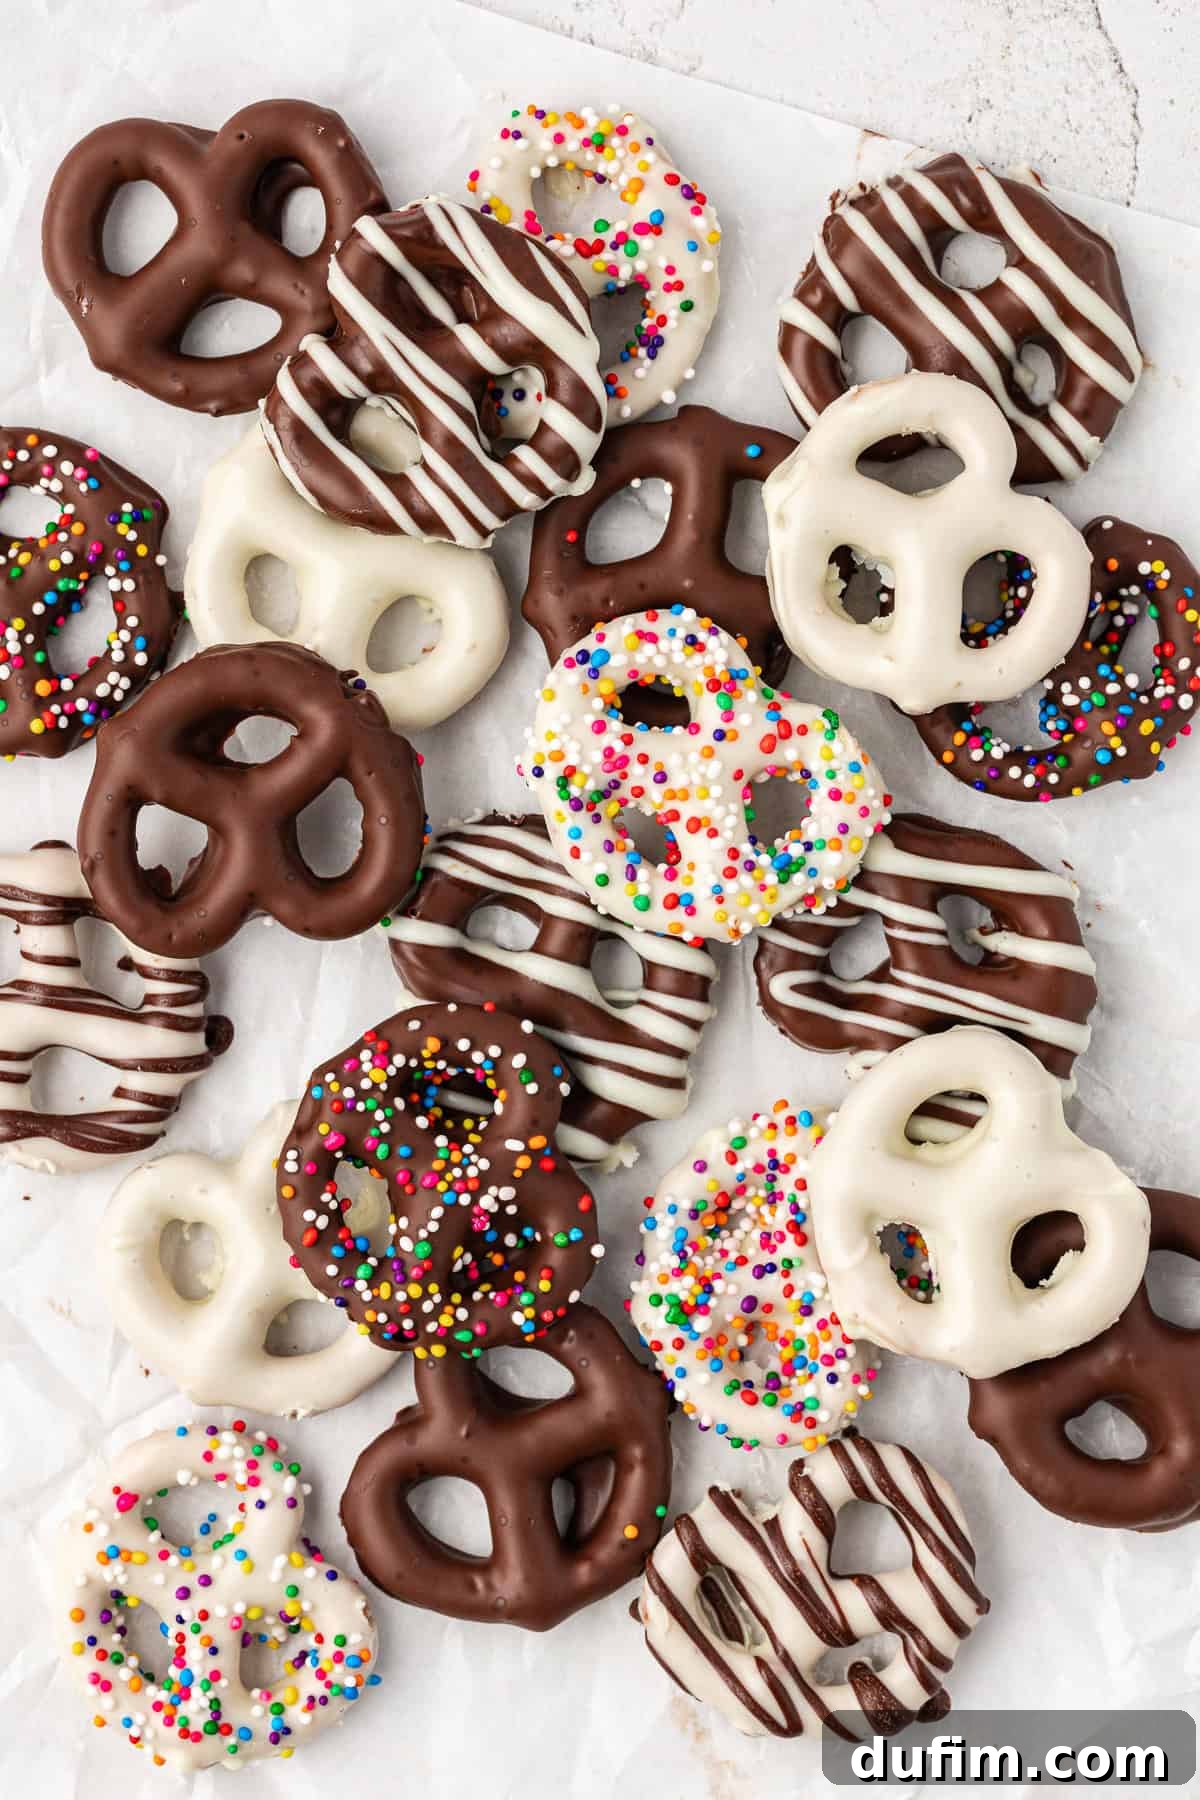
Unveiling the Best Chocolate for Your Pretzel Dipping Adventures
Choosing the right chocolate can elevate your homemade pretzels from good to absolutely extraordinary. To remove any guesswork, I rigorously tested eight different types of chocolate, meticulously documenting their performance and characteristics. My goal was to identify which chocolates provide the best balance of flavor, ease of use, appearance, and drying time for dipping pretzels.
During testing, I took comprehensive notes on: how quickly each chocolate melted, its specific taste profile, the final appearance once set (matte vs. shiny), its consistency for dipping, the time required for it to fully dry, and its overall price per ounce. While any chocolate-dipped pretzel is a treat, these detailed observations will help you craft genuinely superior results. Here’s what I discovered about each chocolate coating:
1. Ghirardelli Milk Chocolate Flavored Melting Wafers
- Time to Melt: Remarkably fast, typically around 60 seconds in the microwave.
- Taste: Sweet, but the milk chocolate flavor was somewhat subtle, not as pronounced as traditional chocolate.
- Dipping Consistency: Exceptionally smooth and easy to work with, making dipping a breeze.
- Overall Appearance: Achieved a pleasant matte finish and a light brown hue.
- Drying Time: Very quick, solidifying within minutes at room temperature.
- Price: Approximately $0.49 per ounce.
- Additional Notes: An excellent choice for beginners due to its quick drying and smooth dipping properties. Ideal for projects where speed is essential.
2. Ghirardelli Semi-Sweet Chocolate Chips
- Time to Melt: Took slightly longer, around 90 seconds.
- Taste: Delivered a deep, rich, and satisfying chocolate flavor.
- Dipping Consistency: Quite thick, even after adding oil, which made dipping more challenging for a smooth coat.
- Overall Appearance: Set with an attractive, glossy sheen.
- Drying Time: Significantly slower, requiring a few hours to fully set.
- Price: A more economical option at approximately $0.34 per ounce.
- Additional Notes: While fantastic for baking, its thickness makes it less ideal for dipping pretzels or fruit where a thin, even coat is desired.
3. Ghirardelli White Chocolate Chips
- Time to Melt: Quick to melt, typically within 60 seconds.
- Taste: Offered a well-balanced, rich flavor that wasn’t overly sweet.
- Dipping Consistency: Maintained a medium thickness, still easy enough for smooth dipping.
- Overall Appearance: Set to an appealing off-white color.
- Drying Time: Dried relatively quickly.
- Price: Around $0.38 per ounce.
- Additional Notes: This was arguably the top white chocolate contender in terms of both taste and efficient drying.
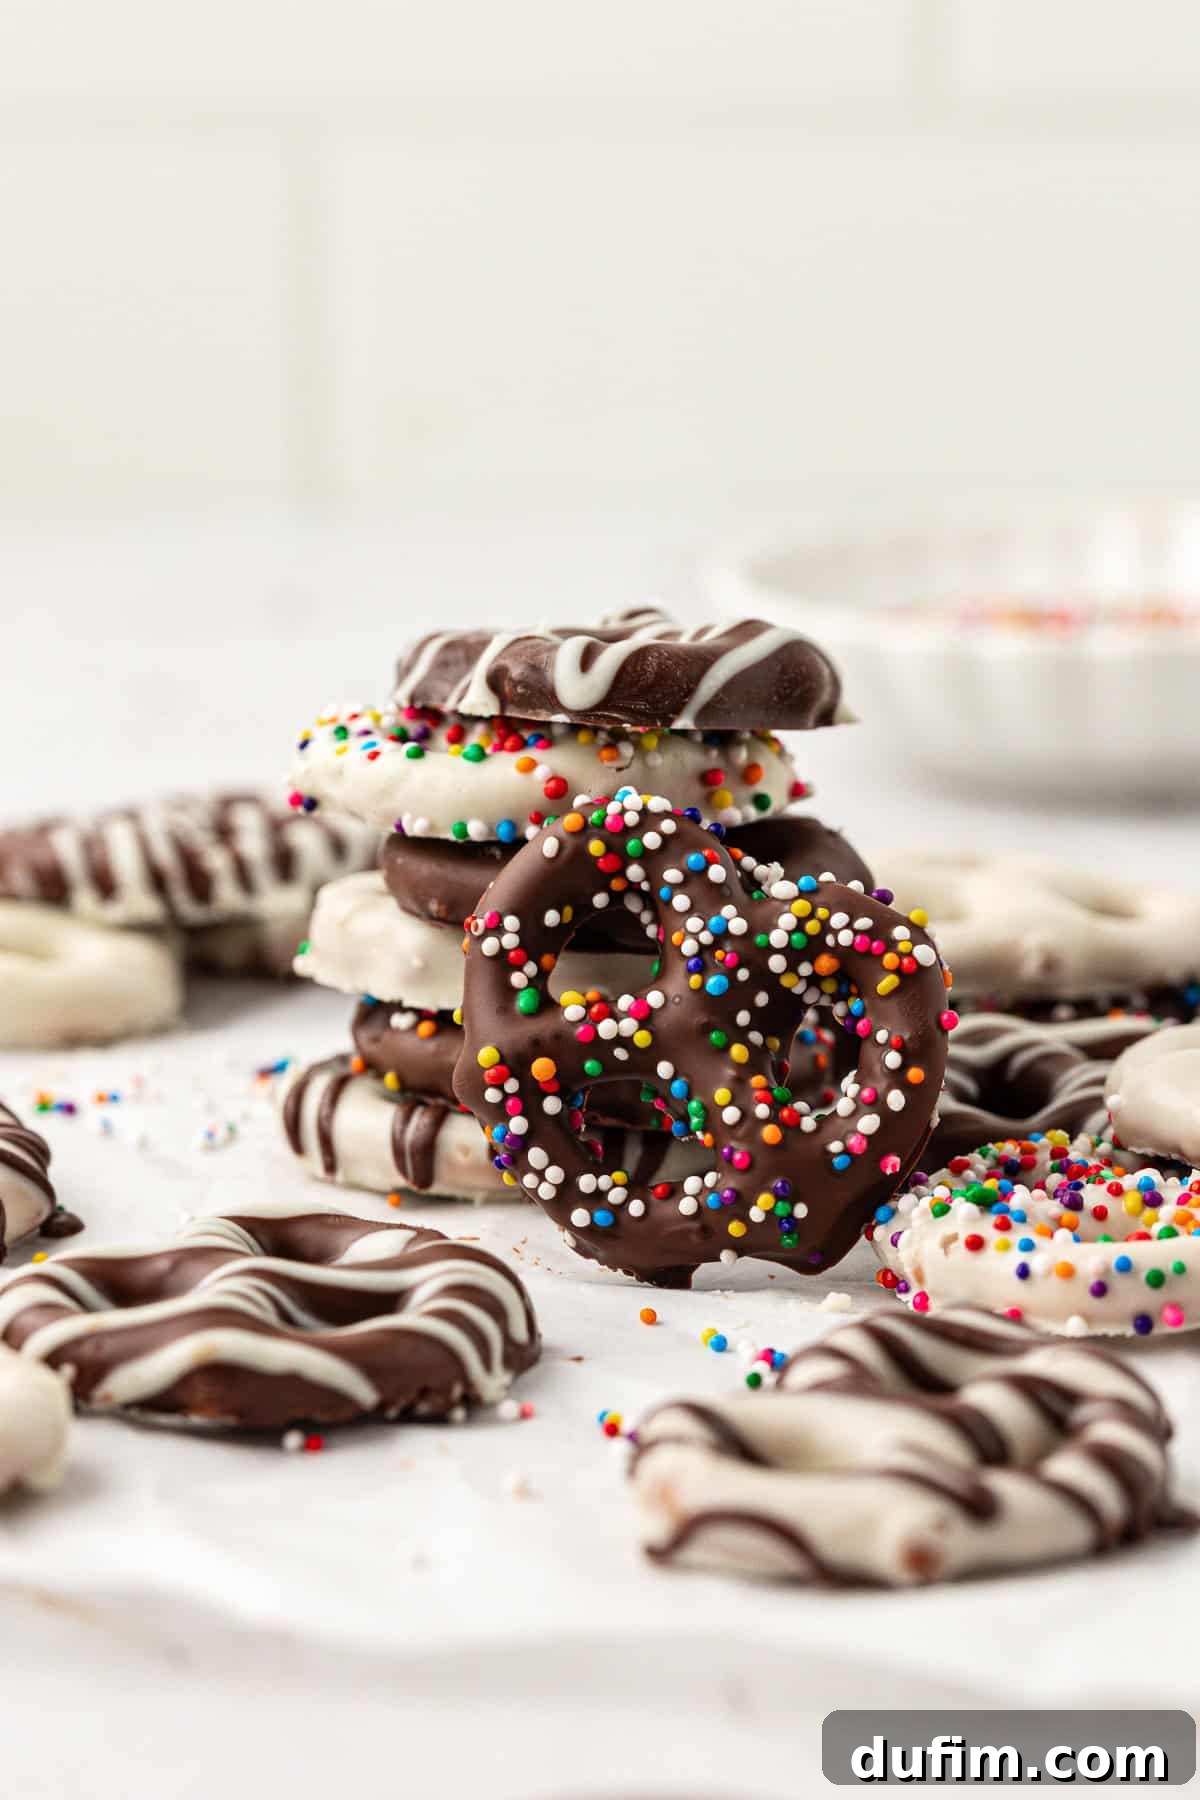
4. Baker’s Semi-Sweet Chocolate Bar
- Time to Melt: Required approximately 90 seconds to melt completely.
- Taste: Provided a deep, robust chocolate flavor that was very satisfying.
- Dipping Consistency: Offered a medium thickness, making it quite manageable for dipping.
- Overall Appearance: Resulted in a beautiful, shiny finish.
- Drying Time: A slower drying chocolate, taking a few hours to fully set.
- Price: Pricier at around $0.62 per ounce.
- Additional Notes: Despite the higher cost and longer drying time, its excellent flavor and consistent dipping texture make it a strong contender for quality.
5. Ghirardelli White Chocolate Bar
- Time to Melt: Melted quickly, within 60 seconds.
- Taste: Possessed a good, rich white chocolate flavor without being excessively sweet.
- Dipping Consistency: Maintained a medium thickness, allowing for relatively easy dipping.
- Overall Appearance: Set to an appealing off-white shade.
- Drying Time: Slow to dry, needing several hours.
- Price: The most expensive option at around $0.72 per ounce.
- Additional Notes: While its taste was commendable, the higher price point and extended drying time are factors to consider.
6. Ghirardelli Dark Chocolate Flavored Melting Wafers
- Time to Melt: Melted very fast, within 60 seconds.
- Taste: Surprisingly not bitter like many dark chocolates; it offered a superior chocolate flavor compared to their milk chocolate wafers.
- Dipping Consistency: Very easy to melt and incredibly smooth for dipping.
- Overall Appearance: Left a sophisticated matte finish.
- Drying Time: Quick to dry, setting rapidly.
- Price: Reasonably priced at approximately $0.49 per ounce.
- Additional Notes: A fantastic option for those who enjoy dark chocolate without the intense bitterness, and its quick-set property is a huge plus.
7. Chocolate Almond Bark (Walmart Brand)
- Time to Melt: Melted in just 60 seconds.
- Taste: Tended to be more sweet than distinctly chocolatey.
- Dipping Consistency: Melted easily and provided a very smooth consistency.
- Overall Appearance: Achieved a matte finish.
- Drying Time: Exceptionally quick drying.
- Price: The most budget-friendly option at around $0.15 per ounce.
- Additional Notes: An excellent choice for drizzles due to its smooth flow and quick setting; a great economical option.
8. White Chocolate Almond Bark (Walmart Brand)
- Time to Melt: Melted quickly, in about 60 seconds.
- Taste: Similar to its chocolate counterpart, it was primarily sweet rather than offering a rich white chocolate flavor.
- Dipping Consistency: Melted smoothly and was very easy to work with.
- Overall Appearance: Stood out for its pure, brilliant white color, the whitest among all tested options.
- Drying Time: Dried very quickly.
- Price: Very economical at approximately $0.15 per ounce.
- Additional Notes: Fantastic for achieving a bright white coating or for creating contrasting drizzles.
★ Which Chocolate Should You Choose? My Top Recommendations
Ultimately, your choice of chocolate will hinge on personal preference regarding taste, budget, and desired working properties. However, based on my extensive testing, here are some tailored recommendations:
- For a Rich, Deep Chocolate Flavor: If you prioritize a profound chocolate taste and don’t mind a longer drying time, opt for Ghirardelli Semi-Sweet Chocolate Chips or Baker’s Semi-Sweet Chocolate Bar. Their flavor depth is unmatched.
- For a Balance of Flavor and Quick Drying: If you want a good chocolate flavor with efficient drying, Ghirardelli Dark Chocolate Flavored Melting Wafers are an excellent middle-ground choice. They offer a pleasing taste without the bitterness of pure dark chocolate and set quickly.
- For the Most Budget-Friendly Option: When cost-effectiveness is key, Chocolate Almond Bark or White Chocolate Almond Bark (Walmart Brand) are your go-to. They are easy to use and very affordable, though their flavor is sweeter and less complex.
- For a Pure White Color: If a pristine, bright white coating is what you’re after, the Walmart Brand White Chocolate Almond Bark delivers the best and purest white color among all tested options.
- Avoid for Dipping (Typically): I generally found chocolate chips (other than melting wafers) to be my least favorite for dipping. Even with added oil, their inherent thickness often resulted in a less smooth and even coating compared to bars or wafers.
How to Make The Best Chocolate Covered Pretzels: Step-by-Step Perfection
This recipe isn’t just incredibly easy; it’s also a blast to make, making it a fantastic activity to share with your kids or loved ones. Homemade chocolate covered pretzels are perfect for holiday gifting, Valentine’s Day treats, or simply a delightful snack for any day. Follow these simple steps and my expert tips to ensure flawless results every time.
- Carefully Melt Your Chocolate: Begin by placing your chosen chocolate (semi-sweet or white) into separate microwave-safe bowls. Heat the chocolate in short 20-second intervals. After each interval, remove the bowl and stir thoroughly. This gradual melting prevents scorching and ensures even heat distribution. Typically, 3-4 intervals are sufficient. Stop microwaving once small pieces of chocolate still remain, then continue stirring with a spoon. The residual heat from the melted chocolate will gently melt these remaining pieces, resulting in a perfectly smooth, unburnt consistency.
- Incorporate Oil for Shine and Smoothness: Once each type of chocolate is fully melted and smooth, stir in ½ teaspoon of a neutral oil (like coconut oil, vegetable oil, or canola oil). This small addition is a game-changer! It helps achieve the perfect dipping consistency, giving your pretzels a beautiful, glossy finish. Furthermore, the oil makes the chocolate softer when set, preventing that hard, brittle crack when you bite into it, and instead offering a pleasant, yielding texture.
- Prepare Your Baking Sheet: Line a baking sheet with wax paper, parchment paper, or a silicone baking mat. This crucial step prevents your chocolate-covered pretzels from sticking to the pan as they set, ensuring easy removal and a clean underside. Prepare this before you start dipping so you have a ready surface.
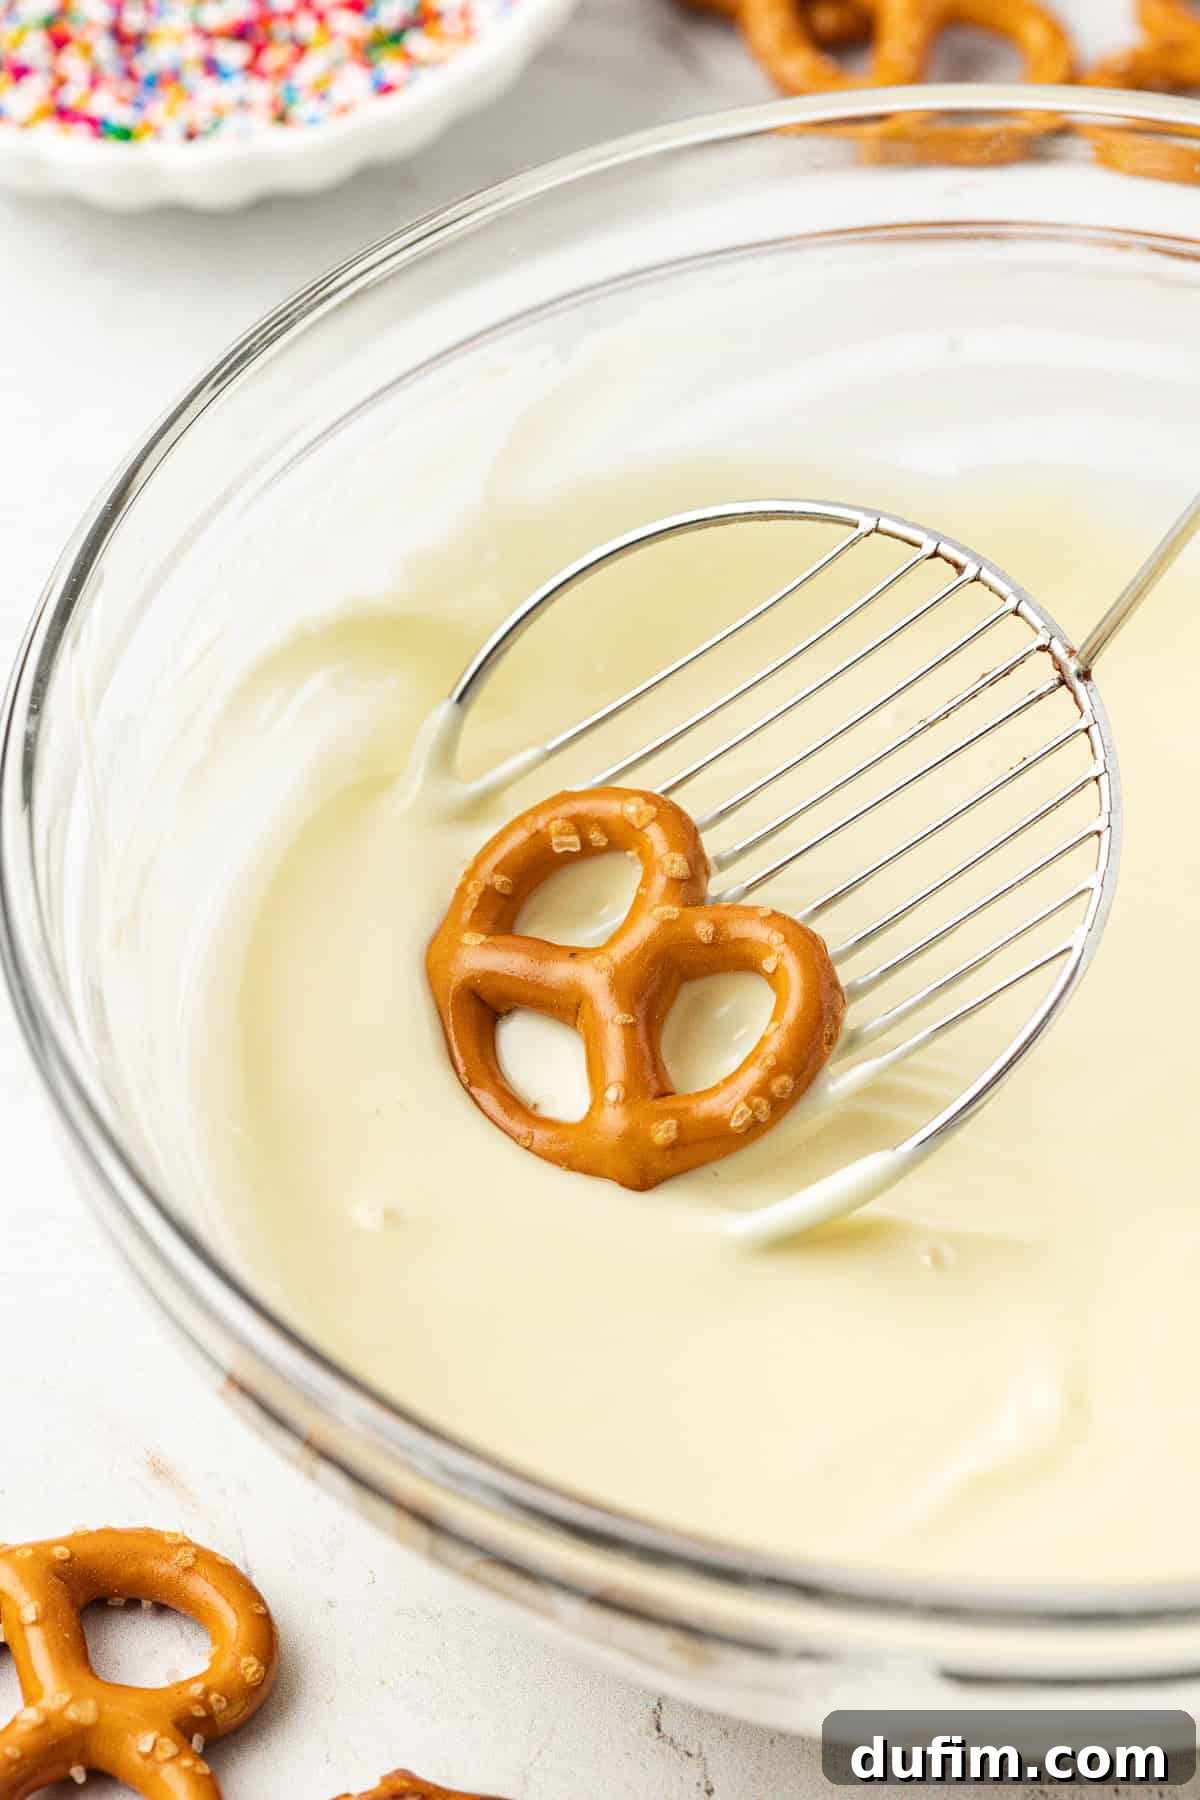
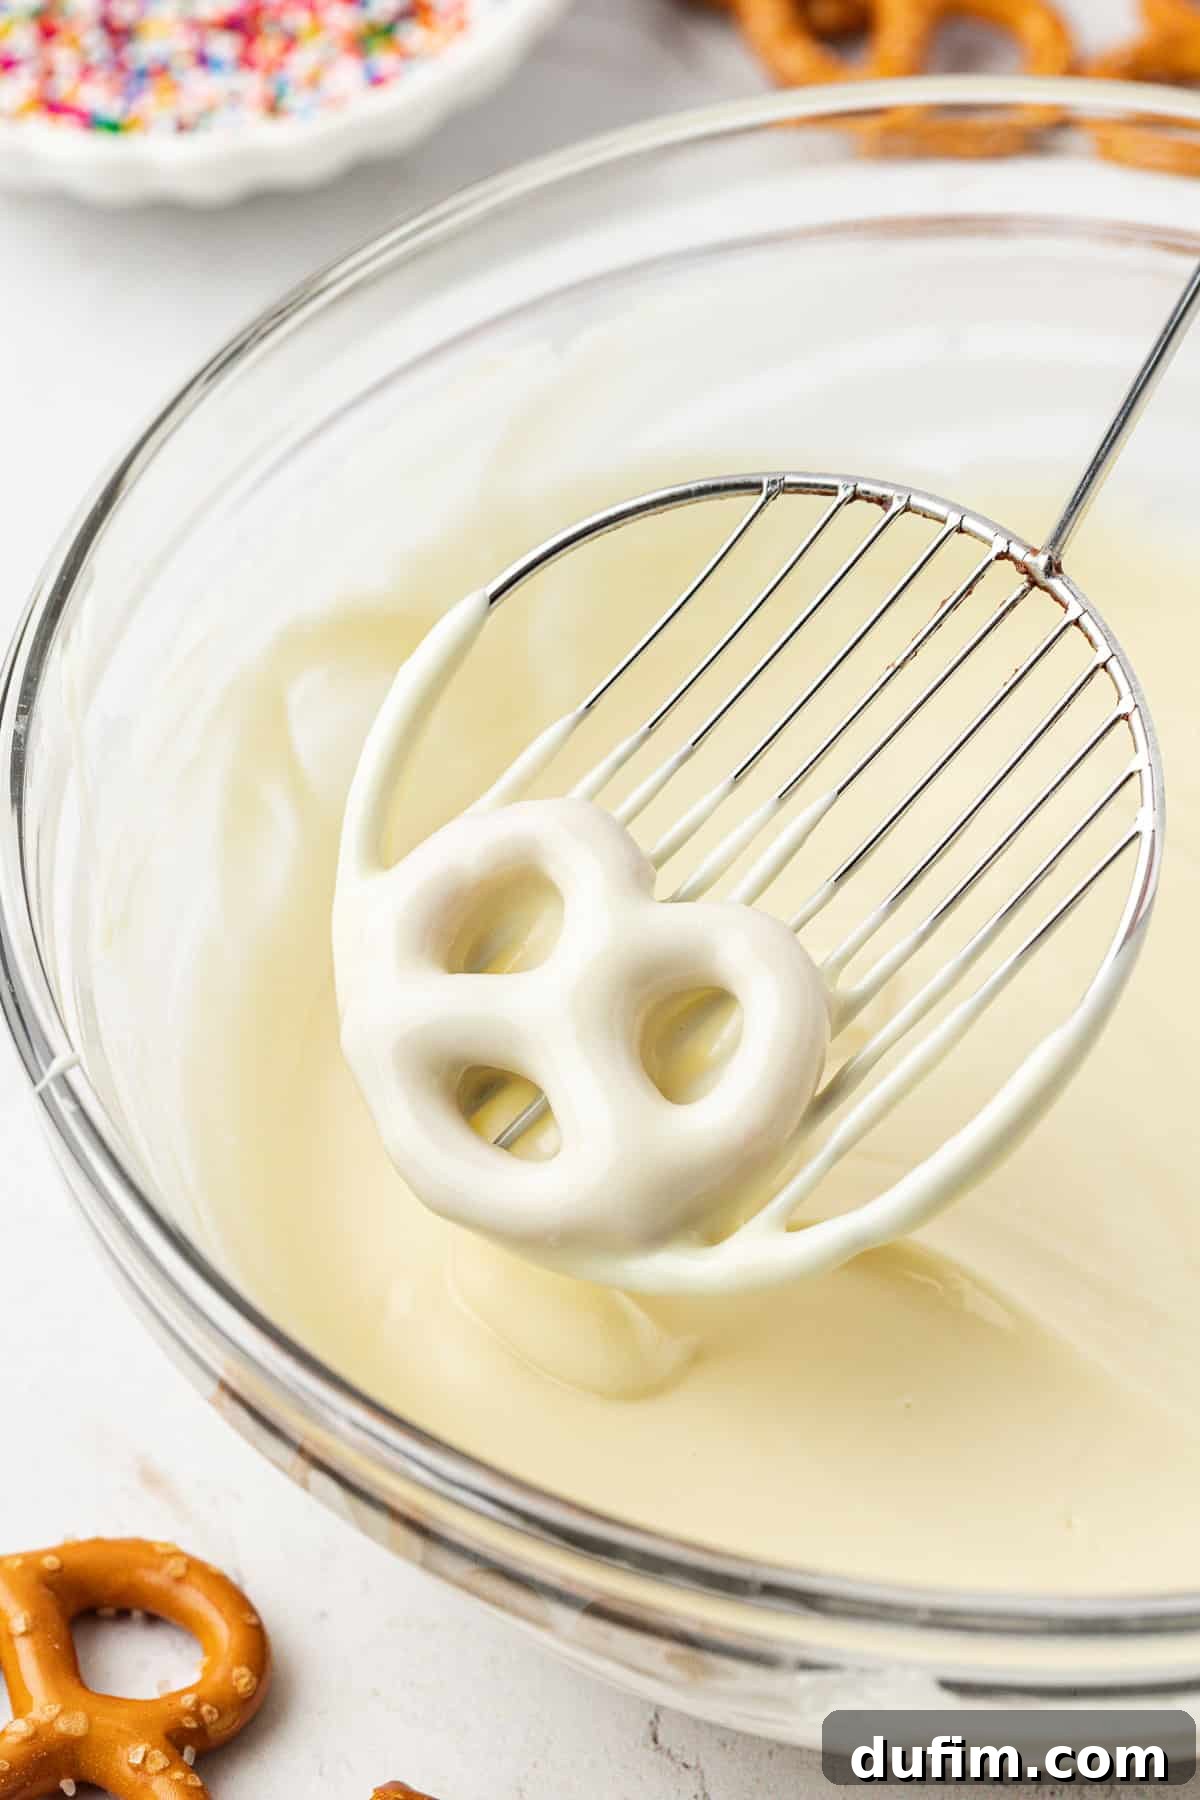
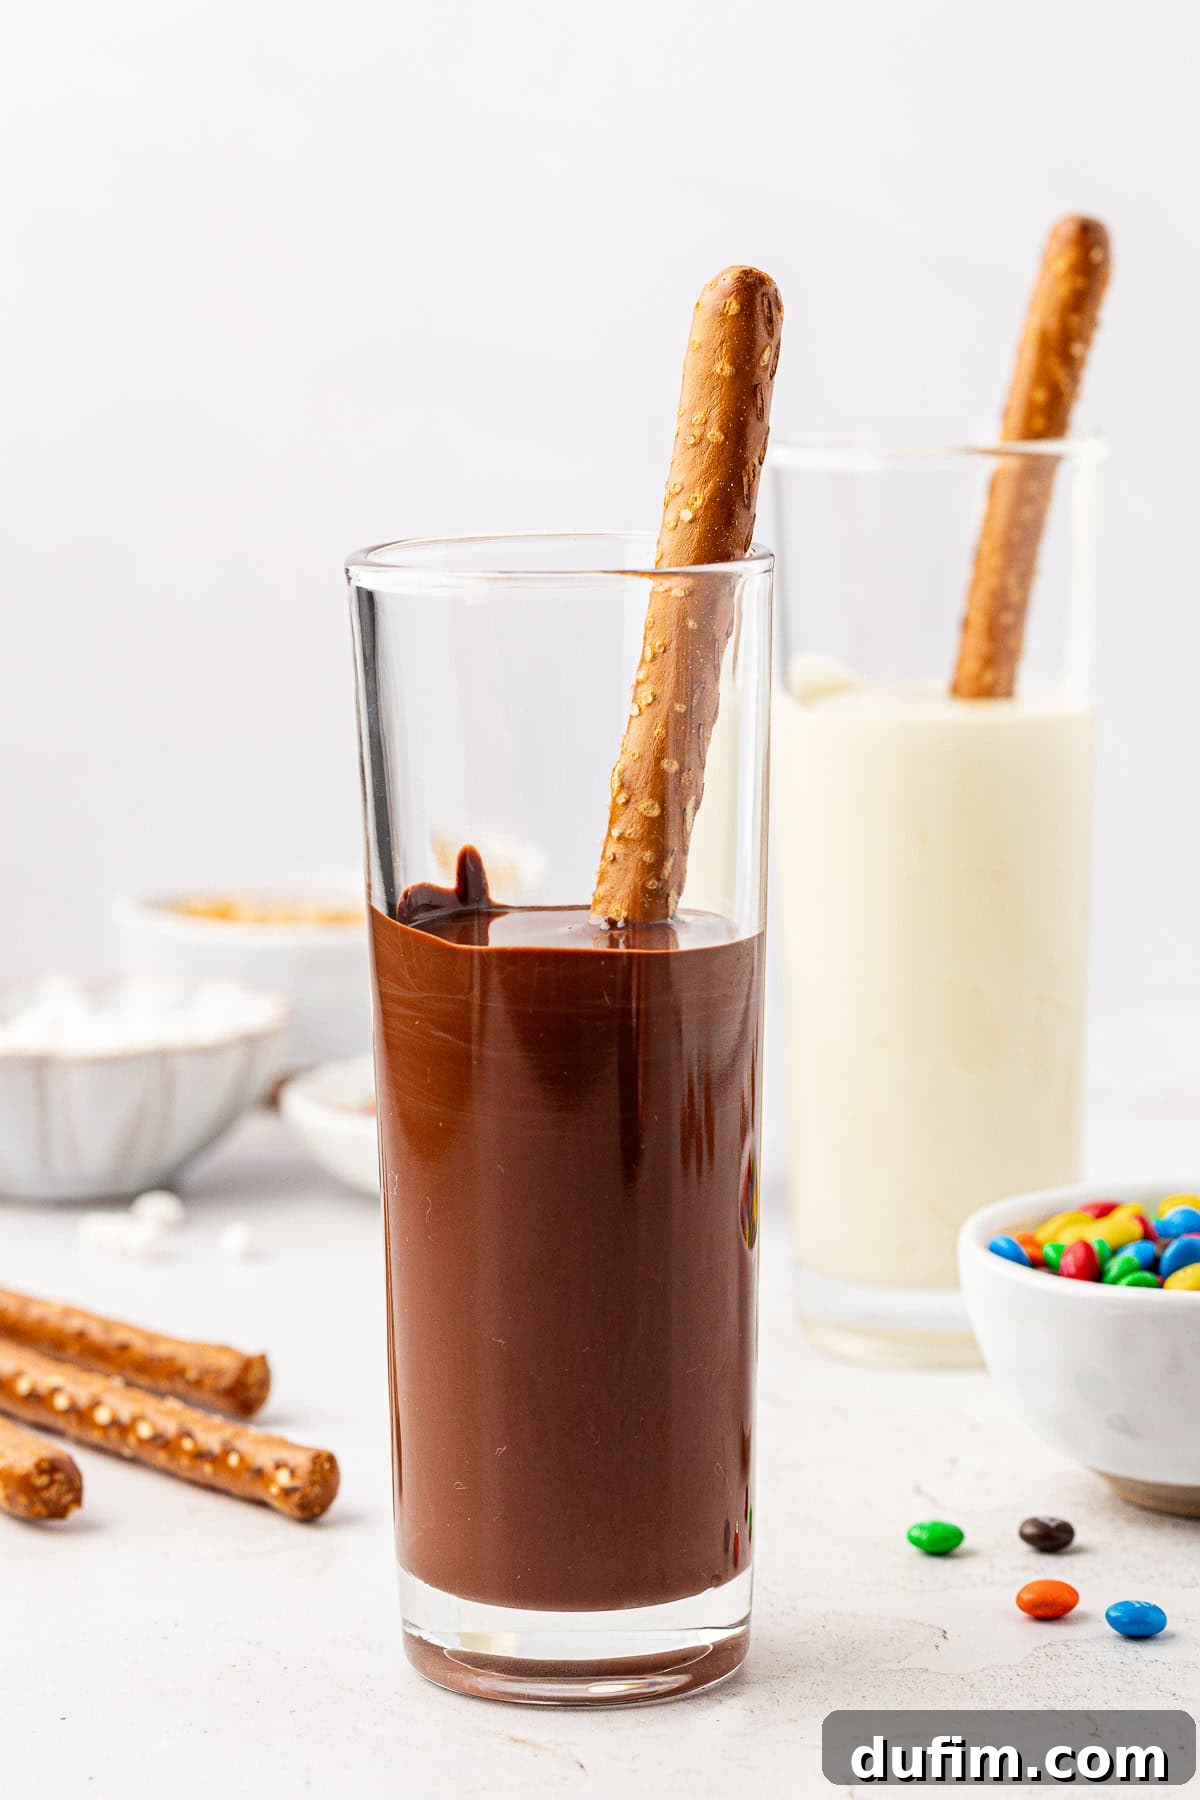
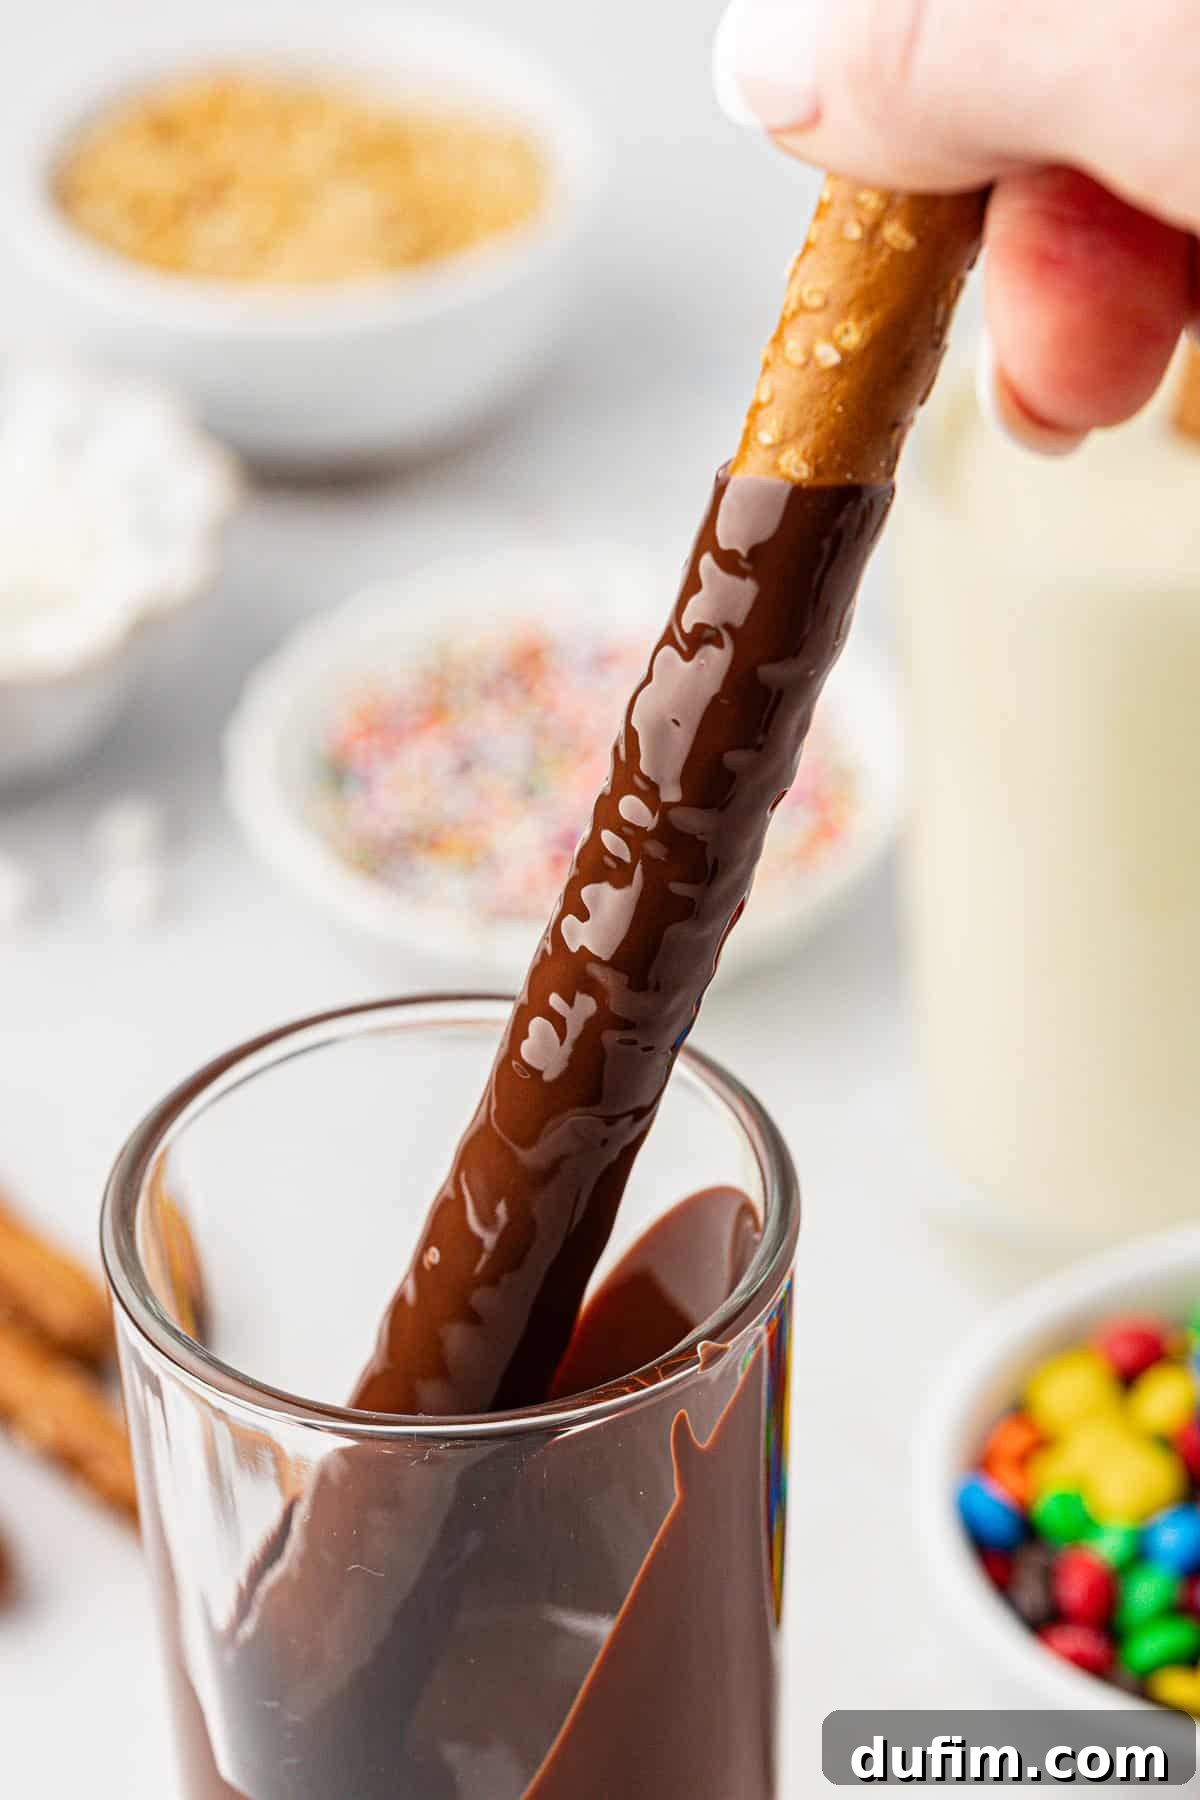
- Expertly Dip Your Pretzels: Submerge each pretzel into the melted chocolate. Use a fork, a dedicated dipping tool, or even your fingers (if comfortable and clean!) to ensure it’s fully coated. Lift the pretzel and gently tap off any excess chocolate against the rim of the bowl. This creates a clean, even coating and prevents pooling on your baking sheet. For pretzel rods, a tall, narrow glass filled with chocolate works wonders for easy, deep dipping.
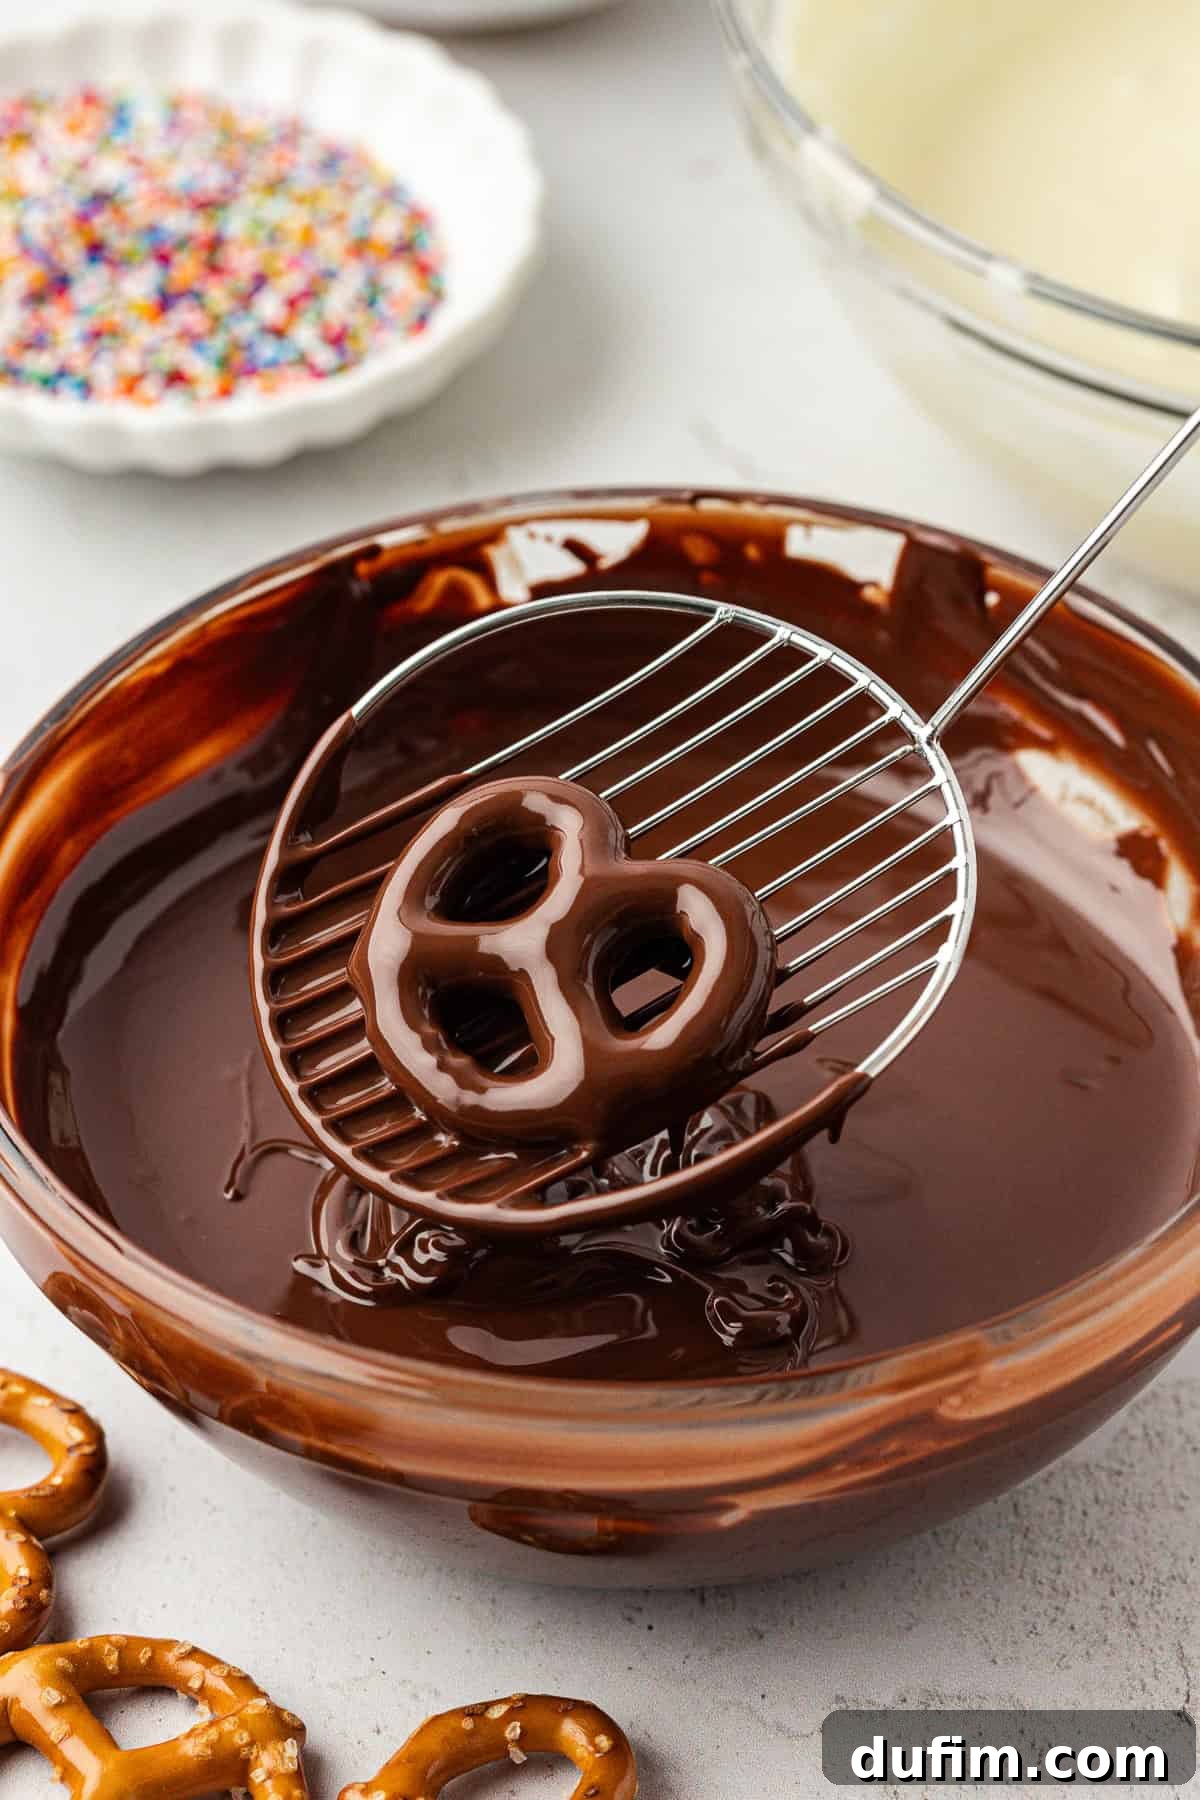
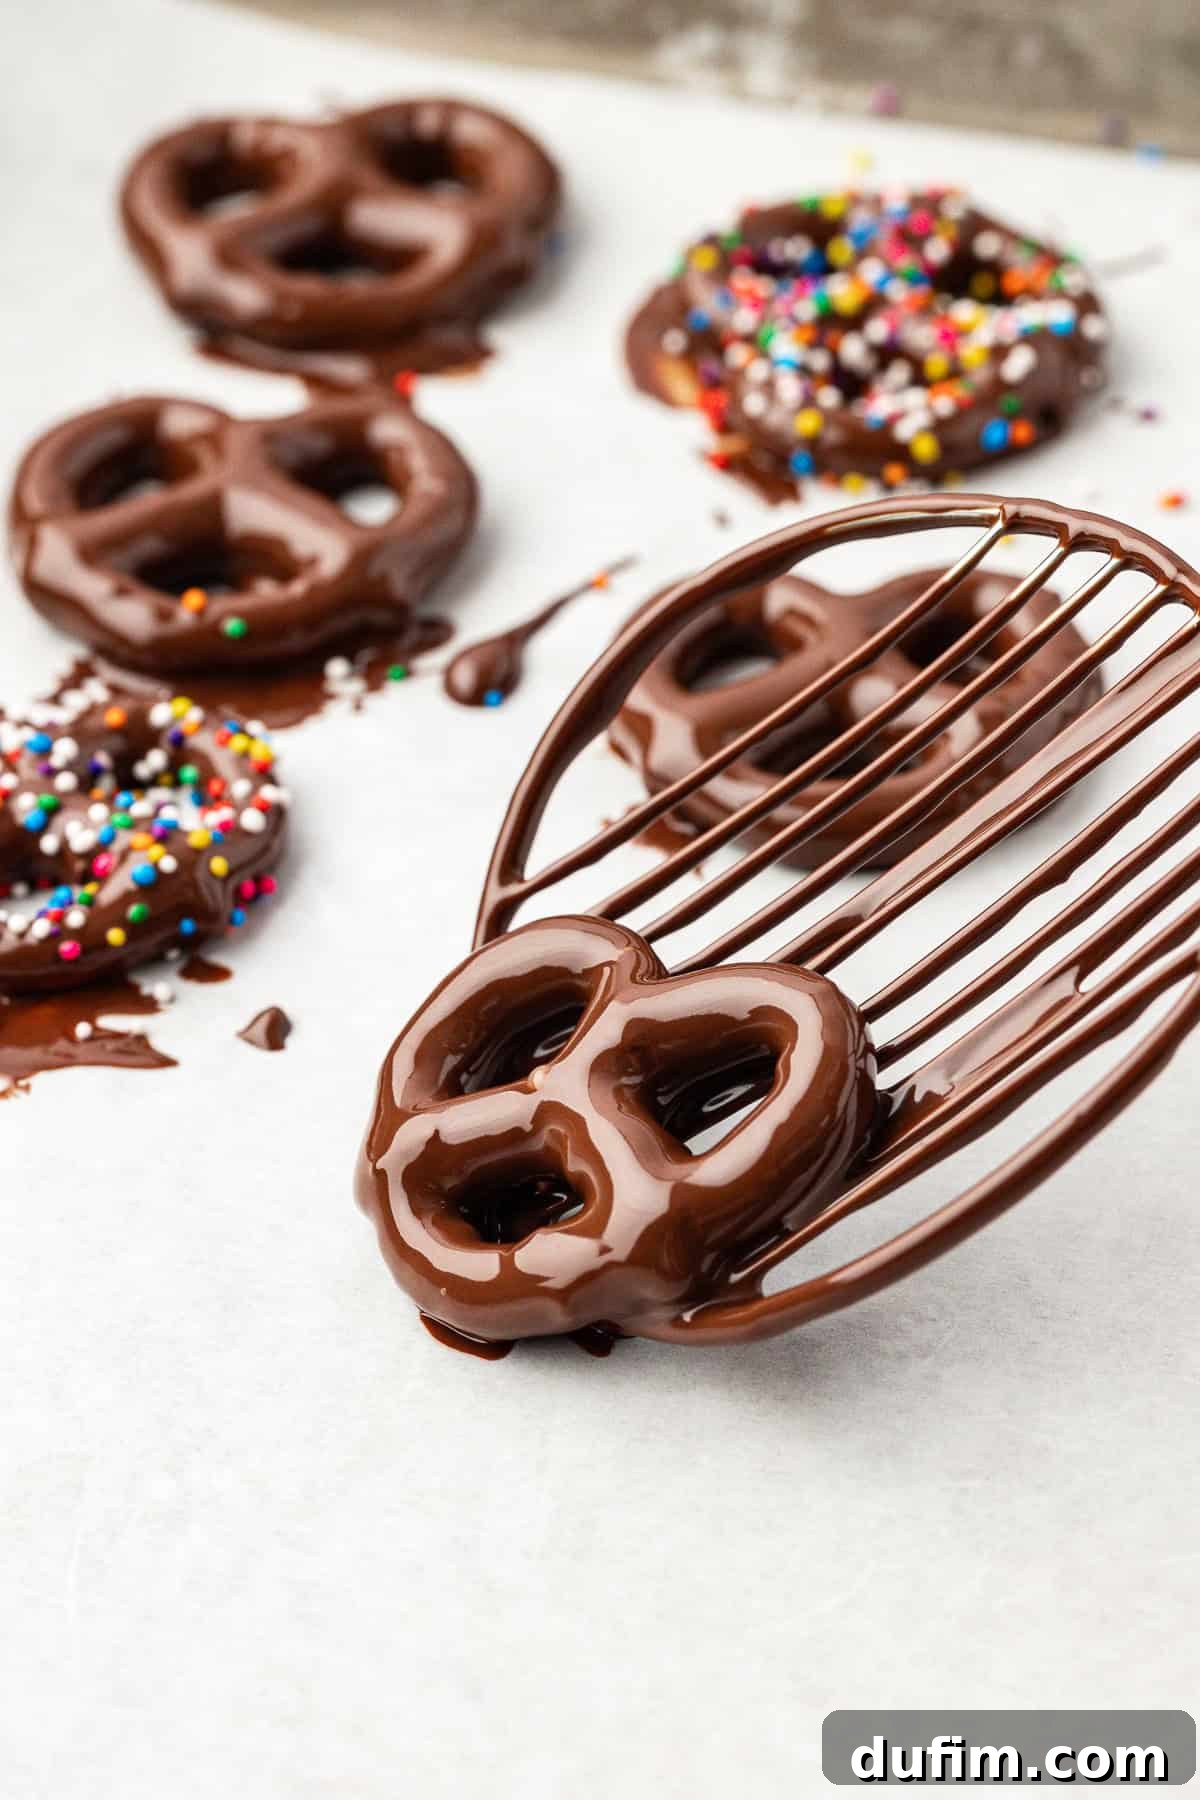
- Arrange and Allow to Set: Carefully place each chocolate-covered pretzel onto your lined baking sheet, ensuring there’s ample space between them. Preventing contact is key; it allows the chocolate to set uniformly without sticking to adjacent pretzels.
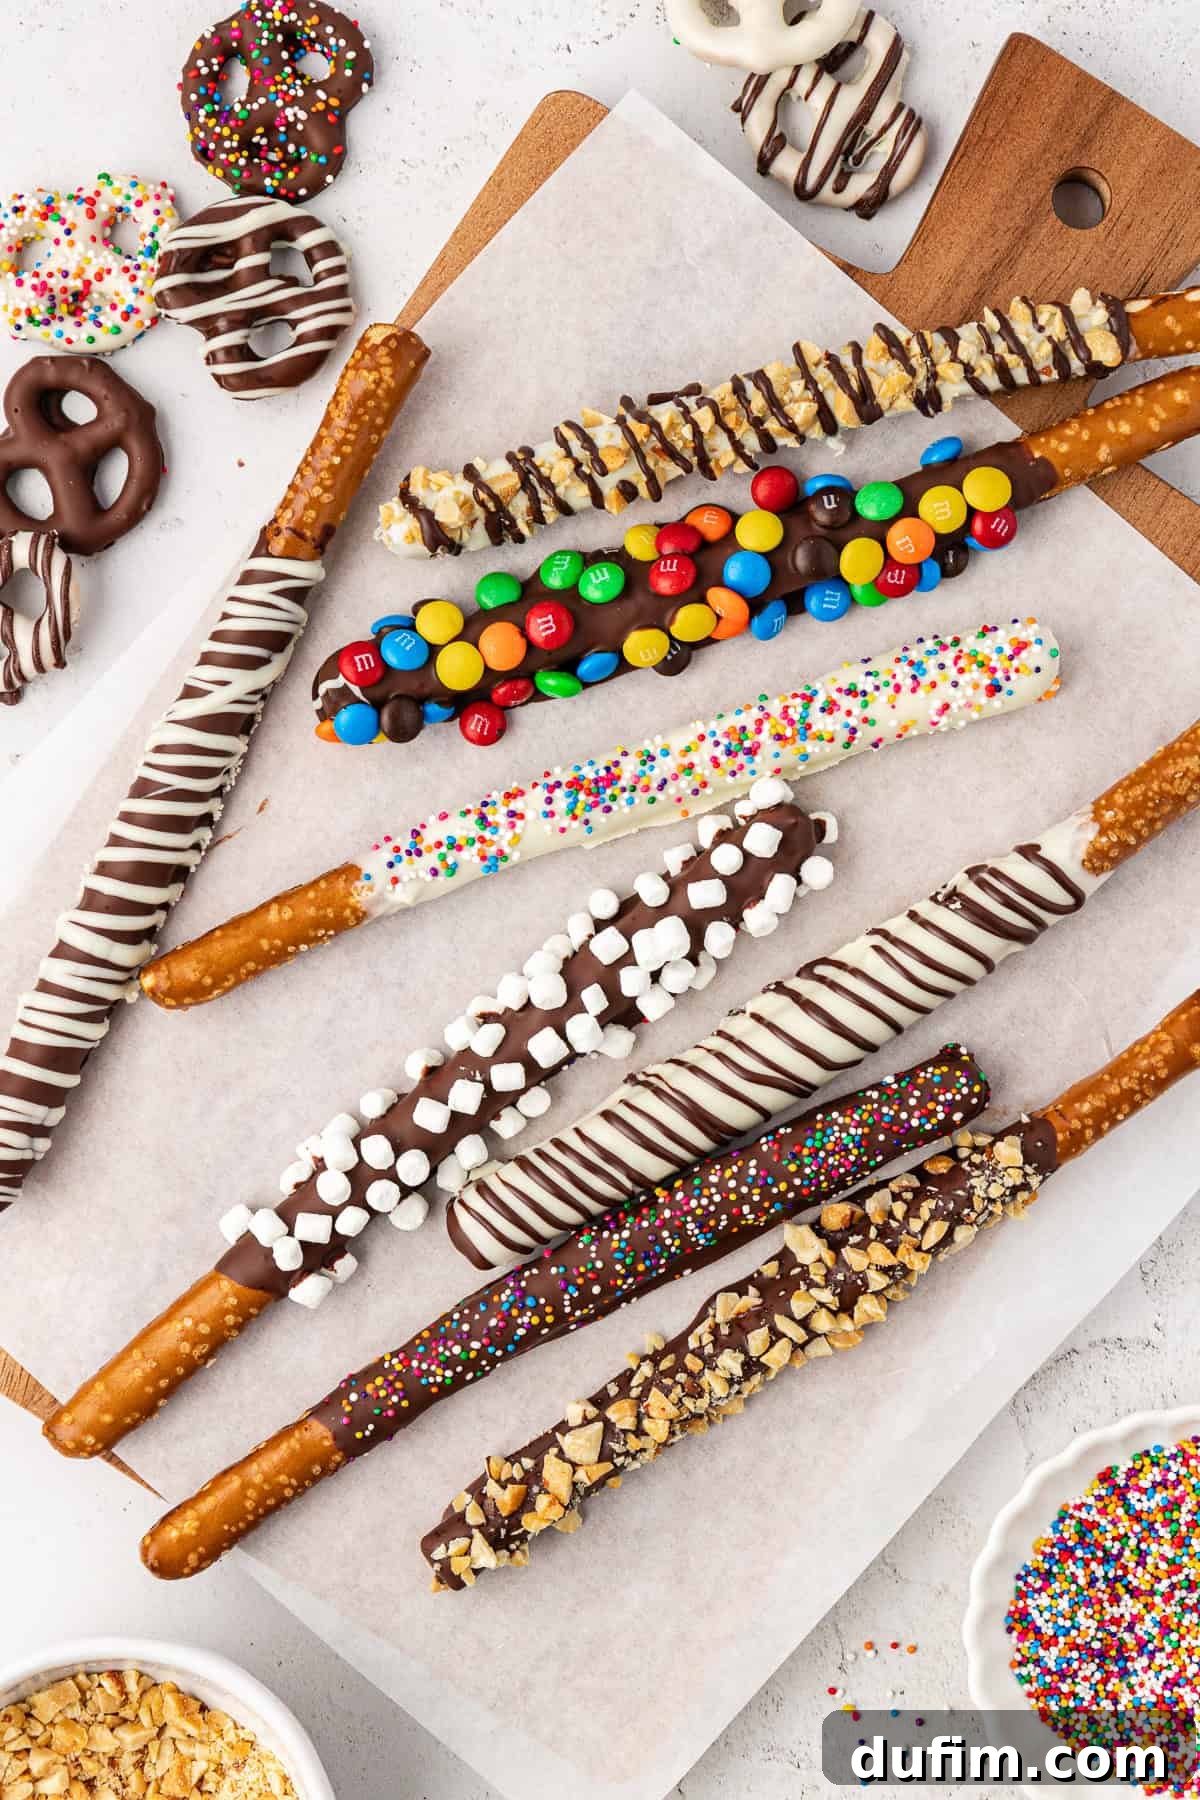
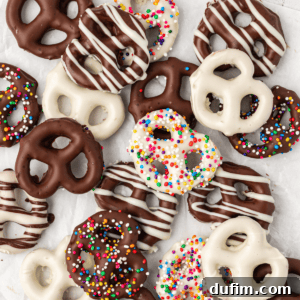
- Add Toppings (Optional): This is where creativity truly shines! If you plan to add any toppings, do so immediately after placing the dipped pretzel on the baking sheet, while the chocolate is still wet and tacky. Popular choices include vibrant sprinkles, finely crushed nuts (peanuts, almonds, pecans), a sprinkle of flaky sea salt for an extra flavor dimension, or even mini candy pieces.
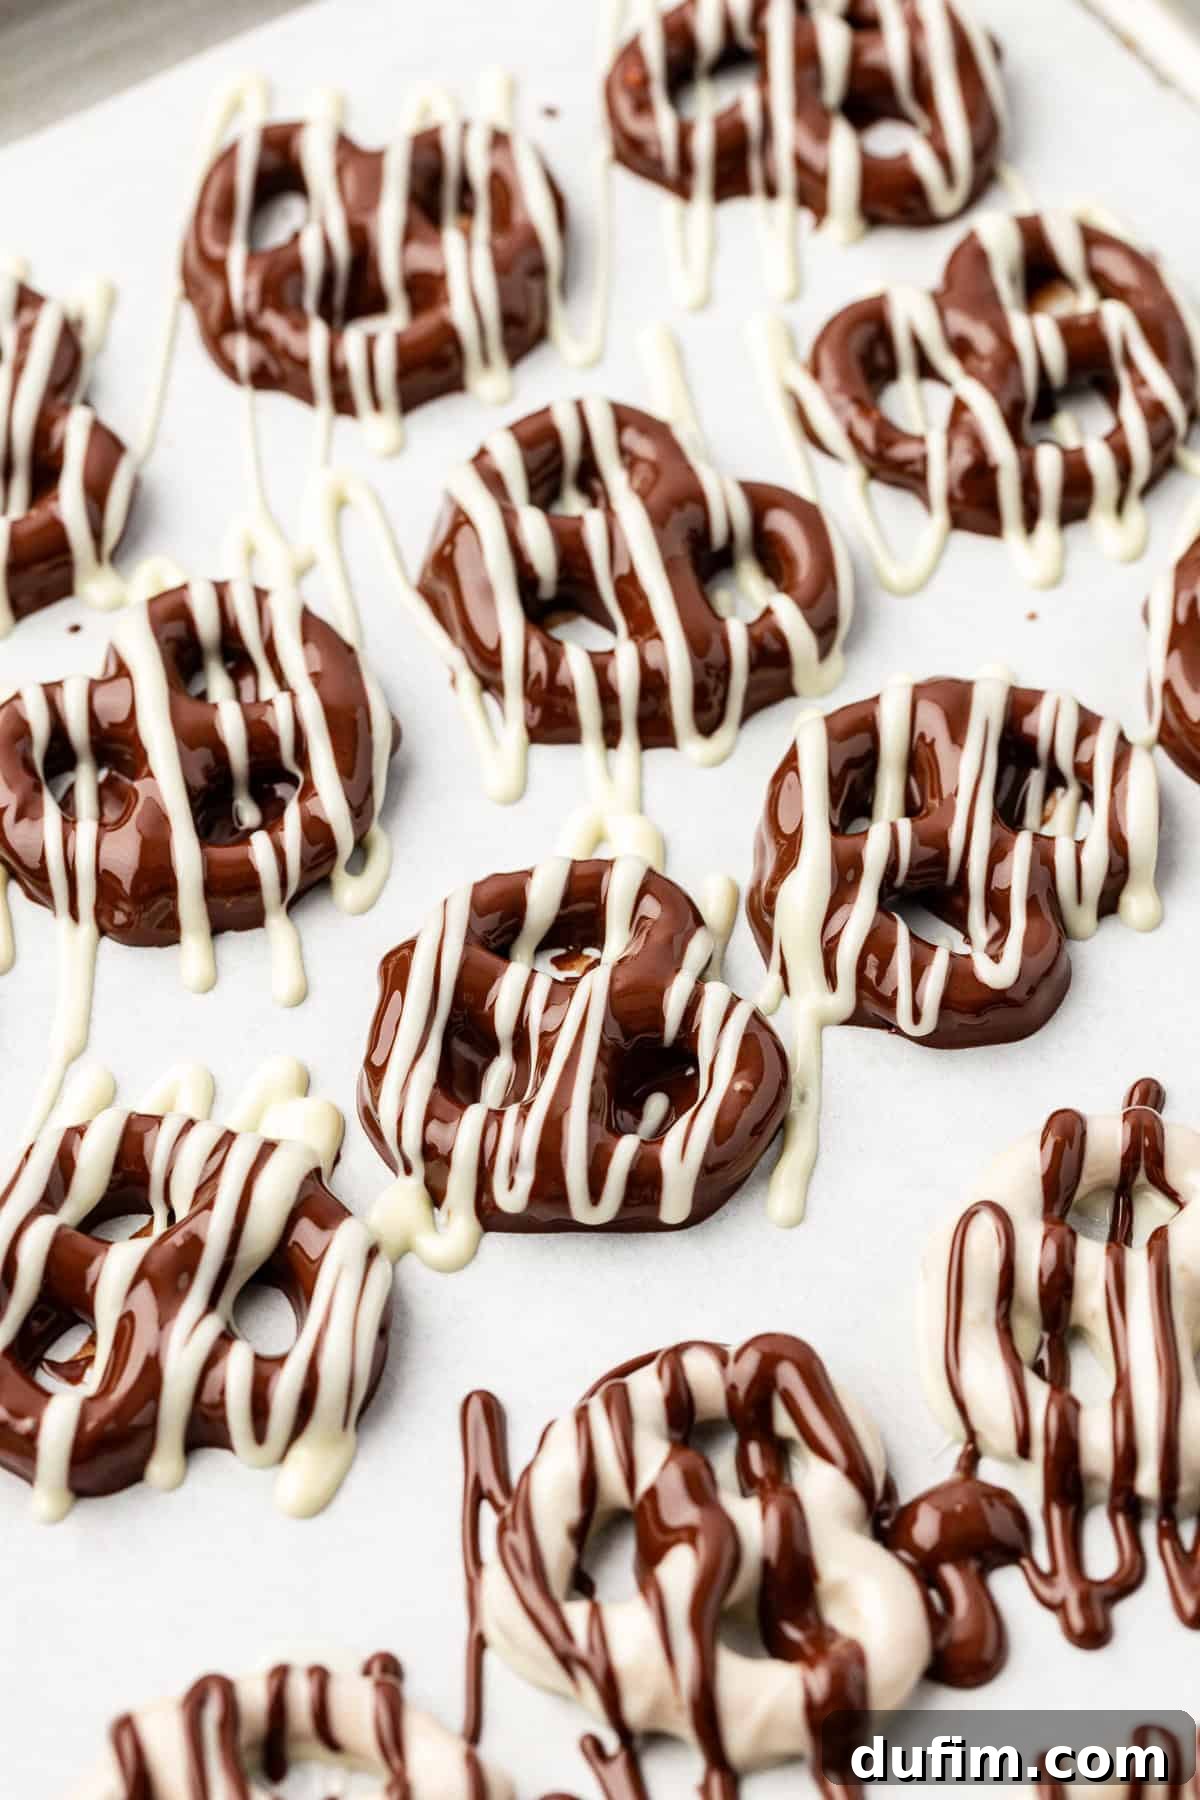
- Let the Chocolate Set Completely: Allow your decorated pretzels to sit undisturbed at room temperature until the chocolate is fully firm to the touch. This can take anywhere from a few minutes (for quick-setting wafers/bark) to a few hours (for traditional chocolate bars/chips). If you wish to add a contrasting chocolate drizzle, transfer a small amount of melted chocolate (it can be a different color) into a piping bag or a small sandwich bag with a tiny corner snipped off. Drizzle artfully over the set pretzels.
- Store and Savor: Once the chocolate has completely set and is hard, carefully transfer the chocolate-covered pretzels to an airtight container. They can be stored at room temperature for several days, maintaining their freshness and delicious crunch.
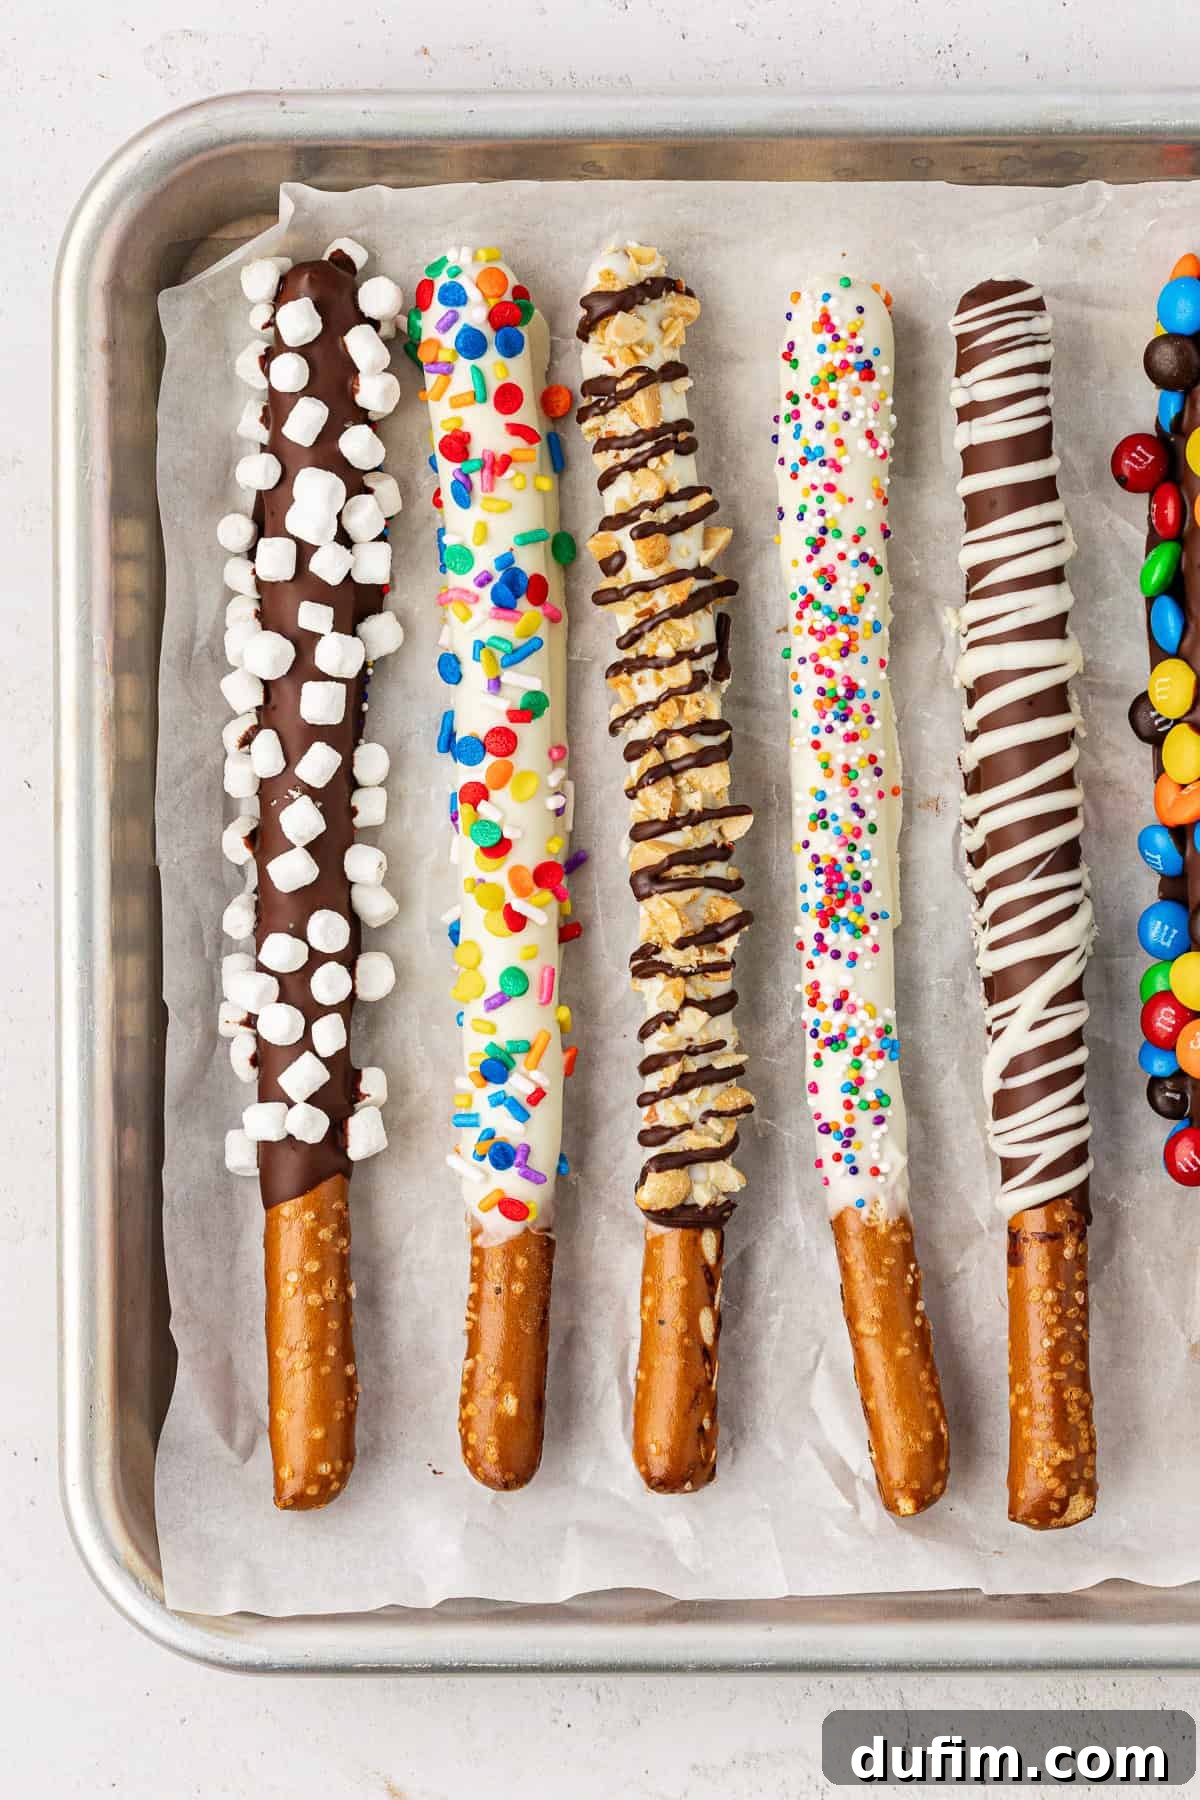
Creative Chocolate Covered Pretzel Recipe Variations
Beyond the classic dark or white chocolate coating, these pretzels are a canvas for your culinary imagination! They can be easily customized to suit any theme, holiday, or personal preference. Here are some inspiring ideas to make your chocolate pretzels truly unique:
- Tailor Your Chocolate Choice: As highlighted in my extensive guide above, the chocolate you select dramatically influences the outcome. Revisit my detailed breakdown of the eight tested chocolates to choose based on taste, drying time, consistency, and appearance for your specific project.
- Endless Topping Possibilities: The moment after dipping, while the chocolate is still wet, is your chance to get creative! Beyond sprinkles and crushed nuts, consider:
- Candy Crush: M&Ms, Reese’s Pieces, chopped Snickers, or crushed candy canes (especially festive for winter holidays).
- Sweet & Savory: Toasted coconut flakes, mini chocolate chips, crumbled Oreos, or even finely crushed potato chips for an extra salty crunch.
- Decadent Drizzles: Create beautiful patterns with a contrasting chocolate drizzle, or even caramel, peanut butter, or white chocolate tinted with food coloring.
- Make Them Festive for Any Occasion: Simple changes to sprinkles or chocolate colors can instantly transform your pretzels for any holiday or celebration:
- Valentine’s Day: Use pink, red, and white sprinkles with white and dark chocolate.
- Halloween: Orange, black, and purple sprinkles; use green-tinted white chocolate for “monster” pretzels. Consider my Frankenstein Pretzels for inspiration!
- Christmas: Red and green sprinkles, peppermint bits, or even crushed ginger snap cookies. Check out my Peppermint Bark Pretzels.
- Easter: Pastel sprinkles, mini eggs, or chick-shaped candies. See my recipe for Easter Pretzels.
- New Year’s Eve: Gold, silver, and black sprinkles for a sophisticated touch. Don’t forget my New Year’s Eve Pretzel Rods!
- Explore Different Pretzel Shapes: While twists and rods are most popular, don’t limit yourself! Mini pretzels, waffle pretzels, or even gluten-free pretzels can all be beautifully dipped and decorated.
Expert Tips for Flawless Homemade Chocolate Covered Pretzels
While this is undoubtedly one of the easiest dessert recipes you’ll tackle, a few key techniques can make all the difference, ensuring professional-looking results every time. Follow these golden tips for the best salty-sweet treats:
- Crucial: Do Not Overheat the Chocolate! This is the most vital tip. Overheating chocolate can cause it to seize, become grainy, or develop an unappetizing texture and dull appearance. Always use the microwave method as described: heat in short 20-second bursts, stirring diligently after each interval. Stop when small chunks remain, allowing residual heat to melt them. Alternatively, use a double boiler over simmering (not boiling) water, ensuring no steam or water gets into the chocolate.
- Lining Your Baking Sheet is Non-Negotiable: It is absolutely essential to line your baking sheet with parchment paper, a silicone baking mat, or wax paper. Skipping this step will cause the chocolate-covered pretzels to firmly stick to the pan as they set, making removal difficult and potentially ruining their presentation.
- Accelerate the Setting Process (If Needed): If you’re pressed for time and need your pretzels to set faster, you can carefully place the lined baking sheet in the refrigerator for 10-15 minutes. Be cautious not to leave them in too long, as extreme temperature changes can sometimes lead to chocolate bloom (the whitish streaks). Remove them as soon as the chocolate is firm.
- Optimize Dipping for Pretzel Rods: For pretzel rods, transfer your melted chocolate into a tall, skinny glass or a wide-mouthed jar. This makes dipping the long rods much easier, allowing for a deep, even coating without getting chocolate all over your hands.
- Avoid Water Contact: Even a tiny drop of water introduced into melting chocolate can cause it to “seize,” turning it into a thick, clumpy, unusable mass. Always ensure your bowls, spatulas, and hands are completely dry.
- Work in a Cool Environment: Chocolate is sensitive to heat. Try to work in a cool kitchen environment, especially if you live in a warm climate. This helps the chocolate maintain its proper consistency and sets faster.
Storage and Shelf Life
Proper storage is key to maintaining the freshness and quality of your homemade chocolate covered pretzels.
- Storing at Room Temperature: Store chocolate covered pretzels in an airtight container at room temperature. A cool, dry pantry is ideal. Avoid direct sunlight or extreme temperature fluctuations.
- Shelf Life: When stored correctly in an airtight container, chocolate covered pretzels can last beautifully for up to one week, though they rarely last that long!
- Can You Freeze Chocolate Covered Pretzels? Yes, you can! To freeze, arrange the fully set pretzels in a single layer on a baking sheet and freeze for about 30 minutes until solid. Then, transfer them to an airtight freezer-safe container or a heavy-duty ziploc bag. I recommend separating layers with parchment paper to prevent them from sticking together. They will remain fresh for up to 3 months. Thaw at room temperature for a few hours before enjoying.
More Delicious Pretzel Dessert Recipes to Explore
If you’ve enjoyed making these chocolate covered pretzels, you’ll love these other pretzel-infused dessert ideas:
- Irresistible Strawberry Jello Pretzel Salad
- Festive Easter Pretzels for Spring Celebrations
- Delightful Peppermint Bark Pretzels for the Holidays
- Spooky & Fun Frankenstein Pretzels
Chocolate Covered Pretzel Recipe
By: Beth
Prep Time: 20 minutes
Set Time: 1 hour
Servings: 36
This is the ultimate guide to the best chocolate covered pretzels! I tested eight different types of chocolate and took detailed notes about melting times, taste, appearance, consistency, drying time, price, and more. Now you can make perfect chocolate pretzels with zero guesswork because I’ve done all the trial and error so you don’t have to!
Rate This Recipe
Print Recipe
Equipment
- Silicone Baking Mat
- Baking Sheet
- Glass Mixing Bowl
Ingredients
- Pretzels (twists, rods, or your preference)
- 8 oz (227g) semi-sweet chocolate (baking bar or chips)
- 8 oz (227g) white chocolate (baking bar or chips)
- ½ tsp coconut oil or another neutral oil (for each type of chocolate)
Instructions
- To melt the chocolate, use a microwave-safe bowl and heat it in 20-second intervals, stirring in between each interval. Usually, it takes about 3-4 intervals. Once you see smaller pieces remaining, stop microwaving and use a spoon to stir, as the residual heat will melt the chocolate. (For 8 oz (227g) semi-sweet chocolate, 8 oz (227g) white chocolate)
- Once fully melted, stir ½ teaspoon of oil into each type of chocolate. This will help you achieve the perfect consistency for dipping, give the chocolate a glossy finish, and allow the chocolate to have a softer texture versus a hard crack when you bite it. (For ½ tsp coconut oil or another neutral oil)
- Line a baking sheet with wax paper, parchment paper, or a silicone baking mat.
- Dip each pretzel into the melted chocolate, using a fork or dipping tool to fully coat it. Tap off any excess chocolate. Pro tip for pretzel rods: transfer the melted chocolate into a tall, skinny glass for easy dipping. (For Pretzels)
- Place the chocolate-covered pretzels on the lined baking sheet, making sure they’re not touching each other. This will allow the chocolate to set without sticking to each other.
- Add Toppings (Optional): If desired, sprinkle the chocolate-covered pretzels with toppings like sprinkles, crushed nuts, or sea salt before the chocolate sets.
- Allow the pretzels to sit at room temperature until the chocolate fully sets. If you want to add a drizzle, place a small amount of chocolate into a piping bag or sandwich bag. Cut a small hole in one corner, then carefully drizzle the chocolate over the pretzels.
- Once the chocolate has set, you can store the chocolate-covered pretzels in an airtight container at room temperature for several days.
Notes
Ultimately, the type of chocolate to use will depend on your personal preference.
- That being said, if you are looking for a rich, deep chocolate flavor and you’re okay with waiting for them to dry, use Ghirardelli or Baker’s Semi-Sweet Chocolate Bar.
- If you want middle-of-the-road chocolate with a quick dry time, I recommend Ghirardelli Dark Chocolate Flavored Melting Wafers.
- If you want the most cost-effective option, use Chocolate Almond Bark or White Chocolate Almond Bark.
- If you want a pure white color, use Walmart Brand White Chocolate Almond Bark.
- The chocolate chips were my least favorite because the mixture was very thick, even after adding additional oil.
Nutrition
Serving: 1g | Calories: 71kcal | Carbohydrates: 7g | Protein: 1g | Fat: 4g | Saturated Fat: 3g | Polyunsaturated Fat: 0.1g | Monounsaturated Fat: 1g | Trans Fat: 0.01g | Cholesterol: 2mg | Sodium: 6mg | Potassium: 54mg | Fiber: 1g | Sugar: 6g | Vitamin A: 5IU | Vitamin C: 0.03mg | Calcium: 16mg | Iron: 0.4mg
Nutrition Disclosure
All nutritional values are approximate and provided to the reader as a courtesy. Changing ingredients and/or quantities will alter the estimated nutritional calculations.
💬 Like this recipe? Please take a moment to rate it and share your thoughts in the comments below!