
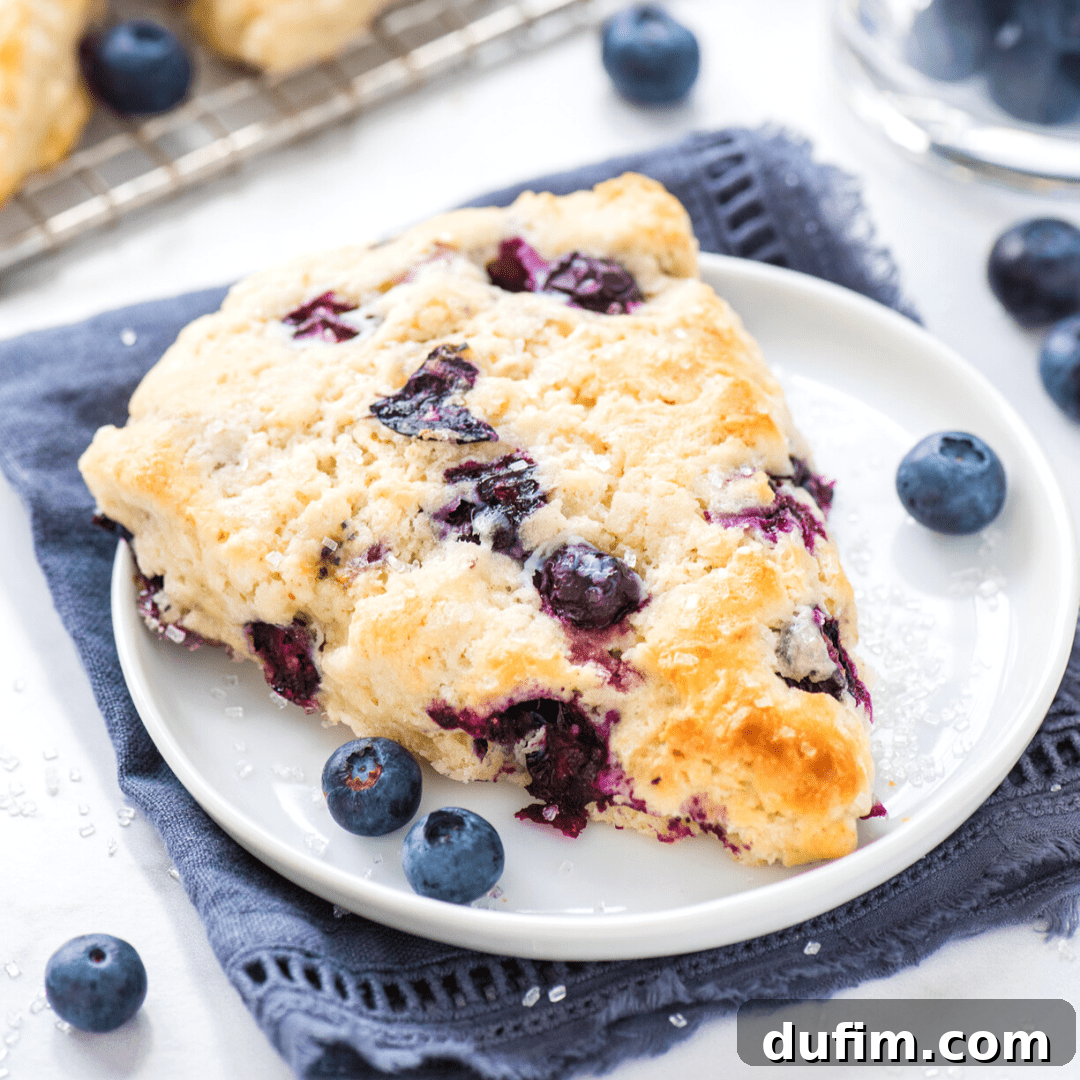
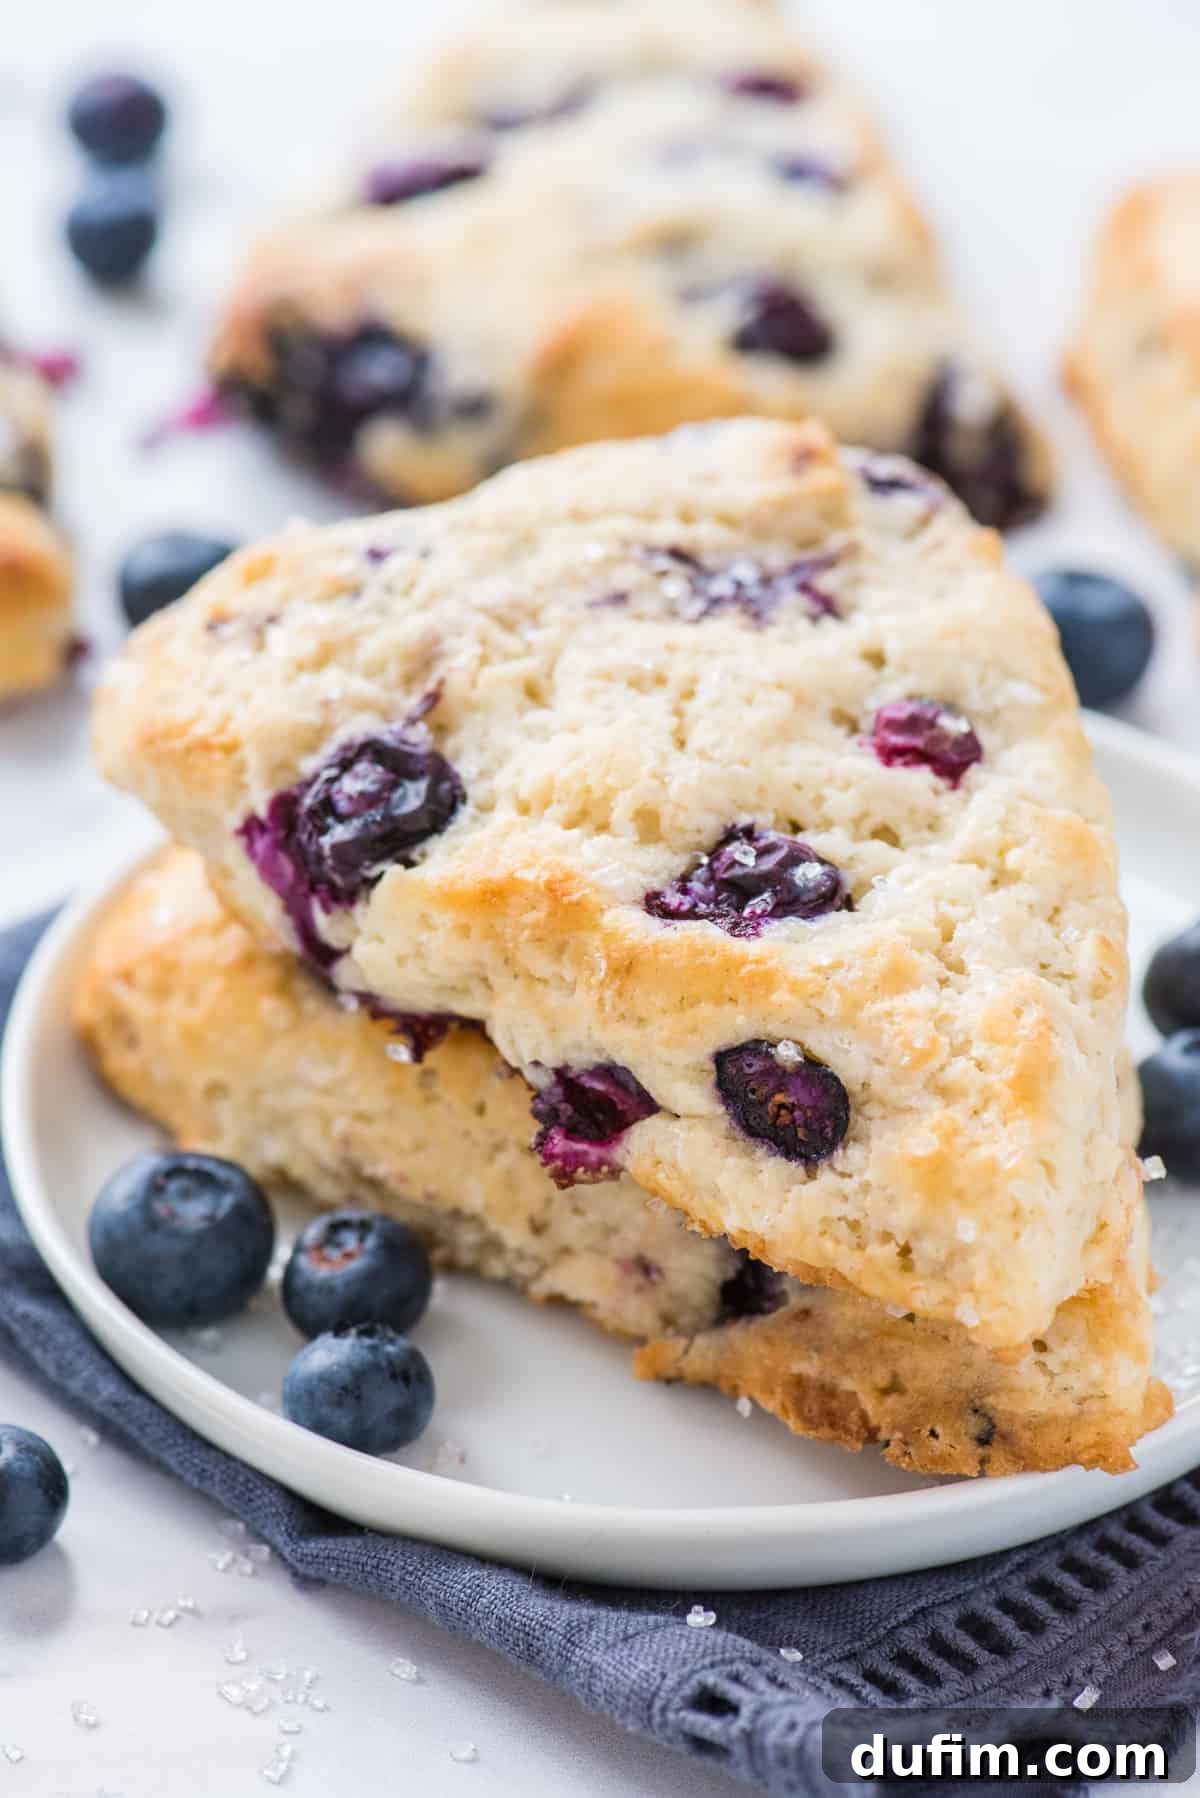
Unlock the secret to baking extraordinary treats with our irresistible homemade Blueberry Scones recipe! Imagine sinking your teeth into a perfectly flaky, wonderfully tender scone, generously studded with plump, juicy blueberries that burst with flavor in every bite. These buttermilk scones are more than just a pastry; they’re a celebration of simple ingredients coming together to create something truly magical. Whether you’re seeking a delightful breakfast companion, an elegant afternoon tea treat, or a sweet indulgence any time of day, this recipe promises to deliver pure joy. Best of all, with just 9 essential ingredients and a total time of about an hour, even novice bakers can achieve bakery-quality results. Get ready to impress your friends, delight your family, or simply treat yourself to the ultimate berry scone experience this season!
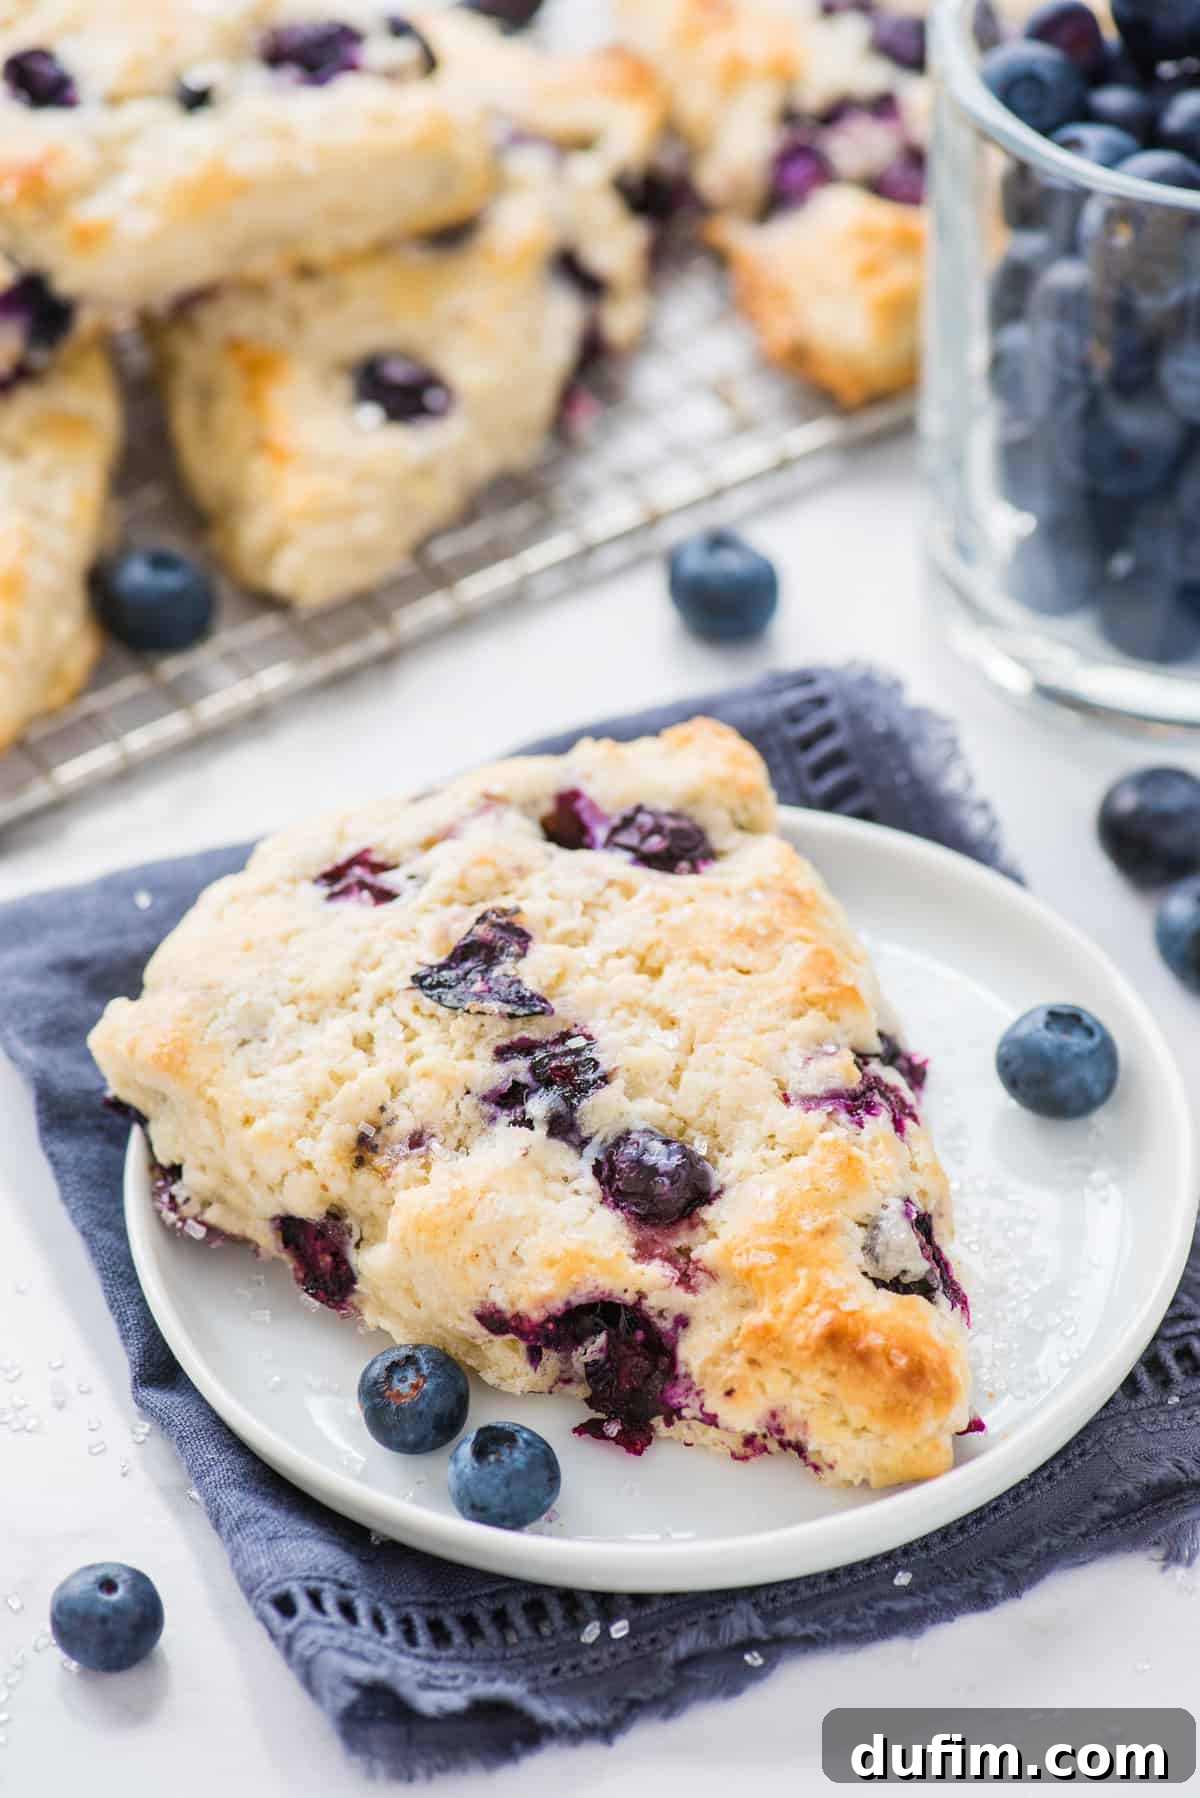
There’s nothing quite like the aroma of freshly baked scones filling your kitchen. These blueberry buttermilk scones are a testament to the fact that delicious baking doesn’t have to be complicated. Our recipe focuses on simplicity and quality, ensuring each scone achieves that coveted flaky texture and rich, buttery flavor, perfectly complemented by the sweetness and slight tang of fresh blueberries. These aren’t just any scones; they are designed to be light, airy, and moist, making them an instant favorite. Prepare to discover your new go-to recipe for a classic treat that feels both gourmet and homey.
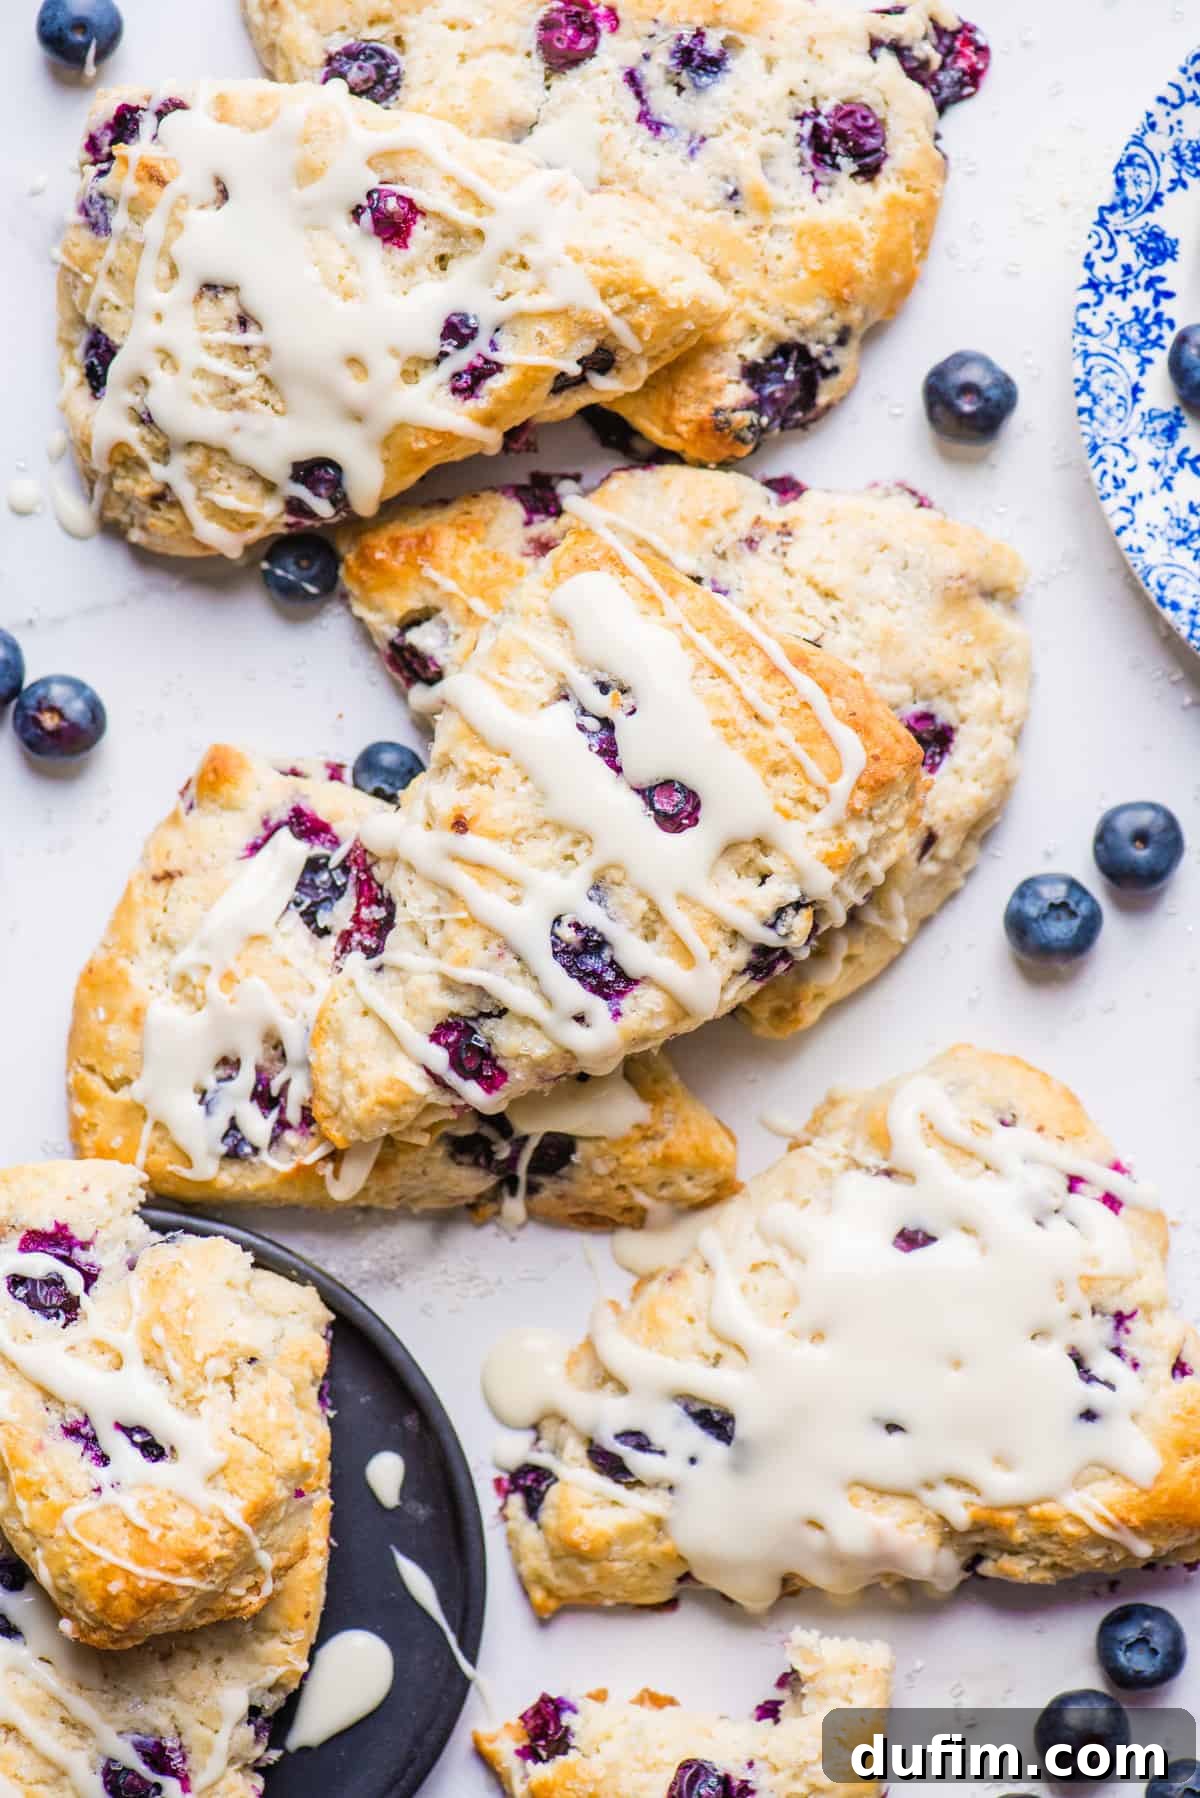
Why Our Flaky Buttermilk Blueberry Scones Are a Must-Try
This blueberry scone recipe isn’t just easy; it’s engineered for success, delivering consistently delicious results every time. Here’s why you’ll want to add it to your baking repertoire:
- Minimal Ingredients for Maximum Flavor: You only need 9 simple ingredients to create these incredibly flavorful scones. This means less shopping, less fuss, and more time to enjoy your freshly baked goods. Each ingredient plays a crucial role in achieving the perfect balance of sweetness, tang, and texture.
- Pantry Staples at Your Fingertips: Chances are, most of the ingredients for these delightful scones are already residing in your pantry or refrigerator. Flour, sugar, butter, and a carton of buttermilk are common household items, making it easy to whip up a batch whenever a craving strikes without an extra trip to the grocery store.
- Bursting with Juicy Blueberries: Fresh, plump blueberries are the undisputed stars of this recipe. Their natural sweetness and slight tartness provide a vibrant contrast to the rich, buttery scone base. Blueberries also offer a healthy dose of antioxidants, making these scones a treat you can feel good about indulging in.
- Quick and Effortless Baking: From mixing bowl to golden perfection, these homemade blueberry scones are ready in approximately 1 hour. This makes them an ideal choice for a spontaneous baking project, a last-minute breakfast, or a quick-to-prepare addition to any brunch spread.
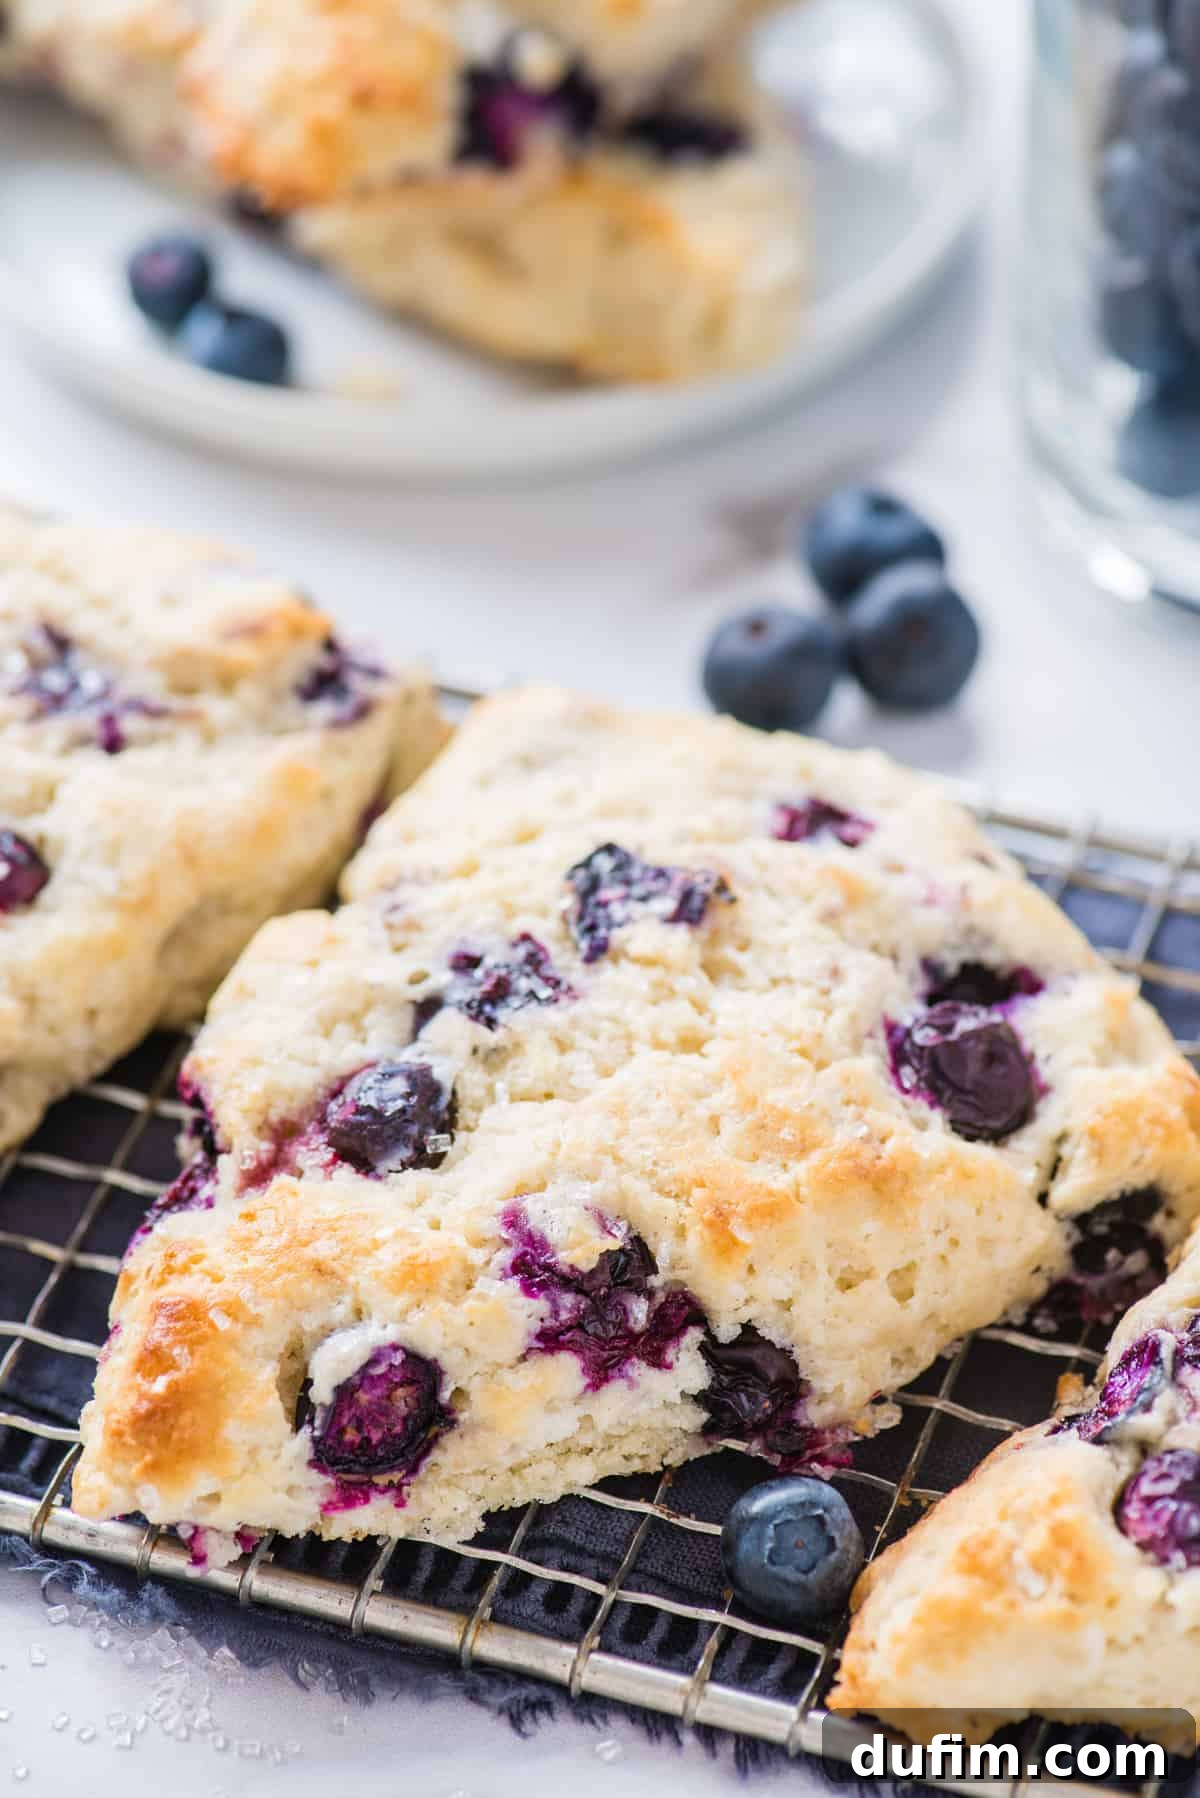
- Unmatched Flaky and Tender Texture: The use of cold butter and the specific mixing technique ensures a truly flaky exterior and a wonderfully tender interior. This perfect contrast in texture is what elevates a good scone to a great one, melting in your mouth with every bite.
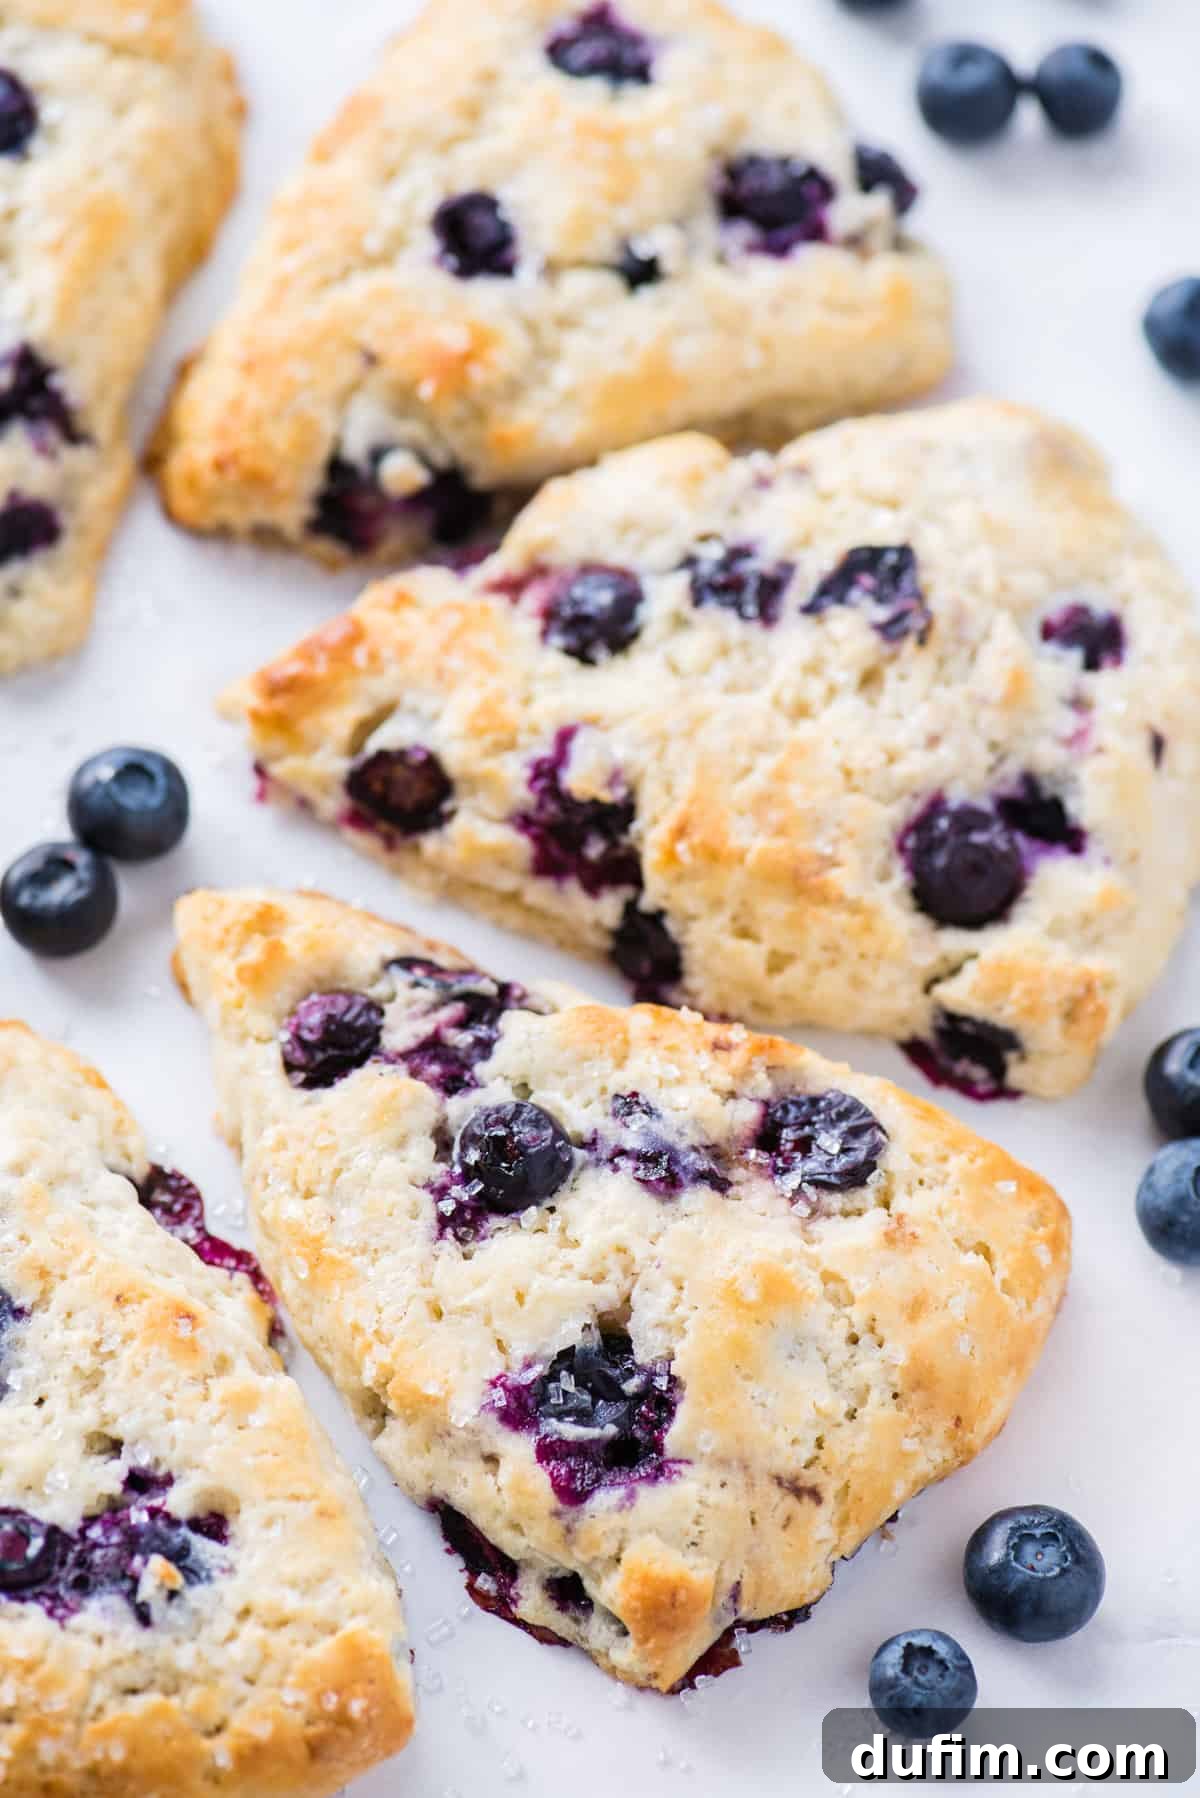
Essential Ingredients for Perfect Buttermilk Blueberry Scones
Crafting the perfect scone begins with understanding the role of each ingredient. Here’s a breakdown of what you’ll need and why it’s crucial for achieving that signature flaky texture and rich flavor:
- All-Purpose Flour: The foundational ingredient, providing the necessary structure for the scones. When measured correctly, it ensures a tender crumb without being overly dense.
- Granulated Sugar: Adds sweetness to balance the tartness of the blueberries and helps in achieving that beautiful golden-brown crust during baking.
- Baking Powder: Our primary leavening agent. It reacts with the buttermilk to create carbon dioxide bubbles, which are essential for the scones to rise tall and develop their characteristic light and fluffy texture.
- Salt: A small but mighty ingredient that enhances all the other flavors, balancing the sweetness and making the butter and blueberries shine brighter.
- Cold Unsalted Butter: This is the secret to flaky scones! Cold butter creates pockets in the dough. As the scones bake, these pockets melt and release steam, pushing the layers apart to create a light, airy, and incredibly flaky result. Unsalted butter allows you to control the overall salt content.
- Buttermilk: Key to both flavor and texture. Its acidity reacts with the baking powder for a better rise, and its fat content contributes to exceptionally moist, tender, and fluffy scones with a subtle, delightful tang.
- Vanilla Extract: A touch of vanilla adds warmth and depth to the overall flavor profile, complementing the blueberries beautifully without overpowering them.
- Large Egg: Acts as a binder, helping to hold the dough together and providing additional structure and richness, contributing to a tender crumb.
- Fresh Blueberries: For the ultimate flavor and texture, fresh blueberries are highly recommended. They remain plump and juicy during baking, bursting with natural sweetness. You can use frozen blueberries if fresh aren’t available, but do not thaw them first.
Step-by-Step Guide: Crafting Your Delicious Buttermilk Blueberry Scones
Follow these detailed steps to create beautiful, bakery-worthy blueberry scones right in your own kitchen:
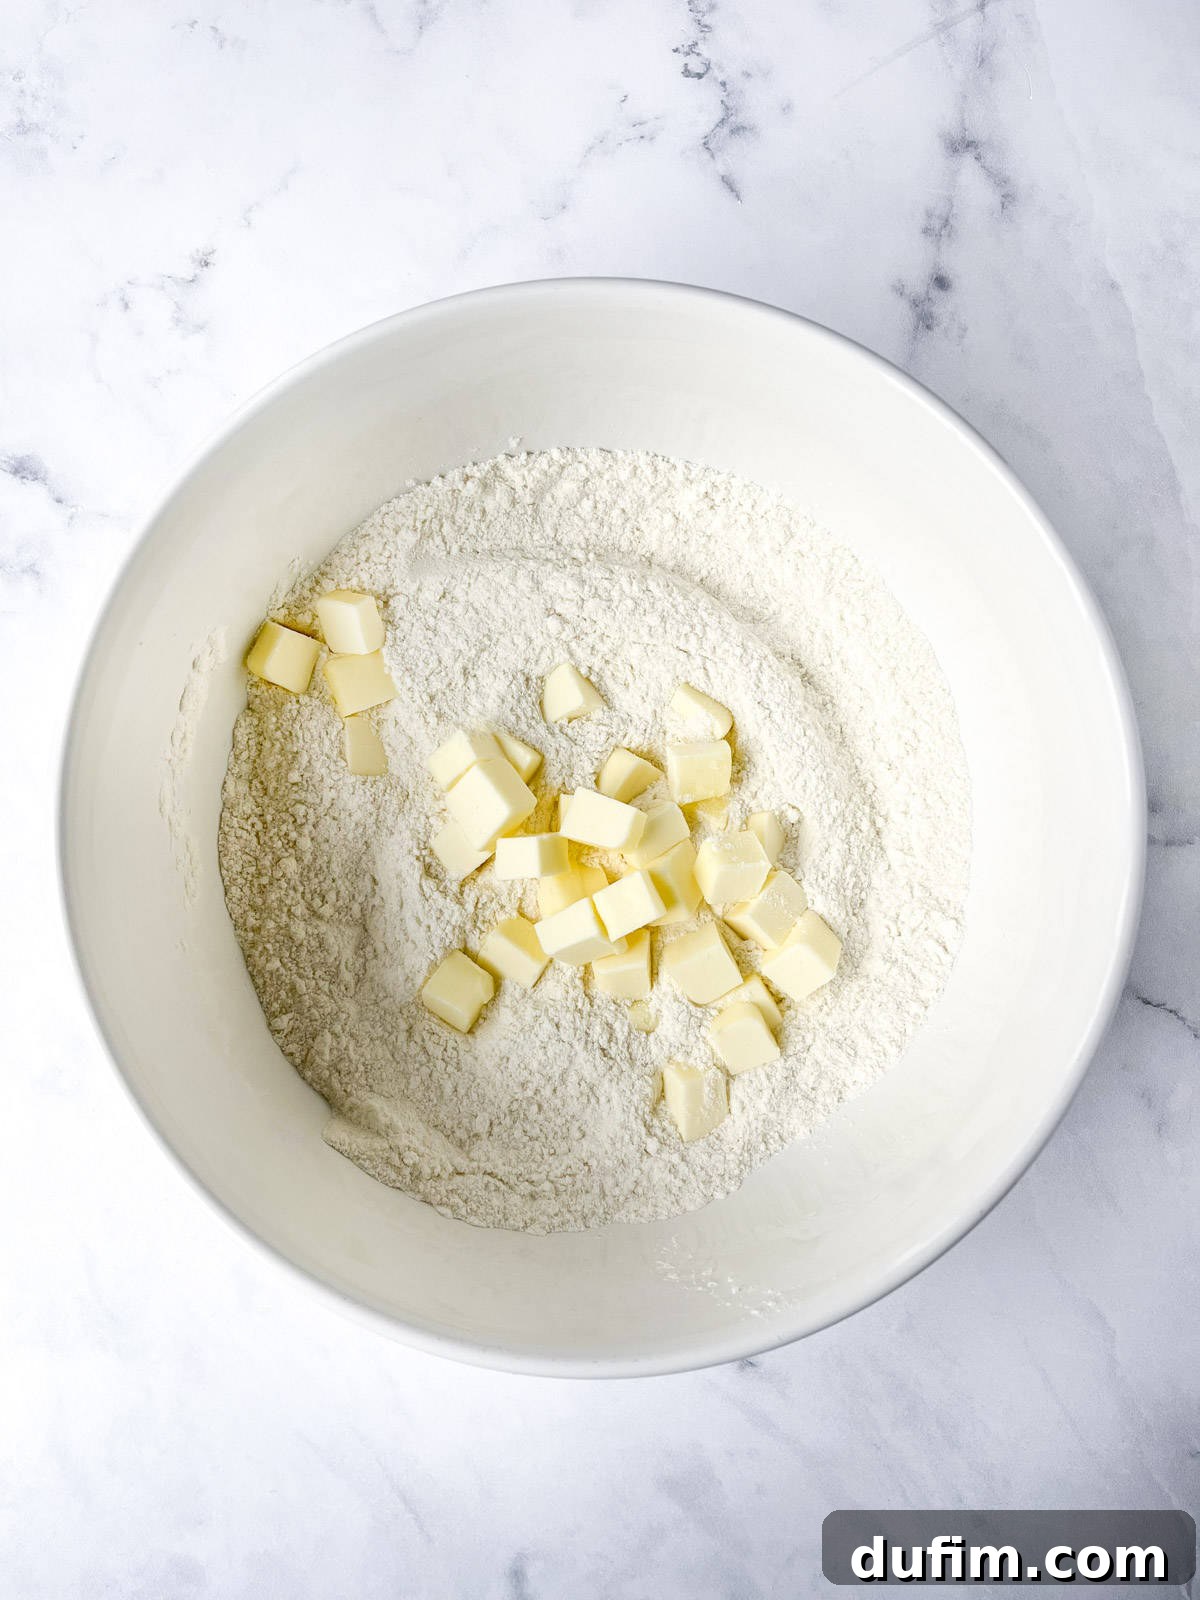
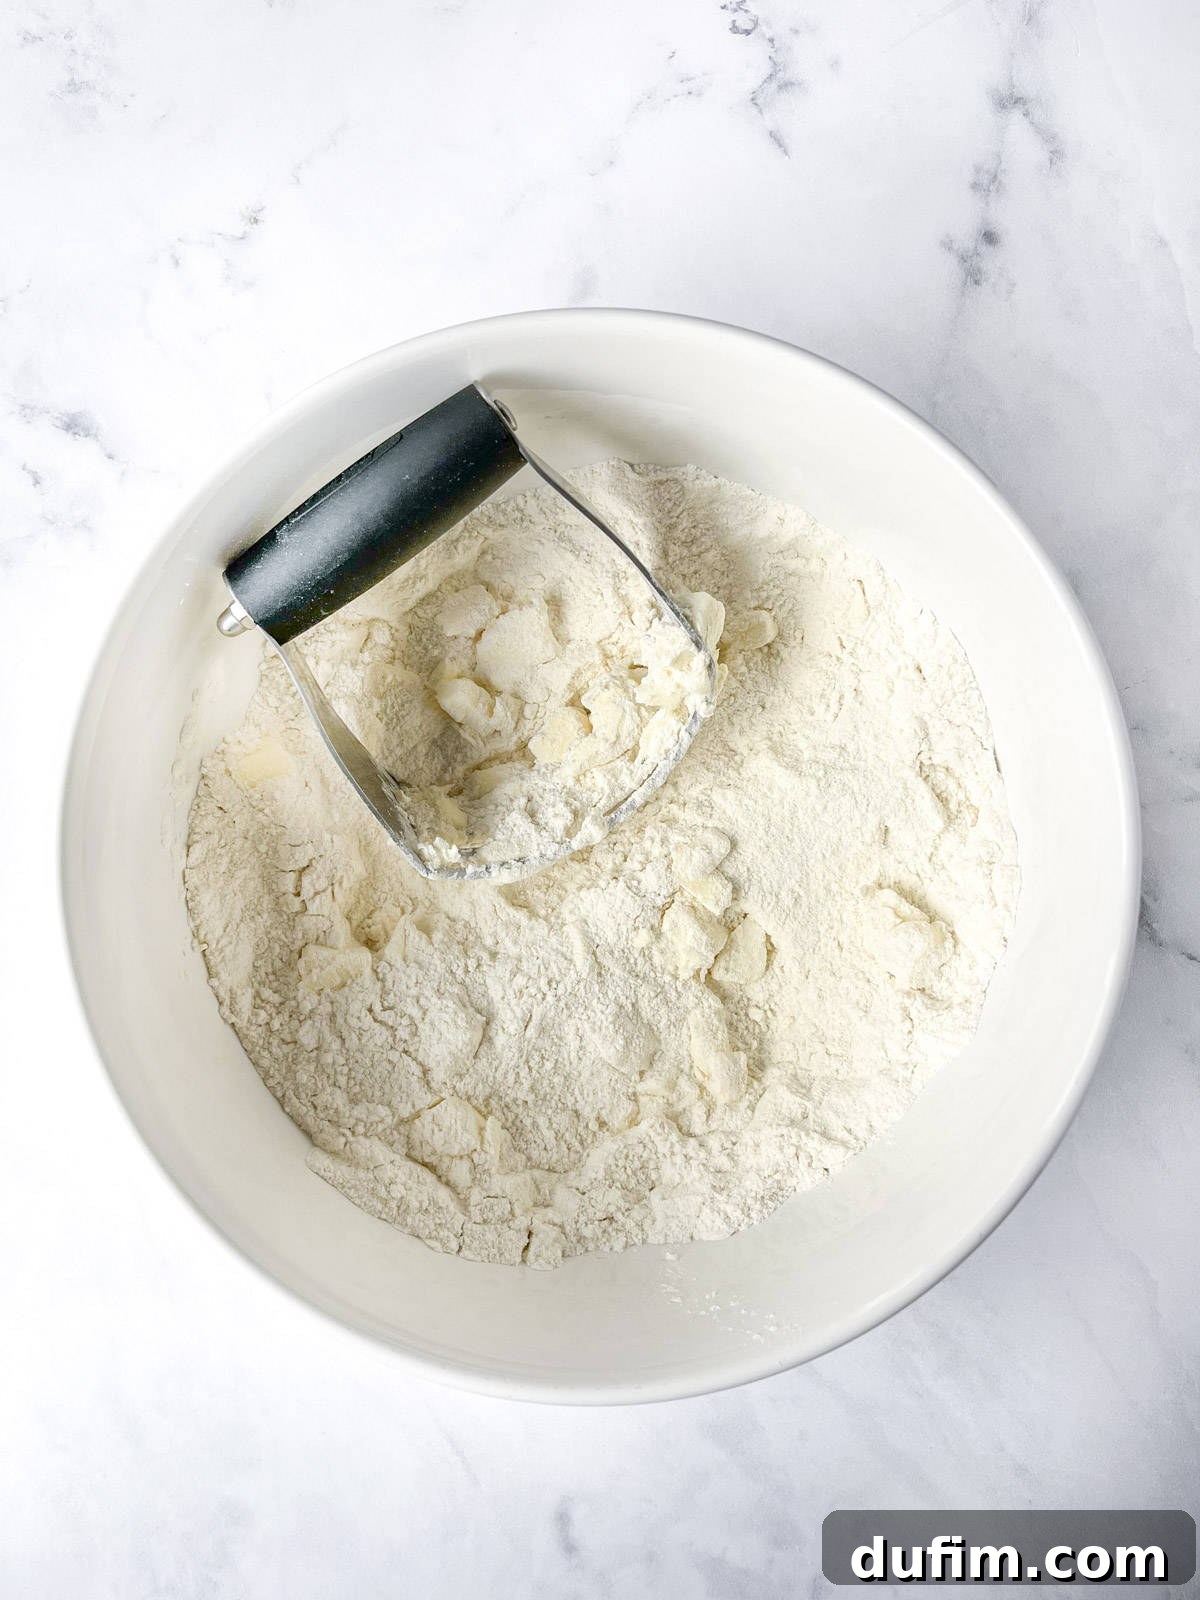
- Combine Dry Ingredients and Butter: In a large mixing bowl, whisk together the all-purpose flour, granulated sugar, baking powder, and salt. Make sure these dry ingredients are thoroughly combined. Next, add the cold, cubed unsalted butter to the dry mixture. Using your fingertips or a pastry cutter, work the butter into the flour until the mixture resembles coarse meal with some pea-sized pieces of butter still visible. The key here is to keep the butter as cold as possible to ensure flakiness.
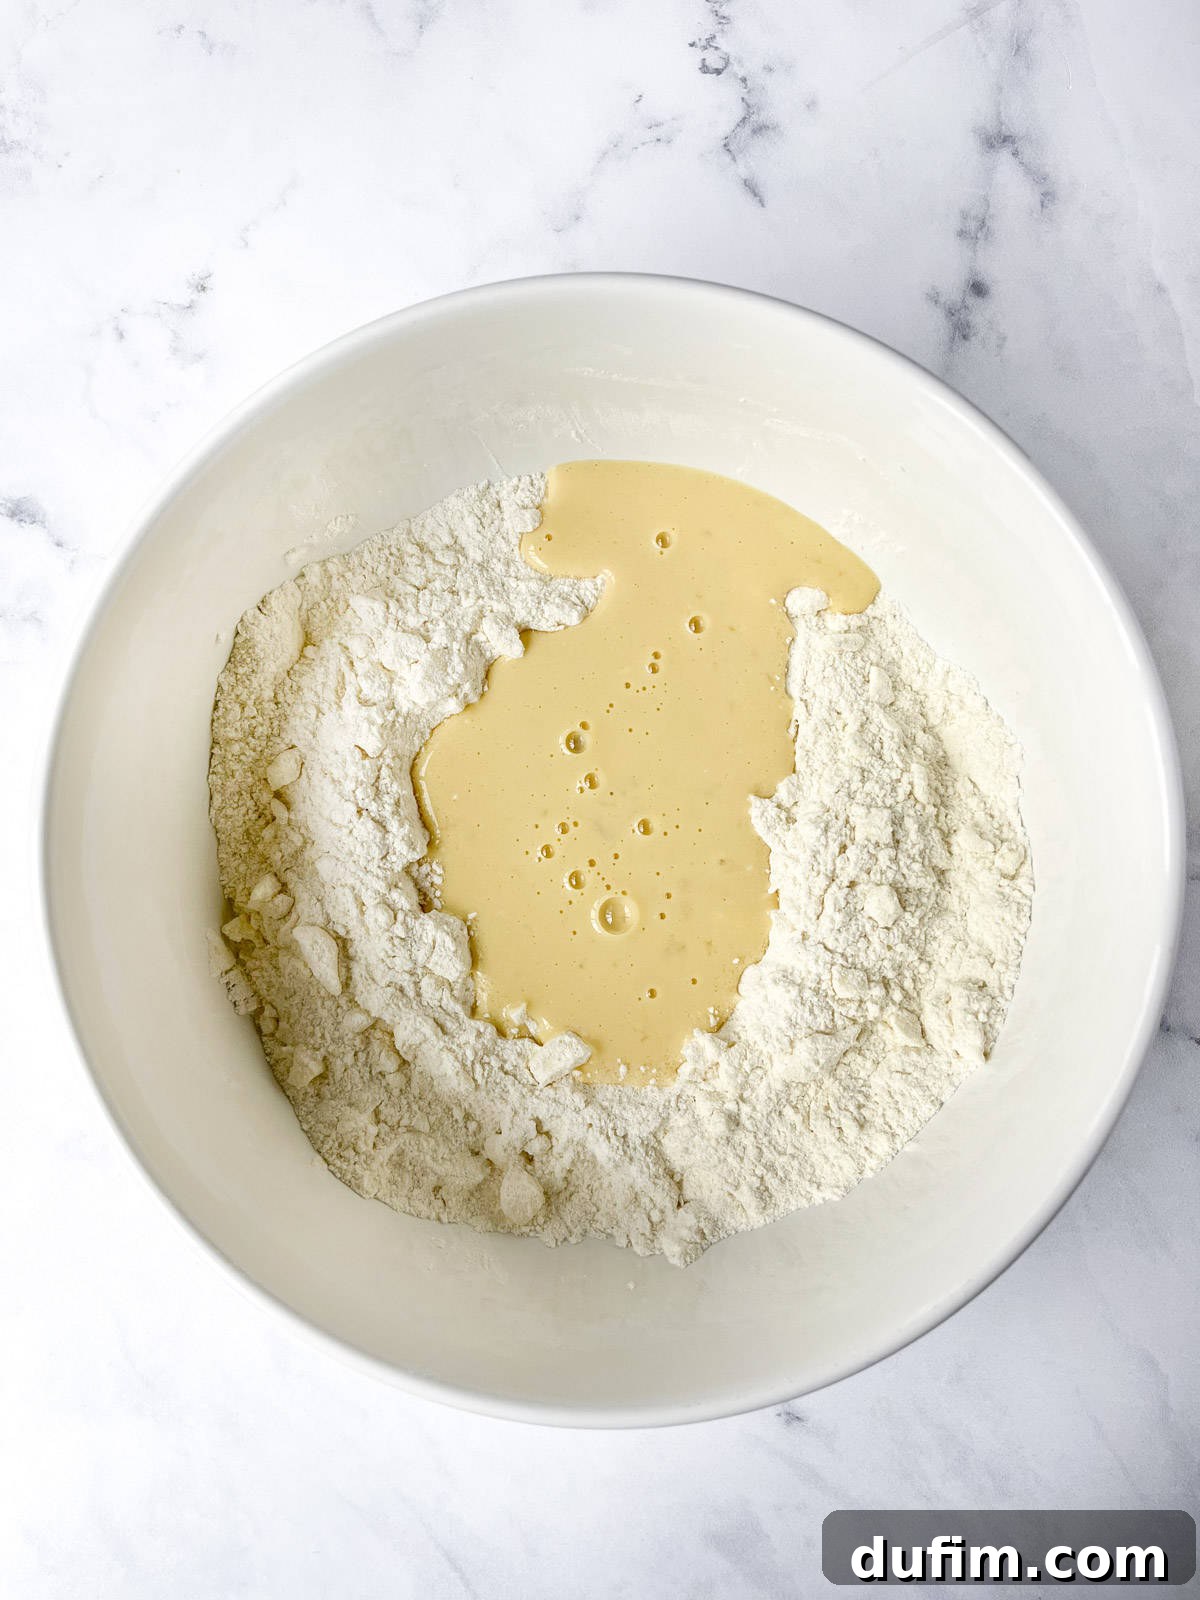
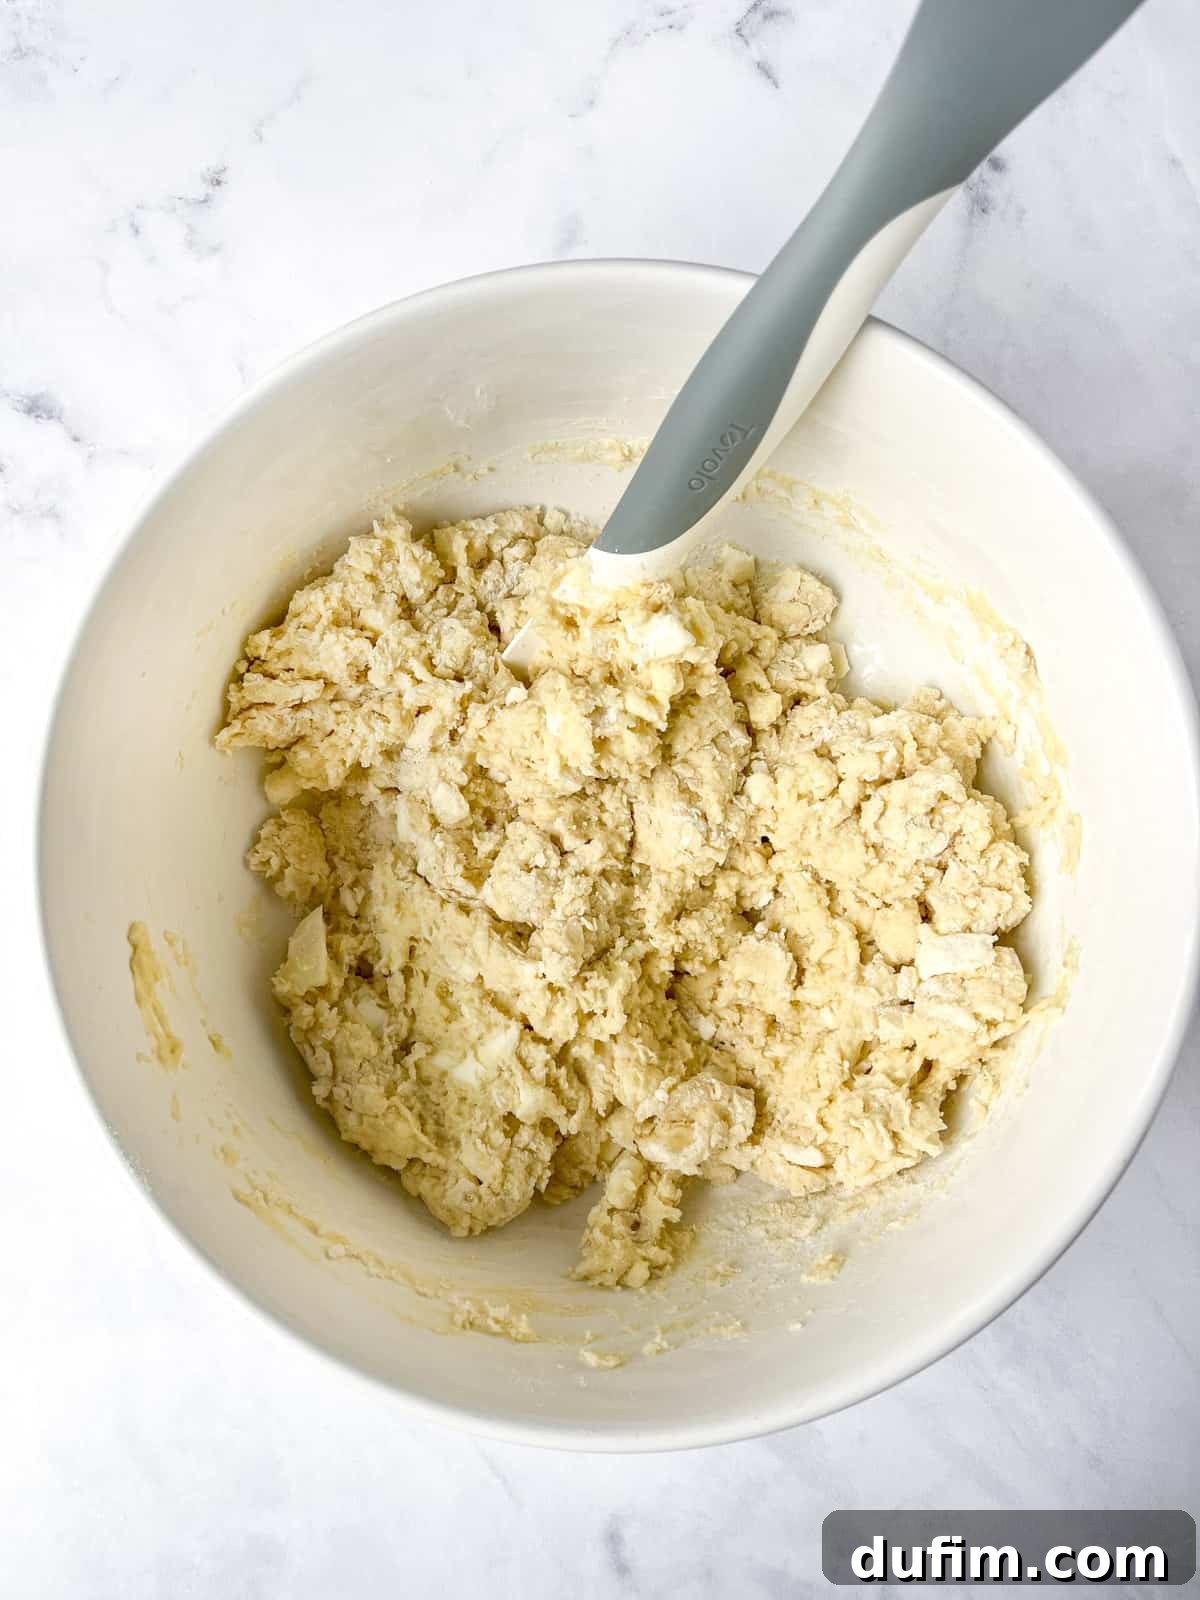
- Incorporate Wet Ingredients: Create a well in the center of your butter-flour mixture. Pour in the buttermilk, vanilla extract, and the lightly beaten egg. With a spatula or your hands, gently mix the wet and dry ingredients until a thick, sticky dough forms. Be careful not to overmix, as this can lead to tough scones. Once the dough is mostly combined, gently fold in the fresh blueberries until they are evenly distributed.
- Lightly Knead the Dough: Transfer the sticky dough onto a lightly floured silicone mat or a clean kitchen counter. Gently knead the dough a few times, just until all the flour is fully incorporated and the dough comes together. If the dough is excessively sticky, you can add 1-2 additional tablespoons of flour, but avoid adding too much, as this can dry out the scones.
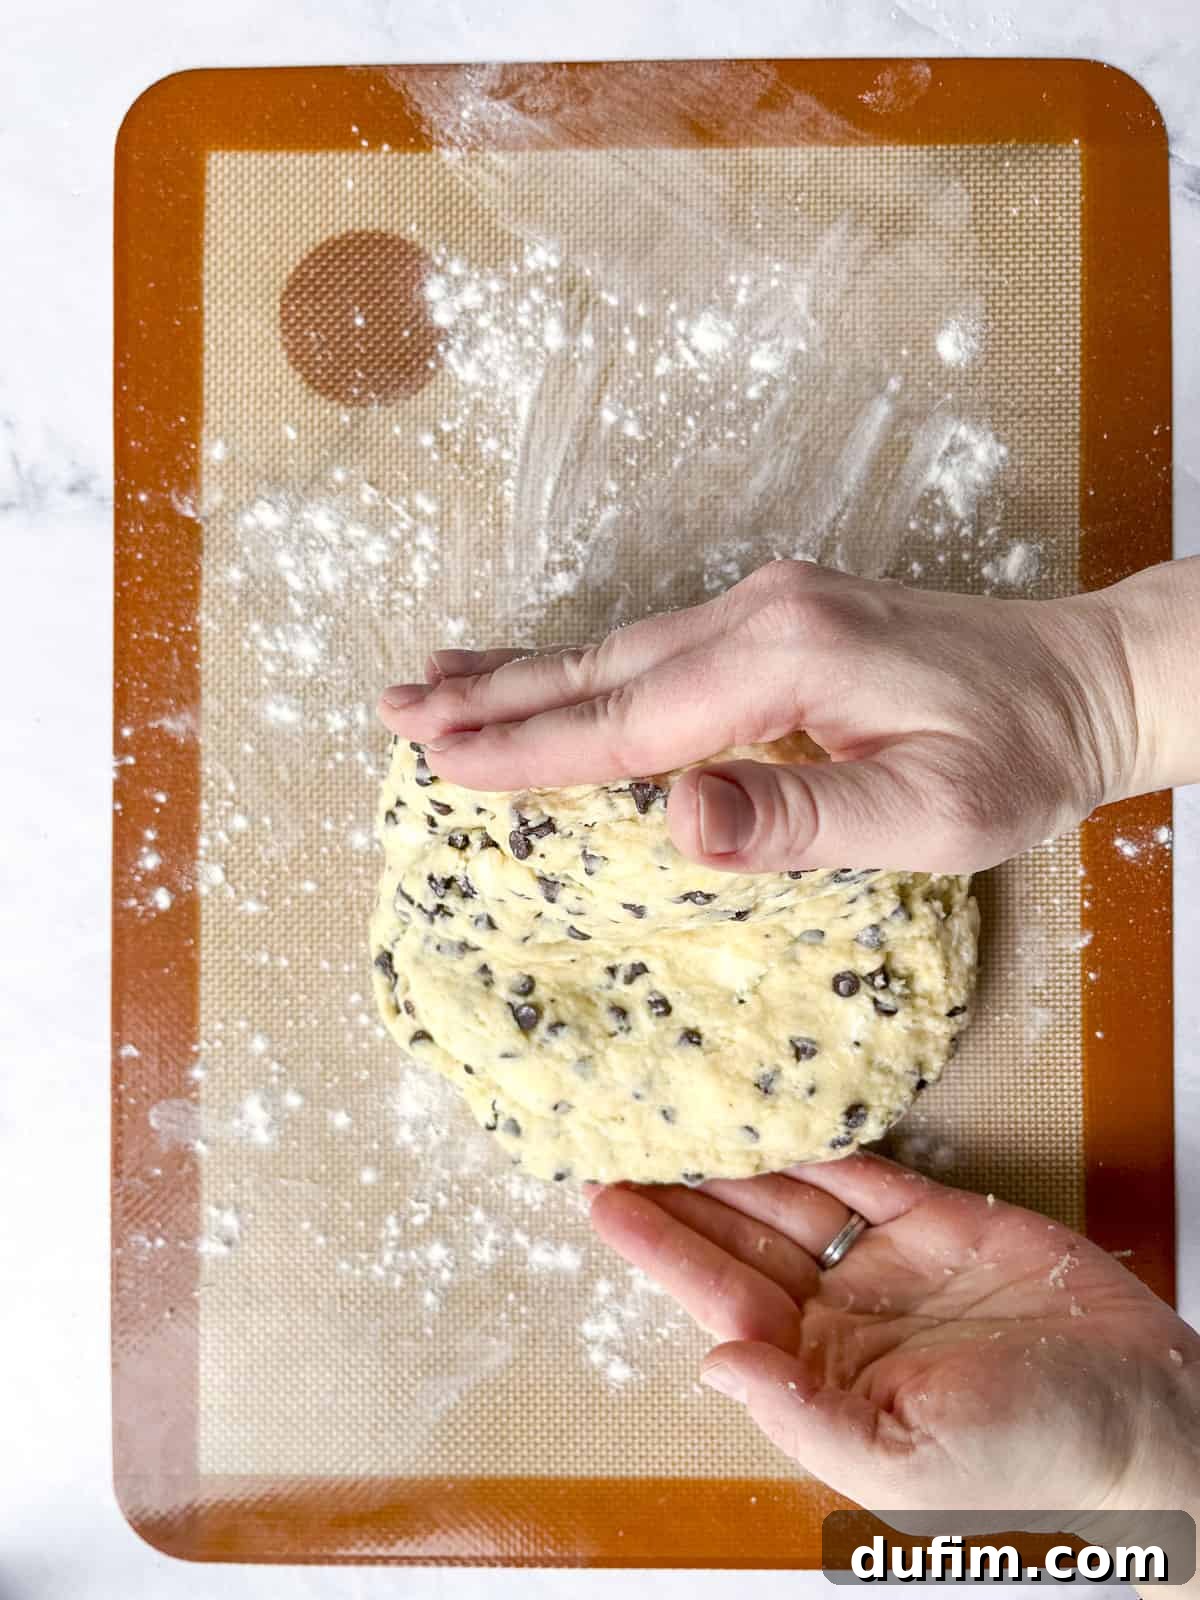
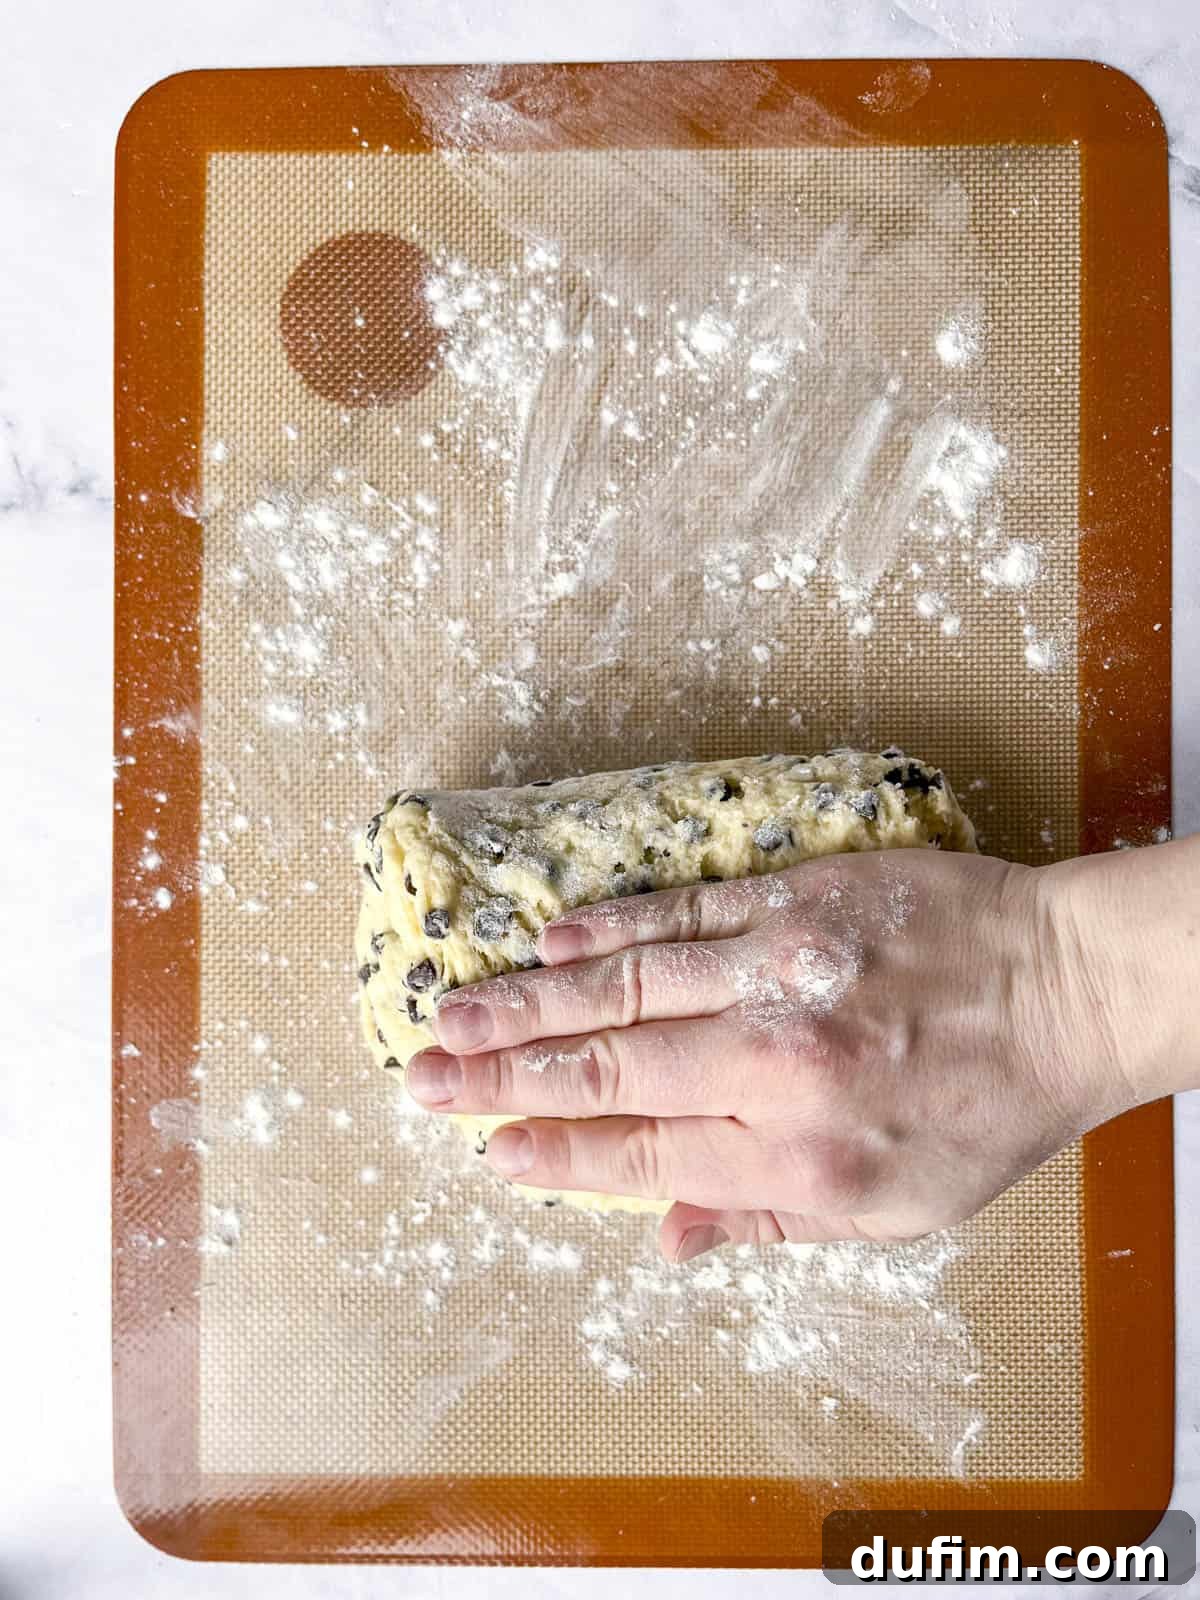
- Perform Lamination (Folding): To achieve those wonderful flaky layers, we’ll perform a simple lamination technique. Fold the dough in half, gently press it down, then rotate the dough 90 degrees. Fold it in half again and press down. Repeat this folding and turning process 4-5 times. This creates multiple layers of butter within the dough, which will result in an incredibly flaky texture when baked.
- Shape and Chill the Dough: After lamination, gently shape the dough into a round disc, about 8-10 inches in diameter and approximately 1.5 to 2 inches tall. Place the dough disc on a plate or baking sheet lined with parchment paper and refrigerate it for 5-10 minutes. This brief chill helps firm up the butter and makes the dough easier to handle before cutting.
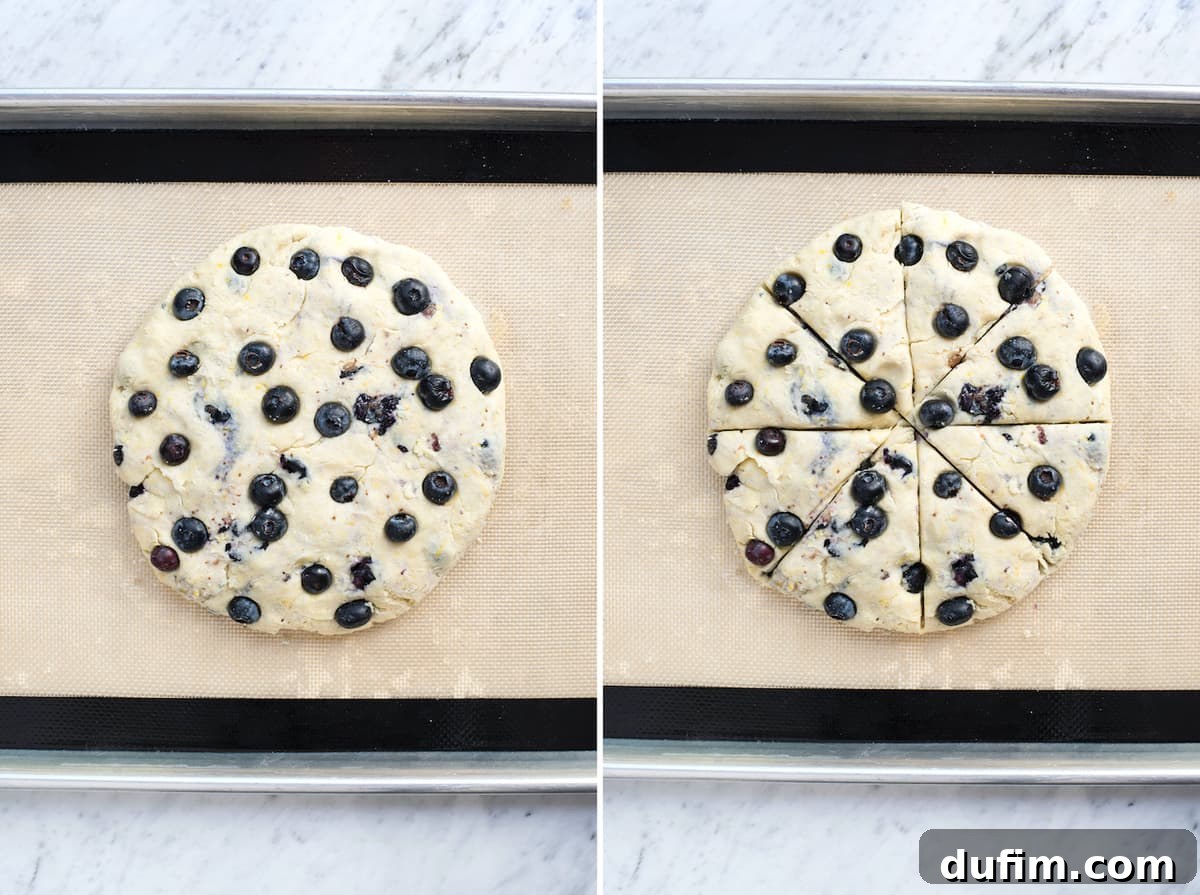
- Cut the Scones: Once chilled, use a sharp knife or a pizza cutter to cut the dough disc into 8 equal wedges, just like slicing a pie.
- Prepare for Baking: Carefully transfer the scone wedges to a baking sheet lined with a silicone mat or parchment paper, ensuring they are spaced 2-3 inches apart to allow for proper air circulation and expansion during baking.
- Freeze Before Baking: This is a critical step for ultimate flakiness! Place the baking sheet with the unbaked scones into the freezer for 30 minutes. During the last 5 minutes of freezing, preheat your oven to 400°F (200°C). Freezing helps prevent the butter from melting too quickly in the oven, ensuring maximum lift and flakiness.
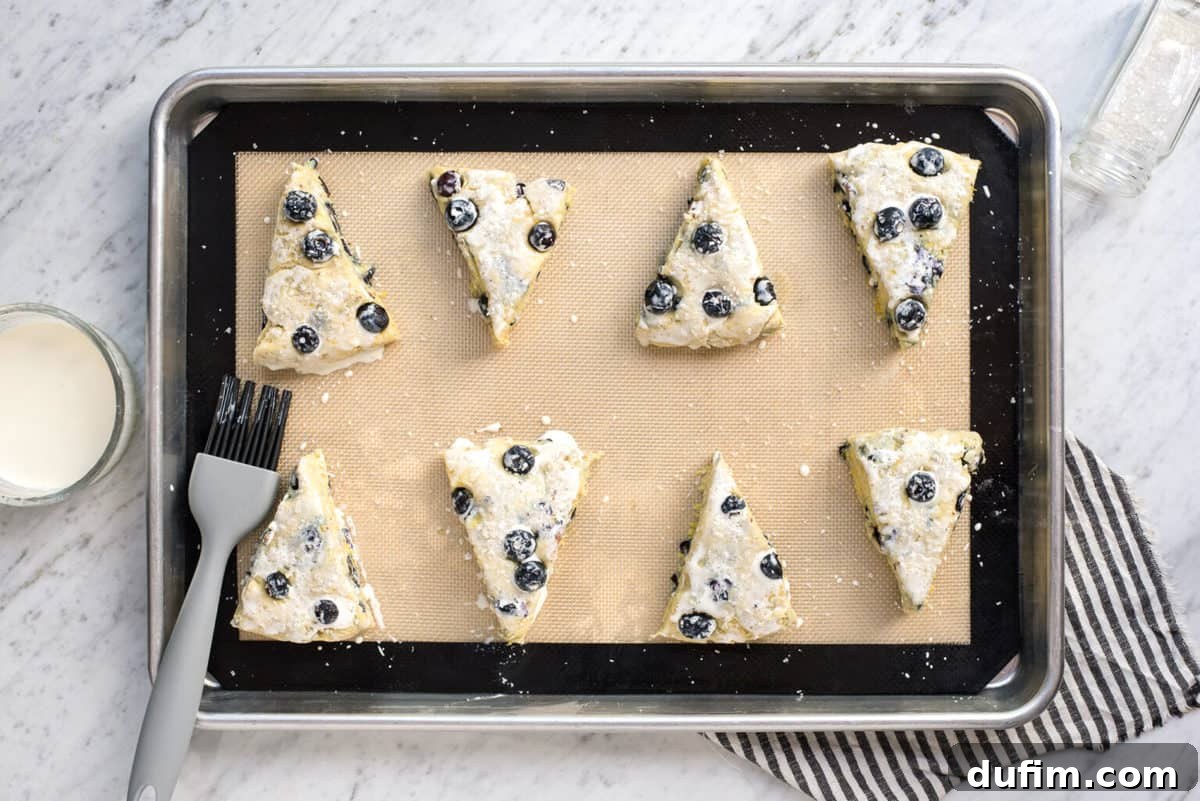
- Apply Egg Wash and Toppings (Optional): Just before baking, gently brush the tops of the frozen scones with an egg wash (1 large egg whisked with 1 tablespoon of water), buttermilk, or heavy cream. This helps them achieve a beautiful golden-brown color. For an extra touch of sparkle and sweetness, sprinkle coarse sanding sugar over the tops.
- Bake and Cool: Bake the prepared scones in the preheated oven for 20-26 minutes, or until they are puffed up, golden brown on top, and cooked through. Once baked, transfer the scones to a wire rack to cool slightly. While they are delicious warm, allowing them to cool a bit helps them set and develop their full flavor and texture.
Mastering Flour Measurement for Scones
Properly measuring flour is essential for the perfect scone texture. Incorrect measurement is a common pitfall that can lead to dry, dense scones. Always use the “scoop and level” method:
- First, lightly fluff the flour in its container with a fork or spoon to aerate it.
- Then, use a spoon to gently scoop the flour into your measuring cup until it’s overflowing. Do not pack it down.
- Finally, use the straight edge of a butter knife or similar tool to level off the excess flour from the top of the measuring cup.
Never dip your measuring cup directly into the bag of flour, as this compacts the flour, resulting in a significantly larger amount than intended, which can make your scones tough and dry.
The Secret to Flaky Scones: Chilling Your Dough
The practice of chilling scone dough is a non-negotiable step for achieving that coveted flaky, fluffy texture. As you mix the dough with your hands, the warmth from your body can soften the butter. Chilling the dough before baking ensures that the butter remains firm and cold. When the cold dough hits the hot oven, the butter quickly melts and releases steam, creating those distinct, airy layers that define a perfect scone.
When to Chill the Dough? For optimal results, chill your dough twice. First, briefly after shaping the large disc, and crucially, for 30 minutes after you’ve cut the scones into individual wedges and placed them on the baking sheet. If you plan to add a coarse sugar topping or an egg/cream wash, do this right before the scones go into the oven, after the final chill.
Don’t be alarmed if your unbaked scone wedges appear somewhat small. The high amount of baking powder in the recipe, combined with the cold butter, will cause them to expand beautifully and rise significantly during baking, transforming into impressive, tall scones.
Gluten-Free Blueberry Scones: A Delicious Alternative
For those with dietary restrictions, or simply looking for an alternative, these blueberry scones can be easily adapted to be gluten-free. I’ve personally tested this recipe with both traditional and gluten-free flours on multiple occasions, yielding consistently excellent results. For the best outcome, I highly recommend using King Arthur’s Gluten Free Measure for Measure Flour. This particular blend is formulated to be a direct one-for-one substitute for regular all-purpose flour, making the transition seamless without needing to adjust other ingredients or liquid quantities. Enjoy all the flakiness and flavor without the gluten!
Expert Tips for the Best Blueberry Buttermilk Scones
Achieving bakery-quality scones is easier than you think with these expert tips:
- Buttermilk Substitutions: While buttermilk is ideal for its tang and tenderizing properties, you can substitute it with heavy cream for a richer scone. However, I strongly advise against using regular milk, as it lacks the fat and acidity needed for the desired texture and rise.
- Keep Butter Cold: This cannot be stressed enough! Use butter straight from the refrigerator. Cut it into small cubes and work it into the dry ingredients quickly using your fingers or a pastry cutter. The colder the butter, the flakier your scones will be.
- Handle Dough Gently: Overmixing or over-kneading the dough will develop the gluten too much, resulting in tough, dense scones. Mix only until the ingredients are just combined and knead only minimally until the flour is incorporated.
- Precise Shaping: Use a ruler to help shape your dough into an even 8-10 inch disc that is about 1.5 to 2 inches tall. Uniform thickness ensures even baking.
- Don’t Skip the Freeze: Freezing the cut scones for 30 minutes before baking is a game-changer. It helps the scones maintain their shape, rise beautifully, and achieve that perfect flaky texture by preventing the butter from melting too quickly.
- Achieve Golden Tops: Brushing the tops of the scones with buttermilk, heavy cream, or an egg wash before baking will help them turn a beautiful golden brown and contribute to a lovely crust. A sprinkle of coarse sanding sugar adds an extra crunch and visual appeal.
- Avoid Overloading with Blueberries: While tempting, too many blueberries can introduce excessive moisture, making the dough difficult to handle and potentially causing the scones to become soggy. Stick to the recommended amount for the best balance.
Serving Suggestions and Storage Tips
Blueberry scones are best enjoyed fresh out of the oven, when they are still warm and their delicate aroma fills the air. They are wonderfully satisfying on their own, but for an extra layer of indulgence, consider serving them with a dollop of clotted cream, a smear of fresh butter, or a spoonful of your favorite fruit jam. They pair exquisitely with a freshly brewed cup of hot tea or a robust coffee, making for an unforgettable breakfast, a sophisticated afternoon tea experience, or a delightful treat at any time of day.
To keep your leftover scones as fresh as possible, first ensure they have cooled completely to room temperature. Once cooled, place them in an airtight container or a resealable plastic bag. They will maintain their optimal freshness and tender texture at room temperature for up to two days. If you wish to store them for a longer period, scones freeze beautifully for up to one month. To serve frozen scones, simply thaw them at room temperature or gently warm them in a preheated oven (around 300°F/150°C) for a few minutes until heated through, restoring much of their fresh-baked goodness.
DELICIOUS and easy to put together!
-Mary
More Delicious Recipes Like Blueberry Buttermilk Scones
If you’ve fallen in love with these blueberry buttermilk scones, you’ll be thrilled to discover more berry-filled and delightful baking recipes:
- Fluffy & Moist Classic Blueberry Muffins
- Effortless Lemon Blueberry Dump Cake
- Rustic Mixed Berry Galette
- Light & Airy Lemon Blueberry Angel Food Cake
Frequently Asked Questions About Blueberry Scones with Buttermilk
The secret to truly outstanding scones lies in a few key factors. Firstly, mixing technique is crucial; combine the dough just until it comes together, avoiding overmixing which can develop gluten and lead to tough scones. Gentle handling is key to a tender result. Secondly, cold butter is paramount. Incorporating tiny pieces of cold butter into the flour creates pockets that release steam during baking, yielding an incredibly flaky texture. You can achieve this by cutting the butter into small cubes or grating it into the dry mix. Lastly, a good tenderizing agent like buttermilk, heavy cream, or yogurt adds moisture, richness, and often a pleasant tang, contributing to a soft and flavorful crumb.
To ensure your scones turn out perfectly every time, avoid these common mistakes: Overmixing the dough is the cardinal sin, as it leads to a tough, dry texture. Always use cold butter; warm or melted butter will not create the necessary steam pockets for flakiness. When shaping the dough, avoid pressing down too hard, as this can compress the layers and result in dense scones rather than light ones. Finally, do not skip chilling the dough before baking. This step is vital for helping the butter stay firm, promoting a proper rise, and maintaining the scones’ shape.
Yes, you can absolutely substitute heavy cream for buttermilk in scone recipes. However, be aware that this substitution will result in a slightly different outcome. Heavy cream has a higher fat content and lacks the acidity of buttermilk. This means your scones might be richer and potentially denser, with a less tangy flavor profile compared to those made with buttermilk. While still delicious, they will have a distinct character, so be prepared for a subtle change in both taste and texture.
Rated 4.91 out of 5 from 11 ratings
Buttermilk Blueberry Scones
By: Beth
Prep Time: 10 minutes
Cook Time: 25 minutes
Additional Time (Chilling): 30 minutes
Total Time: 1 hour 5 minutes
Servings: 8 scones
Summary
Make flaky and tender blueberry scones with our easy to follow recipe that’s only 9 ingredients! These buttermilk scones are fluffy, bursting with blueberries and ready in 1 hour. The best berry scone recipe for summer!
Equipment
- Silicone Baking Mat
- Sanding Sugar (Optional)
- Glass Mixing Bowl
Ingredients
- 2 ½ cups (300g) all-purpose flour
- ½ cup (99g) granulated sugar
- 1 Tbsp baking powder
- ½ tsp salt
- ½ cup (113g) cold unsalted butter, cubed (1 stick)
- ½ cup (118ml) buttermilk
- 1 tsp vanilla extract
- 1 large egg
- 1 cup fresh blueberries
Instructions
- In a large mixing bowl, combine the flour, granulated sugar, baking powder, and salt. Add in the cold, cubed butter and use your hands or a pastry cutter to cut in the butter until pea-sized amounts of butter remain.
- Create a well in the center of the flour mixture. Add the buttermilk, vanilla extract, and egg. Use a spatula to gently combine until the dough is thick and sticky. Gently stir in the blueberries.
- On a silicone mat or kitchen counter, gently knead the dough until all the flour is incorporated. Add 1-2 additional tablespoons of flour if the dough is too sticky.
- Lamination (Folding the dough to create flaky layers!): Fold the dough in half, press it down slightly, then turn the dough 90 degrees and fold in half again. Repeat this folding and turning process 4-5 times.
- Shape the dough into an 8-10 inch disc that is about 1.5 to 2 inches tall. Refrigerate the scone disc for 5-10 minutes.
- Use a sharp knife or pizza cutter to cut the scones into 8 equal wedges.
- Place the scones 2-3 inches apart on a baking sheet that’s lined with a silicone mat or parchment paper.
- Freeze the unbaked scones for 30 minutes. During the last 5 minutes of freezing, preheat the oven to 400º F (200°C).
- Brush the tops of the scones with egg wash (1 large egg + 1 Tbsp water), buttermilk, or heavy cream. Add coarse sanding sugar if desired.
- Bake for 20-26 minutes or until the scones are lightly golden. Allow the scones to cool on a wire rack.
Notes
- Optional: Add sanding sugar to the scones after the heavy cream wash and before baking for extra sparkle and crunch.
- Always properly measure the flour using the scoop and level method to avoid dry scones.
- For a gluten-free option, replace all-purpose flour with an equal amount of all-purpose gluten-free flour. We recommend King Arthur’s Gluten Free Measure for Measure Flour.
- You can use frozen blueberries in place of fresh blueberries. It is crucial not to thaw them before adding them to the batter; add them frozen to prevent staining the dough and introducing too much moisture.
Nutrition
All nutritional values are approximate and provided to the reader as a courtesy. Changing ingredients and/or quantities will alter the estimated nutritional calculations.
Calories: 294kcal | Carbohydrates: 40g | Protein: 5g | Fat: 13g | Saturated Fat: 8g | Polyunsaturated Fat: 1g | Monounsaturated Fat: 3g | Trans Fat: 1g | Cholesterol: 55mg | Sodium: 332mg | Potassium: 81mg | Fiber: 1g | Sugar: 15g | Vitamin A: 421IU | Vitamin C: 2mg | Calcium: 118mg | Iron: 2mg
Like this recipe? We’d love for you to rate it and leave a comment below!