
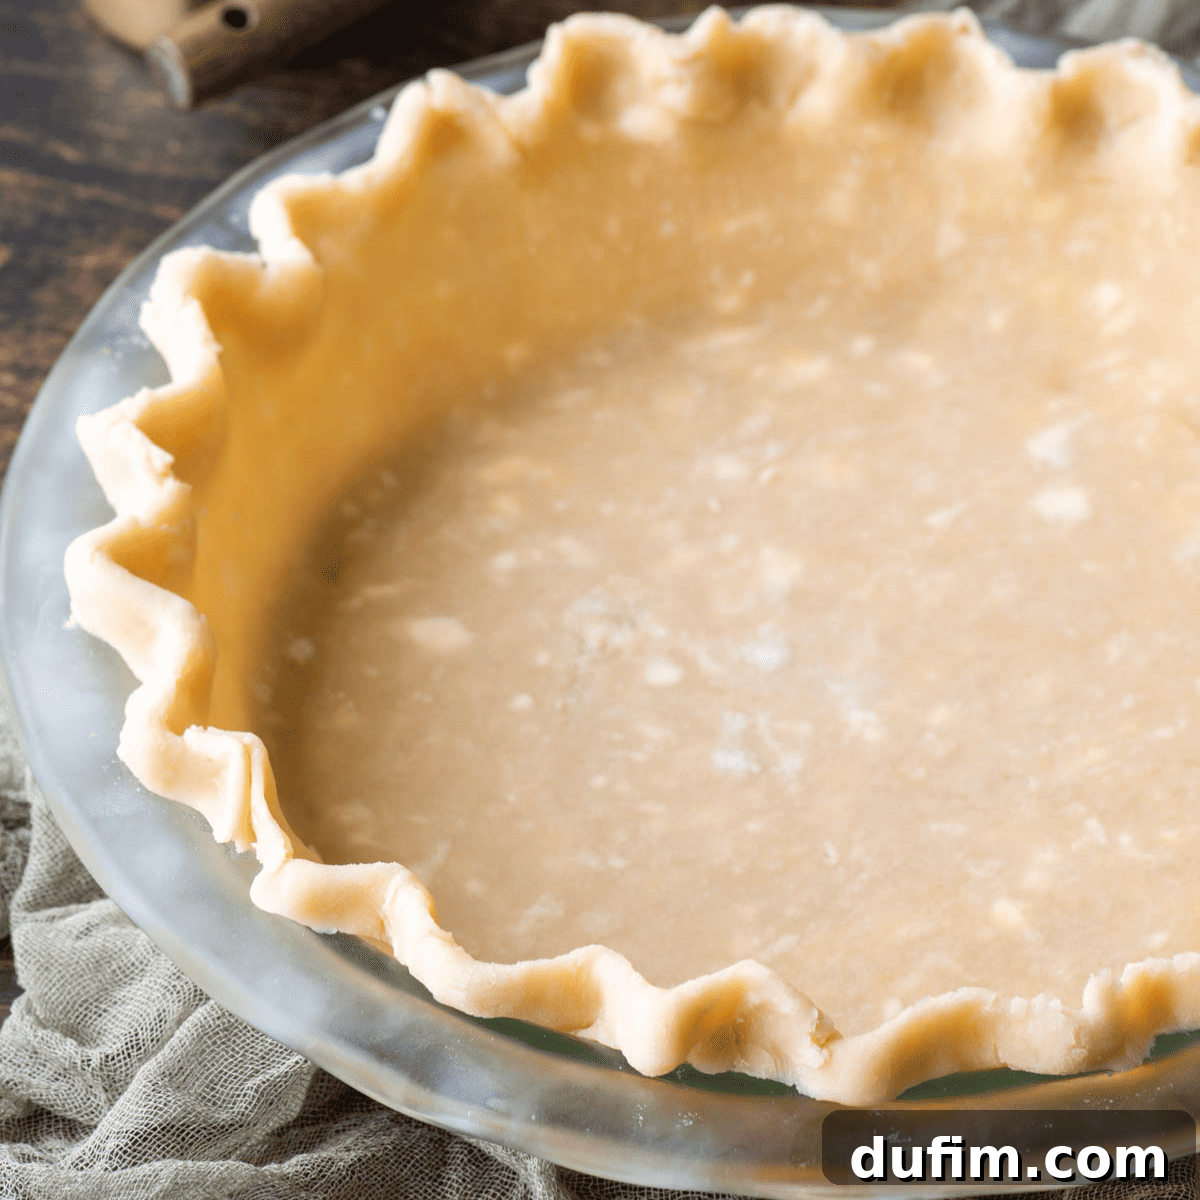
Mastering the Art of Flaky Gluten-Free Pie Crust: Your Definitive Guide to Perfect Pies
After dedicating countless hours over four intense weeks in my kitchen, meticulously testing and refining every detail, I’m incredibly excited to unveil my perfected gluten-free pie crust recipe to you! This isn’t just another recipe; it’s a comprehensive guide born from extensive experimentation, designed to equip you with the knowledge and techniques to create a truly flaky, tender, and exceptionally easy-to-handle crust. Alongside this game-changing recipe, I’m sharing all my best tips and, crucially, the missteps and lessons learned during my journey, ensuring you can master this homemade gluten-free pie crust with confidence from your very first attempt.
Why Trust This Perfected Gluten-Free Pie Crust Recipe?
Having embraced a gluten-free lifestyle for over 16 years, dating back to 2006, my approach to recipe development is unique and deeply personal. Unlike many food bloggers who might simply add “gluten-free instructions” to existing recipes, I rigorously test every single one of my creations exclusively with gluten-free flours. This ensures that when I share a gluten-free baking recipe, it’s not merely an adaptation but a truly authentic, tried, and extensively tested method. You can trust that this homemade gluten-free pie crust has undergone meticulous scrutiny, guaranteeing it performs beautifully and delivers an exceptional result, worthy of your most cherished pie fillings.
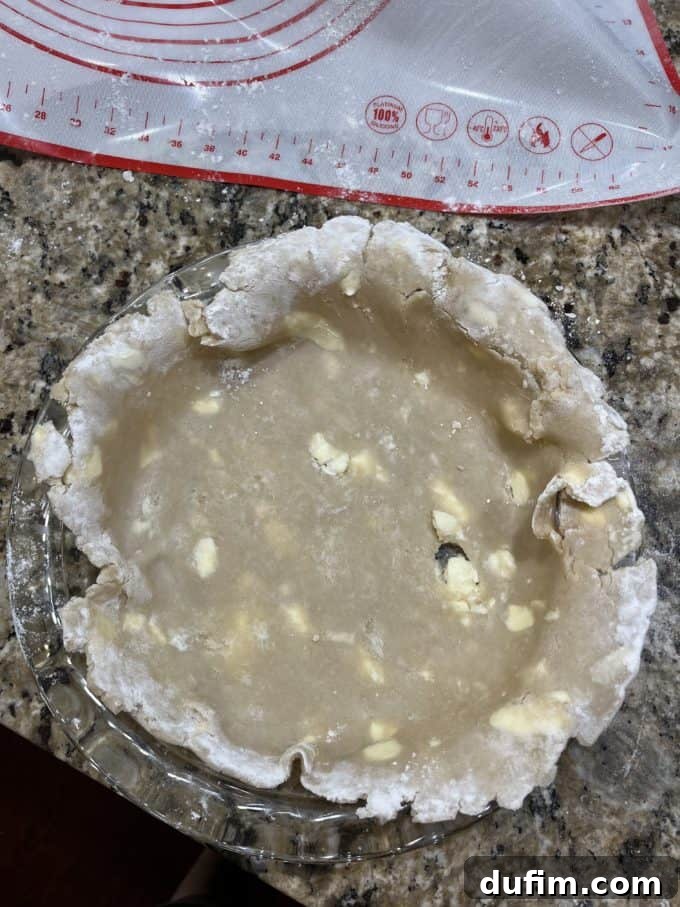
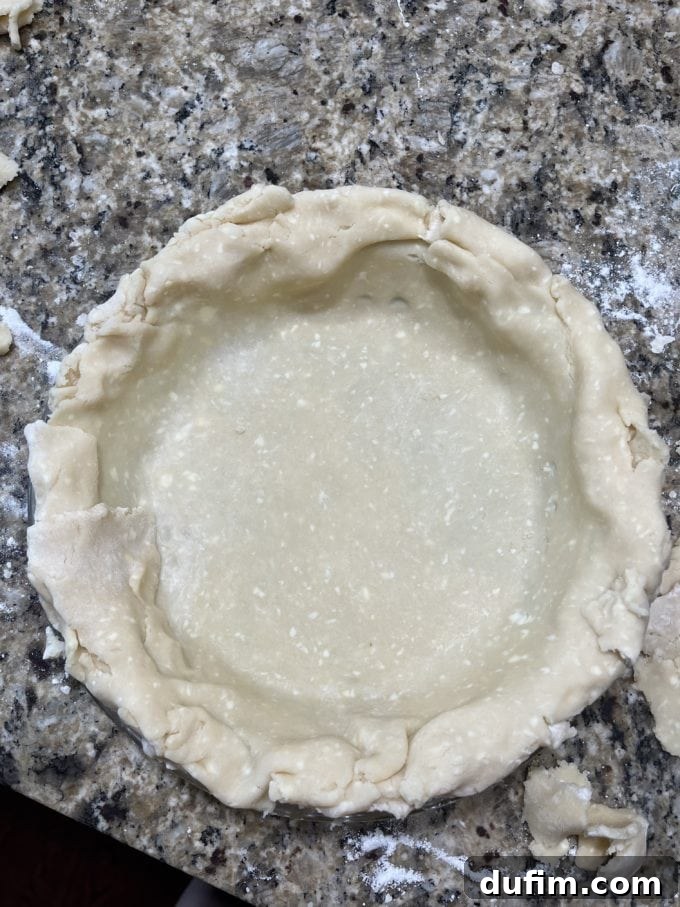
I am genuinely excited to be your personal pie crust coach, guiding you every step of the way to create the most incredible gluten-free pie crust. Not so long ago, I was exactly where many of you might be right now – a complete novice when it came to making pie crust from scratch, especially a gluten-free version. That all changed when I embarked on a rigorous, month-long quest to perfect this very recipe. I started with virtually zero experience, and I’m here to tell you with absolute certainty that it is entirely possible for anyone, regardless of their baking background, to learn how to make a beautifully flaky pie crust from scratch.
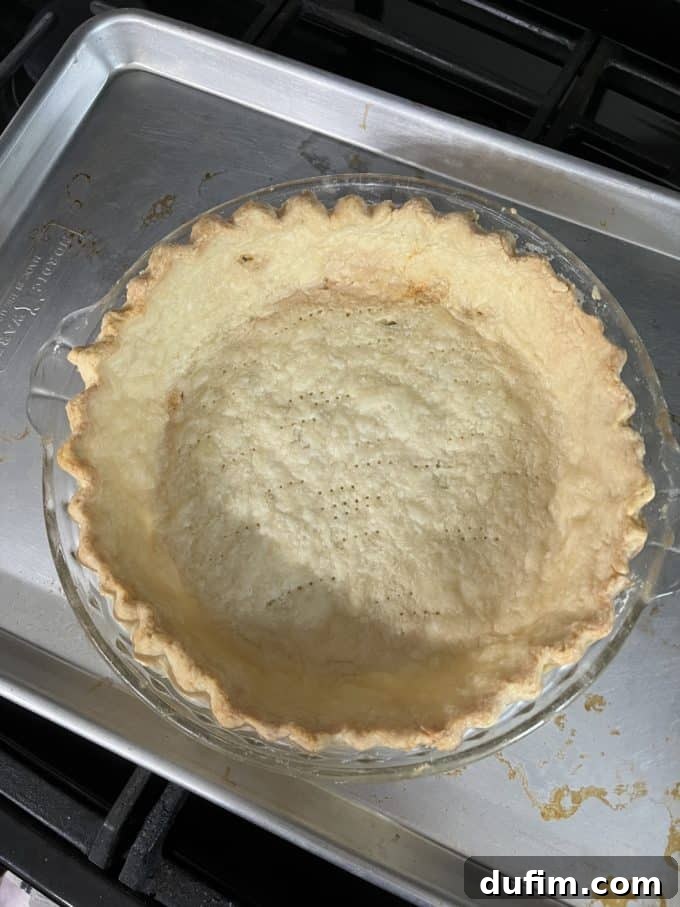
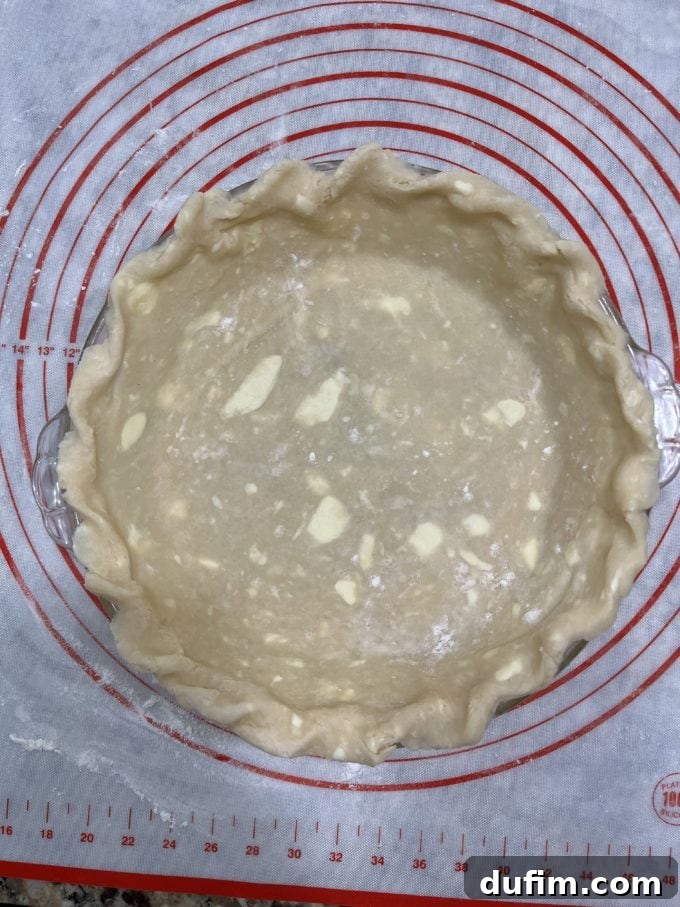
My journey into the world of homemade pie crust truly began this year, driven by a personal challenge to conquer the complexities of gluten-free pie dough. If you followed my culinary adventures on Instagram, you likely witnessed my initial, somewhat comical, attempts at crafting pie dough from scratch. Those early failures, however, were pivotal learning experiences. They quickly taught me a crucial lesson: never knead pie dough by hand like bread dough, especially gluten-free varieties. Recognizing the need for expert guidance, I reached out to a dear friend who had grown up making glorious homemade pie crusts with her mother and grandmother. Her willingness to provide an in-person lesson was a true blessing.
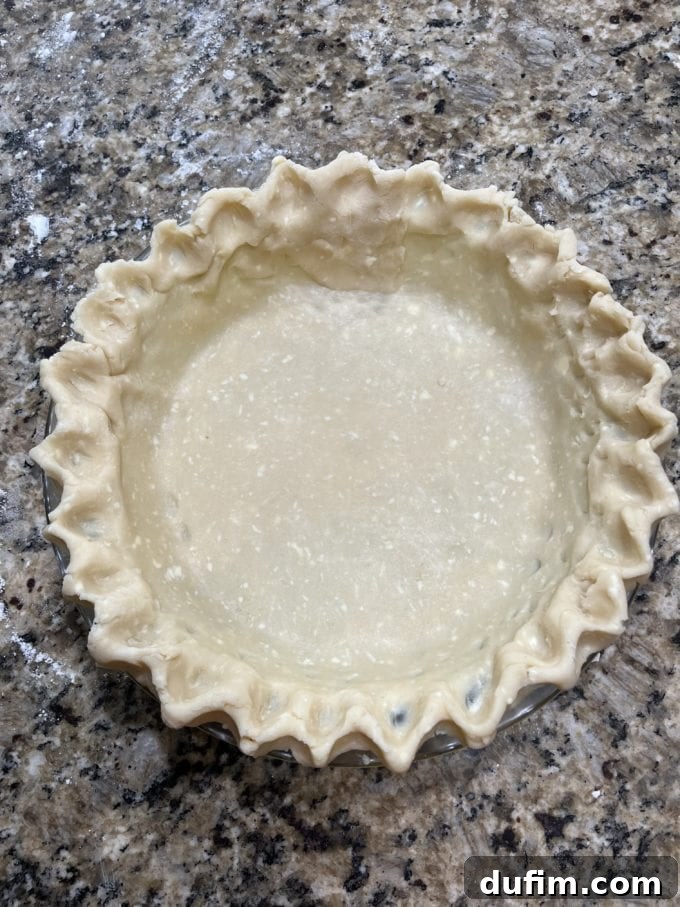
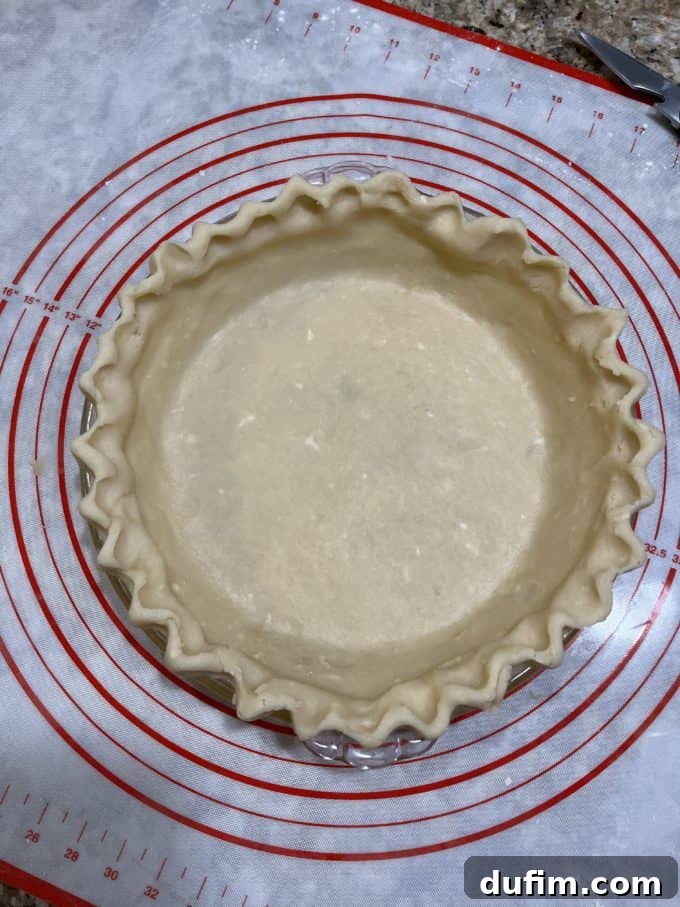
Thanks to my friend’s invaluable expertise, passed down through generations of skilled bakers, I gained critical insights into what perfectly hydrated gluten-free pie dough should truly look and feel like. She taught me the delicate balance of adding just enough water to bring the dough together without making it sticky or tough. I also learned the proper techniques for rolling out the dough evenly and how to elegantly flute the edges, transforming a simple crust into a beautiful frame for any pie. This intensive four-week immersion into making, remaking, testing, rolling, and baking ultimately led to the flawless pie crust I’m sharing today. I’ve distilled all that knowledge into easy-to-follow steps, ensuring you can bypass the common pitfalls and achieve perfection without the frustration I initially faced!
Essential Ingredients for the Best Gluten-Free Pie Crust
This exceptional gluten-free pie crust recipe is designed to elevate all your homemade pies, whether sweet or savory, to an entirely new level. It relies on a foundation of simple, accessible ingredients that you likely already have stocked in your pantry or can easily find at your local grocery store. The magic lies in the quality of these ingredients and how they are handled. You’ll find the complete recipe with precise measurements and detailed instructions in the dedicated recipe card further down this page.
- Gluten-Free All-Purpose Flour Blend: The cornerstone of this recipe is a high-quality 1:1 gluten-free all-purpose flour blend. It is crucial that your chosen blend contains xanthan gum, as this ingredient is vital for mimicking the elasticity and structure normally provided by gluten, preventing a crumbly crust. My personal recommendation and the one I consistently achieve excellent results with is King Arthur Gluten-Free Measure for Measure flour.
- Salt: A small amount of salt is essential not just for flavor, balancing the richness of the fats, but also for enhancing the overall taste of your pie.
- Granulated Sugar: While it might seem unconventional for a pie crust, one tablespoon of granulated sugar contributes to the crust’s beautiful golden-brown color and helps achieve a tender texture. Rest assured, this minimal amount will not make your crust noticeably sweet, allowing it to remain versatile for both sweet and savory applications. However, if you prefer, you can certainly omit it.
- Unsalted Butter, Ice Cold: Cold butter is paramount for a flaky crust. As the butter melts during baking, it releases steam, creating pockets of air that result in those desirable flaky layers. Using unsalted butter allows you to control the overall salt content of your pie.
- Vegetable Shortening, Chilled: Shortening plays a crucial role in achieving tenderness and contributes to flakiness by creating a crispier texture than butter alone. Like butter, it must be kept ice cold.
- Ice Cold Water (or Vodka!): The secret weapon for hydration. Cold water helps keep the fats in the dough solid, preventing premature gluten development (even in GF flours, some starches can become gummy) and ensuring a tender crust. Believe it or not, vodka can be used in place of ice water! Its high alcohol content evaporates quickly during baking, preventing excess moisture from developing and leading to an even flakier result.
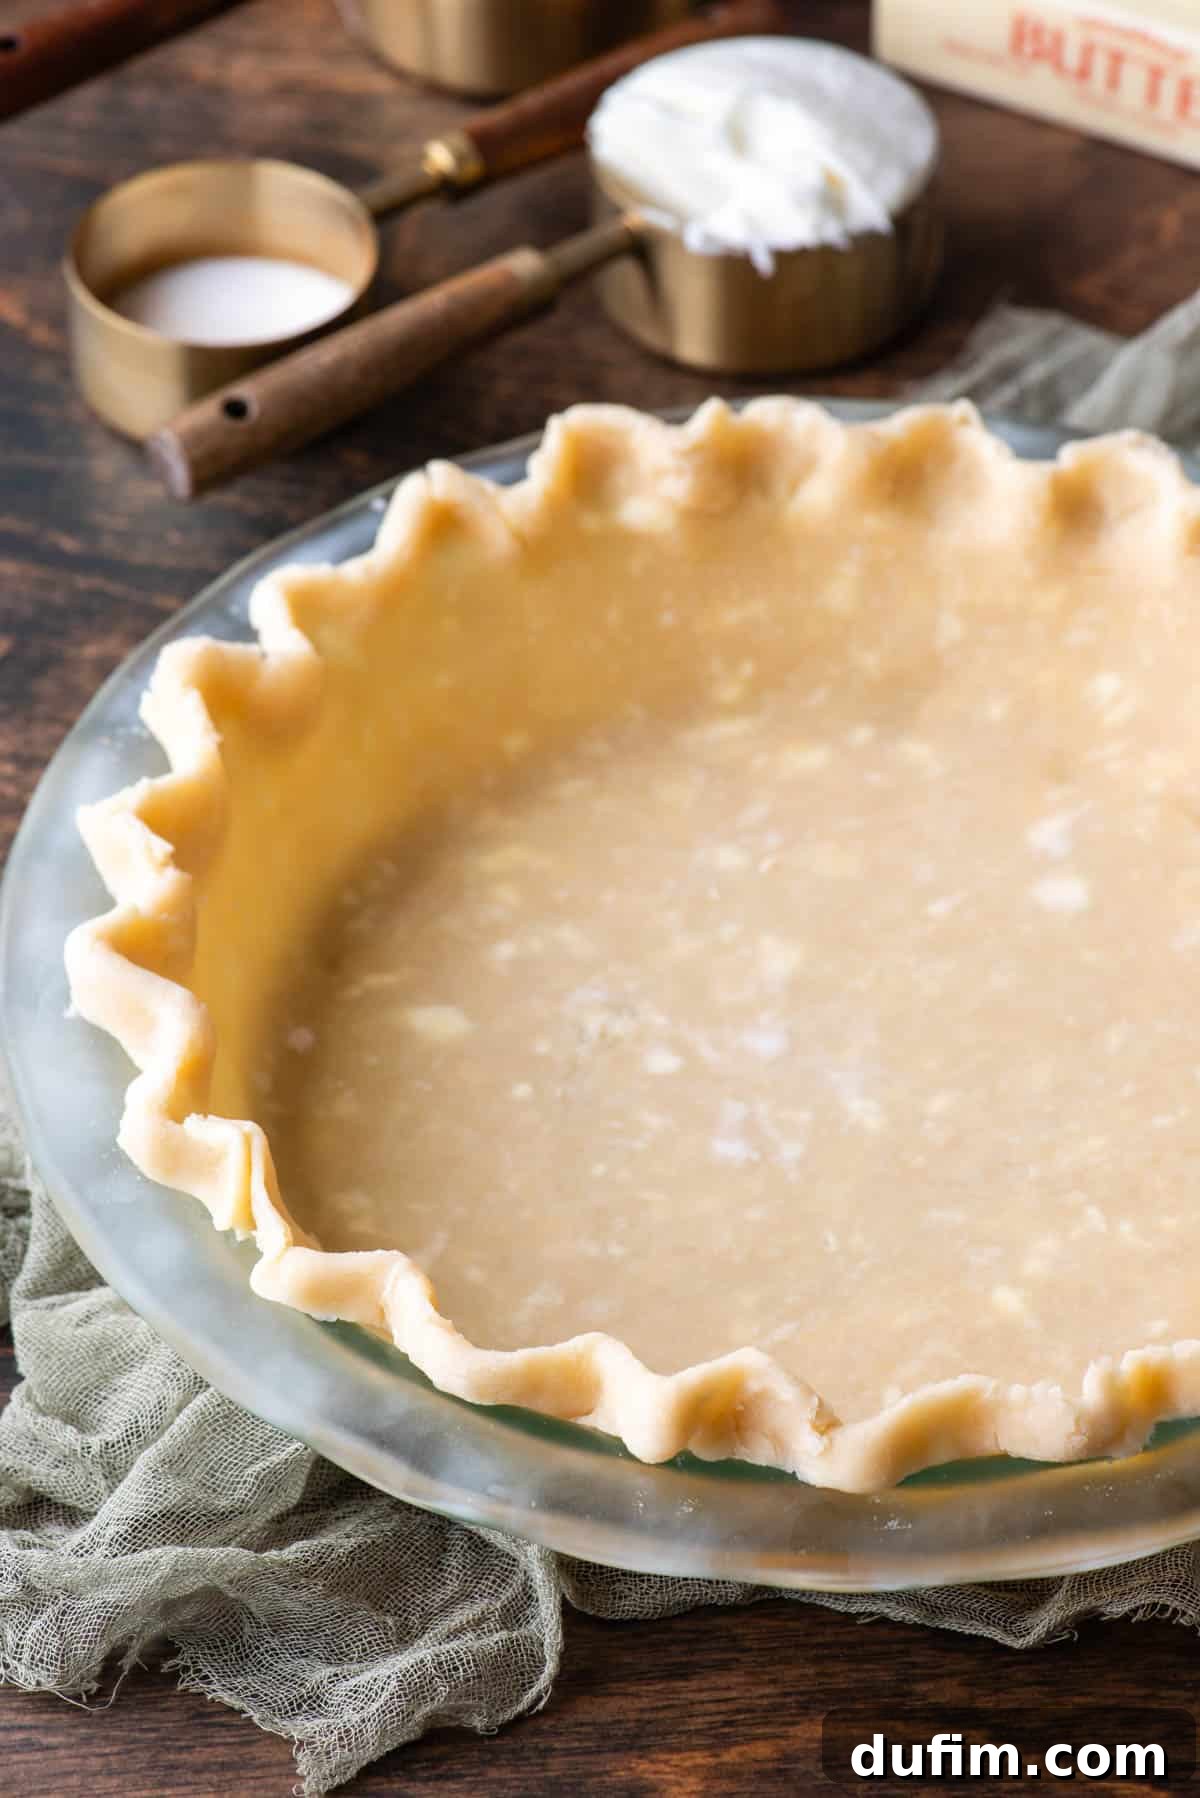
Step-by-Step Guide: Crafting Your Flaky Gluten-Free Pie Crust
My month-long dedication to perfecting this flaky gluten-free pie crust has culminated in this simple, step-by-step guide. It’s designed to be incredibly easy to follow and virtually foolproof, preventing you from encountering the same challenges I did. By breaking down each stage, from preparing your ingredients to shaping your perfect crust, you’ll feel confident and capable in your gluten-free baking endeavors. The complete recipe with precise measurements for all ingredients is detailed in the recipe card below, but here’s a visual breakdown to complement those instructions:
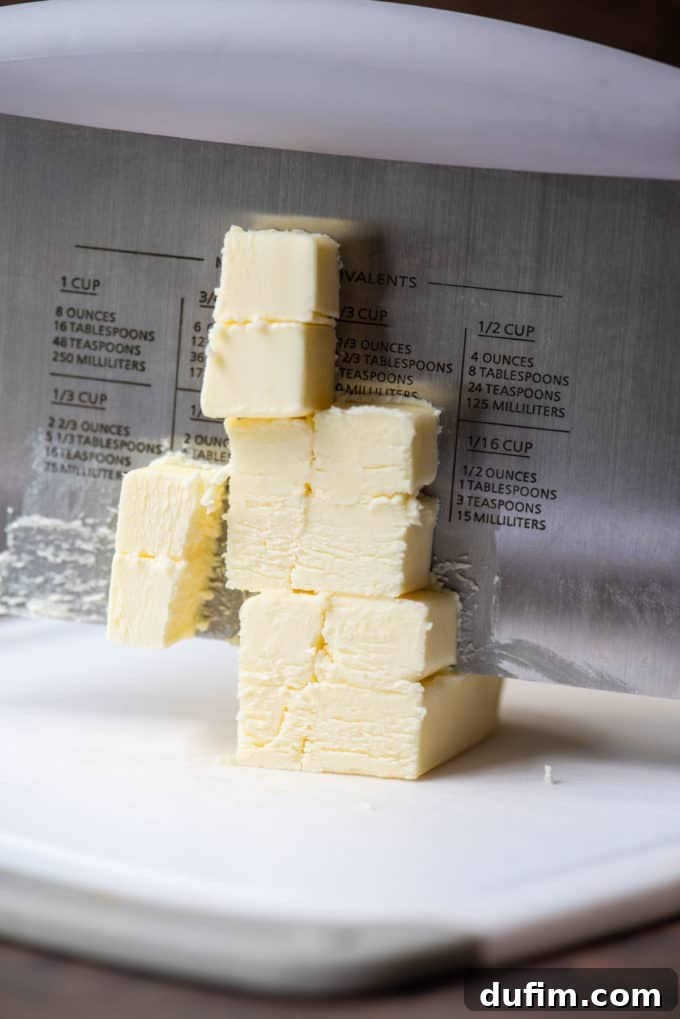
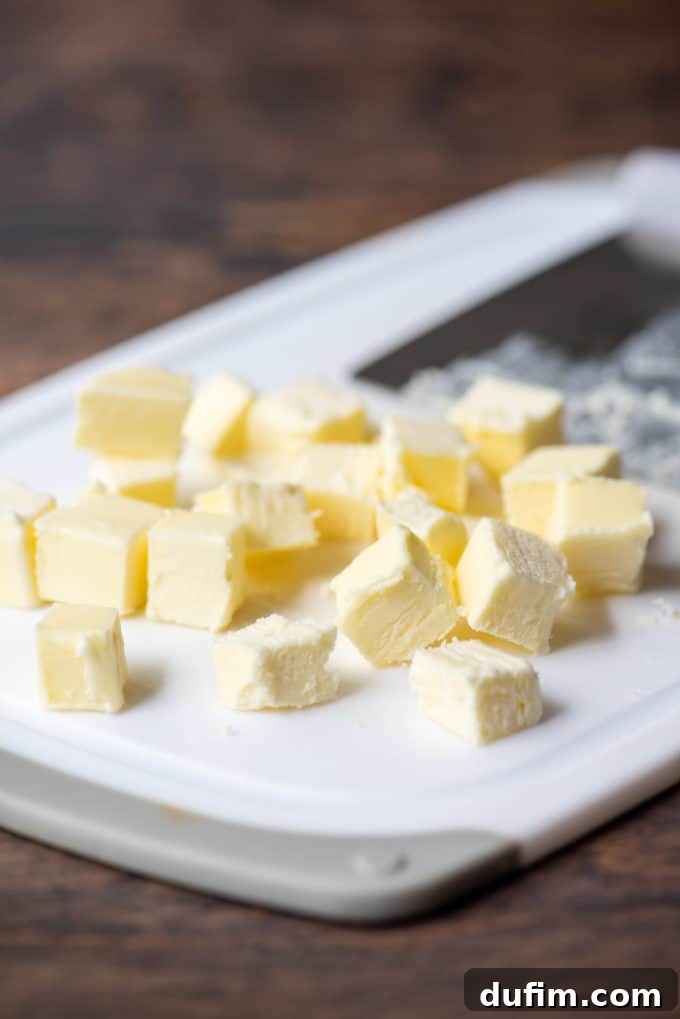
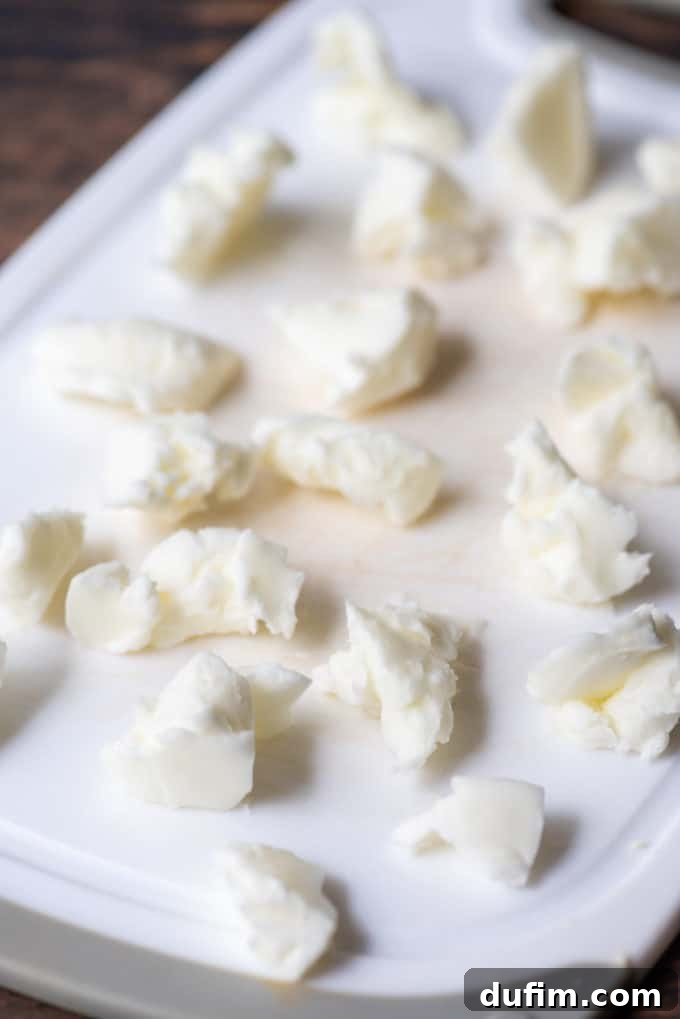
- Chill the Butter and Shortening: This is a non-negotiable step for a flaky crust! Begin by cutting your unsalted butter and vegetable shortening into small, uniform cubes, roughly ½ inch in size. The smaller the pieces, the easier they will incorporate into the flour. Place these cubed fats in a container or on a plate and return them to the refrigerator to chill for at least 30 minutes. If you’re using shortening sticks, they’re generally easier to cut. For tub shortening, scoop out the ⅔ cup and portion it into tablespoon-sized pieces before chilling. Keeping these fats ice cold is key to preventing them from melting into the flour too quickly, which would result in a tough, dense crust instead of a light, flaky one.
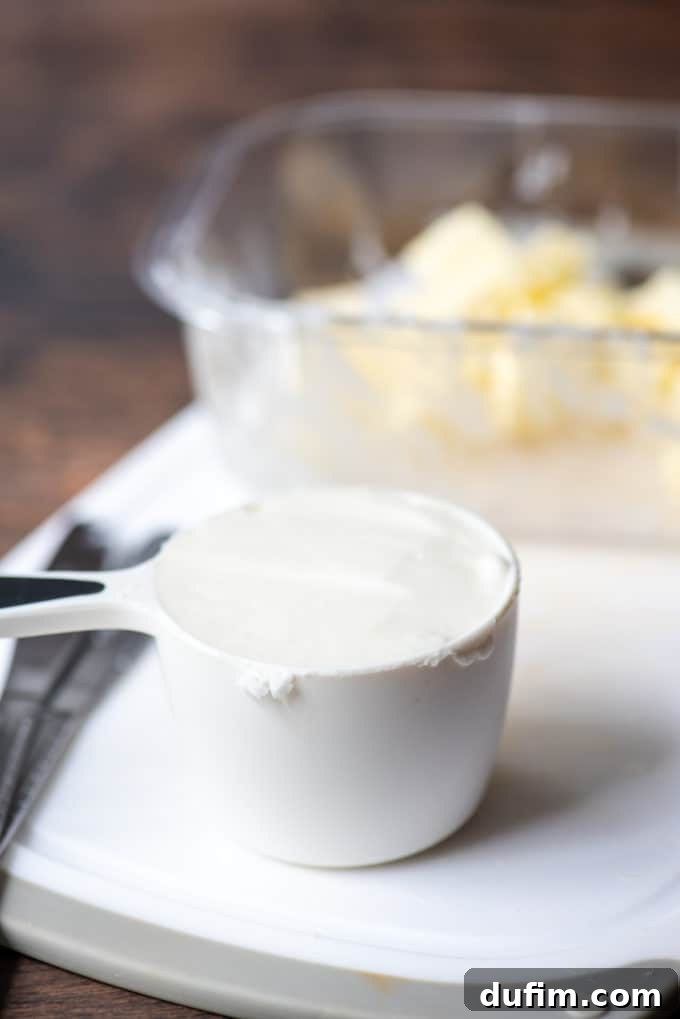
- Combine Dry Ingredients: In the bowl of your food processor (my preferred method for consistency), add the 2 ½ cups of gluten-free all-purpose flour, 1 teaspoon of salt, and 1 tablespoon of granulated sugar. Pulse these dry ingredients together a few times – just enough to ensure they are well combined. This step helps distribute the salt and sugar evenly throughout the flour, contributing to a balanced flavor in every bite.
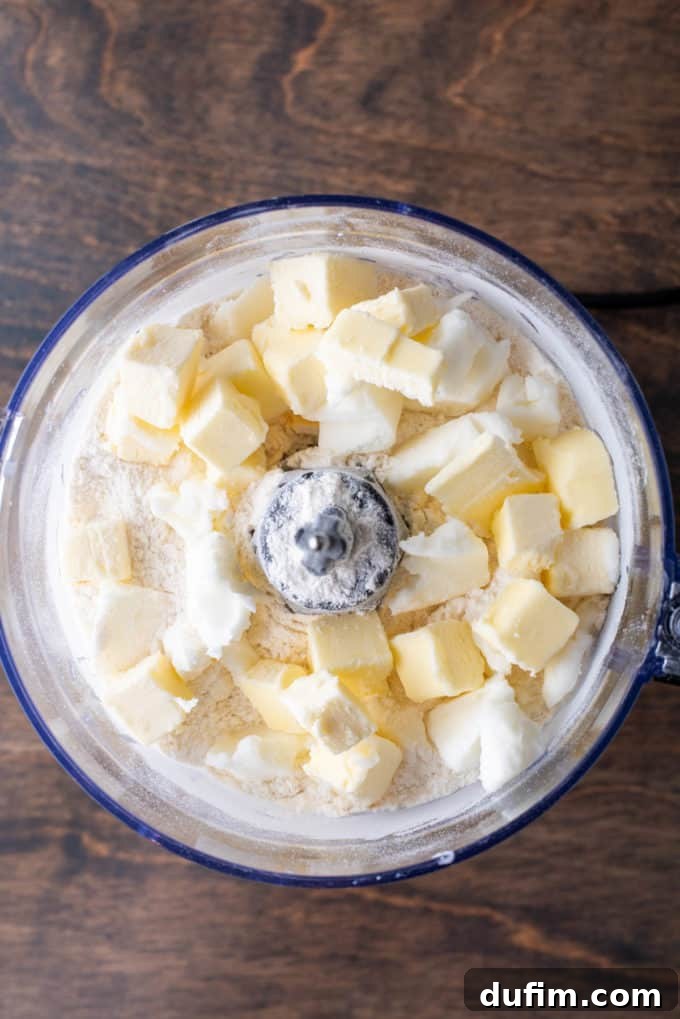
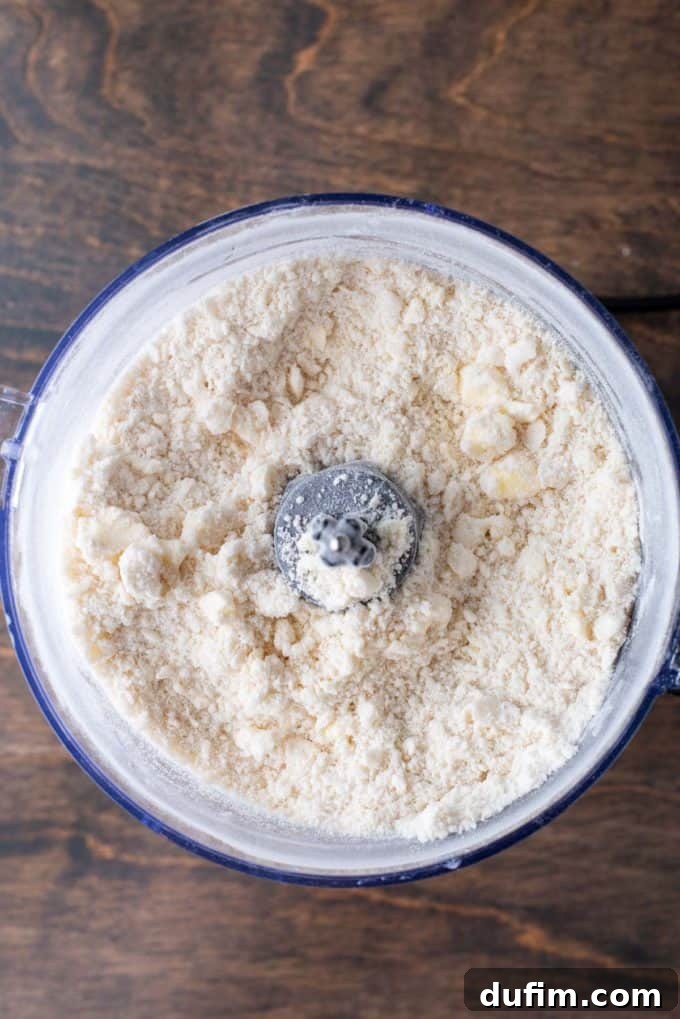
- Incorporate Butter and Shortening: Add the chilled 6 tablespoons of unsalted butter cubes and the chilled vegetable shortening chunks to the food processor with the dry ingredients. Pulse in short, one-second bursts, about 10-15 times. The goal is to break down the fats until the mixture resembles coarse crumbs, with some pea-sized pieces of butter and shortening still visible. It’s important not to over-process here; these small pockets of fat are what create flakiness. Over-mixing can result in a tougher crust.
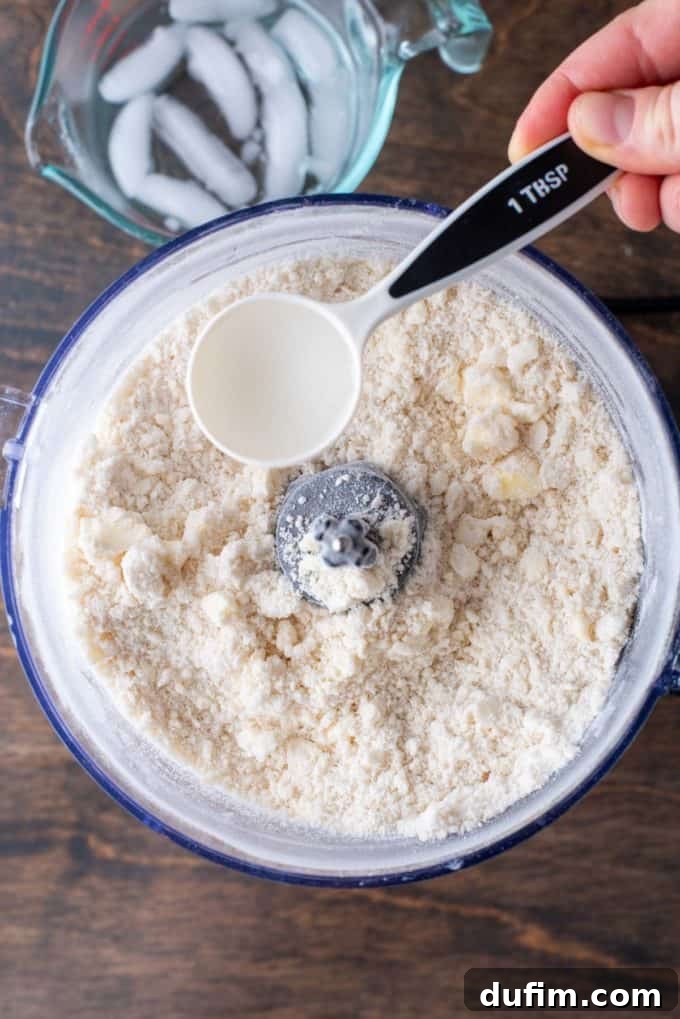
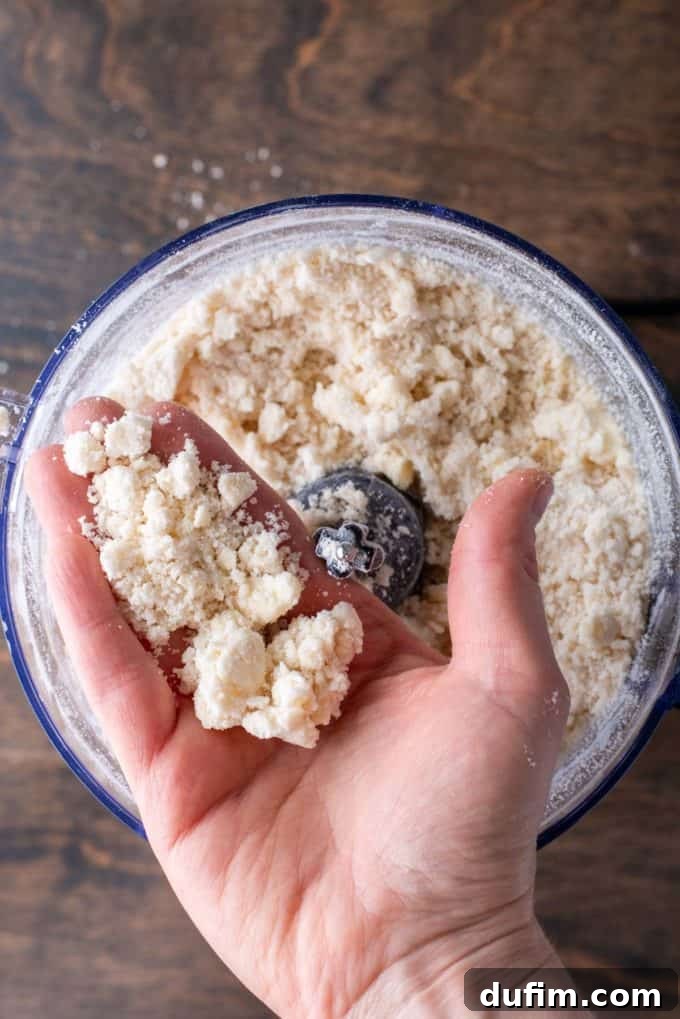
- Add Ice Water Gradually: Now it’s time to bring the dough together. Drizzle in 4 tablespoons of ice-cold water (or vodka, if using). Pulse briefly after each addition, continuing until the dough just begins to clump together. The key here is not to add too much liquid. Test the dough by pinching a small amount between your fingers; if it holds together without being overly sticky or crumbly, it’s ready. If it’s too dry and falls apart, add more water, 1 tablespoon at a time, pulsing briefly after each addition until the perfect consistency is achieved. Be cautious, as too much water can make the dough tough and difficult to handle.
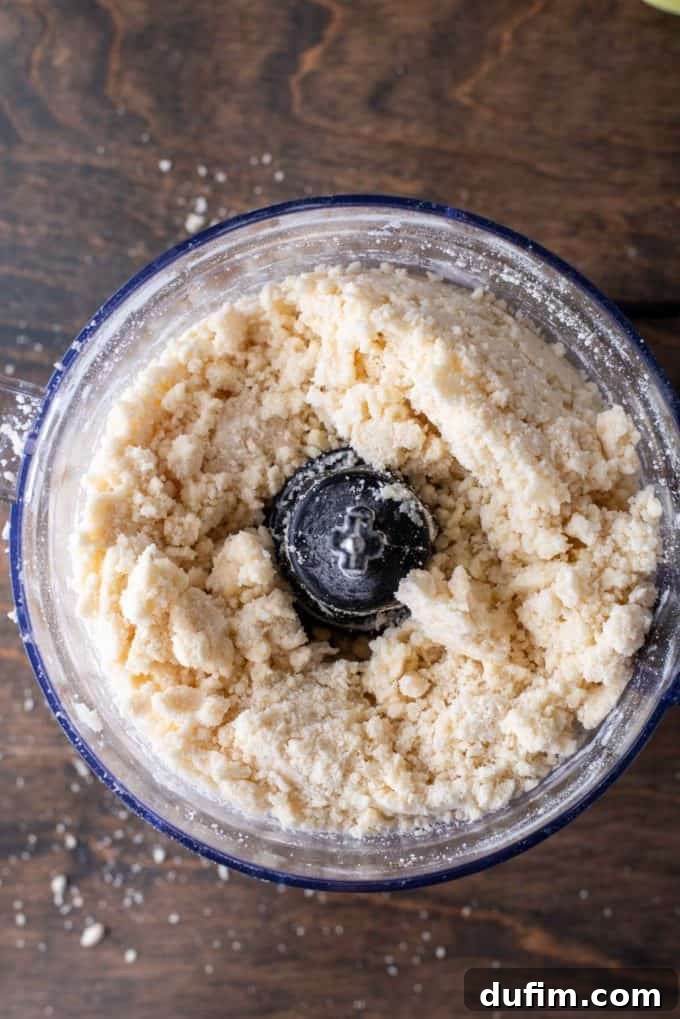
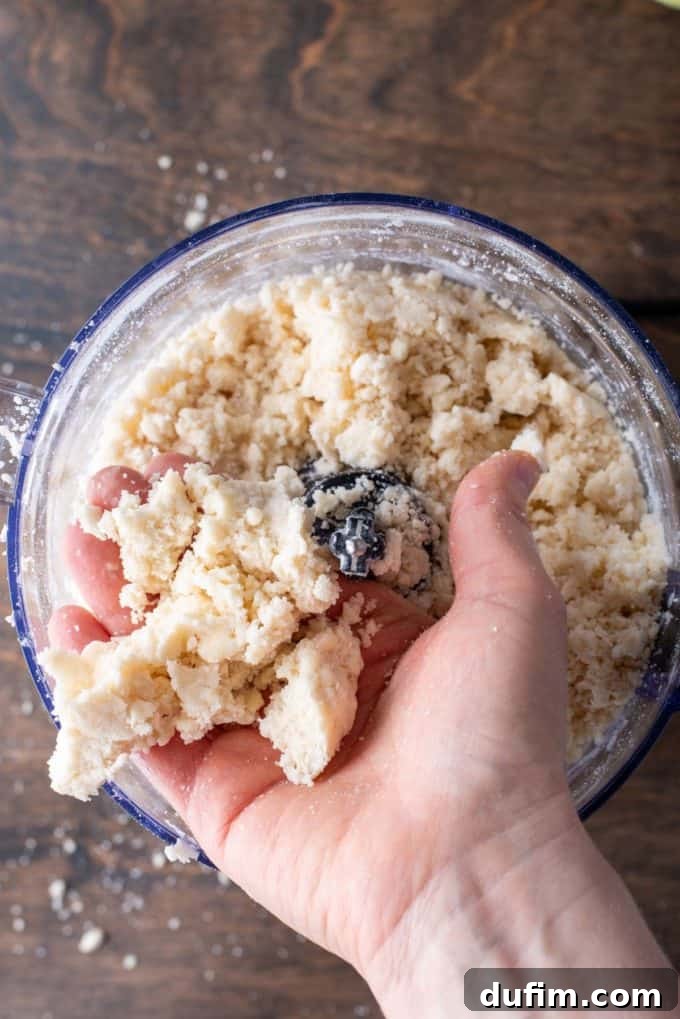
- Form Dough into a Ball: Turn off the food processor and carefully remove the dough from the bowl. It might still look a bit crumbly, but don’t worry. Transfer the dough onto a clean surface, ideally a large piece of plastic wrap or a lightly floured silicone pastry mat.
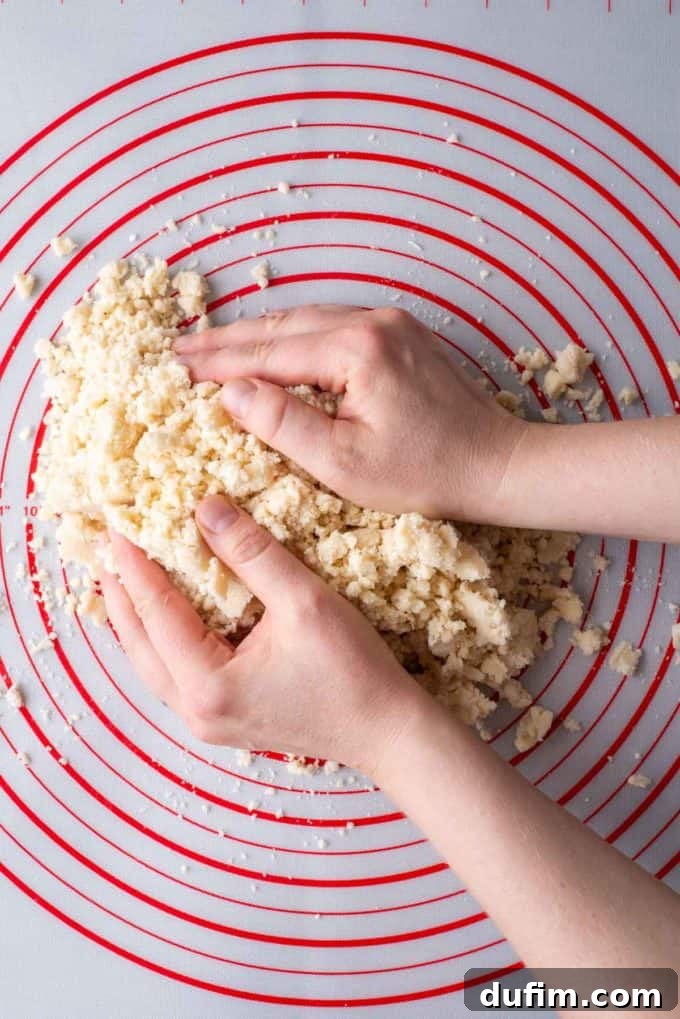
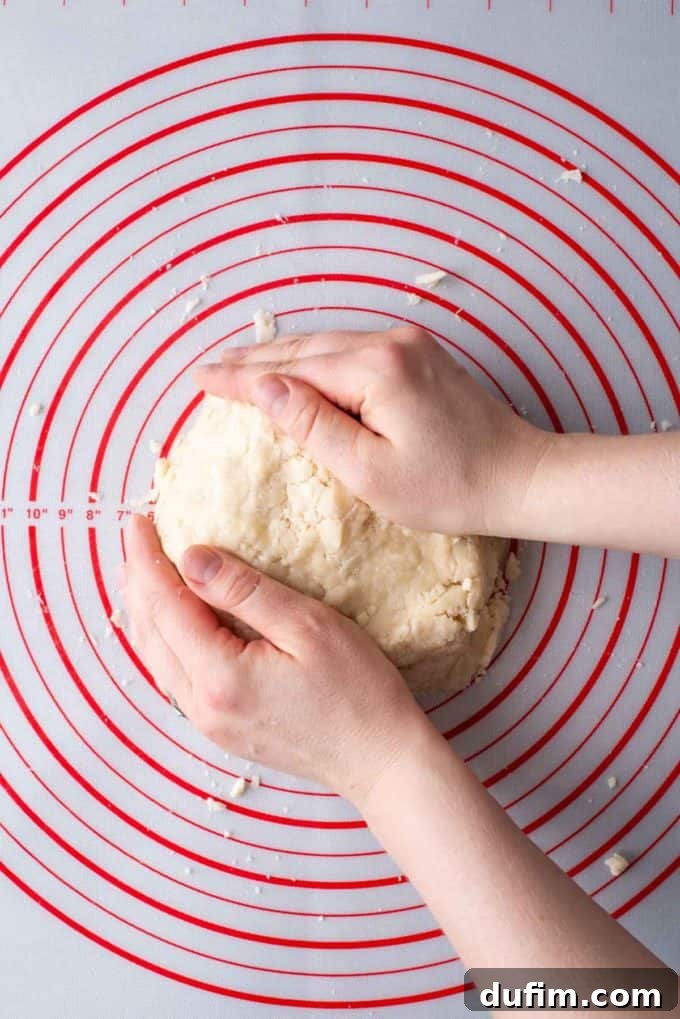
- Shape into Discs and Chill: Gently bring the dough together with your hands, pressing it into a cohesive ball. Then, divide the dough into two equal portions. Shape each portion into a flat disc, about 1 inch thick. This flat disc shape is much easier to roll out later. Wrap each disc tightly in plastic wrap to prevent it from drying out, and refrigerate for at least 60 minutes, or until firm. Chilling is essential as it allows the fats to solidify, relaxes the dough, and makes it much easier to roll without cracking. You can refrigerate the dough for up to 4 days or freeze one of the discs for up to 6 months for future single-crust pies.
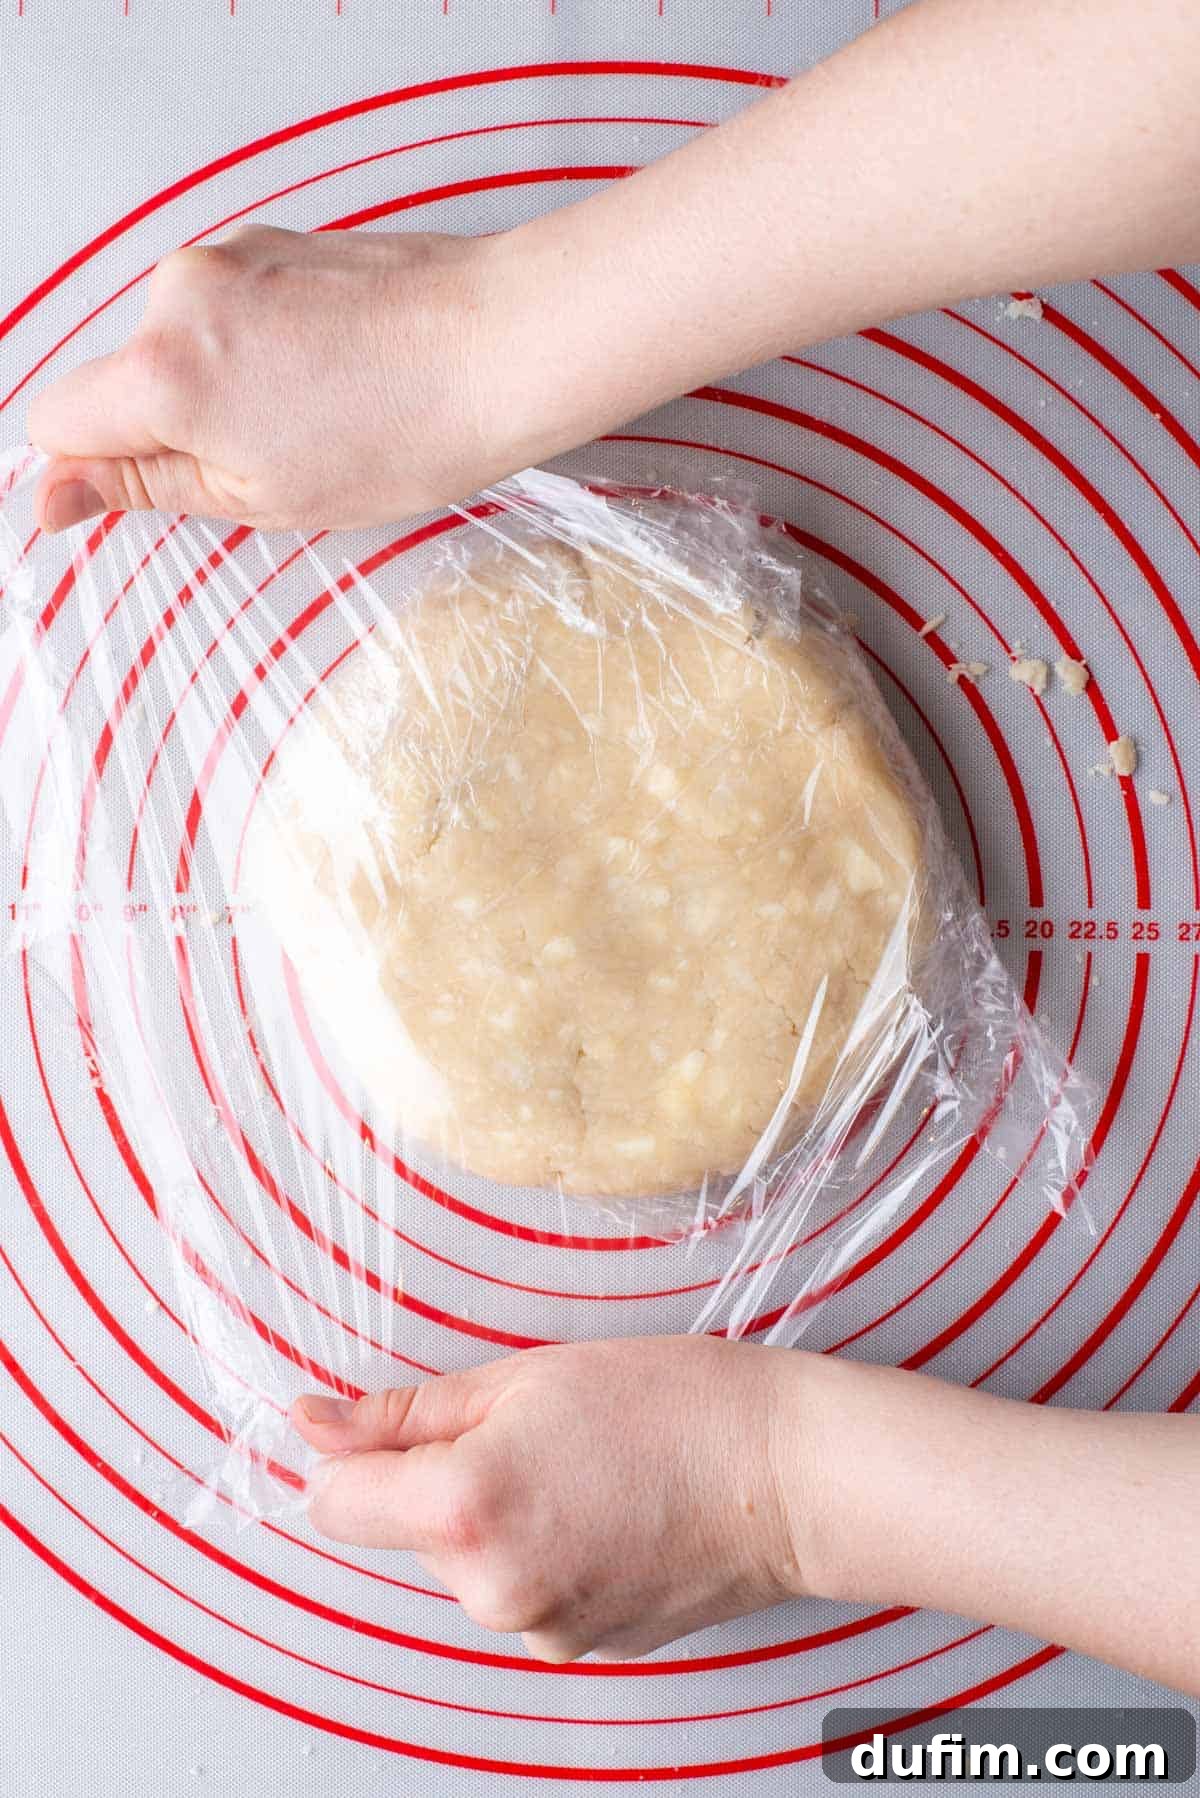
Rolling Out Your Gluten-Free Pie Dough Like a Pro
Rolling out gluten-free pie dough can be a bit different from traditional dough, as it lacks the elasticity of gluten. Patience and a gentle hand are your best friends here. Follow these steps for a smooth rolling process:
- Prepare Your Work Surface: Ensure your countertop or, even better, your pie mat is impeccably clean and completely dry. Lightly dust the surface with gluten-free all-purpose flour. This crucial step prevents the dough from sticking, which is a common challenge with gluten-free dough.
- Allow Dough to Mellow Slightly: Remove one of the chilled dough discs from the refrigerator. Let it sit at room temperature for just 5-10 minutes. This brief period allows the dough to soften ever so slightly, making it less prone to cracking when you begin to roll, without letting the butter and shortening get too warm.
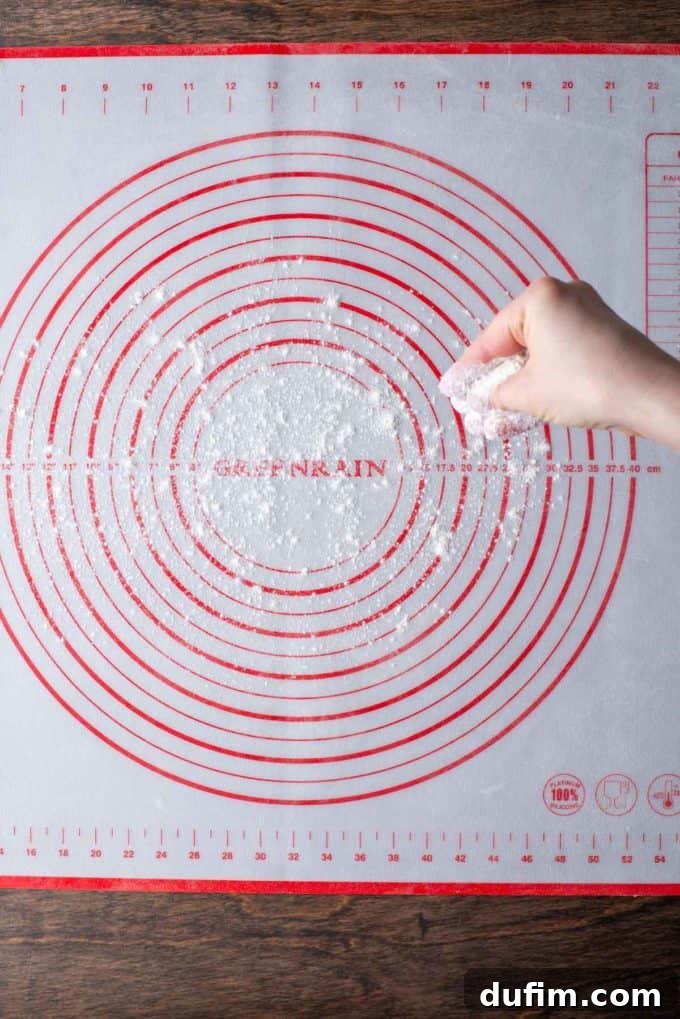
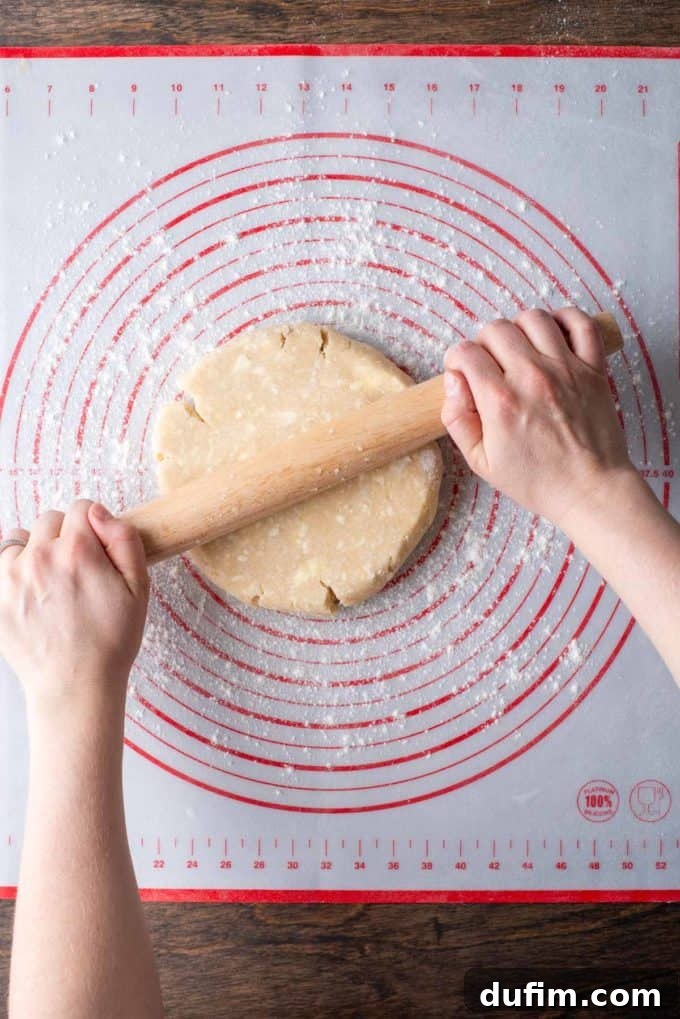
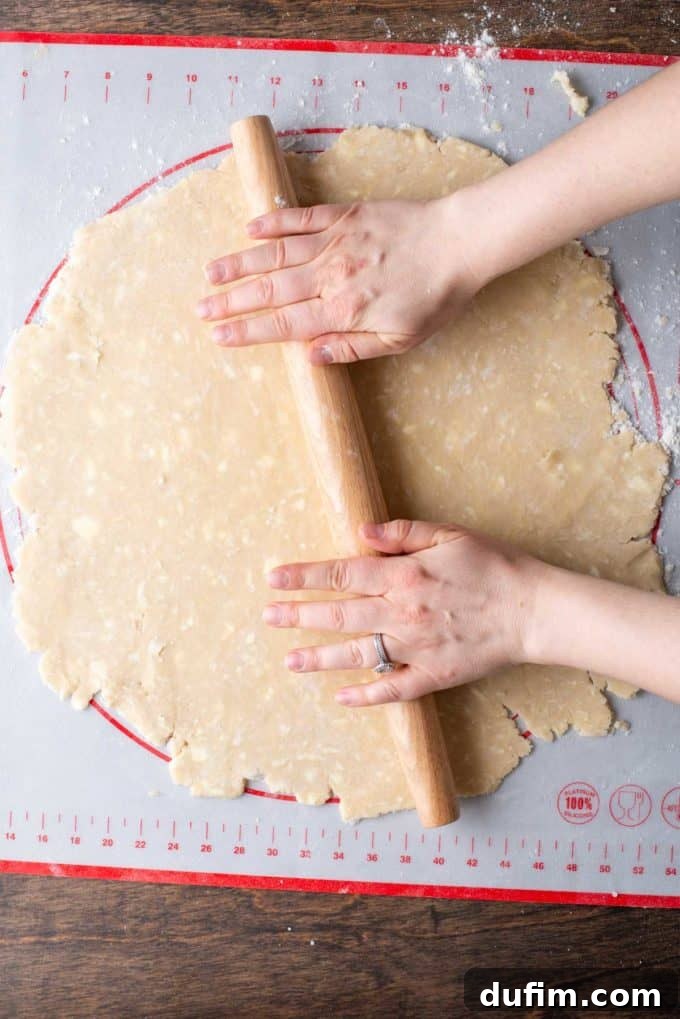
- Begin Rolling: Place the dough disc on your floured surface. Using your rolling pin, gently press down on the center of the disc to start flattening it. Begin rolling from the center outwards, applying even pressure. Work your way around the disc, rolling in all directions to gradually expand it while maintaining a roughly circular shape. It’s common for gluten-free dough to crack or split slightly at the edges during this process; simply use your fingers to gently pinch any cracks back together. Don’t be afraid to patch it up – the beauty of homemade pie crust is its rustic charm!
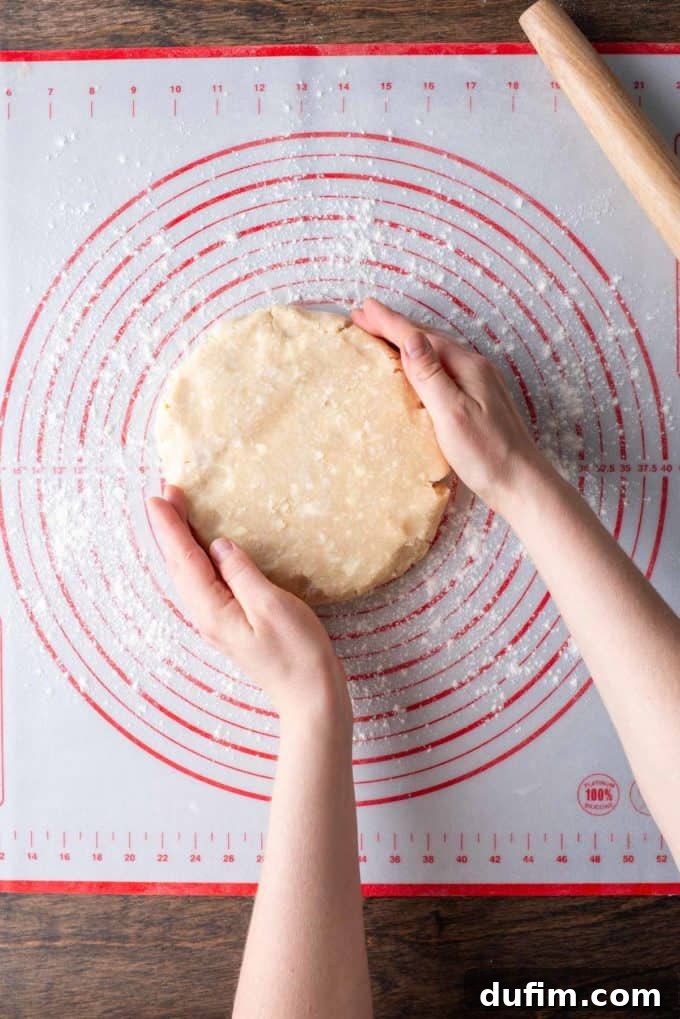
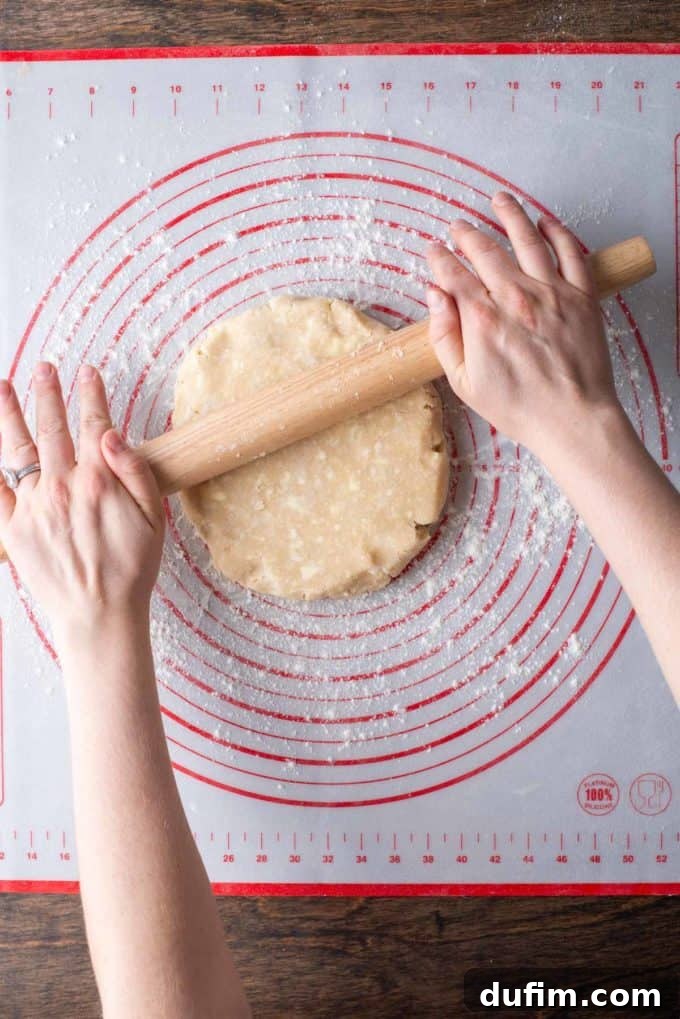
- Rotate the Dough Frequently: After every few rolls, gently rotate the dough a quarter turn. This technique is invaluable for several reasons: it helps you achieve an even thickness, maintains a round shape, and prevents the dough from sticking stubbornly to your work surface. Continue this rolling and rotating motion until your dough reaches approximately 6 inches in diameter.
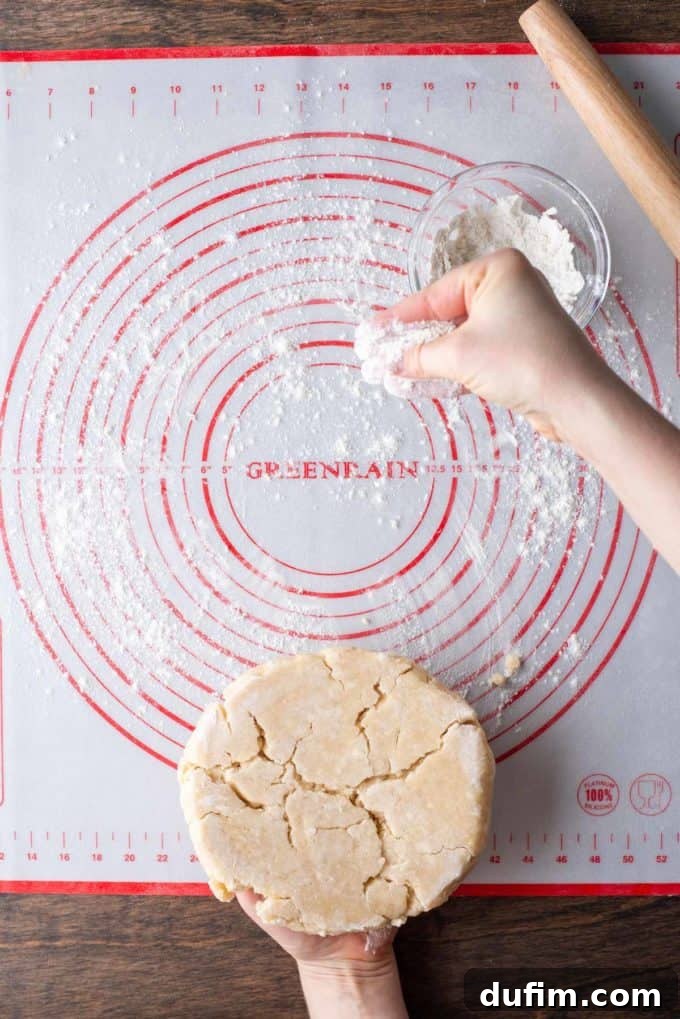
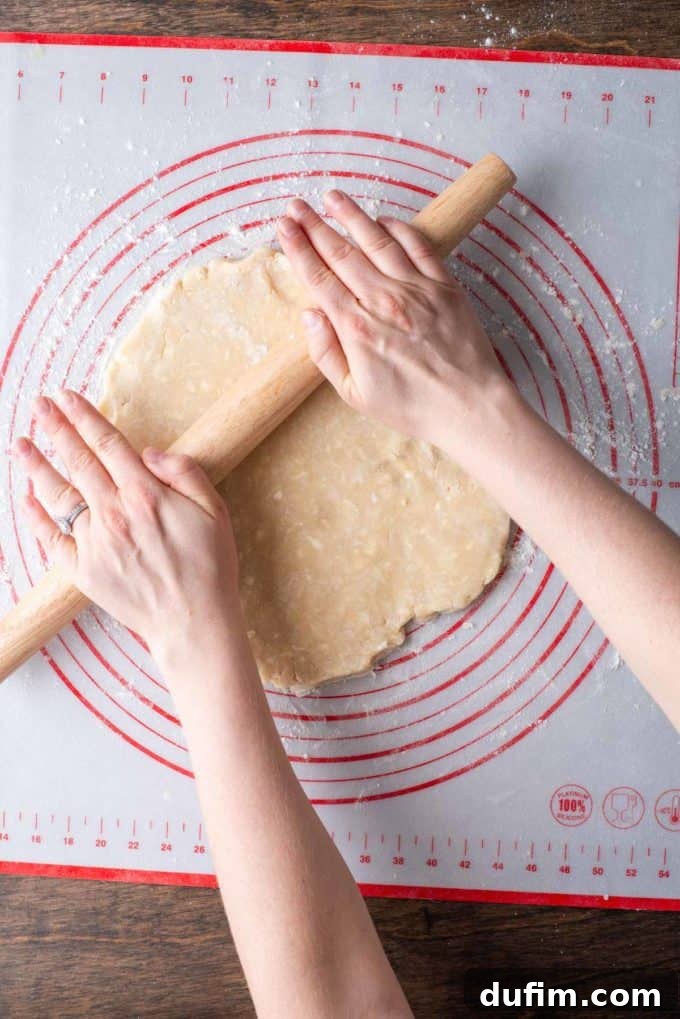
- Flip and Dust with Flour: To ensure even rolling and prevent sticking on both sides, gently lift the dough from the surface using your hands or a large offset spatula, and carefully flip it over. If the dough feels at all sticky, lightly dust the new top surface with a little more gluten-free flour.
- Continue Rolling to Size: Resume rolling from the center outward, continuing to rotate the dough as needed. Your aim is an even thickness throughout the entire circle, gradually working towards your desired size. For a standard 9-inch pie dish, you’ll typically need an 11-12 inch diameter circle of dough to allow for overhang and crimping.
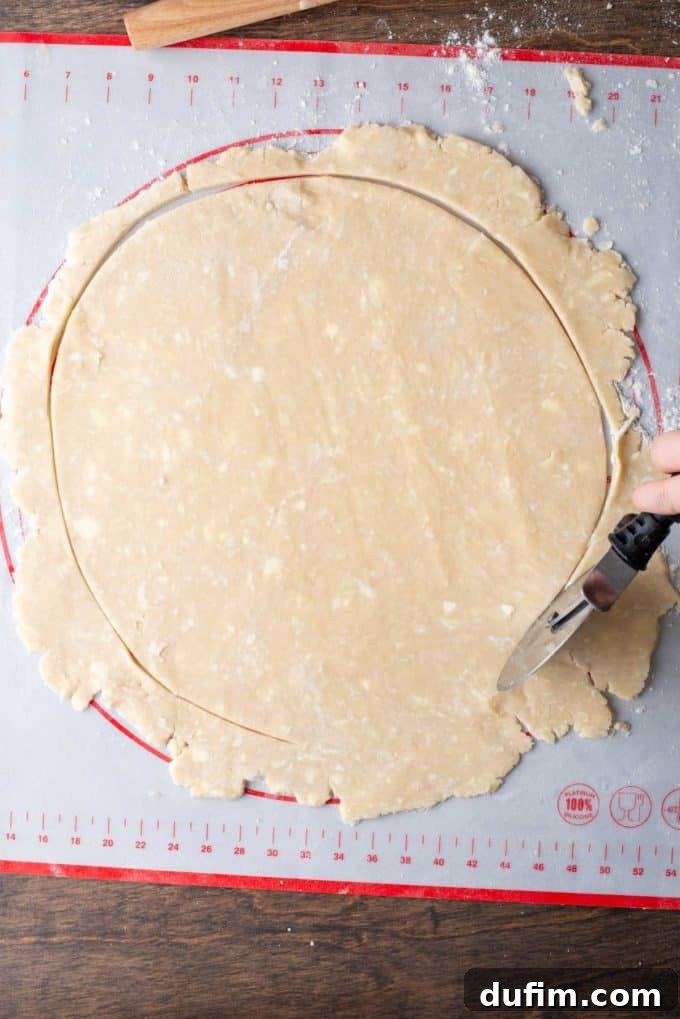
- Use a Pizza Cutter (Optional, but Recommended): For those aiming for a truly perfectly round pie crust, a pizza cutter is your secret weapon. Place the cutter’s wheel at the edge of your rolled-out dough and carefully cut around the perimeter, trimming it into a precise circle. This not only ensures a beautiful shape but also helps you visualize the exact size needed to fit your pie pan seamlessly.
- Lightly Flour Before Rolling onto Pin: To prevent the dough from sticking to itself when you roll it onto your rolling pin for transfer, sprinkle a final, very light dusting of flour over the entire surface of the rolled-out dough.
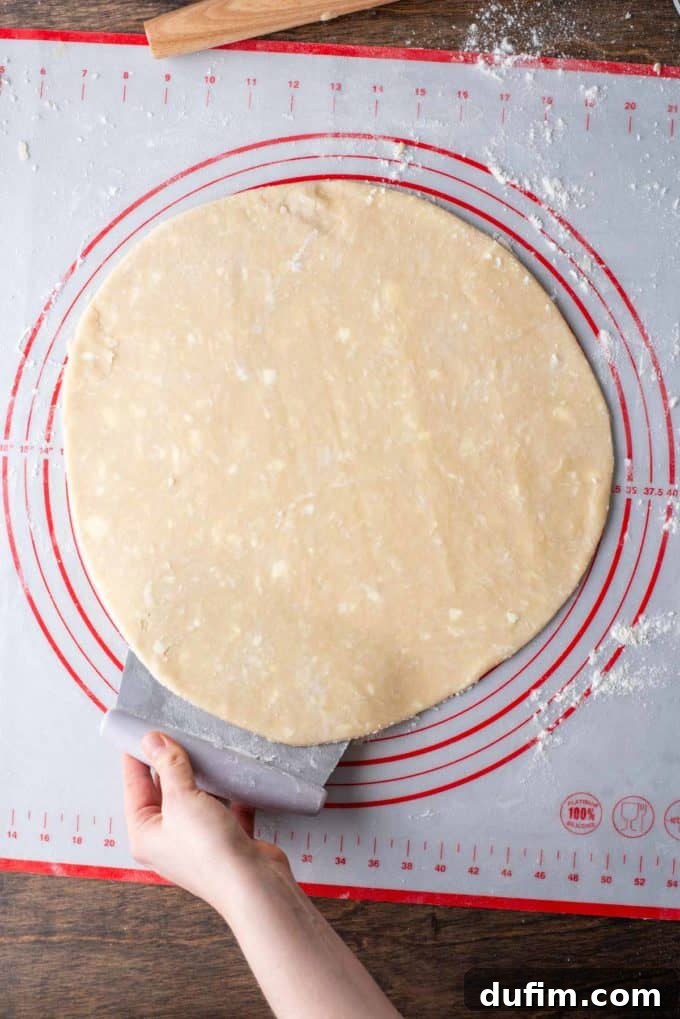
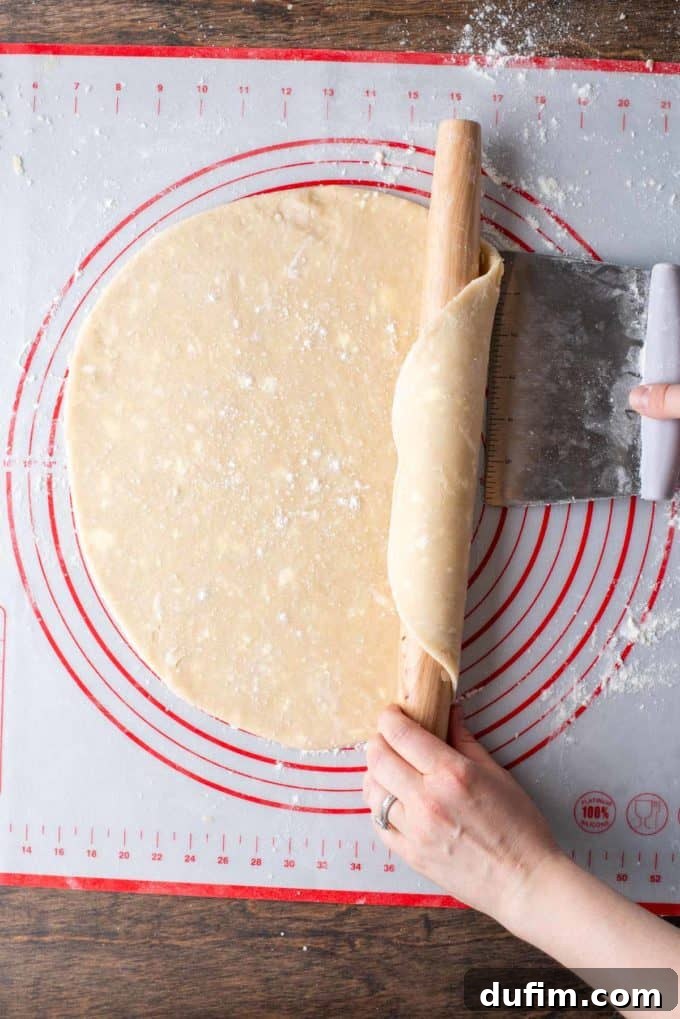
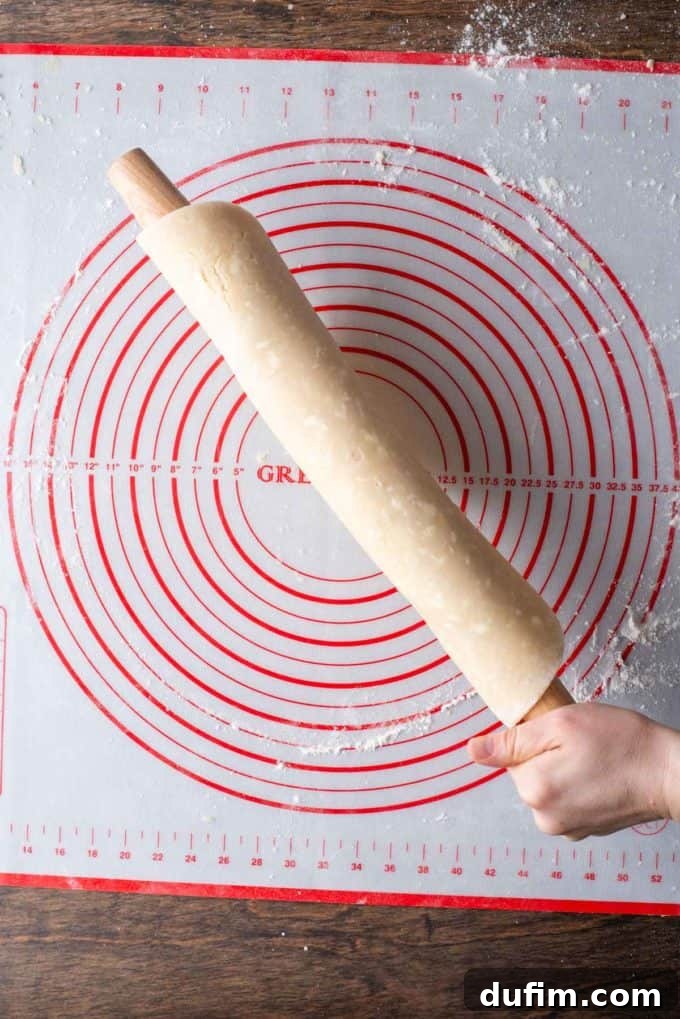
- Roll onto Rolling Pin for Transfer: This is the easiest way to transfer delicate dough. Carefully lift one edge of your perfectly rolled-out dough and gently begin to roll it onto your rolling pin. Continue rolling, smoothly wrapping the entire circular dough around the pin.
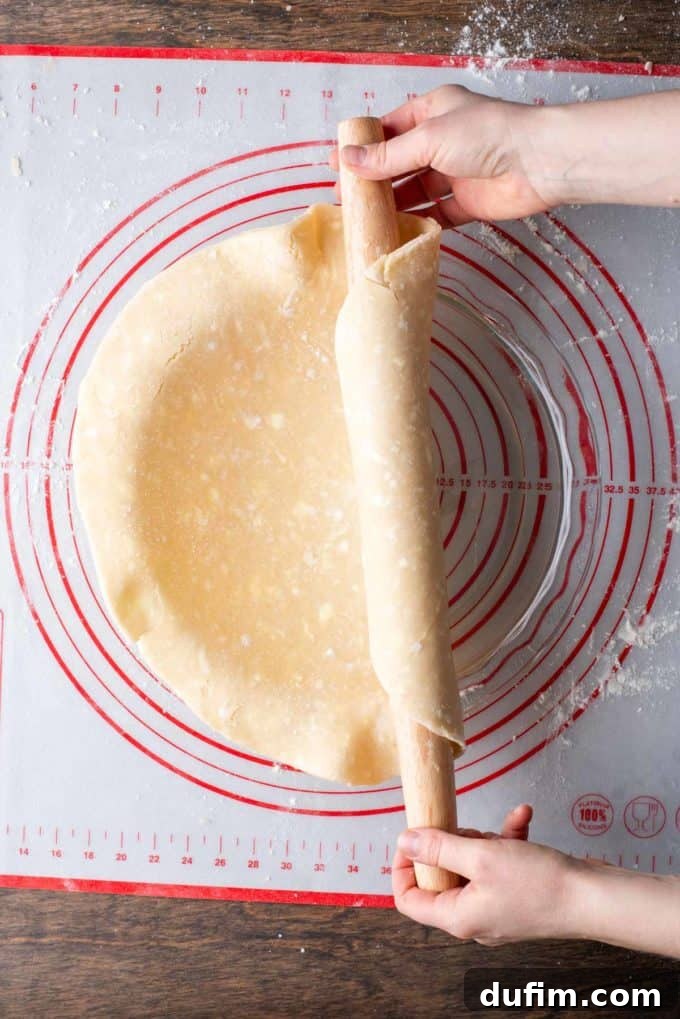
- Transfer to Pie Dish: Position the dough-covered rolling pin directly over your pie dish, allowing one edge of the dough to hang slightly over the side. Gently unroll the dough from the rolling pin, allowing it to settle into the pie dish. Carefully press it into the bottom and up the sides, ensuring it covers the dish evenly without stretching. Stretching the dough can cause it to shrink during baking.
- Trim Excess Dough: Once the dough is comfortably nestled in the pie dish, use kitchen scissors or a sharp knife to trim away any excessive overhang. Leave a generous ½ to 1 inch of dough extending beyond the edge of the pie dish. This excess is crucial for creating a beautiful and sturdy crimped edge.
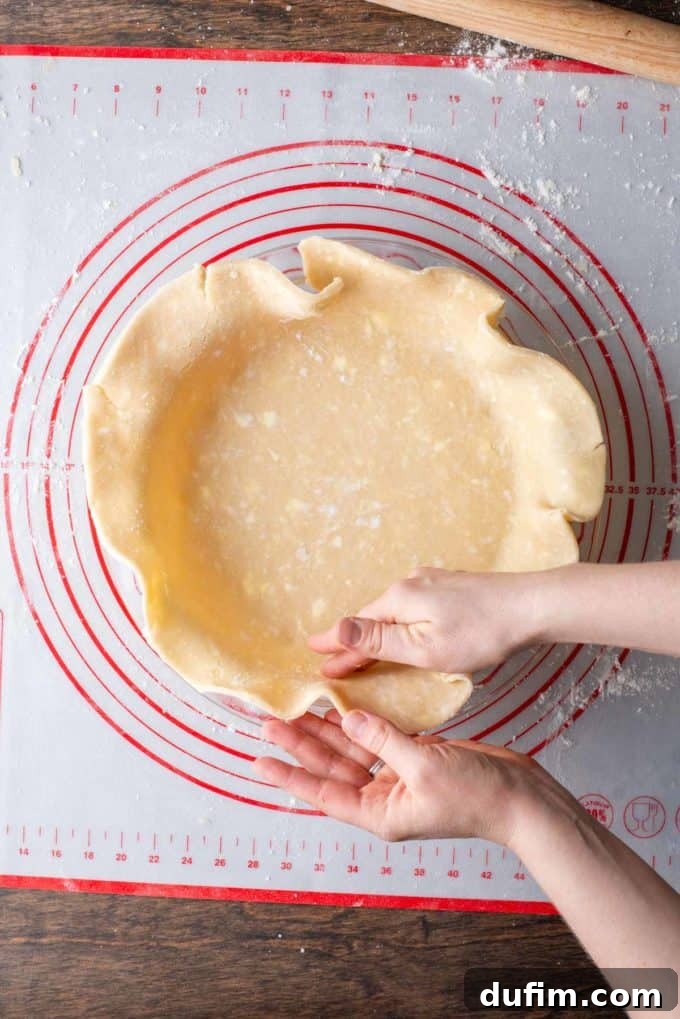
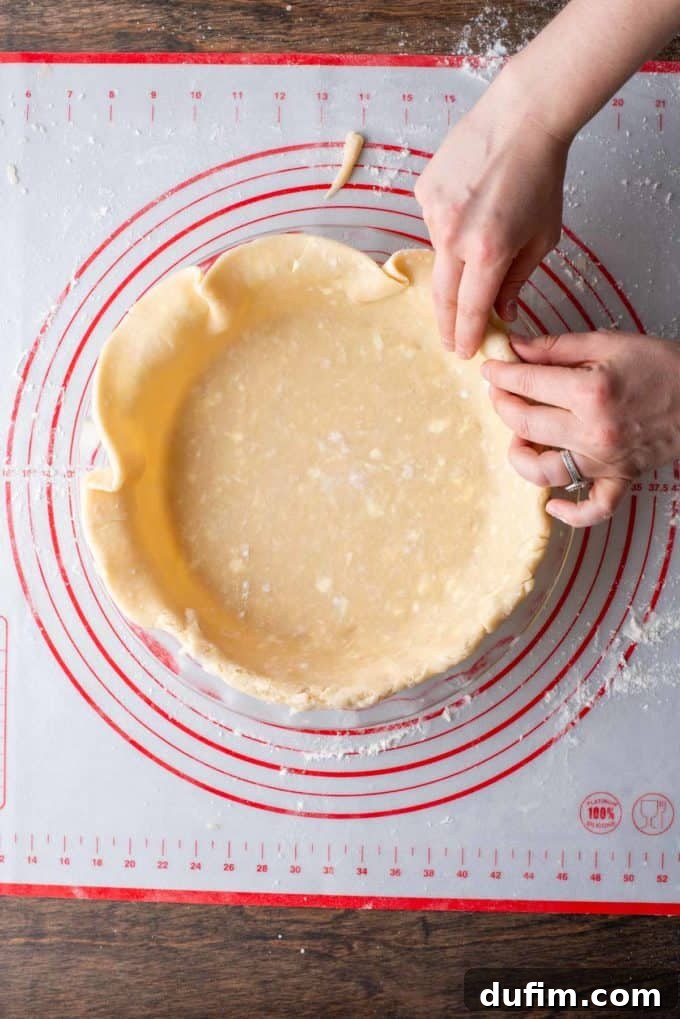
- Fold Under the Overhang: Take the trimmed excess dough and fold it under itself, neatly tucking it against the rim of the pie dish. This action creates a thicker, reinforced double layer of dough around the entire edge of the pie, providing a robust foundation for your decorative crimping. This extra thickness also helps prevent the crust from slumping during baking.
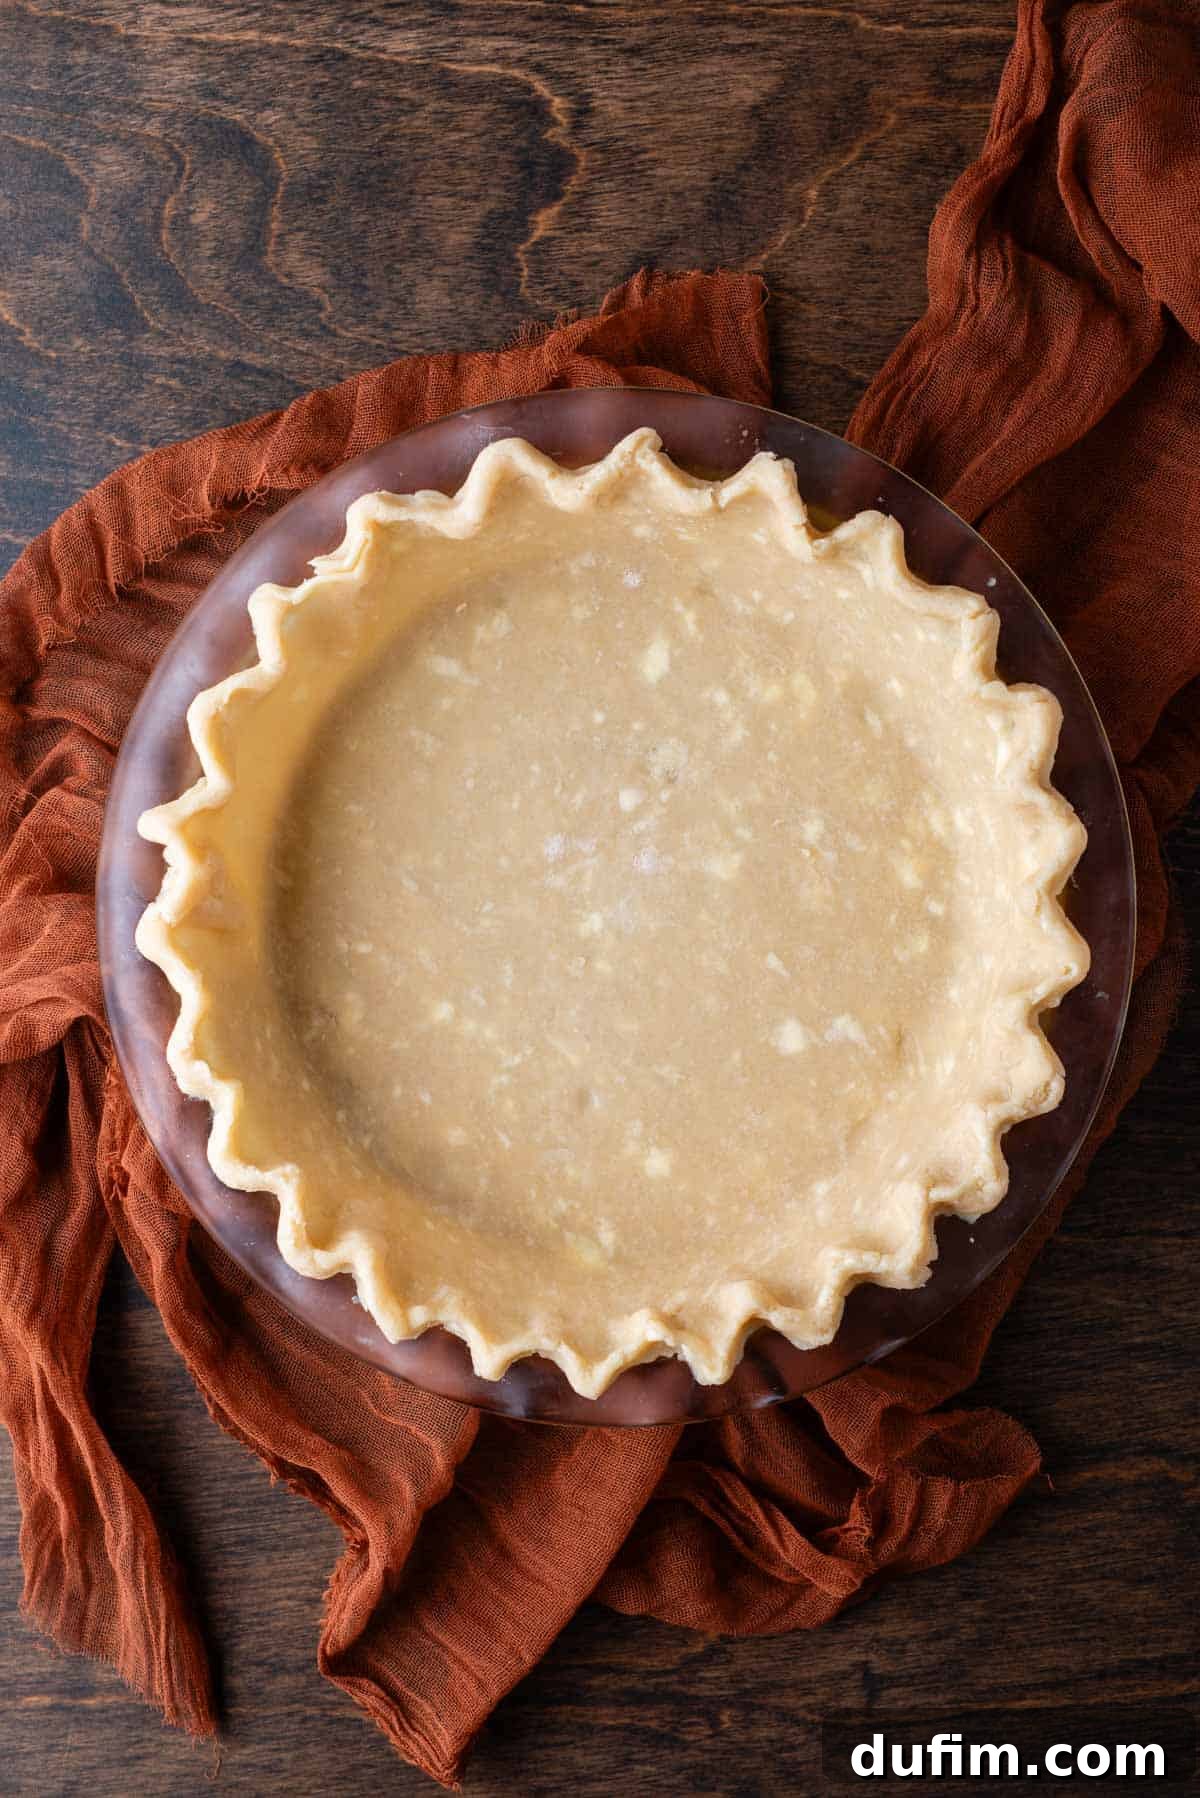
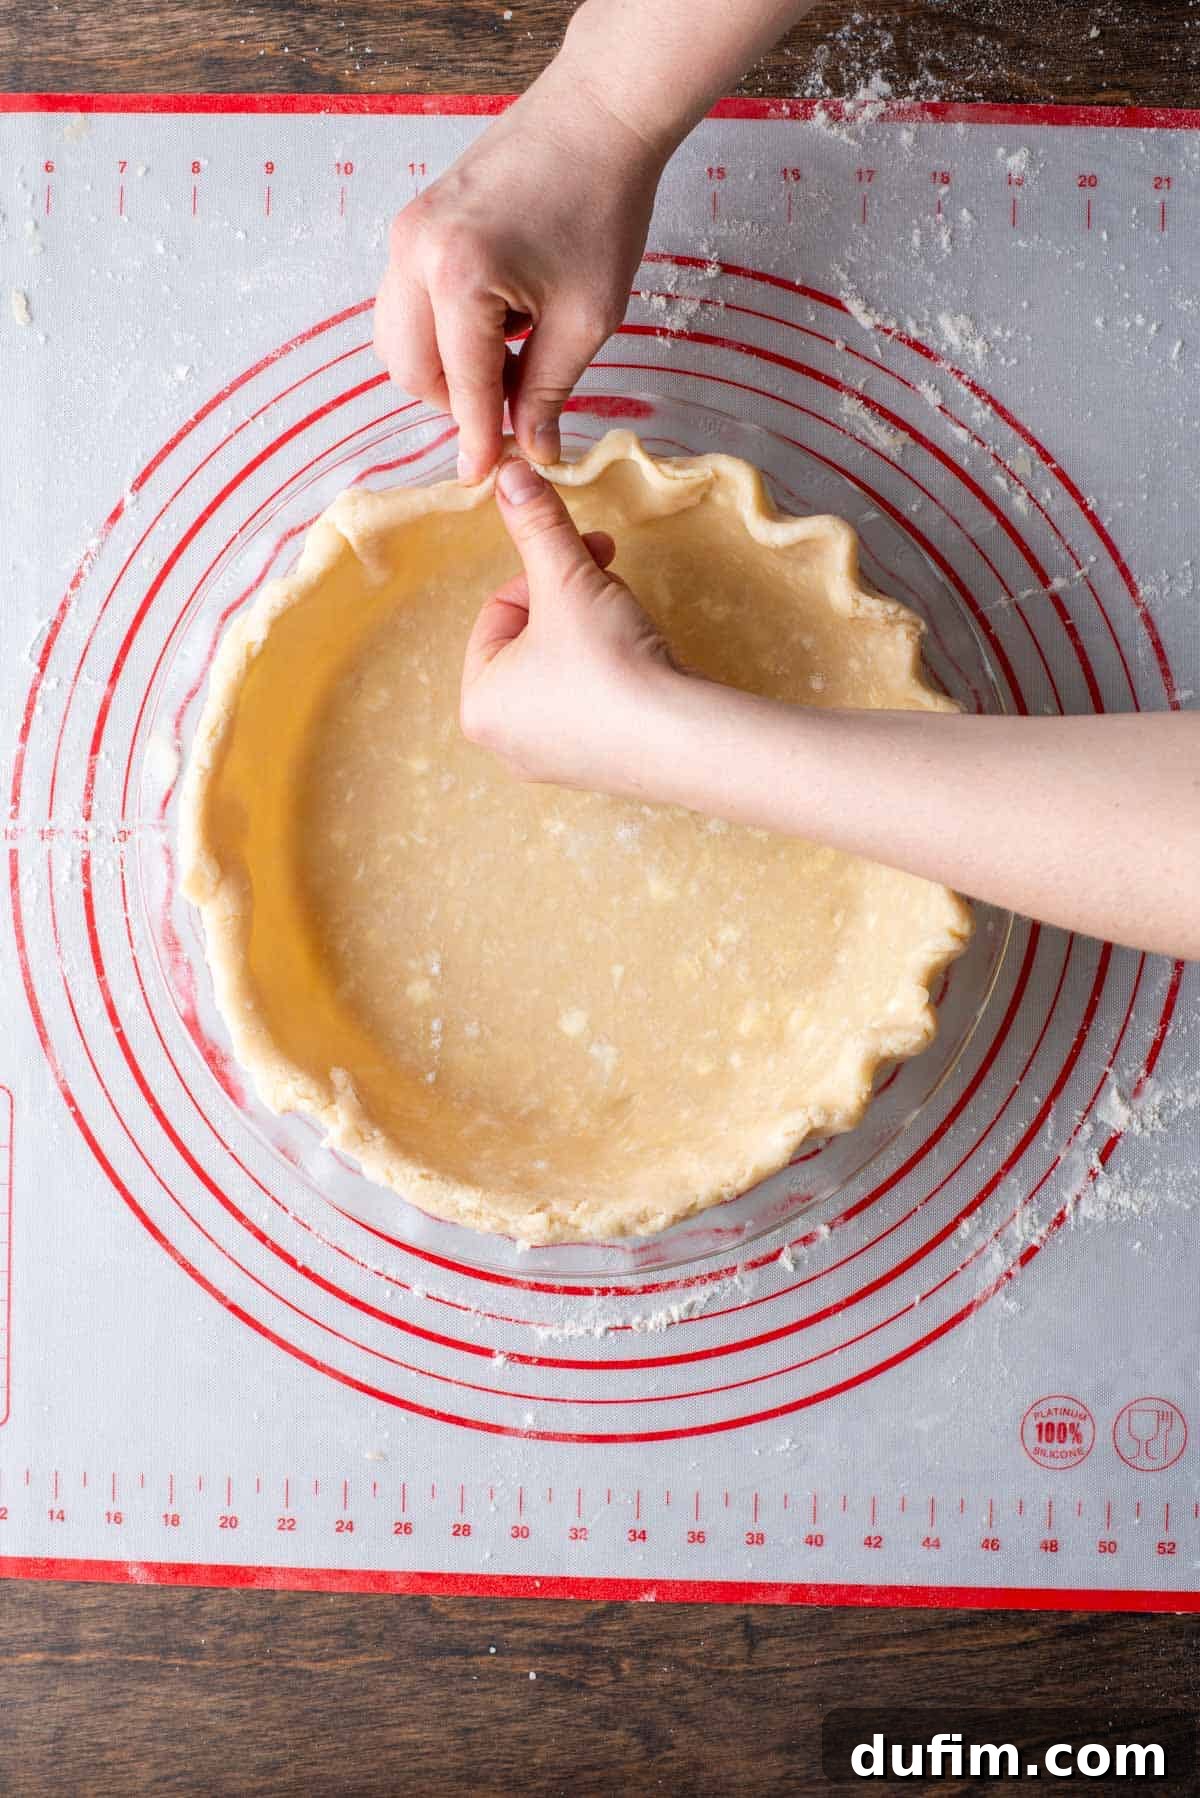
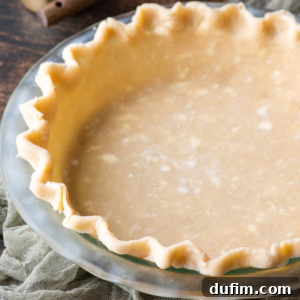
- Flute the Edges for a Classic Finish: Now for the artistic touch! To create a classic fluted edge, use your thumb and pointer finger of one hand to form a “V” shape around the folded edge of the dough. Simultaneously, use the pointer finger of your other hand to gently press the dough into the center of that “V,” effectively pinching and creating a scallop. Continue this motion at regular intervals around the entire circumference of the pie crust, ensuring the flutes are evenly spaced for a beautiful, symmetrical finish. This technique adds a charming, rustic elegance to your pie.
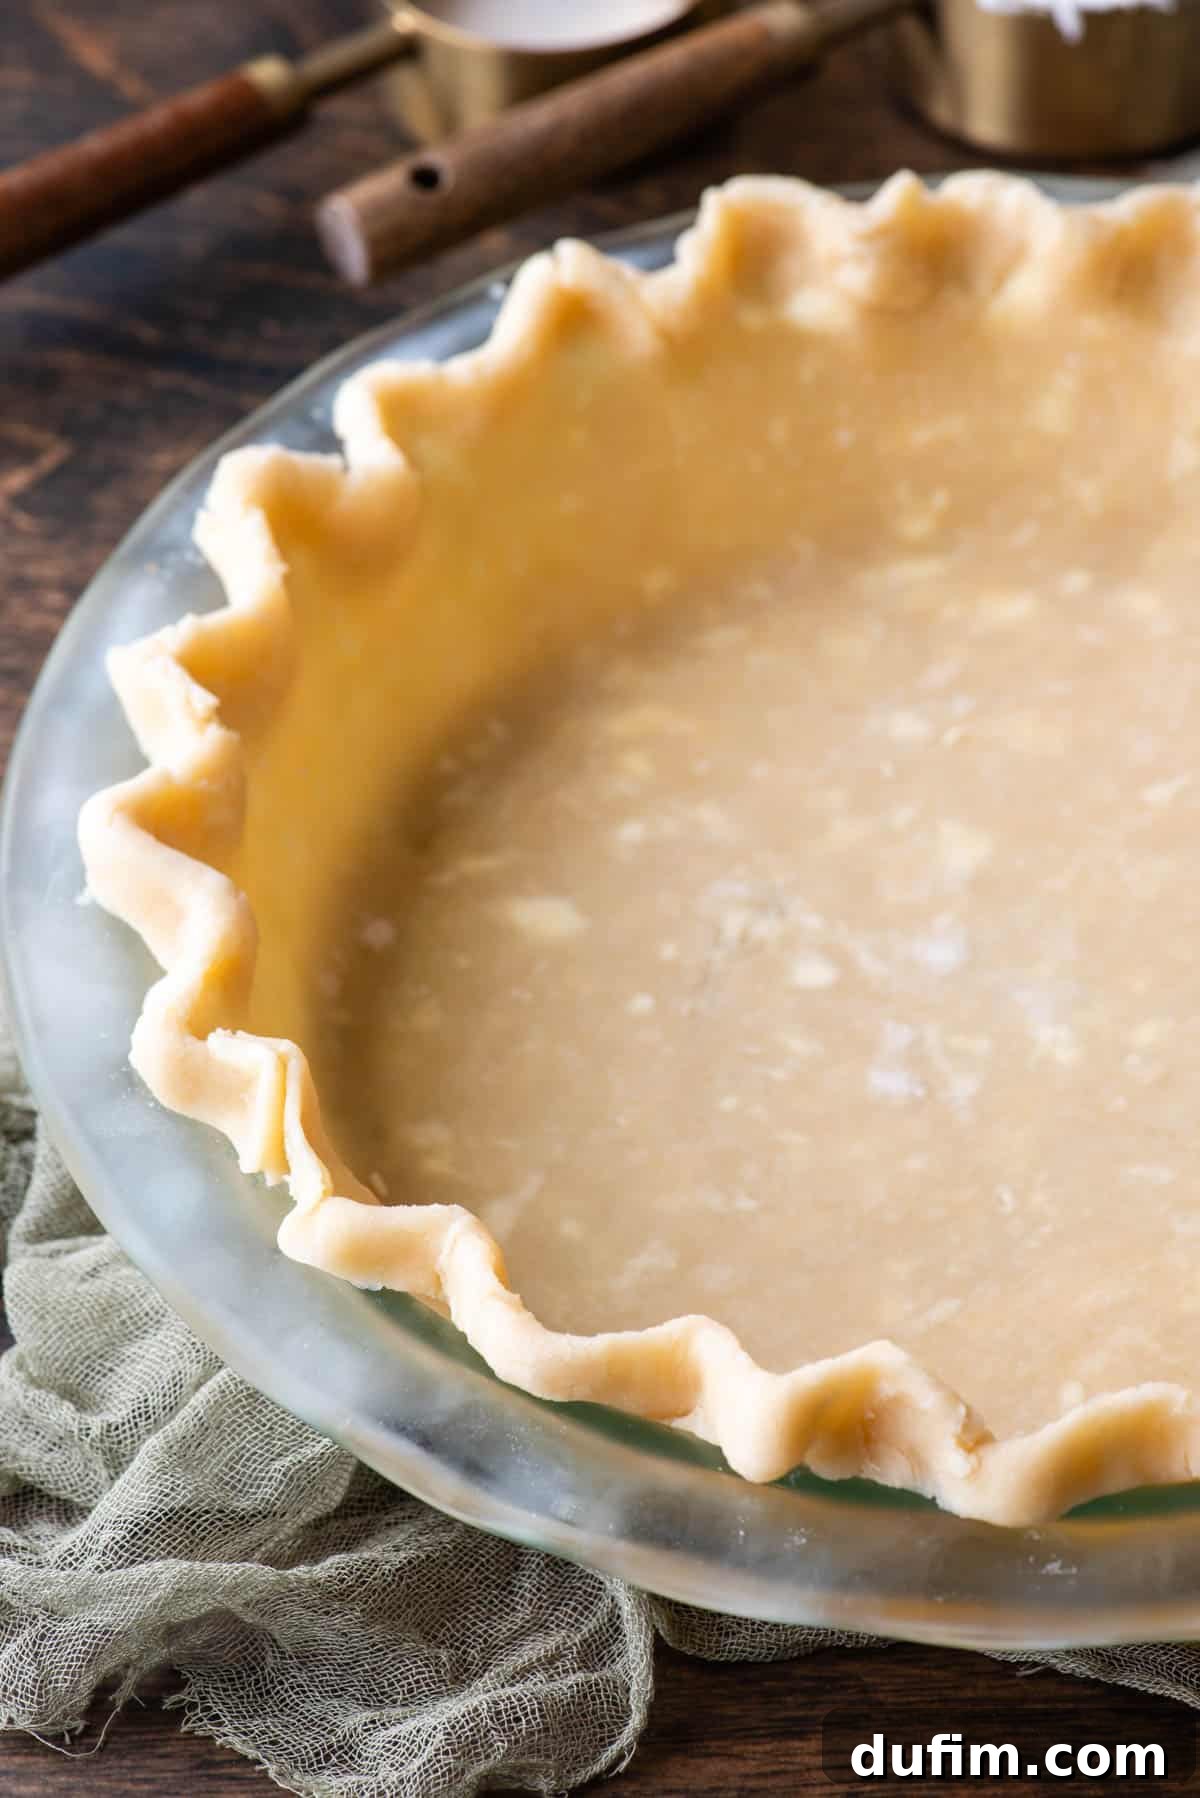
- Final Touches and Adjustments: Once you’ve completed fluting the entire edge, take a moment to step back and inspect your work. Gently adjust any areas that might need a bit more definition or symmetry. Ensure that all the crimps are securely sealed and that the edge looks firm and well-formed.
Chill or Bake as Directed: Depending on your specific pie recipe, your next step will either be to chill the prepared pie crust (especially if blind-baking is required or if it needs to firm up before filling) or to proceed directly to filling and baking. Always follow the specific instructions for your pie filling regarding baking time and temperature to achieve the best results.
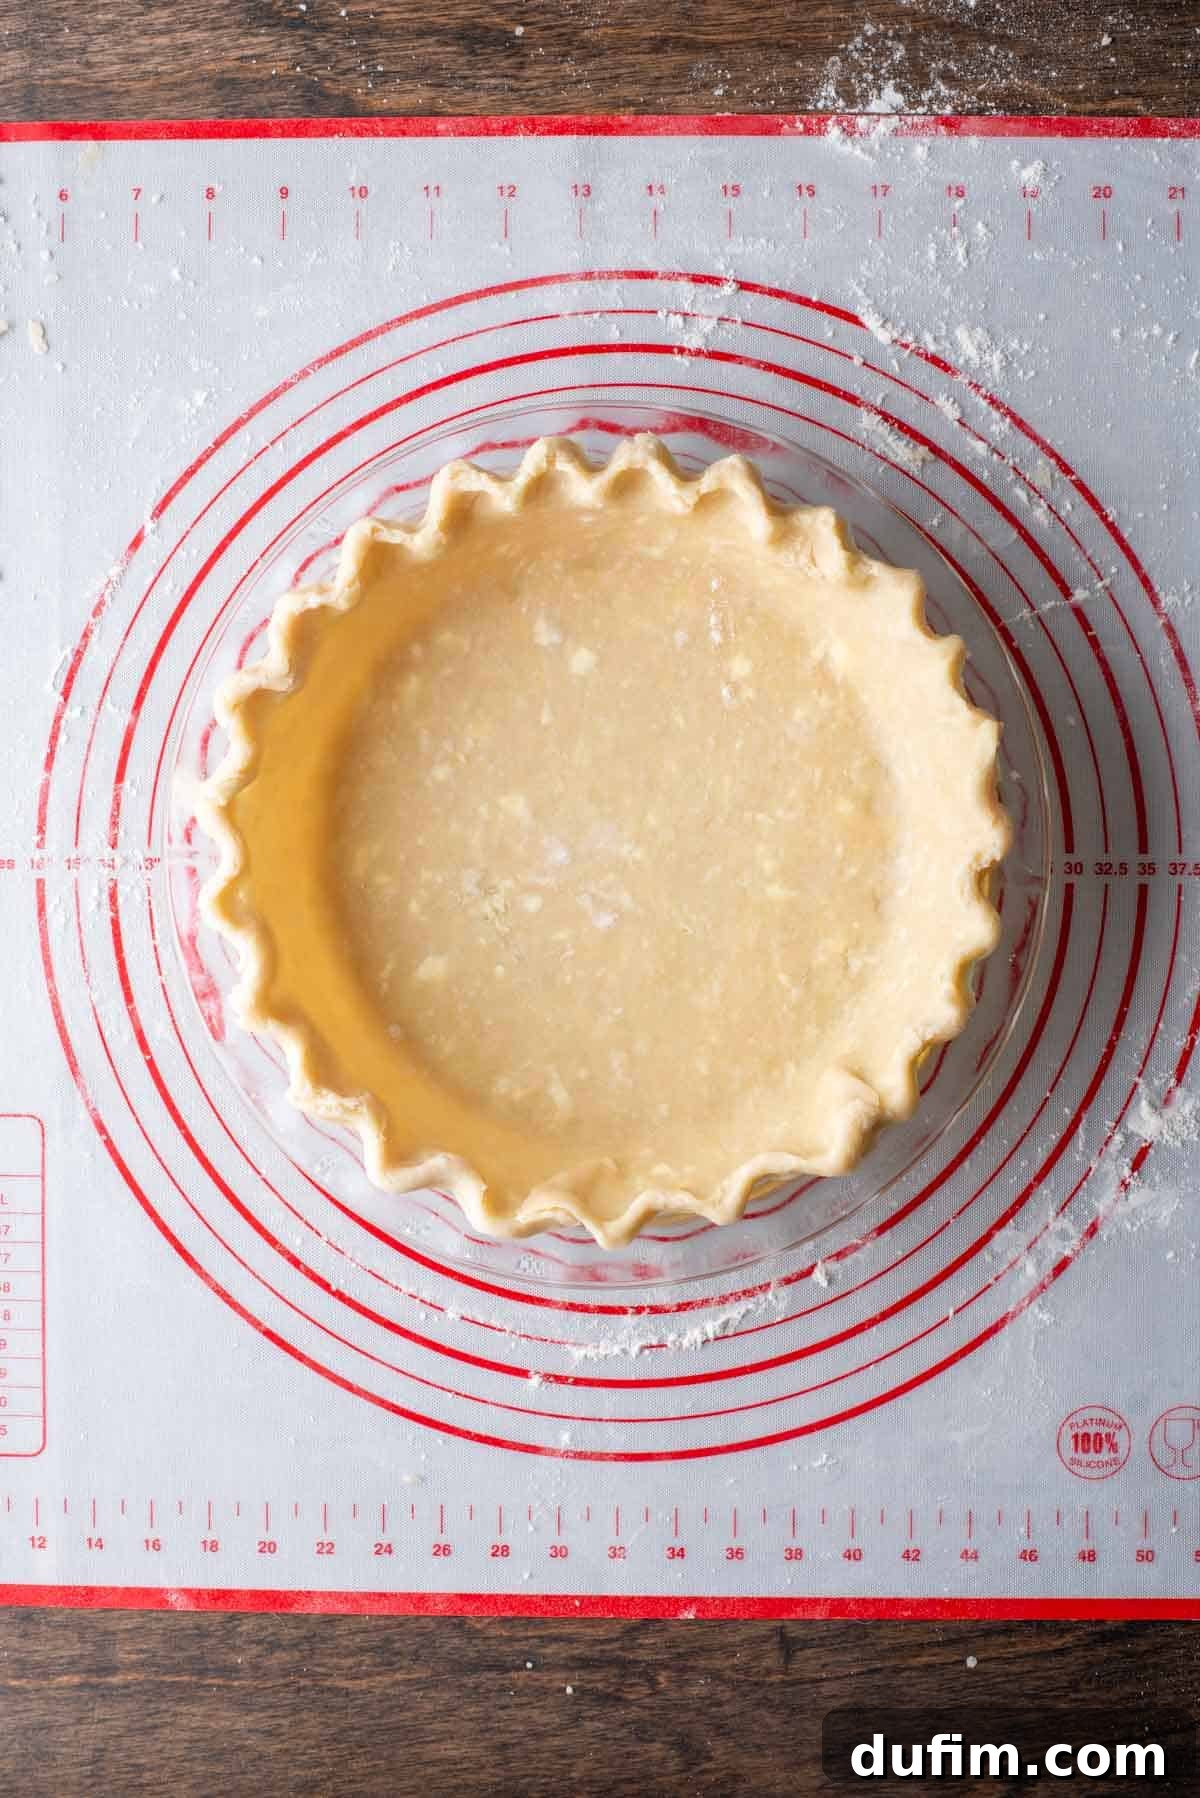
Beyond Fluting: Creative Ways to Crimp Pie Crust Edges
Crimping or fluting the edges of your pie crust is more than just a decorative touch; it helps to seal the pie filling, prevents the crust from shrinking too much, and gives your pie a professional, handcrafted appearance. While the main instructions detailed the classic fluted edge, here are the foundational steps to prepare your crust for any crimping method, followed by additional popular techniques:
- Prepare Your Pie Dish with Dough: First, ensure your rolled-out pie dough is securely placed in the pie dish, with a sufficient overhang beyond the edges.
- Trim Excess Dough: Using kitchen shears or a sharp knife, carefully trim any excess dough from the sides of the pie plate. Aim to leave about ½ to 1 inch of dough overhang all around the pie dish. This provides enough material for a robust and decorative edge.
- Fold Under the Overhang: Take the trimmed excess dough and fold it neatly under itself, tucking it against the rim of the pie dish. This creates a thick, resilient double layer of dough, which is essential for reinforcing the edge and providing a sturdy base for any crimping or fluting technique you choose.
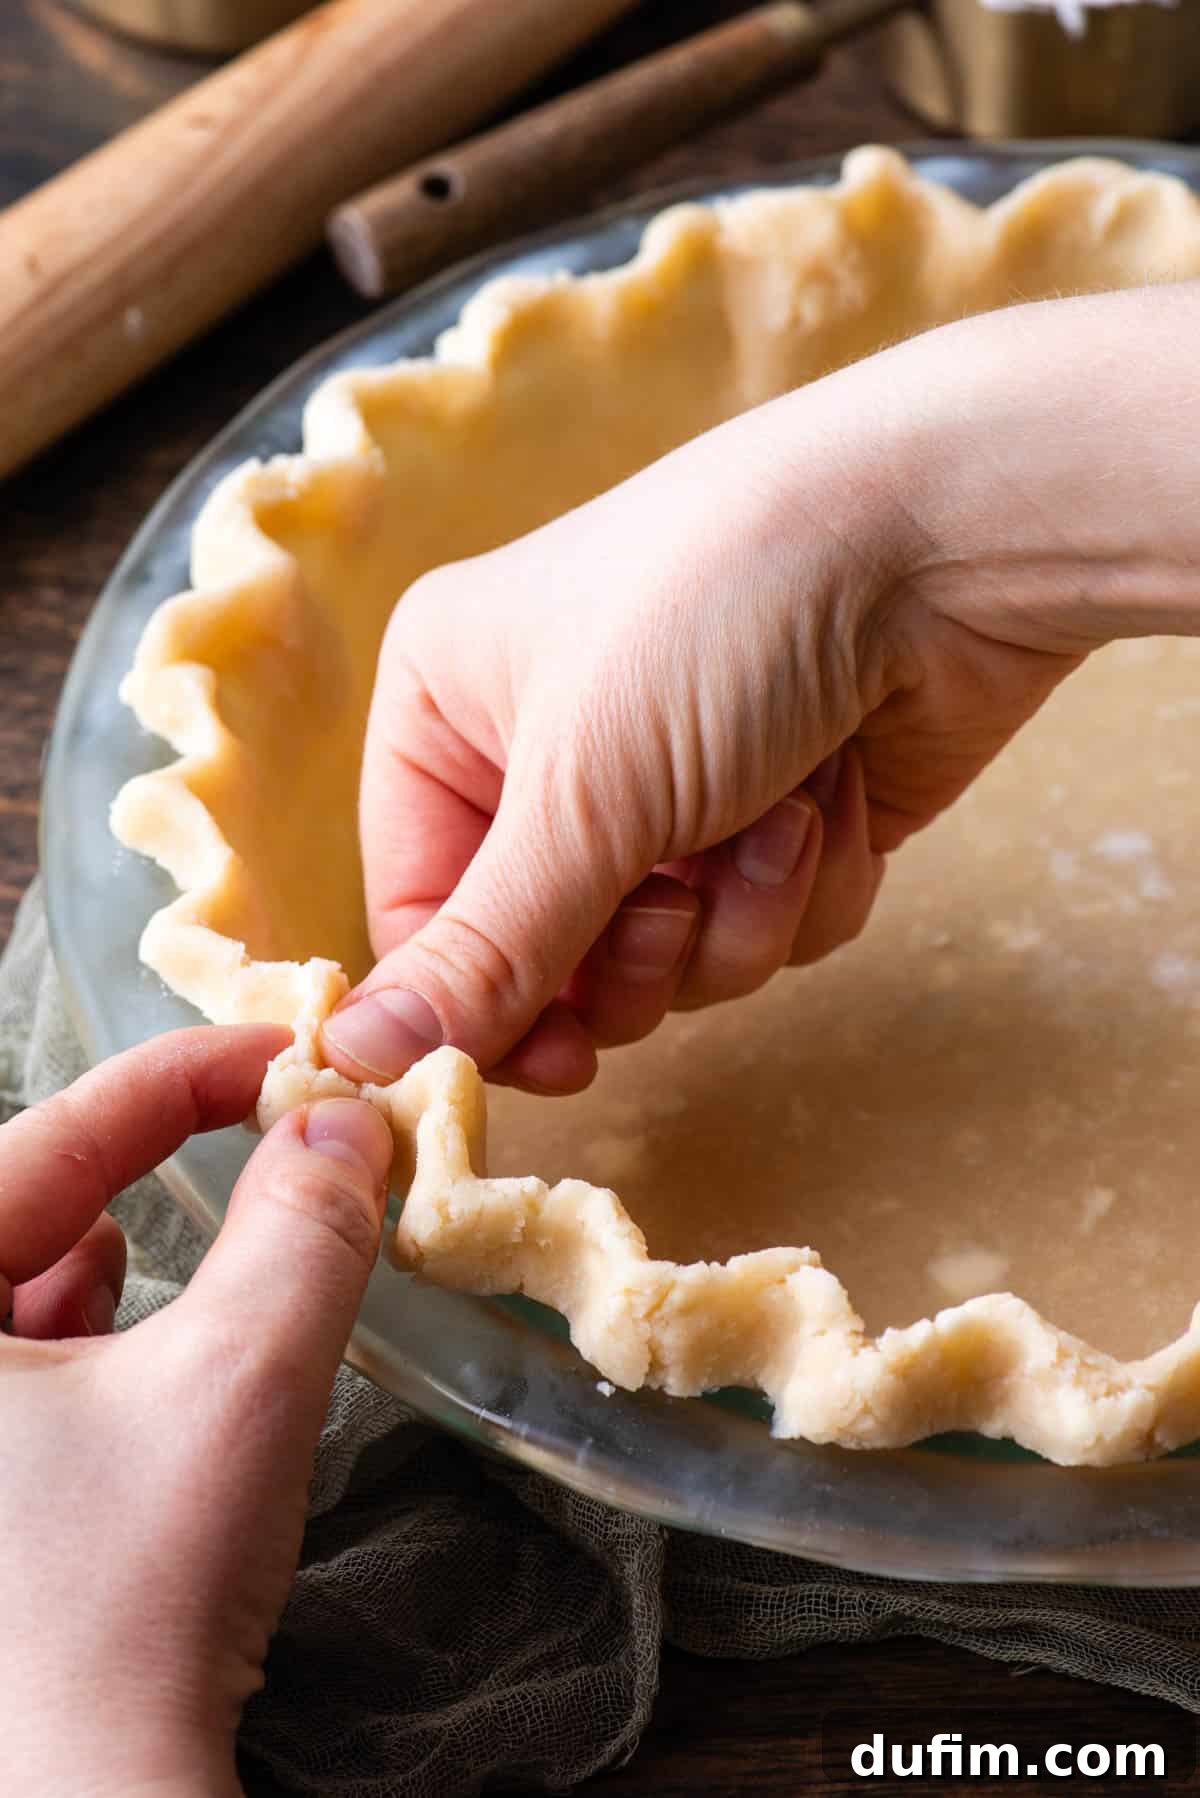
Crimping Method 1: Classic Fluted Edge
The fluted edge is perhaps the most iconic and beloved finish for a homemade pie crust, offering a timeless elegance. To create this beautiful pattern:
- Use your thumb and pointer finger of one hand to create a gentle V-shape around the folded edge of the dough.
- With the pointer finger of your other hand, gently but firmly press the V-shaped dough inwards, forming a distinct flute or scallop.
- Continue this motion, working your way around the entire circumference of the pie crust. Aim for evenly spaced flutes to achieve a professional and aesthetically pleasing finish.
Crimping Method 2: Simple Fork-Crimped Edge
For a straightforward yet charming and rustic finish, crimping with a fork is an excellent choice. This method is incredibly easy and yields a beautiful, textured edge:
- Once the dough’s overhang is folded under and tucked against the rim, take a standard dinner fork.
- Gently press the tines of the fork around the edges of the pie crust, creating a series of parallel lines or a decorative pattern.
- Ensure you don’t press too hard, as this can tear through the dough. The goal is to create an impression, not to cut through.
- Continue this pattern all the way around the entire circumference of the pie crust for a consistently appealing look.
Pro Tips for Achieving the Best Gluten-Free Pie Crust Ever
Once you’ve experienced the joy and superior taste of this homemade gluten-free pie crust, you’ll never consider a store-bought version again. This recipe is designed to empower you, giving you the confidence to craft your own perfect crust every time. To ensure your success and elevate your pie-making game, here are some invaluable extra tips:
- Keep Ingredients Ice Cold: This cannot be stressed enough – it’s the golden rule for a truly flaky crust! Ensure your butter, shortening, and especially your water are as cold as possible. Cold fats create pockets of steam as they melt during baking, which is what separates the layers and gives pie crust its signature flakiness. Warm ingredients can lead to a dense, tough crust.
- Embrace Your Food Processor: Through extensive testing, I found that a food processor is undeniably the easiest and most efficient tool for assembling this dough. It yields remarkably consistent results and is significantly quicker than using a pastry cutter by hand. The food processor quickly breaks down the butter and shortening into uniform, small pieces, which is essential for even flakiness. When I tried a pastry cutter, the fat pieces were often uneven, and larger chunks tended to make the dough break more easily during rolling and transferring.
- Handle the Dough with a Gentle Touch: Gluten-free dough doesn’t have the elastic network of gluten, so it’s more delicate. When you’re bringing the dough together into a disc or shaping it, be incredibly gentle. Resist the urge to knead it like you would bread dough. Overworking the dough can lead to a tough, dry crust, counteracting all your efforts for flakiness.
- Avoid Over-Mixing: Once you add the water, mix the dough only until it just barely comes together. You should still see visible, small, pea-sized bits of butter and shortening throughout the dough. These distinct fat pockets are what will create the flaky layers. Over-mixing can integrate the fat too much, leading to a less tender and less flaky result.
- A Beginner’s Rolling Trick: While my recipe yields enough dough for two standard pie crusts, if you’re a beginner, I highly recommend keeping the entire batch of dough as one large disc for your first few attempts. Working with a larger mass of dough provides more material, making it easier to roll out without breaking and giving you more flexibility for practicing crimping the edges. As your confidence grows, you can then move on to dividing the dough in half and rolling it thinner.
- Utilize a Pie Mat: A silicone pie mat with measurement guides was a absolute game-changer for me. It provided a clear visual reference, showing me exactly what size my pie crust needed to be. I found it incredibly helpful for cutting a perfectly round crust using a pizza cutter and the mat’s etched lines. This perfection in shape made it significantly easier to roll the dough onto my rolling pin and transfer it smoothly to the pie dish.
- Don’t Panic if Dough Cracks: It’s completely normal for gluten-free dough to crack and split a little, especially at the edges, as you begin to roll it out. Don’t worry! Simply use your clean fingers to gently pinch the cracks back together. You can also use your fingers to gently smooth and reshape the outside edges to maintain a uniform circular shape.
- Invest in a Tapered Rolling Pin: Initially, I used a traditional dowel rolling pin. However, after a friend’s recommendation, I switched to a tapered rolling pin and found it to be a superior tool for pie dough. With a dowel pin, I often ended up rolling the edges too thin, leading to uneven thickness. A tapered rolling pin allows for more controlled pressure and leverage, making it much easier to achieve a consistently even thickness across the entire dough circle.
- Optimal Oven Rack Position for Baking: This tip came from trial and error! To ensure your pie crust cooks thoroughly, especially the bottom, always arrange your baking racks so that the pie can be placed on the lowest rack in your oven. I initially baked my pies on the middle rack, only to find the center of the crust often remained undercooked. The lowest rack provides direct heat, ensuring a beautifully golden and crisp bottom crust.
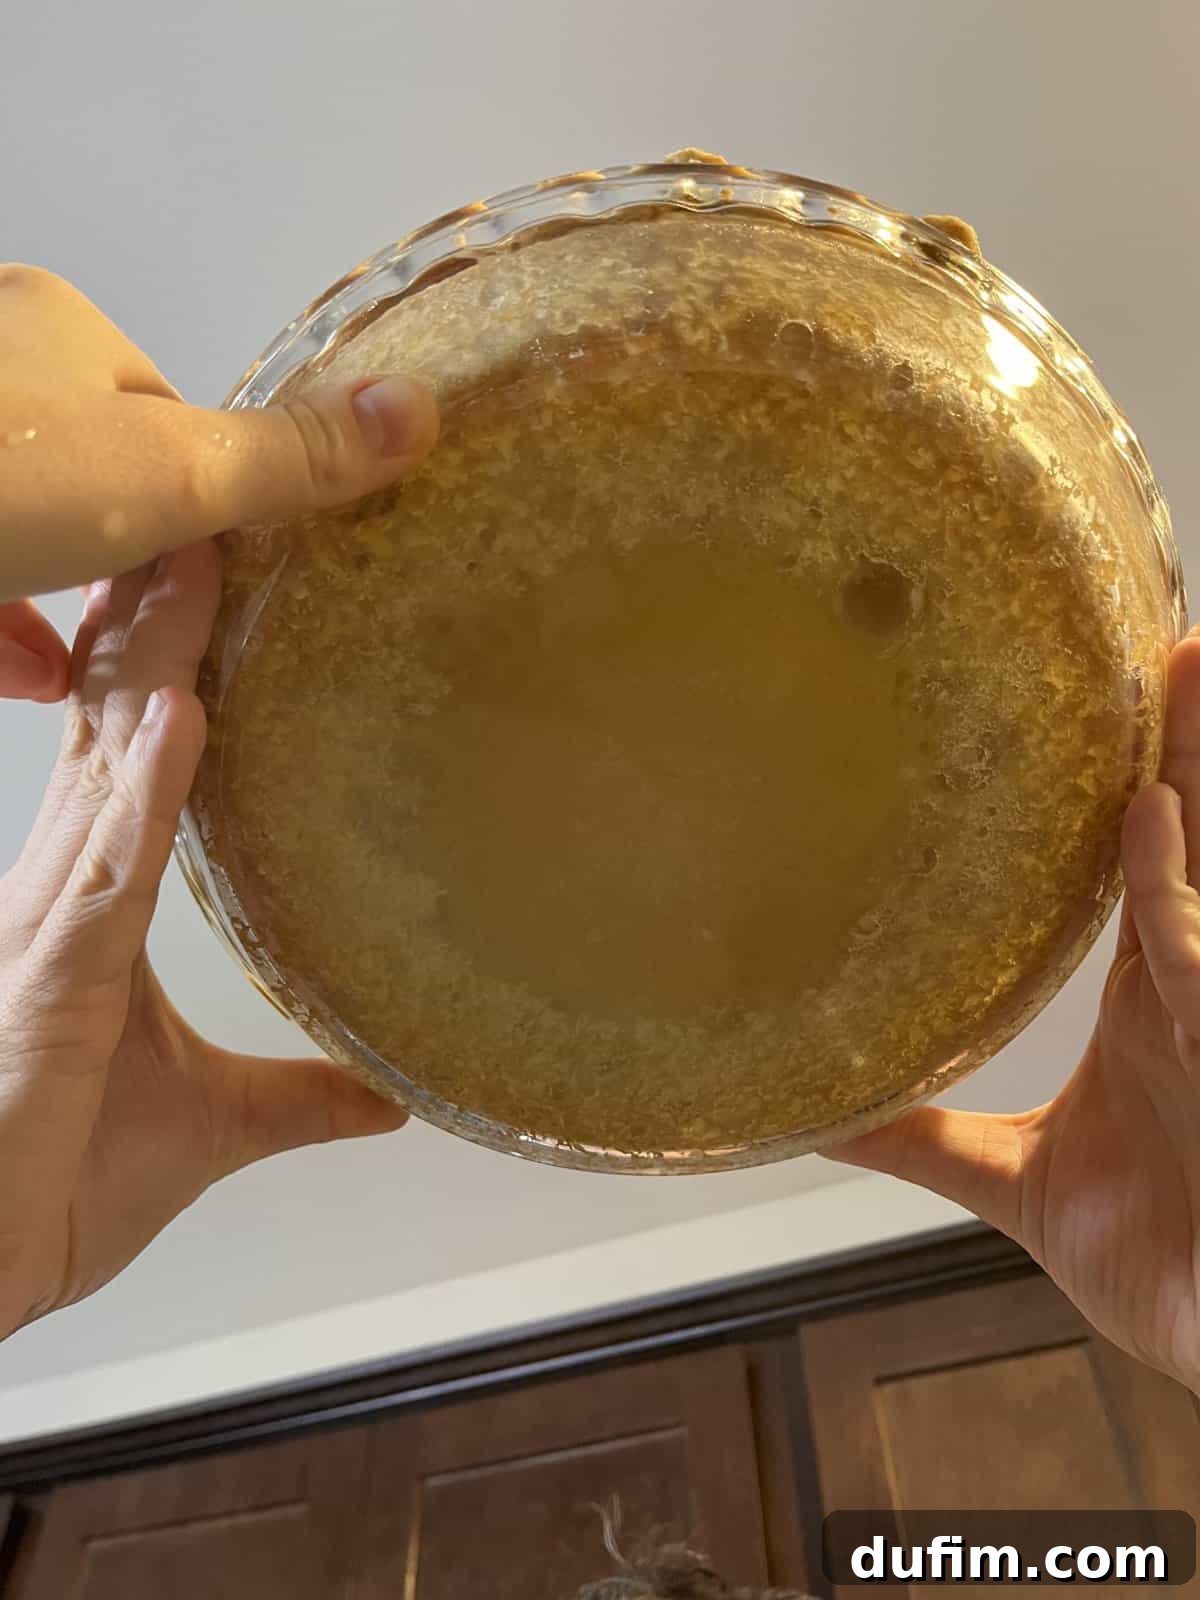
Troubleshooting Your Gluten-Free Pie Crust: Common Issues & Solutions
Even with the best recipe, baking can sometimes present challenges. Here’s a quick guide to troubleshooting common issues with gluten-free pie crust:
Why is my gluten-free pie crust falling apart or crumbly?
The primary reason a gluten-free pie crust might fall apart or be excessively crumbly is an imbalance in the liquid-to-dry ingredient ratio – specifically, too little water or too much flour. Gluten-free flours can absorb liquid differently, so precision is key. Ensure you’re using the exact amount of gluten-free flour blend recommended in the recipe. When adding water, start with the recommended amount (typically 4-5 tablespoons in this recipe) and add more, one tablespoon at a time, only if the dough doesn’t quite come together when pinched. While testing, I noticed that when mixing by hand (with a pastry cutter or spatula), I often needed slightly more water than when using a food processor, as the processor incorporates liquid more evenly. Aim for a dough that holds together when gently squeezed but isn’t sticky.
Why is my gluten-free pie crust too hard or tough?
A hard or tough gluten-free pie crust is usually caused by two main culprits: overworking the dough or over-baking. Unlike traditional wheat dough, gluten-free dough doesn’t benefit from extensive handling. Overworking it can develop starches, making it tough. Handle the dough gently and mix only until it just comes together. Secondly, ensure you bake for the recommended time and temperature. Over-baking will dry out any pie crust, leading to a hard texture. Additionally, using a high-quality 1:1 gluten-free flour blend that contains xanthan gum is important; xanthan gum provides crucial elasticity and helps maintain a tender crumb. I consistently recommend King Arthur Gluten-Free Measure for Measure flour for its reliability.
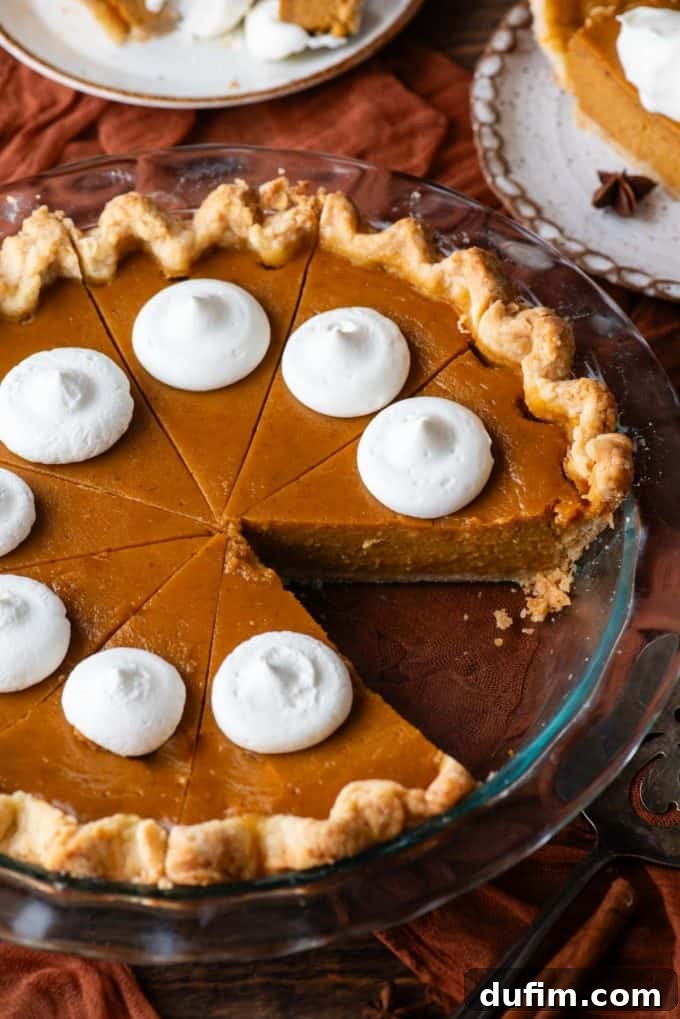
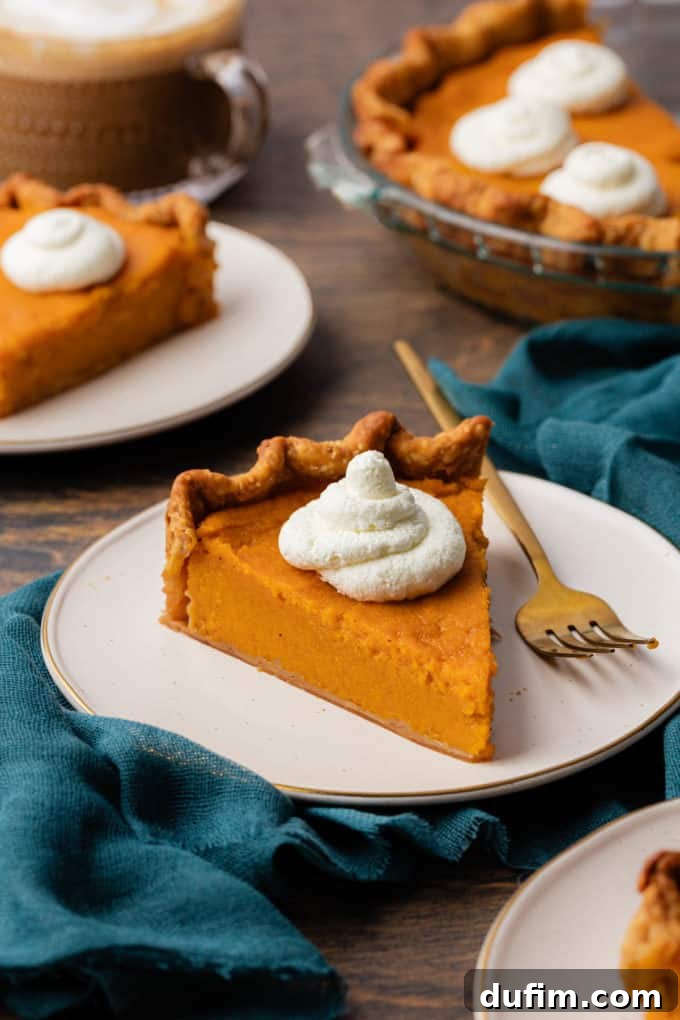
Versatile Applications for Your Perfect Gluten-Free Pie Crust
This incredibly versatile gluten-free pie crust recipe is the ideal foundation for an endless array of sweet and savory creations. Its flaky texture and balanced flavor complement everything from rich fruit fillings to hearty quiches. Here are some of my absolute favorite ways to put this fantastic crust to use:
- Gluten-Free Coconut Cream Pie: A tropical delight with a perfect crust.
- Homemade Pumpkin Pie Recipe: The ultimate fall classic, elevated.
- Gluten-Free Apple Pie: A comforting dessert that shines with this flaky base.
- Gluten-Free Cherry Pie: Bursting with flavor against a tender crust.
- Best Sweet Potato Pie Recipe: A soulful dessert that benefits from homemade goodness.
- Gluten-Free Blueberry Pie: Juicy berries, perfectly contained.
- Gluten-Free Dutch Apple Pie: The crispy topping combined with a tender crust.
- Consider also using this crust for savory options like quiches, pot pies, or even mini tartlets for appetizers!
Storing Your Gluten-Free Pie Crust: Prep Ahead for Convenience
This recipe is perfect for preparing in advance, allowing you to enjoy fresh, homemade pie with minimal last-minute effort. Proper storage is key to maintaining the dough’s quality:
- Refrigeration: If you’re not planning to use the pie dough immediately, the discs of gluten-free pie dough can be wrapped tightly in plastic wrap and refrigerated for up to 4 days. This allows the flavors to meld and the dough to become even more manageable.
- Freezing: For longer storage, tightly wrapped discs of gluten-free pie dough can be placed in an airtight freezer-safe container or a heavy-duty freezer bag and frozen for up to 6 months. When you’re ready to use, simply thaw the frozen dough overnight in the refrigerator before proceeding with rolling and baking instructions. This makes spontaneous pie-baking a breeze!
The most common reasons for a gluten-free pie crust turning out hard are typically over-cooking or using too much flour. It’s crucial to measure your gluten-free flour blend precisely, preferably by weight (300g for 2 ½ cups), as scoops can vary. Follow the recommended cooking times closely to avoid drying out the dough. Remember, gentleness is key with gluten-free dough; overworking it can also lead to a tougher crust.
A crumbly gluten-free pie crust often indicates insufficient moisture or an excess of flour. Gluten-free flours can be quite thirsty. Ensure you’re measuring your flour accurately and add ice-cold water gradually, one tablespoon at a time, until the dough just comes together when pinched. The goal is a cohesive, yet not sticky, dough. If it’s too dry, it won’t hold together. Refer to the water-addition tips in the main recipe for best results.
The primary way to achieve a softer, more pliable gluten-free dough is by using a high-quality gluten-free flour blend that contains xanthan gum. Xanthan gum acts as a binder, providing the necessary structure and elasticity that gluten would normally offer, leading to a smoother, softer, and more workable dough. I highly recommend King Arthur Gluten-Free Measure for Measure flour, which includes xanthan gum for optimal texture.
Ready for another gluten-free baking adventure? Try your hand at gluten-free pizza dough!
Explore More Delicious Pie Recipes
Your perfect gluten-free pie crust is just the beginning! Dive into our collection of other incredible pie recipes that are sure to delight your taste buds and impress your guests:
- Easy No-Bake Peanut Butter Pie
- Festive Eggnog Pie
- Creamy Chocolate Pudding Pie
- Decadent Reese’s Peanut Butter Cup Pie
- Fun No-Bake M&M Pie
Tap stars to rate!
Recipe For Gluten Free Pie Crust
Beth
20 minutes
1 hour
2
pie crusts
Rate
Equipment
-
Glass Pie Pan
-
Pizza Cutter
-
Rolling Pin
-
Food Processor
-
Silicone Pie Mat (Optional, but recommended)
Ingredients
-
2 ½
cups (300g)
Gluten Free All-purpose flour
-
1
tsp
salt -
1
Tbsp
granulated sugar -
6
Tbsp (86g)
cold unsalted butter -
⅔
cup (129g)
vegetable shortening,
chilled -
½
cup (118ml)
ice cold water,
I typically only use 4-5 tablespoons
Instructions
-
1. Chill the Butter and Shortening: Start by cutting the butter and shortening into small cubes. Place in a container or on a plate and put in the fridge to chill for at least 30 minutes. I recommend using shortening sticks so it’s easier to cut into pieces. If using a tub of shortening, you can portion the ⅔ cup into about tablespoon size pieces.6 Tbsp (86g) cold unsalted butter,
⅔ cup (129g) vegetable shortening -
2. Combine Dry Ingredients: In the food processor, add the 2 1/2 cups of all-purpose flour, 1 teaspoon of salt, and 1 tablespoon of granulated sugar. Pulse a few times to combine the dry ingredients.2 ½ cups (300g) Gluten Free All-purpose flour,
1 tsp salt,
1 Tbsp granulated sugar -
3. Add Butter and Shortening: Add the 6 tablespoons of cold unsalted butter cubes and the chilled vegetable shortening chunks into the food processor. Pulse until the mixture resembles coarse crumbs with some pea-sized pieces of butter and shortening remaining. This should take about 10-15 one-second pulses.
-
4. Add Ice Water: Drizzle in the ice-cold water, starting with 4 tablespoons, and continue processing until the dough begins to clump together. You can test the dough by pinching it; if it holds together, it’s ready. If it’s too dry, add more water, 1 tablespoon at a time, and pulse briefly until the dough reaches the right consistency.½ cup (118ml) ice cold water
-
5. Form Dough: Turn off the food processor and carefully remove the dough from the bowl. Place it onto a clean surface, such as a large piece of plastic wrap or a silicone mat.
-
6. Shape into Discs: Divide the dough into two equal portions. Shape each portion into a flat disc. This makes it easier to roll out later. Wrap each disc tightly in plastic wrap and refrigerate for at least 60 minutes or until firm. You can refrigerate for up to 4 days. You can also freeze one of the discs for future use if you’re only making a single-crust pie.
-
7. Prepare Your Work Surface: Ensure your countertop or pie mat is clean and dry. Lightly dust it with all-purpose flour to prevent sticking.
-
8. Take Out Chilled Dough: Remove one of the chilled dough discs from the refrigerator and let it sit at room temperature for a few minutes (5-10 min). This will make it easier to roll without cracking.
-
9. Begin Rolling: Place the dough disc on the floured surface and use your rolling pin to gently press it down in the center. Start rolling from the center outward. Apply even pressure as you roll, working in all directions to maintain a roughly circular shape. If the dough cracks or splits during the rolling process, use your fingers to gently pinch it back together.
-
10. Rotate the Dough: After each roll, rotate the dough a quarter turn. This helps ensure an even thickness and round shape, and prevents the dough from sticking to the surface. Continue rolling and rotating until the dough is about 6 inches in diameter.
-
11. Flip and Dust with Flour: Gently lift the dough from the surface using your hands or a large offset spatula, and flip it over. This prevents sticking and ensures even rolling. If the dough feels sticky, lightly dust it with more flour.
-
12. Continue Rolling: Resume rolling from the center outward, rotating the dough as needed. Aim for an even thickness and gradually work your way to your desired size, typically 11-12 inches in diameter for a standard pie dish.
-
13. Use a Pizza Cutter (Optional): For a perfectly round shape, consider using a pizza cutter. Place the cutter’s wheel at the edge of the dough, and cut around the perimeter to trim it into a precise circle. This also helps you visualize the exact size needed for your pie pan.
-
14. Sprinkle with Flour: To prevent the dough from sticking to itself when rolled onto the rolling pin, sprinkle a little more flour over the surface of the dough.
-
15. Roll onto Rolling Pin: Carefully lift one edge of the dough and gently roll it onto your rolling pin. Start from one edge and continue rolling until the entire circle is wrapped around the rolling pin.
-
16. Transfer to Pie Dish: Position the dough-covered rolling pin over your pie dish with the edge of the dough hanging over the side. Gently unroll the dough from the rolling pin into the pie dish, ensuring it covers the bottom and sides evenly.
-
17. Trim Excess Dough: Trim any excessive overhang from the dough, leaving about 1/2 to 1 inch of overhang all around the pie dish. You can use scissors or a knife to do this.
-
18. Fold Under the Overhang: Start by folding the excess dough under itself. This creates a thick, double layer of dough around the edge of the pie dish. It also helps to reinforce the edge and create a more substantial crust.
-
19. Flute the Edges: Using your thumb and pointer finger on one hand and your pointer finger on the other hand, pinch the folded edge of the dough together. Hold your fingers perpendicular to the edge of the crust. Continue pinching at regular intervals along the edge. As you pinch, press the dough between your fingers gently. You can create various crimp patterns, such as small points or scallops, depending on your preference.
-
20. Final Touches: After you’ve crimped the entire edge, take a moment to go back and adjust any areas that might need a bit more attention. Make sure the edge is sealed securely.
-
21. Chill or Bake as Directed: Depending on your pie recipe, you may need to chill the pie crust or proceed directly to baking. Follow the specific instructions for your pie filling and baking time and temperature.
Nutrition
Calories:
1428
kcal
|
Carbohydrates:
115
g
|
Protein:
16
g
|
Fat:
108
g
|
Saturated Fat:
39
g
|
Polyunsaturated Fat:
21
g
|
Monounsaturated Fat:
38
g
|
Trans Fat:
10
g
|
Cholesterol:
90
mg
|
Sodium:
1170
mg
|
Potassium:
10
mg
|
Fiber:
15
g
|
Sugar:
11
g
|
Vitamin A:
1050
IU
|
Calcium:
112
mg
|
Iron:
6
mg
Nutrition Disclosure
All nutritional values are approximate and provided to the reader as a courtesy. Changing ingredients and/or quantities will alter the estimated nutritional calculations.
Like this recipe? Rate and comment below!