
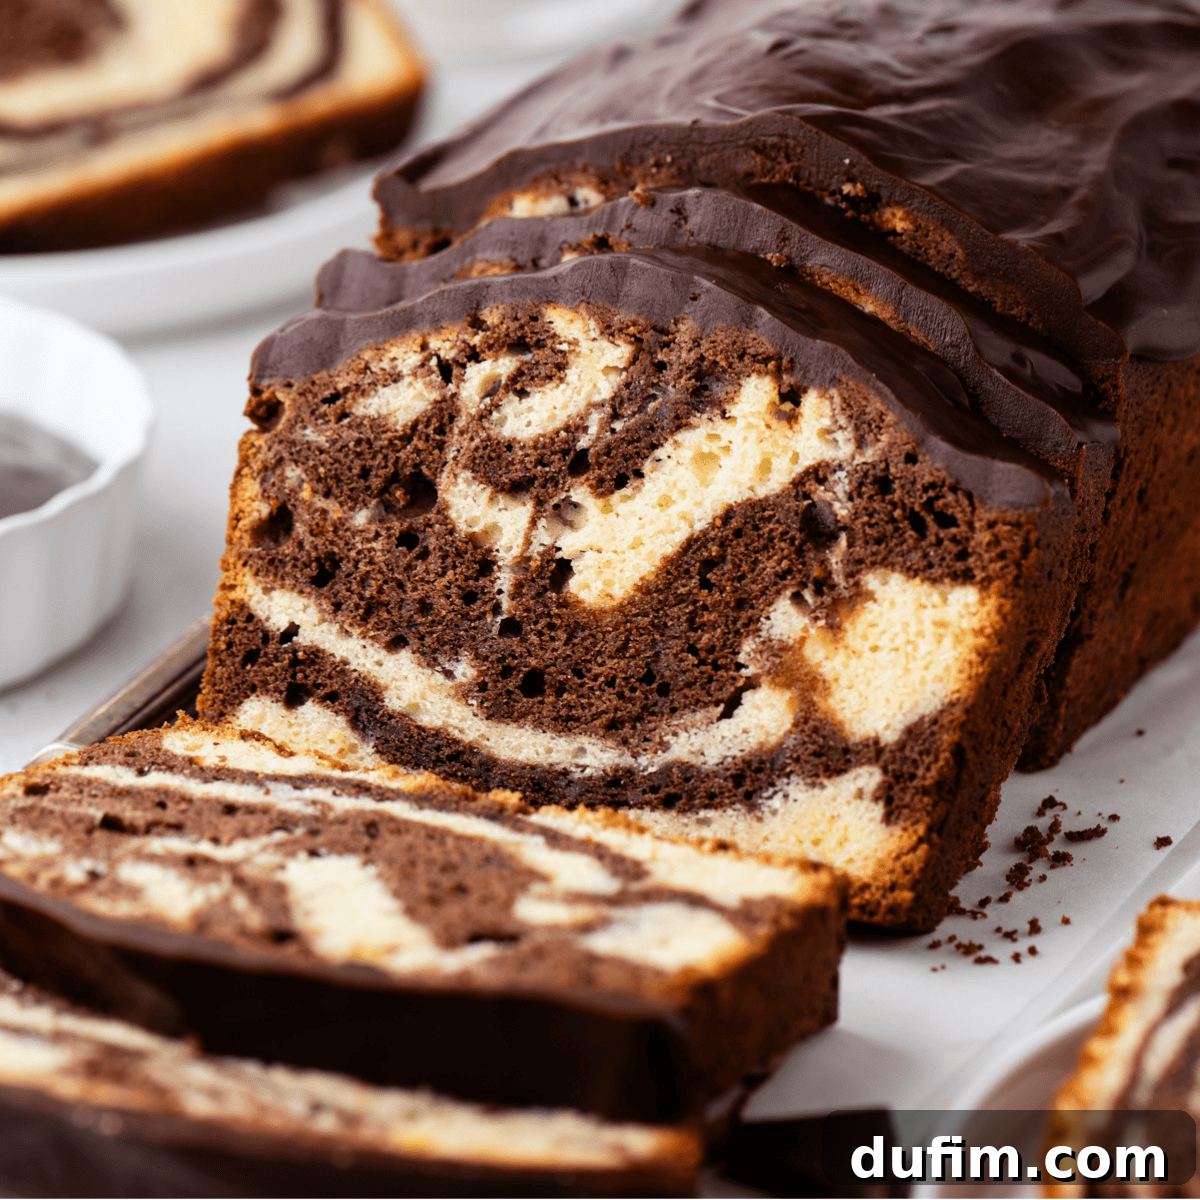
Prepare to bake a show-stopping dessert with our ultimate Marble Pound Cake recipe. This isn’t just another cake; it’s the culmination of rigorous testing, precise ingredient adjustments, and a deep understanding of how to achieve truly outstanding flavor. By combining a supremely moist cream cheese base with an intensely flavorful chocolate swirl – boosted by espresso-bloomed cocoa – every slice offers a perfect balance of richness and texture. If you’re searching for a Marble Pound Cake that captivates both visually and gastronomically, your search ends here. Each forkful promises a delightful experience, making it an ideal treat for any occasion, from casual gatherings to elegant celebrations.
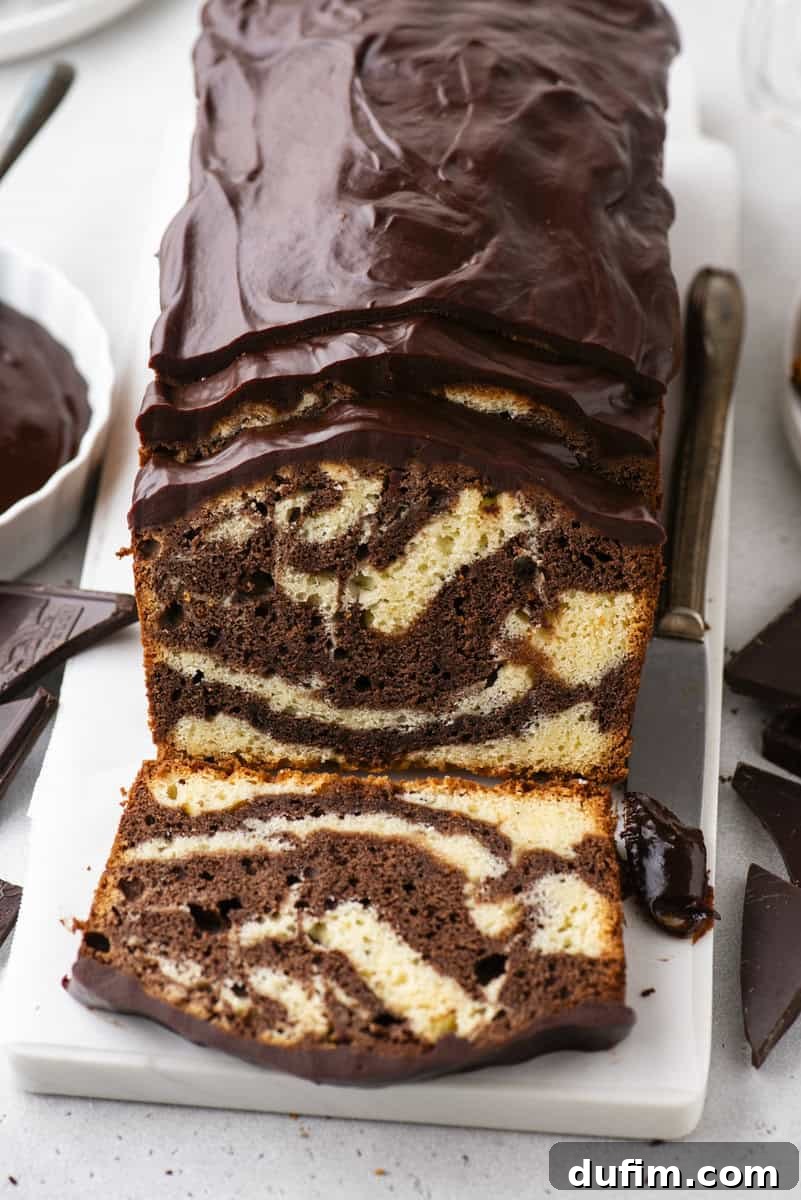
The Ultimate Marble Pound Cake: Rich, Moist, and Perfectly Swirled
The Creation Story Behind This Marble Pound Cake
Crafting this exceptional Marble Pound Cake was a journey of dedication and culinary experimentation. Our process began with an intensive week of focused pound cake development in April 2024. During this period, we meticulously developed and tested various pound cake variations, including a classic version, a vibrant lemon pound cake, and a rich cream cheese pound cake. Our goal was to thoroughly compare and analyze their texture, moisture retention, and overall flavor profiles. Day after day, we baked, tasted, and refined, steadily gaining clarity on which elements truly contributed to a superior pound cake.
Among the many iterations, the cream cheese pound cake quickly emerged as the clear favorite. Its remarkable richness and incredible moisture stood out, yet it managed to avoid the common pitfalls of cream cheese desserts, which can sometimes taste overly tangy or heavy. This delicate balance of creaminess and lightness made it an ideal candidate for further development. We subjected this cream cheese base to seven separate testing rounds, meticulously fine-tuning its ingredient ratios to achieve absolute perfection. Once we had a foundational recipe that consistently delivered on texture and taste, we knew we had discovered the perfect canvas for our Marble Pound Cake.
With the structural integrity and moist crumb of the vanilla base perfected, our attention shifted entirely to developing a chocolate swirl that could not only deliver a profound chocolate flavor but also seamlessly integrate into the vanilla batter without compromising the cake’s delicate crumb structure. This phase was crucial to ensuring the finished cake had a harmonious texture throughout, where both flavors could shine.
Crafting a Chocolate Swirl That Truly Pops with Flavor
When it came to the chocolate swirl, flavor was non-negotiable. We were determined to create a chocolate component that didn’t just add color but delivered an unmistakable, deep chocolate taste. To achieve this, we opted for **Dutch-processed cocoa powder**. Unlike natural unsweetened cocoa, Dutch-processed cocoa has been treated to reduce its acidity, resulting in a darker color and a significantly smoother, more intense chocolate flavor. This was a crucial first step in building the desired richness.
Through years of extensive chocolate cake testing, we’ve learned a game-changing technique: blooming cocoa powder. This process involves whisking cocoa powder with a hot liquid, which helps to dissolve the cocoa solids and unlock its full flavor potential. Our initial tests bloomed the cocoa with hot water, but while the swirl looked appealing, the chocolate flavor still felt somewhat subdued when paired with the robust vanilla batter. It lacked the pronounced impact we envisioned; we wanted a distinct chocolate presence, not merely a darker hue woven through the cake.
The idea of incorporating melted chocolate was considered, but quickly dismissed. Adding melted chocolate would drastically alter the fat and sugar balance within the chocolate portion of the batter. This would inevitably lead to a denser, heavier texture, transforming it into something more akin to a brownie than a delicate pound cake. This wasn’t the harmonious texture we were striving for. Instead, we turned to a more ingenious solution: blooming the Dutch-processed cocoa powder with strong espresso or hot coffee and a small pinch of salt. The coffee, despite not making the cake taste like coffee, significantly amplifies the natural chocolate notes, deepening its richness and complexity. The salt, meanwhile, acts as a flavor enhancer, making the chocolate taste even more vibrant.
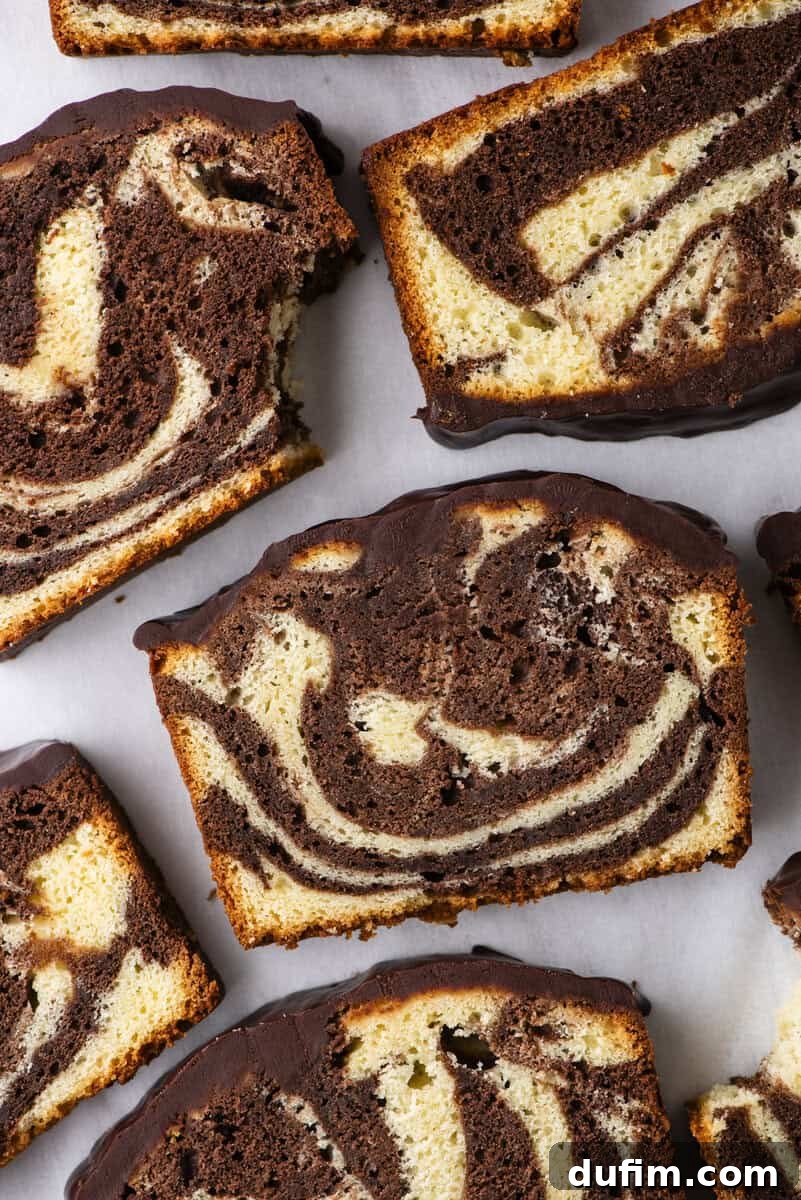
This espresso-bloomed cocoa mixture was the breakthrough. It completely transformed the flavor profile, giving the chocolate swirl the profound richness and depth it desperately needed. From this point, the challenge became one of precise balance. The resulting chocolate batter remained light enough to be gently swirled into the vanilla batter, creating beautiful, distinct patterns, all while ensuring that every single slice delivered an authentic and satisfying burst of chocolate flavor that perfectly complemented the moist cream cheese base.
The Art of the Swirl and the Importance of Pan Size
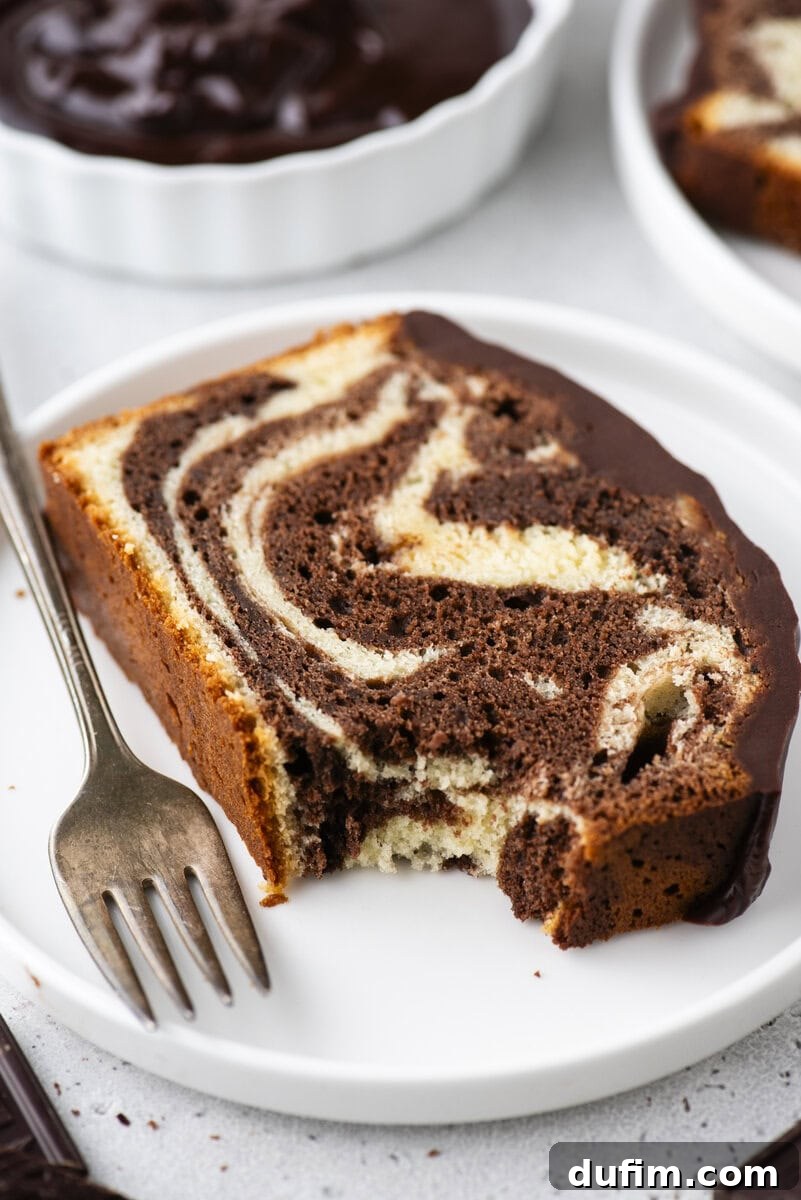
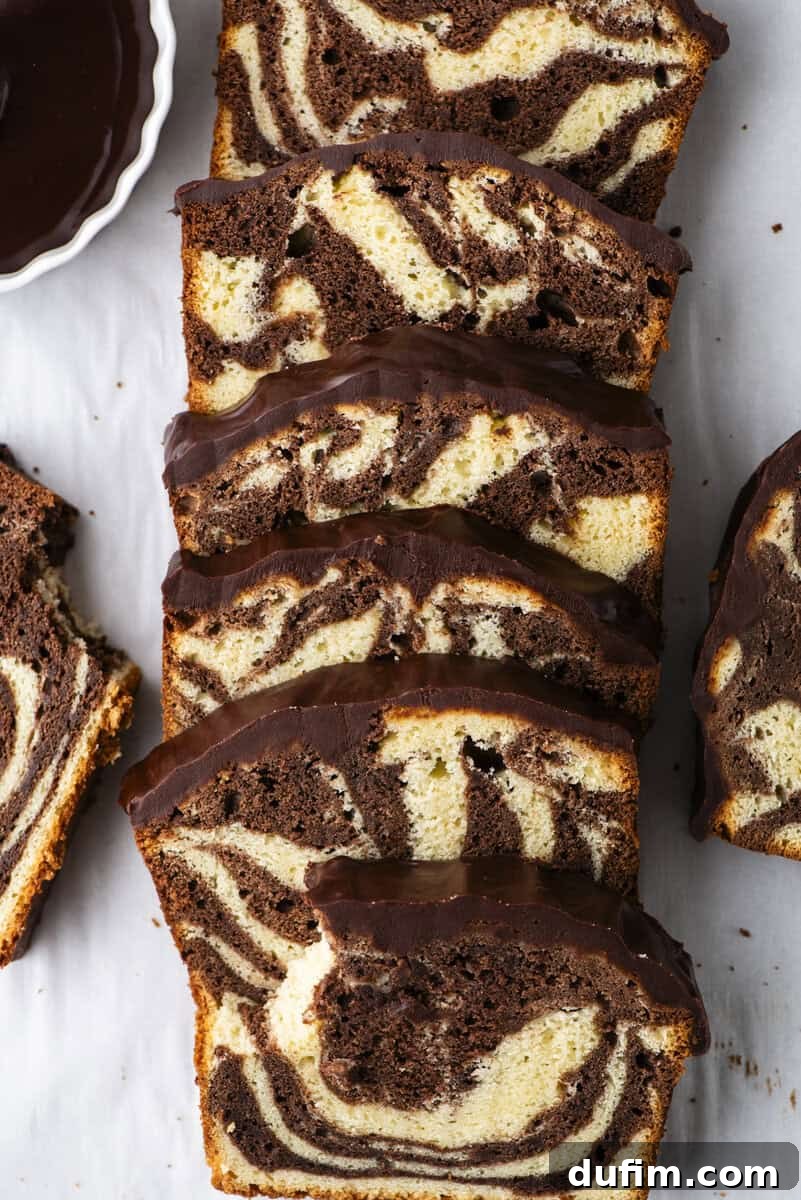
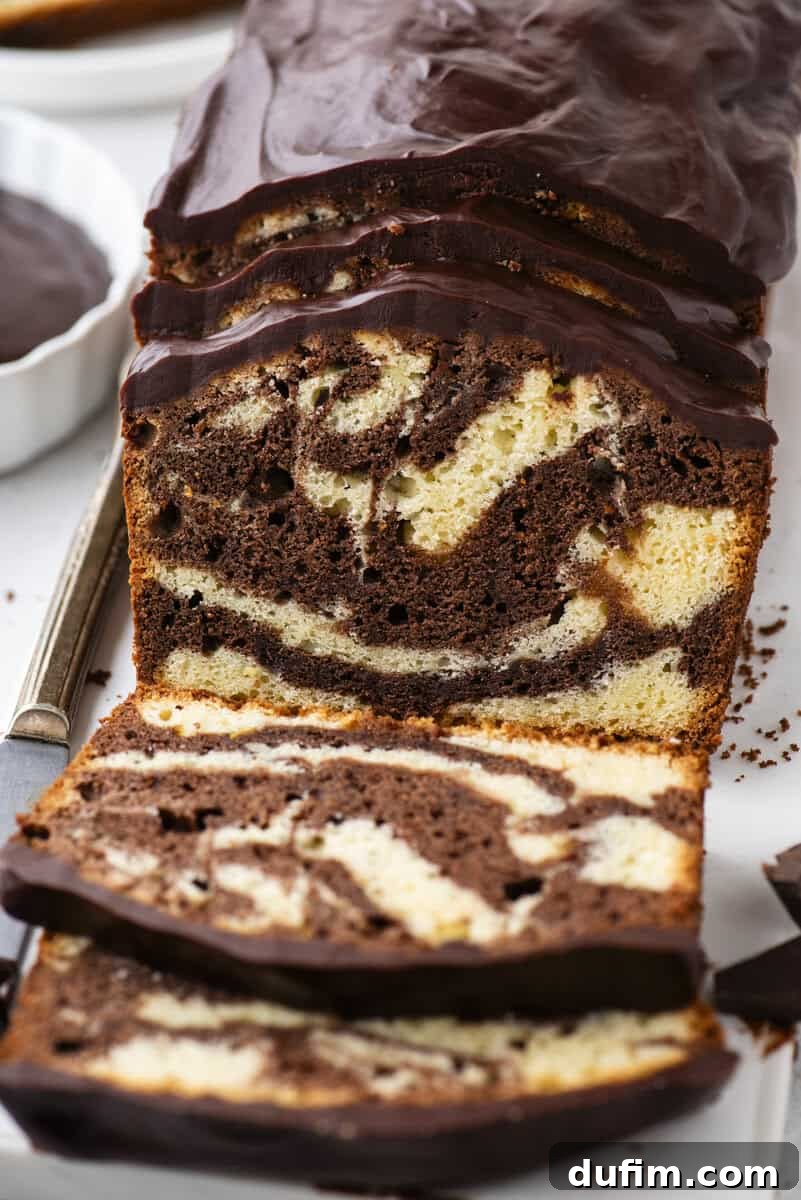
Achieving that iconic, elegant marble pattern in your pound cake is more than just combining two batters; it’s an art that heavily relies on the right swirling technique and using the correct pan size. The method you employ to swirl the batters makes a significant difference, not only in the cake’s visual appeal but also in how evenly it bakes and its overall texture.
Initially, we experimented with alternating dollops of vanilla and chocolate batter. While this approach was straightforward, it often resulted in a less sophisticated “polka dot” or patchy appearance rather than the fluid, intertwined marble effect we desired. After numerous trials, we found that the most stunning and consistent results were achieved by **layering the batters** and then performing a few gentle swirls.
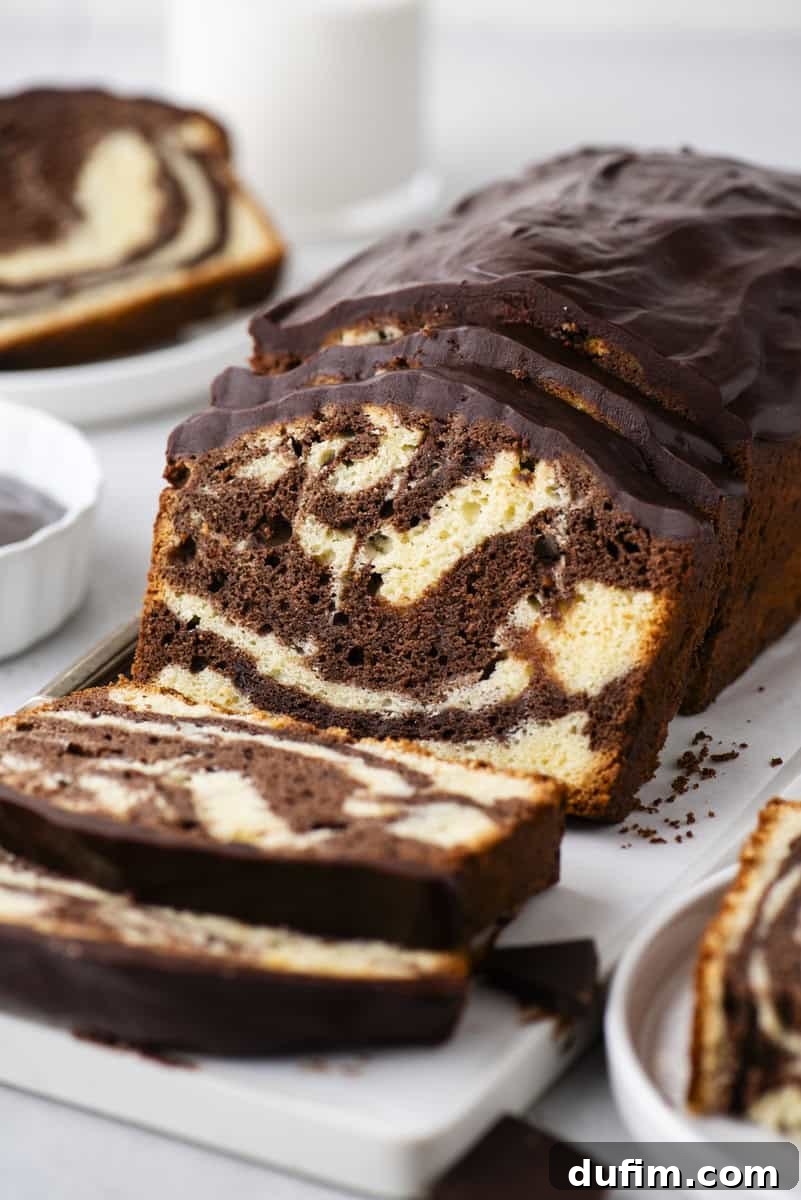
To execute this technique flawlessly, begin by spooning alternating layers of vanilla and chocolate batter into your prepared loaf pan. Once all the batter is in the pan, take a thin spatula, butter knife, or skewer and gently make just a few large, deliberate swirls through the layers. The key here is to embrace the principle of “less is more.” Over-swirling is the most common mistake; it will cause the distinct vanilla and chocolate batters to blend excessively, leading to a muddy, indistinct pattern rather than crisp, beautiful swirls. Aim for no more than 2-3 passes through the batter to create elegant, well-defined streaks.
Equally critical to the success of this recipe is using the **correct pan size**. This Marble Pound Cake recipe is specifically formulated and tested for a standard **9×5 inch loaf pan**. Using a smaller pan, such as an 8.5×4.5 inch pan, will lead to significant problems. The batter volume is too great for a smaller pan, which can cause the cake to overflow during baking, creating a messy situation and potentially an unevenly baked cake. Furthermore, insufficient pan volume can result in a dense, undercooked center and an over-baked exterior. For the very best texture, perfectly clean slices, and to prevent any baking mishaps, it is highly recommended to stick precisely with a 9×5 inch loaf pan.
Key Ingredients and Their Transformative Roles
Every ingredient in this Marble Pound Cake recipe plays a vital role in creating its renowned moist texture and rich flavor. Understanding the function of each component will not only deepen your appreciation for this cake but also empower you to bake it with confidence.
- Cream Cheese: This is the secret weapon for an unbelievably rich and moist crumb. It adds a subtle tang that beautifully complements the sweetness and chocolate, without making the cake feel heavy or overly dense. It’s the cornerstone of the cake’s tender structure.
- Dutch Processed Cocoa Powder: Chosen specifically for its deep, intense, and less acidic chocolate flavor. When bloomed, it unlocks a profound cocoa taste that truly stands out against the vanilla base, creating a chocolate swirl that’s genuinely impactful.
- Espresso or Hot Coffee: Not just for blooming the cocoa, coffee is a phenomenal flavor enhancer for chocolate. It intensifies the cocoa’s natural bitterness and depth, creating a more complex and robust chocolate profile without imparting a discernible coffee flavor to the finished cake.
- Unsalted Butter: Essential for classic pound cake flavor and structure. When properly creamed with sugar and cream cheese, it creates countless tiny air pockets, contributing significantly to the cake’s light yet rich texture. Using unsalted butter allows you to control the salt content in the recipe.
- Granulated Sugar: Beyond sweetness, sugar contributes to the cake’s tenderness by interfering with gluten development. It also helps retain moisture, keeping the cake fresh longer, and aids in the creaming process for a lighter crumb.
- Large Eggs & Egg Yolk: Eggs provide structure, richness, and help emulsify the batter, preventing it from separating. The extra egg yolk adds richness, tenderness, and a beautiful golden hue to the vanilla batter. Ensure they are at room temperature for optimal incorporation.
- All-Purpose Flour: The primary structural component of the cake. Measuring correctly is crucial to prevent a dense or crumbly texture.
- Baking Powder: Our leavening agent, which helps the cake rise and achieve its light, tender crumb.
- Salt: A critical flavor enhancer. It balances the sweetness of the sugar and cream cheese, and remarkably, it makes the chocolate flavor in the swirl taste even more pronounced and complex.
- Pure Vanilla Extract: A staple in baking, vanilla extract rounds out and enhances all the other flavors, particularly complementing the cream cheese and chocolate notes.
- Chocolate Ganache: This simple yet elegant topping adds an extra layer of chocolate decadence and a beautiful glossy finish, tying both vanilla and chocolate elements together in a sophisticated way. It’s the perfect finishing touch.
Step-by-Step Guide to Baking a Perfect Marble Pound Cake
Baking a homemade Marble Pound Cake might seem intricate, but with this detailed, easy-to-follow guide, even novice bakers can achieve spectacular results on their first attempt. Follow these steps for a moist, flavorful, and beautifully swirled cake.
Before You Begin: Prep Oven and Ingredients
Preheat your oven to 350°F (180°C). Crucially, ensure that your butter, cream cheese, and eggs are all at room temperature. This isn’t a minor detail; room-temperature ingredients emulsify much more effectively and trap air more efficiently when beaten. This aeration is key to a lighter, more tender, and better-textured pound cake. Cold ingredients can lead to a lumpy batter and a dense cake.
Step 1: Combine Dry Ingredients
In a medium-sized bowl, whisk together the all-purpose flour, baking powder, and salt. Whisking ensures these dry ingredients are evenly distributed, preventing pockets of leavening or salt in your finished cake. Set this mixture aside for later.
Step 2: Cream Butter and Cream Cheese
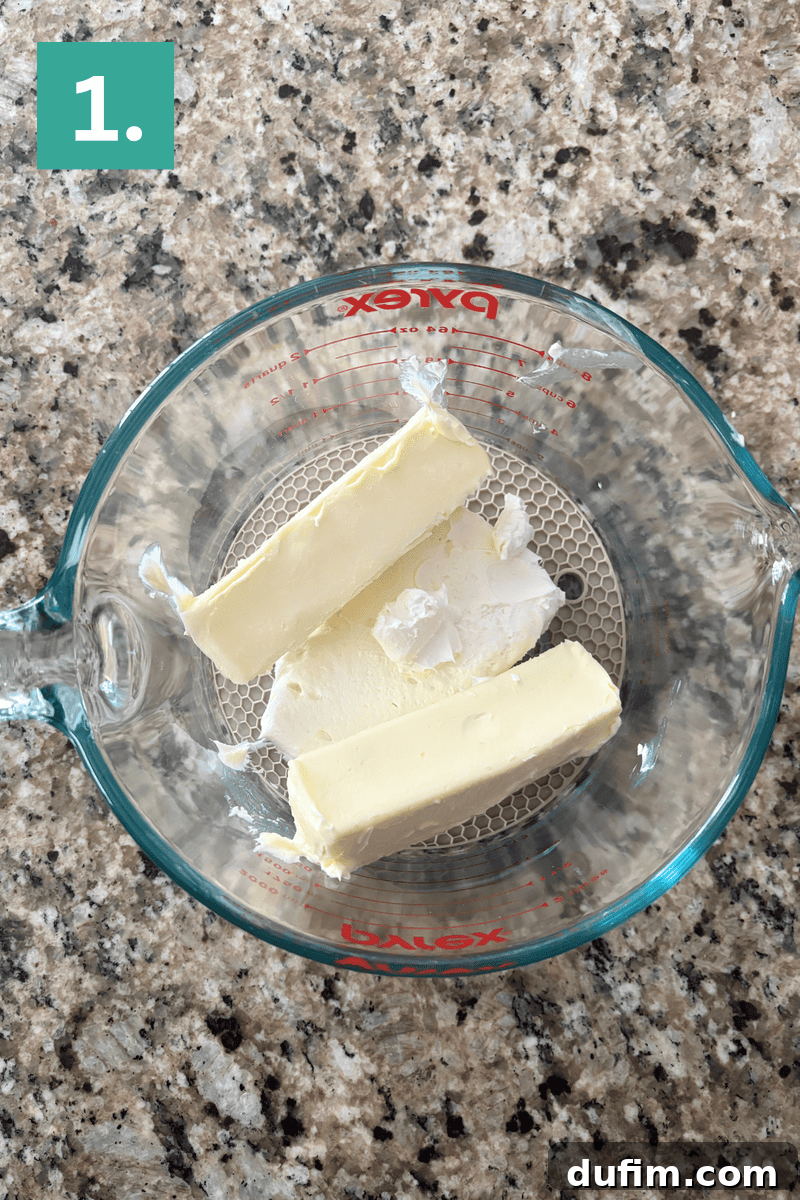
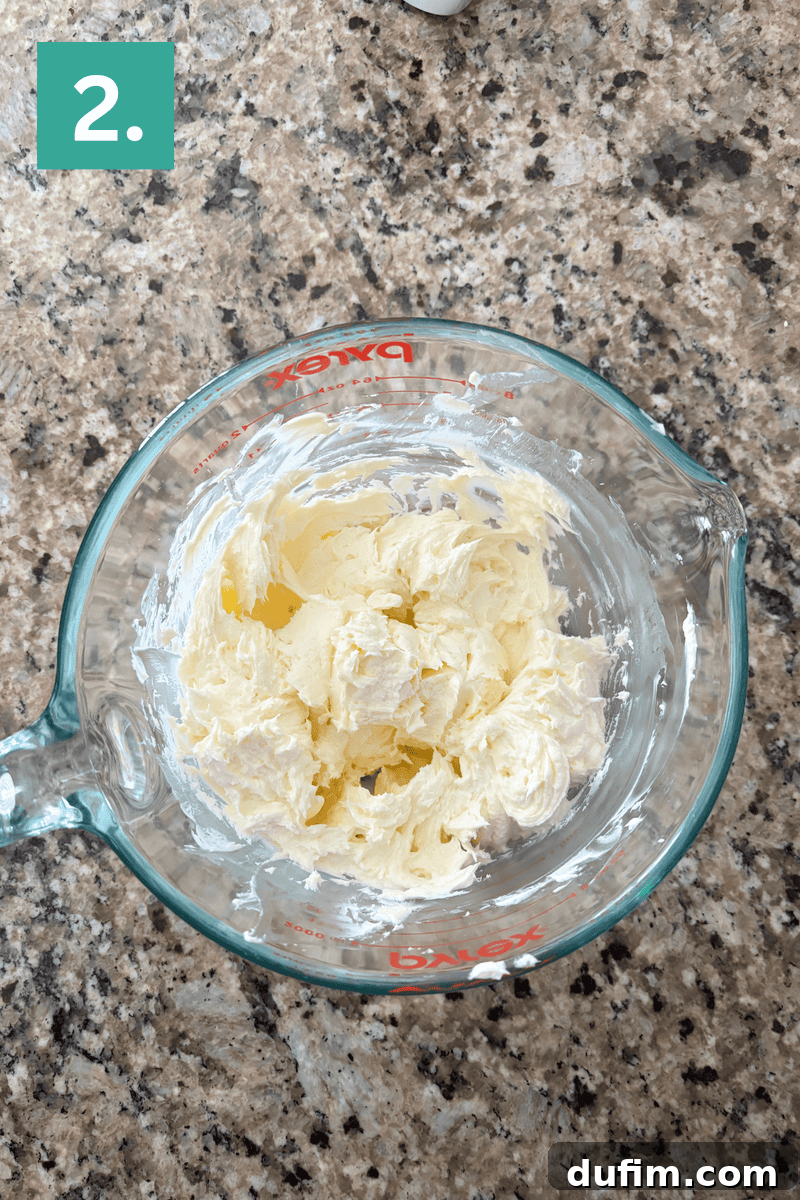
In a large mixing bowl, or the bowl of a stand mixer fitted with the paddle attachment, beat the softened butter and room-temperature cream cheese together for a full 2 minutes. The mixture should become noticeably light, fluffy, and pale in color. This initial creaming incorporates air, which is fundamental to the pound cake’s tender texture.
Step 3: Incorporate Sugar
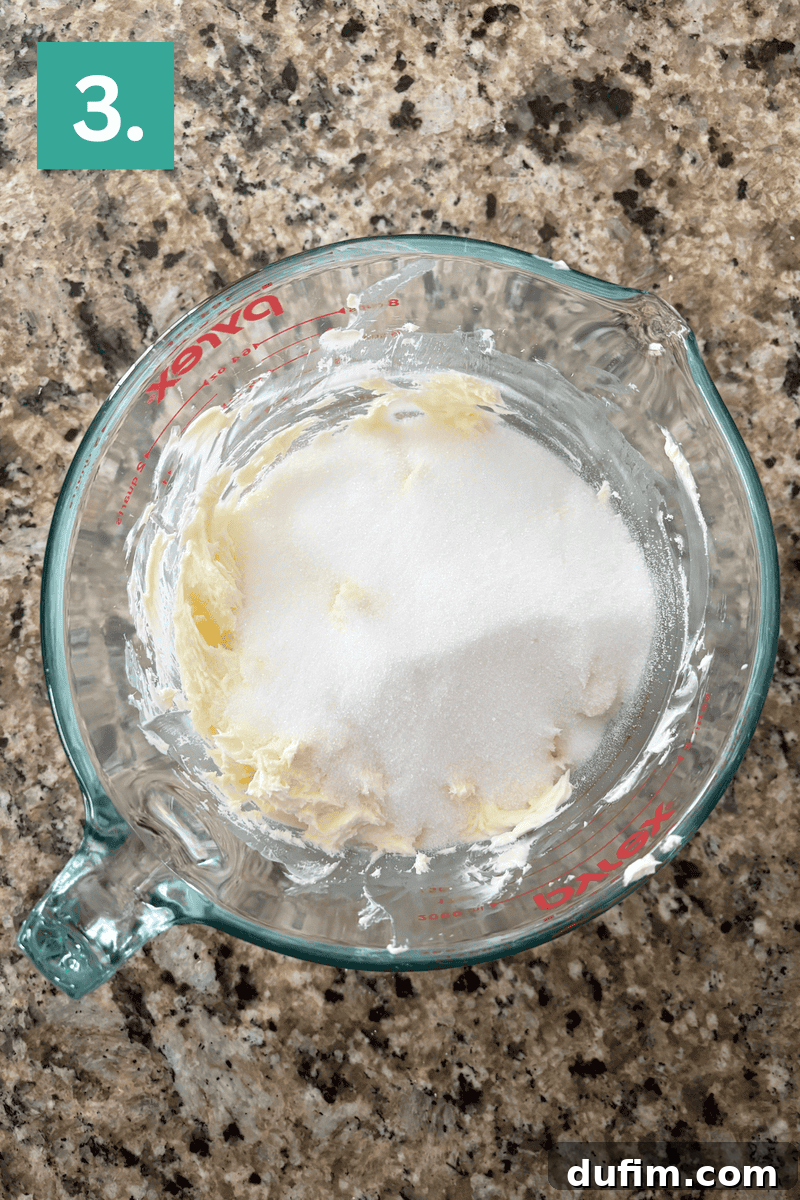
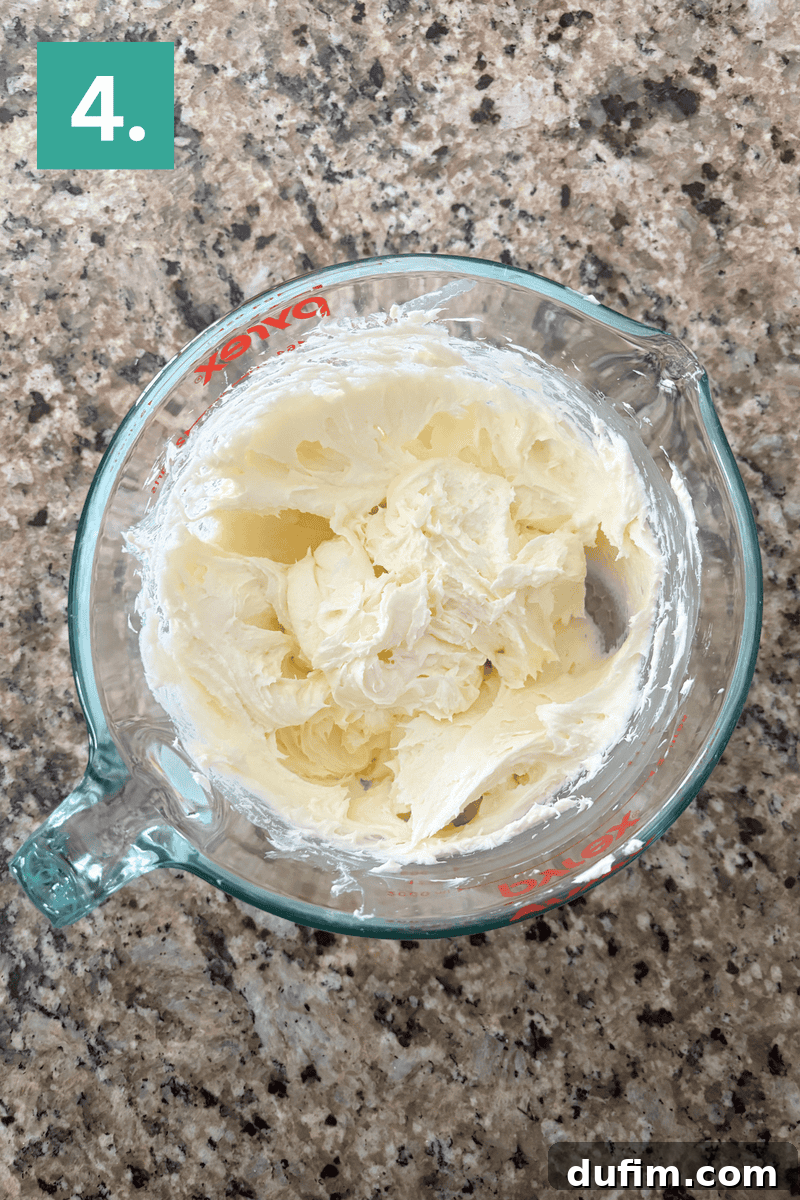
Next, add the granulated sugar to the butter and cream cheese mixture. Continue beating for another 2 minutes, ensuring you scrape down the sides of the bowl frequently with a spatula. This step is crucial for both texture and flavor. Properly creaming the butter and sugar creates a light, airy base for the cake by dissolving sugar crystals and incorporating more air, leading to a fine, tender crumb. Don’t rush this step; set a timer if needed.
Step 4: Combine Wet Ingredients
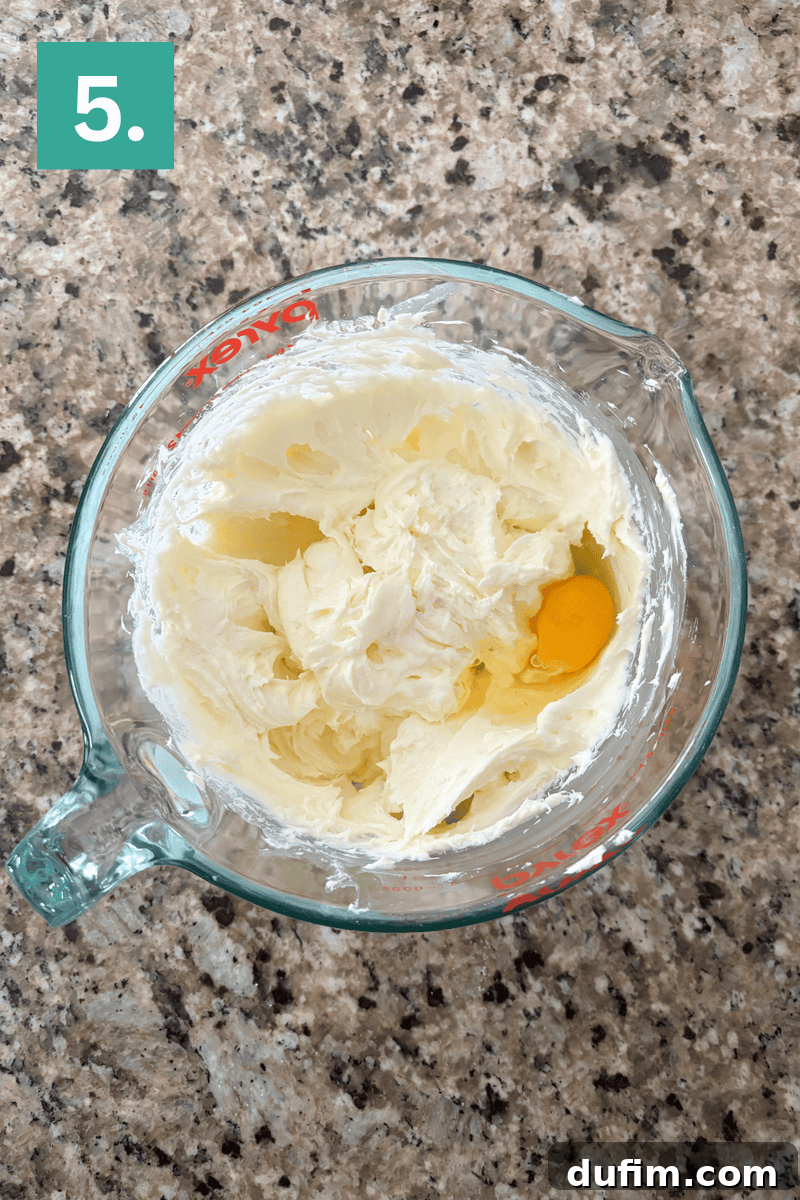
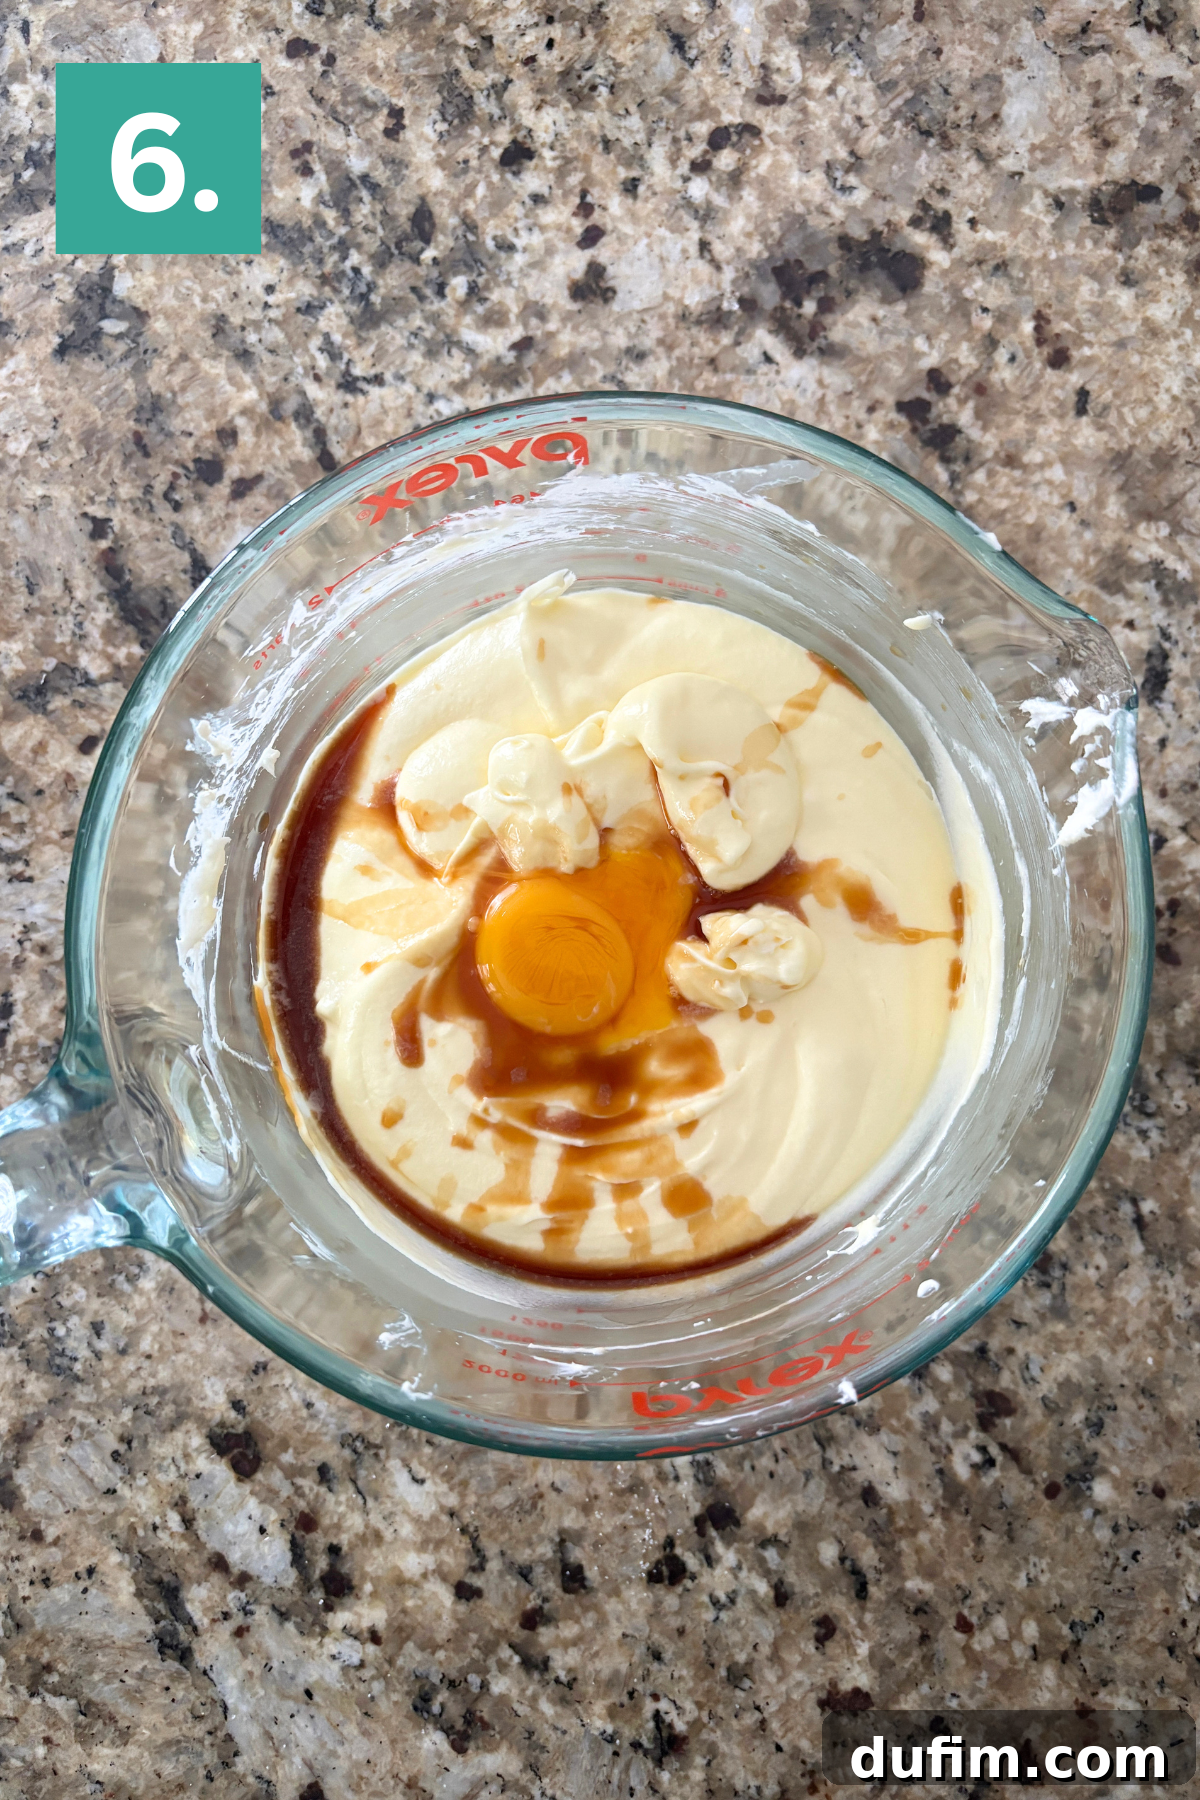
Add the eggs one at a time, beating thoroughly after each addition until fully incorporated. This gradual process prevents the batter from curdling and ensures a smooth emulsion. After the eggs, beat in the additional egg yolk (for extra richness and moisture) and the pure vanilla extract. Continue to beat until the mixture is cohesive and well-combined, scraping the bowl as needed.
Step 5: Incorporate Dry into Wet Ingredients
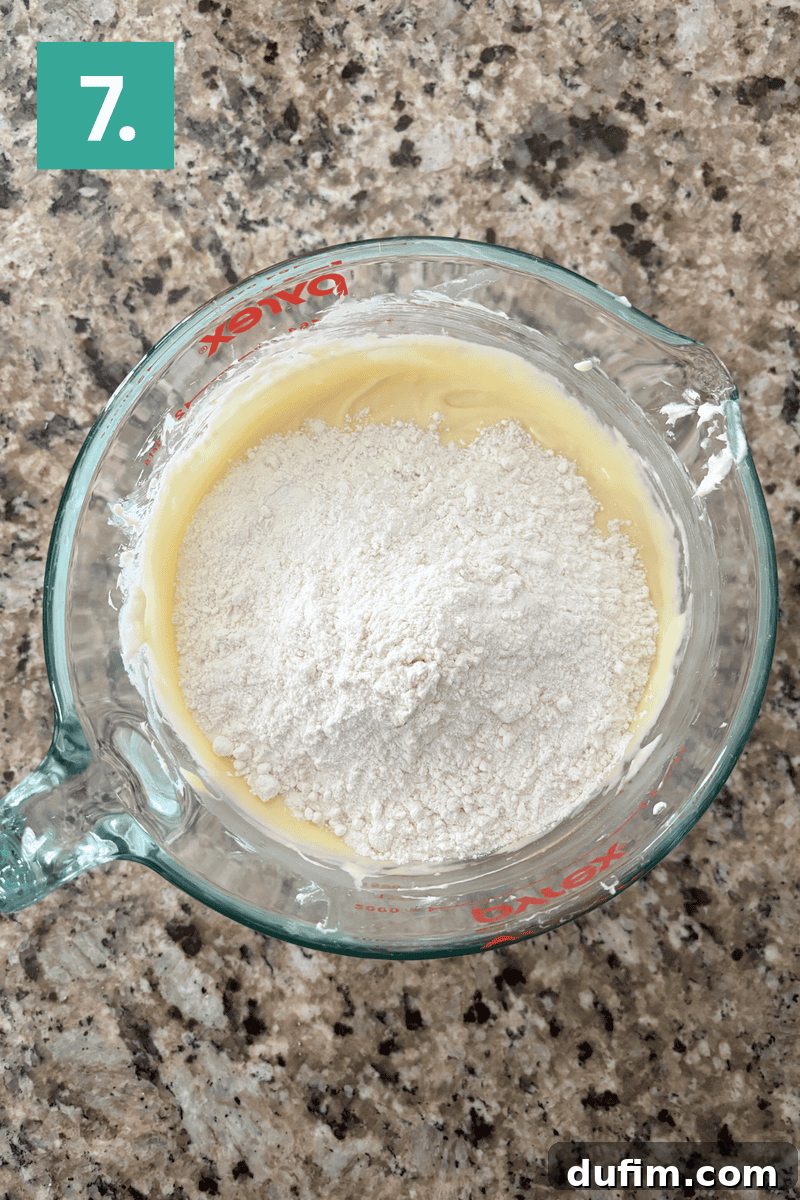
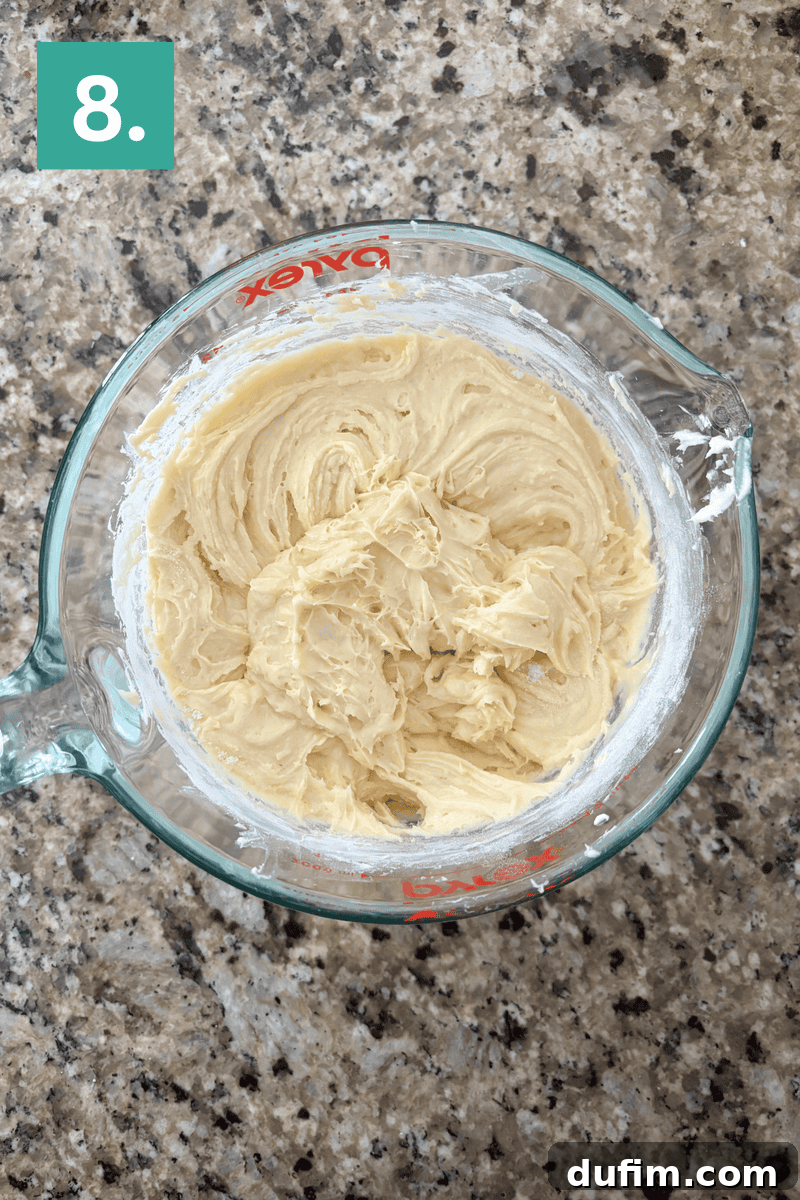
Gradually add the reserved flour mixture to the wet ingredients, mixing on low speed just until they are combined. It’s crucial not to overmix the batter at this stage, as excessive mixing can develop the gluten in the flour, leading to a tough and dry cake. Stop mixing slightly early, when a few streaks of flour are still visible, and then gently finish incorporating the remaining flour by hand with a spatula. The resulting batter will be thick and rich. Divide this batter evenly between two separate bowls. One will remain vanilla, and the other will become your chocolate batter.
Step 6: Bloom the Cocoa Powder for Chocolate Batter
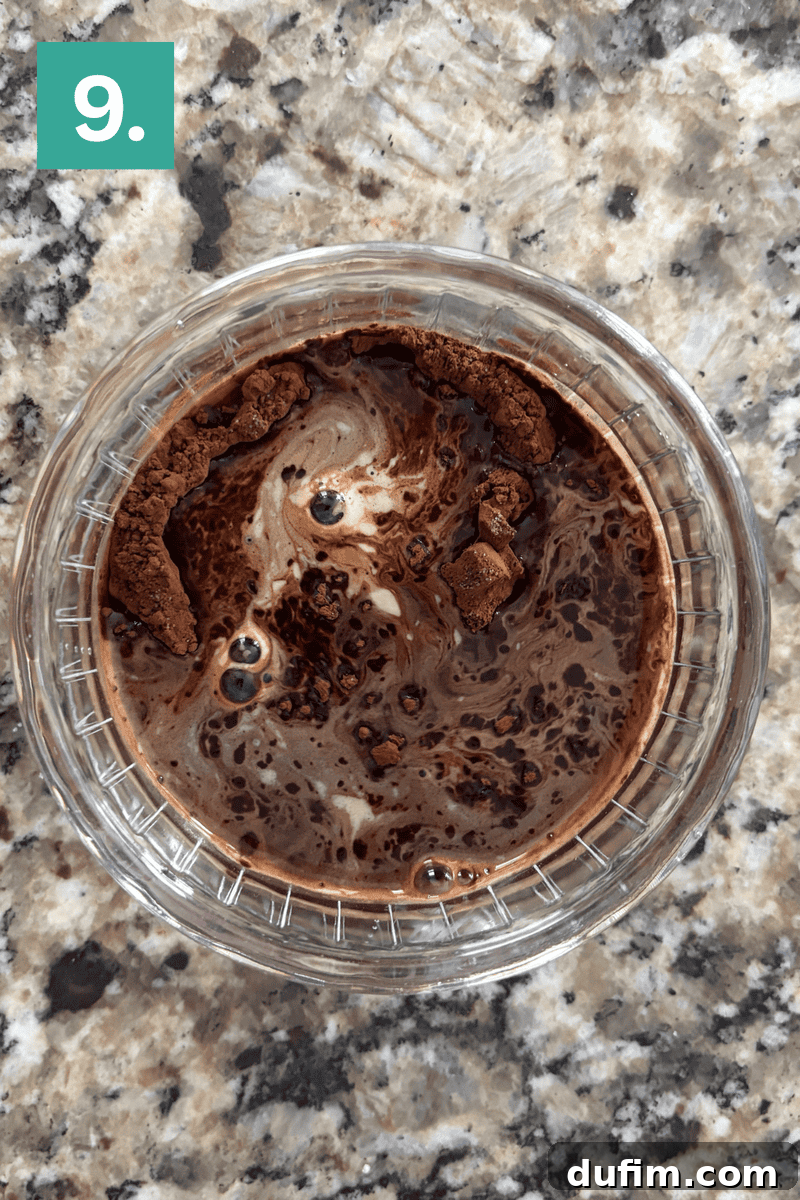
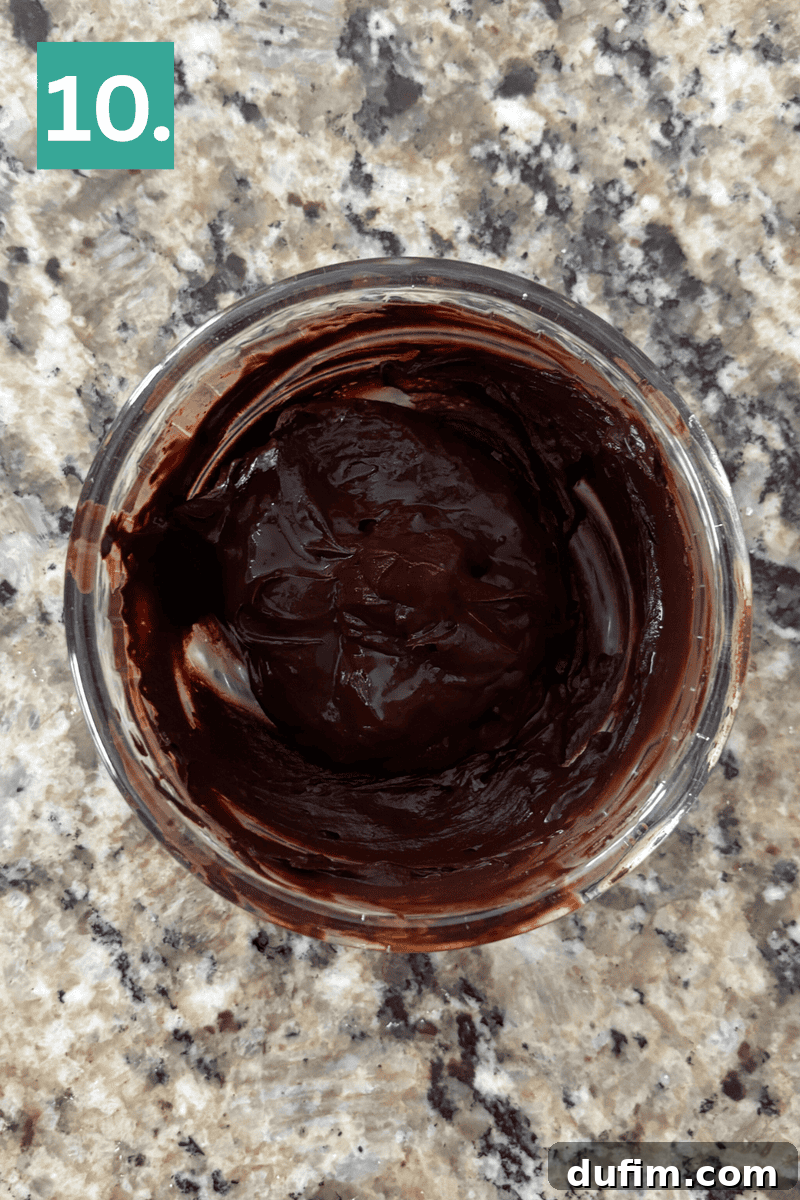
To prepare the deeply flavored chocolate swirl, combine the Dutch-processed cocoa powder, a pinch of salt, and the hot espresso or coffee in a small bowl. Whisk these ingredients together until a thick, smooth, pudding-like mixture forms. This is the blooming process, which significantly enhances the cocoa’s flavor. Add this intensely flavored cocoa mixture to one of the bowls of divided batter and mix on low speed until the chocolate is fully and uniformly combined, ensuring no streaks of vanilla remain.
Step 7: Prepare the Loaf Pan
Generously butter or grease a 9×5-inch loaf pan. For an extra non-stick measure, you can also lightly dust the greased pan with a thin layer of flour (or cocoa powder if you prefer not to see white flour on the crust of the chocolate parts). Remember, this recipe is specifically designed for a 9×5-inch pan. Using a smaller 8.5×4.5-inch pan will cause the batter to overflow during baking and result in an unevenly cooked cake.
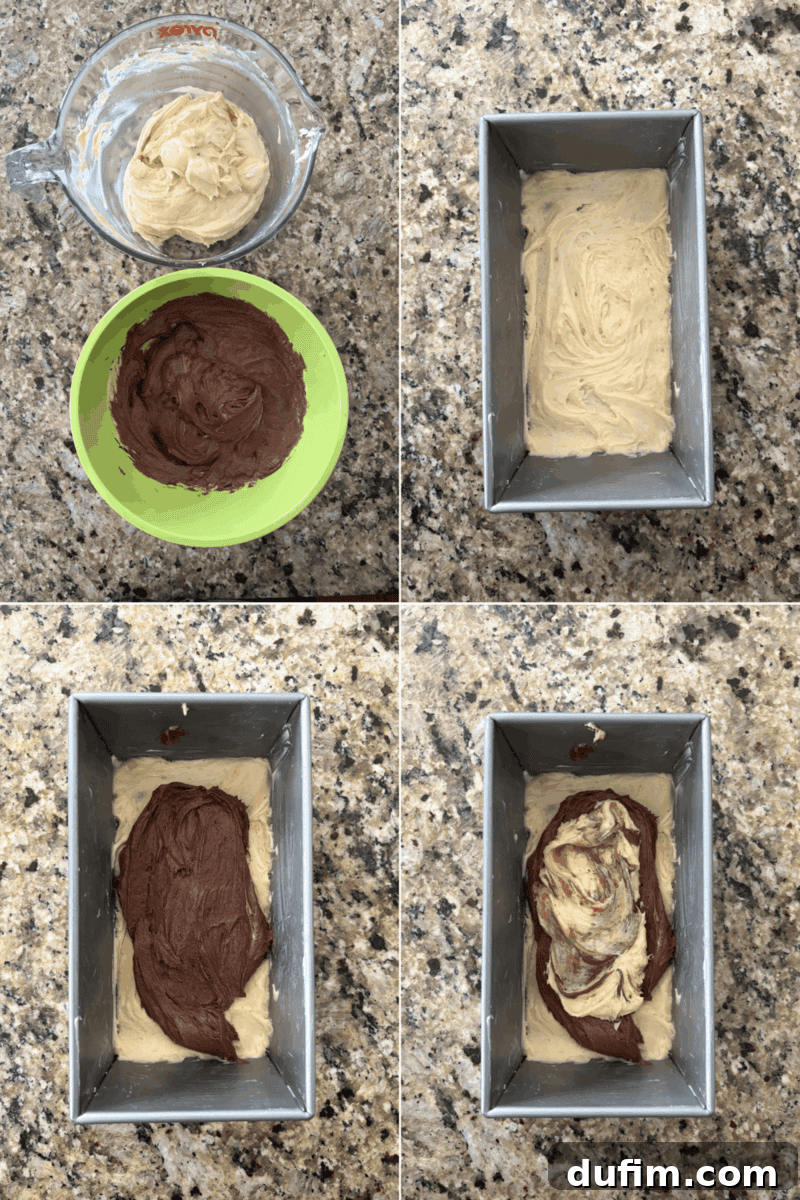
Step 8: Layer and Swirl the Batter
Begin by spooning approximately ½ cup of the vanilla batter into the bottom of the prepared loaf pan and spread it into an even layer. Then, add ½ cup of the chocolate batter directly on top, spreading it gently. Continue alternating layers of vanilla and chocolate batter until both bowls are empty, gently shaking the pan as needed to help the batter settle and level. Once all the batter is in the pan, take a thin spatula, a butter knife, or a skewer and gently draw it through the batter a few times to create elegant, sweeping swirls. Be careful not to over-swirl, as this will blend the colors too much and muddy the beautiful marble effect. Aim for distinct, intertwined patterns. Finally, use your spatula to gently smooth the top surface of the batter.
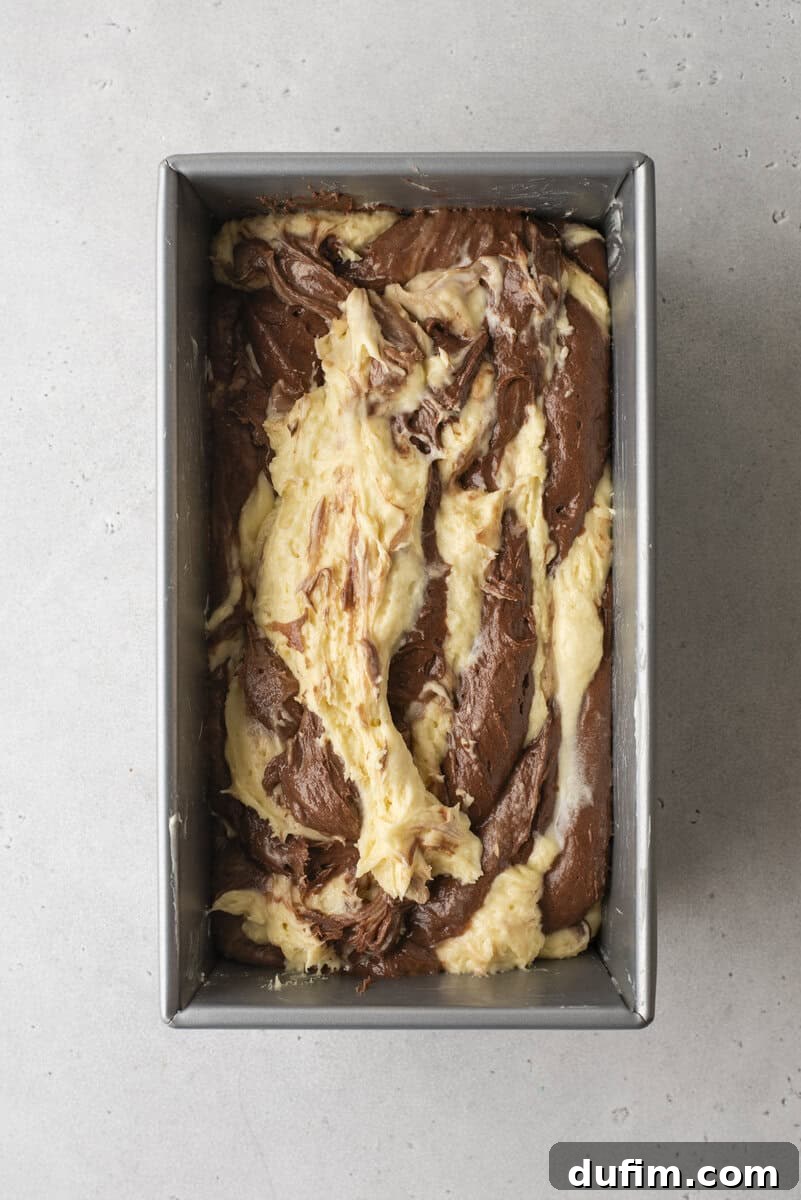
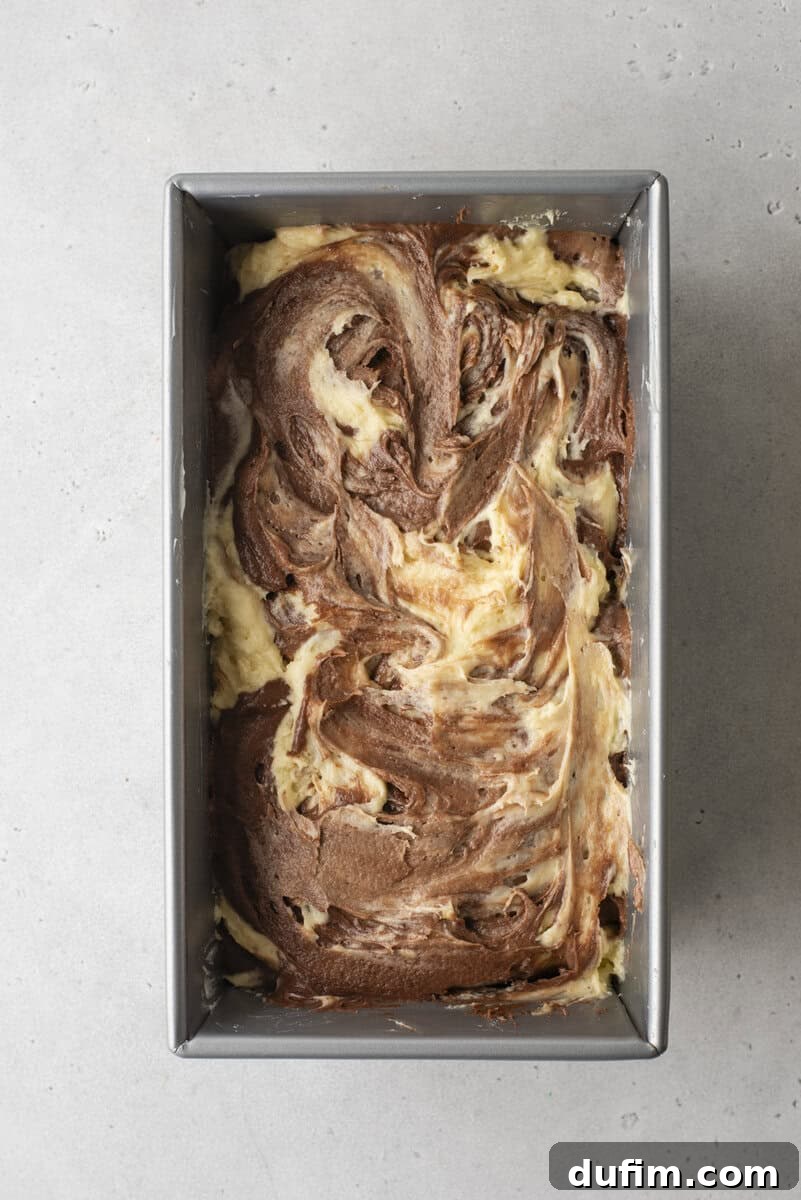
Step 9: Bake to Golden Perfection
Place the loaf pan in the center of your preheated oven and bake for approximately 50 minutes. At this point, check the cake’s progress. If the top is browning too rapidly or appears to be getting too dark, loosely tent the pan with aluminum foil. This will prevent further browning while allowing the inside of the cake to continue baking. Continue baking for an additional 10–15 minutes, or until a wooden skewer or toothpick inserted into the center of the cake comes out clean or with only a few moist crumbs attached. If you don’t need to tent the cake at 50 minutes, continue checking every 5 minutes thereafter. The total bake time for a 9×5-inch pan will typically range from 60–65 minutes.
Step 10: Cool Completely
Once baked, allow the pound cake to cool in its pan on a wire rack for 30 minutes. This resting period allows the cake to set its structure, making it easier to remove without breaking. After 30 minutes, carefully invert the cake onto the cooling rack to cool completely. Cooling completely is important before glazing or slicing, as it allows the internal structure to firm up and prevents the ganache from melting.
Step 11: Prepare the Decadent Ganache Topping
While the cake cools, prepare the chocolate ganache. Place the heavy cream in a microwave-safe bowl and microwave for 30–60 seconds, or until it’s hot and just beginning to bubble around the edges. Immediately add the semi-sweet chocolate chips to the hot cream. Let the mixture sit undisturbed for 1–2 minutes to allow the chocolate to melt. Then, gently stir the mixture with a spatula or whisk until it becomes completely smooth and glossy. Allow the ganache to cool slightly at room temperature until it thickens to a pourable but not runny consistency. This will ensure it sets beautifully. Once cooled, spoon the ganache over the completely cooled pound cake and spread it into an even layer using the back of a spoon or an offset spatula. Let the ganache set completely before slicing and serving. This creates a neat, clean finish.
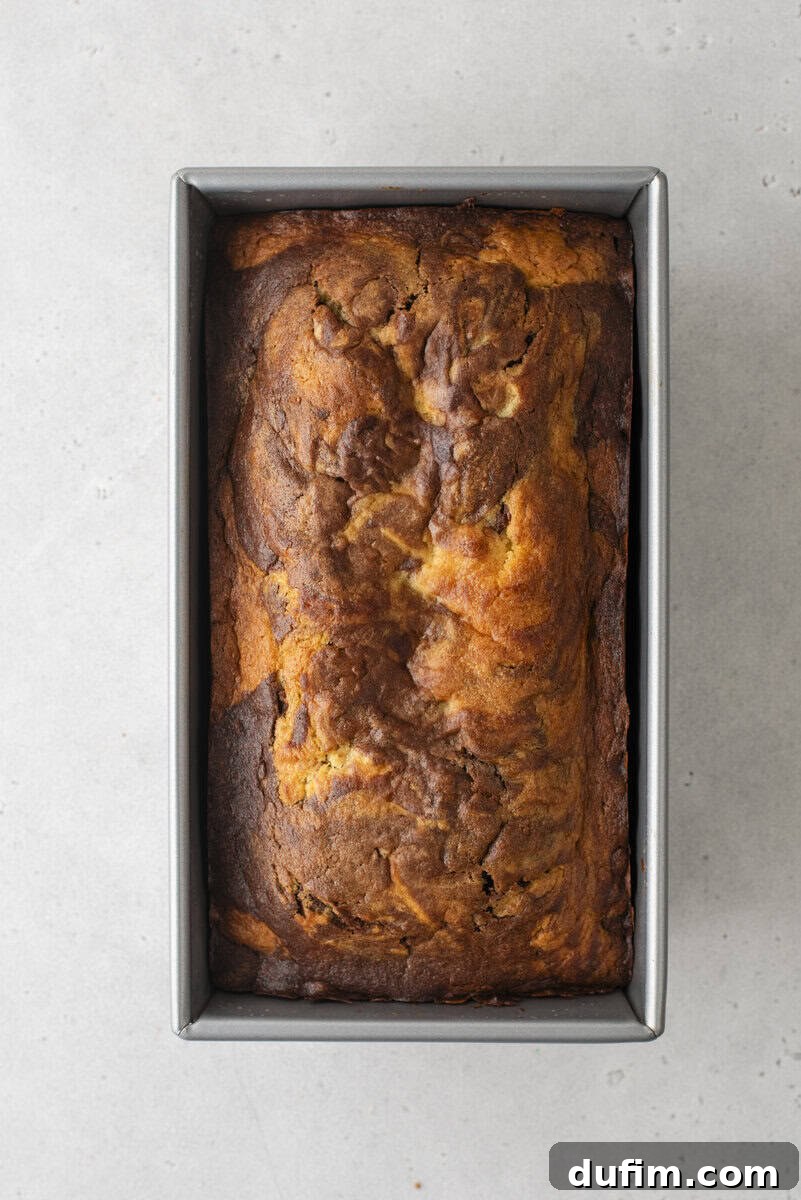
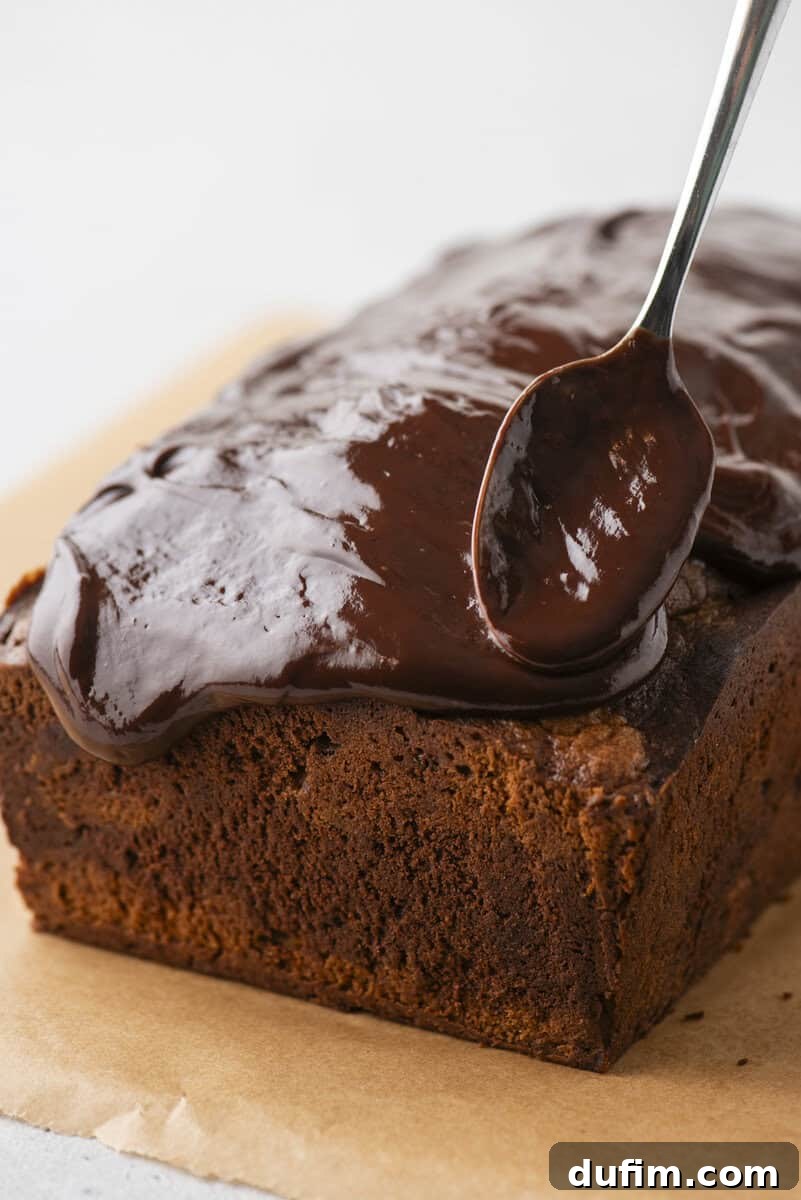
The Decadent Chocolate Ganache Topping
The chocolate ganache on this Marble Pound Cake is far more than just a decorative element; it’s an essential component that elevates the entire dessert. This simple yet sophisticated topping provides a rich, glossy finish that makes the loaf feel incredibly special and complete. It adds a layer of intense chocolate flavor that perfectly complements both the creamy vanilla and the deep chocolate swirls within the cake, without ever overpowering its delicate balance.
Our ganache recipe uses a slightly thicker ratio of semi-sweet chocolate to heavy cream. This ensures that once melted together until smooth and perfectly glossy, it sets beautifully on the cake. The trick is to allow it to cool slightly before spooning it over the cooled loaf. This slight cooling period is critical, as it allows the ganache to firm up just enough to create a clean, even, and opaque layer that won’t simply drip off the sides. Once fully set, this ganache slices cleanly with the cake, adding precisely the right amount of decadent chocolate on top, enhancing both the visual appeal and the overall flavor experience.
Storage and Make-Ahead Tips
To keep your Marble Pound Cake tasting its best, store it in an airtight container at room temperature for up to 3 days. This helps maintain its moist texture and fresh flavor. While you can refrigerate the cake for up to a week, be aware that the colder, drier environment of a refrigerator can sometimes cause the cake to dry out slightly. If refrigerating, consider bringing it to room temperature for a short period before serving to enhance its texture.
For convenience and to ensure peak freshness for serving, this pound cake is an excellent candidate for making ahead. You can bake the loaf one day in advance, allowing it to cool completely, and then prepare and apply the ganache on the day you plan to serve it. This method guarantees the best texture and a vibrant, fresh appearance for your presentation.
If you wish to store the cake for a longer period, it freezes exceptionally well. Freeze the loaf without the ganache, tightly wrapped in several layers of plastic wrap and then a layer of aluminum foil, for up to 3 months. When you’re ready to enjoy it, thaw the cake overnight in the refrigerator, then bring it to room temperature and apply the fresh ganache before serving. This ensures the cake tastes as delicious as if it were freshly baked.
More Delightful Pound Cake Recipes
If you’ve fallen in love with the rich flavors and tender crumb of this Marble Pound Cake, you’ll be thrilled to explore our other beloved pound cake creations. Each recipe is crafted with the same attention to detail and dedication to deliciousness:
- Brown Sugar Pound Cake: A deeply flavored cake with notes of caramel and molasses.
- Traditional Pound Cake Recipe: The classic, simple, yet undeniably elegant pound cake that started it all.
- Lemon Pound Cake: A bright, zesty, and refreshing pound cake perfect for spring and summer.
- Old Fashioned Cream Cheese Pound Cake: The incredibly moist and rich base that inspired this very marble cake.
Marble Pound Cake Recipe
Print Recipe
Ingredients
- 2 cups (240g) all-purpose flour
- 2 tsp baking powder
- ½ tsp salt
- 1 cup (226g) unsalted butter, room temperature
- 8 oz (227g) cream cheese, room temperature
- 1 ¼ cups (248g) granulated sugar
- 3 large eggs, room temperature
- 1 egg yolk, room temperature
- 2 tsp pure vanilla extract
- ¼ cup (24g) dutch processed cocoa powder
- ⅛ tsp salt
- 3 Tbsp espresso or hot coffee
For the Ganache
- ⅔ cup semi-sweet chocolate chips, 4 oz
- 6 Tbsp heavy cream
Instructions
- Preheat the oven to 350°F (180°C). Ensure butter, cream cheese, and eggs are at room temperature for a lighter, better-textured pound cake.
- In a medium bowl, whisk together the flour, baking powder, and salt. Set aside.
- In a large mixing bowl or stand mixer, beat the butter and cream cheese for 2 minutes, until light and fluffy. Add the granulated sugar and beat for another 2 minutes, scraping down the sides of the bowl as needed. Properly creaming is key to pound cake’s texture.
- Add the eggs, one at a time, beating well after each addition. Beat in the egg yolk and vanilla extract.
- Gradually add the flour mixture, mixing on low speed just until combined. Stop slightly early and finish mixing with a spatula to avoid overmixing. The batter will be thick. Divide the batter evenly between two bowls and set aside.
- To bloom the cocoa powder, combine the Dutch-processed cocoa powder, ⅛ tsp salt, and espresso or hot coffee in a small bowl until a thick, pudding-like mixture forms. Add this cocoa mixture to one bowl of batter and mix on low speed until fully combined.
- Generously butter a 9×5-inch loaf pan. This recipe will not fit in an 8.5×4.5-inch pan.
- Add ½ cup of vanilla batter to the bottom of the pan and spread into an even layer. Add ½ cup of chocolate batter on top, then continue alternating between vanilla and chocolate batter. Gently shake the pan as needed to help level the batter. Use a thin spatula or skewer to create a few large swirls—be careful not to over-swirl. Smooth the top with a spatula.
- Bake in the center of the oven for 50 minutes. Check the cake at that point—if the top is browning too much, loosely tent with aluminum foil and continue baking for 10–15 minutes. If you don’t need to tent at 50 minutes, continue checking every 5 minutes.
- Total bake time: 60–65 minutes for a 9×5-inch pan.
- Allow the pound cake to cool in the pan for 30 minutes, then turn it out onto a cooling rack to cool completely.
- Make the ganache: Place the heavy cream in a microwave-safe bowl and microwave for 30–60 seconds, or until hot and bubbling. Add the chocolate chips and let sit for 1–2 minutes, then stir until smooth and glossy. Let the ganache cool slightly, then spoon it over the loaf and spread into an even layer. Allow the ganache to set before slicing.
Notes
- Gluten-Free: For a gluten-free version, use a 1:1 gluten-free baking flour blend in place of all-purpose flour. King Arthur’s Measure for Measure Gluten Free Flour has been tested with great results.
- To Store: Wrap the cooled cake tightly in plastic wrap and store at room temperature for up to 3 days to maintain optimal freshness and moisture.
- To Make Ahead: For best texture and appearance, bake the pound cake a day in advance, allow it to cool completely, and then prepare and apply the ganache on the day of serving.
- To Freeze: To freeze, wrap the unfrosted loaf tightly in plastic wrap, then in aluminum foil, and store for up to 3 months. Thaw overnight in the refrigerator, bring to room temperature, and then add the ganache before serving.

Nutrition
Nutrition Disclosure
All nutritional values are approximate and provided to the reader as a courtesy. Changing ingredients and/or quantities will alter the estimated nutritional calculations.
Enjoy baking this exquisite Marble Pound Cake!