
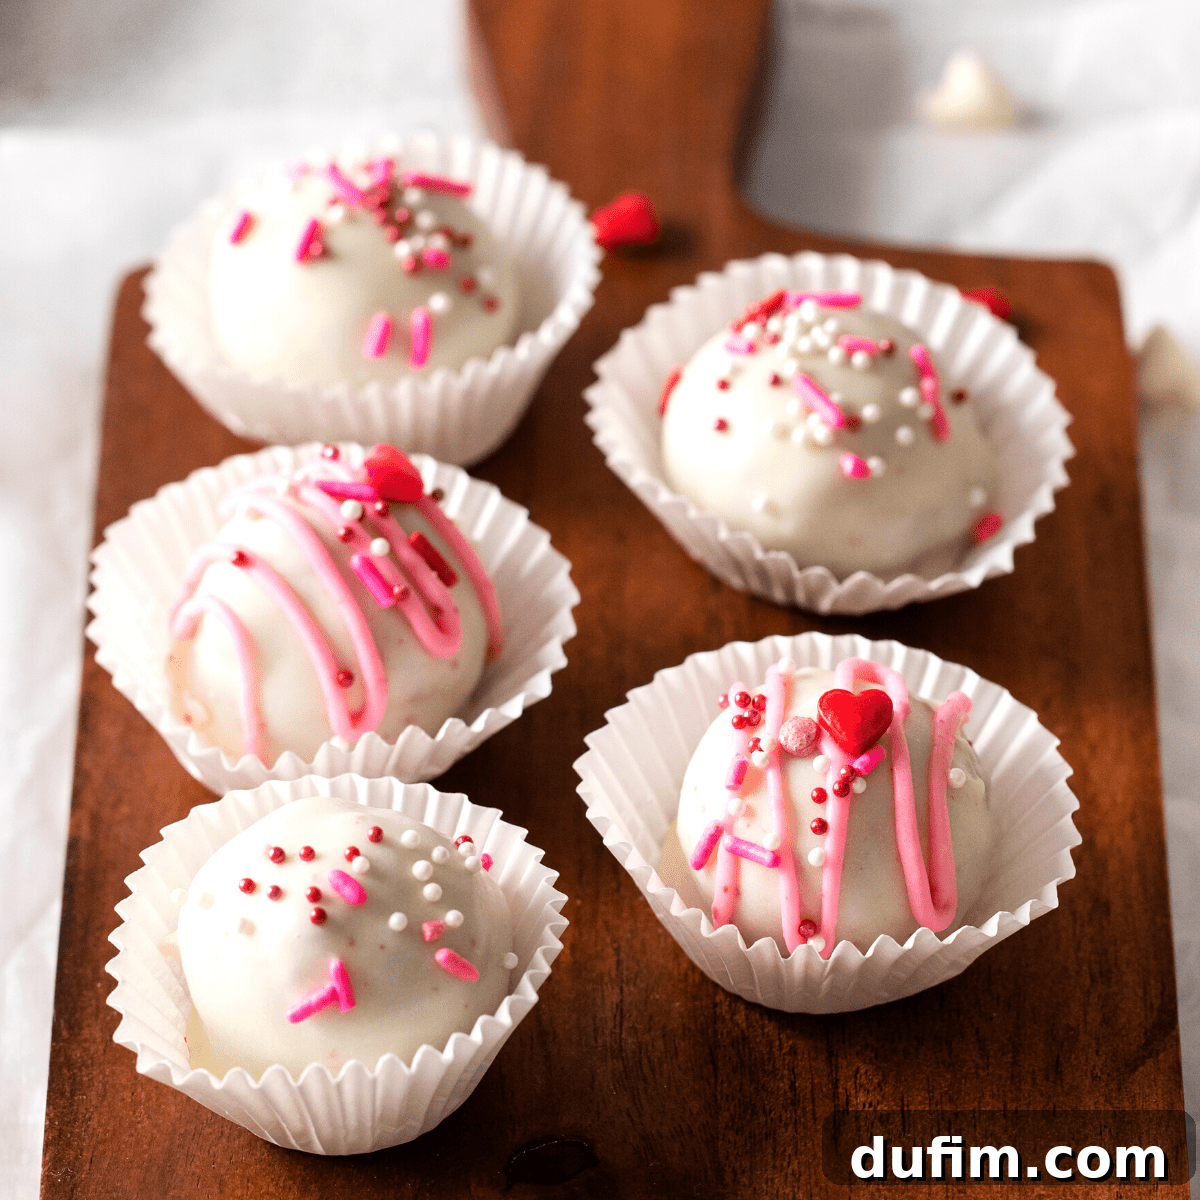
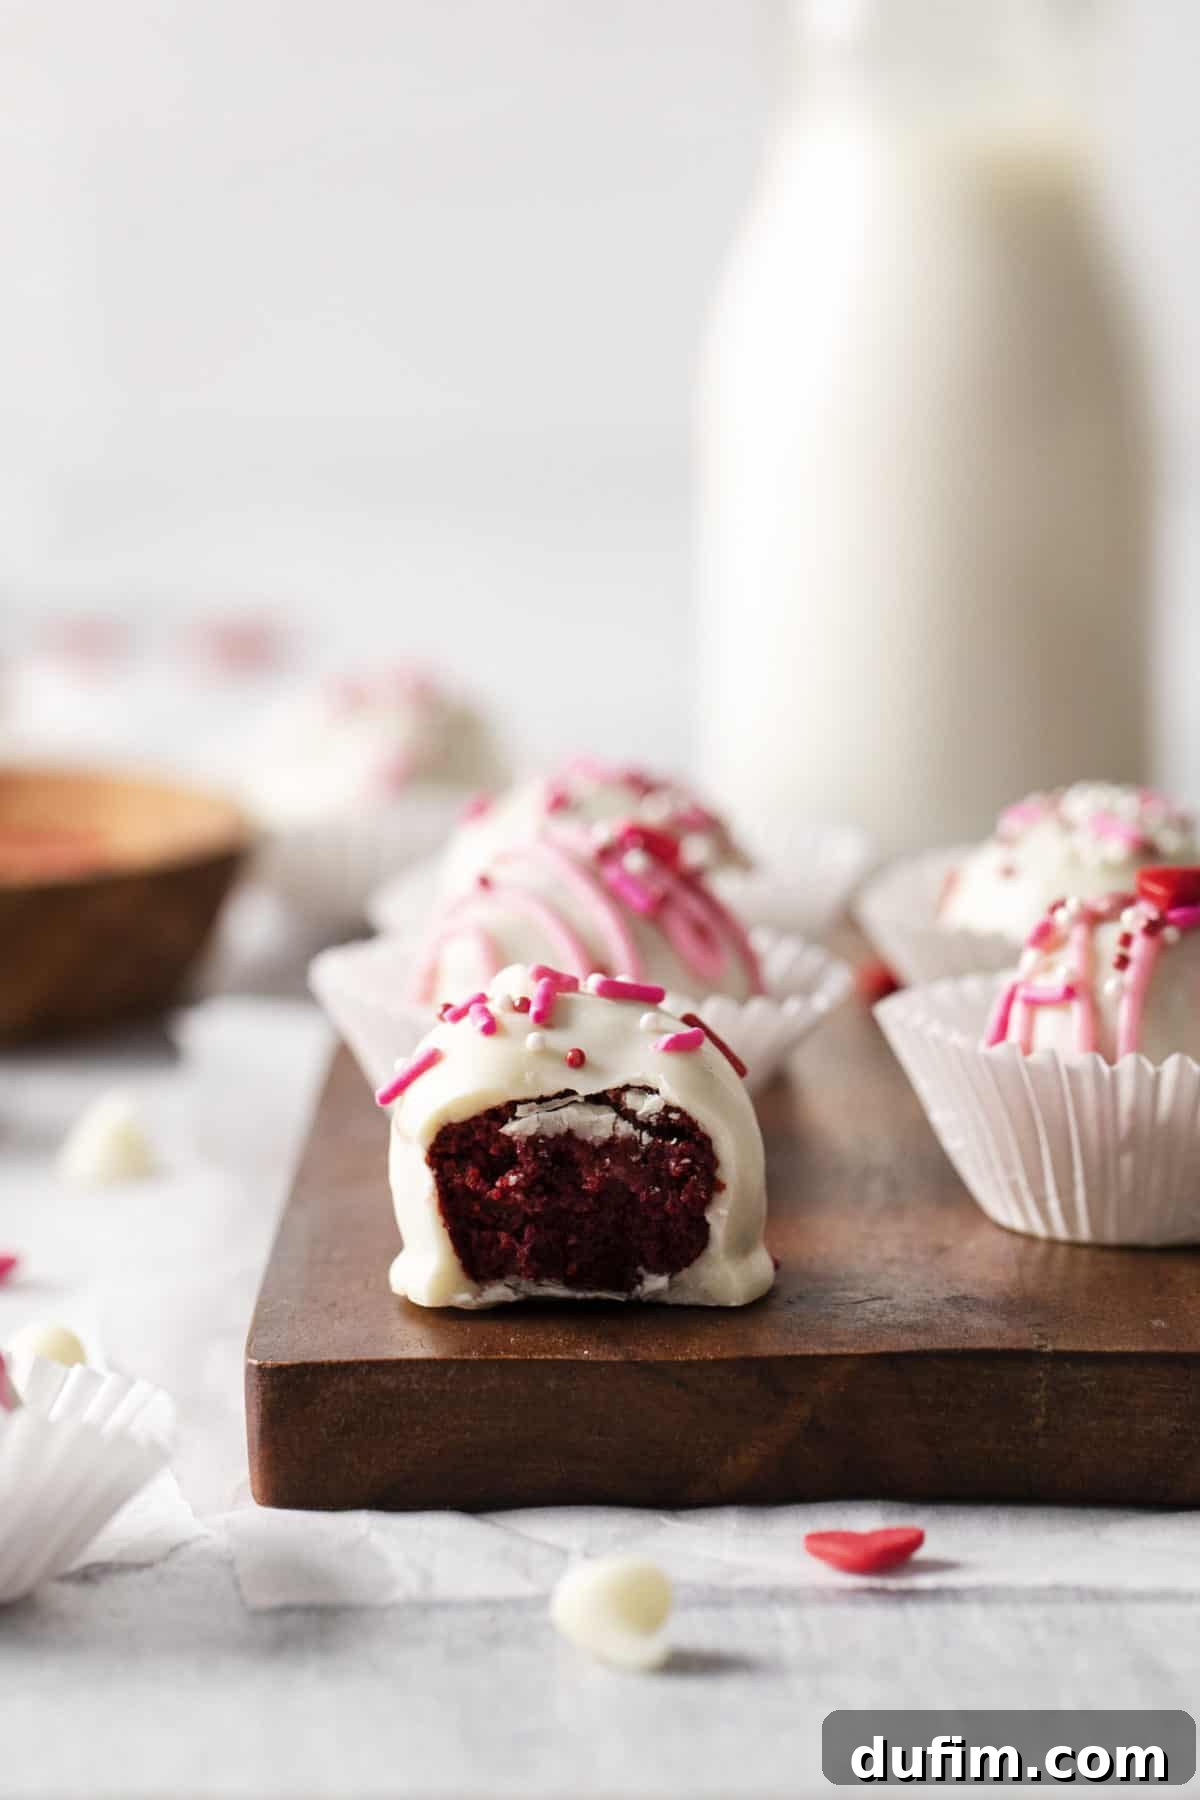
Looking for a show-stopping yet incredibly easy dessert that’s perfect for Valentine’s Day, holidays, or any sweet celebration? These Red Velvet Cake Pops are your answer! Combining the rich flavor of red velvet with the simplicity of a cake mix and store-bought frosting, you can create delightful red velvet truffles that will charm everyone. Get ready to impress with these festive Valentine’s cake pops!
Obsessed with red velvet? Don’t miss our classic red velvet cookies. If chocolate is calling your name, try our indulgent homemade chocolate cake or a light and airy chocolate whipped cream.
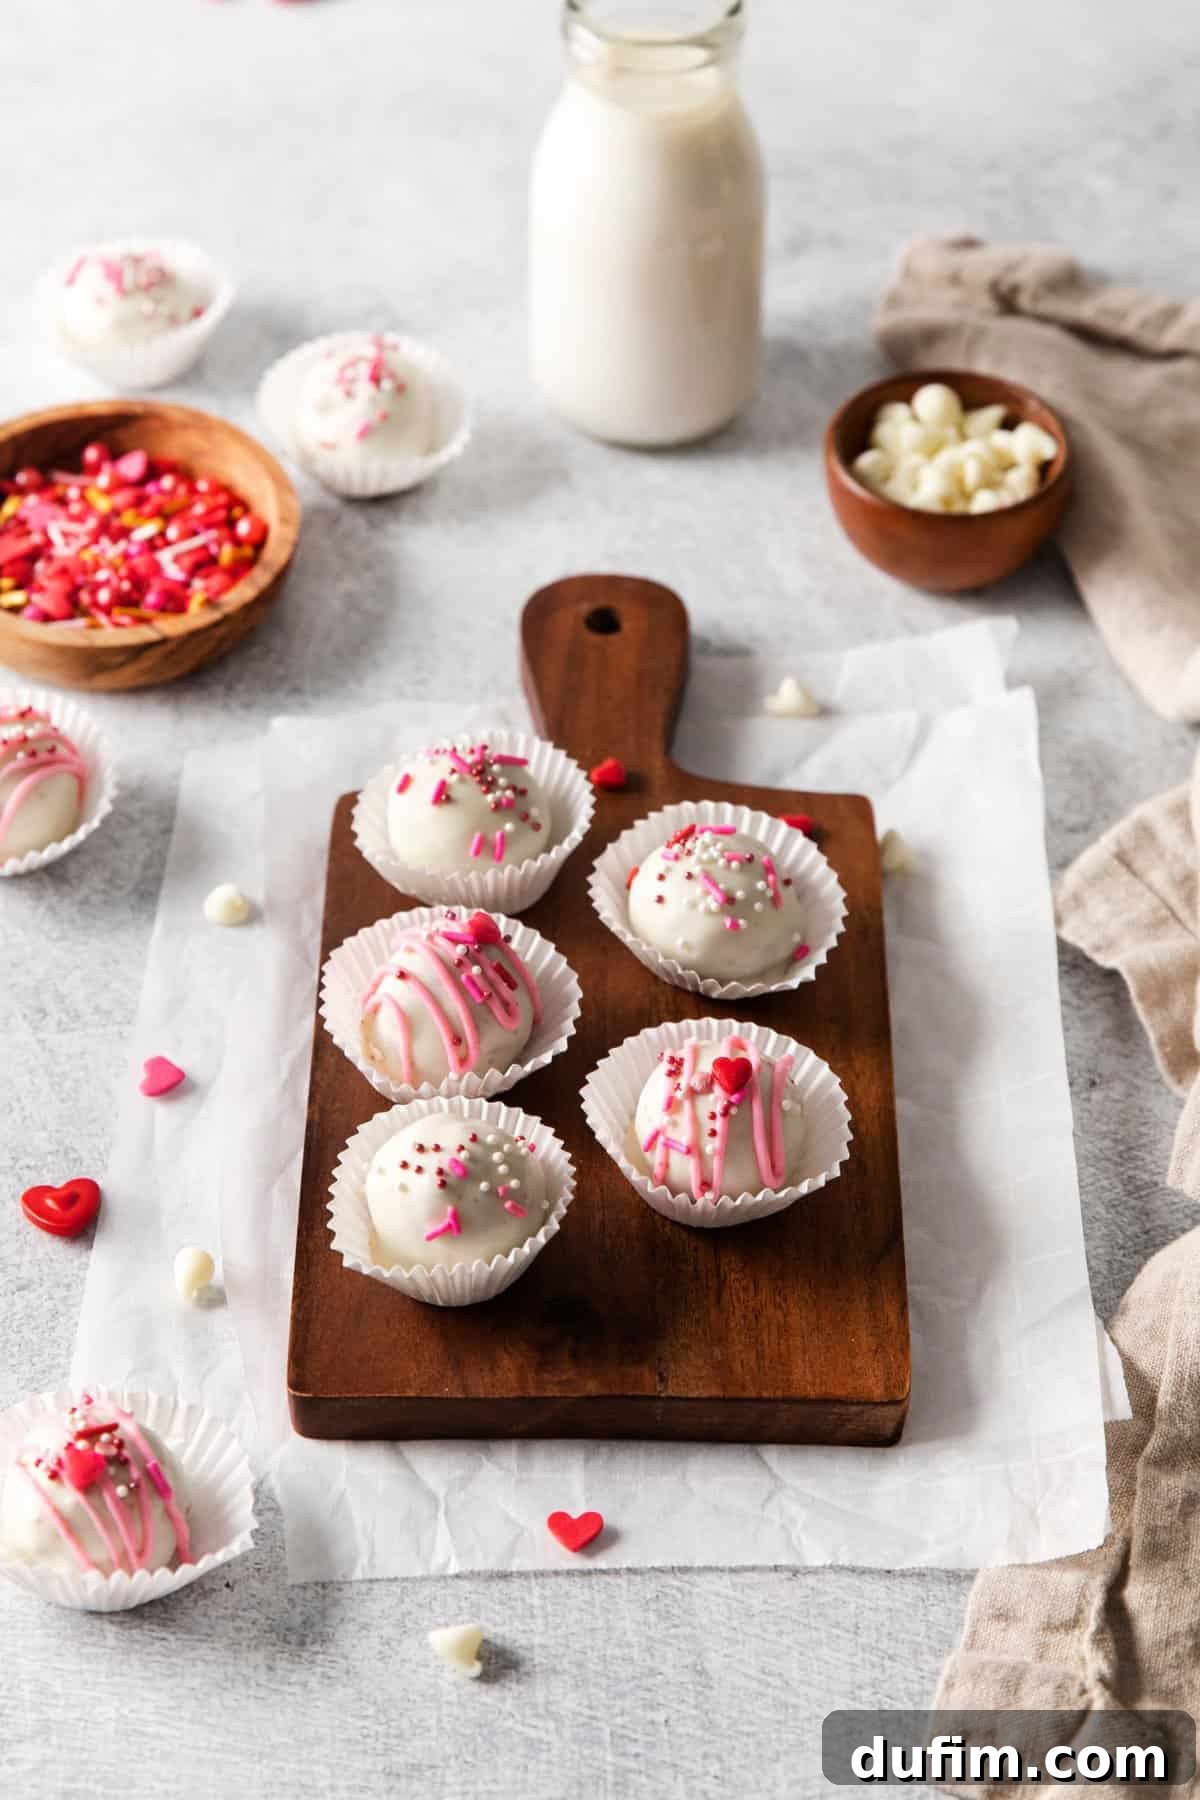
The Easiest Red Velvet Cake Pops You’ll Ever Make
Red velvet cake pops are a beloved treat, celebrated for their vibrant color, moist texture, and delightful flavor. While they might look intricate, this recipe simplifies the process dramatically, making them accessible to even novice bakers. Forget about spending hours from scratch; our version leverages the convenience of a box of red velvet cake mix and ready-made cream cheese frosting. This clever shortcut is the secret to cutting down on preparation time without compromising on taste or presentation.
These festive cake balls are absolutely perfect for Valentine’s Day! Their deep red hue naturally evokes feelings of love and passion, making them an ideal sweet gesture for your loved ones. Beyond Valentine’s, they are fantastic for birthdays, anniversaries, or any occasion where you want to add a touch of elegance and fun to your dessert spread. The combination of moist cake and creamy frosting, enrobed in a smooth chocolate shell, creates an irresistible bite-sized delight.
One of the greatest advantages of using a cake mix and store-bought frosting is the significant reduction in overall prep and bake time. This means less stress in the kitchen and more time to enjoy the celebration. Plus, it makes these cake pops a fantastic last-minute dessert option that still looks and tastes homemade. Don’t forget to explore your local grocery store for an array of charming Valentine’s Day sprinkles – stores like Target often have a fantastic, seasonal selection to make your cake pops truly pop!
Why You’ll Adore These Red Velvet Cake Pops
- Effortless Elegance: Achieve a gourmet look with minimal effort.
- Time-Saving: Boxed cake mix and pre-made frosting drastically cut down on preparation.
- Perfect for Gifting: Beautifully packaged, they make thoughtful edible gifts.
- Versatile: Ideal for Valentine’s Day, holidays, parties, or just a sweet treat.
- Irresistible Flavor: The classic tang of red velvet combined with sweet cream cheese frosting and a chocolate shell is pure bliss.
Essential Equipment for Perfect Cake Pops
Having the right tools can make the cake pop creation process even smoother. While many items are probably already in your kitchen, here’s a quick list to ensure you’re fully prepared:
- Glass Mixing Bowl: Ideal for combining ingredients and melting chocolate.
- Electric Mixer (Optional but Recommended): A KitchenAid 9-Speed Mixer or similar will make crumbling cake and mixing frosting a breeze.
- Baking Sheet: Essential for chilling your cake balls.
- Silicone Baking Mat or Parchment Paper: Prevents sticking and makes cleanup easy.
- Sturdy Spatula: For mixing the cake and frosting until perfectly combined.
- Small Scoop or Tablespoon: To ensure uniform cake ball sizes.
- Fork or Dipping Tools: For easily submerging and removing cake balls from chocolate.
- Tall, Narrow Cup (for cake pops on a stick): Makes dipping stick-mounted cake pops much easier.
- Styrofoam Block (for cake pops on a stick): To hold cake pops upright while the chocolate sets.
Simple Steps to Create Decadent Red Velvet Cake Pops
Making red velvet cake pops is a fun and straightforward process. Follow these easy steps for delicious results:
-
Bake the Cake
Start by preparing your favorite red velvet cake mix according to the package directions. Typically, this involves adding eggs, oil, and water. Bake the cake in a 9×13 inch pan until a toothpick inserted into the center comes out clean. Allow the cake to cool completely before proceeding. This step is crucial; a warm cake will not mix well with frosting and can lead to a greasy, crumbly mixture.
-
Crumble the Cake
Once the cake is fully cooled, crumble it into fine pieces into a large mixing bowl. You can do this by hand for a slightly chunkier texture, or use an electric mixer on low speed for a finer, more uniform crumb. The goal is to break the cake down so it resembles coarse sand or fine breadcrumbs, with no large lumps.
-
Prepare and Mix with Frosting
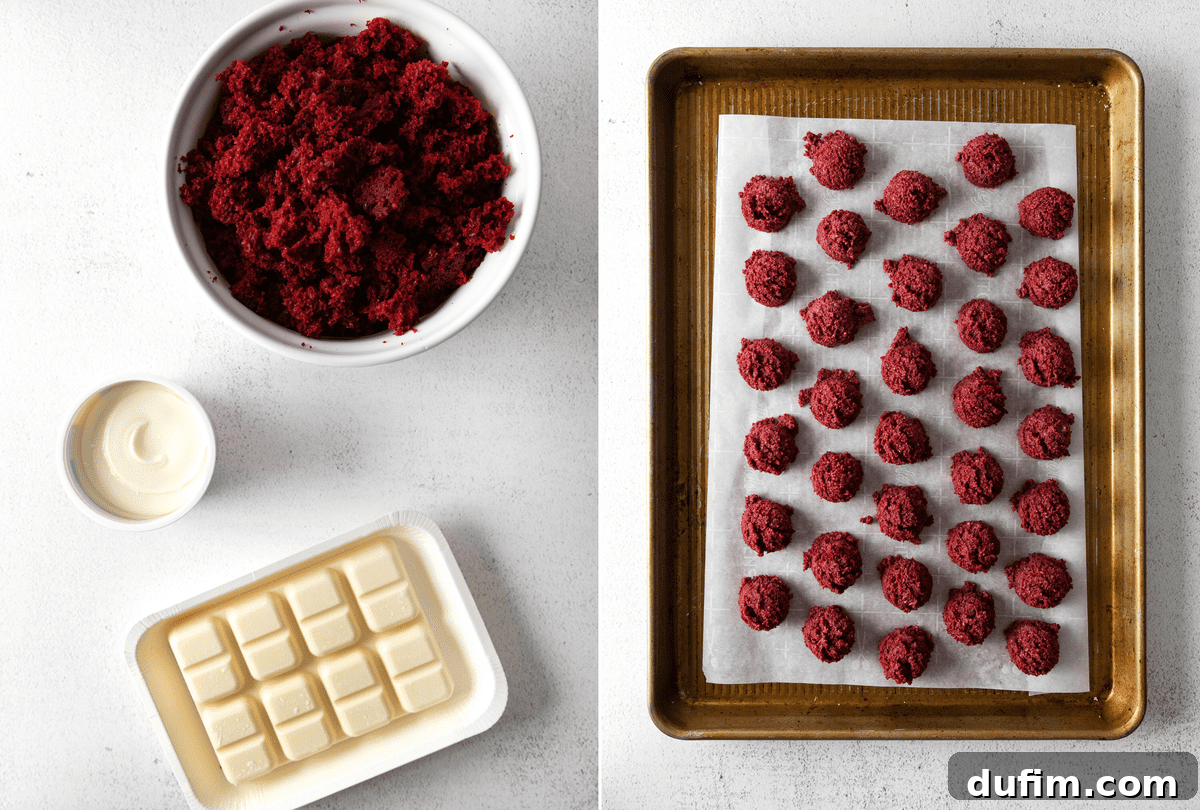
Transfer your store-bought cream cheese frosting into a microwave-safe bowl. Gently microwave it for about 15-20 seconds, or just until it becomes slightly thinned and pourable. This makes it easier to incorporate into the cake crumbs. Add the warmed frosting to the crumbled cake and mix thoroughly, either by hand or with your electric mixer, until the mixture comes together to form a soft, pliable “dough.” It should be sticky enough to hold its shape but not overly wet.
-
Form the Cake Balls
Using a tablespoon or a small cookie scoop, portion out the cake mixture into uniformly sized balls. Place these balls on a baking sheet lined with a silicone mat or parchment paper. Uniform size is key for even dipping and a professional appearance.
-
Chill for 30 Minutes
Refrigerate the formed cake balls for at least 30 minutes. This chilling period is essential for them to firm up, making them easier to roll and dip. You can chill them longer if needed, but avoid freezing them solid, as this can lead to cracking chocolate later.
-
Roll to Smooth Perfection
After chilling, remove the cake balls from the fridge. Take a few at a time and roll them between your palms to create perfectly smooth, round spheres. This step helps eliminate any rough edges and ensures a beautiful, even coating of chocolate. Return the smoothed balls to the fridge as you work through the batch to keep them cold.
-
Dip in Melted Chocolate
Melt your white chocolate almond bark (or preferred chocolate coating) according to its package directions. It’s best to keep the chocolate warm but not scorching hot. Remove only a few cake balls from the fridge at a time for dipping. This helps maintain their cool temperature, which is crucial for a smooth dipping process and to prevent the chocolate from cracking. Dip each ball into the melted chocolate, ensuring it’s fully coated. Let excess chocolate drip off before decorating.
-
Decorate and Harden
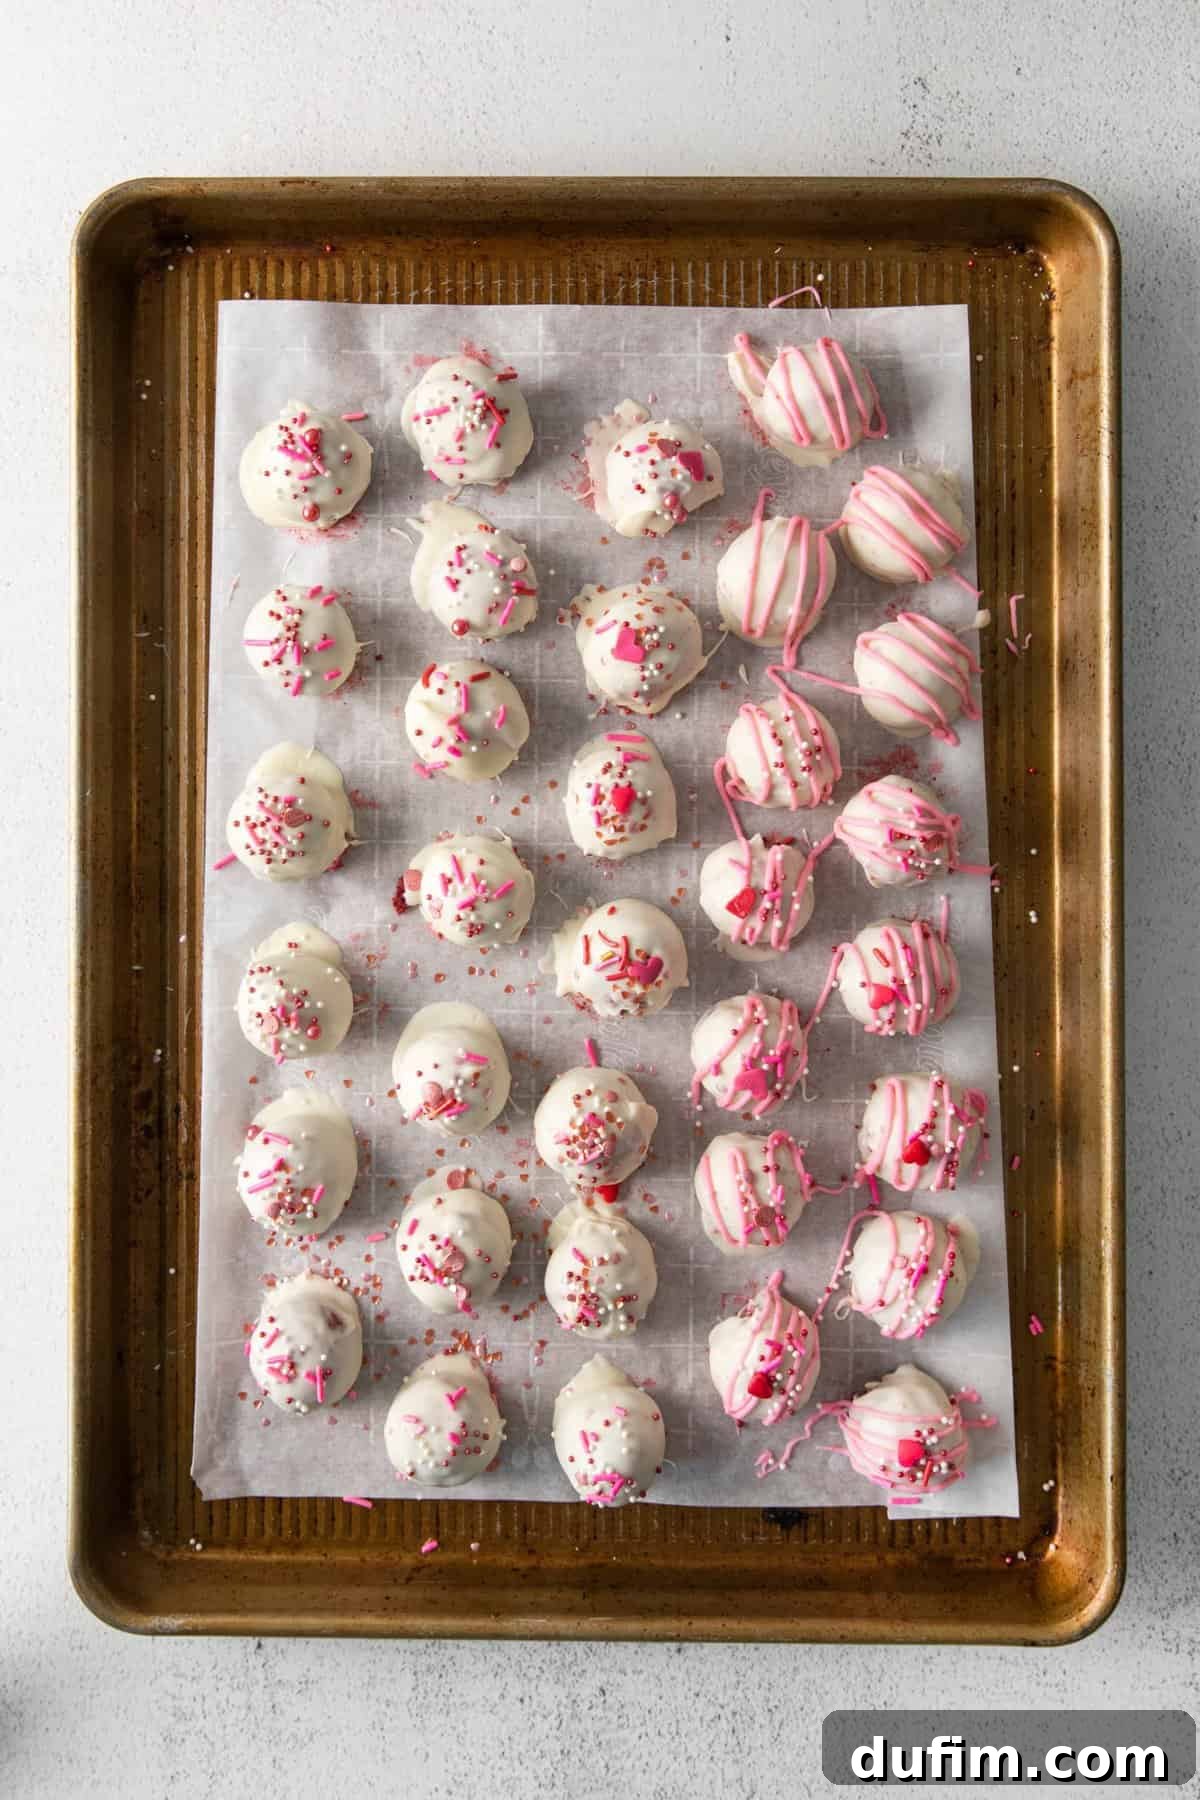
Immediately after dipping, while the chocolate is still wet, adorn your red velvet cake pops with festive sprinkles. If you plan to drizzle with additional colored chocolate, allow the main coating to set for 1-3 minutes first so the sprinkles adhere without falling off. For drizzles, you can add a drop of pink or red food coloring to some of the remaining melted white chocolate. Let the cake pops harden completely at room temperature or in the refrigerator.
Mastering the Dip: Essential Cake Pop Dipping Tips
The key to professional-looking cake pops lies in the dipping process. Here are some crucial tips to ensure a flawless chocolate coating:
-
Temperature of Cake Balls is Key
It’s incredibly important that your cake balls are chilled but not frozen solid before you dip them. If the truffles are too cold or frozen, the chocolate coating will undergo an extreme temperature change when it hits the frigid cake ball. This rapid cooling can cause the chocolate to crack as it sets, ruining the smooth finish. Aim for a firm, cold cake ball straight from the refrigerator, but not one that has been in the freezer for an extended period. Chilling for about 30 minutes in the fridge is usually ideal.
-
Work in Small Batches
To maintain the optimal temperature of your cake balls, only remove a few at a time from the refrigerator to dip. Keeping the majority of the balls cold helps the dipping process go much smoother, ensuring a quick set and preventing the chocolate from getting too thick or gloopy due to warmer cake balls.
-
Efficient Dipping Technique
To dip a cake ball, gently place one into the pot or bowl of melted chocolate. If the chocolate doesn’t fully cover the ball, use a spoon to spoon melted chocolate over the top until it’s completely enrobed. For removing, use a fork to carefully lift the cake ball out of the chocolate. Avoid using a spoon as it can leave too much excess chocolate.
-
Remove Excess Chocolate
Once you’ve lifted the ball out with the fork, gently tap the handle of the fork against the edge of the pot. This helps to shake off any excess chocolate, ensuring a thinner, more even coating. You can also lightly scrape the bottom of the fork on the pot’s edge. Then, carefully transfer the dipped ball back onto your silicone baking mat or parchment paper.
-
Patience with Sprinkles and Drizzles
For best results with sprinkles, add them immediately after dipping while the chocolate is still wet. If you’re adding decorative drizzles (e.g., pink chocolate on a white base), allow the initial chocolate coating to set for a minute or two first. This prevents the drizzle from merging with the base layer and ensures distinct lines.
-
Type of Chocolate Matters
White chocolate almond bark or candy melts are often recommended for cake pops because they melt smoothly, set quickly, and provide a durable, non-cracking shell without needing tempering. If using regular chocolate, you might need to add a touch of coconut oil or shortening to thin it out and improve its consistency for dipping, or consider tempering it for a truly professional shine and snap.
Cake Pops on a Stick: Elevating Your Presentation
While delicious as simple cake truffles, turning them into “cake pops” on a stick adds a playful, elegant touch perfect for parties and dessert bars. Here’s how to create them:
-
Prepare the Sticks: Before inserting, dip one end of each lollipop stick about half an inch into the melted chocolate. This acts as a “glue” to secure the stick firmly within the cake ball.
-
Insert Sticks: Carefully insert the chocolate-dipped end of the stick into the center of a chilled cake ball, pushing it in about halfway. Ensure the stick is centered for stability.
-
Second Chill (Optional but Recommended): Once all sticks are inserted, you can place the cake pops back in the fridge for 5-10 minutes to allow the “glue” chocolate to fully harden, ensuring the cake balls stay on the sticks during dipping.
-
Dipping with Sticks: Transfer your melted chocolate into a tall, narrow cup. This shape makes it easier to fully submerge the cake pop without dipping the stick too much. Hold the cake pop by the stick and dip it smoothly into the chocolate, twirling it gently to ensure full coverage.
-
Drip and Decorate: Lift the cake pop out, gently rotating and tapping the stick against the cup’s edge to remove excess chocolate. Decorate immediately with sprinkles while the chocolate is wet. For drying, insert the stick into a piece of styrofoam or a cardboard box with small holes, allowing the chocolate to harden completely without touching any surface.
Storing Your Delicious Cake Pops and Truffles
Proper storage is essential to keep your red velvet cake pops fresh and delicious. Since they contain cream cheese frosting, refrigeration is generally recommended.
According to FDA guidelines, perishable items containing cream cheese should not be left at room temperature for more than 2 hours. For optimal freshness and safety, store your finished cake pops or truffles in an airtight container in the refrigerator. They will remain fresh and delightful for up to three days.
If you need to store them for longer, cake pops freeze remarkably well! Place them in a single layer on a baking sheet to freeze solid, then transfer them to an airtight freezer-safe container or bag. They can be stored in the freezer for up to 1-2 months. When ready to enjoy, simply thaw them in the refrigerator overnight or at room temperature for a couple of hours.

Beyond Red Velvet: Creative Cake Pop Variations
While red velvet is a timeless favorite, the cake pop concept is incredibly versatile! Once you master this basic recipe, you can experiment with endless flavor combinations:
- Chocolate Lover’s Dream: Use chocolate cake mix and chocolate fudge frosting, then dip in dark or milk chocolate.
- Lemon Zest: Lemon cake mix with lemon cream cheese frosting, dipped in white chocolate and garnished with lemon zest.
- Birthday Funfetti: Vanilla cake mix with vanilla frosting and plenty of sprinkles, coated in white chocolate.
- Seasonal Flavors: Pumpkin spice cake with cream cheese frosting for fall, or peppermint chocolate cake for winter holidays.
The possibilities are only limited by your imagination. Experiment with different cake mixes, frosting flavors, and chocolate coatings to find your next favorite cake pop combination!
Other Delightful Valentine’s Day Treats
If you’re planning a full spread of sweet treats for Valentine’s Day or any special occasion, consider these other delectable options:
- Maraschino Cherry Chocolate Chip Cookies
- Classic Cut Out Sugar Cookies
- Rich Chocolate Cheesecake
- Easy Chocolate Mousse
Frequently Asked Questions About Cake Pops
Can I use homemade cake and frosting?
Absolutely! While this recipe focuses on shortcuts for ease, you can certainly use your favorite homemade red velvet cake and cream cheese frosting. Just ensure the cake is completely cooled and crumbled, and the frosting is slightly warmed for easier mixing.
What kind of chocolate is best for dipping?
White chocolate almond bark or candy melts are highly recommended because they melt smoothly, set quickly, and create a hard shell that resists cracking. If using pure chocolate, you might need to temper it or add a small amount of paramount crystals or coconut oil to achieve the right consistency and prevent bloom.
My chocolate is too thick for dipping. What should I do?
If your melted chocolate is too thick, add a teaspoon of coconut oil, vegetable shortening, or paramount crystals at a time, stirring well after each addition, until you reach a smooth, pourable consistency. Be careful not to add too much, or the chocolate might not set properly.
Why did my chocolate coating crack?
Cracking usually occurs if the cake balls are too cold (especially frozen) when dipped into warm chocolate. The extreme temperature difference causes the chocolate to contract too quickly. Ensure your cake balls are just chilled from the refrigerator, not frozen.
How far in advance can I make cake pops?
You can prepare cake pops up to 2-3 days in advance if stored in an airtight container in the refrigerator. If you need to make them further ahead, they can be frozen for up to 1-2 months. Thaw them in the refrigerator before serving.
These Red Velvet Cake Pops are truly a celebration in miniature! Whether you’re making them for Valentine’s Day, a birthday, or simply as a delightful treat for yourself, their ease of preparation and stunning results make them a winning recipe. Enjoy the process of creating these beautiful bites, and delight in the sweet, tangy flavor of red velvet enrobed in a crisp chocolate shell. Happy baking!
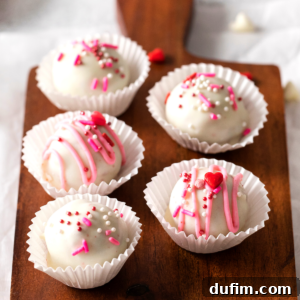
Red Velvet Cake Pops Recipe
By: Beth
Prep Time: 25 minutes
Chill Time: 1 hour (includes 30 mins initial chill, plus additional cooling/setting)
Servings: 36 cake pops
Ingredients
- 1 box (15.25 oz) red velvet cake mix, prepared according to package directions
- 1 container (16 oz) cream cheese frosting, store-bought
- 1 package (16 oz) white chocolate almond bark
- Sprinkles (optional, for decoration)
Instructions
- Prepare the cake according to the package directions. Bake in a 9×13 inch pan. Allow it to cool completely before making the truffles.
- Once the cake has cooled, crumble it into small pieces and place it in a large bowl.
- Transfer the cream cheese frosting to a microwave-safe bowl and microwave it for 15-20 seconds, or just until it is thinned and pourable.
- Add the warm frosting to the crumbled cake and stir until the mixture comes together in a soft dough.
- Scoop out 1 tablespoon sized balls and place them on a silicone mat or parchment paper lined baking sheet.
- Refrigerate the balls for 30 minutes. You can refrigerate them longer if needed.
- Melt the white chocolate bark according to the package directions. Meanwhile, once the balls are cold, roll them between your hands to create smooth, even balls. Return the balls to the fridge. Only remove a few at a time to dip, keeping the balls cold will help the dipping process go smoother.
- To dip, place 1 ball in the pot with melted chocolate. Use a spoon to spoon chocolate on top, if needed. To remove the ball, use a fork to lift it out of the chocolate. To remove excess chocolate from the ball on the fork, scrape the bottom of the fork on the edge of the pot, then put the ball back on the silicone baking mat. Continue this process until all the balls are dipped. I like to let each ball sit for about 1-3 minutes before adding sprinkles – that way the pieces don’t fall off the ball because the chocolate isn’t too hot. If you want to drizzle them with pink chocolate, add pink food coloring to the remaining chocolate.
- Allow them to harden at room temperature. Serve and enjoy. Store in the fridge for up to three days.
Notes
If you’d like to create cake pops on a stick, dip the stick 1/2 inch into the melted chocolate and insert into the center of the ball. Insert the stick about halfway into the cake ball. Transfer the melted chocolate into a tall, narrow cup. Dip each cake ball in the chocolate. Place the stick on a piece of styrofoam while the chocolate hardens.
Nutrition Information (Approximate per serving)
Calories: 194kcal | Carbohydrates: 28g | Protein: 1g | Fat: 9g | Saturated Fat: 5g | Polyunsaturated Fat: 1g | Monounsaturated Fat: 1g | Sodium: 128mg | Potassium: 44mg | Fiber: 1g | Sugar: 24g | Vitamin A: 1IU | Calcium: 18mg | Iron: 1mg
Nutrition Disclosure
All nutritional values are approximate and provided to the reader as a courtesy. Changing ingredients and/or quantities will alter the estimated nutritional calculations.