
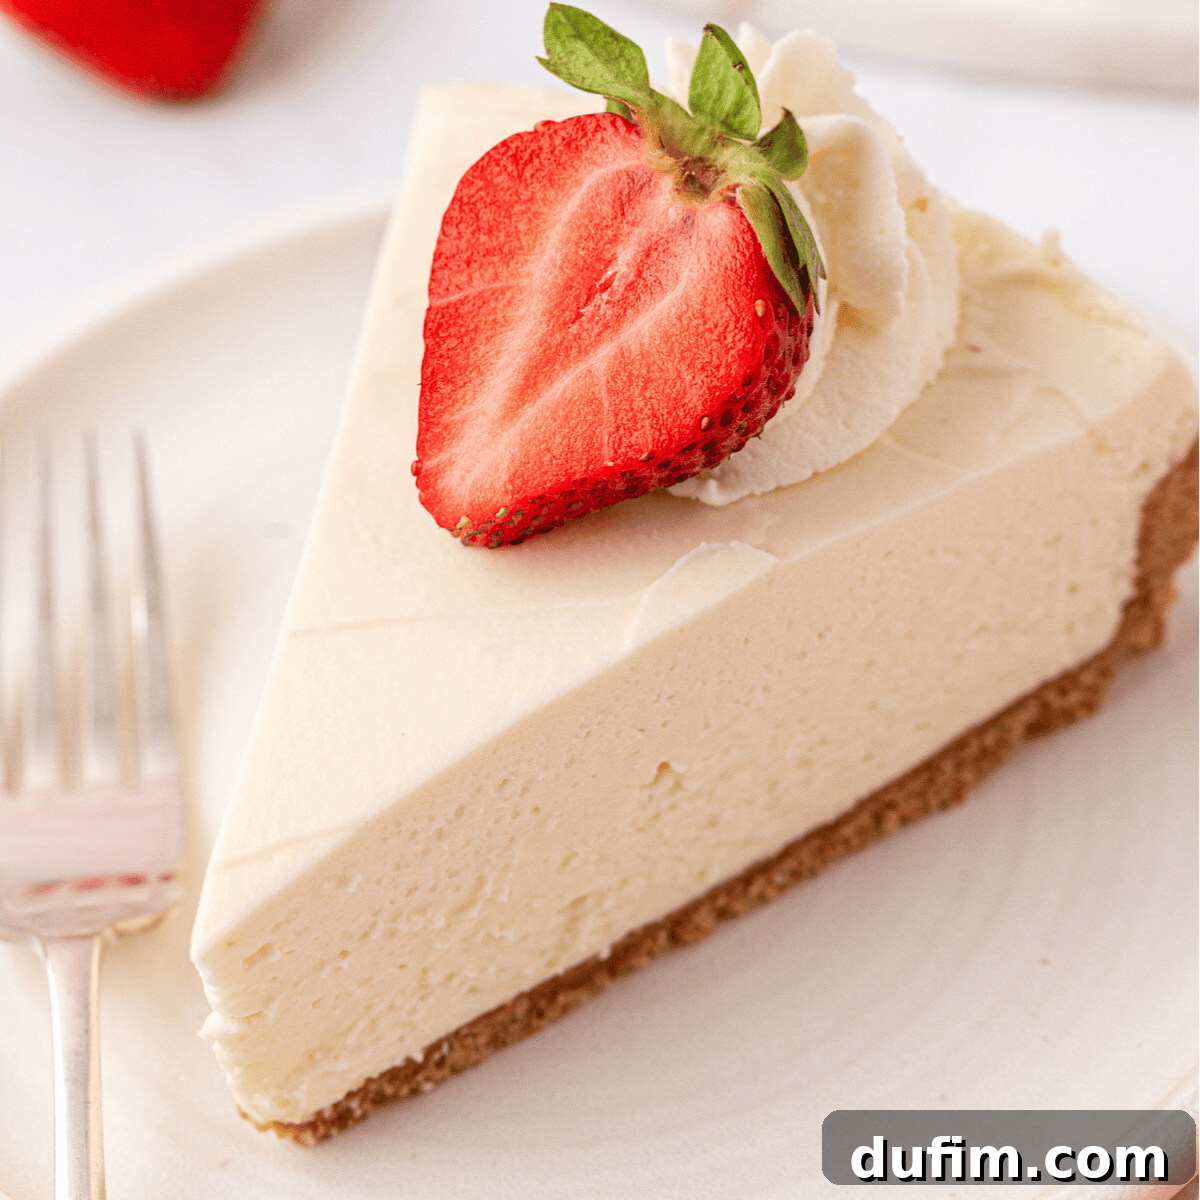
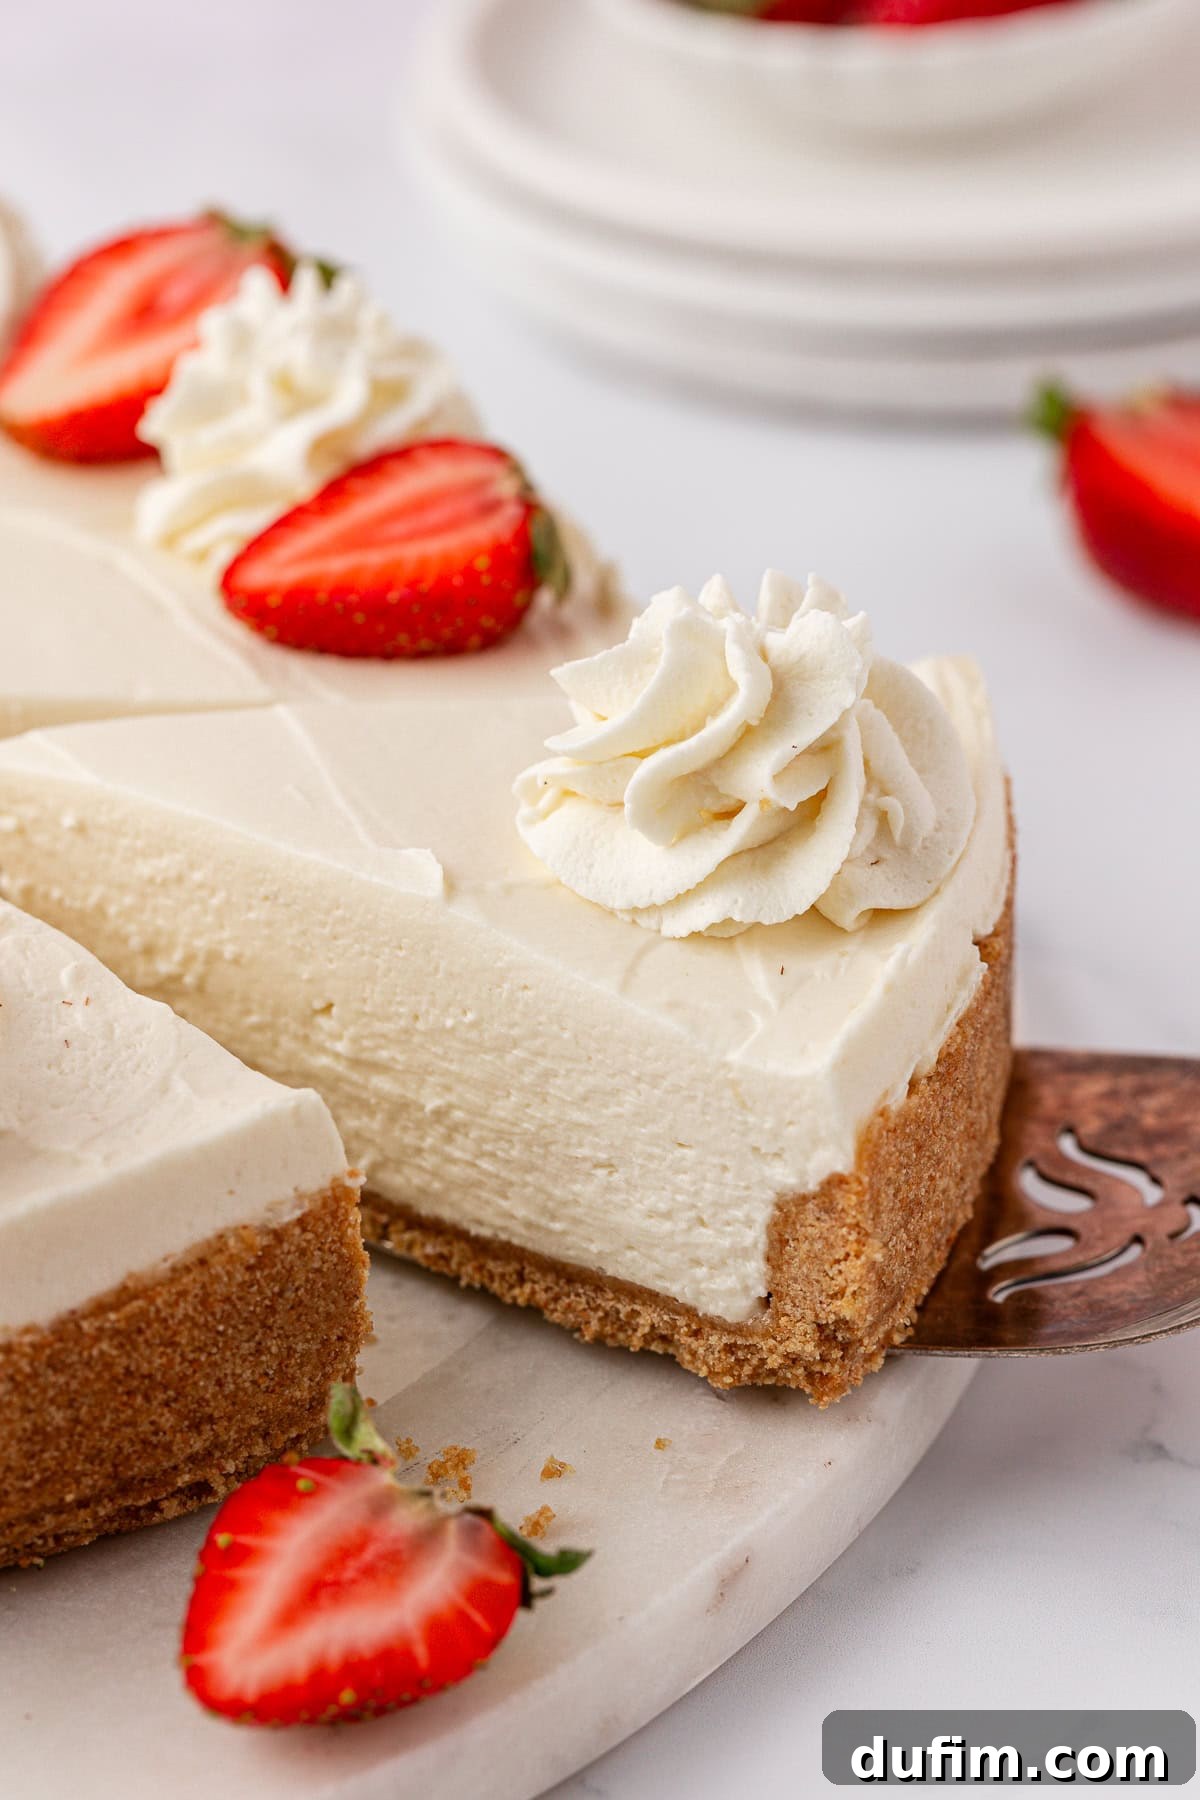
After countless trials and numerous frustrating failures—from fillings that wouldn’t set to slices that tragically collapsed—I finally perfected this no-bake cheesecake recipe. The secret to its impeccable texture and unwavering stability lies not in exotic ingredients, but in a precise, game-changing technique: separately whipping the cream cheese and the heavy cream. This method guarantees an exceptionally fluffy, rich, and remarkably thick cheesecake that consistently holds its shape, delivering perfect slices every time.
Say goodbye to unreliable no-bake recipes that demand gelatin or leave you with a dessert that refuses to hold its form. This thoroughly tested and proven method allows you to effortlessly create a stunning cheesecake with clean, precise slices. Trust me, I’ve navigated every possible pitfall and tested every wrong approach, so you can confidently follow these steps and achieve dessert perfection on your very first try, enjoying a truly stable and delicious no-bake cheesecake without the fuss.
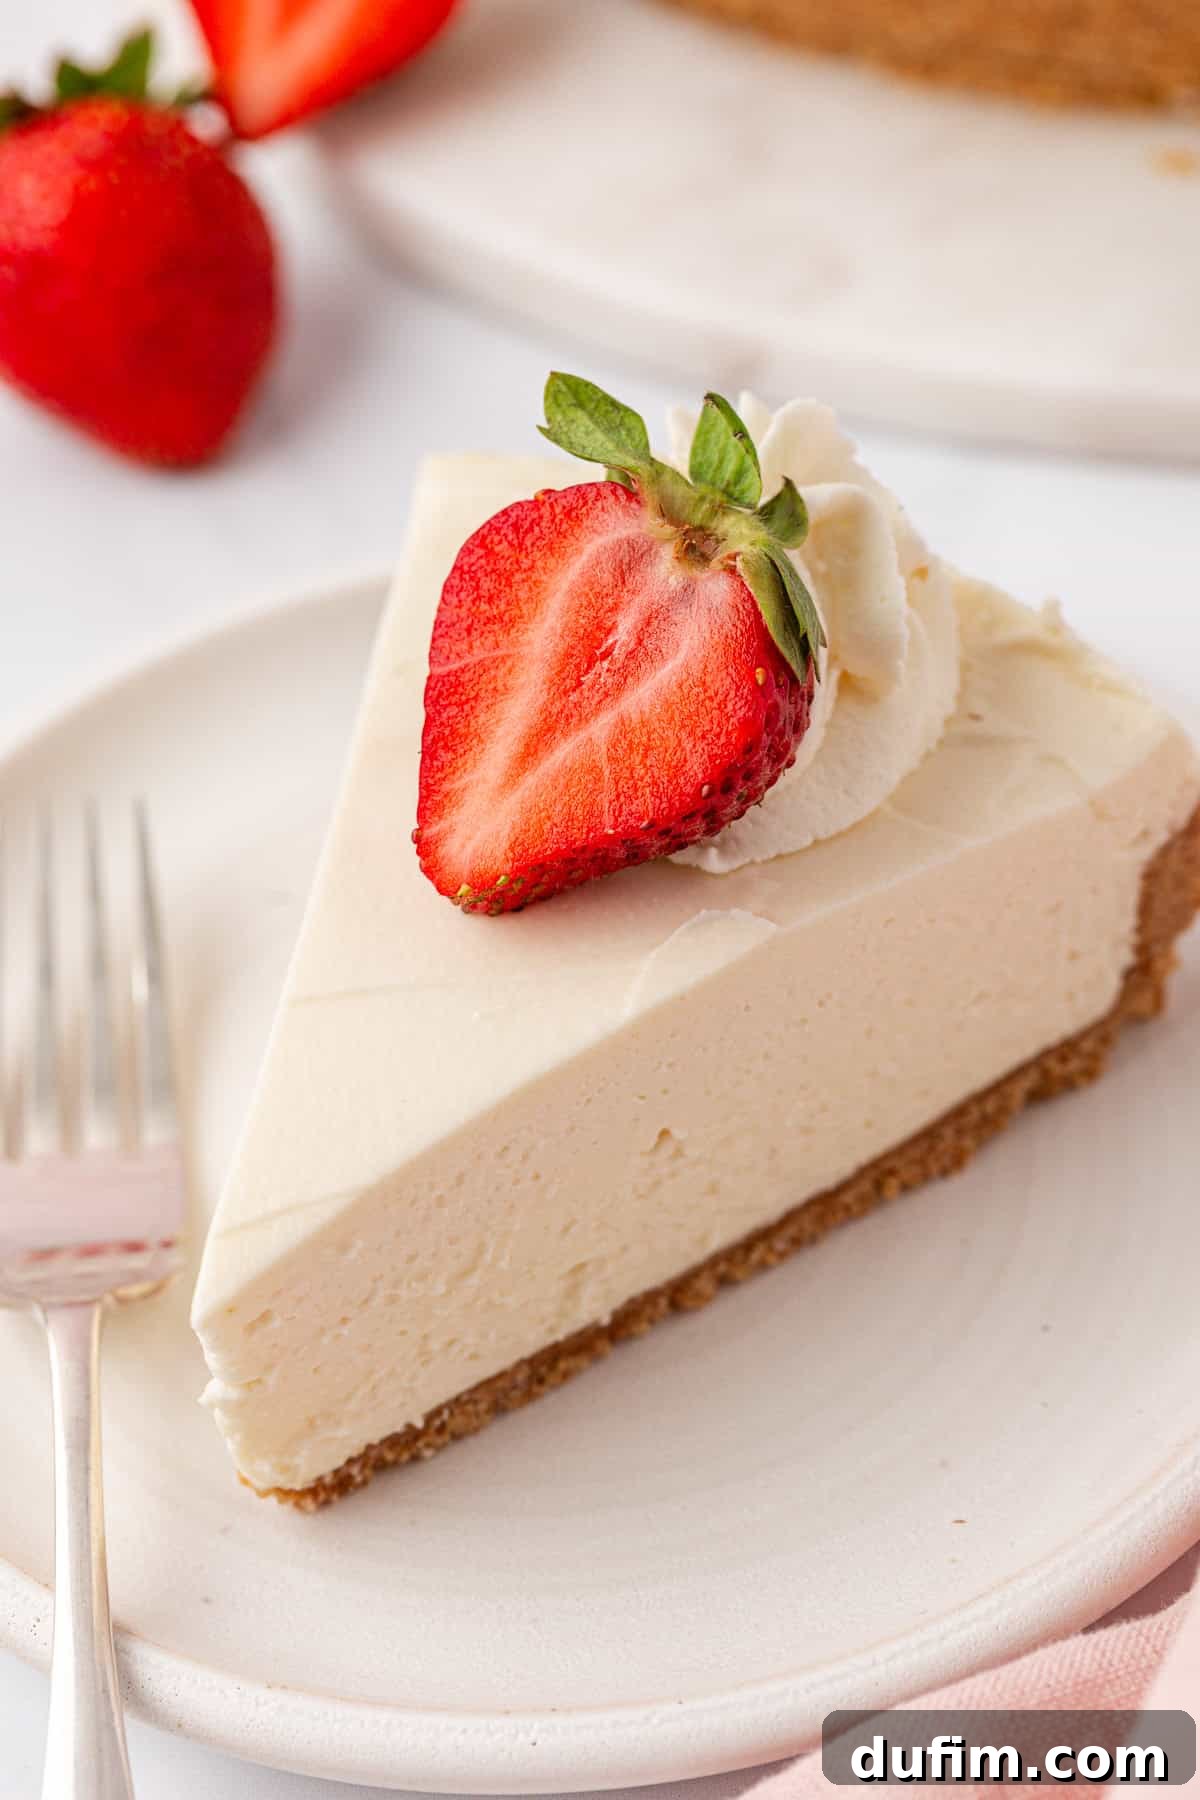
“This cheesecake recipe is absolutely the best, I’ve used it countless times with perfect results!”
– Bernie
Why You’ll Adore This Easy No-Bake Cheesecake Recipe
The allure of a no-bake cheesecake is undeniable: a delightful dessert that promises the rich, tangy creaminess of a classic cheesecake without the fuss of baking. Yet, many home bakers encounter frustrating challenges—fillings that refuse to set, textures that are either too dense or too soft, and slices that simply fall apart upon serving. I understand these struggles intimately because I faced every single one of them during my week-long quest to perfect this very recipe. This wasn’t a quick fix; it involved meticulous testing, careful ingredient adjustments, and, most importantly, a complete re-evaluation of the combining technique.
My primary hurdle was achieving a filling that would set firmly yet remain wonderfully light and airy. After three rounds of disheartening failures and experimenting with various ratios and methods, I pinpointed the core issue: the way the cream cheese and whipping cream were initially incorporated. Many conventional recipes often suggest simply mixing everything together, but this approach compromises the delicate aeration and structural integrity needed for a truly stable no-bake dessert. The breakthrough came from a small but critical modification that transformed my runny attempts into the impeccably structured, creamy cheesecake you see today.
The game-changing technique involves two distinct whipping stages that maximize volume and stability. First, full-fat cream cheese is beaten separately with a portion of the powdered sugar until it’s incredibly smooth, light, and utterly lump-free. This creates a stable, rich, and velvety base. Second, very cold heavy whipping cream is vigorously whisked with the remaining powdered sugar, a touch of fresh lemon juice, and pure vanilla extract until it forms stiff, voluminous peaks. The magic truly happens when these two perfectly prepared components—the creamy cheese base and the airy whipped cream—are gently folded together. This careful, gentle integration ensures the mixture retains its maximum aeration and develops a thick, luxurious consistency that firms up beautifully when chilled, requiring absolutely no gelatin.
I’m thrilled to share this thoroughly tested method because I want you to bypass the common frustrations often associated with no-bake cheesecakes. You won’t have to worry about a collapsed dessert or a filling that lacks body and refuses to hold its shape. I’ve navigated all the trial and error, troubleshooting every common issue, so that your baking journey can be smooth, straightforward, and successful from the very start. This recipe isn’t just easy; it’s foolproof, designed to deliver a velvety smooth, rich, yet delightfully airy cheesecake filling atop a perfectly buttery graham cracker crust. It’s ready to impress for any occasion, all without ever needing to turn on your oven.
This recipe truly embodies the best of both worlds: the decadent taste and satisfying texture of a classic cheesecake combined with the effortless preparation of a no-bake dessert. Whether you opt for the convenience of store-bought Cool Whip or prefer to whip your own homemade whipped cream for an extra touch of fresh flavor and superior texture, this recipe adapts beautifully. We’ll also walk you through simple, expert tips to ensure every slice you cut is flawlessly clean, sharp, and picture-perfect, making your dessert presentation as impressive as its taste.
Essential Ingredients for Your Philadelphia No-Bake Cheesecake
Creating a perfectly stable, wonderfully fluffy, and beautifully sliceable no-bake cheesecake hinges on using the right, high-quality ingredients and, crucially, incorporating them with the correct technique. While the ingredient list is refreshingly straightforward, each component plays a vital role in achieving that desired rich, creamy texture without the need for baking or relying on gelatin for structure.
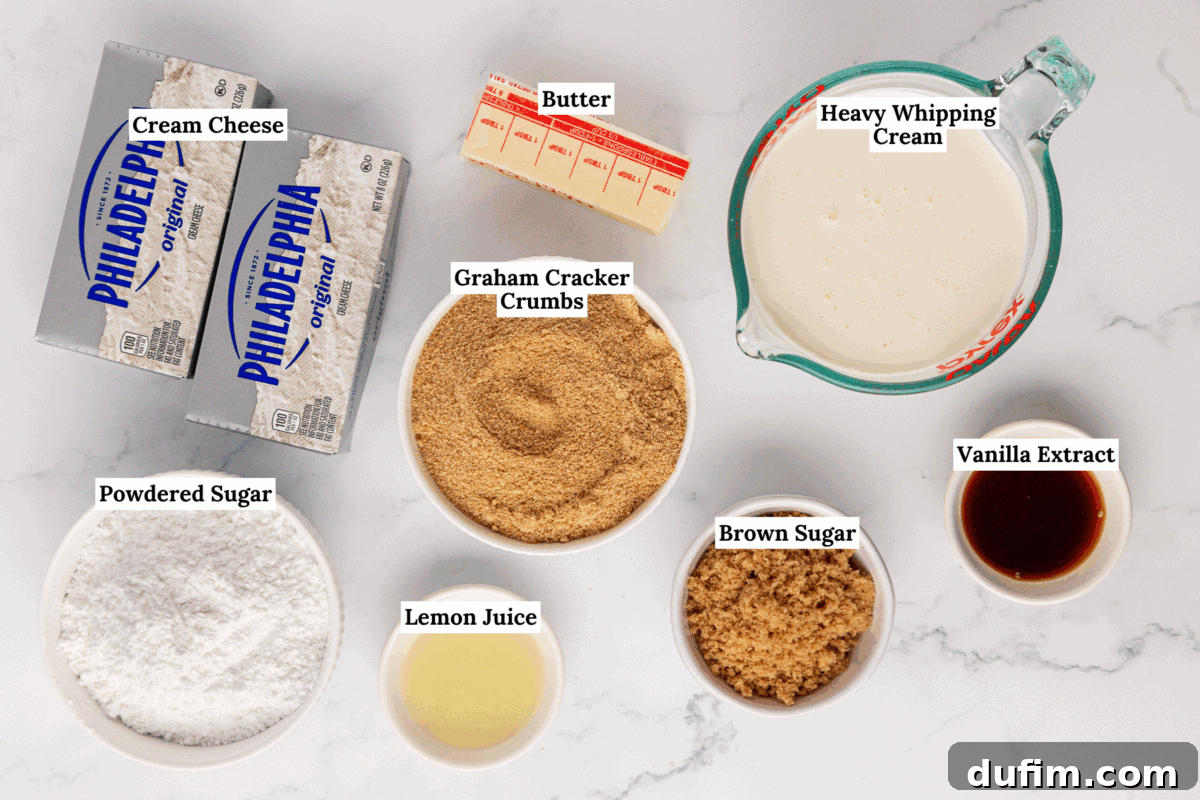
Remember, the resounding success of this cheesecake is deeply rooted in how you combine these high-quality ingredients, so pay close attention to the instructions!
- Graham Cracker Crumbs: You’ll need about 9 full graham crackers to make 1 ½ cups of crumbs. For ultimate convenience, pre-crushed graham cracker crumbs are readily available at most grocery stores, typically located near the premade pie crusts. These form the foundational, buttery, and slightly spiced crust.
- Light Brown Sugar: This ingredient adds a subtle molasses flavor and helps bind the graham cracker crumbs together, contributing to the crust’s rich golden hue and delightful sweetness. It also aids in creating a firm, cohesive crust.
- Unsalted Butter: Melted butter is absolutely essential for holding the graham cracker crumbs together. It creates a firm, flavorful crust that won’t crumble when sliced, providing the perfect counterpoint to the creamy filling.
- Full-Fat Cream Cheese: This is the undisputed star of your cheesecake filling. It’s crucial to ensure it’s softened to room temperature before you begin. This allows for optimal whipping, resulting in a perfectly smooth, velvety, and lump-free consistency. Full-fat varieties provide the necessary richness, tang, and body for a stable filling.
- Heavy Whipping Cream: When very cold and whipped to stiff peaks, this provides the crucial airy volume and stable structure for the cheesecake filling. It’s the key to achieving a light yet firm texture without needing gelatin.
- Powdered Sugar (Confectioners’ Sugar): This fine sugar not only sweetens the filling but also plays a significant role in stabilization, helping both the cream cheese and whipped cream maintain their distinct textures. Using powdered sugar ensures a smooth, non-gritty finish.
- Fresh Lemon Juice: Do not be tempted to skip this! While the cheesecake won’t taste overtly lemony, a tablespoon of fresh lemon juice is a secret weapon. It brightens the overall flavors, subtly cuts through the richness of the dairy, and enhances the natural tang of the cream cheese, contributing significantly to the cheesecake’s balanced profile.
- Vanilla Extract: A classic flavor enhancer that beautifully rounds out the sweetness and creamy notes, adding depth, warmth, and a comforting aroma to your finished cheesecake.
Mastering the Easy No-Bake Cheesecake: A Step-by-Step Guide to Perfection
The journey to a flawless no-bake cheesecake is surprisingly simple once you understand and adhere to the core technique. My extensive recipe testing revealed that the key to a stable, fluffy, and perfectly set filling—without the need for gelatin—is to whip the cream cheese and heavy cream separately before gently combining them. This meticulous approach ensures maximum volume and structural stability, resulting in a cheesecake that not only tastes incredible but also slices beautifully every time. Follow these detailed steps for guaranteed success and a show-stopping dessert.
Part 1: Crafting the Buttery Graham Cracker Crust
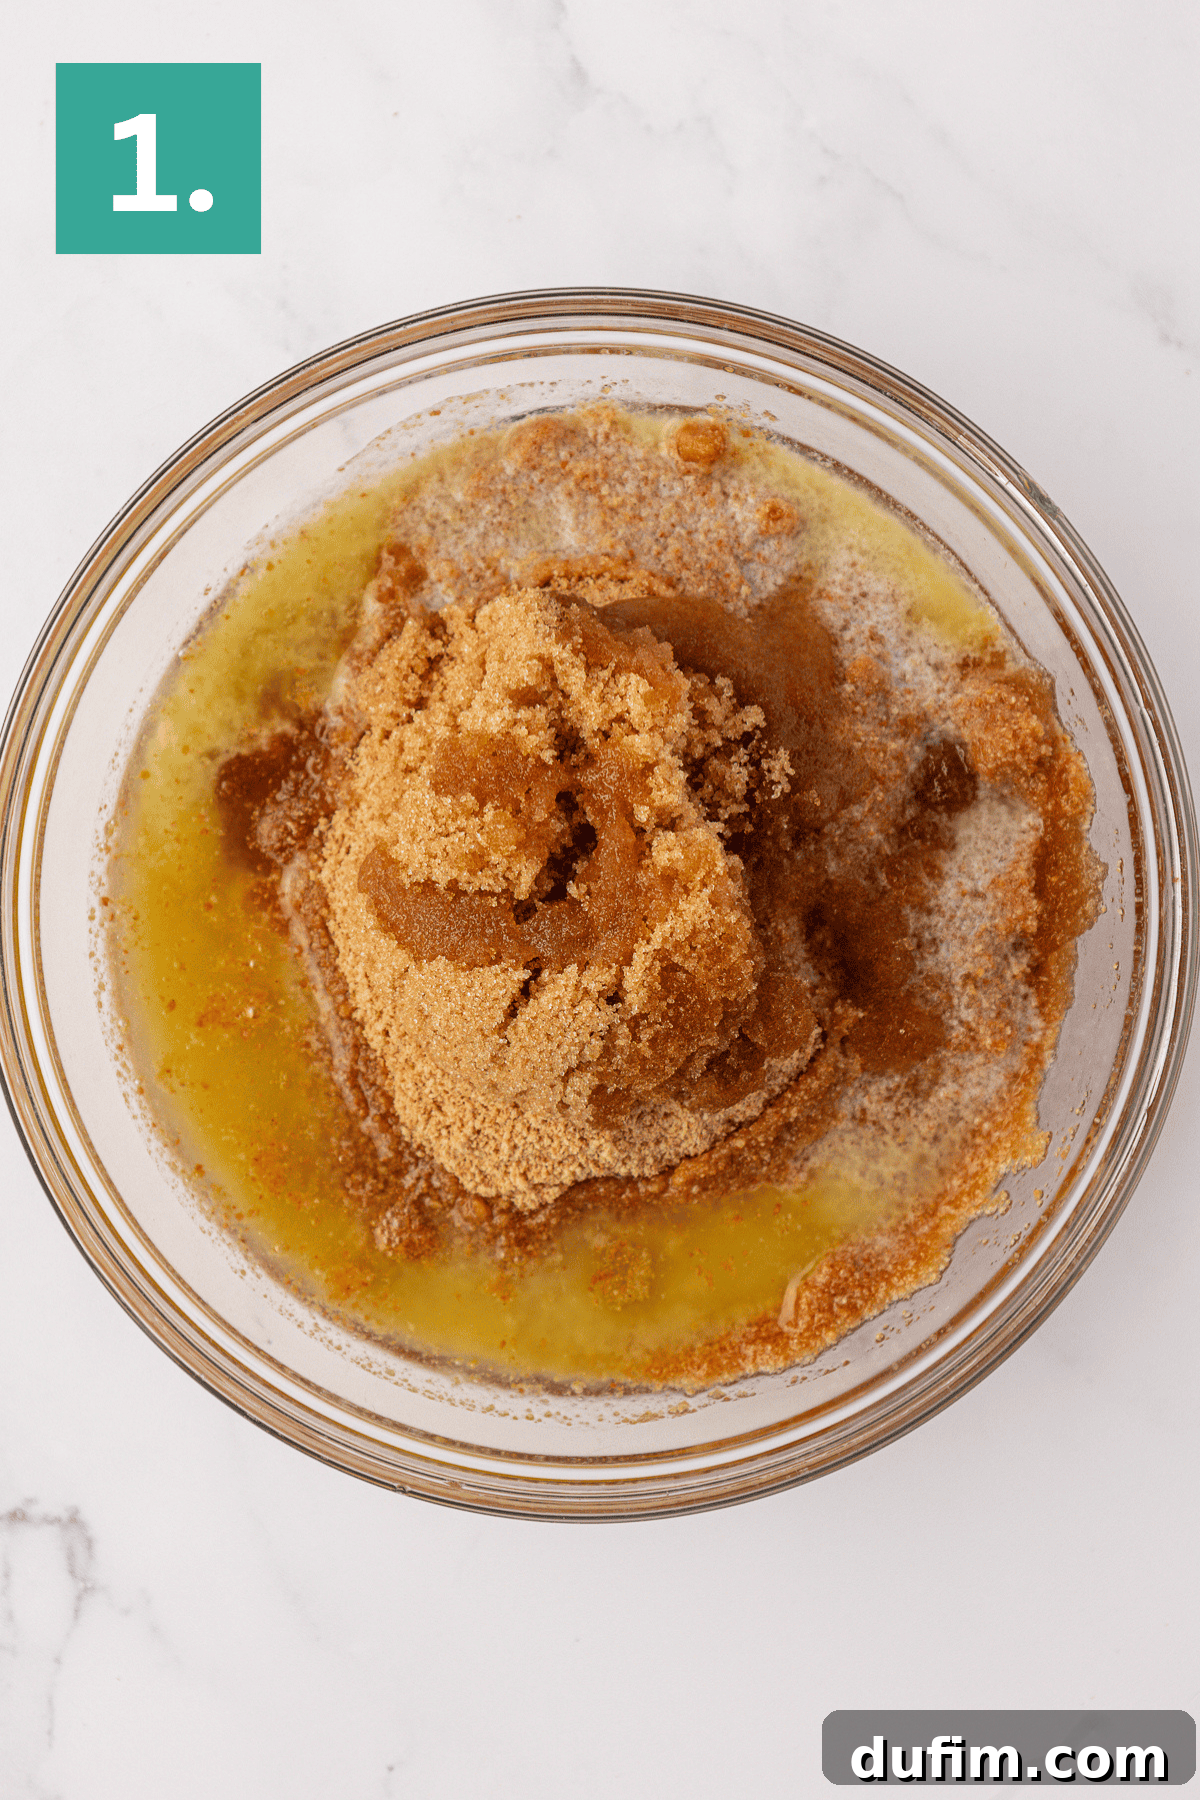
- In a medium-sized mixing bowl, combine the finely crushed graham cracker crumbs, light brown sugar, and thoroughly melted unsalted butter. Ensure the butter is fully melted but not scorching hot, as this can affect the crust’s texture.
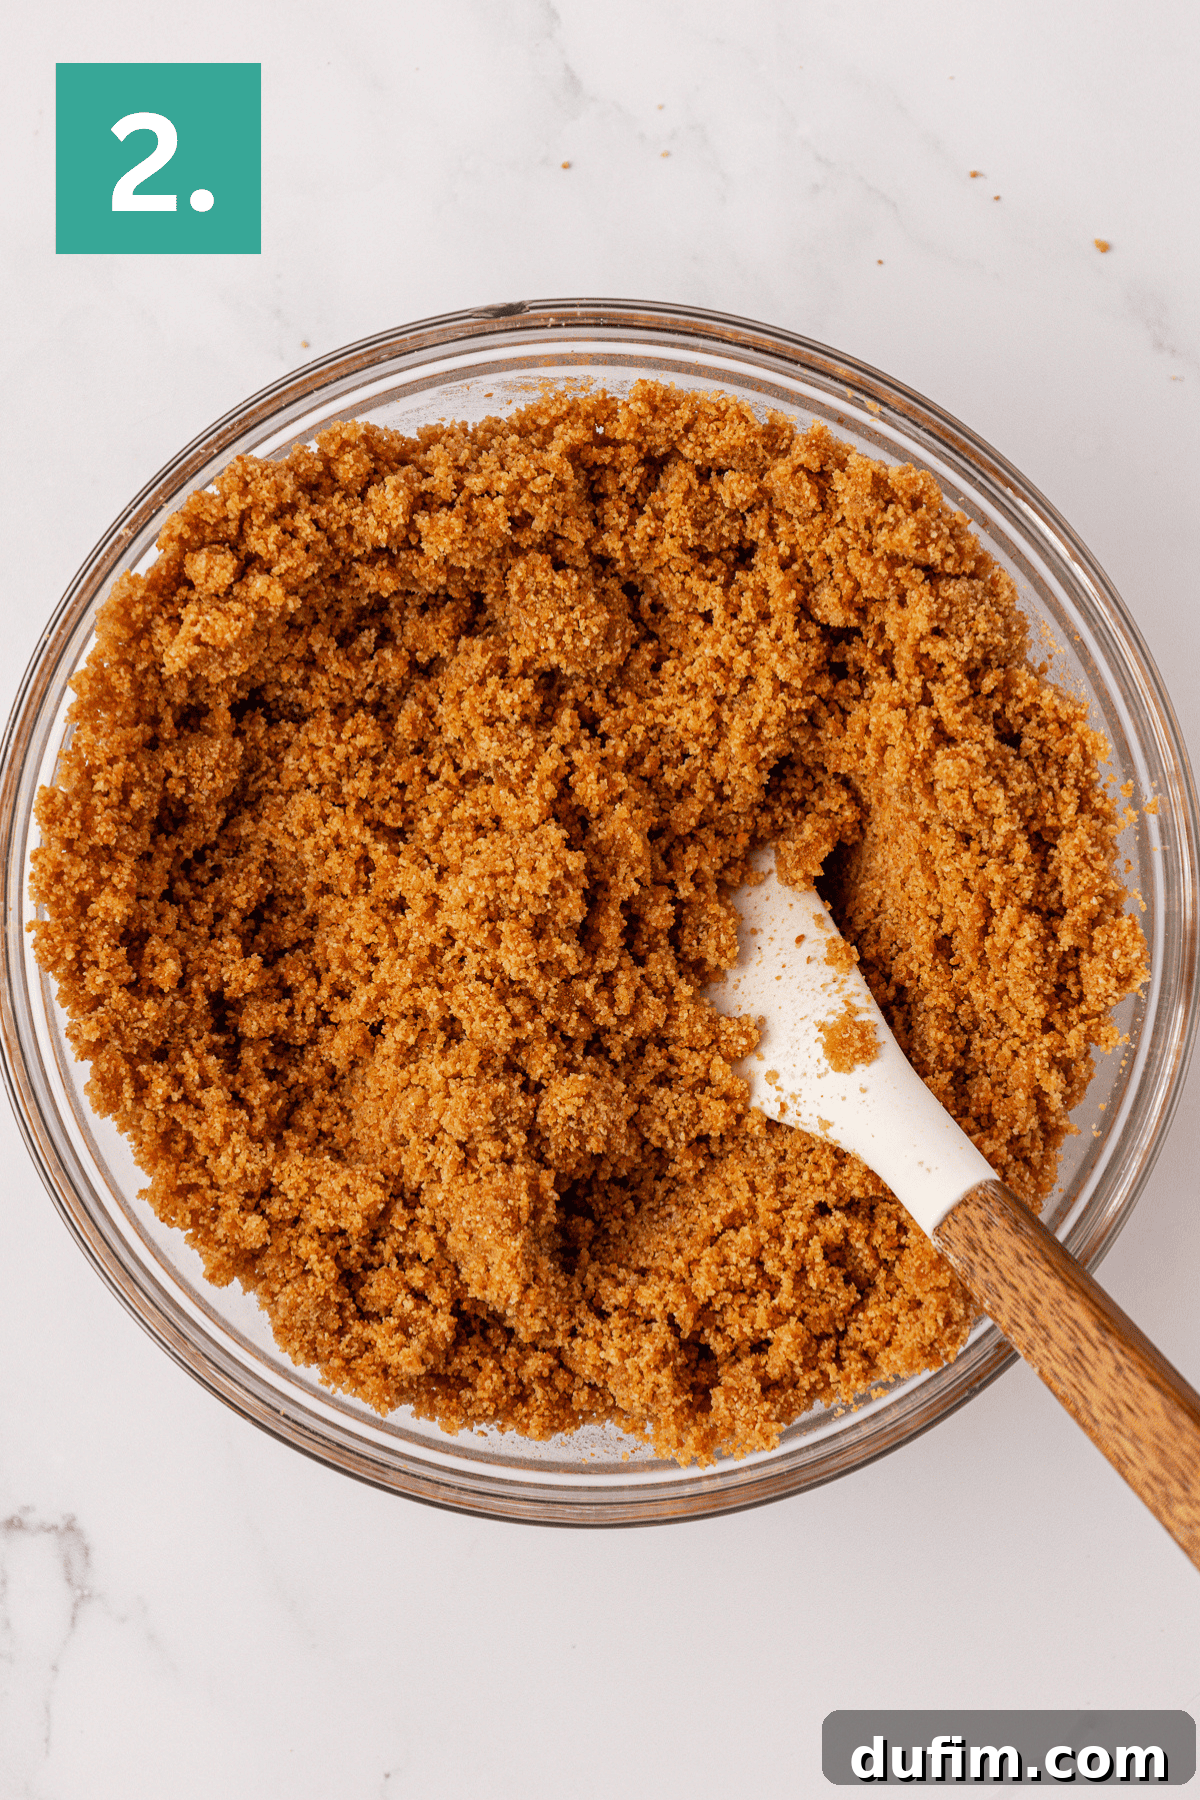
- Stir all the ingredients together thoroughly using a spoon or a sturdy spatula until a thick, uniform mixture forms. The crumbs should be evenly moistened and clump together when gently pressed, indicating they are ready for the pan.
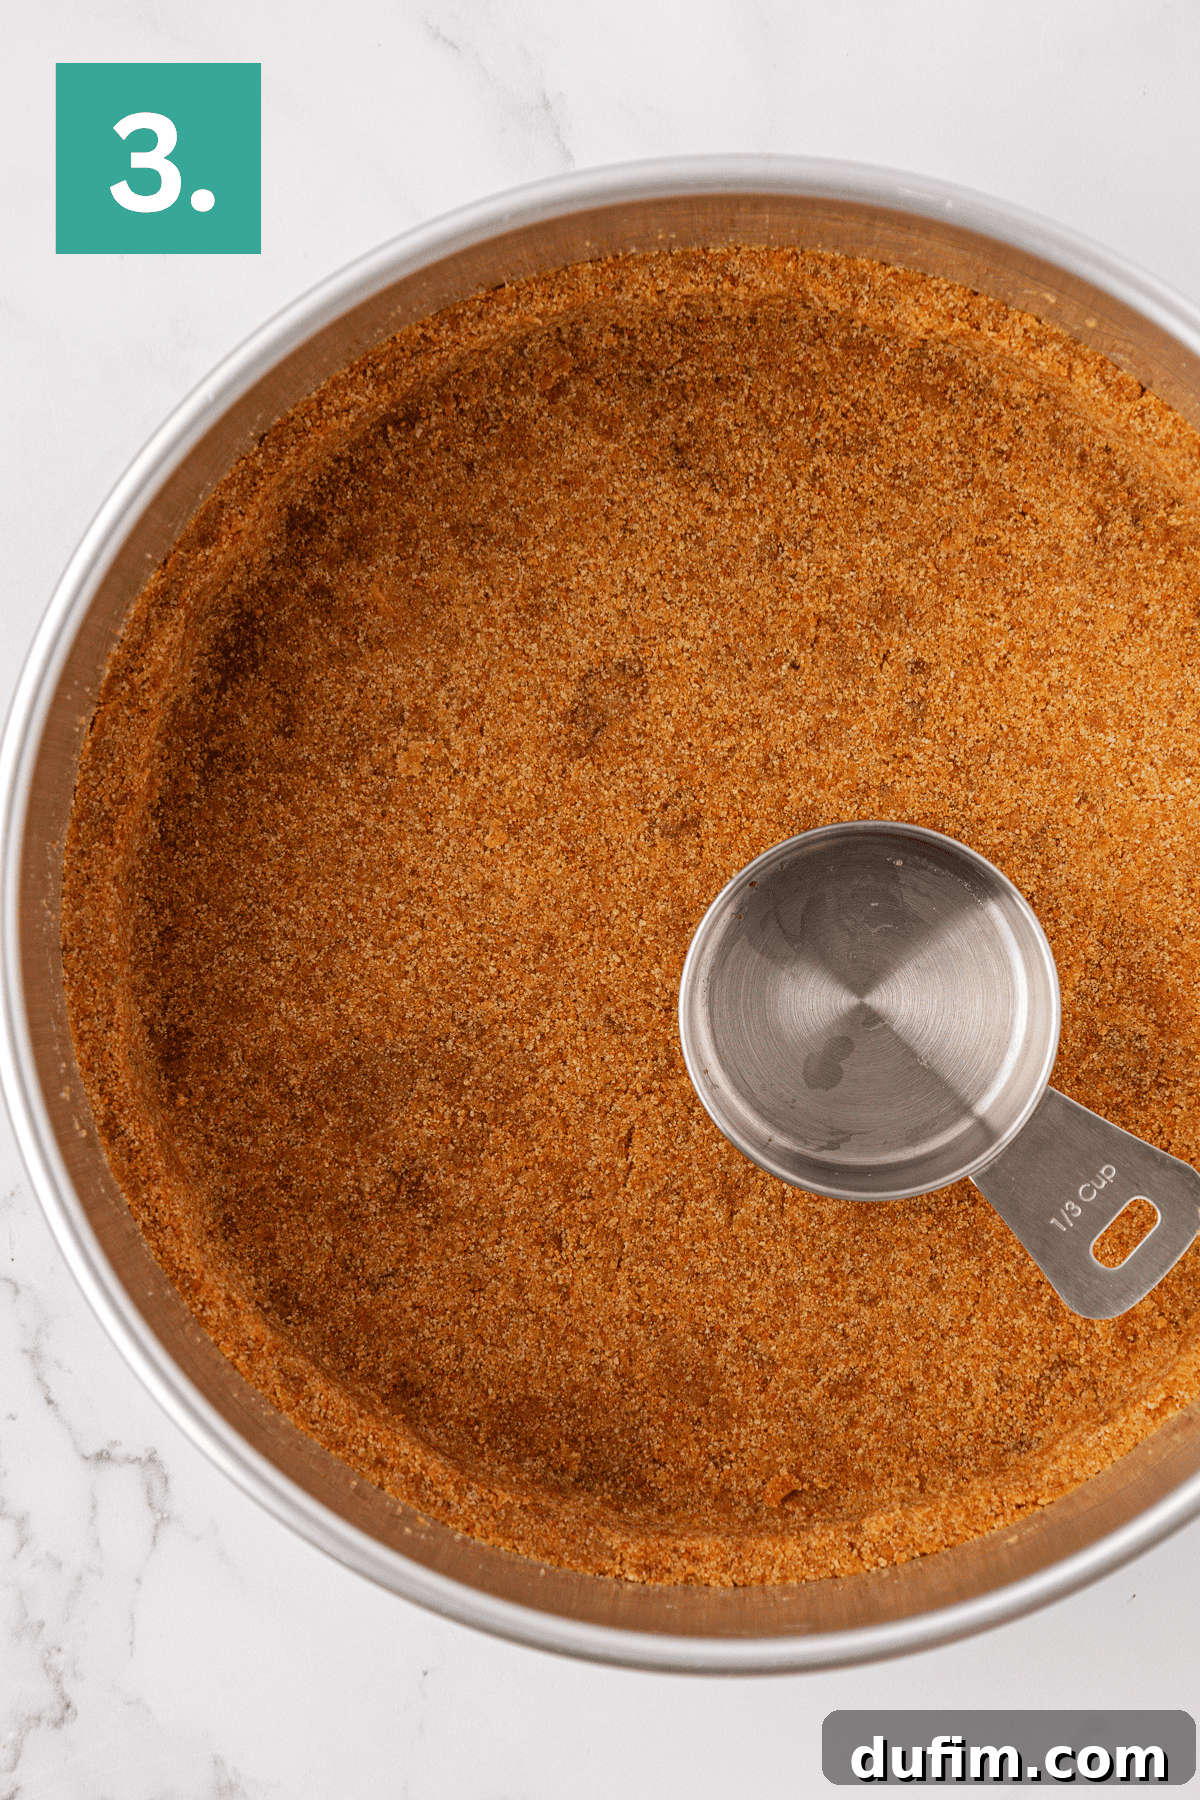
- Transfer the crust mixture into an un-greased 8 or 9-inch springform pan. Using your fingers, or the flat bottom of a measuring cup (a ½ cup measure works wonderfully for this), press the mixture firmly and evenly across the bottom of the pan. For an extra touch of elegance and stability, you can press some of the mixture slightly up the sides to create a small, neat crust wall. It’s crucial that the crust mixture is very compacted to prevent crumbling when sliced.
- For the best possible structure, place the prepared crust in the freezer for at least 15 minutes to firm up while you prepare the creamy filling. If you’re preparing the crust further in advance (a few hours or even a day), cover it tightly with aluminum foil or plastic wrap and store it in the refrigerator until ready to use.
Part 2: Preparing the Velvety No-Bake Cheesecake Filling
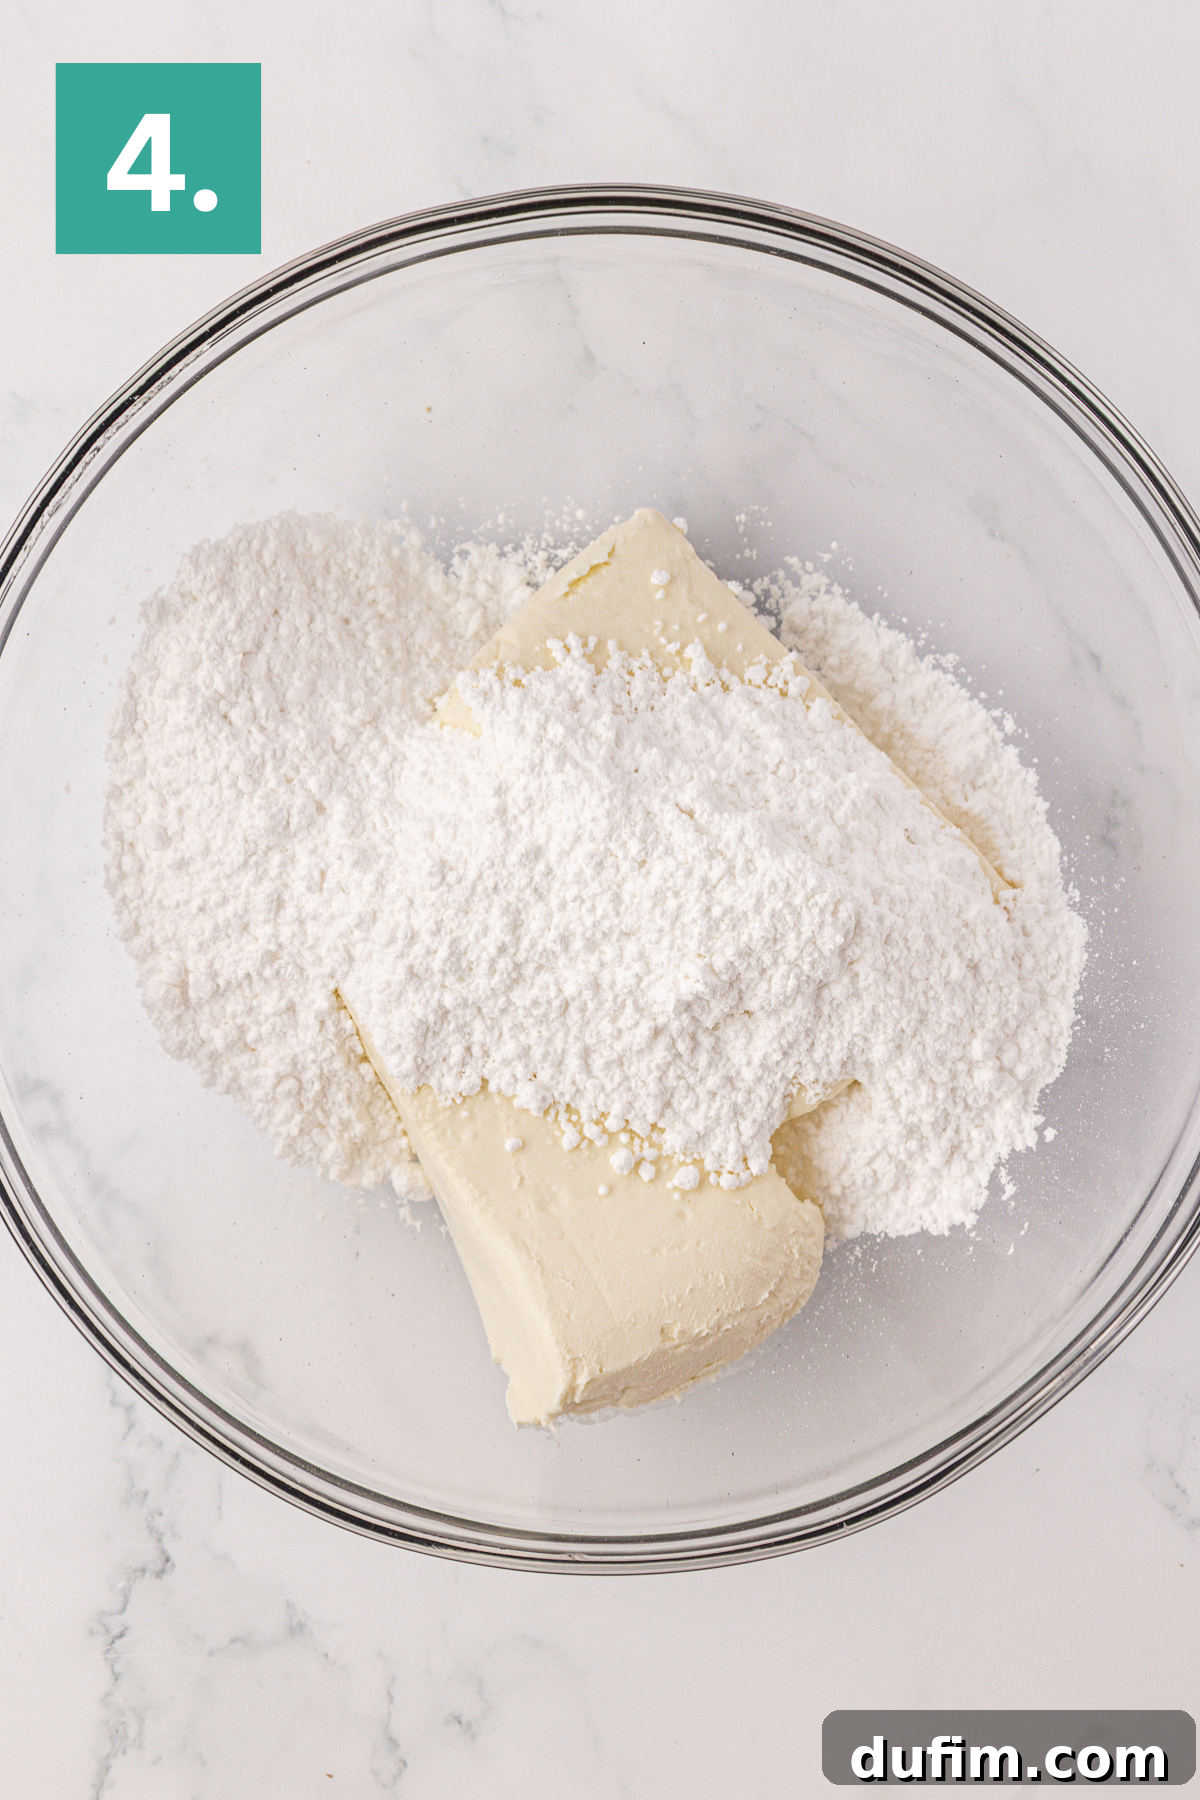
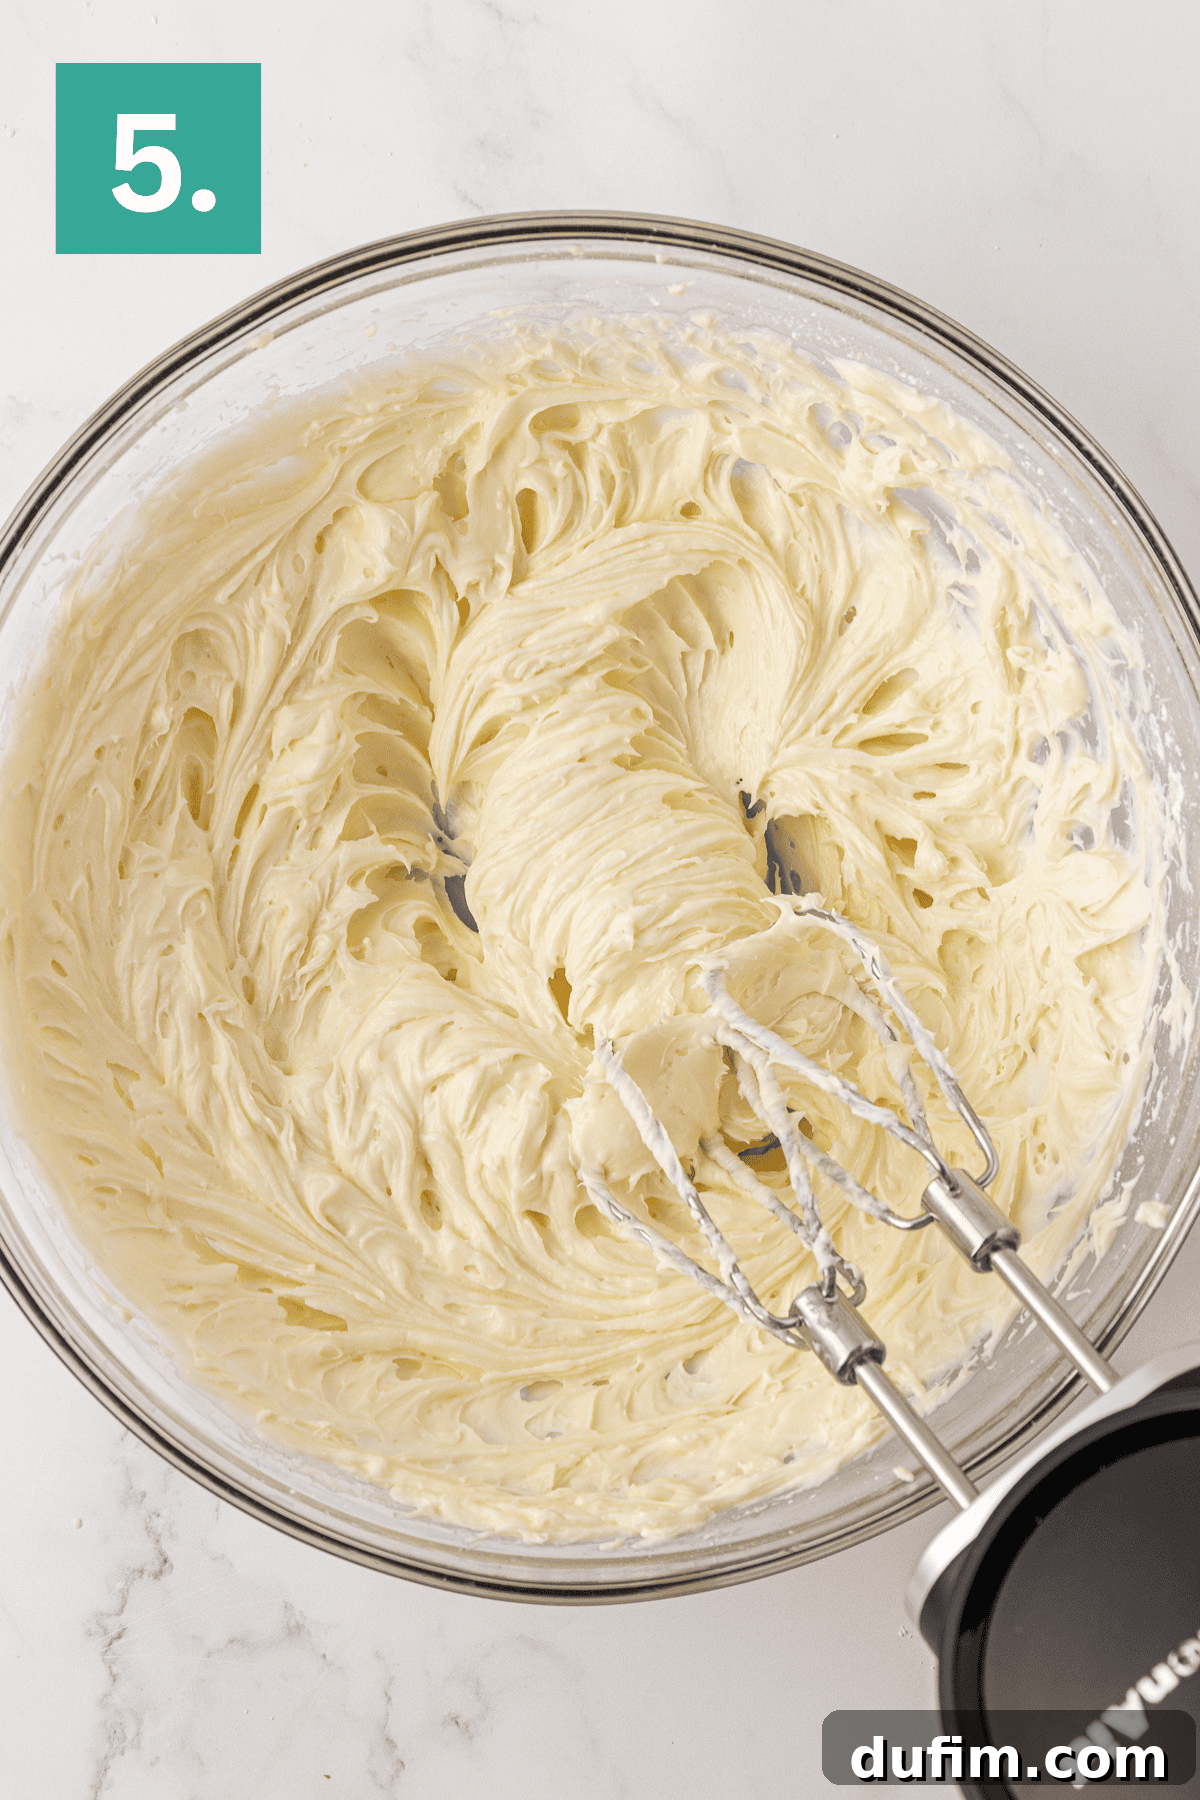
- In a separate large mixing bowl, using an electric mixer (either a stand mixer with the paddle attachment or a high-powered hand mixer), beat the softened full-fat cream cheese with 1 cup of the powdered sugar. Beat on medium-high speed for 1-2 minutes until the mixture is incredibly smooth, creamy, and completely free of any lumps. Be sure to scrape down the sides and bottom of the bowl as needed to ensure even mixing. Set this velvety cream cheese mixture aside.
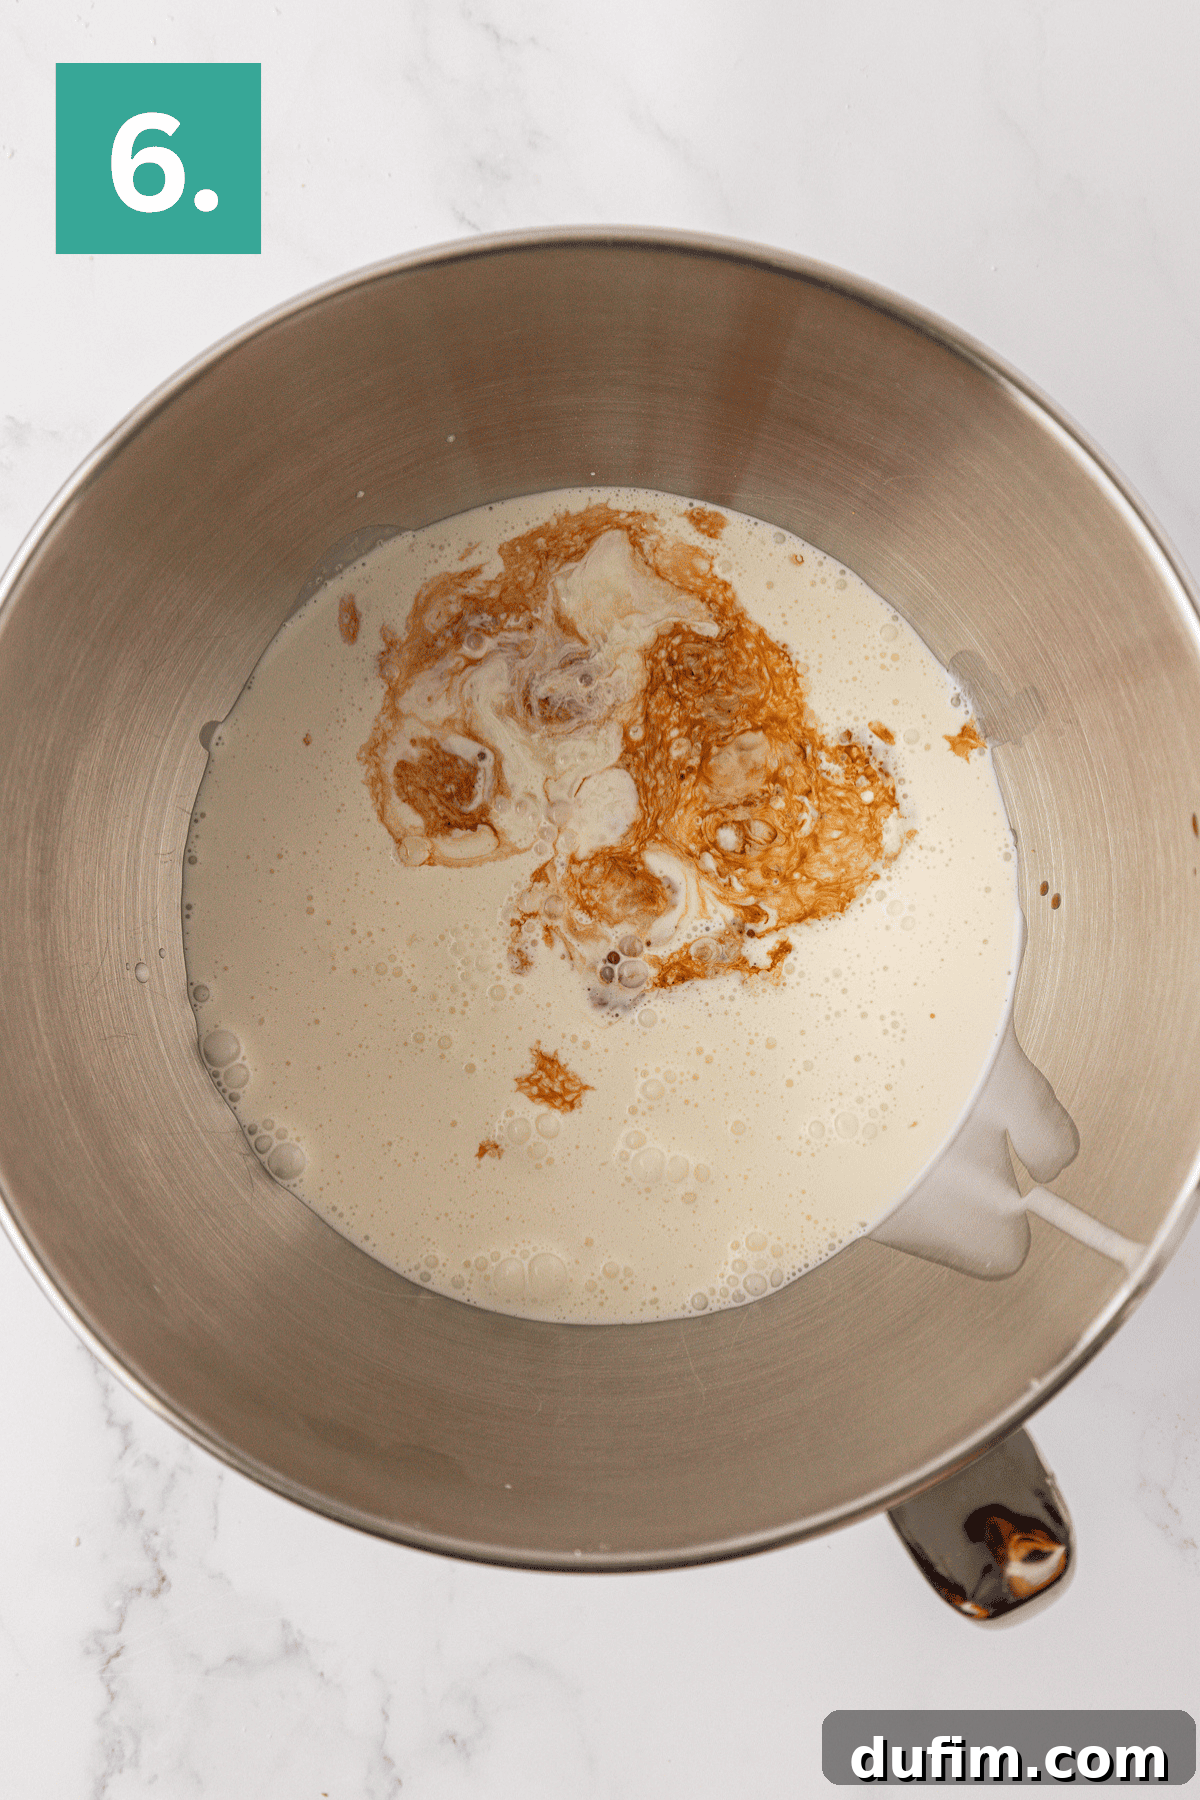
- Retrieve your thoroughly chilled metal mixing bowl and beaters from the freezer. Pour in the very cold heavy whipping cream, along with the remaining ½ cup of powdered sugar, fresh lemon juice, and pure vanilla extract.
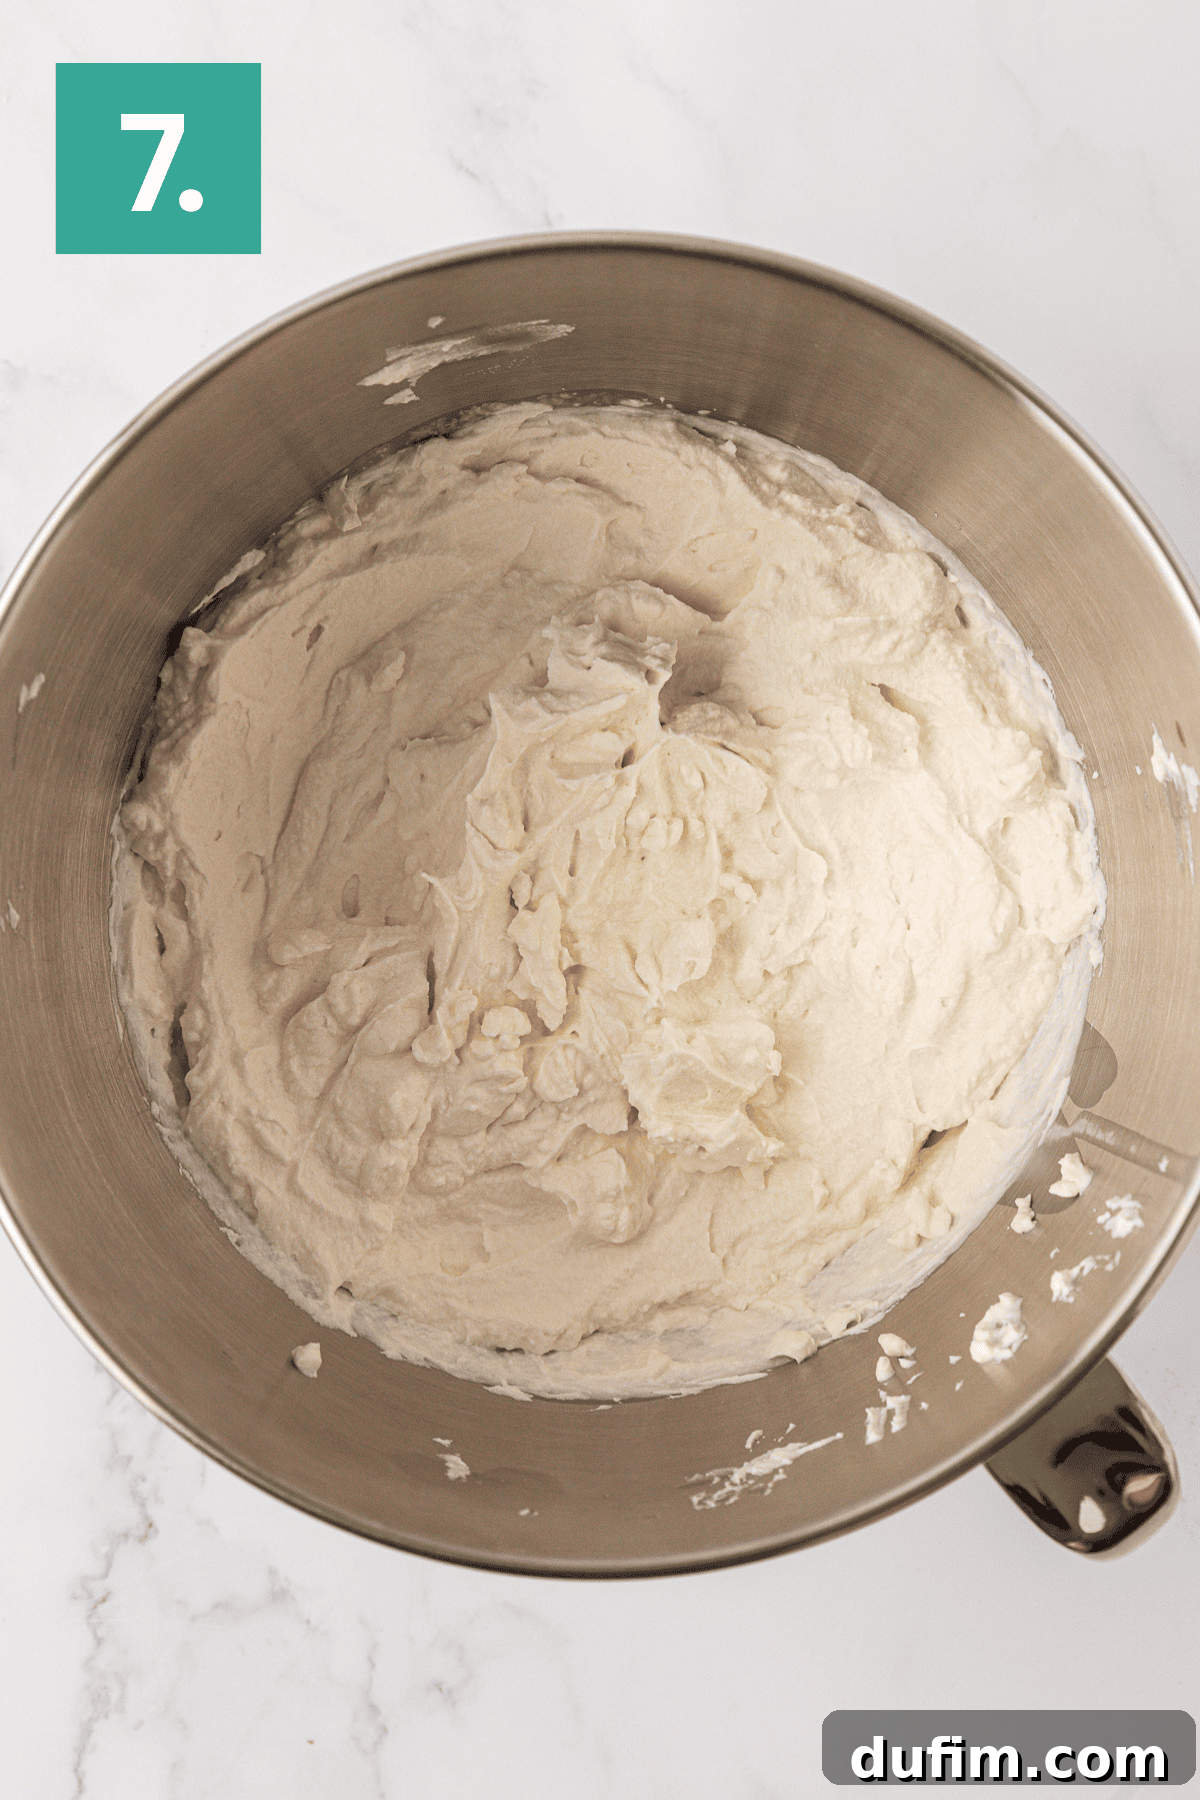
- Beat on high speed with the electric mixer for 4-5 minutes, or until stiff peaks form. Stiff peaks mean that when you lift the beaters, the whipped cream holds its shape firmly and doesn’t droop or collapse. It’s important to be careful not to overbeat, as this can cause the whipped cream to become grainy or turn into butter.
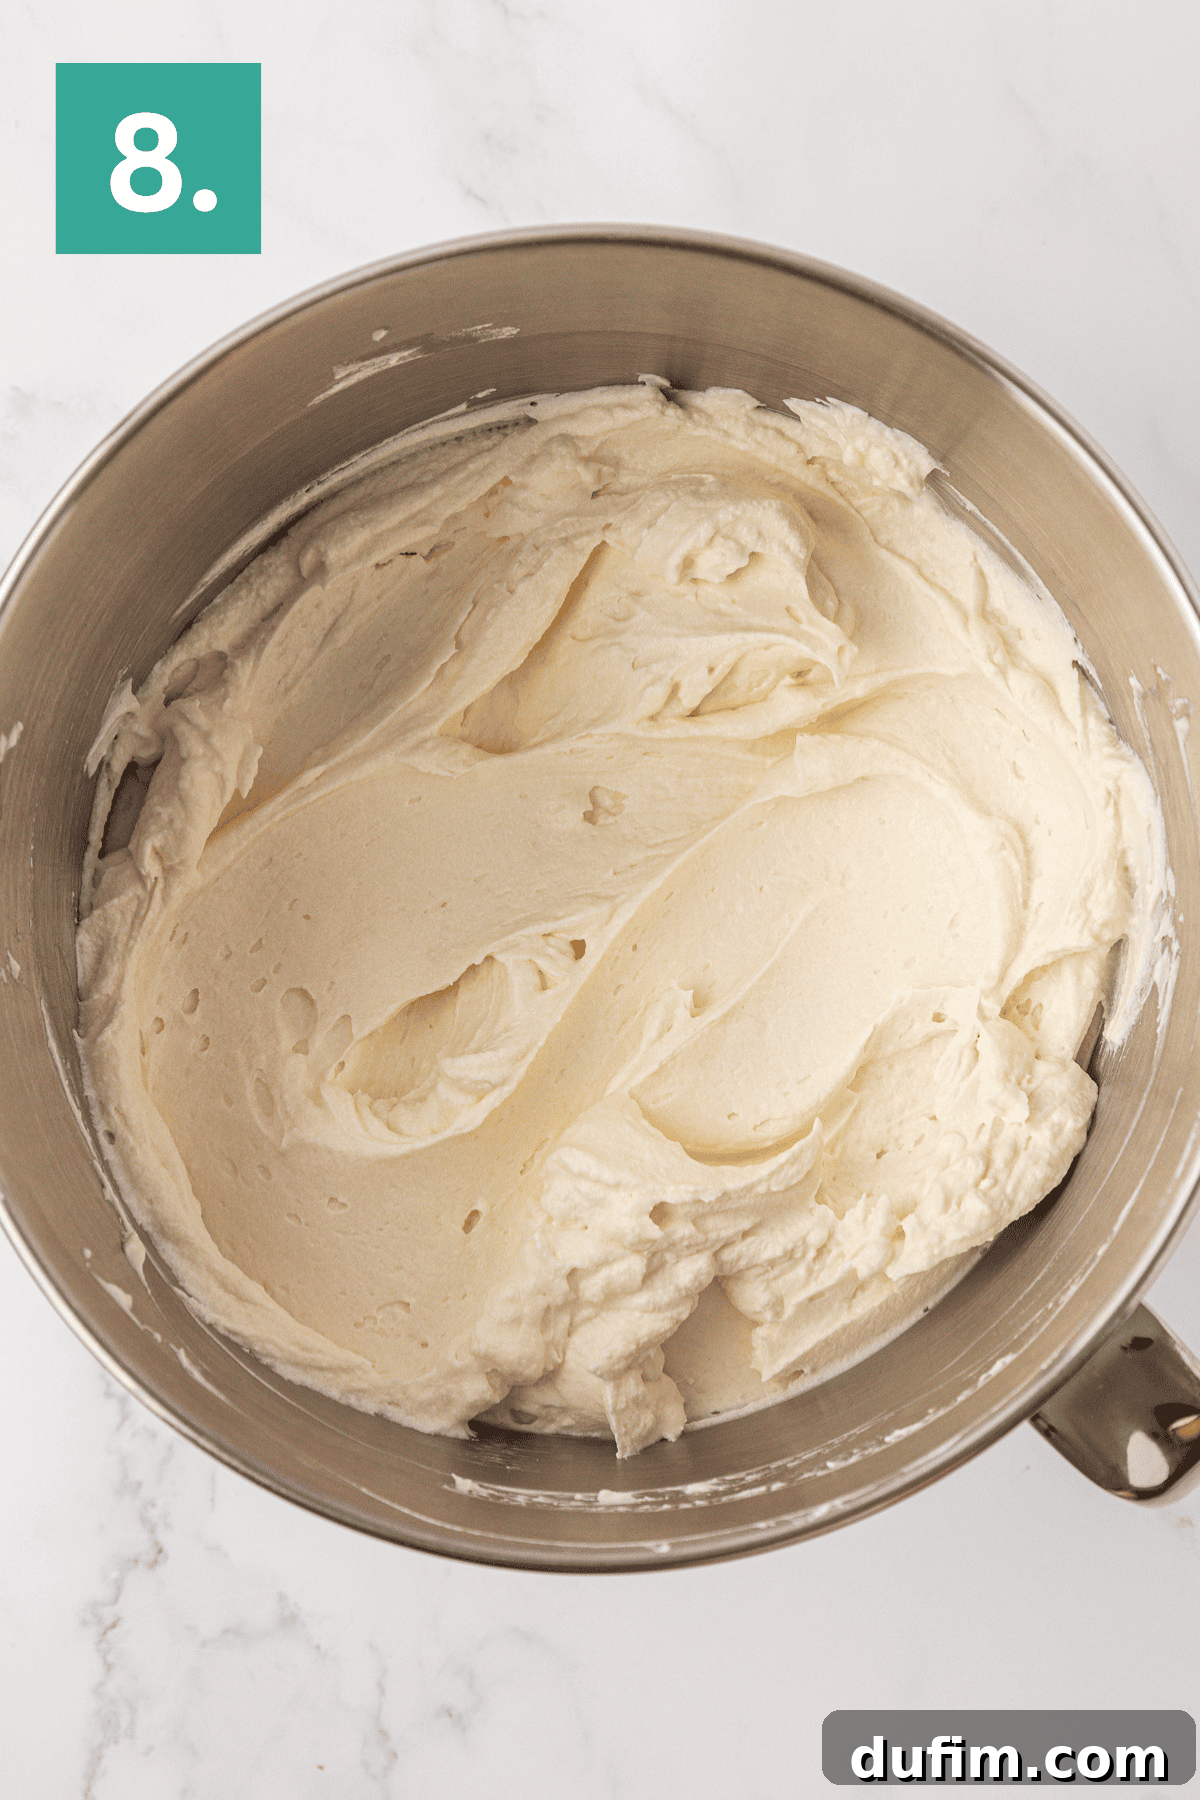
- Gently add the whipped cream cheese mixture to the bowl containing the stiff-peaked whipped cream. Mix on the lowest speed of your electric mixer for just 1-2 minutes, or until the two mixtures are just combined and no streaks of either cream cheese or whipped cream remain. Alternatively, you can use a rubber spatula to gently fold the cream cheese into the whipped cream until fully incorporated. Overmixing at this stage can deflate the delicate whipped cream, resulting in a less airy and less stable filling.
Part 3: Assembly, Chilling for Perfection, and Serving
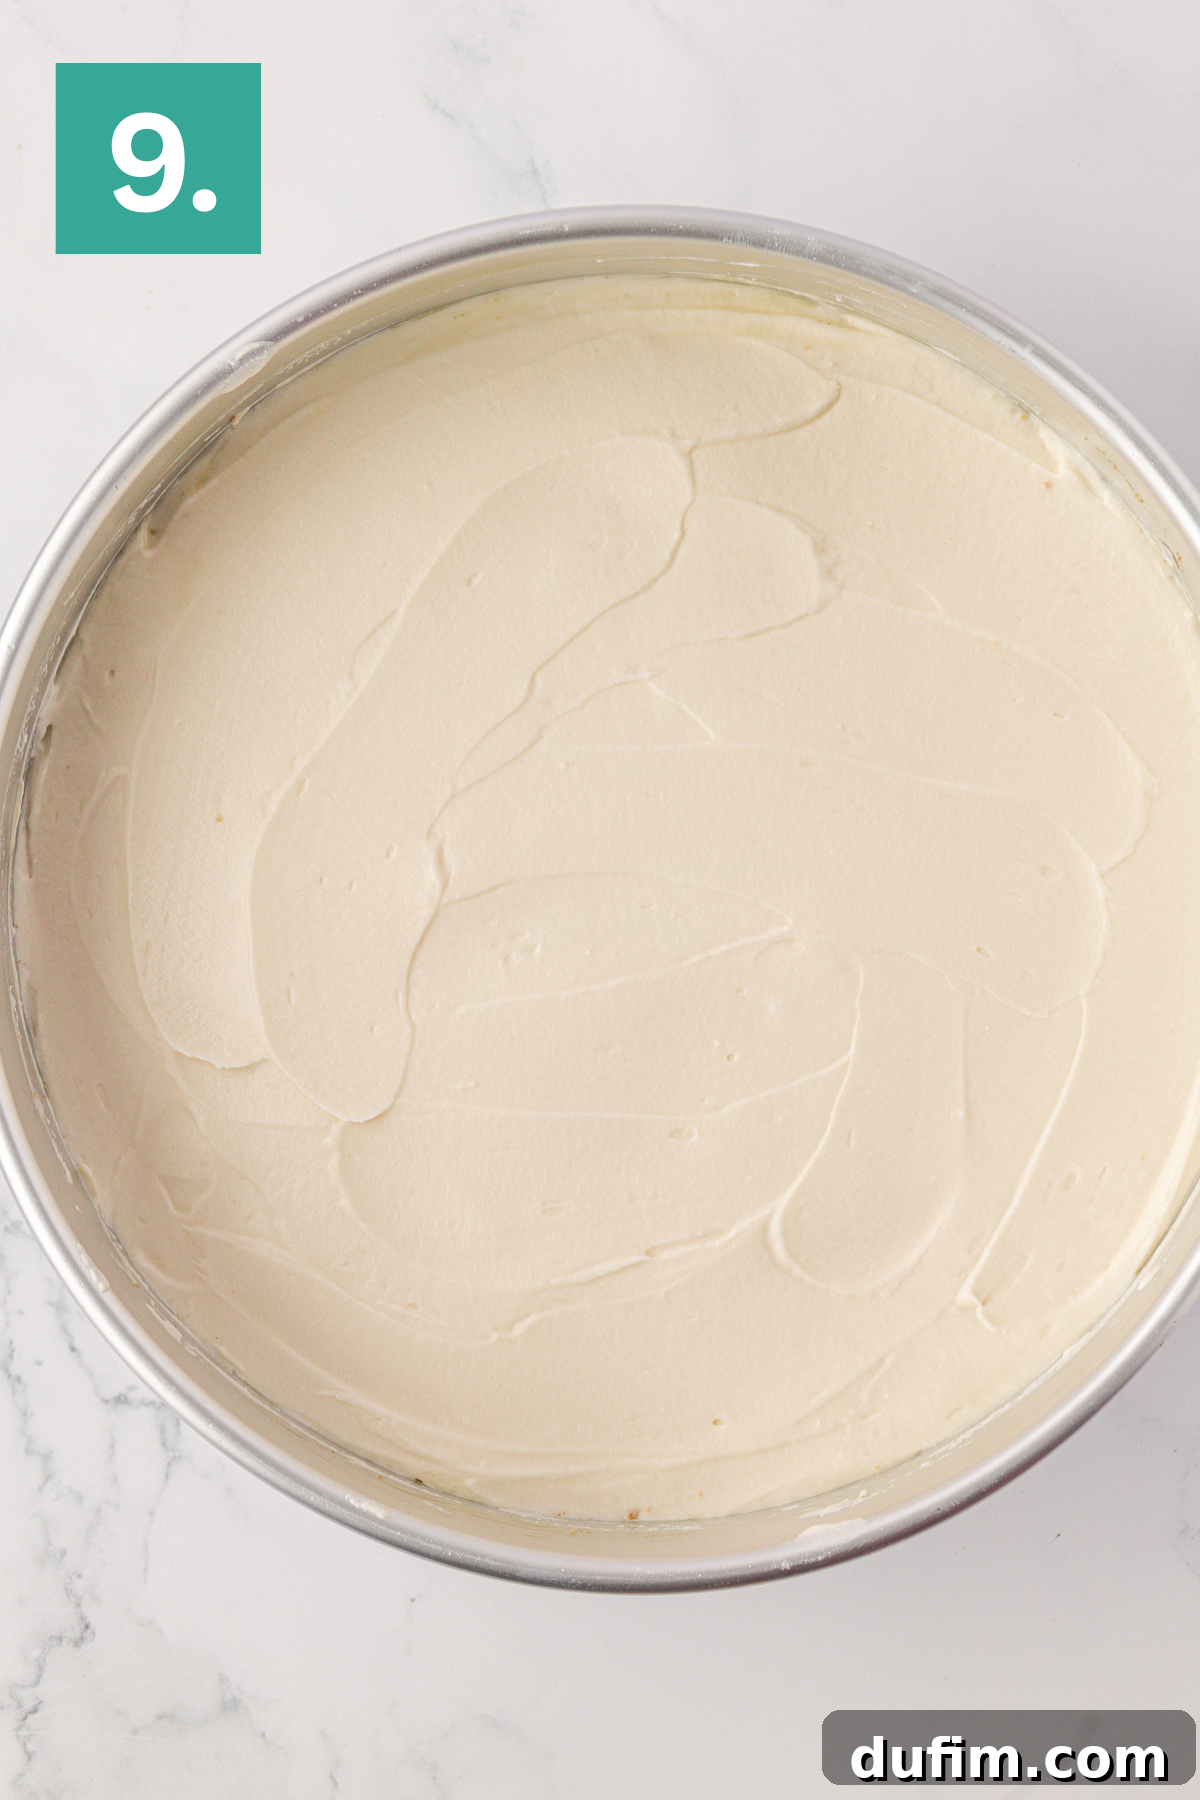
- Carefully scoop the prepared cheesecake filling into your chilled graham cracker crust. Use an offset spatula or the back of a spoon to gently spread the filling evenly, creating a smooth and appealing top surface. Aim for an even layer from edge to edge.
- Cover the springform pan tightly with plastic wrap or transfer the cheesecake to a dedicated cake keeper. This crucial step prevents the cheesecake from drying out, absorbing any unwanted odors from the refrigerator, and helps maintain its optimal moisture. Refrigerate the cheesecake for a minimum of 6 hours, or ideally, overnight. Adequate chilling time is absolutely crucial for the cheesecake to firm up properly and achieve its stable, sliceable, and delightful texture. Patience here will be rewarded!
- Before serving, carefully remove the outer ring of the springform pan. This can be done by running a thin, sharp knife along the inner edge of the pan before unclasping it, ensuring a clean release without damaging the crust.
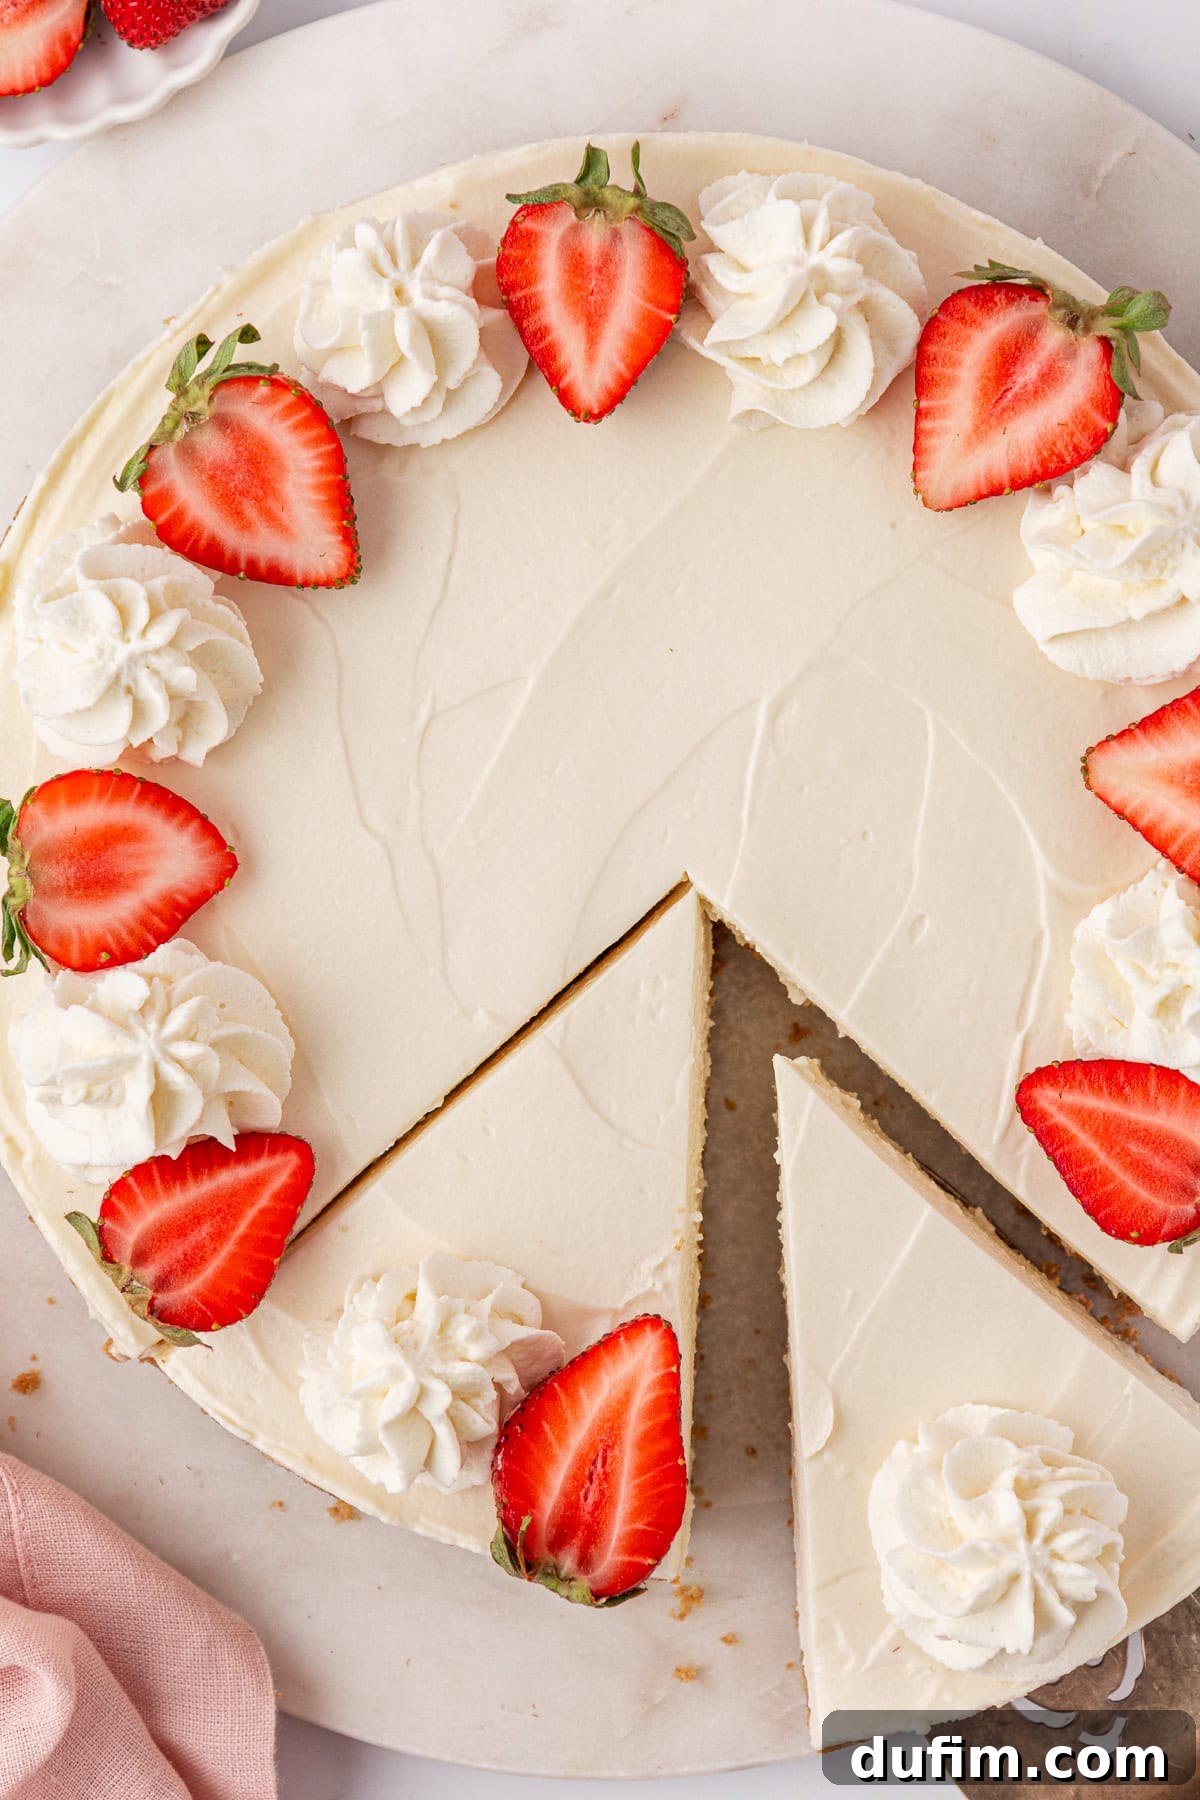
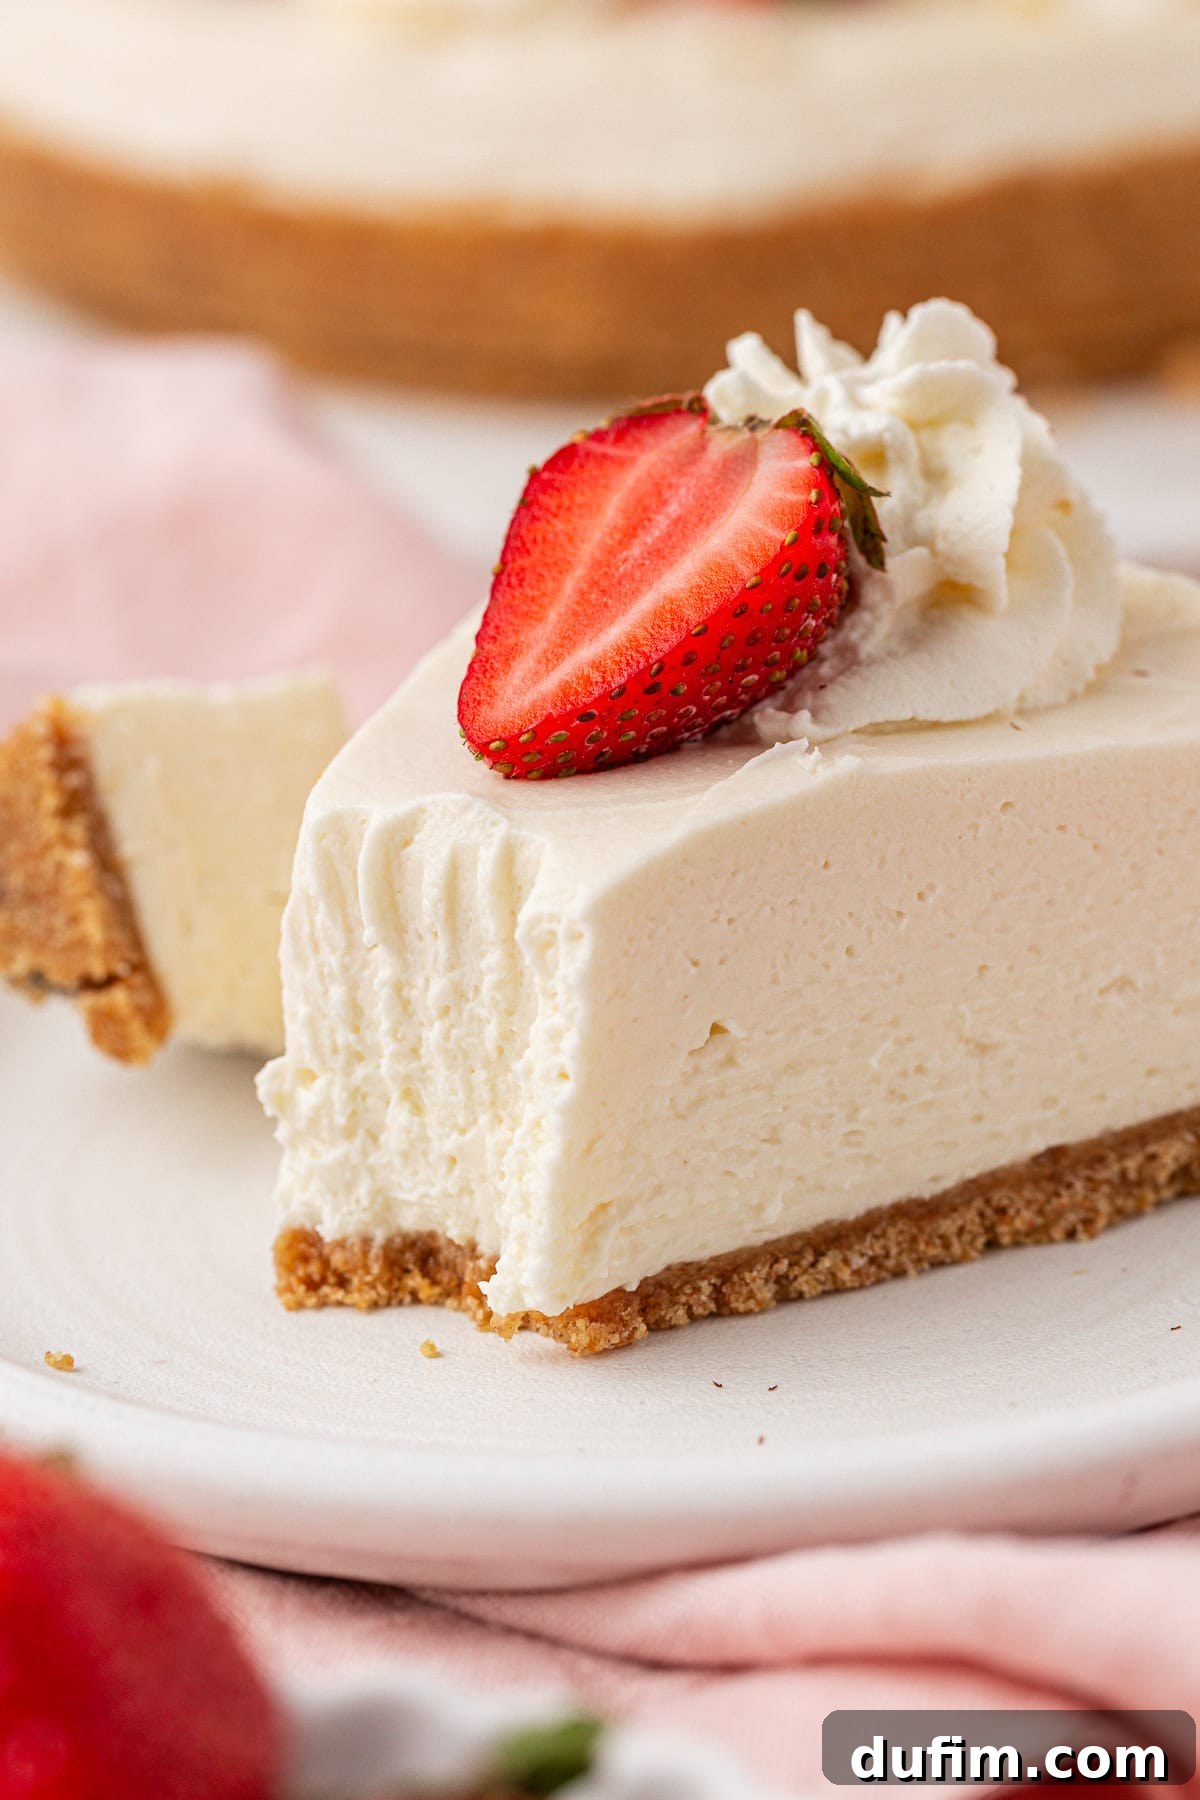
- For the cleanest, most professional-looking slices, use a very sharp, thin knife. After each and every cut, immediately wipe the knife clean with a warm, damp cloth and then dry it thoroughly. This simple yet effective step prevents crumbs and creamy filling from dragging across subsequent slices, ensuring neat, picture-perfect edges every single time.
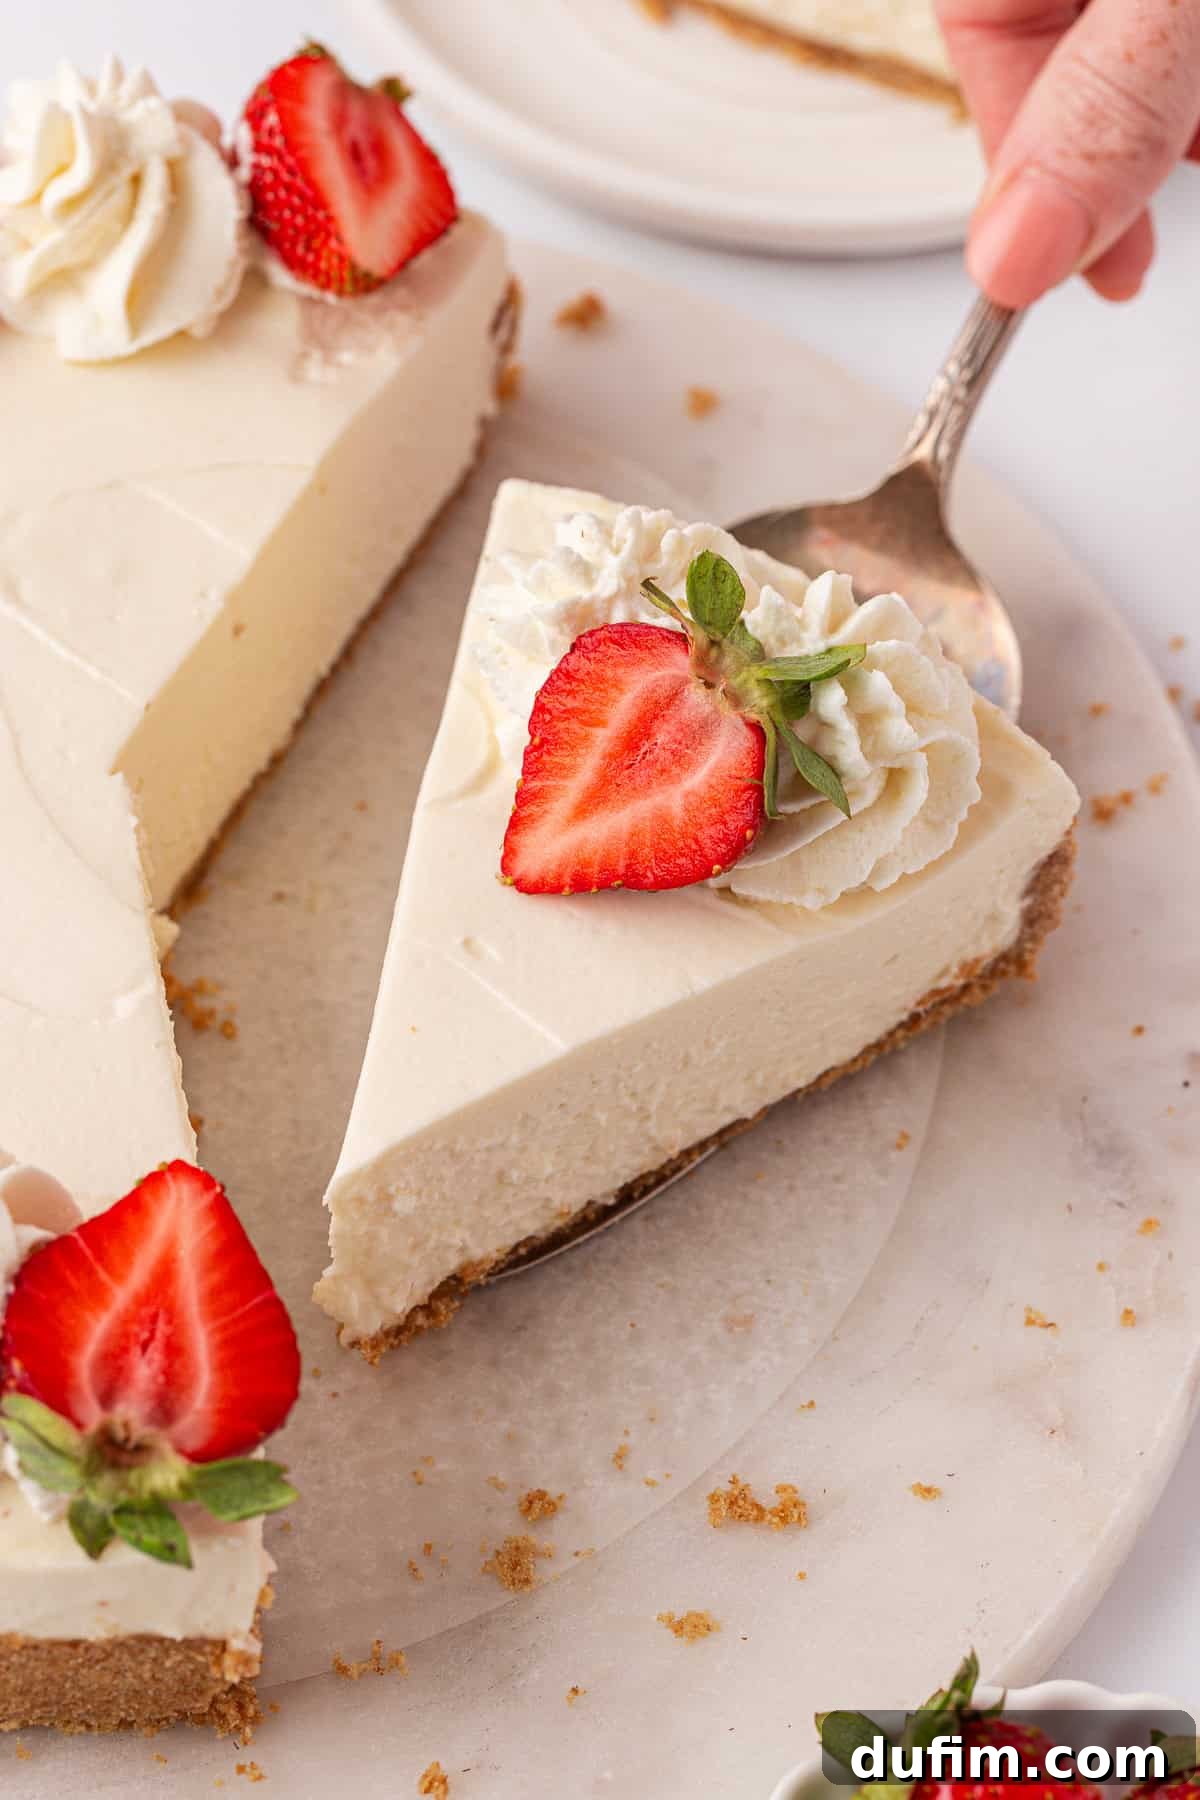
- Serve your beautiful no-bake cheesecake plain to let its creamy texture and balanced flavors shine, or personalize it with your favorite toppings. Options abound, including fresh berries, various fruit pie fillings, a decadent drizzle of chocolate ganache, a rich caramel sauce, or an extra dollop of homemade whipped cream.
Delightful Topping Ideas for Your No-Bake Cheesecake
One of the most appealing aspects of a simple yet elegant no-bake cheesecake is its incredible versatility when it comes to toppings. Whether you crave a burst of fresh fruit, a rich, indulgent sauce, or a satisfyingly crunchy addition, there’s a perfect topping waiting to elevate your dessert. Here are some inspiring ideas to spark your culinary creativity and transform your cheesecake from simply delicious to absolutely unforgettable:
Fresh Fruits & Fruit Fillings
- Classic Pie Fillings: Cherry, blueberry, apple, peach, strawberry, or raspberry pie fillings offer a convenient, vibrant, and sweet-tart contrast to the creamy cheesecake.
- Fresh Berries: Strawberries, blueberries, raspberries, and blackberries are always a hit. Their natural sweetness and slight tartness pair beautifully with the rich base. You can arrange them artfully in patterns or simply scatter them generously over the top.
- Sliced Stone Fruits: Fresh peaches, nectarines, or plums, especially when perfectly ripe and in season, add a delightful juiciness and subtle sweetness.
- Citrus Zest or Segments: A delicate sprinkle of finely grated lemon or orange zest, or small, pith-free segments of grapefruit or orange, can add a wonderfully bright, refreshing zing that cuts through the richness.
Rich Syrups & Indulgent Sauces
- Chocolate Sauce: A smooth, decadent chocolate sauce or a rich chocolate fudge drizzle is a timeless pairing, offering a luxurious and deeply satisfying chocolatey touch.
- Caramel Sauce: Warm, gooey caramel sauce provides a sweet, buttery, and often slightly salty complexity that beautifully complements the creamy cheesecake.
- Strawberry Sauce: Homemade or high-quality store-bought strawberry sauce adds a fresh, vibrant, and fruity sweetness that harmonizes beautifully with the creamy base.
- Hot Fudge: For the ultimate chocolate lover, a thick, rich hot fudge sauce takes this dessert to an entirely new level of indulgence.
- Butterscotch Sauce: A warm, sweet, and distinctly nutty butterscotch sauce offers a comforting and sophisticated flavor profile.
Crunchy & Decadent Additions
- Chopped Oreos: Crushed chocolate sandwich cookies add a fantastic textural contrast and a classic, universally loved chocolate flavor.
- Reese’s Peanut Butter Cups: Finely chopped mini Reese’s cups bring a delightful sweet and salty peanut butter kick that’s irresistible.
- Chocolate Chips or Shavings: A sprinkle of mini chocolate chips, elegant chocolate shavings, or even cocoa nibs adds visual appeal and a burst of concentrated chocolate flavor.
- Toasted Nuts: Finely chopped and lightly toasted pecans, walnuts, or almonds provide a lovely crunch and a complementary nutty flavor that pairs well with cream cheese.
- Coconut Flakes: Toasted coconut flakes can add a wonderful tropical twist and an appealing chewy texture.
Storage & Freezing Tips for Your No-Bake Cheesecake
How long does no-bake cheesecake keep in the fridge?
Proper storage is absolutely key to maintaining the freshness, delectable flavor, and stable texture of your no-bake cheesecake. Once fully set and chilled, your cheesecake can be safely stored, covered, in the refrigerator for up to 5 days. To prevent it from drying out, absorbing any unwanted odors from other foods in the fridge, or developing a film on its surface, ensure it’s exceptionally well-covered. A dedicated cake keeper works wonderfully for this, providing ample space and robust protection. Alternatively, you can carefully cover the top of the springform pan or the entire cheesecake with several layers of aluminum foil or plastic wrap. Make sure the wrapping is snug and creates an airtight seal to maximize freshness.
Can I freeze no-bake cheesecake?
This is a common and excellent question with a nuanced answer! While it might be tempting to use the freezer as a shortcut to speed up the initial chilling and setting process, I strongly advise against it. Rapid freezing can significantly alter the delicate creamy texture of a no-bake cheesecake, making it potentially icy, grainy, or even rubbery. The refrigerator’s slow, steady, and gradual chill is essential for the dairy fats and stabilizers to properly firm up and meld, creating that signature smooth consistency.
However, you can absolutely freeze an entire no-bake cheesecake for longer-term storage, allowing you to prepare it in advance or save leftovers to enjoy at a later date. This is a fantastic option for meal prepping desserts for future gatherings or simply extending the life of your delicious creation. To freeze a cheesecake successfully, ensure it is fully chilled and very firm from having been in the refrigerator. Carefully remove it from the springform pan base if possible. Then, wrap it meticulously: start with several layers of plastic wrap, ensuring every surface is completely covered, followed by a robust layer of heavy-duty aluminum foil for extra protection against freezer burn. For even greater security, you can place the wrapped cheesecake inside a large, airtight freezer-safe bag or container. Properly stored, it can last for up to 1-2 months in the freezer.
To thaw a frozen cheesecake, transfer it from the freezer to the refrigerator. Crucially, remove all the plastic wrap and foil before it begins to thaw. This prevents condensation from forming directly on the cheesecake surface, which could make it soggy. Place the unwrapped cheesecake inside a cake keeper or loosely cover it with fresh plastic wrap. Allow it to thaw slowly in the fridge overnight (at least 8-12 hours is recommended). This gradual thawing process is vital for preserving its creamy, luxurious texture and ensuring it tastes just as good as when it was freshly made.
Achieving Perfectly Clean Cheesecake Slices
A beautifully presented cheesecake starts with clean, crisp slices. While this technique might seem a bit tedious, this simple trick will ensure your cheesecake looks as professional and appealing as it tastes. The key is to use a very sharp, thin knife. After each and every cut you make into the cheesecake, immediately wipe the knife blade clean with a warm, damp cloth and then dry it thoroughly. This crucial step removes any clinging crumbs or creamy filling, preventing them from dragging through your next slice and creating unsightly, messy edges. This meticulous attention to detail will yield the most perfect, picture-worthy slices that truly impress your guests and make serving a joy.
For an added touch of freshness and flavor, consider topping your perfectly sliced cheesecake with our delightful homemade strawberry sauce, which complements the creamy base beautifully with its sweet and tart notes.
Philadelphia No-Bake Cheesecake Recipe FAQs
Yes, you absolutely can substitute Cool Whip for homemade whipped cream in this recipe, especially if you’re looking for extra convenience. While I personally find that homemade whipped cream provides a richer, fresher flavor and contributes more significantly to the cheesecake’s overall thickness and superior stability, two 8 oz containers of thawed Cool Whip can be used as a perfectly acceptable alternative. Just ensure it’s completely thawed according to package directions before gently folding it into the cream cheese mixture.
Absolutely! Using a store-bought graham cracker crust is a fantastic and highly recommended time-saver that works perfectly with this recipe. Any standard store-bought graham cracker crust, typically found in the baking aisle of your grocery store, will be suitable for this no-bake cheesecake. This convenient shortcut makes the recipe even quicker and easier to assemble, allowing you to focus all your attention on crafting the dreamy, creamy filling.
Several factors can prevent your no-bake cheesecake from firming up properly. The most common reason is insufficient chilling time—it truly needs a minimum of 6 hours, or preferably overnight, to set completely and achieve its stable texture. Another critical factor is the whipping technique for both the cream cheese and heavy cream; ensure both are whipped to their correct consistency (smooth and creamy for room-temperature cream cheese, stiff peaks for very cold heavy cream) and then gently folded together without overmixing, which can deflate the mixture. Using full-fat cream cheese and heavy whipping cream is also crucial, as lower-fat alternatives lack the necessary fat content for proper setting. Lastly, ensure your heavy whipping cream is very cold before whipping, as this significantly aids in achieving stiff peaks. High humidity in your kitchen can also sometimes impact setting, so chilling for an extra hour or two can provide additional stability.
Yes, absolutely and emphatically! No-bake cheesecake relies entirely on the chilling process to achieve its firm, sliceable texture. Unlike traditional baked cheesecakes, where the proteins in the eggs and dairy coagulate from heat to set, no-bake versions solidify as their fat content (primarily from the full-fat cream cheese and heavy whipping cream) cools and firms up. The longer it chills in the refrigerator, the firmer and more stable it will become, making it easier to cut into perfect slices. This is precisely why adequate chilling time is not just a recommendation but a necessity for a successful, stable, and satisfying no-bake cheesecake.
No, it is not safe to leave a no-bake cheesecake out at room temperature overnight. This type of cheesecake is made primarily with perishable dairy products such as cream cheese and heavy whipping cream. These ingredients require constant refrigeration to prevent rapid bacterial growth and spoilage. For food safety reasons and to maintain its quality, always store your no-bake cheesecake in the refrigerator. It should not be left at room temperature for more than two hours, in line with general food safety guidelines for perishable dairy-based products.
More Cream Cheese Delights to Explore
If you’ve thoroughly enjoyed the creamy indulgence and delightful ease of this no-bake cheesecake, you’ll be thrilled to discover these other fantastic recipes that prominently feature the versatile and delicious cream cheese! From rich, decadent desserts to unique flavor combinations, cream cheese consistently adds a delightful tang, a luxurious texture, and an irresistible richness to a wide array of sweet treats.
- Oreo Earthquake Cake: A fun, visually impressive, and incredibly decadent cake featuring delightful pockets of creamy cream cheese and crumbled Oreo cookie goodness.
- Mini Cheesecakes with Reese’s Cup Bottom: These adorable individual cheesecakes offer a delightful surprise with a full Reese’s Peanut Butter Cup nestled at their base, combining two favorite desserts.
- No Bake Oreo Pie: Another incredibly easy, no-bake dessert that combines the irresistible convenience of an Oreo cookie crust with a rich, creamy, and satisfying filling.
- Peanut Butter Cup Chocolate Pie: A truly rich and utterly irresistible pie designed for peanut butter and chocolate lovers, elevated with a hint of cream cheese for added creaminess and depth of flavor.
Easy Philadelphia Cream Cheese No-Bake Cheesecake
Average Rating: 4.48 out of 5 stars (based on 40 ratings)
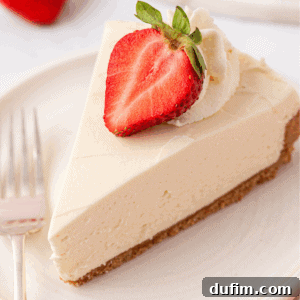
I tested this no-bake cheesecake for over a week before perfecting it, running into every issue from runny filling to collapsed slices. The secret is all in the technique – whipping cream cheese separately from the whipped cream for the fluffiest, thickest texture. This recipe holds its shape, cuts into clean slices, and proves you don’t need gelatin for a stable no-bake cheesecake. Trust me, I’ve tested every wrong way so you can succeed on the first try.
Equipment You’ll Need
- Large Mixing Bowls (preferably one metal bowl to chill)
- Electric Mixer (stand mixer with paddle attachment or hand mixer)
- Rubber Spatula
- 8 or 9-inch Springform Pan (or a sturdy pie pan)
- Measuring Cups and Spoons
- Sharp Knife (for clean slices)
- Kitchen Scale (optional, for precise measurements)
Ingredients
For the Graham Cracker Crust
- 1 ½ cups (170g) graham cracker crumbs (from about 9 whole graham crackers)
- ¼ cup (54g) packed light brown sugar
- 6 Tbsp (86g) unsalted butter, melted
For the No-Bake Cheesecake Filling
- 16 oz (452g) full-fat cream cheese, softened to room temperature
- 2 cups (473g) heavy whipping cream, very cold (equal to 1 pint)
- 1 ½ cups (169g) powdered sugar, divided (1 cup for cream cheese, ½ cup for whipped cream)
- 1 Tbsp fresh lemon juice
- 2 tsp vanilla extract
Instructions
Preparation Notes
- Place a metal mixing bowl and the beaters of your electric mixer in the freezer for at least 15 minutes. This chilling is crucial for whipping the heavy cream to stiff peaks.
Making the Graham Cracker Crust
- In a mixing bowl, combine the graham cracker crumbs, brown sugar, and melted butter. Stir well until the mixture is uniformly moistened and resembles wet sand.
- Press the crust mixture firmly and evenly into an un-greased 8 or 9-inch springform pan. Use the bottom of a flat glass or measuring cup to compact it tightly.
- Place the prepared crust in the freezer for 15 minutes to set while you prepare the filling.
Crafting the No-Bake Cheesecake Filling
- In a separate large bowl, using an electric mixer, beat the softened cream cheese with 1 cup of the powdered sugar until perfectly smooth and creamy (1-2 minutes). Set aside.
- Remove the chilled metal bowl and beaters from the freezer. Add the very cold heavy whipping cream, the remaining ½ cup powdered sugar, fresh lemon juice, and vanilla extract. Beat on high speed for 4-5 minutes until stiff peaks form.
- Gently add the beaten cream cheese mixture to the whipped cream. Mix on low speed for just 1-2 minutes, or carefully fold with a spatula, until just combined and no streaks remain. Avoid overmixing.
Assembly, Chilling, and Serving
- Scoop the cheesecake filling into the chilled crust, spreading the top smoothly with an offset spatula.
- Cover the cheesecake tightly with plastic wrap or a cake keeper and refrigerate for at least 6 hours, or ideally, overnight, to allow it to fully set.
- Before serving, release and remove the outer ring of the springform pan.
- For immaculate slices, use a sharp knife and wipe it clean with a warm, damp cloth after each cut.
- Serve plain or topped with your favorite fresh fruit, fruit sauce, whipped cream, or chocolate ganache.
Recipe Video
Watch this video to guide you through the process of making this perfect no-bake cheesecake and see the techniques in action:
Nutrition Information (per serving, approximate)
Calories: 438kcal | Carbohydrates: 30g | Protein: 4g | Fat: 34g | Saturated Fat: 20g | Polyunsaturated Fat: 1g | Monounsaturated Fat: 9g | Trans Fat: 1g | Cholesterol: 111mg | Sodium: 208mg | Potassium: 111mg | Fiber: 1g | Sugar: 23g | Vitamin A: 1264IU | Vitamin C: 1mg | Calcium: 77mg | Iron: 1mg
All nutritional values are approximate and provided to the reader as a courtesy. Changing ingredients and/or quantities will alter the estimated nutritional calculations.
Loved this recipe? Please share your thoughts and rate it below! Your feedback is incredibly valuable and helps other home bakers too.