
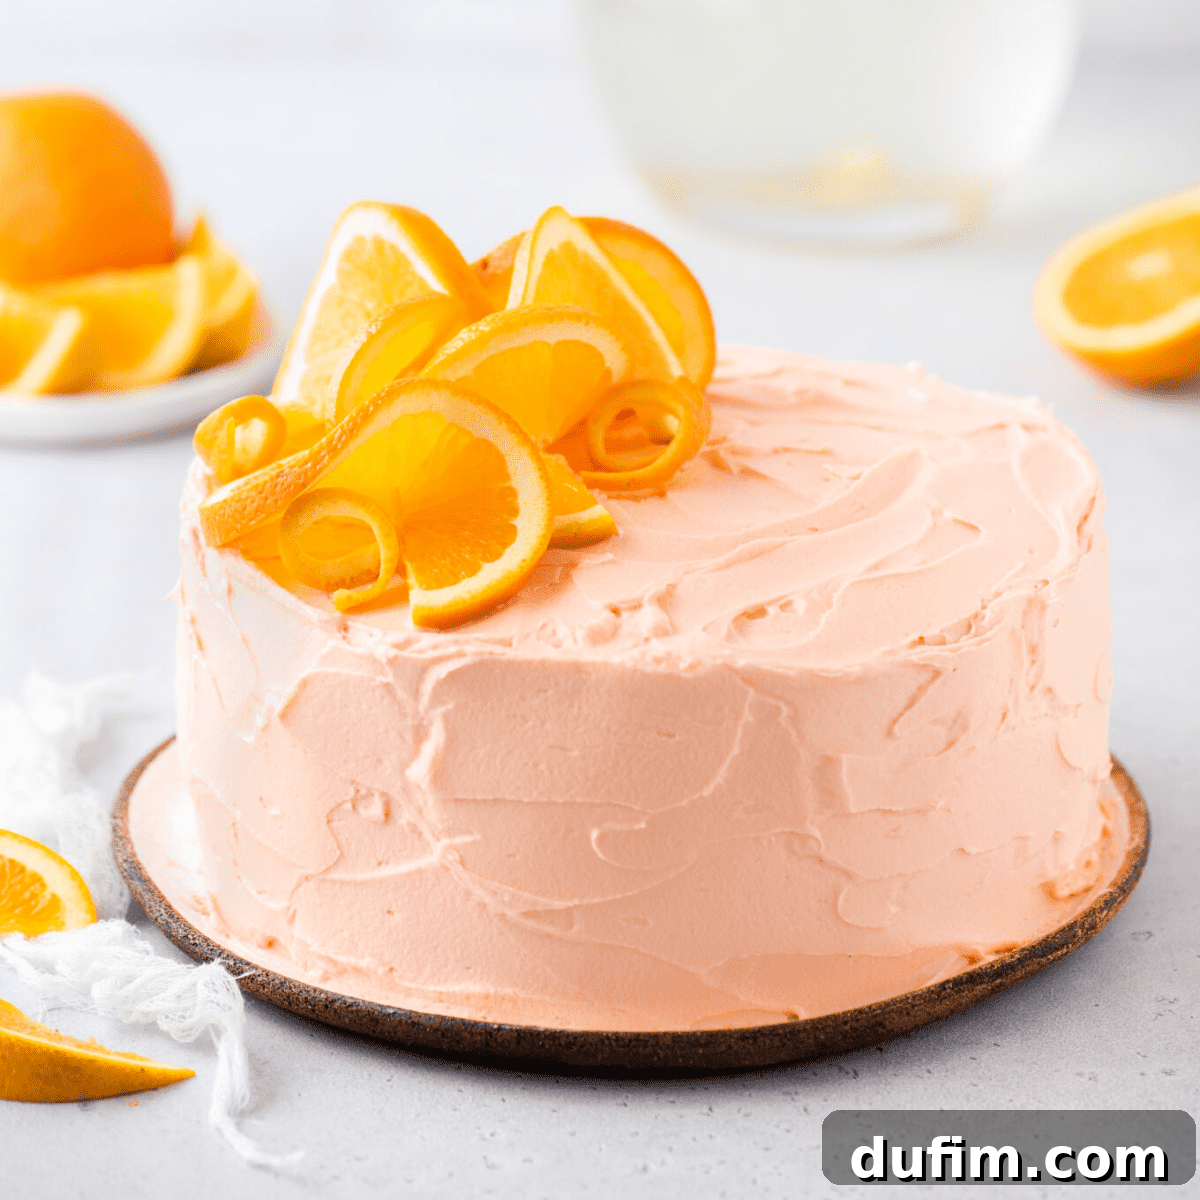
Indulge in the bright, refreshing taste of sunshine with our exceptional homemade orange cake. This recipe delivers an incredibly light, moist, and intensely flavorful two-layer cake, brimming with the vibrant essence of fresh oranges. Perfectly balanced with a rich, sweet-and-tangy cream cheese frosting, this dessert isn’t just a treat – it’s an experience. Whether you’re a seasoned baker or new to layer cakes, our detailed guide ensures a stunning and delicious outcome every time.
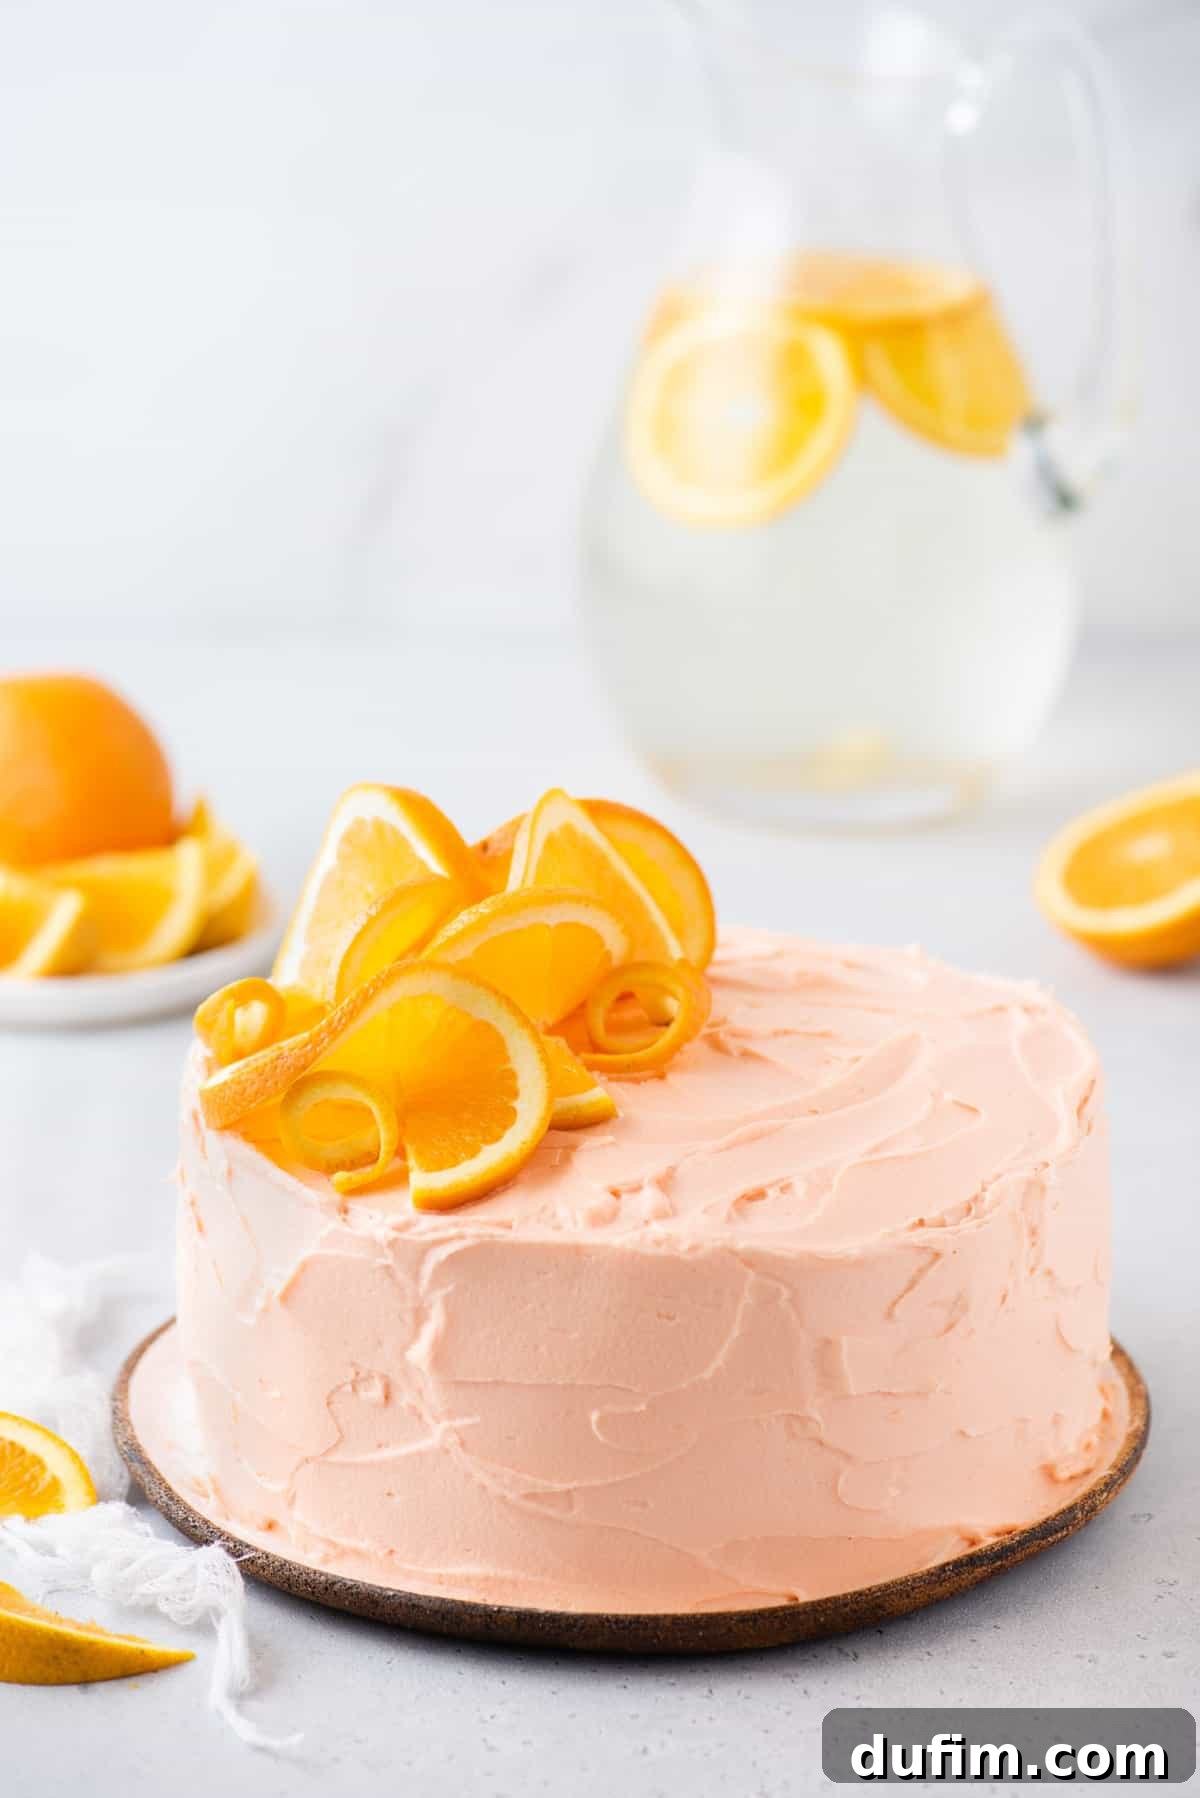
If you’re a fan of citrus-infused desserts, particularly classics like a bright lemon cake, then our fresh orange cake recipe is an absolute must-try. While lemon offers a sharp, distinct tang, orange introduces a warmer, sweeter, and equally invigorating citrus note that delights the palate. The secret to this cake’s intense flavor lies in using freshly grated orange zest, which captures the essential oils and aroma of the fruit, creating a truly unforgettable taste experience.
Got a surplus of beautiful, juicy oranges? Don’t let them go to waste! Beyond this spectacular cake, you can transform them into delightful treats like fluffy Orange Muffins for breakfast or wholesome Orange Cranberry Granola to enjoy with your yogurt. Oranges are incredibly versatile, and their bright flavor complements a wide range of dishes.
What You’ll Discover in This Guide:
- Essential tips for properly measuring flour for perfect cake texture.
- Step-by-step instructions on preparing your cake pans for effortless release.
- A curated list of recommended cake baking tools to set you up for success.
- Proven techniques for baking flat, even cake layers every time.
- A comprehensive breakdown of the total time required for this recipe.
- Guidance on achieving the ideal amount of frosting between cake layers.
- Expert tips for serving, storing, and freezing your orange cake.
- Creative variations to customize your orange cake experience.
Mastering Flour Measurement: The Key to a Perfect Cake
Achieving a light, moist, and tender crumb in your cake largely depends on accurately measuring your flour. Too much flour can lead to a dense, dry cake, while too little can result in a crumbly or overly soft texture. Avoid the common mistake of scooping your measuring cup directly into the flour bag, as this compacts the flour, adding up to 25% more than intended. Instead, follow these simple steps for precise measurement:
- Fluff the Flour: Before measuring, use a fork or whisk to gently aerate the flour in its container. This lightens it and breaks up any clumps.
- Spoon into Cup: With a spoon, delicately scoop the fluffed flour into your dry measuring cup. Allow it to overflow slightly, ensuring it’s not compacted.
- Level Accurately: Use the flat side of a butter knife or a straight edge to level off the excess flour, sweeping it across the top of the measuring cup. This removes any heaped portions without pressing the flour down.
By taking these extra few seconds, you guarantee the correct amount of flour, setting the foundation for an exquisitely textured cake every single time.
Essential Ingredients for a Heavenly Orange Layer Cake
Crafting the perfect orange cake begins with selecting high-quality ingredients. Each component plays a crucial role in developing the cake’s signature flavor, tender texture, and creamy frosting. For this recipe, you will specifically need two 8-inch round cake pans or springform pans. Remember to scroll down to the full recipe card at the end of this article for precise quantities.
FOR THE LUSCIOUS ORANGE CAKE LAYERS:
- All-Purpose Flour: The structural backbone of your cake. Measure it correctly to prevent a dry or dense crumb.
- Finely Grated Orange Zest: The star of the show! Use fresh, vibrant oranges. The zest contains all the aromatic oils that give the cake its intense citrus flavor. Aim for about 1 large orange’s worth.
- Baking Powder: Our primary leavening agent, ensuring your cake layers rise beautifully and become light and airy.
- Salt: A pinch of salt enhances all the other flavors, balancing the sweetness and brightening the citrus notes.
- Unsalted Butter (Room Temperature): Crucial for a smooth batter and tender cake. Ensure it’s softened (but not melted) to cream easily with sugar, incorporating air for a light texture.
- Granulated Sugar: Provides sweetness, moisture, and aids in browning the cake.
- Large Eggs (Room Temperature): Like butter, room temperature eggs emulsify better with other ingredients and whip up with more volume, resulting in a lighter and fluffier cake.
- Vanilla Extract: A classic flavor enhancer that complements the orange beautifully, adding depth and warmth.
- Milk (2% or Whole): Adds essential moisture and richness to the cake batter, contributing to its tender crumb.
FOR THE IRRESISTIBLE CREAM CHEESE FROSTING:
- Unsalted Butter (Room Temperature): Essential for a smooth, creamy, and spreadable frosting. Ensure it’s perfectly softened for best results.
- Cream Cheese (Brick-Style, Room Temperature): Use 12 oz (1 ½ standard bricks) of full-fat, brick-style cream cheese. Avoid tub varieties as they contain more water and can lead to a runny frosting. Room temperature is key for a lump-free, fluffy texture.
- Vanilla Extract: Enhances the sweet and tangy profile of the cream cheese, adding a delightful aroma.
- Powdered Sugar (Confectioners’ Sugar): Provides sweetness and structure to the frosting. Sift it for the smoothest possible finish. You’ll add this gradually to achieve your desired consistency and sweetness.
- Light Orange Food Coloring (Optional): A few drops can tint your frosting a beautiful, delicate orange, adding to the visual appeal. We recommend AmeriColor gel food coloring for vibrant results.
Recommended Cake Baking Tools for Success
Having the right tools can make all the difference in your baking journey. These items will help ensure your orange cake turns out perfectly round, evenly baked, and beautifully decorated.
- 8-inch Round Cake Pans or Springform Pans: Essential for creating perfectly shaped cake layers. Springform pans offer easy removal, especially for delicate cakes.
- Bake-Even Cake Strips: These amazing strips wrap around your cake pans to help regulate the temperature, ensuring your cake bakes evenly with flat tops, minimizing doming and waste.
- Cake Leveler or Serrated Knife: For trimming cake tops to create perfectly flat layers, which is crucial for a stable and professional-looking stacked cake.
- Parchment Paper: Prevents sticking and makes cake removal a breeze. Pre-cut rounds or a roll for tracing your pan bottoms are invaluable.
- Electric Mixer (Stand or Handheld): Indispensable for creaming butter and sugar, and whipping up fluffy frosting quickly and efficiently.
- Rubber Spatula: For scraping down bowls, folding ingredients, and spreading batter and frosting smoothly.
- Wire Cooling Racks: Allows air to circulate around your cakes for even and complete cooling, preventing sogginess.
- Offset Spatula: Your best friend for spreading frosting evenly and smoothly on your cake layers and sides, especially for the crumb coat and final finish.
- Cake Turntable (Optional but Recommended): Makes frosting and decorating your cake significantly easier and more precise.
The Secret to Extracting Maximum Orange Juice and Zest
To maximize both juice and zest from your oranges, start by washing the fruit thoroughly. For zest, use a microplane grater to remove only the bright orange outer layer, avoiding the bitter white pith underneath. For juicing, a simple trick will yield significantly more liquid: place the orange on your counter and roll it firmly under the palm of your hand for about 10-15 seconds. This action breaks down the internal membranes, making the orange release its juice more readily. Then, cut the orange lengthwise (from stem to blossom end) and use a lemon reamer or a hand juicer to firmly press and twist, extracting every last drop of that precious, fresh orange juice.
Crafting the Best Homemade Orange Cake: A Step-by-Step Journey
Baking a two-layer cake might seem daunting, but it’s a fantastic starting point for anyone looking to master layer cake techniques. The beauty of this recipe is its flexibility: you can easily divide the hands-on time over two days if your schedule is tight, baking the layers one day and assembling/frosting the next. This makes the process enjoyable and stress-free.
Phase 1: Baking the Perfect Orange Cake Layers
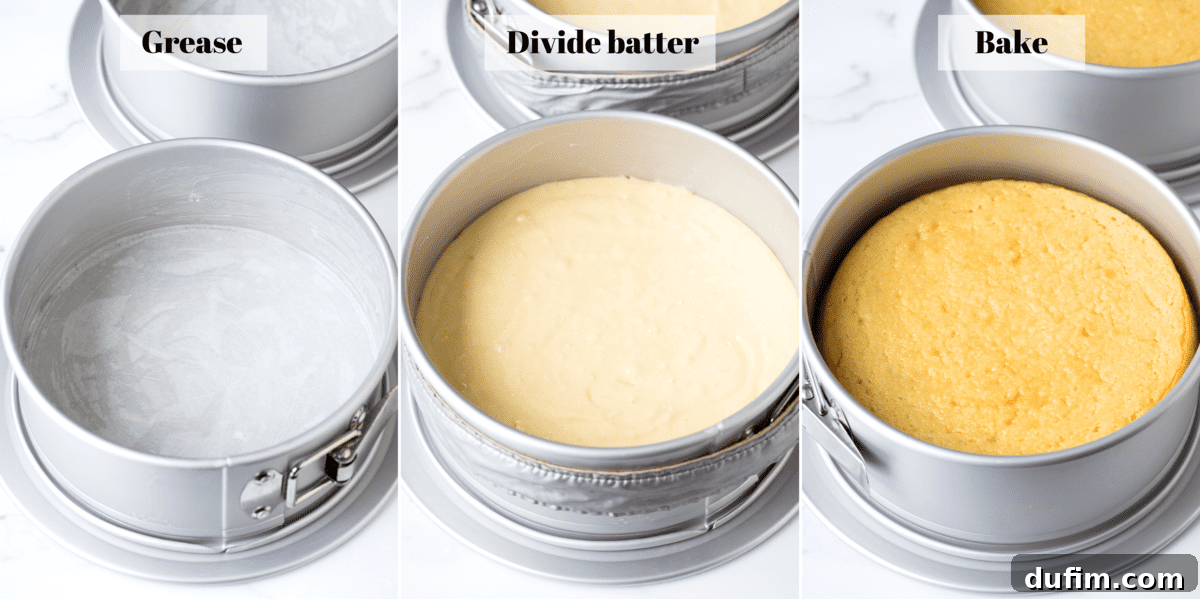
- Prepare Your Workspace and Pans: Begin by preheating your oven to 350ºF (175ºC). Next, prepare two 8-inch round cake pans or springform pans. Liberally grease the bottoms and sides of each pan with softened butter (avoid non-stick sprays for best results). For super easy cake removal and perfectly flat layers, line the bottoms with round pieces of parchment paper cut to size. For truly even baking and minimal doming, consider wrapping your pans with bake-even strips that have been soaked in water and squeezed dry.
- Combine Dry Ingredients: In a medium mixing bowl, whisk together the all-purpose flour, finely grated orange zest, baking powder, and salt. Whisking ensures these dry ingredients are evenly distributed, preventing pockets of leavening agent. Set this mixture aside.
- Cream Wet Ingredients: In a large mixing bowl (or the bowl of your stand mixer), use an electric mixer on medium-high speed to beat the room temperature unsalted butter and granulated sugar until the mixture is light, fluffy, and pale in color – typically 2-3 minutes. This process, called creaming, incorporates air, which is vital for a light cake. Then, beat in the room temperature eggs one at a time, ensuring each egg is fully incorporated before adding the next. Finish by beating in the vanilla extract, scraping down the sides of the bowl as needed to ensure everything is well combined.
- Integrate Wet and Dry: Reduce your mixer speed to low. Gradually add the flour mixture to the wet ingredients in three additions, alternating with the milk in two additions. Always begin and end with the flour mixture. Mix just until combined; be careful not to overmix, as this can develop the gluten too much, leading to a tough cake.
- Bake to Perfection: Divide the prepared batter evenly between your two cake pans. Each pan should receive approximately 2 ½ cups of batter. Use an offset spatula to gently spread the batter to the edges, creating an even layer. Bake for 30 to 34 minutes, or until a wooden toothpick inserted into the centers of the cakes comes out clean. If you opt for three 8-inch pans (about 1 ¾ cups batter each), baking time will reduce to approximately 23-27 minutes.
- Cooling is Crucial: Allow the cakes to cool in their pans on wire cooling racks for 10 to 20 minutes. This initial cooling period allows the cakes to firm up and prevents them from breaking when removed. After this time, carefully invert and remove the cakes from the pans (if using springform pans, release the sides). Let them finish cooling completely, directly on the wire racks. Once entirely cool, gently peel off the parchment paper from the bottoms.
- Prep for Assembly (or Storage): If your cake tops have domed slightly, now is the time to level them using a cake leveler or a long serrated knife. This ensures a stable and professional-looking stacked cake. If you’re not assembling the cake immediately, wrap each cooled cake layer tightly in plastic wrap and refrigerate for up to a week, or freeze for longer storage.
Phase 2: Whipping Up the Dreamy Cream Cheese Frosting
- Cream Butter and Cream Cheese: In a large mixing bowl, combine the room temperature unsalted butter and brick-style cream cheese. Using an electric mixer on medium-low speed, beat these two ingredients together for 1-2 minutes until the mixture is beautifully light, fluffy, and completely smooth. Ensure there are no lumps of cream cheese remaining.
- Add Remaining Ingredients: Beat in the vanilla extract. Then, gradually add the powdered sugar, starting with 2 cups. Begin mixing on low speed to avoid a cloud of sugar. Continue adding powdered sugar, one half cup at a time, until the frosting reaches your desired thickness and sweetness. Once all sugar is added, beat on medium-low until it’s perfectly fluffy and smooth. If you desire a pale orange hue, add a few drops of light orange food coloring and mix until uniformly colored.
- Adjust Consistency (if needed): If your frosting appears too thick, add a small splash (no more than 1 tablespoon at a time) of milk or heavy cream and beat until it reaches a creamy, spreadable consistency. Conversely, if it’s too thin, add a bit more powdered sugar.
Phase 3: Assembling Your Masterpiece Orange Layer Cake
Assembling a layer cake is where all your hard work comes together! A cake turntable can be incredibly helpful for this stage, allowing you to easily rotate the cake as you work.
- Stack the Cake Layers: Place a small dollop of frosting in the center of an 8-inch round cardboard circle or directly onto your serving cake plate. This acts as “glue” to secure the first cake layer. Carefully place your first leveled cake layer on top of the frosting, pressing down lightly to adhere.
- Frost the First Layer: Using an offset spatula, spread approximately 1 cup of your delicious cream cheese frosting evenly over the top of this first cake layer, extending almost to the edges.
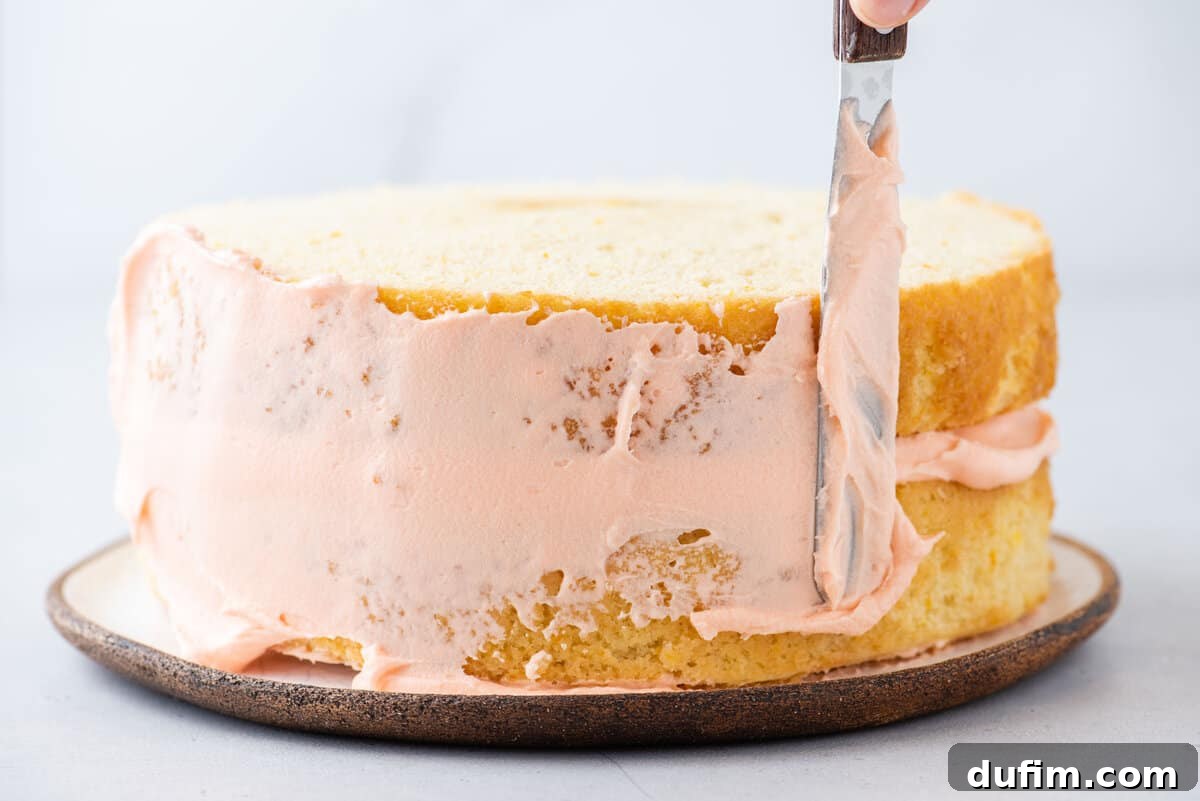
- Add Second Layer and Crumb Coat: Gently place the second cake layer directly over the frosted first layer, pushing down very lightly to ensure it’s level. Now, it’s time for the critical “crumb coat.” Using your offset spatula, apply a very thin, almost translucent layer of frosting around the sides and top of the entire stacked cake. The purpose of this crumb coat is to trap any loose crumbs, preventing them from mixing into your final, pristine layer of frosting. Don’t worry about neatness here; it’s purely functional.
- Chill the Crumb Coat: Place the entire crumb-coated cake into the refrigerator for at least 20 minutes (or up to an hour). Chilling allows the crumb coat to firm up, effectively “setting” the crumbs so they won’t interfere with your final frosting layer.
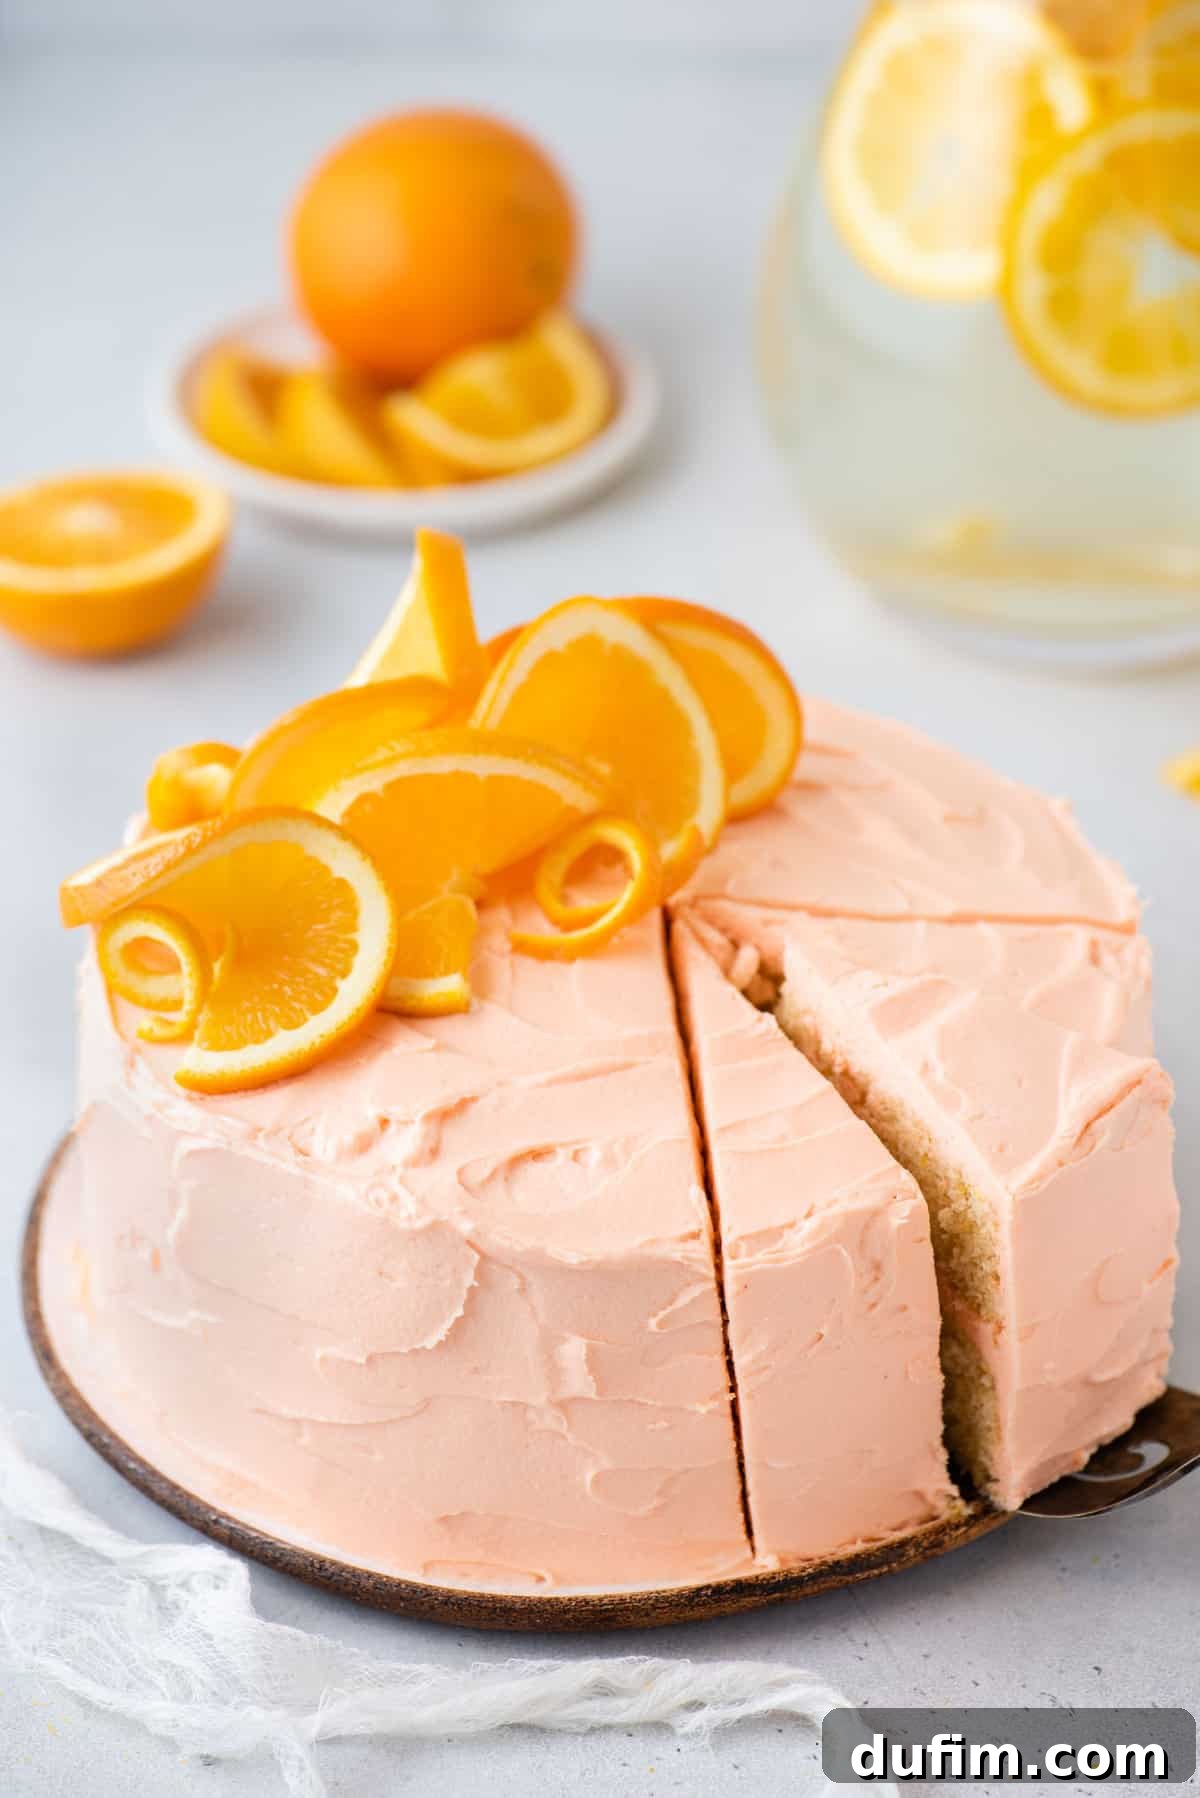
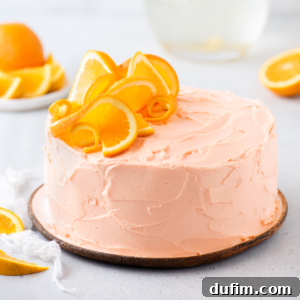
- Apply Final Frosting & Decorate: Once the crumb coat is thoroughly chilled and firm to the touch, retrieve your cake. Use an offset spatula to spread the remaining frosting onto the sides and top of the cake. Take your time to achieve a smooth, even finish. For bakery-smooth sides, you can use a bench scraper or a clean, straight edge to gently smooth the frosting. Finally, add your decorative touches. Fresh orange slices, delicate orange zest curls, or even edible flowers make for a beautiful presentation. Slice, serve, and enjoy!
The Perfect Frosting-to-Cake Ratio: How Much Frosting Between Layers?
Achieving the right balance of cake and frosting is crucial for a harmonious eating experience. For an 8-inch, two-layer orange cake, we recommend using approximately ¾ to 1 cup of frosting between the cake layers. This quantity provides a substantial layer of delicious creaminess without overwhelming the delicate orange cake flavor. The remaining frosting will be reserved for generously coating the sides and top of the cake, ensuring every bite is perfectly balanced.
The Art of Preparing a Cake Pan for Flawless Release
A beautifully baked cake can quickly become frustrating if it sticks to the pan. Proper pan preparation is simple but essential for effortless cake removal. While non-stick cooking sprays might seem convenient, for layer cakes, we highly recommend using good old-fashioned butter or shortening.
Here’s why and how:
Why Butter/Shortening is Best: Butter (or shortening) creates a more robust, non-stick barrier compared to most sprays. It greases the pan more thoroughly and consistently, significantly reducing the chances of your cake sticking, especially around the delicate edges.
Step-by-Step Pan Preparation:
- Liberally Grease: Take about ½ tablespoon of softened butter or shortening. For a mess-free application, you can place your hand inside a resealable plastic bag or use a paper towel to hold the butter.
- Coat Thoroughly: Liberally spread the butter/shortening across the entire interior surface of your cake pan – the bottom, sides, and even into any corners or crevices. Ensure every part that will touch the batter is well coated.
- Parchment Paper Perfection: For the absolute easiest cake removal, especially with delicate cakes, add a round of parchment paper to the bottom of the pan. To do this, trace the bottom of your cake pan onto a sheet of parchment paper, cut out the circle, and then press it into the buttered bottom of the pan. The butter will help it adhere. This creates a foolproof non-stick surface.
Following these steps will give you peace of mind that your perfectly baked orange cake layers will slide right out of their pans, ready for cooling and frosting.
Total Time Investment for Your Orange Cake
Understanding the time commitment can help you plan your baking session effectively. While the process involves a few stages, much of it is passive cooling time.
- Batter Preparation: Approximately 15 minutes of active mixing.
- Baking Time: 30-34 minutes for two 8-inch pans (adjust slightly for different pan sizes).
- Cake Cooling: At least 1 hour for the cake layers to cool completely on wire racks, preventing the frosting from melting.
- Frosting Preparation: Roughly 5 minutes of active whipping for the cream cheese frosting.
- Assembly and Frosting: 10-20 minutes for stacking, crumb coating, chilling, and final frosting.
The entire process, from start to finish, can be completed within 2 to 2.5 hours, with some flexibility for cooling or breaking up the steps over two days.
Expert Baking Tips for Your Best Orange Cake Yet
Achieving a bakery-quality orange cake at home is entirely possible with a few insider tricks. These expert hints and tips will help ensure your cake turns out flawless, delicious, and perfectly presented:
- Baking Even, Flat Cakes: The secret to level cake layers is consistent heat distribution. Bake-even strips are revolutionary for this! Simply moisten them thoroughly, wring out excess water, and wrap them tightly around your cake pans before baking. They insulate the sides of the pan, causing the cake to rise more evenly across the entire surface rather than doming in the center. If you don’t have commercial strips, you can make your own: cut strips from an old towel or thick cotton T-shirt, soak them in water, squeeze out excess, and secure around the pan with a safety pin or foil.
- Don’t Overcool in the Pan: While it might seem intuitive to let cakes cool completely in their pans for easy removal, the opposite is often true. Leaving them too long can cause them to stick as they cool and condense. The optimal window for cooling in the pan is 10 to 20 minutes. This allows the cake to firm up just enough to be handled without breaking, but still warm enough to release easily.
- Achieving Super Smooth Sides: For that professional, polished look, invest in a bench scraper. After applying your final layer of frosting to the sides of the cake, hold the bench scraper vertically against the side, parallel to the cake. Gently rotate the cake on a turntable (or slowly move the scraper around the cake if not using a turntable), applying light, even pressure. The scraper will smooth out imperfections and create incredibly sharp, clean edges.
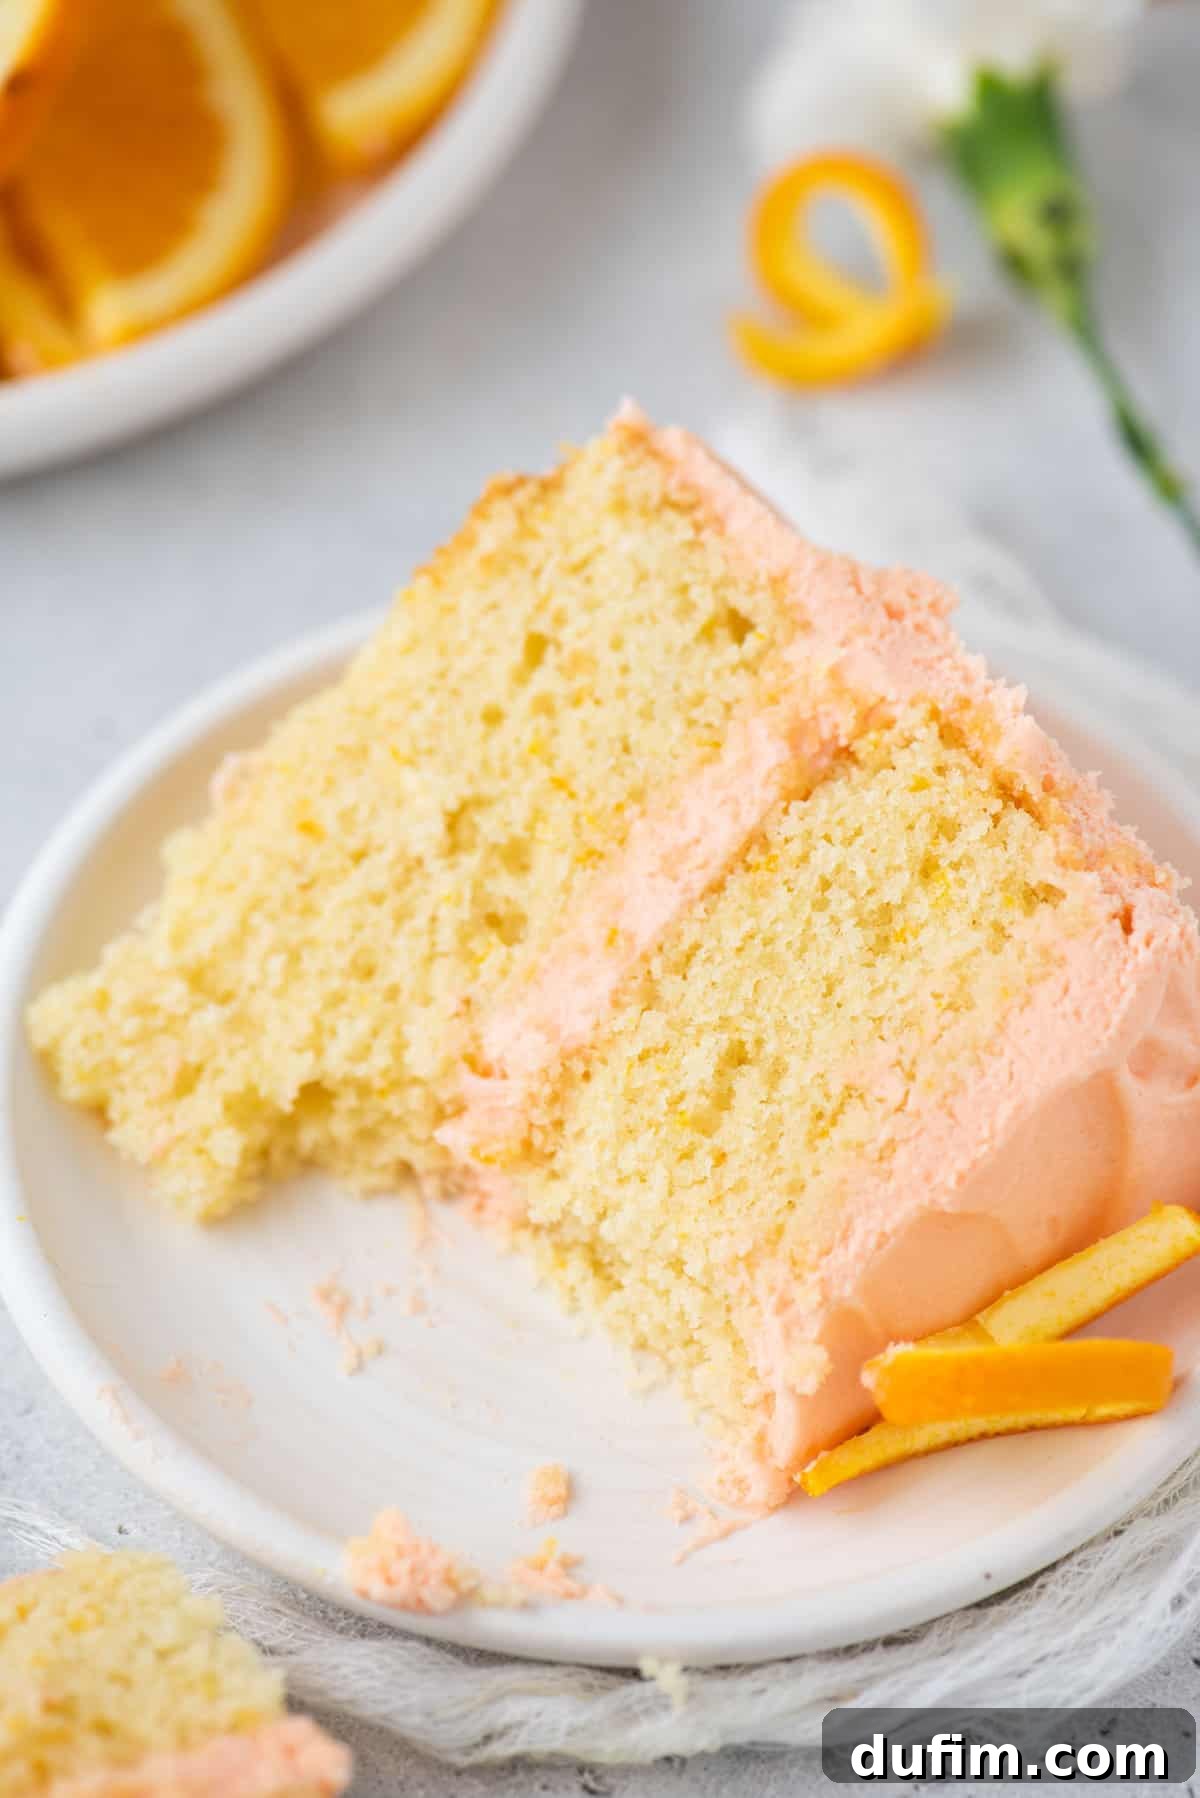
- Adding the Perfect Finishing Touch: Presentation matters! Elevate your orange cake with thoughtful decorations. Fresh orange slices, delicately peeled into segments or finely zested curls, make for a vibrant and thematic garnish. For an elegant touch, consider edible flowers, a scattering of fresh berries (like blueberries or raspberries for contrasting color), or even artfully piped frosting designs. Candied orange peels also add a sophisticated, sweet-tart element and beautiful shine.
Serving Your Exquisite Orange Cake
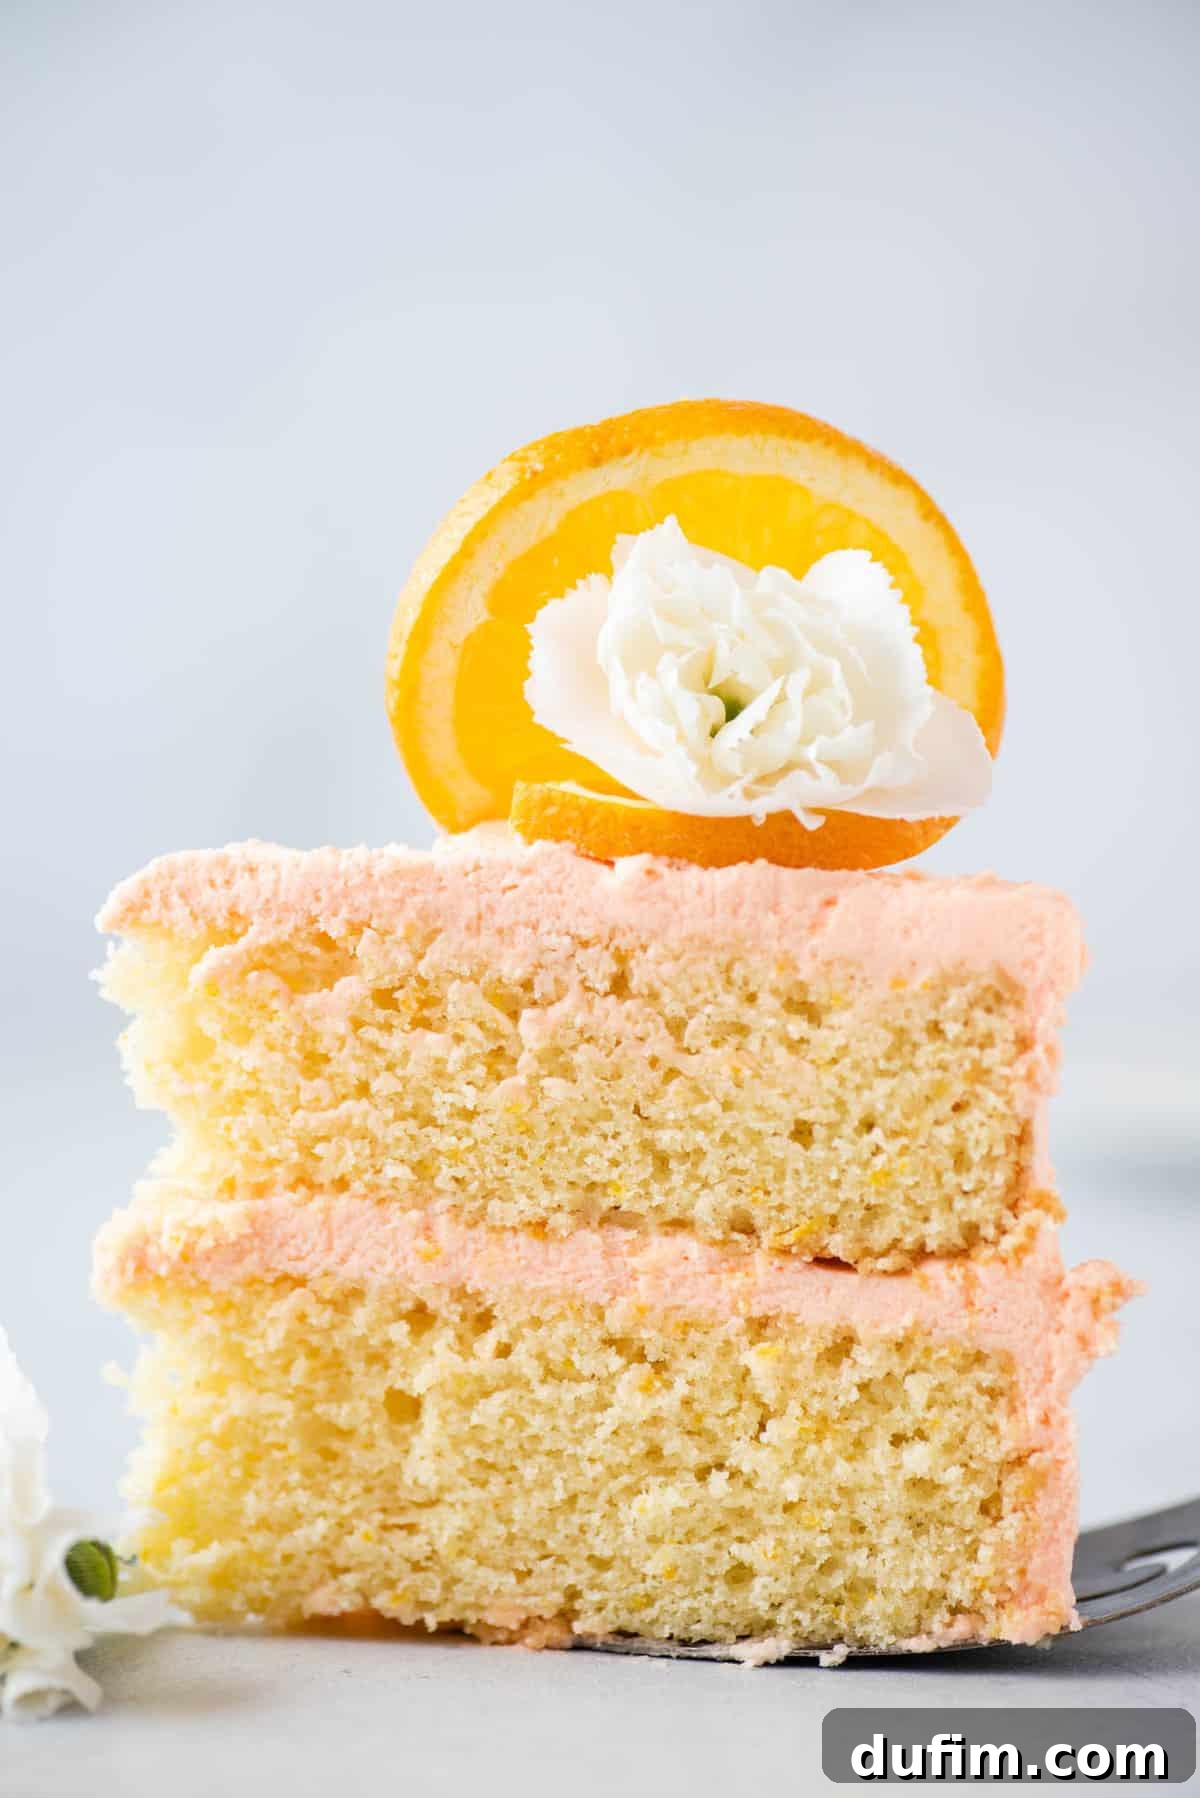
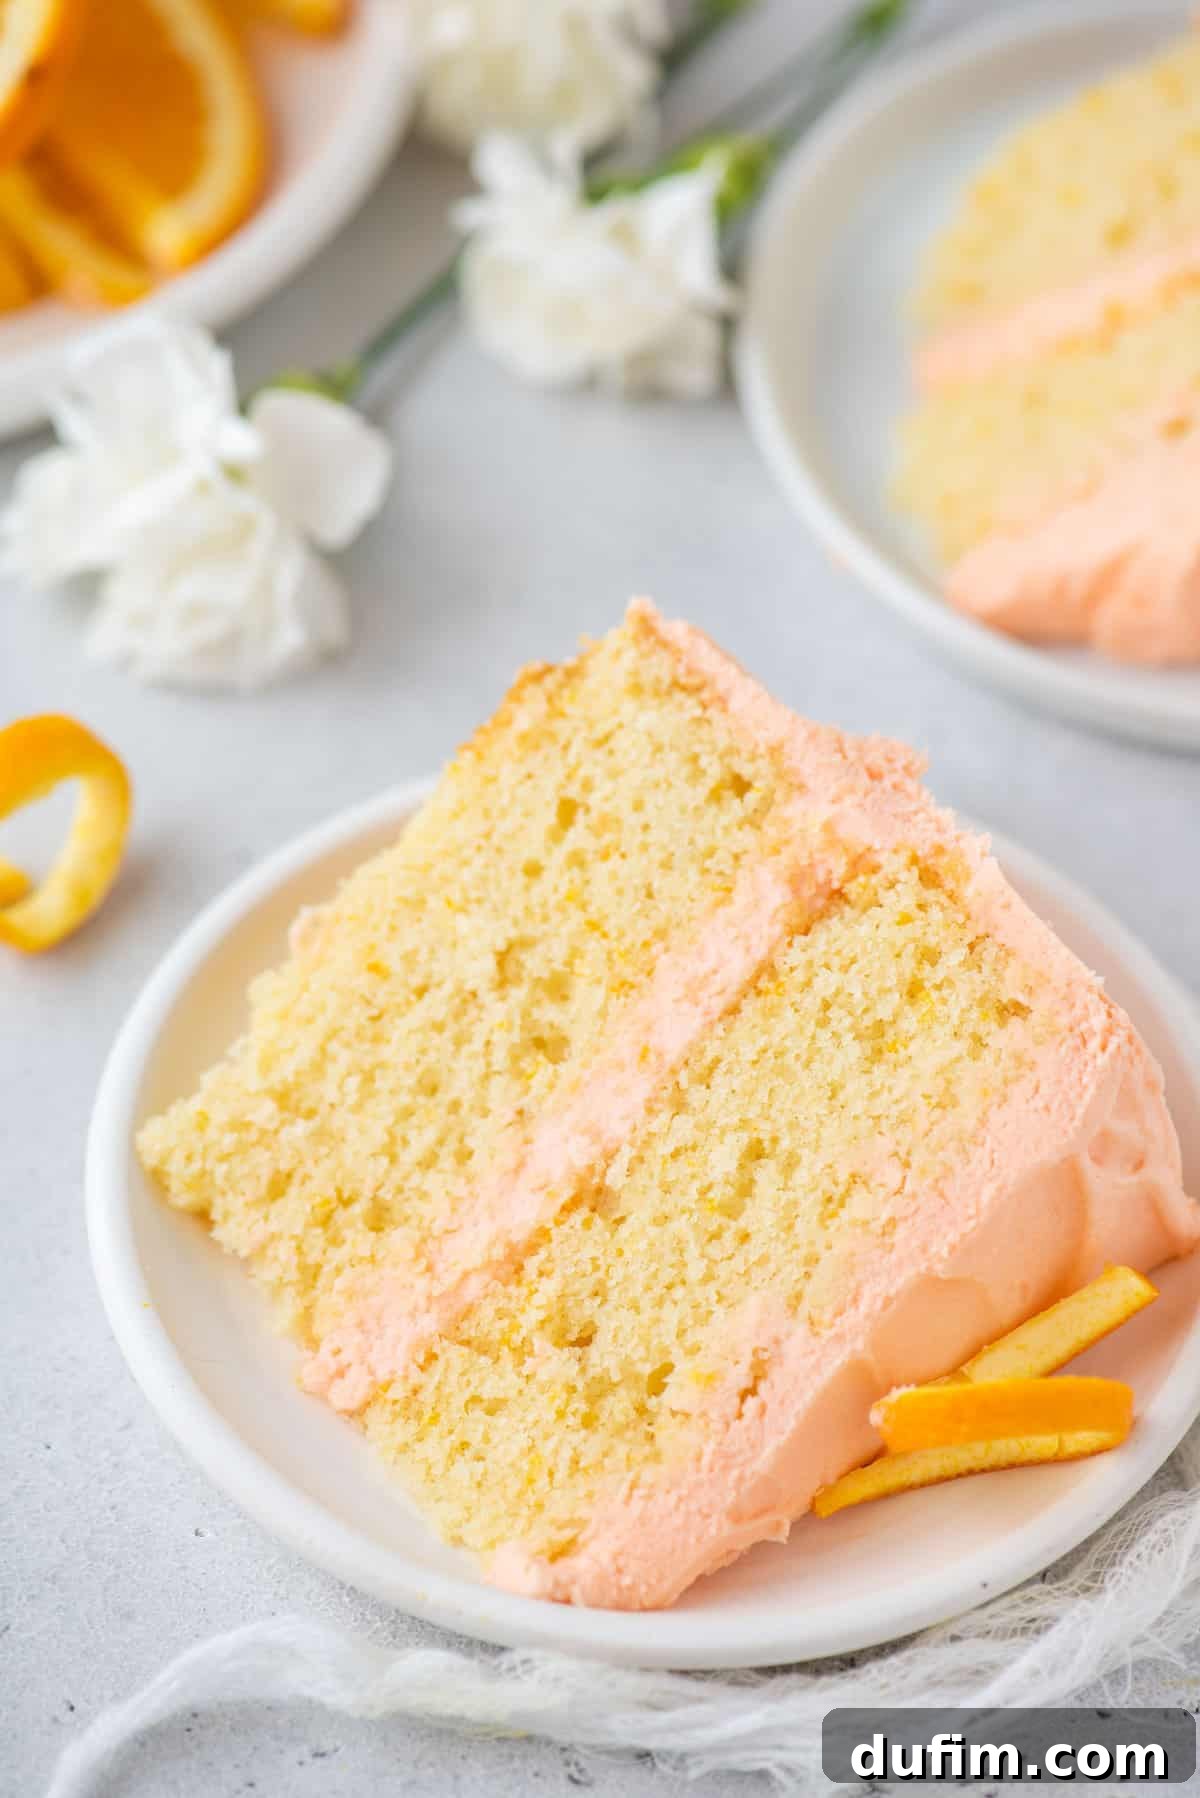
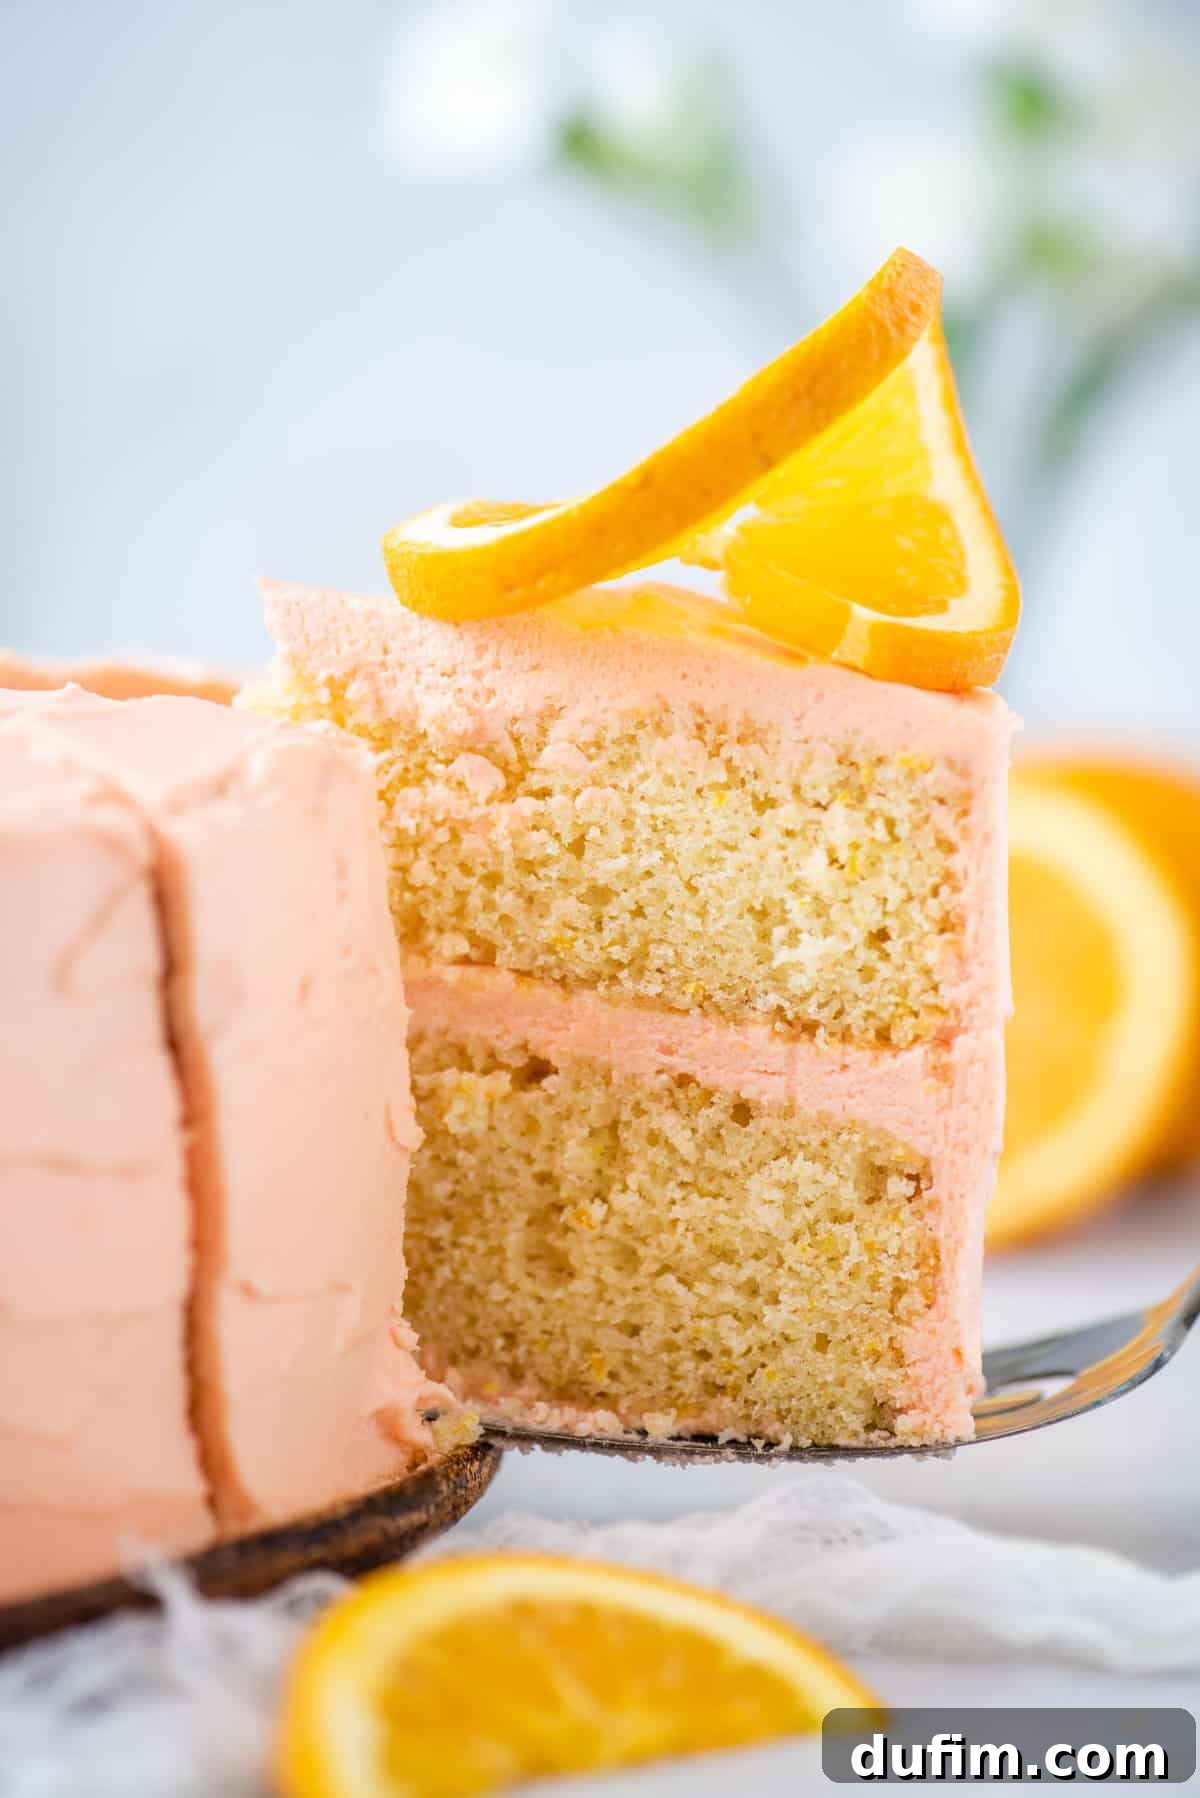
Presenting your layered orange cake beautifully is part of the joy. To serve, use a long, sharp knife, preferably one that has been warmed slightly under hot water and wiped dry, to ensure clean slices. Carefully cut into desired portions, then use a cake server or wide spatula to transfer each slice onto individual plates or an elegant serving platter.
For an extra “wow” factor and to further highlight the cake’s vibrant flavor, consider garnishing each slice. A thin, fresh orange slice, a delicate sprinkle of fresh orange zest, or even a tiny edible flower can elevate the presentation. This orange cake pairs wonderfully with a cup of Earl Grey tea, a light sparkling wine, or simply enjoyed on its own as a delightful dessert.
Proper Storage for Your Homemade Orange Cake
To keep your delicious orange cake fresh and moist, proper storage is key, especially given the cream cheese frosting. At room temperature, this orange cake recipe can be left out for up to 3 days. Ensure it is loosely covered with plastic wrap or stored in an airtight cake container to prevent it from drying out.
For longer freshness, particularly in warmer climates, storing the cake in the refrigerator is recommended. Again, cover it loosely or place it in an airtight container to protect the frosting and prevent the cake from absorbing refrigerator odors. Allow refrigerated cake to come to room temperature for about 30 minutes before serving for the best texture and flavor.
Freezing Your Orange Cake: A Smart Solution for Later Enjoyment
Yes, this orange cake freezes beautifully, making it perfect for preparing ahead or saving leftovers. Freezing correctly will preserve its flavor and texture for weeks.
To Freeze a Whole Cake:
- Place the frosted, undecorated cake on a sheet pan and transfer it to the freezer, uncovered, until the buttercream has frozen solid (this usually takes a few hours).
- Once completely frozen and firm, tightly wrap the cake in several layers of plastic wrap, followed by a layer of aluminum foil. This double-layer protection prevents freezer burn and protects against odors.
- Return the securely wrapped cake to the freezer for up to 1-2 months.
To Freeze Leftover Cake Slices:
- Place individual slices on a small plate or baking sheet and freeze until firm.
- Once firm, wrap each slice tightly in plastic wrap, then place them in an airtight container or a freezer-safe bag. If stacking slices, place a piece of parchment paper between them to prevent sticking.
- Store in the freezer for up to 1 month.
Thawing Your Frozen Cake:
To enjoy, thaw the cake in the refrigerator overnight or for several hours. If you’re thawing a whole orange cake, remember to loosen the plastic wrap before thawing to prevent it from sticking to the frosting as it defrosts. Once thawed, let the cake sit at room temperature for about 30 minutes before serving to achieve the optimal texture and flavor.
Creative Orange Cake Recipe Variations
While this classic orange cake is perfect as is, it also serves as a fantastic base for creative modifications. Here are some delightful ideas to switch things up and add your personal touch to your orange layer cake:
- Orange Poppy Seed Cake: For a delightful textural contrast and a subtle nutty flavor, transform this into an orange poppy seed cake. Simply add 2 tablespoons of poppy seeds to the dry batter ingredients. The tiny seeds add a charming speckle and a unique mouthfeel.
- Blueberry-Orange Bliss: Oranges and blueberries are a match made in heaven. To make a blueberry-orange cake, gently toss 1 cup of fresh or frozen blueberries (do not thaw if frozen) with 1-2 tablespoons of flour before folding them into the cake batter. The flour coating helps prevent the blueberries from sinking to the bottom during baking, ensuring they are evenly distributed throughout your beautiful cake layers.
- Exotic Fillings: Instead of solely using cream cheese frosting between the layers, consider incorporating an additional filling for an extra burst of flavor and texture. Options include a vibrant homemade orange curd (for an extra citrus punch), a creamy vanilla custard, or a luscious berry filling (such as raspberry or strawberry compote) to complement the orange. You can pipe a ring of cream cheese frosting around the edge of each layer to create a dam, then fill the center with your chosen fruit curd or custard before adding the next cake layer.
- Spiced Orange Cake: Introduce warm spices like a pinch of ground cinnamon, nutmeg, or cardamom to the dry ingredients for a cozy, autumnal twist on the citrus flavor.
- Chocolate Orange Dream: For chocolate lovers, consider folding in mini chocolate chips into the batter, or drizzling a dark chocolate ganache over the frosted cake for an elegant and decadent pairing.
Frequently Asked Questions (FAQs) for This Homemade Orange Cake
Can I substitute orange juice for milk in a cake recipe?
Substituting orange juice for milk in a standard cake recipe is generally not recommended without significant adjustments. Milk provides fat, protein, and a neutral pH that contributes to the cake’s moistness and tender crumb. Orange juice, on the other hand, is highly acidic and lacks the fat content of milk. This acidity can react differently with leavening agents (like baking powder/soda), potentially altering the cake’s rise and texture, making it denser or even crumbly. Furthermore, the strong flavor of orange juice might become overpowering or even bitter when baked. For the best results and to infuse citrus flavor, it’s always better to use orange zest as specified in the recipe, or seek out recipes specifically formulated to use orange juice as a liquid component, which will have balanced proportions of other ingredients to account for the juice’s properties.
Why do my cake layers dome in the middle?
Cake layers often dome in the middle because the edges bake and set faster than the center. The outside of the cake cooks first, creating a crust, while the middle continues to rise. Using bake-even strips (as mentioned in our expert tips) helps insulate the pan edges, allowing the cake to bake more evenly across its entire surface, resulting in flatter tops. Ensuring your oven temperature is accurate can also help; if your oven runs too hot, it will exacerbate doming.
How do I prevent my cream cheese frosting from being too runny?
Several factors can contribute to runny cream cheese frosting. The most common culprits are:
- Over-whipping: Beating cream cheese for too long, especially at high speeds, can make it warm and lose its structure. Beat only until just combined and fluffy.
- Warm Ingredients: While butter needs to be room temperature, cream cheese should be on the cooler side of room temperature – soft enough to mix, but still cool to the touch. If it’s too warm, it won’t hold its shape.
- Too Much Liquid: Adding too much milk or cream when adjusting consistency. Add liquids very sparingly, a teaspoon at a time.
- Tub Cream Cheese: Always use brick-style, full-fat cream cheese. Tub varieties often have a higher water content and are softer, leading to a thinner frosting.
If your frosting becomes too runny, try chilling it in the refrigerator for 20-30 minutes, then re-whipping it for a short period. You can also gradually add a bit more powdered sugar for thickening.
Can I make this orange cake into cupcakes?
Absolutely! This orange cake batter is perfectly suitable for making cupcakes. Line a muffin tin with paper liners and fill each liner about two-thirds full with batter. The baking time will be significantly shorter, typically ranging from 18-22 minutes, or until a toothpick inserted into the center of a cupcake comes out clean. The yield will be approximately 24-30 standard-sized cupcakes, which you can then frost with the same delicious cream cheese frosting.
Tap stars to rate!
Orange Cake Recipe
Beth
25 minutes
30 minutes
2 hours
20
Rate
Equipment
-
8 inch cake pan
-
KitchenAid 9-Speed Mixer
-
My favorite spatula!
-
Bake Even Cake Strips
Ingredients
Orange Cake
-
3
cups (360g)
all purpose flour -
3
Tbsp
finely grated orange zest,
(about 1 large orange) -
3
tsp
baking powder -
½
tsp
salt -
1
cup (226g)
unsalted butter,
2 sticks, room temperature -
1 ½
cups (297g)
granulated sugar -
3
large eggs -
2
tsp
vanilla extract -
1
cup (236ml)
milk,
2% or whole
Cream Cheese Frosting
-
1
cup (226g)
unsalted butter,
2 sticks, room temperature -
12
oz (342g)
cream cheese ,
room temperature (1 & 1/2 bricks) -
1
tsp
vanilla extract -
2-3
cups (227-339g)
powdered sugar -
Light orange food coloring,
optional – I used AmeriColor brand
Instructions
Orange Cake
-
Preheat the oven to 350 degrees F. Grease the bottom and sides of two 8-inch round cake pans or springform pans with butter and line the bottom of each pan with a round piece of parchment paper. To ensure even baking, place a bake-even strip around the pan. Set aside. You can also use three 8-inch pans for this recipe to make a 3-layer cake.
-
In a medium bowl, whisk together the all-purpose flour, orange zest, baking powder, and salt, set aside.
-
Using an electric mixer, beat the butter and sugar on medium-high until fluffy, 2 to 3 minutes. Beat in the eggs and vanilla extract, scraping down the sides of the bowl as needed.
-
Reduce mixer speed to low and add the flour mixture in 3 additions and the milk in 2 additions, beginning and ending with the flour mixture. Mix on low just until combined.
-
Divide the batter evenly among two pans, with about 2 ½ cups batter in each pan. If dividing the batter among 3 pans, put about 1 ¾ cups in each pan. Place the pans in the oven. For two 8-inch pans bake for 30-34 minutes or until a toothpick inserted in the center comes out clean. For three 8-inch pans bake for 23-27 minutes or until a toothpick inserted in the center comes out clean.
-
Once the cakes are done, allow them to cool in the pan on a cooling rack for 10-20 minutes. After cooling, carefully remove the cake from the pan. If using a springform pan, remove the sides and bottom. Allow the cake to cool completely on a cooling rack. Once cool, remove the parchment paper round from the bottom of the cake. If you need to level the top of your cakes, do so now using either a cake leveler or knife. If you’re assembling the cake later, wrap each cake layer really well in plastic wrap and place them in the refrigerator, for up to 3 days.
Cream Cheese Frosting
-
Place the room temperature unsalted butter and cream cheese in a mixing bowl. Use an electric mixer on medium and beat together for 1-2 minutes, until whipped and fluffy.
-
Add in the vanilla extract, powdered sugar, and optional light orange food coloring, beat again on low for 1-2 minutes, scraping down the sides of the bowl, until everything is incorporated.
-
If the frosting is too thick, add a splash (1 tablespoon or less) of milk or heavy cream, beat until creamy.
Assemble
-
I like to assemble my cakes on a turntable. Spread a small amount of frosting on an 8-inch round cardboard circle or cake plate if skipping the cardboard circle. Place the first layer on top of the cardboard, lightly push down to adhere the cake to the frosting.
-
Evenly spread 1 cup frosting on top of the first layer.
-
Add the second layer of cake, lightly pushing down. Now, it’s time to do a crumb coat. The crumb coat will help seal the crumbs in. Using your offset spatula, spread a thin layer of frosting around the sides and top of the cake.
-
Place the entire cake in the fridge for 20 minutes.
-
Spread the remaining frosting on the sides and top of the cake. Add fresh orange slices for decoration. Slice and serve. Cover leftover cake tightly with plastic wrap and store on the counter for up to 3 days.
Notes
How to Properly Measure Flour
- Fluff the flour with a fork or whisk
- Use a spoon to scoop the flour into your measuring cup
- Use a butter knife to level off the flour in the measuring cup
Sticking the measuring cup straight into the bag of flour will result in too much flour to be packed into the cup, which can result in dry cake.
Nutrition
Calories:
414
kcal
|
Carbohydrates:
43
g
|
Protein:
4
g
|
Fat:
25
g
|
Saturated Fat:
16
g
|
Polyunsaturated Fat:
1
g
|
Monounsaturated Fat:
7
g
|
Trans Fat:
1
g
|
Cholesterol:
92
mg
|
Sodium:
192
mg
|
Potassium:
79
mg
|
Fiber:
1
g
|
Sugar:
28
g
|
Vitamin A:
852
IU
|
Vitamin C:
1
mg
|
Calcium:
81
mg
|
Iron:
1
mg
Nutrition Disclosure
All nutritional values are approximate and provided to the reader as a courtesy. Changing ingredients and/or quantities will alter the estimated nutritional calculations.